Introduction:
Asthma, a chronic respiratory condition, can make breathing challenging and impact daily life. While medication is essential for managing asthma, incorporating yoga into your routine can offer additional benefits.
Yoga’s emphasis on controlled breathing, relaxation, and gentle physical activity can help improve lung capacity, reduce stress, and enhance overall respiratory health. Certain yoga poses specifically target the lungs and diaphragm, promoting better breathing patterns and providing relief from asthma symptoms.
Deep breathing, relaxation methods, and mild movements that support the respiratory system, lower stress levels, and expand lung capacity are the main components of yoga’s comprehensive approach to managing asthma.
People who have asthma may find that their symptoms are easier to manage and that they don’t require as much medicine if they include certain yoga poses in their daily routine.
Asthma: What is it?
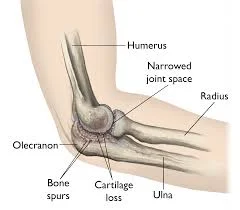
The airways are affected by a long-term lung condition called asthma. The airways become irritated and narrowed during an asthma attack. Chest tightness and coughing are symptoms caused by the surrounding muscles contracting and squeezing.
The standard approach to treating asthma is the use of medication, which relaxes the muscles surrounding the airways and reduces swelling and mucus. Yoga may be beneficial as an alternative asthma treatment, according to a few research investigations. This suggests that a person would carry it out in addition to an ongoing treatment regimen, most likely using medication.
Yoga’s health benefits:
Yoga poses not only help people with asthma, but they also have many other physical and mental health benefits.
Mental benefits:
- Calms the mind
- Controlling stress
- Increases physical awareness and improves focus
- Calm and peace of mind
Physical advantages:
- Strengthened and toned muscles
- Strengthening the heart and arteries
- Improving vitality, breathing, and energy levels
- Improved immunity and greater quality of sleep.
- Energy levels that are higher and weight control.
- Greater flexibility
- Defense from harm
- Improved physical abilities
- Keeping the metabolism in balance
Yoga Poses to Help with Asthma:
Those who have asthma may benefit from the following yoga poses. They might help with breathing control, deep breathing encouragement, and chest opening.
Before beginning any new exercise program, people should consider their present fitness level and any remaining ailments, even if the following positions seem suitable for beginners.
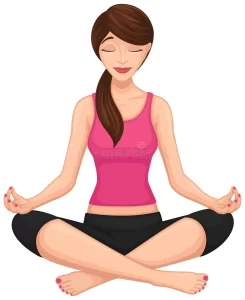
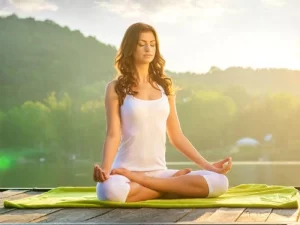
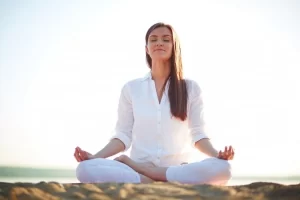
Sukhasana (Easy Pose)
Opening up the chest and collarbones is the basic cross-legged sitting pose, as sukhasana. It’s a complete lung exercise because it focuses only on controlling breathing. It makes use of the technique of breathing from the abdomen, which is the basis for all yoga poses.
- Place yourself on the ground in a sitting position.
- Make sure your left leg touches your right thigh as you fold it while seated.
- After that, make sure your right leg meets your left thigh by folding it.
- Cover the knees with your hands.
- The fingers and thumb should form a circle, via the surface of the palm of the hand pointing upward.
- Try to maintain a straight head and body.
- Breathe in deeply, hold it for a few seconds, and then release it, repeating the breathing exercise.
- Alternate how your legs are crossed, then go through the movements again.
- Then return to your neutral position.
- Then relax.
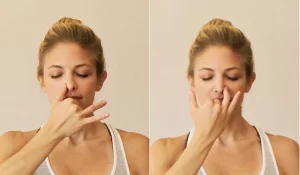
Nadi Shodhan Pranayama (Alternate Nostril Breathing Technique)
For those who suffer from asthma, even a brief session of this yoga pose is beneficial. It is taking a breath through one nostril, letting it out through the other, and then repeating the motion by switching sides. It is said to control the flow of oxygen and remove toxins from the circulation.
- With your shoulders back and your spine straight, take a comfortable seat.
- Keep your face slightly smiled.
- With your thumb and index finger lightly touching at the tips, place your left hand on your left knee, palms facing upward.
- Position the ring and little fingers on the left nostril, the thumb on the right nostril, and the tips of the index and middle fingers of the right hand in the space between the eyebrows.
- The thumb will be used to open or close the right nostril, and the ring and little fingers will be used to open or close the left.
- Breathe out gently through your left nostril while pressing your thumb against your right nostril.
- After taking a breath with your left nose, lightly press it with your little and middle fingers.
- Breathe out of the right nostril while removing the right thumb from it.
- Breathe in by way of your right nose and out of your left side.
- This shows your first round of Nadi Shodhan pranayama.
- Continue breathing in and out through different noses.
- Breathe through both nostrils alternately until you finish of this.
- After every breath, remember to breathe in through the same nostril that you just exhaled.
- Continue taking long, deep, smooth breaths without exerting any force or effort while keeping your eyes closed.
- Then return to your neutral position.
- Then relax.
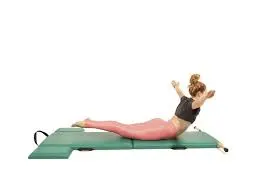
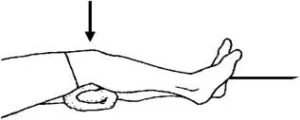
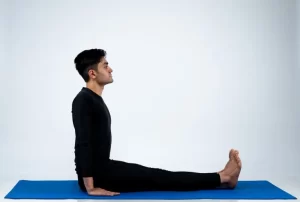
Dandasana (Staff Pose)
Although it appears simple, the staff pose, or dandasana, has a significant impact in reducing asthma symptoms. This yoga pose gets better by opening up the chest and building strength in the back and core. Breathing becomes challenging in this yoga pose, which strengthens the lung muscles.
- Start by sitting with your legs out in front of you.
- Arms straightened, bring hands to hip-width apart.
- Make contact with your big toes and maintain a slight gap between your heels.
- As you bring your toes back, flex your ankles.
- Press forward, putting your big toes forward.
- Use your femur to press down while rotating your inner thighs in and out.
- Stretch your sternum out from under your belly button and enlarge your collarbones.
- Flex your upper arm heads back and relax your front rib cage.
- Then return to your neutral position.
- Then relax.
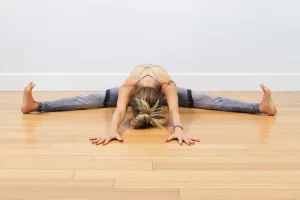
Upavistha Konasana (Seated Wide Angle Pose)
In this yoga pose, the legs should be wide open to allow the body to lengthen from the hips and fully extend the back and chest. Holding this pose while breathing improves lung function.
- Take the Staff Pose (Dandasana), sitting squarely on your sitting bones.
- Stretch your legs as widely as possible out to the sides.
- Toes pointed upward, flex your feet.
- Press through the big toe points and use your femur to root down to ensure that your quadriceps are facing the ceiling.
- Inhale, extending your back; exhale, bending forward at the hips, bringing your hands forward and your body to rest between your legs on the floor.
- Then return to your neutral position.
- Then relax.
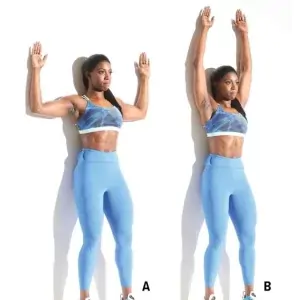
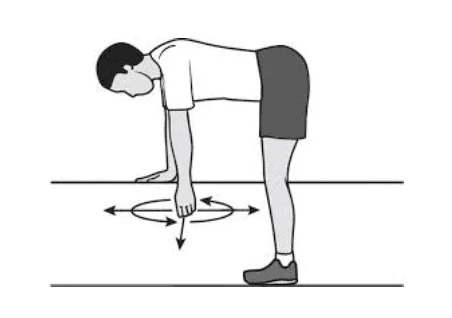
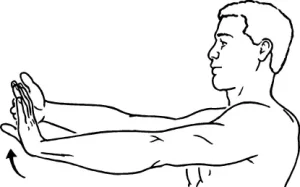
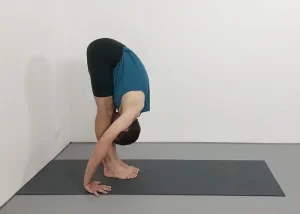
Uttanasana (Forward Bend Pose)
This yoga pose, which involves rotating from the hip, essentially lengthens the abdominal and hamstring muscles. This is the point when your body transitions from the sympathetic to the parasympathetic nervous system, which promotes sleep. It even aids in lung opening and helps to reduce asthmatic symptoms.
- Step your feet slightly apart to form the pose of Tadasana.
- To balance your weight evenly, use both of your feet.
- Breathe in and lift your arms overhead.
- Exhale and bend forward toward your feet, maintaining a flat back.
- Breathe deeply as you hold this position for a short while.
- Your hands should be resting on your legs or by your feet while your spine and legs are straight.
- Lift your hips and bottom higher and bend your chest toward your knees as you exhale.
- Let your head drop and come closer to your feet as you keep taking deep breaths.
- Stretch your arms forward and upward while inhaling.
- Come gradually to a standing posture.
- Let your arms fall to your sides as you release your last breath.
- Then relax.
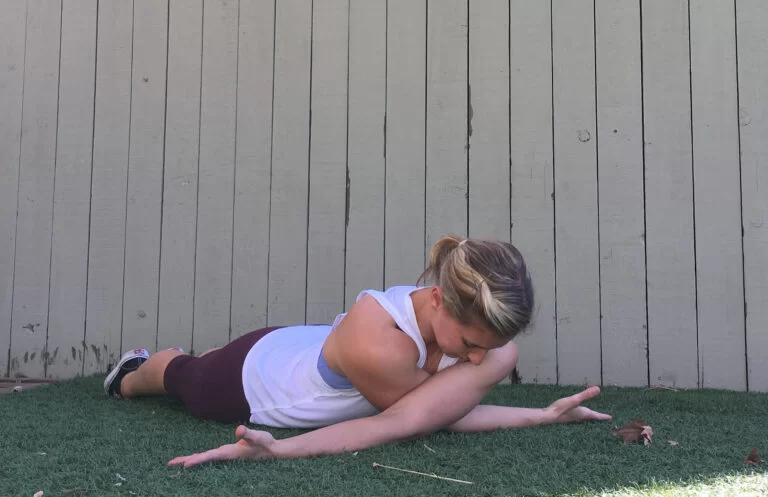
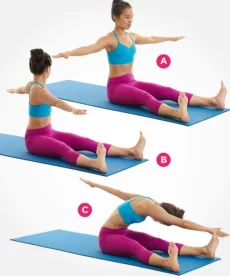
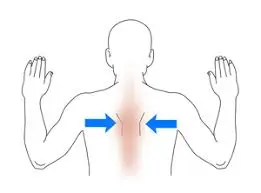
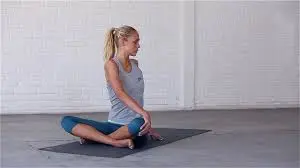
Parivrtta Sukhasana (Seated twist)
This position improves relaxation and works the diaphragm, intercostal muscles, abdomen, and neck muscles in addition to the body, back, and respiratory system.
- Sitting on the floor, lean forward and put your right hand on the ground.
- Next, stretch your spine and slowly bring your left hand to the outside of your right knee.
- As you do so, softly twist your body.
- Look over your right shoulder gently.
- Breathe deeply in and out while seeing your spine becoming longer and more relaxed.
- After a short period of holding, move back to the middle.
- Continue on the opposite side.
- Then relax.
Kapal Bhati
This breathing method calms the senses while stimulating the nervous system. Better blood circulation and the opening of all nadis, or energy pathways, are also benefits of it.
- Keep your back straight and sit comfortably.
- Put your hands on your knees, palms facing up.
- Breathe in deeply.
- Pull your belly button back toward your spine after exhaling.
- As much as you find it comfortable, do it.
- You can feel the contraction of the abdominal muscles by keeping your right hand on your stomach.
- Breath naturally enters your lungs when your abdomen relaxes.
- One round of Kapal Bhati requires 20 of these breaths.
- Once you’ve completed the round, close your eyes, relax, and pay attention to your body’s sensations.
- Then return to your neutral position.
- Then relax.
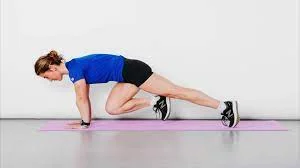
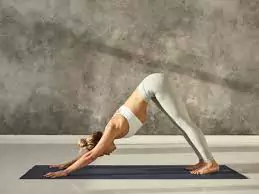
Adho Mukha Svanasana (Downward-Facing Dog Pose)
This pose is beneficial for those with bronchitis and asthma because it calms the mind and lowers tension and anxiety.
- This pose can be performed anywhere a yoga mat can be set up.
- Lie with your hands and knees under your shoulders and your wrists under your hips.
- Lift your hips and extend your legs by curling your toes under and applying pressure with your hands.
- Spread your fingers and squeeze your fingertips to your forearms.
- You should rotate your upper arms outward to widen your collarbones.
- Head hanging loose, move your shoulders from your ears to your hips.
- To remove the weight of your body from your arms, firmly contract your quadriceps.
- This is essentially a resting pose because of this movement.
- With the rear parts of your legs raised, turn your thighs inward and curl your heels down toward the floor.
- Make sure your hands and feet are the proper distance apart as you raise yourself into a plank position.
- These two positions should have the same amount of space between the hands and feet.
- In order to bring your heels to the floor, do not step your feet in the direction of your hands in Down Dog.
- Returning your hands and kneeling position, exhale and bend your knees to release tension.
- Then relax.
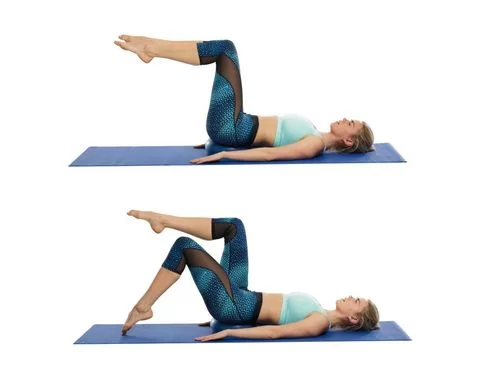
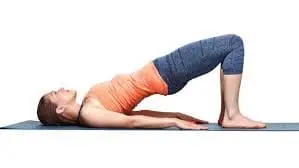
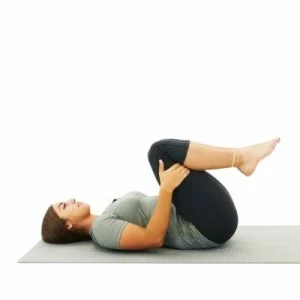
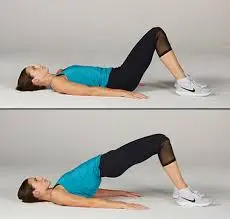
Setu Bandhasana (Bridge Pose)
An extensive stretch for the neck, throat, chest, and lungs can be achieved with this backward bend asana. Breathe in, allowing your chest to expand and fill your stomach with air. When you exhale, your chest contracts and your abdomen gets smaller.
- Laying on your back, begin by bending your knees.
- Place your feet’s heels on the ground just below your knees.
- Bring your arms down to your sides.
- Pull back your shoulders so that the shoulder blades press into the mat.
- Press into the feet, contract the core, and raise the hips.
- Hold this position for a few seconds.
- Inhale deeply and drop yourself back down.
- Then return to your neutral position.
- Then relax.
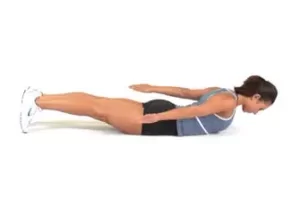
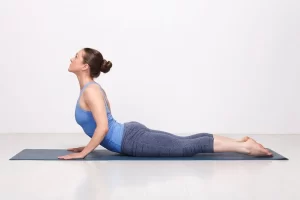
Bhujangasana (Cobra Pose)
The Cobra pose, also known as Bhujangasana, is a great way to improve mood, and energy, and reduce lower back pain. Providing a healthy expansion in the chest and throat and promoting relaxed breathing, this yoga pose is highly recommended for individuals suffering from asthma.
- Lying on your stomach, place your forehead on the ground with your soles pointing up and your toes flat on the floor.
- Your feet and heels should only just barely contact as you keep your legs tight together.
- With both hands, hold yourself so that your elbows are parallel to your body and your palms are flat on the floor beneath your shoulders.
- Breathe deeply while raising your head carefully.
- In order to maintain this stance, keep your belly button in contact with the ground.
- Raise your upper body off the ground with your hands. Ensure that the pressure applied to both palms is the same.
- As you continue to bend your back, vertebra by vertebra, take mindful breaths.
- If it’s possible, raise your gaze, move your head back, and arch your back to straighten your arms.
- For four to five breaths, stay in that position and breathe evenly.
- Exhale now, and then slowly return your head, chest, and abdomen to the floor while you relax.
- Then return to your neutral position.
- Then relax.
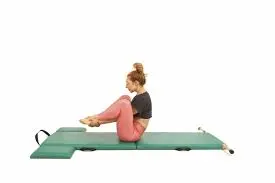
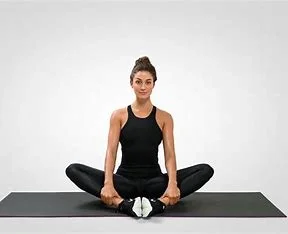
Badhakonasana (Butterfly Pose)
People with asthma can benefit from the Badhakonasana (Butterfly Pose), which also relieves exhaustion and increases blood circulation.
- Legs together and arms straight out in front, take a seat on the floor.
- Maintain a straight head, level shoulders, and back.
- Put your hands flat on top of your thighs, palms down, and take a deep breath.
- Take a breath out, flex your knees, and bring your feet up to your chest.
- Place the soles of the feet together and interlock your fingers with your hands after bringing the feet closer together and pressing the heels against the bottom of the foot.
- Every foot should make contact with the floor at the outside and small toe.
- While lowering your knees to the floor, maintain a straight back.
- If needed, press down with the elbows on the thighs to lower the knees and calves to the ground.
- Maintain the position while gently breathing through your nose.
- Then return to your neutral position.
- Then relax.
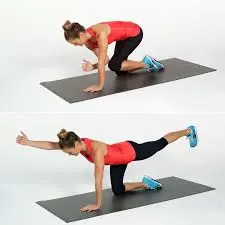
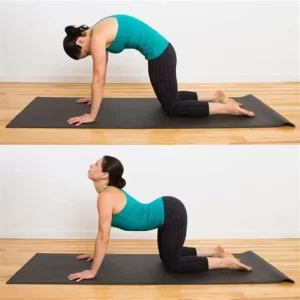
Marjaryasana Bitilasana (Cat-cow pose)
Posing both cat and cow together helps to expand the chest and strengthen the lungs.
- Place your wrists beneath your shoulders and your knees beneath your hips as you begin on your hands and knees.
- Point your fingertips toward the mat’s top.
- Stretch your knees and shins to the width of your hips.
- Maintain a neutral head alignment and gently lower your gaze.
- Beginning in the cow pose, bring your belly down to the mat and inhale.
- Elevate your chin and chest while looking up at the ceiling.
- Extend your shoulders beyond your ears and widen the space between them.
- Next, take the Cat Pose, which is bringing your abdomen to your spine and arching your back upwards as you let go of your breath.
- It should resemble a cat stretching its back in this pose.
- Don’t press your chin against your chest; instead, let go of the top of your head and look down.
- Breathe in to go back into Cow Pose, and release the breath to go back into Cat Pose.
- Rest by sitting back on your heels with your body upright after repeating the comfortable times.
- Then relax.
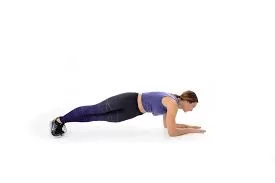
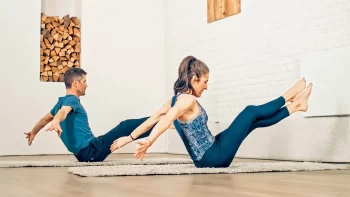
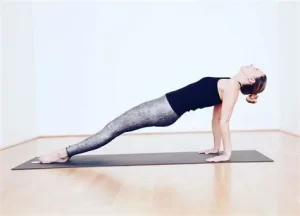
Poorvottanasana (Upward Plank Pose)
The Upward Plank Pose strengthens the wrists, arms, and spine in addition to improving the thyroid gland and respiratory system.
- Maintaining an upright posture, sit up straight with your legs extended in front of you and your feet together.
- With your fingertips pointing away from you, place your hands on the ground at waist or shoulder height.
- Keep your arms straight.
- Use your hands to support your body’s weight as you lean back.
- Inhaling, lift your pelvis while maintaining a straight posture throughout your body.
- Bring your feet level with the floor while maintaining a straight knee.
- The sole will automatically move in the direction of the ground if the toes are planted there.
- Allow the head to drop back to the ground.
- As you maintain the pose, keep breathing.
- Return to a sitting position and let go as you exhale.
- With your fingers pointing in the opposite direction, repeat the pose.
- Then return to your neutral position.
- Then relax.
Ujjayi Pranayama (Ocean Breath)
Among the best poses for asthma is this one. Ujjayi Pranayama is a method of controlled breathing that helps to reduce asthma symptoms by warming and moisturizing the airways.
- Close your eyes while maintaining a straight posture and relaxed shoulders away from your ears.
- To get ready, notice your breathing and try not to control it at all.
- If you have been breathing through your nose, then start to breathe in through your mouth and out again.
- Bring your awareness up to the throat. As you exhale, start to tone the soft palate, also known as your glottis, by slightly restricting the airflow.
- Pretend that you are experiencing hazy glasses. There should be a slight whistling noise.
- Start applying the same throat contraction to the inhales after you are comfortable with the exhale.
- Once more, there ought to be a slight whistling noise. This is where the breath gets its name it has an oceanic sound.
- Close your mouth and start breathing through your nose once you can regulate your throat during both inhalations and exhalations.
- Maintain the same toning technique on the throat as you did with the mouth open.
- There will still be a sound produced by the breath entering and exiting the nose. Ujjayi breath is this.
- As you practice, begin using this breath right now.
- If the instructor tells you to move on to the next inhale, make the inhale an ujjayi.
- Hold onto this breath and use it to help yourself in keeping a pose.
- Then relax.
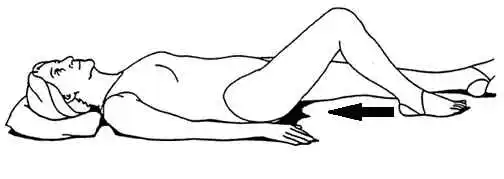
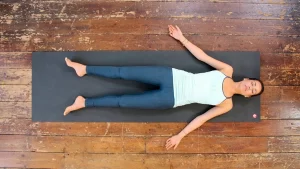
Shavasana (Corpse Pose)
Spend some time lying down in the corpse pose, also known as Shavasana, following doing yoga. This yoga pose revitalizes you, helps lower stress and anxiety levels, and creates a meditative state in your body. Having a relaxed and at-free body and mind is crucial for managing asthma.
- Take a lying down position.
- Take your legs apart.
- Allow your feet to drop freely to either side by releasing the need to keep your legs straight.
- Instead of attempting to keep your palms open, turn them face up.
- Let the fingers curl inside out.
- Put force on your back and shoulder blades to maintain stability.
- After your limbs are in position, let go of the effort it took to hold them there.
- Relax your face and your entire body.
- Breathe naturally as it happens.
- If your thoughts wander, you can return your focus to your breathing; however, attempt to simply observe it without going deeper.
- Spend a minimum of five minutes there. Ten minutes is excellent.
- To avoid being tempted to constantly check the time when practicing at home, set an alarm.
- Breathe deeper before attempting to exhale.
- Next, start moving your fingers and toes to gradually reawaken your body.
- Your whole body can be extended from your hands to your feet by lifting your arms upwards.
- Bring your knees up to your chest and twist to the side while keeping your eyes closed.
- Breathe deeply a few times, then lie down on your side with your lower arm resting on the pillow.
- Use your hands to balance yourself as you get back into a sitting position.
- Then relax.
Summary:
In summary, including yoga in your daily routine for managing your asthma can be helpful. There are specific yoga poses that help open up the lung capacity, improve breathing, and encourage relaxation. It is necessary to bear in mind, though, that yoga should not take the place of medical treatment for asthma.
Consult your doctor before starting any new exercise regimen, especially if you have asthma or any other medical conditions. Working with a certified yoga instructor can also guarantee that you perform the poses safely and correctly. Together with getting the right medical attention, yoga can improve your general health and even help with some asthma symptoms.
FAQ:
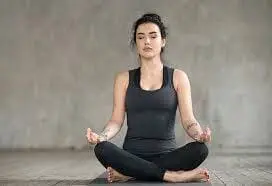
Is it possible for meditation to alleviate asthma?
By helping reset our regulatory set points and the mind-body’s restoration to balance or homeostasis following an anxious reaction, meditation may reduce our receptivity to illnesses like asthma.
What is the best yoga pose for the lungs?
Pose variations such as Bridge, Sukhasana, Cobra, and Upward-Facing Dog help asthmatic patients relieve their symptoms by opening and stretching their chests and stimulating their lungs.
For those who have asthma, what kind of exercise is recommended?
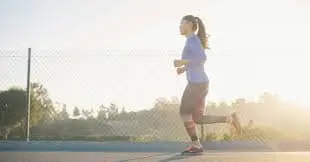
Exercise not only improves overall health but over time may also help lessen asthma symptoms. Yoga, swimming, walking, riding, and other activities are a few types of exercise. Exercises that include certain types of exertion may trigger asthma episodes that result in wheezing or tightness in the chest.
Is lung strength increased by Kapalbhati?
The Kapalabhati Pranayama improves pulmonary function by strengthening the respiratory muscles through increased respiratory muscle activity, which is required for breath coordination at a higher pace.
How can I take care of my lung asthma?
Regular physical activity strengthens your heart and lungs, which helps lessen the indications of asthma. To warm the air you breathe when exercising in cold weather, put on a face mask. Keep your weight within healthy bounds. Obesity increases the risk of developing other health issues and worsens asthmatic symptoms.
Is stretching beneficial for people with asthma?
During an asthma attack, we use every muscle in our body to try to breathe, which makes our muscles tense. You can teach your muscles to relax in the event of an asthma attack by stretching your breathing, shoulder, back, and side muscles on a regular basis.
References:
- January ViOn December 13, 2023, Mangukiya, J. The Top 11 Asthma-Relieving Yoga Pose – Mobile Physical Therapy. Mobile Physio Clinic. The top 11 yoga poses for asthma relief can be found at https://mobilephysiotherapyclinic.in.
- W. Myers, 2024 (March 23). Asthma and yoga. EverydayHealth.com. great yoga positions for asthma relief.aspx asthma pictures at https://www.everydayhealth.com
- Z. S. Mph (2021, July 9). Things to know about asthma and yoga. Here’s an article about asthma yoga from Medical News Today
- S. Ayurveda (2016) July 29. The Top 6 Asthma Yoga Poses for Quickly Healing. Ayurvedic doctor Sharda. Here are the top six yoga poses for asthma sufferers to get better quickly: https://drshardaayurveda.com/blogs/respiratory
- Image 3, On November 9, 2021, Jana, A.Dandasana | The Staff Pose: Steps, Safety measures, and Health Advantages. Breaking Buddha. Dandasana staff members offer steps, benefits, and precautions at https://www.smashingbuddha.com/
- Image 5, On September 3, 2023, Rod. Pose: Standing Forward Bend, or Uttanasana. The website Yoga Selection offers a standing forward bend pose known as Uttanasana.
- Image 6, 2022, December 31; Yoga15abi. Yoga 15. Yoga 15. Seated Twist: https://yoga15.com/pose/seated-twist/
- Image 7, S. Panda (2021) March 8. Pranayama Kapal bhati – Saachi Baat. Saachi Baat. Kapal bhati Pranayama: https://saachibaat.com/lifestyle/health-fitness/