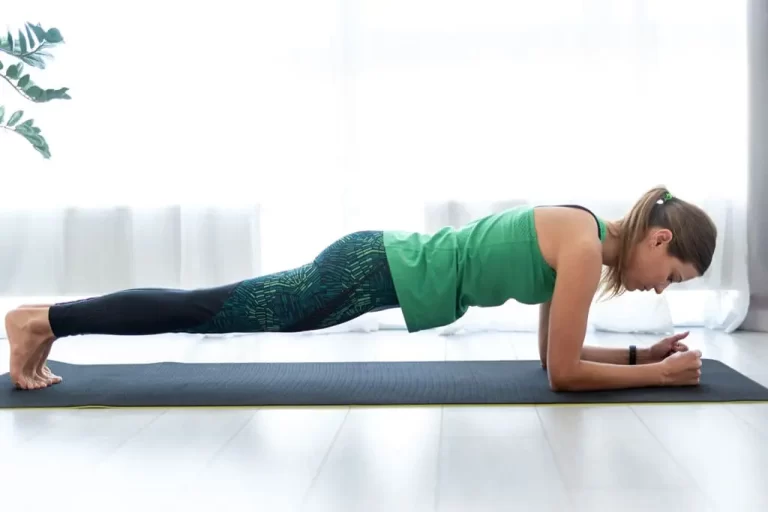
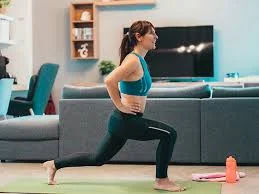
Blog

  • Deltoid Muscle Pain

    Deltoid Muscle Pain

    What is a Deltoid Muscle Pain?

    Deltoid muscle pain is a common complaint that can significantly impact daily activities and overall quality of life. The deltoid muscle, located on the uppermost part of the arm and shoulder, plays a crucial role in various movements such as lifting, rotating, and stabilizing the arm. Pain in this muscle can arise from a variety of causes, including overuse, injury, or underlying medical conditions.

    The Deltoid muscle: The muscular structure that gives the shoulder its rounded shape is the Deltoid, a big, triangular muscle situated over the glenohumeral joint.

    • It is comprised of three distinct portions
    • anterior or clavicular,
      middle or acromial,
      and posterior or spinal

    Anatomy

    • Origin:
    • Anterior border
      • an upper surface of lateral1/3 of the Clavicle (clavicular part),
    • The spine of the Scapula (spinal part)
    • Acromion (acromial part),
    deltoid muscle
    deltoid muscle
    • Insertion:
    • In the humerus, it goes into the deltoid tuberosity
    • Nerve:
    • Axillary nerve (C5, C6) ,
    • The deltoid muscle primarily serves as the humeral head stabilizer and shoulder abductor. further supports forward elevation
    • The deltoid is a very strong muscle of the shoulder joint which used in many ADL activities and athletic activities. (eg netball, swimming,
    • Around the top of the upper arm and shoulder is a round muscle called the deltoid.

    Function:

    • The deltoid muscle’s primary function is to assist in lifting and rotating the arm.
      deltoid muscle pain feels mainly in the shoulder and is experienced during shoulder movements such as lifting or carrying.
    • Deltoid muscle strain and overuse are the causes of this muscle stiffness.
      There’s pain and swelling in the deltoid muscle.
    • If the patient feels that the pain has many causes, including neck issues, arthritis, and other medical conditions.
      However, if the pain is coming from the shoulder joint’s side, front, or back, it is most often caused by a deltoid muscle injury, which occurs when lifting the arm.
    • For some emergency signs please get in touch with the doctor.

    What is deltoid muscle?

    • The deltoid is known as the thick, triangular shoulder muscle known as the deltoid.
      Because of how similar it is to the Greek letter “delta,” this muscle is known as the deltoid
      This muscle’s broad origin includes the clavicle, acromion, and scapular spine.
    • It enters into the humerus after passing inferiorly through the region surrounding the glenohumeral joint (GH joint).
      The acromial, clavicular, and scapular spinal segments combine to produce the deltoid muscle.
      the deltoid.
    • The acromial part = middle fibers that abduct the arm, while the clavicular & scapular spinal parts play a significant role in the stabilization, ensuring the steady plane of the abduction movement.
    • The clavicular part = Anterior fibers function as the arm’s flexor and internal rotator (IR).
    • The scapular Part=muscles in the posterior region that stretch and rotate the arm externally.

    Deltoid muscle Pain

    Deltoid muscle Pain
    Deltoid muscle Pain
    • Deltoid muscle pain feels mainly in the shoulder and is experienced during shoulder movements such as lifting or carrying.
    • Deltoid muscle strain and overuse are the main causes of this muscle stiffness which also cause
      pain and swelling in the deltoid muscle.
    • One of the more typical “problem areas” of the shoulder joint is thought to be the deltoid.
    • The most common activities that cause injuries to the deltoid are lifting, reaching back, throwing overhead, and even raising weights while performing exercises like push-ups and pull-ups.
    • Here, we’ve covered the causes, symptoms, and deltoid discomfort as well as cures and therapies to assist you in getting clear of the pain.

    What is the cause of deltoid muscle pain?

    • The most frequent causes of deltoid muscle pain are sprains and overuse injuries to the shoulder.
      Athletes and other people who frequently use their shoulder and deltoid muscles are more likely to suffer from soft tissue injuries and deltoid pain. Another cause of muscle spasms is a shoulder dislocation.
    • Deltoid strain can happen suddenly as a result of an accident, such as tripping or heavy lifting, resulting in acute pain.
    • The majority of deltoid injuries occur gradually over time and are especially caused by sports like baseball, swimming, and weightlifting.
    • Individuals who experience shoulder bursitis (bursa is a thin, fluid-filled sac that provides a cushioning effect) generally also get shoulder tendinitis in which injury to rotator cuff tendons occurs because of its rubbing, known as the acromion, between the humerus and the upper outer edge of the shoulder This condition happens in impingement syndrome.

    Other:

    • Not warming up properly before physical exercise
    • Poor flexibility
    • Poor exercise
    • Overexertion and fatigue
    • Weakness
    • Acute injuries cause a macro-trauma to the muscle and usually represent the outcome of a single traumatic event. There is a clear connection between the symptoms and the cause. They play contact sports with a high strike rate and are dynamic, much like tennis and baseball. A strain might result from moving or turning the elbow and shoulder oddly or unexpectedly.
    • The Deltoid muscle is overused.

    Repetitive movements

    Prolonged weight bearing or stress (e.g., wearing a large backpack) is applied to the deltoid muscle, which hurts and damages the muscle.
    There is a greater chance of straining the deltoid muscle in sports and other activities that involve repetitive movements, like tennis, swimming, and other hobbies.

    Acute trauma

    The deltoid muscle is experiencing sudden pressure or trauma, which is producing a tear in the patient.
    This occurs when one lifts excessive weight or breaks a fall with an outstretched arm.

    Poor posture
    Variations in posture affect the shoulder joint’s range of motion, the location of the humerus, and the degree to which the joint’s components function as a unit.
    These additional pressures cause the muscle to become more strained over time, which results in pain and decreased movement.

    Poor flexibility

    Warming up, cooling down, and stretching are essential before starting any type of activity.
    By doing this, the deltoid will be more protected. Stretches focusing on the deltoid and shoulder muscles will increase flexibility and help avoid injuries.

    What are the Symptoms of the deltoid muscle pain?

    • The patient usually feels deltoid pain/soreness. (especially in the morning)
      An unexpected pain in the arm’s front side.
      Tenderness or pain near the deltoid muscle
      Your deltoid experiences a snapping or popping feeling.
    • bruises and swelling in the deltoid muscle.
      Restricted deltoid muscle mobility.
      spasms in the deltoid muscle.
      weakening of the muscles.
      tightness in the muscles.

    Other Symptoms depend on the severity of the strained muscle.
    Three grades of strains to the deltoid muscle can be identified.

    • Grade one – 1
    • If the patient presents a grade one strain, the patient uses the arm normally but has some tightness/soreness in the shoulder.
    • The shoulder joint is slightly swollen.
    • Using the arm produces slight pain, but the range of movement [ ROM ] is often not restricted.
    • Grade two -2
    • When partial tears of the deltoid muscle occur in a patient with Grade 2 strains.
    • Using or raising the arm normally is difficult when there is a grade two strain.
    • In addition to a somewhat enlarged shoulder joint, the patient has acute pain when attempting to utilize their arm.
    • Pressing down or raising the arm in any way when suffering from this condition.
    • Grade Third -3
      More severe or total deltoid muscle rips occur in grade three strains.
      Pulled muscles result in excruciating agony and complete immobility of the arm.
    • The enlarged shoulder joint is quite large.
      The arm is either completely immobile or has very restricted movement due to the pain.
    • The patient experiences deltoid muscle discomfort, weakness, and tightness.
      When the deltoid muscle is injured, the person typically experiences pain and tenderness when lifting their arm and at the front, side, or rear of the shoulder joint.
      Should the deltoid muscle be injured and bruising and edema result from it
    • Restricted to the patient’s ROM (range of motion).
      Serious muscular injury might cause problems with regular movement.
      It may indicate a frontal muscle injury if the patient finds it difficult to raise their arm or move it 90 degrees to the side of their body.
      Raise the arm from the side upwards in response to increased pain to avoid damaging the middle or upper region of the deltoid muscle

    Why Do the Deltoid Muscles Hurt After Sleeping?

    During sleep, direct pressure is usually applied to your deltoid muscles and other shoulder muscles,
    which can create pain when you wake up, especially if you roll over and sleep on the side that is damaged or sore.

    When should I consult a physician for pain in the deltoid muscle?

    • Severe episodes of shoulder joint pain might be caused by:
    • Limit arm mobility completely.
    • Should the patient experience a popping sound coming from a muscle
    • Continue for a few weeks if the patient feels
    • If the severe discomfort interferes with sleep, even when you’re at rest

    Diagnosing the deltoid muscle pain

    Diagnostic testing is not necessary for the majority of minor or partial muscle strains, but it can assist in determining whether you have a rupture strain and rule out other possible reasons for arm or shoulder pain.

    Investigation

    X-rays:
    An overall two-dimensional image of your upper arm, elbow, and shoulder can be obtained by X-rays. They aid in the diagnosis of instability, unusual
    bone forms, avulsion fractures, and other issues.

    MRI
    provide more details and aid in the assessment of the soft tissues in and surrounding your deltoid.
    They can assist in assessing the degree of your injury, the quality of your tear or inflammation, and other conditions that are similar.
    They can also detect damage to your tendons or ligaments.

    Assessment of deltoid pain

    • History along with any related symptoms.
    • mechanism of injury.
    • triggering trauma’s direction and force of harm.
    • Repetitive trauma: injuries associated with poor posture.

    Observation

    • An evident deformity resembling a bulge or defect in the muscular belly may be the result of strain injuries to the deltoid.
    • Tenderness
    • Swelling

    Treatment of deltoid muscle pain

    For immediate pain relief :

    • Conservative: Surgery is not necessary for maximum muscular strains, but if the muscle is completely injured, experts advise it.
    • Even with a partial cut, athletes can still replace it when they can move and exert themselves normally.
    • This usually happens after many weeks to several months of intensive counseling and treatment.
    • Surgical treatment may be beneficial for the athlete if the muscle is destroyed.
    • When it comes to over-the-counter (OTC) medications like ibuprofen (Advil, Motrin IB), aspirin, and naproxen sodium (Aleve), some therapists advise against using them for the first 48 hours following a muscle strain because they can increase your risk of bleeding.
    • Pain management during this time may be achieved using acetaminophen (Tylenol) and other medications.
    • A physiotherapist helps you to increase the strength and stability of the injured joint or limb.
    • Deltoid muscle sprint surgery may be necessary for specific muscle injuries.

    Easy remedies at home:

    To reduce pain and swelling as first aid by following the PRICE star:

    • P- Protection
    • R- Rest
    • I- Ice for cooling
    • C- Contraction tapping and splinting
    • E- Elevation

    the P. R.I.C.E approach

    PROTECTION: Protection means to protect the injured part from further movements.
    It is usually achieved by keeping the desired area in a protective covering such as a shoulder sling or shoulder brace.
    Sometimes a certified sports therapist might perform Kinesio-taping to keep the muscle in a protective stance and reduce the chance of further.

    Rest: You need to stop or change the activity that may have caused the shoulder pain.

    Ice: Cold compresses can help in shoulder swelling reduction.
    Sharp discomfort can also be reduced by cooling. Up to five times a day, apply an ice pack for up to 20 minutes.
    Cover the cold pack with a gentle cloth. Avoid touching your skin directly with a cold pack.

    Compression: To help with pain and swelling reduction, wrap the shoulder with an elastic medical bandage.
    Either use a standard ACE bandage or a cold compression bandage. A pharmacy is another place where you can get a shoulder wrap. Don’t wrap it too tightly, yet firmly.
    Avoid obstructing blood flow. Loosen the compression bandage if your hand or arm starts to go numb, tingling, or bluish.

    Elevate: The burnt space that allows gravity to help reduce swelling above your heart’s extent, especially around midnight.

    One to five days following the injury, or when pain and swelling have reduced, the patient is instructed to aid heat. Giving the shoulder joint some rest during this period will help it heal.
    In addition, the patient is using over-the-counter medications to help with pain management.

    Applying gentle stretching can help relieve pain caused by deltoid tension.
    Raise your clasped hands over your head and try holding the arm across to your chest.
    These stretches aid in improving flexibility and range of motion (ROM).

    Allowing a greater range of motion in the shoulder joint reduces discomfort.

    Immediate treatment According To The Grade Of The Deltoid Strain:

    Grade 1 of the deltoid muscle strain:

    PRICE protocol with if needed mild painkillers.

    • Use a compression bandage and apply ice on a regular basis during the first 24 hours following an injury to minimize swelling.
    • Keep the arm in a protective sling and reduce the use of the arm as much as possible.
    • After that, apply a heating pad to relieve pain and soreness.
    • Allowing the shoulder joint rest is also important.
    • After doing this for a day or two, change to gradual isometric contraction.
    • Initially, perform 5-7 repetitions with a 3-5 second hold. Gradually increase the reps, hold length, or both, depending on the plan or planned result.

    Grade 2 of the deltoid muscle strain:

    • PRICE protocol
    • over-the-counter anti-inflammatories and painkillers.
    • The swelling can be decreased by applying ice regularly for 3-5 days.
    • Alternating between ice and heat packs can help reduce pain after an acute muscular injury.
    • A compression bandage is put around the arm until the swelling goes down, in addition to the protective sling.
    • ROM exercise is started once the initial pain and swelling have subsided. Usually, two to three sets a day, with seven to ten repetitions in each set.
    • The patient and physiotherapist work together to gradually expand the range of motion.
    • After the patient reaches full range of motion, the next step is strengthening and conditioning,
    • which could take several weeks to months, depending on the patient’s needs
    • . Here, a physiotherapist prepares a program especially for the needs, objectives, and planned results of that individual patient.
    • Give the injury time to heal and reduce back on the regular amount and intensity of exercise during this time.

    Grade 3 of the deltoid muscle strain:

    • PRICE protocol followed with some painkillers and anti-inflammatories.
    • First, a protective cast—such as a shoulder brace—is placed on the injured arm
    • After the protection phase is over, the physiotherapist proceeds to the rehabilitation phase,
    • progressively increasing the range of motion through several manual techniques before setting a rigorous strength-training plan.
    • Before prior strength is reached, the surrounding structures must typically be conditioned as well, which could take months.
    • After applying ice to the damage, attempt to avoid using the injured arm and shoulder joint and elevate the affected portion of the area when you can.
    • To lessen the suffering, take over-the-counter pain relievers.
    • A doctor or rehabilitation professional makes additional advice to control the patient’s pain and expedite recovery if the patient’s discomfort does not go away with time after trying home cures.

    Role of Physiotherapy in Deltoid Muscle Pain:

    • A Physiotherapist plays an important role in reducing and further preventing deltoid pain.
      with the use of electrotherapy and manual therapy, the therapist first works on reducing your pain.
      Once that is done, they curate a specially customized program for you based on your needs and goals.
    • As an example, the physiotherapist may include strength training in the treatment plan for a patient with grade 2 deltoid strain if the patient wants to play with their children.
      Strength training works all the shoulder muscles, including the rotator cuff, deltoid, joint play, and occasionally even the arm muscles, such as the triceps and biceps.

    Rehabilitation program for deltoid pain

    Physiotherapy treatment

    GOALS FOR TREATMENT:

    • Relieve deltoid muscle pain
    • Reduce muscle swelling
    • Increases deltoid muscle strength
    • Improve full mobility of the ligament and joint
    • Restore the patient’s confidence
    • Restore patients’ full functional activity

    Phase one
    PRICE PROTOCAL CONTINUE
    Electrotherapy

    1. ultrasound
      Ultrasound is used for tissue healing
      To increase blood circulation and mobility.
      To reduce swelling and pain
    1. Cryotherapy
      Cryotherapy, which involves applying an ice pack and taking a cold bath to the affected area, helps lessen swelling and inflammation.
      Applying cold constantly for 15 to 30 minutes at a time, multiple times a day is recommended.
    1. TENS
      Transcutaneous electrical nerve stimulation (TENS) is able to help reduce pain and muscle spasms.
    2. IFT
      IFT appears to be used:
      Pain relief
      Muscle stimulation
      Increased local blood flow
      Reduction of edema

    Phase two
    Electrotherapy

    As the patient feels pain start exercise
    active exercise for a few days can be start

    Mobility exercises: level: 1

    (A) Pendular Exercises

    This exercise divided into 4 parts

    To perform these exercises: Bend forward and rest your unaffected arm on a table or chair. Relax the painful arm and let it hang down straight.

    Part 1: Slowly start to swing the straight arm forward and backward.
    Do this for at least 5 minutes.
    Start with a small motion and as you become stronger try and increase the range of movement in the forward and backward motion.

    Part-1

    Part 2: Begin to swing the straight arm side to side gradually. Work on this for at least five minutes, or until you are no longer able to.
    Begin with modest motions and work your way up to a broader range of motion as your strength increases.

    Part-2

    Part 3: Swing the straight arm slowly in a clockwise motion. Work on this for at least five minutes, or until you are no longer able to. Once you gain strength,
    aim to extend the circular movement’s range of motion by starting with a smaller motion

    Part-3

    Part 4: Begin to slowly rotate the straight arm in the opposite direction of the clock. Work on this for at least five minutes, or until you are no longer able to. Once you gain strength, strive to extend the circular movement’s range of motion by starting with smaller motions.

    Part-4

    level: 2 Short Lever Exercises in Lying

    ( A) Shoulder Flexion (Short Lever)
    Shoulder flexion
    • To perform this exercise, lie on your back and place a rolled towel under the elbow of the arm that pains.
    • Extend your elbow as much as possible. Your elbow should point straight up towards the ceiling as you shift your shoulder.
    • If you are having difficulty lifting your painful arm, you can use your other arm to assist; but when lifting the painful arm, try to ensure that your shoulder muscles are
    • Doing the majority of the effort. going back to where you start.
    • Try to complete this for a total of five minutes, or until you feel exhausted and unable to perform anymore. For this exercise, five sets of sixty seconds are advised.
    B) Side Lying Abduction (Short Lever)
    Side lying abduction
    • To perform this exercise, place the affected arm on top of your healthy side while lying down. As you raise your hand up to your chest, bend your elbow as much as you can.
    • Raise your elbow away from your body and out to the side. Make an effort to point your elbow upward.
    • Then go back to where you were before. Try to perform this for a total of five minutes, or until you become too tired to continue.
    • For this workout, it is advised to attempt five sets of sixty seconds.
    C) Circles (Short Lever)
    Circles
    • To perform this exercise, lie on your back and place a rolled towel under the elbow of the arm that is painful. Extend your elbow as much as possible.
    • Your elbow should point straight up toward the ceiling as you shift your shoulder. To assist in lifting your hurting arm, you can utilize the other arm.
    • When lifting the hurting arm, try to make sure your shoulder muscles are doing the majority of the effort if you are having trouble.
    • Try using your elbow to create circles while pointing it toward the ceiling.
    • Until you are completely exhausted and unable to perform anymore, aim for a total of five minutes.
    • Try to complete five sets of sixty seconds in a clockwise direction, followed by five sets of sixty
    D) Air Punches (Short Lever)
    Supine-punch (Air Punches)
    Supine-punch (Air Punches)
    • To perform this exercise, place a rolled towel under the elbow of the arm that pains as you lie on your back.
    • Your elbow should be 90 degrees bent. Punch straight up in the air, hold it for three seconds, and then carefully and slowly bring it back down to the beginning position.
    • Aim for a total of five minutes, or until you are completely exhausted and unable to perform anymore.
    • For this workout, it is advised to attempt five sets of sixty seconds.
    • As you gain strength, you can increase the resistance and force your shoulder muscles to work harder by adding a tiny hand weight.

    Level 3: Long Lever Exercises in Lying

    A) Static 90 Degree Arm Hold
    Static 90-degree arm hold
    • Lay on your back to perform this exercise. Hold your arm straight and raise it to about a ninety-degree angle.
    • If you are having a problem lifting your painful arm, you can try using your other arm to assist but try to ensure that your shoulder muscles are making the most of the effort when
    • lifting the painful arm.
    • Keep yourself in this posture for a total of five minutes, or until you are too tired to continue.
    • For this exercise, five sets of sixty seconds are advised.
    B) Circles (Long Lever)
    • To complete this task: Place yourself on your back. Raise your arm to about ninety degrees, but keep it straight.
    • If you are having problems lifting your painful arm, you can try using your other arm to assist but try to ensure that your shoulder muscles are doing the most of the effort when lifting the painful arm. With your fingers pointing straight up at the ceiling,
    • maintain a straight arm. Refrain from adjusting the wrist. For five minutes in total, or until you are so exhausted that you are unable to perform anymore,
    • move your shoulder in a clockwise circle. Consider attempting five 60-second sets instead.
    • Next, rotate your shoulder anticlockwise for a total of five minutes, or until you are no longer able to do so due to tiredness. Or attempt five 60-second sets.
    • Start increasing the size of the circular movement you perform as you gain strength. To make the shoulder muscles work harder, you can also progress by adding a small hand weight.
    C) Crosses (Long Lever)
    • Lay on your back to perform this exercise. Raise your painful arm to a ninety-degree angle.
    • If you are having trouble lifting your painful arm, you can try using your other arm to assist but try to ensure that your shoulder muscles are doing the most of
    • the effort when lifting the painful arm.
    • Move your arm up and down in alignment with your body to begin. Repeat for a total of five minutes, or until you get too tired to continue. Or try five sixty-second sets.
    • Next, extend the arm to the side and then return it, crossing the midline in the process.
    • Five minutes in total, or until you become too tired to continue. Alternatively, attempt five 60-second sets.
    • When you gain strength, you can work your shoulder muscles harder by increasing the resistance by constructing bigger As you gain strength,
    • you can work your shoulder muscles harder by making larger crosses and adding a hand weight to increase resistance.
    D) Long Lever Active Shoulder Flexion/Extension Pulses
    Active shoulder flexion / Extension
    • To do this exercise: Lie on your back. Lift your arm to 90 degrees. To assist in lifting your hurting arm, you can utilize the other arm.
    • Keep your arm straight and move your arm back towards your head and then try to lower back to the bed (but don’t go all the way down) and then pulse this motion for 5 minutes in total or until you reach your fatigue point and are unable to do anymore.
    • Do 5 sets of 60 seconds.
    • Alternatively, to increase the workload on the shoulder muscles, add a hand weight.

    Level 4: Supported Sitting Short Lever Flexion

    A) Short Lever Flexion (Supported Sitting)
    • To perform this exercise: Sit with your back to the pillows, leaning backward while maintaining your posture.
    • Try bending the elbow of the arm that pains as much as you can. Raise your elbow to the ceiling and then slowly lower yourself back to the beginning position.
    • Aim for 5 minutes in total or until you feel fatigued and unable to do any more.
    • You can try 5 sets of 60 seconds.
    B) Short Lever Abduction (Supported Sitting)
    Shoulder abduction
    • To do this exercise: Position yourself sitting up but leaning backward and supported by pillows.
    • Extend the elbow of your arm that pains as much as you can. Raise, extend, and release your elbow from your body.
    • Make an effort to point your elbow upward.
    • Until you are completely exhausted and unable to perform anymore, aim for a total of five minutes.
    • It is suggested to try to do 5 sets of 60 seconds.

    Level 5: Supported Sitting Long Lever

    (A) Active Shoulder Flexion/Extension Pulses
    Shoulder flexion /Extension
    • To complete this exercise, sit up, lean back, and use cushions to support oneself.
    • Raise your arm to shoulder height while maintaining a straight arm. If you are having trouble lifting your affected arm, you can use the other arm to assist, but be sure your shoulder muscles are strong enough.
    • when lifting the sore arm, put forth the majority of the effort.
    • Next, extend your arm as far as possible in the direction of your head, and then return it to your side (without going all the way down).
    • Pulse for a total of five minutes, or until you are no longer able to do so due to weariness.
    • It is advised to attempt five sets of sixty seconds.

    Stretches for deltoid pain

    Anterior Deltoid Stretch

    Anterior Deltoid Stretch
    Anterior Deltoid Stretch

    Sit or stand straight with the shoulder relaxed.

    • As though you’re standing in an attentive position, clasp your hands behind your back.
    • try holding one hand with the other or a used towel behind your back in two hands.
    • Gently roll your shoulders, puff out the chest, and squeeze your shoulder blades together.
    • Gradually pull your hands above where you feel a minor stretch or a pleasant discomfort.
    • Make careful to keep your posture upright and avoid bending forward when doing this.
    • Relax your body, breathe deeply via your nose, and hold this position for 15-20 seconds.
    • Repeat 3-5 times as per required.

    Posterior deltoid Stretch

    • Sit comfortably on a chair or stool. As an alternative, take a relaxed stance with your feet somewhat wider than your hips.
    Posterior deltoid strech
    Posterior deltoid strech
    • Stretch your arm sideways as though you passed a football to someone on the opposite side of you while maintaining a relaxed body posture.
    • The second arm should be used to gently pull the extending hand’s elbow in the same direction.
    • Make sure you are only pulling your outstretched hand and not leaning towards the same side.
    • Pull till you feel a slight deep stretch.
    • Maintain that for 15-20 seconds.
    • Repeat 3-5 times.

    Dynamic Bear Hug Stretch

    Dynamic bear hug stretch
    • The affected individual is in Place your feet shoulder-width apart and stand tall, maintaining a straight posture and tight core.
    • Then, spread your arms wide as if you were going to give someone a hug.
    • When the patient feels a light stretch across the front of the shoulder joint & chest, bring the arms across the chest,
    • then hug by the patient’s self-right arm on the top of the left, till the patient feels a stretch at the back of the shoulder joint.
    • Swing the arms out wide once more in a controlled motion.
    • After reaching the limit of your range of motion, or ROM, swing your arms back into an embrace, placing your left arm on top of your right this time.
    • For thirty seconds, this stretching is continued.

    Do the Rest after that, then carry out the last two rounds.

    Standing chest and shoulder stretch

    Shoulder chest and shoulder stretch
    • The patient is standing tall with the feet roughly hip-distance apart so that engaged core muscle & shoulder joint back.
    • Must be focused on maintaining good posture.
    • Then Reach behind the back with both arms & clasp the hands together.
    • Take a breath in & as you exhale, lift the hands behind to as high as comfortably till they feel a good stretch across the front of the shoulders & chest. Hold the stretching position & breathe deeply for 30 seconds.
    • Then Release & repeat two more times.

    Cross-body shoulder stretch

    Cross-body shoulder stretch
    • The patient is Standing position in tall with the feet hip distance apart & the muscle of the core is tight.
    • To maintain proper posture, place your ears over your shoulders, hips, knees, and ankle joints.
    • Bring your left arm across the body at shoulder height.
    • Use the right hand to grab the left forearm.
    • Gently pull the left arm closer to the body till the patient feels a stretch toward the middle of the left shoulder.
    • Hold the stretching position & breathe deeply, for the30 seconds.
    • Then take a break, and then perform this exercise twice more in front of the tricking sides.

    Strengthening exercises for deltoid pain

    Since resistance band exercises allow the user to adjust the amount of resistance to bear, they are occasionally referred to as weighted exercises.

    A) Rear deltoid Fly

    Rear deltoid Fly
    Rear deltoid Fly
    • To do this exercise, place the middle of the resistance band beneath your feet as indicated in the above diagram, holding both ends of the theraband in your hands.
    • After connecting the resistance band, raise your arms to shoulder height by gradually lifting them sideways.
    • You can hold this position for 3-5 seconds or lower it immediately.
    • One hand can be used to complete the movement first, or both hands can be used in sequence. One more hand is slowly left hanging on the side in the event that it happens later.

    B) Front deltoid Raise

    Front deltoid Raise
    Front deltoid Raise
    • To perform the movement, hold the resistance band’s edge in one hand and secure the other either underneath the foot or on one sturdy surface that is below your knee height, like the leg of the bed.
    • Gently raise the arm in front of you.
    • Either maintain the posture or quickly drop it.
    • The movement should be pain-free and smooth.
    • You can start off with 10-15 repetitions.
    • Please remember to keep your elbows and knees relaxed or unlocked to prevent putting undue strain on your joints.

    C) Reverse fly

    Reverse fly
    Reverse fly
    • Hold a dumbbell in each hand while standing with your feet hip-distance apart. Lean your body forward diagonally and reach your arms toward the floor as you swing forward at the hips. Stretch your arms to the sides to the height of your shoulders.
    • Put your shoulder blades together, then let go to return to the starting posture. Do this ten times over.

    D)Dumbbell shoulder press

    Angled-shoulder-press
    Dumbbell shoulder press
    • Place your feet hip-distance apart as you stand. Raise a dumbbell with both hands. Raise the dumbbells until your arms are shoulder height, palms facing away from you, like a goal post. This is where you are supposed to start.
    • Using your core to maintain stability on each repetition, push the dumbbells upward. Return to the starting position slowly. Ten repetitions should be made.

    How to prevent deltoid muscle pain?

    some prevention tips are given here

    • Always do the Warm-up before the exercise and add a cool-down period after exercises
    • Do the Stretch daily to improve the range of motion = ROM & flexibility
    • Do the Rest after some exercise.
    • If the patient works at a computer, make sure the keyboard is positioned so that positioned on the shoulder joint
    • Don t overuse
    • Always do Practice for good posture.
    • If you have a physically demanding occupation, regular exercise can help to prevent injuries.
      Follow a healthy diet and an exercise program to maintain a healthy lifestyle.

    Conditions and Disorders

    What conditions and disorders affect deltoid muscles?

    Axillary nerve palsy: Using crutches improperly, suffering a major injury, or having surgery can all cause nerve compression or damage. These issues might cause numbness or weakness in your shoulders, especially in the deltoid muscle.

    Adhesive capsulitis: The thickening and stiffening of the capsule surrounding your shoulder joint causes this ailment. It may result in stiffness, muscle spasms, and shoulder pain.

    Rotator cuff tears: Rarely does a serious rotator cuff injury cause the deltoid muscle to be damaged or dislocated.

    Strains and overuse injuries: Overstretched muscle fibers might cause a shoulder strain. Strains may occur quickly or may build gradually over time as a result of repeated overhead arm motions.

    Tendonitis: When your shoulder tendons become inflamed, you can get shoulder tendonitis. Tendonitis can impair your ability to move the joint, use your shoulder muscles, or produce deltoid pain.

    FAQs

    Does massage help deltoid pain?

    For a number of conditions, massage is a highly helpful form of pain management. Massage therapy is a common and highly effective treatment for musculoskeletal neck and shoulder discomfort. Long-hold static stretches and deep tissue massages are effective ways to “relax” muscles.

    Can deltoid muscle heal?

    it depends on the severity of the deltoid muscle tear, and if surgery is required, it can take weeks to months to heal.

    How should I sleep with deltoid pain?

    Try sleeping on your back or the side that is not affected if you have a frozen shoulder. To ease some of the discomfort, place some pillows beneath the afflicted arm. To alleviate some of the related pain, you can also take some painkillers approximately one hour prior to going to bed.

    Which exercise is best for shoulder pain?

    Pendulum. Lean over and use a table or chair to support your non-injured arm while you begin the pendulum exercise.
    Arm Extended Over Chest and then hold your right hand in front of you, keeping it close to your waist, to perform this stretch.

    Is physiotherapy good for shoulder pain?

    Physiotherapy is helpful in both treating and preventing shoulder problems that are related to sports. Your physiotherapist will perform a comprehensive examination to detect any weak points or abnormalities in your muscles.

    References

    • Garewal, D. (2021, January 3). Deltoid Pain: A Simple Guide to Muscle Pain & Relief. Melbourne Arm Clinic. https://melbournearmclinic.com.au/deltoid-pain/
    • Professional, C. C. M. (n.d.). Deltoid Muscles. Cleveland Clinic. https://my.clevelandclinic.org/health/body/21875-deltoid-muscles
    • Walden, M. (2022, October 6). Deltoid Pain. Sportsinjuryclinic.net. https://www.sportsinjuryclinic.net/acute-shoulder-injuries/deltoid-muscle-strain
    • Patient, R. M. (n.d.). Deltoid | Rehab My Patient. https://www.rehabmypatient.com/shoulder/deltoid
    • Deltoid Muscle Pain – Causes & Best Treatment Options in 2024. (2024, March 23). ProHealth Prolotherapy Clinic. https://prohealthclinic.co.uk/blog/deltoid-muscle-pain/
    • Deltoid Muscle Pain – Causes & Best Treatment Options in 2024. (2024, March 23). ProHealth Prolotherapy Clinic. https://prohealthclinic.co.uk/blog/deltoid-muscle-pain/
    • Deltoid Rehab Program | ShoulderDoc. (n.d.). https://www.shoulderdoc.co.uk/article/1028
    • Cronkleton, E. (2023, February 3). Top 10 Exercises to Relieve Shoulder Pain and Tightness. Healthline. https://www.healthline.com/health/shoulder-pain-exercises
    • Deltoid. (n.d.). Physiopedia. https://www.physio-pedia.com/Deltoid
    • Eight Stretches You Need to Strengthen & Mobilize Your Shoulders. (n.d.). DMoose. https://www.dmoose.com/blogs/training/8-stretches-tone-strengthen-shoulders
    • https://orthoinfo.aaos.org/en/recovery/shoulder-surgery-exercise-guide/
  • Back muscles

    Back muscles

    Introduction

    The Back muscles are a group of strong, paired muscles located on the trunk’s posterior aspect. They provide spinal movement, trunk stability, and coordination of limb and trunk movements.
    Back muscles are divided into two major groups:

    Extrinsic (superficial) back muscles are those that are closest to the skin on the back. These muscles are also known as immigrant muscles because they originated in the upper limb and migrated to the back during foetal development. These muscles are subdivided into superficial and intermediate.

    The intrinsic (deep) back muscles are also known as true back muscles. The thoracolumbar fascia divides them from the extrinsic muscles, where they are situated deep within. Their primary function is to cause movements in the vertebral column. These muscles are divided into three layers: superficial, deep, and deepest.

    Extrinsic back muscles

    the extrinsic muscles of the back function similarly to the upper-limb muscles but are located superficially on the posterior trunk. They are separated into:

    Superficial extrinsic muscles:

    • trapezius
    • latissimus dorsi
    • rhomboid major
    • rhomboid minor
    • levator scapulae

    Trapezius

    • Origin: the spinous processes of C7–T12, the nuchal ligament, the external occipital protuberance, and the superior nuchal line.
    • Insertion: the acromion, spine of the scapula, and lateral third of the clavicle
    • Innervation: the accessory nerve (12th cranial nerve).

    Letissimus dorsi

    • Origin: iliac crest, sacrum, thoracolumbar fascia, spinous processes of T7–L5, and 10th–12th ribs.
    • Insertion: the intertubercular groove of the humerus
    • Innervation: the thoracodorsal nerve.

    Rhomboid major

    • Origin: the nuchal ligament and spinous processes of C7-T1.
    • Insertion: the line connecting the superior angle and the trigonum scapula, which is the superior portion of the scapula’s medial border.
    • Innervation: the dorsal scapular nerve.

    Rhomboid minor

    • Origin: spinous processes of T2-T5.
    • Insertion: the line connecting the inferior angle and the trigonum scapula, which is the inferior portion of the scapula’s medial border.
    • Innervation: the dorsal scapular nerve.

    Levator scapulae

    • Origin: the cervical vertebrae’s first four transverse processes.
    • Insertion: the superior angle of the scapula.
    • Innervation: the dorsal scapular nerve.

    Intermediate extrinsic muscles

    • Serratus posterior superior and inferior

    Serratus posterior superior

    • Origin: the spinous processes of the T11-L3 vertebrae.
    • Insertion: the inferior border of the 9th–12th ribs.
    • Innervation: the T9-T12 spinal nerves

    Serratus posterior inferior

    • Origin: the C7-T3 vertebrae’s ligamentum nuchae and spinous processes.
    • Insertion: the superior aspect of the 2nd-5th ribs.
    • Innervation: the anterior rami of the T1-T4 spinal nerves.

    Intrinsic back muscles

    The true, intrinsic back muscles are the deepest layer of muscles connected to the vertebral column. The muscles of the thoracic area are deep into the thoracolumbar fascia, whereas the muscles of the lumbar area are between the superficial and middle layers of the fascia. Almost all of them get their nerve supply from the posterior (dorsal) rami of spinal nerves, and they’re known as the intrinsic group because they only affect the vertebrae. The numerous muscles in this group are divided into three layers:

    Superficial layer:

    • splenius muscle
    • erector spinae muscle

    Splenius muscle

    The splenius muscle group includes two muscles:

    Splenius Capitis.

    • Origin: Spinous processes of C7 vertebrae, T1-T3 (or T4) vertebrae, and supraspinous ligaments.
    • Insertion: Mastoid process, a lateral third of the superior nuchal line.
    • Innervation: The lateral branches of the C2–C3 dorsal rami.

    Splenius Cervicis.

    • Origin: T3-T6 spinous processes
    • Insertion: atlas and axis transverse processes, posterior tubercle of C3 vertebra.
    • Innervation: Lateral branches of the lower cervical dorsal rami.

    Erector Spinae Muscles

    The erector spinae is a massive muscle group that consists of three muscular columns on each side of the spine. The erector spinae group’s muscles are arranged from medial to lateral:

    Spinalis muscle is classified into three regions: spinalis capitis, spinalis cervicis (colli), and spinalis thoracis. They attach to the spinous processes of the vertebrae in their respective regions.

    Spinalis Thoracis

    • Origin: The most medial erector spinae in the thoracic region originate from the spinous processes of T11-L2.
    • Insertion: Upper thoracic vertebrate spinous processes
    • Laterally blends with the longissimus thoracis muscle.

    Spinalis cervicis and capitis are vaguely defined and underdeveloped. These fibres may not be present in all people.

    Spinalis cervicalis

    • Origin: ligamentum nuchae and the C7 spinous process.
    • Insertion: Spinous processes C3–C4 and axis.

    Spinalis Capitis

    Instead of the customary insertions on the thoracic transverse processes, a small number of semispinalis capitis fibres are usually inserted into the spinous processes of C7 and T1.

    Longissimus muscle is further classified into longissimus capitis, longissimus cervicis (colli), and longissimus thoracis. They attach to the transverse processes of the vertebrae in their respective regions.

    Longissimus capitis

    • origin: C4-T4 transverse processes.
    • Insertion: The posterior edge of the mastoid process.

    Longissimus Cervicis

    • Origin: T1-T4 transverse processes.
    • Insertion: The posterior tubercle of the C2-C6 transverse processes.

    Longissimus Thoracis

    It includes lumbar and thoracic sections.
    The largest erector spinae group

    • Origin: Transverse process at the inferior vertebral levels.
    • Insertion: Mastoid process and transverse process at superior vertebral level

    Iliocostalis muscle

    There are three different types of iliocostalis muscle: iliocostalis lumborum, iliocostalis thoracis, and iliocostalis cervicis (colli). They extend between the rib angles and the transverse processes of the corresponding regional vertebra.

    Iliocostalis Cervicis

    • Origin: Angle of ribs 3 to 6.
    • Insertion: posterior tubercle of the transverse process of C4-6.

    Iliocostalis Thoracis

    • Narrow, fusiform shape.
    • Origin: Angle of the lower six ribs.
    • Insertion: C7’s transverse process and upper six rib angles.

    Iliocostalis Lumborum

    • It includes lumbar and thoracic sections.
    • Origin: the iliac crest’s dorsal segment and medial end.
    • Insertion: angle of ribs 4–12, thoracolumbar fascia, and L1–L4 lumbar transverse processes.

    Deep layer:

    • transversospinales (semispinalis, multifidus, rotatores)

    Transversal Spinalis

    This group of muscles connects a spinous process to the transverse process of a vertebra below.
    Organised by length and region covered.

    Rotatores are the deepest and shortest.

    • Span 1-2 segments.
    • Eleven pairs between T1 and T12.
    • The rotator brevis connects the transverse process of the lower vertebra to the lateral lamina of the upper vertebra directly above.
    • The rotator longus connects the transverse process of the lower vertebra to the base of the upper vertebra’s spinous process two levels up.

    Multifidus can have two to four segments.

    • Covers the lamina of vertebrae.
    • Origin: Sacrum and ilium, transverse processes T1-L5, and articular processes C4-C7.
    • Insertion: Spinous processes two or four segments above the origin

    The semispinalis has four to six segments.

    • Origin: Thoracic and cervical transverse processes
    • Insertion: Occipital bone and spinous processes in the thoracic and cervical regions. 4-6 segments above the origin.

    Deepest layer:

    • Interspinales muscle
    • Intertransversarii muscle

    These muscles work together to maintain the body’s posture and move the vertebral column.

    Interspinales Muscles

    The interspinales are short muscles that connect the adjacent spinous processes of the vertebrae.

    They are classified as interspinales cervicalis, interspinales thoracis, and interspinales lumborum. However, only the cervical and lumbar regions are fully developed, while the thoracic is frequently absent or rudimentary. The cervical and lumbar spines can extend because of the interspinales muscles.

    Intertransversarii muscle

    The intertransversarii connect the adjacent transverse processes of vertebrae. They are most prominent in the cervical and lumbar spines but are rarely present in the thoracic region.

    The anterior and posterior groups of intertransversarii colli have a joint function that aids in stabilising the cervical spine and lateral flexion.
    The intertransversarii lumborum is made up of medial and lateral slips that help the spine flex laterally.

    Function of the back muscles

    The back muscles provide the primary structural support for your trunk (torso). These muscles help you move your entire body, including your head, neck, shoulders, arms, and legs. Bending, twisting, turning your head, and extending your back are all possible because your back muscles work together.

    You can sit and stand straighter with the aid of these muscles. They are essential for supporting your spine and allowing you to breathe. Their jobs include:

    Superficial muscles: These muscles enable you to maintain a straight back, move your arms, and shrug your shoulders. Superficial muscles include:

    • The latissimus dorsi (lats) muscle helps you extend and rotate your shoulder and arm.
    • Levator scapulae raise the scapula (shoulder blade).
    • Rhomboids are two muscles (rhomboid major and minor) that pull the scapula inward towards the spine.
    • Trapezius (traps) muscles help you move your body, raise your arms, and maintain proper posture.

    Intermediate muscles. The second extrinsic group consists of two muscles. They connect to the ribs and spine and play an important role in breathing. These two sets of intermediate muscles support your rib cage as your lungs expand and depress during breathing:

    • Serratus posterior superior—helps you breathe in
    • Serratus posterior inferior—helps you breathe out.

    Superficial and intermediate muscles are also known as immigrant muscles. This is because they were originally muscles of the arms and legs but were transferred to the back during foetal development.

    Intrinsic muscles. Intrinsic muscles are regarded as the only true back muscles. They are well-developed, large muscles that connect to the bones that support your spine. Intrinsic muscles allow you to maintain your posture, bend, rotate, and flex your back.

    Intrinsic muscles are classified into three types, with many smaller, interconnected muscles. The prominent intrinsic muscle groups are:

    • Erector spinae are a large group of muscles arranged in three columns around the spine.
    • Splenius muscles—located between your upper back and neck
    • Transversospinal muscles line the upper spine.

    Embryology

    In human development, there are three germ layers: the ectoderm, mesoderm, and endoderm. The paraxial mesoderm, which forms the skin’s dermis, also produces the majority of the body’s skeletal muscles and axial skeleton. The back skin’s epidermis is derived from the ectoderm. The spinal cord is derived from an ectodermal structure known as the neural plate. The neural plate develops bilateral neural folds that rise, meet, and fuse to form the neural tube. By day 27, the tube has fused completely and no longer communicates with the amniotic cavity. Failure of this fusion can result in anencephaly.

    The term “extrinsic” refers to the back’s superficial and intermediate muscles, which arise from hypaxial myotomes during embryogenesis. Epaxial myotomes form the basis for intrinsic back muscles.

    Skeletal muscle develops through epitheliomesenchymal transformation from the somatic mesoderm. Epaxial myotomes are responsible for the development of the vertebral column’s extensor muscles. Because it is challenging to determine the direction of the muscle bundles using current preparation techniques, studying the embryological development of the back muscles has proven to be a challenging subject.

    Blood supply

    The dorsal branches of the posterior intercostal arteries provide the majority of blood supply to the back’s muscles and skin. These arteries originate from the intercostal arteries or, in some cases, directly from the descending aorta. The intercostal arteries form a groove with the intercostal vein and nerve caudal to the ribs.

    The thoracic aorta is anterior to the vertebral column and slightly lateral on the left side. The azygos and hemizygous veins may also be found anterior to the spinal cord. The location and developmental stage of the spinal cord determine which blood supply it receives.

    The anterior spinal artery, posterior spinal arteries, and Adamkiewicz artery provide vascular supply to the spinal cord. The anterior and posterior intercostal veins supply venous blood to the back.

    The lumbar, posterior intercostal, subcostal, and deep cervical arteries provide blood to every muscle group in the back. Arterial supply varies from person to person.

    Back muscles injury

    In most cases, injuries affect the way the back muscles work. Problems with the back include:

    • Muscle strains: The muscles in the back can stretch and tear. These common injuries are usually caused by lifting a heavy object (or lifting incorrectly), exercise, overuse, or an accident. Back strains can cause muscle cramps or spasms. In severe injuries, the back muscles can become paralysed.
    • Pain, tightness, and stiffness: Chronic back pain is very common. Pain can cause stiffness and decreased mobility (difficult movement). Tense muscles and back pain can also be caused by depression, stress, and anxiety. Pain in the neck and upper back can cause headaches.
    • Ruptured discs: Discs cushion each vertebra in the spine. If the disc ruptures, it puts more pressure on a nerve, causing back pain.
    • Bulging discs: Similar to ruptured discs, a bulging disc can increase pressure on a nerve.
    • Sciatica is a sharp, shooting pain that travels through the buttocks and down the back of the leg. This can happen when a bulging or herniated disc presses on a nerve, or when a muscle specifically pushes on the sciatic nerve.
    • Arthritis: Osteoarthritis can cause problems with the hips, lower back, and other joints in the body. The area around the spinal cord constricts in certain situations. Experts refer to this as spinal stenosis.
    • Back pain can result from unusual spine curvature. The condition referred to as scoliosis results in a skewed spine.
    • Osteoporosis occurs when bones, including the vertebrae of the spine, become brittle and porous, increasing the likelihood of compression fractures.

    Signs and symptoms of back muscle injury

    Different things can cause your back muscles to ache. They can sprain (or twist) if you pull them in an awkward motion or exercise. Muscles can also strain or tear when they are subjected to excessive pressure or stretched too far.

    A common cause of severe muscle strain is a traumatic injury, such as one sustained while playing sports or in a car accident. Other causes include not getting enough rest between activities, attempting to recover quickly from a sudden movement (such as a loss of balance), or lifting heavy objects.

    Age, weight, and fitness level are all factors that can contribute to different types of back injuries. Signs that something may be wrong with your back muscles are:

    • Bruising of the muscles
    • Decreased mobility
    • Limited range of motion.
    • Numbness on your back
    • Pain and stiffness in the back
    • Spasms (often extremely painful).
    • Symptoms include swelling and muscle weakness.

    Ninety percent of adults will at some point in their lives experience back pain. In some cases, the pain is caused by a mild strain and will subside after a few days of rest. If you are experiencing persistent back or muscle pain symptoms, consult your doctor immediately to learn about treatment options.

    Back muscles exercises

    Knee-to-chest stretch

    One-Knee-to-Chest
    One-Knee-to-Chest

    using both feet flat on the ground and bent knees, lie on your back. Using both hands, raise one knee and press it against your chest. Tense your abdominal muscles and press your spine to the floor. Hold for 5 seconds. Return to the starting position, then repeat with the other leg. Return to the starting position. Then repeat with both legs simultaneously. Repeat each stretch 2–3 times. Perform the entire routine once in the morning and once in the evening, if possible.

    Lower back rotational stretch.

    Lower Back Rotation Stretch
    Lower Back Rotation Stretch

    using both feet flat on the ground and bent knees, lie on your back. Keep your shoulders firmly planted on the floor and gradually roll your bent knees to one side. Hold for 5-10 seconds. Slowly return to the starting position. Repeat on the opposite side. Repeat each stretch 2–3 times. Perform the entire routine once in the morning and once in the evening, if possible.

    Bridge exercise.

    Hip bridge exercise
    Hip bridge exercise

    Through the knees bent and your feet flat on the ground, lie on your back. Keep your shoulders and head relaxed on the floor while tightening the muscles in your belly and buttocks. Then raise your hips to create a straight line between your knees and your shoulders. Try to remain in that position long enough to take three deep breaths. Return to where you started and repeat. Begin by doing five repetitions per day and gradually increase to 30.

    Cat – Cow exercise

    Cat-and-Cow-Stretching
    Cat-and-Cow-Stretching

    Kneel on your knees and hands. Slowly arch your back, pulling your belly up towards the ceiling as you lower your head. Then, as you lift your head, gradually allow your back and belly to sag towards the floor. Return to where you started. Repeat 3 to 5 times twice daily.

    Bird-dog

    Bird Dog
    Bird Dog

    The bird dog exercises the gluteal muscles. It also works the back extensor muscles, which connect to the back of the spine and allow you to stand, bend, and lift objects.

    To do the bird-dog exercise, you should follow these steps:

    • Begin the exercise on your hands and knees, placing your shoulders directly over your hands and your hips directly above your knees.
    • Tense the abdominal muscles and extend the right arm straight in front of the body.
    • Maintain the position while remaining balanced.
    • Slowly raise the left leg and extend it straight behind the body.
    • Hold this position for 15 seconds.
    • Repeat on the other side after making a slow return to the starting position.
    • Repeat five times.

    Abdominal draw-in manoeuvre

    Strong abdominal muscles help to support the spine and keep the hips in proper alignment.

    To do the ADIM, one should follow these steps:

    • Arms by your sides, knees bent, lie on your back.
    • Hold the spine in a neutral position and pull the belly button towards it.
    • Inhale.
    • Exhale while contracting the abdominal muscles and drawing the belly button towards the spine.
    • Hold the position for 10 seconds, then release. Pause for 15 seconds.
    • Repeat ten times.

    Plank

    PLANK
    PLANK

    The plank exercise primarily works the abs, but it also engages the arms, shoulders, hip flexors, and feet, making it an excellent full-body stability exercise. This position may also work the back extensor muscles and the quadratus lumborum, the deepest back muscle.

    Use the following instructions to execute a plank.

    • Lie on your stomach, forearms against the floor, elbows directly in line with the shoulders.
    • Tighten your abdominal and gluteal muscles.
    • Raise the hips and both knees off the floor.
    • Hold the position for 10-30 seconds, not allowing the pelvis to sag towards the floor.
    • Repeat five times, taking your time getting back to the starting position.

    Side plank

    Side plank
    Side plank

    A side plank consists of the following steps:

    • Lie on your right side, right leg slightly bent, left leg straight, foot on the floor. Position the right arm directly beneath the right shoulder, with the forearm extended out in front.
    • Tighten the abdominal muscles and lift the right hip off the floor.
    • Lift the right knee off the floor to straighten the right leg, then stack the feet on top of one another.
    • Maintain a straight posture for 10-30 seconds.
    • Slowly return to the starting position, then repeat on the other side.
    • Repeat the steps outlined above five times.

    Summary

    The back muscles are a group of paired muscles located on the posterior aspect of the trunk, providing spinal movement, trunk stability, and coordination of limb and trunk movements. They are divided into two major groups: extrinsic (superficial) and intrinsic (deep) back muscles. Extrinsic muscles are located closest to the skin on the back and function similarly to upper-limb muscles but are superficially located on the posterior trunk.

    Intrinsic back muscles are the deepest layer connected to the vertebral column and are divided into three layers: superficial, deep, and deepest. The erector spinae muscle group consists of three muscular columns on each side of the spine, classified into three regions: spinalis capitis, spinalis cervicis (colli), and spinalis thoracis. The iliocostalis muscle has three different types and extends between the rib angles and the transverse processes of the corresponding regional vertebra.

    Injuries to the back muscles can cause muscle strains, pain, tightness, stiffness, ruptured discs, bulging discs, sciatica, osteoarthritis, unusual spine curvature, and osteoporosis. Ninety percent of adults will at some point in their lives experience back pain. Exercises to strengthen the back muscles include knee-to-chest, lower back rotational, bridge, cat-cow, bird-dog, abdominal draw-in manoeuvre, plank, and side plank.

    FAQs

    What are the three muscles of the back?

    They consist of the longissimus, iliocostalis, and spinalis muscles. Their attachments divide these muscles, and they all share a tendinous origin. They help to move the thoracic cage and flex the upper vertebral column and head. As the back muscles develop, they extend causally.

    How do the back muscles divide?

    The back muscles are divided into three groups: superficial, intermediate, and deep. Superficial – Associated with shoulder movements. Intermediate – Associated with thoracic cage movements. Deep is associated with vertebral column movements.

    Why do back muscles matter?

    Your back muscles provide the primary structural support for your trunk (torso). These muscles help you move your entire body, including your head, neck, shoulders, arms, and legs. Bending, twisting, turning your head, and extending your back are all possible because your back muscles work together.

    Do you require strong back muscles?

    Strong back muscles support the spine, lowering the risk of strains, sprains, and other injuries caused by lifting, bending, or twisting movements. Muscle strains and sprains can be caused by sports, accidents, or daily chores like picking up something from the floor.

    Which nerves cause back pain?

    The sciatic nerve is a confluence of nerve roots in the lower back. The sciatic nerve runs from the buttocks down each leg. Pain along the sciatic nerve’s path is known as sciatica.

    References:

    • Overview of the back muscles. (2023, November 3). Kenhub. https://www.kenhub.com/en/library/anatomy/overview-of-back-muscles
    • Henson, B., Kadiyala, B., & Edens, M. A. (2023, August 14). Anatomy, Back, Muscles. StatPearls – NCBI Bookshelf. https://www.ncbi.nlm.nih.gov/books/NBK537074/
    • Professional, C. C. M. (n.d.). Back Muscles. Cleveland Clinic. https://my.clevelandclinic.org/health/body/21632-back-muscles
    • Modes, R. J., & Fahrioglu, S. L. (2023, February 27). Anatomy, Back. StatPearls – NCBI Bookshelf. https://www.ncbi.nlm.nih.gov/books/NBK539746/
    • Kashani, S. (2022, August 29). Back Muscles: What to Know. WebMD. https://www.webmd.com/fitness-exercise/back-muscles-what-to-know
    • McIntosh, J. (2023, March 17). What is causing my back pain, and how can I remedy it? https://www.medicalnewstoday.com/articles/172943#causes
    • Back exercises in 15 minutes a day. (2023, August 15). Mayo Clinic. https://www.mayoclinic.org/healthy-lifestyle/adult-health/in-depth/back-pain/art-20546859
    • Cadman, B. (2023, November 30). How to strengthen the lower back. https://www.medicalnewstoday.com/articles/323204#strengthening-exercises
  • Shoulder muscles

    Shoulder muscles

    Introduction

    The shoulder joint, also known as the glenohumeral joint, is a ball and socket joint with the widest range of motion in the human anatomy. The shoulder muscles perform a variety of functions, including abduction, adduction, flexion, extension, internal and external rotation.

    The scapula is the shoulder’s central bony structure and the site of all muscle interaction. The glenoid cavity, or articular surface of the glenohumeral joint, is located on the lateral aspect of the scapula. The glenoid labrum, shoulder joint capsule, supporting ligaments, and the rotator cuff muscles’ myotendinous attachments surround and reinforce the glenoid cavity.

    The shoulder muscles maintain the greatest range of motion of any joint in your body. Because of its flexibility, the shoulder can become unstable or sustain an injury. The humerus (upper arm), clavicle (collar bone), and shoulder blade (scapula) are the attachment points for about eight shoulder muscles. Many other muscles help to stabilise and guide the shoulder’s movements.

    These are the largest shoulder muscles:

    • Trapezius
    • Deltoid
    • Pectoralis major
    • Serratus anterior
    • Rhomboid major

    Another four shoulder rotator cuff muscles:

    • Supraspinatus
    • Infraspinatus
    • Teres minor
    • Subscapularis

    Other shoulder muscles include:

    Trapezius muscle

    Origin

    • Medial one-third of the superior nuchal line
    • External occipital protuberance
    • Ligament nuchae
    • C7 spine
    • T1-T12 spines
    • Correspondings supraspinous ligaments

    Insertion

    • Upper fibres into the lateral third of the clavicle’s posterior border
    • Middle fibres into the upper lip of the crest of the scapula’s spine and the medial border of the acromion
    • Lower fibres, on the apex of the triangular area at the medial end of the spine, with a bursa intervening

    Nerve supply

    • Spinal part of accessory nerve(XI)
    • Branches from C3,C4

    Actions

    Upper fibers act with levetor scapulae, and elevate the scapula, as in shrugging. The upper fibres of both sides extend the neck.

    Middle fibres act with the rhomboid, and retract the scapula,

    Upper and lower fibres act with the serratus anterior, and rotate the scapula forwards around the chest wall thus playing an important role in the abduction of the arm beyond 90 degrees.

    Deltoid muscle

    The acromial part of the deltoid is an example of a multipennate muscle. many fibres arise from the septa of origin that are attached above the acromian. the fibers converge onto three septa of insertion which are attached to the deltoid tuberosity.

    Origin

    • the front edge and surrounding surface of the clavicle’s lateral third.
    • The lateral border of the acromion where three septa of origin are attached.
    • the bottom lip of the scapular spine’s crest.

    Insertion

    the humerus’s deltoid tuberosity, to which three insertional septa are connected.

    Nerve supply

    Axillary nerve (C5, C6).

    Actions

    • The multipennate acromial fibres are powerful abductors of the arm at the shoulder joint from the beginning to 90 degrees.
    • The anterior fibres are the flexors and medial rotators of the arm.
    • The arm’s lateral rotators and extensors are the posterior fibres.

    Pectoralis major muscle

    Origin

    • the medial two-thirds of the clavicle’s anterior surface
    • Half the breadth of the anterior surface of the manubrium and sternum up to 6th costal cartilage
    • Second to sixth costal cartilages, sternal end of 6th rib
    • A abdominal external oblique muscle aponeurosis

    Insertion

    • It is inserted by a bilaminar tendon on the lateral lip of the bicipital groove in the form of “U”
    • The inferior surface of the two laminae is continuous with one another.

    Nerve supply

    Medial and lateral pectoral nerves

    Actions

    • The muscle as a whole results in the following actions: Adduction and medial rotation of the arm’s shoulder joint.
    • The clavicular region results in Arm flexion
    • The sternocostal part is used in the extension of the flexed arm against resistance, Climbing
    • Acts as an accessory muscle during inspiration when the humerus is fixed in abduction

    Serratus anterior muscle

    Another name for the serratus anterior is the boxer’s muscle.

    Origin

    The fascia covering the intervening intercostal muscles and the upper eight ribs in the mid-axillary plane give rise to the eight digitations that make up the serratus anterior muscle. The first digitation appears in the posterior triangle of the neck. It arises from the outer border of the 1st rib and a rough impression on the 2nd rib. Also, 5th-8th digitations interdigitate with the costal origin of the external oblique muscle of the abdomen.

    Insertion

    All 8 digitations pass backwards around the chest wall.

    • Along the medial border of the scapula, the muscle inserts into the costal surface.
    • Starting from the superior angle and moving towards the spine’s root is the first digitation.
    • The subsequent two or three digits are placed on the medial border, lower down.
    • Over the inferior angle, the lower five or four digitations are inserted into a sizable triangle.

    Nerve supply

    Long thoracic nerve(C5,C6.C7)

    Actions

    • Pushing and punching movement
    • The fibres inserted into the inferior angle of the scapula pull it forward and rotate the scapula so that the glenoid cavity is turned upwards. The trapezius assists the serratus anterior in this action by pulling the acromion both upward and backwards.
    • The muscle steadies the scapula during weight-carrying
    • It helps in forced inspiration

    Rhomboid major muscle

    Origin

    • Spines of T2-T5
    • Supraspinous ligaments

    Insertion

    The medial border of the scapula below the root of the spine

    Nerve supply

    Dorsal scapular nerve (C5)

    Actions

    Retraction of scapula

    Supraspinatus muscle

    Origin

    • the middle two-thirds of the scapula’s supraspinous fossa. The muscles merge with the shoulder joint capsule by passing a tendon laterally beneath the coracoacromial arch.
    • The subacromial bursa divides the tendon from the arch.

    Insertion

    upper impression on the humerus’s larger tubercle

    Nerve supply

    Suprascapular nerve(C5,C6)

    Actions

    It stabilises the head of the humerus during arm movements, along with other short scapular muscles. its action as abductors of the shoulder joint from 0-15 degrees is controversial. The deltoid and supraspinatus are both involved in the beginning and end of abduction.

    Infraspinatus muscle

    Origin

    the middle two-thirds of the scapula’s infraspinous fossa

    Insertion

    middle impression on the humerus’s larger tubercle

    Nerve supply

    Suprascapular nerve (C5,C6)

    Actions

    Lateral rotator of arm

    Teres minor muscle

    Origin

    the top two-thirds of the lateral scapular border’s dorsal surface as two slips

    Insertion

    The largest tubercle of the humerus’s the lowest impression

    Nerve supply

    Axillary nerve (C5, C6)

    Actions

    Lateral rotator of arm

    Subscapularis muscle

    Origin

    Medial two-thirds of the subscapular fossa

    Insertion

    Lesser tubercle of the humerus

    Nerve supply

    Upper and lower subscapular nerves (C5, C6)

    Actions

    Medial rotator and adductor of arm

    Pectoralis minor muscle

    Origin

    • 3,4,5 ribs, near the costochondral junction
    • Intervening fascia covering external intercostal muscles

    Insertion

    The coracoid process’s upper surface and medial border

    Nerve supply

    Medial and lateral pectoral nerve

    Actions

    • Draws the scapula forward
    • Depresses the point of the shoulder

    Latissimus dorsi muscle

    Origin

    • one-third of the iliac crest’s posterior outer lip
    • Posterior layer of lumber fascia; thus attaching the muscle of the lumber and sacral spines
    • Spines of T7-T12, lower four ribs
    • Inferior angle of scapula

    Insertion

    • The muscle winds around the lower border of the teres major and forms the posterior fold of the axilla
    • The tendon is twisted upside down and inserted into the floor of the intertubercular sulcus

    Nerve supply

    Thoracodorsal nerve (C6-C8)

    Actions

    • When swimming, rowing, climbing, pulling, folding the arm behind the back, and scratching the opposite scapula, the shoulder’s adduction, extension, and medial rotation are all involved.
    • Hold the inferior angle of the scapula in place

    Biceps brachii muscle

    Origin

    It has two heads of origin:

    • From the tip of the coracoid process, the short head emerges with the coracobrachialis.
    • The glenoidal labrum and the supraglenoid tubercle of the scapula give rise to the long head.

    Insertion

    The posterior rough part of the radial tuberosity. the tendon is twisted; the anterior fibres become medial. A bursa separates the tendon from the anterior portion of the tuberosity.

    Nerve supply

    Musculocutaneous nerve (C5,C6)

    Actions

    • The arm’s flexor is the short head.
    • The humerus’s head cannot move upward due to its long head.

    Triceps muscle

    Origin

    The Triceps muscle arises from the following three heads:

    • The long head arises from the infra glenoid tubercle of the scapula; it is the longest of the three heads.
    • The lateral lip of the radial groove, which corresponds to an oblique ridge on the upper portion of the posterior surface of the humerus, is where the lateral head originates.
    • The medial and lateral intra-muscular septa, as well as a sizable triangular region on the humerus’ posterior surface beneath the radial groove, are the sources of the medial head. The medial head is medial to the lateral head at the level of the radial groove.

    Insertion

    A superficial flattened tendon covering the medial head and inserted into the posterior region of the olecranon process’s superficial surface is formed by the convergence and fusion of the long and lateral heads. Part of the medial head is inserted into the olecranon and part of it into the superficial tendon.

    A tiny bursa divides the medial head from the elbow joint capsule, but some of its fibres are inserted into this area of the capsule to keep the capsule from nipping during arm extension. These fibres are referred to as the articularis cubiti or the sub anconeus.

    Nerve supply

    The radial nerve gives each head its branch (C7, C8). The radial groove and the axilla are where the branches emerge.

    Actions

    An effective active elbow extensor is the triceps. When the arm is abducted, the long head stabilises the humeral head. Gravity extends the elbow passively.

    Shoulder Muscles Functions

    The muscles of the shoulder perform a variety of functions, including

    • Shoulder and Arm Movement: The shoulder muscles move the upper arm and shoulder girdle through flexion, extension, abduction, adduction, internal and external rotation, elevation and depression, protraction, and retraction.
    • Connecting the upper limb to the trunk: transmitting forces from the hands and arms to the central body.
    • Shoulder Stabilisation: The shoulder’s rotator cuff muscles help to deepen the shoulder socket and draw the head of the humerus into the socket for increased stability.
    • Stabilising The Scapula: The posterior shoulder muscles control and allow smooth movement of the shoulder blade, helping to protect the shoulder.
    • Preventing Joint Dislocation: The muscles of the shoulder play an important role in preventing the joints from moving out of place.
    • Tightening the Joint Capsule: Some of the muscle feeds into the joint capsule, which helps to improve joint stability and reduce friction.

    Embryology

    The embryologic development of the limbs begins at the end of the fourth week of foetal development. By the sixth week, the foetus has developed hand and foot plates. Mesenchymal cells condensate and differentiate into chondrocytes during limb development, eventually forming the upper and lower extremity’s bones and cartilage.

    The upper and lower extremities have very similar embryological development patterns. Limb musculature is first visible around the seventh week. Mesenchyme migrates from the dorsolateral cells of somites to the limb, where it differentiates into muscle cells. The upper extremity’s distal muscles develop later than the shoulder muscles.

    Blood Supply

    The upper extremities receive blood supply from the subclavian artery. These vessels are located on both sides of the body and supply blood to the upper extremities. The blood supply for both arteries comes from the aortic arch. The vertebral artery, internal thoracic artery, thyrocervical trunk, and dorsal scapular artery are among the branches of the subclavian artery that run parallel to each other on both sides of the body.

    When the subclavian artery reaches the first rib’s lateral border, it becomes the axillary artery.

    The axillary artery is divided into three parts, each of which contains arterial branches that supply the shoulder muscles. The superior thoracic artery, thoracoacromial artery, circumflex humeral artery, and lateral thoracic artery all branch off of the axillary artery. The subscapular artery is a branch of the third segment of the axillary artery. The subscapular artery separates into the circumflex scapular artery and the thoracodorsal artery. In general, the shoulder muscles are supplied by arteries that are named after the muscles they supply.

    Lymphatic drainage

    Efferent lymphatic vessels originate in the distal upper extremity and travel through the shoulder. Furthermore, axillary lymph nodes supply efferent lymphatic vessels in the shoulder region and pass proximally through the shoulder. Deep lymphatic vessels exist alongside superficial lymphatic vessels. The deep lymphatic vessels transport lymph from the joint capsule, tendons, and nerves. The subclavian lymphatic trunk drains lymphatics from the shoulder and axillary region. The right lymphatic duct receives drainage from the subclavian trunk. On the left, the subclavian trunk empties into the thoracic duct.

    Shoulder muscles injury

    Because the shoulder joint is extremely flexible, the muscles and soft tissues surrounding it are subjected to a great deal of wear and tear. This makes the shoulder muscles prone to injuries and degenerative conditions, including:

    • Adhesive capsulitis, also known as frozen shoulder, occurs when the capsule around the shoulder joint thickens and stiffens. It can cause spasms, pain, and extreme stiffness in the shoulder muscles.
    • Shoulder bursitis is an inflammation of the bursae (tiny fluid-filled sacs) in your shoulders. Inflammation can make it difficult to move your shoulder joint and cause muscle irritation.
    • Rotator cuff injury: Rotator cuff injuries, such as tears, typically affect tendons but can also involve muscles.
    • Shoulder impingement syndrome occurs when your shoulder muscles or tendons rub against bones excessively, causing the soft tissues to become painful and inflamed.
    • Strain: A shoulder strain is caused by overstretched muscle fibres. A muscle strain, also known as a pulled muscle, is determined by how much muscle stretches or tears. Muscle strains are divided into three grades: Grade 1 (mild)—A few muscle fibres have been torn, resulting in shoulder pain and tenderness the day after exercise.
      Grade 2 (moderate): Approximately half of the muscle fibres are torn, resulting in significant pain, swelling, and weakness after activity.
      Grade 3 (severe)—Complete muscle rupture, resulting in severe pain, swelling, and loss of strength.
    • Dislocation. The top of your arm may come out of its socket if you rotate or pull your shoulder back too forcefully. Your shoulder will be painful and weak. You may also experience swelling, numbness, or bruising.
    • Separation. This injury impacts the joint where your shoulder blade and collarbone meet. It’s known as the acromioclavicular (AC) joint. A fall or hard blow tears the ligaments that keep it together. If your collarbone is pushed out of position, you will develop a bump on the top of your shoulder.
    • Fracture. If you fall or take a hard hit, your bone may break or crack. The clavicle (collarbone) and humerus (arm bone closest to the shoulder) are the most commonly broken bones. You will feel a lot of pain and may bruise. If your collarbone is broken, your shoulder will sag and you may be unable to lift your arm.

    Shoulder muscles exercises

    Shoulder rolls

    Shoulder Roll
    Shoulder Roll
    • Stand with your feet hip-width apart.
    • Lean the arms at your sides to hang loosely.
    • Inhale deeply and lift your shoulders to your ears.
    • Squeeze the shoulder blades together by repositioning the shoulders.
    • Exhale and drop your shoulders back.
    • Move the elbows forward and feel the stretch in the back of the shoulders.
    • Repeat this ten times.

    Cross-body shoulder stretch.

    Cross-body stretch
    Cross-body stretch
    • Stand with your feet hip-width apart.
    • Stretch your right arm out straight.
    • Bring the right arm across the body, with the hand pointing to the floor on the opposite side of the left leg.
    • Bend your left arm at the elbow.
    • Hook the left forearm under the right arm to support it above the elbow.
    • Stretch the back of the right shoulder by pulling the right arm further in and across the body with your left forearm.
    • Hold for 20 seconds, then repeat the stretch on the opposite side.

    Child’s Pose.

    Childs-Pose
    Childs-Pose
    • Kneel on the floor or a mat.
    • Touch your big toes together.
    • Spread the knees apart.
    • Sit up straight.
    • Breathe out and raise your arms above your head.
    • Exhale and bow forward, towards the floor, with arms extended in front.
    • Touch the ground with your palms.
    • Bring both elbows to the ground.
    • Sit back, bringing the bottom of the back to the heels.
    • As you stretch the back of your shoulders, feel it.
    • Breathe deeply and hold the position for one minute or more.

    Cow Face Pose

    Cow face pose
    Cow face pose
    • Stand with your feet hip-width apart.
    • Elevate your right arm vertically towards the heavens.
    • Bend your right arm at the elbow.
    • Keeping the elbow raised, extend the right hand over the head and down the back.
    • Stretch your left arm down.
    • Reach your left hand behind and up the back.
    • Bring the left and right hands together, clasping them if it is comfortable.
    • Take three to four deep breaths.
    • Give up the stretch and repeat on the other side.

    Arm lifts (standing)

    Arm lifts (standing)
    Arm lifts (standing)
    • Place your hands behind your head, elbows pointing to the sides, and press back as far as you can. Hold for 5 seconds.
    • Then, place your hands behind your back, elbows pointing out, and pressed as far back as possible. Hold for 5 seconds.
    • Repeat each movement five times.

    Shoulder circle

    Shoulder circle
    Shoulder circle

    Stand with one hand on the chair. Let your other arm hang down and gently swing it back and forth in a circle. Repeat this motion five times and aim to do it two or three times per day. This can be an effective warm-up exercise.

    Stretch your shoulders with a resistance band.

    • Hold a yellow or red elasticated resistance band in your hands, fingers curled around it, facing inward. Your elbows should be bent at waist height, just above your hips, with your arms and hands aligned with your shoulders.
    • Keeping your elbows at your sides, extend the band as far as is comfortable. Hold for 10 counts. Gently bring your hands back into line with your shoulders. Repeat this ten times. Try doing this exercise three times per day.

    Summary

    The shoulder joint, also known as the glenohumeral joint, is a ball and socket joint with the widest range of motion in human anatomy. It is composed of eight muscles, including the trapezius, deltoid, pectoralis major, serratus anterior, and rhomboid major. The largest shoulder muscles are the trapezius, deltoid, pectoralis major, serratus anterior, and rhomboid major. These muscles maintain the greatest range of motion but can become unstable or sustain an injury due to their flexibility.

    Shoulder muscles are responsible for various functions, including shoulder movement, connecting the upper limb to the trunk, stabilizing the shoulder socket, preventing joint dislocation, and tightening the joint capsule. They also play a crucial role in blood supply, with the subclavian artery providing blood to the upper extremities and the axillary artery supplying blood to the lower extremities.

    Shoulder muscle injury is common due to the flexibility of the shoulder joint, making it susceptible to wear and tear. Examples include adhesive capsulitis, shoulder bursitis, rotator cuff injuries, and shoulder impingement syndrome.

    Various shoulder muscle exercises, such as shoulder rolls, cross-body shoulder stretches, child’s poses, cow face poses, arm lifts, shoulder circles, and resistance band stretching, can help maintain the shoulder’s flexibility and prevent injuries.

    FAQs

    What is the primary muscle in your shoulder?

    The primary skeletal muscles of the shoulder are: The rotator cuff is a group of four muscles—the supraspinatus, infraspinatus, teres minor, and subscapularis—that work together to stabilize the humeral head.

    What kind of joint is the shoulder?

    The shoulder joint (glenohumeral joint) is the articulation between the scapula and the humerus. It is a ball and socket synovial joint, one of the most mobile in the human body.

    How many major muscles are in the shoulder?

    This joint is supported by approximately eight muscles in your shoulder. They lend it strength, stability, and shape. Your shoulder muscles are skeletal. Tendons connect them to bones.

    Which muscle rotates the arm?

    During arm movements, the rotator muscles contract to prevent the head of the humerus from sliding, allowing a full range of motion and stability. Rotator cuff muscles also contribute to shoulder joint mobility by allowing for abduction, medial rotation, and lateral rotation.

    What is the most frequently injured muscle in the shoulder?

    Rotator cuff tears.
    The muscles and tendons that hold your shoulder bones together are known as the rotator cuff. A rotator cuff tear is a common shoulder injury that causes a partial or complete tear in this group of muscles and tendons.

    References:

    • Chaurasia, B. D. (2019, June 30). Bd Chaurasia’s Human Anatomy, Volume 1. CBS Publishers & Distributors Pvt Limited, India. http://books.google.ie/books?id=F7cRyAEACAAJ&dq=BD+chaurasias&hl=&cd=1&source=gbs_api
    • McCausland, C., Sawyer, E., Eovaldi, B. J., & Varacallo, M. (2023, August 8). Anatomy, Shoulder and Upper Limb, Shoulder Muscles. StatPearls – NCBI Bookshelf. https://www.ncbi.nlm.nih.gov/books/NBK534836/
    • Hecht, M. (2020, April 17). Anatomy of the Shoulder Muscles Explained. Healthline. https://www.healthline.com/health/shoulder-muscles
    • Muscles Of The Shoulder: Anatomy, Function & Common Injuries. (n.d.). Shoulder-Pain-Explained.com. https://www.shoulder-pain-explained.com/muscles-of-the-shoulder.html
    • Shoulder Pain. (2023, May 8). WebMD. https://www.webmd.com/pain-management/why-does-my-shoulder-hurt
    • Professional, C. C. M. (n.d.). Shoulder Muscles. Cleveland Clinic. https://my.clevelandclinic.org/health/body/21798-shoulder-muscles
    • Dpt, J. F. P. (n.d.). Shoulder Muscle Anatomy: How to Strengthen and Avoid Injury. Hospital for Special Surgery. https://www.hss.edu/article_shoulder-muscle-anatomy.asp
    • Burgess, L. (2024, March 18). Top 10 stretches for shoulder tightness. https://www.medicalnewstoday.com/articles/324647
    • Exercises for the shoulders. (n.d.). Versus Arthritis. https://versusarthritis.org/about-arthritis/exercising-with-arthritis/exercises-for-healthy-joints/exercises-for-the-shoulders/
  • Flexor Pollicis Longus Muscle

    Flexor Pollicis Longus Muscle

    What Is The Flexor pollicis longus Muscle?

    In the anterior compartment of the forearm, the flexor pollicis longus (FPL) is a long muscle situated at the deep layer with the flexor digitorum profundus and pronator quadratus. Despite being located in the forearm, it is considered a component of the hand’s extrinsic muscles because it is involved in thumb movement.

    Structure Of Flexor pollicis longus muscle

    The thumb’s major flexor, the FPL muscle, flexes the interphalangeal (IP) and metacarpophalangeal (MCP) joints. Additionally, FPL has minimal effect on radial wrist rotation and wrist flexion.

    FPL forms on the volar aspect of the radius and the surrounding interosseous membrane, directly distal to the radial tuberosity. Its proximal attachment is located distal to the supinator muscle and deep and radially to the flexor digitorum superficialis (FDS) radial head. The muscle tapers into a long, flat muscle that comes straight lateral to the FDS index finger and superficial to the pronator quadratus muscle.

    Now covered in the radial bursa’s synovial sheath, the FPL muscle passes deep into the transverse carpal ligament, or flexor retinaculum, as it passes into the carpal tunnel. Between the two sesamoid bones on the volar face of the thumb MCP joint, FPL continues along the first metacarpal.

    Function Of Flexor pollicis longus muscle

    The main function of the flexor pollicis longus is to flex the thumb at the interphalangeal joint. The flexor pollicis longus is critical for activities requiring hand grasping since it is the only muscle capable of bending the thumb’s interphalangeal joint.

    In addition to flexing the thumb at the metacarpophalangeal joint, the flexor pollicis longus aids with wrist flexion. This muscle in the bottom layer of your forearm is easily felt when you flex your thumb. muscles three circular ligaments (A1, Av, and A2), and one oblique ligament form up the thumb’s flexor pulley system.

    Ligaments are positioned proximally to distally in the form of A1, Av, oblique, and A2. The oblique ligament is the main pulley of the FPL muscle. Damage to the A1 and oblique ligaments will cause the FPL muscle to the bowstring. In 7% of cases, there is no AV ligament. A malfunctioning excursion of the FPL muscle through the pulley system is the cause of the trigger thumb.

    Origin

    It originates from the central region of the radius’s front surface and the corresponding section of the interosseous membrane. Furthermore, it has been found that the flexor digitorium superficialis, the medial epicondyle of the humerus, and the coronoid process of the Ulna are the origins of FPL.

    According to a study by Ballesteros et al. the flexor digitorium superficialis accounts for 47.1% of the auxiliary head of FPL, the epicondyle of the humerus for 29.4%, and the coronoid process of the Ulna in the forearm for 23.5% of the muscle. According to Hemmady et al. of the 66.6% accessory head of FPL discovered, 16.6% comes from the ulna’s coronoid process and 55.5% from the medial epicondyle of the humerus.

    Insertion

    Forming a flattened big muscle, the muscle attaches at the base of the distal phalanx after passing through the carpal tunnel and three hand joints.

    Nerve Supply

    The FPL muscle is innervated by the anterior interosseous nerve (AIN), a branch of the median nerve. The anterolateral segment of the median nerve provides the origin of the AIN just proximal to the point where the nerve crosses over the two heads of the pronator teres muscle. The AIN flows distally with the anterior interosseous artery at the interosseous membrane that separates the FPL and FDP. The three deep flexors innervated by the AIN are the pronator quadratus, FPL, and FDP. The volar wrist capsule receives sensory innervation from the AIN as well.

    Actions

    When the thumb is fixed, the flexor pollicis longus, a flexor of the thumb’s phalanges, helps to flex the wrist.

    Blood Supply

    The common interosseous artery divides off as the ulnar artery passes beneath the teres minor muscle’s ulnar head. It goes laterally and profoundly before abruptly dividing into the anterior and posterior interosseous arteries. The anterior interosseous artery and anterior interosseous nerve (AIN) run distally along the interosseous membrane between the flexor pollicis longus and flexor digitorum profundus.

    The pre-digital section of the FPL muscle receives its blood flow from branches of the median nerve artery. The connection V1 and V2 supply the digital component of the FPL muscle. V1 comes from either the Princeps pollicis artery or both digital arteries and is situated right proximal to the MCP joint. V2 is located near the IP intersection and is supplied by both digital arteries.

    Lymphatic Drainage

    The lymphatic drainage of the hand and forearm uses both superficial channels that run beside the basilic and cephalic veins and deep channels that run accompanying arteries. The lymphatics drain to lymph nodes inside the elbow, such as the cubital and epitrochlear lymph nodes, before mostly emptying into the axillary or infraclavicular lymph nodes.

    Embryology

    The three primary signaling centers area of polarizing activity (ZPA), nonridged ectoderm, and the tips ectodermal ridge (AER) cooperate to direct the formation of the appropriate developmental axis for the upper extremities. By the conclusion of the fourth week of embryonic development, four limb buds sprout from the ventrolateral surface of the growing embryo.

    The cuboidal ectoderm that encloses somites and mesenchyme generated from the lateral plate dermis makes up the limb buds. The lateral plate mesoderm cells eventually continue to develop into the connective tissue of the extremities. The limb musculature originates from the paraxial dermis cells of the somites that have migrated into the limb buds. Muscle progenitor cells travel in a specific segmental pattern from somites.

    The dermis layer at the distal tip of the growing limb gradually enlarges, causing the formation of the AER. While more proximal limb cells farther away from the AER start to develop into connective tissue and muscle cells, the AER causes nearby mesenchymal cells to stay undifferentiated to increase.

    At the end of the sixth week of embryonic development, chondrocytes produce the fundamental structure of hyaline cartilage. This construct will eventually undergo endochondral ossification and will end in its ossification into the bones of the upper extremities.

    Anatomical Variations

    An auxiliary FPL muscle head might originate from the FDS muscle, the middle cortex of the humeral, or the coronoid process of the muscle of the ulna. The accessory head is eventually placed into the ulnar aspect of the FPL or FDP muscles. Many recent investigations have shown that Gantzer’s muscle, already believed to be an anatomical variation, is present in up to two-thirds of the population.

    The Gantzer muscle has many clinical effects. The accessory head may compress the median nerve or AIN, based on its anatomical placement. When the AIN is squeezed, the pronator quadratus, FPL, and FDP might all exhibit symptoms ranging from weakness to paralysis. Most thenar and intrinsic hand muscles will become paralyzed in the case of median nerve compression, and sensory deficiencies will also result.

    The Linburg-Comstock phenomenon is a persistent correlation between FPL and the FDP of the second digit. Because of this muscle slip, the thumb IP joint and the index finger distal interphalangeal joint cannot be flexed individually. But usually, this aberration does not result in the emergence of any symptoms.

    Surgical Considerations

    The most frequent causes of flexor muscle lacerations, including FPL, are blade, glass shard, or sharp metal cut injuries. Primary muscle repair is the entire reattachment of the damaged muscle.

    Hand flexor muscle injuries are classified into many areas. The A1 pulley is connected to the carpometacarpal joint by T3, the A2 pulley to the A1 pulley, and the FPL muscle insertion to T2. These three locations begin distally in the thumb. In addition to treating digit muscle challenges, areas 4 and 5 include the region above the wrist.

    Damage to the FPL muscle may result in a whole or partial laceration.

    Treatments for partial flexor muscle lesions vary depending on the percentage of the muscle diameter that has been injured.

    Nonoperative Management

    • Damage to the FPL muscle may result in whole or partial tears.

    Surgical repair indications

    • More than 75–80% of the muscle has tears.
    • More than half to sixty percent of the muscle has caused tears.

    A complete FPL muscle tear may cause the proximal muscle to regress proximally, making muscle retrieval more difficult.

    Primary muscle repair is an option for zone I injuries if the distal muscle stump measures more than 1 cm. To allow for proper healing, the proximal muscle has to be attached to the cancellous bone if the distal muscle stump is less than 1 cm. The connecting is done with button anchors or suture bases. Direct, end-to-end repair is used in the surgical management of areas II through V.

    Many attached techniques are used to anastomose the two muscle ends. The amount of stitches placed inside the muscle is closely proportional to the muscle’s strength following surgery. To guarantee a solid bond and seamless passage through the flexor muscle pulley system, many strands of epi tendinous suture are employed in the most popular core suture repair approaches.

    As of present, no research has created a multi-strand core suture technique that is universally accepted. The greatest risk of muscle re-rupture occurs in the first two weeks after surgery. It has been shown that the range of motion can be improved without significantly increasing the risk of re-rupture by employing a post-operative splint and early active mobilization.

    Among the factors that can impact the outcome of surgically mending an FPL muscle are the location of the injury, the length of time between the injury and operation, postoperative care, and the presence of muscle retraction.

    A particular kind of FPL rupture known as a Mannerfelt’s lesion develops in the carpal tunnel as a result of chronic tendon deterioration. After the scaphoid moves volar, abrasion results in this progressive weakening. Mannerfelt’s injury is most commonly caused by rheumatoid arthritis. It is a chronic systemic inflammatory disease that usually causes chronic synovitis, which can lead to carpal dislocation.

    The FPL muscle is the one that gets injured most frequently in the carpal tunnel because it is the most radial muscle. However, this could affect any or all of the muscles in the carpal tunnel. One way to differentiate patients with FPL rupture from those with trigger thumbs is by looking for passive thumb flexion rather than pushed IP joint flexion.

    If the rupture is detected within four to six weeks muscle grafting may be used to repair the FPL muscle. If the problem is not fixed in that period, a muscle transfer is a necessary medical procedure because the muscle would experience myostatic contraction.

    Clinical Significance

    Trigger Thumb

    From a medical perspective, the flexor pulley system is important since a trigger thumb can result from a pulley compressing the FPL muscle. The FPL muscle’s incapacity to pass through the pulley system smoothly is known as the trigger thumb. Mostly affecting the A1 pulley, pulley is a condition most usually brought on by tendinitis.

    Activity modification, corticosteroid injections, NSAIDs, and splinting are the first lines of treatment for trigger thumb. Between 50% and 92% of patients respond well to these conservative therapy choices. 60% to 100% of patients who do not improve have their symptoms reduced once the issue pulley is surgically removed.

    Volkmann’s Contracture

    A crippling disease known as Volkmann’s contracture develops as a result of untreated acute compartment syndrome. Although it can happen in the leg, Volkmann’s contracture usually affects the forearm.

    Acute compartment syndrome of the forearm is most commonly caused by fractures and severe soft tissue damage, such as those resulting from crush injuries. These wounds produce swelling and edema and may increase the intra-compartmental pressure significantly and prevent the compartmental tissues from receiving enough blood. Ischemia of the muscles and nerves follows, leading to necrosis in time. As the damaged tissue heals, the myofibroblasts in the granulation cells will contract, allowing the damaged tissue to contract.

    First to suffer damage are the flexor digitorum profundus and FPL in the forearm. The characteristically flexed deformity of Volkmann’s contracture is explained by a significant shortening of these muscles due to fibrosis. Within six months of the initial injury, the abnormality will reach its final stage if treatment is not received, leaving the hand with minimal functionality.

    Treatment of acute compartment syndrome and early diagnosis is crucial in preventing Volkmann’s contracture. The “Six Ps” system can help assess people with injuries that increase their chance of developing compartment syndrome.

    • extreme discomfort during a physical examination; discomfort when the afflicted compartment is passively stretched.
    • Paresthesia
    • Paresis
    • Pallor
    • Pulselessness
    • Poikilothermia

    Even though a clinical diagnosis of compartment syndrome is typically made, depending on the patient’s cognitive state, it is occasionally possible to diagnose the condition by measuring the intra-compartmental pressure. If there is a difference between the intra-compartmental pressure and diastolic blood pressure of less than 30 mm Hg, revascularization and an urgent open fasciotomy are required.

    If left untreated, acute compartment syndrome results in nerve ischemia in 30 minutes and attached damage within 12 hours. The first four hours will experience a decrease in muscular function, and the following six to twelve hours will see long-term muscle decline.

    Two systems are used to classify Volkmann’s contracture: the Seddon classification system (Grades I–III based on contracture severity) and the Tsuge classification system (Mild, Moderate, and Severe based on muscles and nerve involvement as well as presentation). For mild to grade I contractures, conservative therapy with splinting and stretching is the first line of treatment Surgery is not required for moderate or severe contractures, but it is possible for mild contractures. Surgical interventions include muscle slides, free functional muscle transfers, and lengthening.

    Assessment

    To test the flexor pollicis longus, the distal phalanx of the thumb is flexed against resistance while the proximal phalanx is maintained inactive.

    Exercises of Flexor Pollicis Longus Muscle

    Stretching Exercise

    Extensor Stretch

    Extensor Stretch
    Extensor Stretch
    • Stretch out one arm straight from the elbow.
    • Grip it at the side of the thumb with the other hand, then bend the wrist downward.
    • Give the stretch a 20–30-second hold.

    Flexor Stretch

    Flexor Stretch
    Flexor Stretch
    • With your elbow straight in the afflicted arm, hold the palm of one hand with the other.
    • Gently draw your hand back to get a forearm stretch.
    • Give the stretch a 20–30-second hold.

    Strengthening Exercise

    Wrist flexion:

    • While seated, rest your forearm on the table with your wrist hanging over its edge.
    • Flex your wrist to raise the weight or draw the resistance band closer to your body while you hold a lightweight resistance band in your hand.
    • Return the weight or band to its original position slowly, then repeat a few times.

    Thumb flexion:

    Thumb Flexion
    Thumb Flexion
    • When seated at a surface, place your palm downward and rest your forearm on the surface.
    • Put something little on the table, like a coin, and use your thumb to pick it up and bring it to your palm.
    • Release the object gradually, then repeat a few times.

    Finger walks

    Finger walks:
    Finger walks:
    • Spread your fingers wide and place your hand down on a table.
    • One finger at a time, slowly extend your fingers forward until your fingers are gathered into a fist.
    • After that, carefully extend your fingers once more. Repeat many times.

    Grip strengthening

    Grip strengthening
    Grip strengthening
    • Squeeze a softball or grip strengthener for a moment before releasing your hold.
    • Repeat many times.

    Pinch grip exercise

    Pinch grip exercise
    Pinch grip exercise
    • Using your thumb and fingers, hold a small object between them, like a ball or a pen.
    • After a few seconds of firm pressure, release the object.
    • Do this ten to fifteen times.

    Fingertip push-ups

    Fingertip push ups
    Fingertip push-ups
    • With your torso straight and your weight evenly distributed over your toes and fingertips, begin in the push-up position.
    • Bending your elbows, slowly drop your body toward the ground.
    • Try to raise yourself back with the tips of your fingers, not your palms, as you push yourself up.
    • Do this ten to fifteen times.

    Conclusion

    The flexor pollicis longus, or FPL, is the main forearm muscle tasked with bending the thumb. It enters the base of the thumb’s distal phalanx from the middle third of the front surface of the radius and the nearby interosseous membrane.

    The thumb muscle is necessary for numerous daily tasks that include thumb movements, such as pinching, gripping, and grasping. Because it passes through the carpal tunnel alongside the median nerve, its muscle compresses in conditions such as carpal tunnel syndrome.

    FAQ

    What is the purpose of the longus flexor pollicis?

    The main function of the flexor pollicis longus is to flex the thumb at the interphalangeal joint. The flexor pollicis longus is crucial for activities requiring hand grasping since it is the only muscle capable of bending the thumb’s interphalangeal joint.

    What nerve Innervates the flexor pollicis longus?

    The FPL muscle is innervated by the anterior interosseous nerve (AIN), a branch of the median nerve. The anterolateral segment of the median nerve provides the origin of the AIN just proximal to the point where the nerve crosses over the two heads of the pronator teres muscle.

    What is the action of the pollicis longus?

    The thumb’s terminal phalanx is extended by the extensor pollicis longus. The thumb’s interphalangeal joint can be extended to its neutral position by the abductor pollicis brevis and adductor pollicis, which both attach to the extensor pollicis longus muscle.

    Is flexor pollicis longus a thenar muscle?

    Three small muscles on the hand’s lateral (radial) portion cosmetics the thenar muscles. These muscles are the opponens pollicis, flexor pollicis brevis, and abductor pollicis brevis.

    What type is flexor pollicis longus?

    In the anterior compartment of the forearm, the flexor pollicis longus (FPL) is a long muscle situated at the deep layer with the flexor digitorum profundus and pronator quadratus. Despite being located in the forearm, it is categorized as an extrinsic hand muscle because it participates in thumb movement.

    How do you treat flexor pollicis longus?

    The preferred course of treatment for Flexor Pollicis Longus (FPL) injuries is primary repair with end-to-end sutures. muscle transfer and grafting are performed when primary repair is impossible; each procedure has advantages and disadvantages.

    Where do you palpate the flexor pollicis longus?

    Simply place your palpating finger pads on the radial side of the anterior, distal forearm and ask the patient to bend their thumb’s distal phalanx at the interphalangeal joint to palpate this muscle.

    What is a flexor pollicis longus symptoms?

    An injury to the flexor pollicis longus may manifest as noticeable thumb weakness, localized discomfort, or a reduction in thumb range of motion. The flexor pollicis longus muscle becomes inflamed, leading to the excruciating disease known as trigger thumb.

    What is the muscle attachment of the flexor pollicis longus?

    The flexor pollicis longus is a muscle located in the deep compartment of the front forearms. This attachment: Originates from the interosseous membrane that covers the radius’s anterior surface. The muscle exits the carpal tunnel and joins at the tip of the thumb’s distal phalanx.

    How do you heal abductor pollicis longus pain?

    Heat or cold packs. Myofascial relaxation of the muscle and stretching are part of manual therapy. the type of activity recommended for long-term conditions. Taping, medication, and thumb splinting (thumb spica) can be utilized for intense pain and severe conditions.

    How do you identify flexor pollicis longus?

    One of the muscles of the deep anterior compartment of the forearm is the flexor pollicis longus. This kind of skeletal muscle is called unipennate. Its muscle leaves the wrist and goes deep into the hand’s flexor retinaculum, where it enters the tendinous sheath of the flexor pollicis longus.

    References:

    • Flexor pollicis longus muscle. (2024, January 4). In Wikipedia. https://en.wikipedia.org/wiki/Flexor_pollicis_longus_muscle
    • Flexor Pollicis Longus. (n.d.). Physiopedia. https://www.physio-pedia.com/Flexor_Pollicis_Longus
    • Benson, D. C., Miao, K. H., & Varacallo, M. (2023, July 24). Anatomy, Shoulder and Upper Limb, Hand Flexor Pollicis LongusMuscle. StatPearls – NCBI Bookshelf.
    • https://www.ncbi.nlm.nih.gov/books/NBK538490/
    • Flexor pollicis longus muscle. (2023, October 30). Kenhub.
  • Calf Muscles

    Calf Muscles

    Introduction

    The calf muscles, located on the back of the lower leg, are a crucial part of the human body’s musculoskeletal system. These muscles, primarily consisting of the gastrocnemius and the soleus, play a vital role in various movements, including walking, running, and jumping.

    The gastrocnemius is the most superficial muscle, with two heads: medial and lateral. The two heads of the gastrocnemius come together to create a confluent muscular belly.

    The lateral head develops from the lateral surface of the lateral femoral condyle, while the medial head develops from the posterior, non-articular aspect of the medial femoral condyle. The calcaneal tendon, sometimes referred to as the Achilles tendon, is formed when the gastrocnemius muscle belly joins the soleus muscle distally and attaches to the posterior calcaneus.

    The calf muscle, which plantarflexes the ankle joint, is innervated by the tibial nerve. Located deep within the gastrocnemius is the large, flat muscle known as the soleus. The tendon portion of the plantaris, a small muscle, is incredibly long. It is easy to confuse the tendinous portion of a nerve.

    The plantaris muscle originates in the lateral supracondylar line of the femur and is completely absent in up to 10% of the population. The muscle descends medially and eventually forms a tendon that runs down the leg, between the gastrocnemius and soleus. The calcaneal tendon joins forces with this tendon.

    Embryology

    Upper limbs typically develop before lower limbs. Lower limb development begins in week 4 of gestation and is well differentiated by weeks 8 to 10. The limb buds begin to develop following the activation of mesenchymal cells in the lateral plate mesoderm.

    Gastrocnemius muscle

    The gastrocnemius is a large muscle in the posterior leg. The calf’s bulk is formed by the most superficial of the leg’s muscles, located posteriorly. The name derives from the Greek words γαστήρ (gaster), meaning stomach or belly, and κvήμη (knee), meaning leg. The combination of the two words refers to the “belly of the leg” or the bulk of the calf.

    It is part of the triceps surae, a three-headed muscle group that includes the soleus muscle. They participate in a variety of basic activities, including walking, running, and leaping.

    Origin

    The gastrocnemius muscle has two heads that originate from the femur. The medial head is formed by the popliteal surface of the femoral shaft and the posterior surface of the medial condyle.

    The lateral head develops from a facet on the upper posterolateral surface of the lateral condyle of the femur, where it joins the lateral supracondylar line. Both heads originate from the capsule of the knee joint.

    Insertion

    At the inferior margin of the popliteal fossa, the two heads meet and fuse to form a single, elongated muscle belly. This accounts for the majority of the soft tissue bulge on the posterior leg, also known as the calf.

    The fleshy part of the muscle extends to about the middle of the calf. In the lower leg, the gastrocnemius muscle fibres form a broad aponeurosis over time. The aponeurosis gradually narrows and fuses with fibres from a deeper muscle, the soleus, to form the calcaneal (Achilles) tendon. The calcaneal tendon connects the posterior surface of the calcaneus in the foot.

    Innervation

    Tibial nerve (S1, S2)

    Functions

    The gastrocnemius is a strong plantar flexor in the foot at the talocrural joint. It also bends the leg at the knee. The gastrocnemius’ actions are typically considered part of the triceps surae group, which also includes the soleus. These are the primary plantar flexors of the foot. The muscles are typically large and powerful. The gastrocnemius muscle is responsible for propulsion when walking, running, or jumping.

    Soleus muscle

    The soleus muscle is a broad, flat leg muscle located on the posterior leg. It extends from just below the knee to the heel and is immediately adjacent to the gastrocnemius. These two muscles, along with the plantaris, are part of the superficial posterior compartment calf muscles. Soleus contraction causes strong plantar flexion. It also helps us maintain an upright posture because of its function as an antigravity muscle.

    Origin

    The soleus muscle originates from the soleal line on the dorsal surface of the tibia, medial border of the tibia, head of the fibula, and posterior border of the fibula. A portion of the fibres originate from the soleus’ tendinous arch, which spans the tibia and fibula and arches over the popliteal vessels and tibial nerve.

    Insertion

    The soleus muscle runs alongside the gastrocnemius muscle and connects to the posterior surface of the calcaneus via the calcaneal tendon. The calcaneal tendon, also known as the Achilles tendon, is the strongest in the human body. It is visible and palpable at the heel.

    Innervation

    Tibial nerve (S1, S2)

    Function

    The soleus muscle functions similarly to the gastrocnemius muscle. They work together to form a primary plantar flexor; their contraction causes plantar flexion of the upper ankle joint, allowing the heel to be lifted against gravity when walking or jumping. The soleus muscle is one of several antigravity muscles (along with the leg extensors, gluteus maximus, and back muscles) that help humans maintain an upright posture.

    Blood supply of calf muscles

    The blood supply to the calf muscles comes from the popliteal artery, which divides into the anterior and posterior tibial arteries. The fibular (or peroneal) artery is derived from the posterior tibial artery. The posterior tibial artery travels alongside the tibial nerve and enters the plantar aspect of the foot via the tarsal tunnel. The anterior tibial artery connects the tibia and fibula via a gap in the interosseous membrane. It runs the entire length of the leg and into the foot, becoming the dorsalis pedis artery.

    Lymphatic drainage of calf muscles

    The venous supply to the calf is divided into superficial and deep veins. The superficial veins include the greater saphenous vein and the small saphenous vein. The deep veins consist of the popliteal vein, anterior tibial vein, posterior tibial vein, and fibular vein. The greater saphenous vein is the body’s longest vein, extending the entire length of the lower extremity.

    Cardiothoracic surgeons frequently use this vein for coronary artery bypass grafting. The small saphenous vein is a relatively large vein that runs along the posterior aspect of the calf, passing between the gastrocnemius muscle heads before draining into the popliteal vein.

    The popliteal vein is formed when the anterior and posterior tibial veins converge. When the popliteal vein enters the femoral region, it becomes the femoral vein. The anterior tibial veins are responsible for the drainage of the knee, ankle, tibiofibular, and anterior leg joints. The lateral and medial plantar veins supply blood to the posterior tibial vein, which drains the lower leg’s posterior muscles and the plantar surface of the foot. The fibular veins, also called peroneal veins, transport blood from the leg’s lateral compartment to the posterior tibial vein.

    Importance of Calf Muscle

    The calf muscles are responsible for the initial propulsion of movements such as running, walking, and cycling. Most people train calves for aesthetic reasons. However, calf muscle serves a purpose other than to look good. The calf muscle is commonly referred to as the pseudo or periphery heart due to its critical function of returning blood from the leg and foot to the heart. Blood flow from the lower body to the heart must overcome gravity, so the contraction of the calf muscle generates external pressure that propels the blood through the veins to the heart.

    The gastrocnemius muscle is used more during dynamic, high-force activities, whereas the soleus muscle is more active during postural and static contractions. The position of the knee during the plantar flexion resistance exercise influences the activity of the gastrocnemius muscle, which crosses the knee and ankle. At 90 degrees of knee flexion, the gastrocnemius experiences passive insufficiency and thus becomes less active. During the calf raise exercise, keep your knee 90 degrees flexed to target the soleus and zero degrees flexed to target the gastrocnemius.

    The calves also serve as a deceleration mechanism for the body. When sprinting and stopping or changing directions quickly, the calves absorb up to 10 to 12 times the body weight. To avoid injury during the eccentric phase of any exercise, trained calves must bear this load and ensure that deceleration occurs safely.

    The calves also help to stabilise the knees, which is important for jumping exercises because unstable knees can lead to poor form and injuries. The joints are protected by a strong set of calves.

    Well-trained calves produce more vertical jumping power. The gastrocnemius, which is mostly made up of fast-twitch muscle fibres, allows the calves to perform quick and explosive movements like high jumps, squat jumps, and sprints. Although genetics determine how many fast-twitch muscle fibres each person has, strengthening the calves allows everyone to perform these powerful movements.

    Clinical importance of calf muscles

    • Muscle strain is the most common type of calf injury. It happens when your muscle fibres overstretch or tear. It is usually the result of strenuous exercise or overuse. Running and sports involving jumping or sudden stops and starts, like football, volleyball, basketball, and soccer, are common causes of this injury.
    • Leg cramps and muscle spasms in the calves can be extremely painful. Leg cramps may happen at any time of day or night. They can be caused by a variety of factors, including pregnancy, dehydration, certain medications, and health conditions.
    • Tennis leg: This type of muscle strain injury involves the gastrocnemius muscle. Tennis leg is a term used by providers to describe what happens when your leg extends while your foot flexes. Tennis players place their legs in this position when serving a tennis ball and “push off” into motion. But it can occur in any sport.
    • Compartment syndrome is a serious, life-threatening condition that occurs when pressure builds up within a muscle. Pressure reduces the flow of blood and oxygen. The injury could be caused by trauma (such as a fracture) or strenuous exercise.
    • Calf muscle tear: All shin muscle strains cause the tearing of some muscle filaments. More serious injuries can cause a partial or complete tear of the muscle.
    • A calf muscle strain is commonly referred to as a pulled shin muscle. Pulling the muscle involves stretching the shin muscle.
    • Calf muscle rupture: A complete gash to the shin muscle, resulting in severe pain and inability to walk. The shin muscle may collapse, resulting in a lump that can be seen and felt through the skin.
    • Rhabdomyolysis typically affects several muscles throughout the body. Shin muscle breakdown can be caused by prolonged pressure, medication side effects, or a serious medical condition.
    • Calf muscle myositis is inflammation of the shin muscle. Infections or autoimmune conditions (caused by the vulnerable system incorrectly attacking the body’s tissues) are usually to blame, though shin muscle myositis is unusual.
    • Calf muscle cancer: Cancer of the shin muscle is rare. The excrescence can begin in the shin muscle (sarcoma) or spread to the shin muscle from elsewhere (metastasis).

    Exercises for calf muscles

    Following are the Best Calf Exercises:

    Strengthening Exercises

    Double-leg calf raise.

    Double leg calf raise
    Double leg calf raise

    Calf raises are a classic calf-strengthening exercise. They use your body weight to strengthen and tone the gastrocnemius and soleus muscles.

    Starting position: Stand near a wall for balance. To protect your joints, space your feet hip-width apart and keep your ankles, knees, and hips vertically aligned.

    Action: To raise your body, press down on the balls of both feet. Keep your abdominal muscles pulled in so that you can move straight up rather than forward or backward.

    Single-Leg Calf Raise.

    Singal leg calf raise
    Singal leg calf raise

    You can increase the intensity of the calf raise by performing it on one leg. This allows you to further strengthen your calf muscle.

    Starting position: Stand with one leg near a wall for balance and the other bent behind you. To protect the joints, ensure that the ankle, knee, and hip of the leg being worked on are vertically aligned.

    Press down into the ball of your foot to lift your body. Keep your abdominal muscles pulled in to avoid shifting forward or backward

    Seated Calf Raise.

    Start by sitting in a firm, sturdy chair with your feet flat on the floor. Keep your knees directly over your feet. Refrain from bending or extending your knees. Lean forward, place your hands on your thighs near your knees, and push down to add resistance.

    Action: Slowly press down on the balls of your feet to raise your heels as high as possible. Finally, slowly lower your heels. Repeat.

    Stretching exercises

    Towel Stretch

    Lying Stretch
    Lying Stretch
    • While seated with your legs straight, wrap a towel around the ball of your foot.
    • Keeping your knee straight, pull the towel’s ends towards you.
    • Hold for 30 seconds. Repeat three times per side. Three times a day.

    Lunge stretch.

    Lunge stretch
    Lunge stretch
    • Stand arm’s length from a wall or kitchen counter.
    • Position one foot behind the other. Slowly bend your front knee while keeping your back leg straight and heel on the floor. Engage your core muscles.
    • Hold for about 30 seconds and relax. Switch legs and repeat.
    • Repeat this exercise three times on each side, three times a day.

    Step Stretch

    Hold something for support. Step both feet hip-width apart onto the bottom step of the stairs. Slide one foot back, leaving only the ball of the foot on the step. Keeping this knee straight, bend the opposite knee and lower the heel of the step until the calf tightens. Hold for 30 seconds, then relax. Repeat 3 times on each side, 3 times per day.

    Summary

    The calf muscles, including the gastrocnemius and soleus, are the largest in the posterior part of the lower leg. The gastrocnemius is the most superficial muscle, with two heads: medial and lateral. It is part of the triceps surae group and is responsible for propulsion during activities like walking, running, and jumping. The soleus muscle, located deep within the gastrocnemius, is a broad, flat leg muscle that forms a primary plantar flexor and helps maintain an upright posture.

    The soleus muscle, along with the plantaris, is part of the superficial posterior compartment calf muscles and works together to form a primary plantar flexor. Blood supply to the calf muscles comes from the popliteal artery, which divides into the anterior and posterior tibial arteries. The venous supply to the calf is divided into superficial and deep veins, with superficial veins including the greater saphenous vein and the small saphenous vein.

    The calf muscle is crucial for the initial propulsion of running, walking, and cycling. It is also known as the pseudo or periphery heart, as it returns blood from the leg and foot to the heart. The gastrocnemius muscle is used more during dynamic, high-force activities, while the soleus muscle is more active during postural and static contractions. The calves also serve as a deceleration mechanism for the body, absorbing up to 12 times the body weight during sprinting and stopping or changing directions. They help stabilize the knees, which are important for jumping exercises, and produce more vertical jumping power.

    Clinical importance of calf muscles includes muscle strain, leg cramps, tennis leg, compartment syndrome, shin muscle tear, shin muscle rupture, rhabdomyolysis, shin muscle myositis, and shin muscle cancer. Strengthening exercises for calf muscles include double-leg calf raises, single-leg calf raises, seated calf raises, towel stretch, lunge stretch, and step stretch. Strengthening exercises can help prevent muscle strain, leg cramps, and other health issues.

    FAQs

    Which is the most important calf muscle?

    The gastrocnemius muscle is a complex muscle essential for walking and maintaining posture. The gastrocnemius is the largest muscle in the back of the lower leg and is extremely powerful.

    What’s the calf made of?

    The calf is made up of muscles from the leg’s posterior compartment: the gastrocnemius and soleus (which make up the triceps surae muscle) and the tibialis posterior. The sural nerve supplies innervation.

    What is the primary function of the calf muscle?

    The calf muscles control plantarflexion of the foot and ankle. Activities involving the calf muscles include running and jumping.

    How to work the calf muscles?

    Calf raises.
    Begin in a standing position, feet hip-width apart and core engaged. Squeeze your calf muscles and gradually raise your body, lifting your heels until you’re on your toes. Make sure to stand tall and straight. Then carefully lower your heels back to the floor.

    What are the positive implications of the calf?

    Strong calf muscles enable better-running mechanics, resulting in increased speed and endurance. Furthermore, maintaining strong calves can help to prevent calf pain and fatigue, which are common complaints among runners — so keeping your calves in good shape is essential to helping you run at your best.

    References:

    • Gastrocnemius muscle. (2023, October 30). Kenhub. https://www.kenhub.com/en/library/anatomy/gastrocnemius-muscle
    • Binstead, J. T., Munjal, A., & Varacallo, M. (2023, May 23). Anatomy, Bony Pelvis and Lower Limb: Calf. StatPearls – NCBI Bookshelf. https://www.ncbi.nlm.nih.gov/books/NBK459362/
    • Soleus muscle. (2023, September 19). Kenhub. https://www.kenhub.com/en/library/anatomy/soleus-muscle
    • Physiotherapist, N. P. (2024, January 15). Calf Muscle: Origin, Insertion, Innervation & Exercise. Mobile Physiotherapy Clinic. https://mobilephysiotherapyclinic.in/calf-muscle-details-and-exercise/
    • Professional, C. C. M. (n.d.). Calf Muscle. Cleveland Clinic. https://my.clevelandclinic.org/health/body/21662-calf-muscle
    • Taylor, R. B. (2023, July 18). Calf-Strengthening Exercises. WebMD. https://www.webmd.com/fitness-exercise/strengthening-calf-muscles
    • Calf Muscle Stretching – Move Better Gwent. (n.d.). Move Better Gwent. https://movebettergwent.nhs.wales/self_management/calf-muscle-stretching/
  • 16 Best Exercises for Ankylosing Spondylitis

    16 Best Exercises for Ankylosing Spondylitis

    Exercises for ankylosing spondylitis are crucial in managing this chronic inflammatory condition that primarily affects the spine and can lead to significant pain and stiffness. Regular physical activity can help maintain flexibility, improve posture, reduce pain, and enhance overall quality of life for those living with ankylosing spondylitis.

    Incorporating specific exercises tailored to this condition can mitigate its impact and promote better spinal health.

    Here, we explore the 16 best exercises recommended for individuals with ankylosing spondylitis to help manage symptoms and improve daily functioning.

    Exercises that stretch the affected areas, such as the spine, hips, and chest, help to maintain or increase joint flexibility and reduce stiffness. In addition to promoting improved posture and relieving muscle tension, gentle stretching can help. Patients with Ankylosing Spondylitis can benefit from lower back, chest, and neck stretches in addition to common exercises.

    The goal of strengthening exercises is to increase and preserve muscle strength to support the spine while improving stability in general. Exercises specifically designed for Ankylosing Spondylitis frequently target the legs, back, and core. Low-impact aerobic sports like swimming, cycling, and walking as well as resistance training with weights or resistance bands are examples of strengthening exercises.

    Walking, swimming, and cycling are examples of cardiovascular exercises that help strengthen the heart, expand lung capacity, and increase general fitness. Additionally, these exercises help with weight control, which is important for people with Ankylosing Spondylitis because being overweight may exacerbate symptoms and put excessive stress on the joints.

    Ankylosing Spondylitis: What Is It?

    One painful form of inflammatory arthritis that develops over time is called ankylosing spondylitis (AS). Although it can also affect the joints, tendons, ligaments, eyes, and digestive system, it primarily affects the spine. People are affected by this unexpected disease in different ways. it is important that exercise ought to be a top priority and is an important aspect of the condition’s treatment.

    Pain and stiffness are two symptoms that most individuals with ankylosing spondylitis experience, therefore maintaining your flexibility and fitness helps manage the illness. Maintaining proper posture, increasing flexibility, and lessening pain are all benefits of exercising regularly.

    When you have ankylosing spondylitis, why work out?

    Both the core and paraspinal muscles are strengthened by exercise. Maintaining stronger paraspinal and core muscles relieves pressure on the back’s joints, which is essential to joint-generated pain syndromes like ankylosing spondylitis. On the other hand, resistance training can be just as effective as cardio exercises like swimming and walking to strengthen your stabilizing muscles.

    Cardiovascular exercise improves blood flow to tissues, improves nutrition distribution to joints and discs, and tones and maintains supporting muscles. Better musculoskeletal health and function can be seen by all of this.

    Advantageous:

    Reduced Ankylosing Spondylitis symptoms and increased strength and flexibility can be achieved through exercise.

    • Helps in posture correction
    • Improve mobility, strength, and balance
    • Improving the health of the heart
    • Increasing one’s ability to breathe
    • Reducing hypertension
    • Optimizing the density of bone
    • Helping in weight control

    Exercises for Ankylosing Spondylitis:

    Plank

    • With your face down and your forearms and toes on the ground, enter the plank posture at the beginning.
    • Your forearms are pointing forward, and your elbows are exactly below your shoulders.
    • You should be staring at the floor, presently your head is relaxed.
    • Squeeze your abdominal muscles.
    • Keep your body straight from your ears to your toes, without bending or falling.
    • The neutral spine posture is this.
    • Make sure that your shoulders are down and not pulled up toward your ears.
    • The toes of your feet should be below your heels.
    • Hold this position for a few seconds.
    • Then return to your neutral position.
    • Then relax.
    • Repeat this exercise three to six times.
    PLANK
    PLANK

    Diaphragmatic breathing

    • With your legs lowered and your shoulders, head, and neck relaxed, take a seat on a comfortable chair.
    • Put one hand directly behind your rib cage and the other by your side.
    • Breathing through it feels more natural to your diaphragm.
    • Until your hand is placed against your stomach, take a slow, deep breath via your nose.
    • Your stomach will return as you exhale through pursed lips and contract your abdominal muscles.
    • Then return to your neutral position.
    • Then relax.
    Diaphragmatic-breathing
    Diaphragmatic-breathing

    Lower back rotational stretch

    • Start with lying on your back is an excellent place to start.
    • Bend your knees both ways.
    • Keep your feet flat on the floor.
    • Take a deep breath in.
    • Make sure your shoulders are properly grounded.
    • Bend forward on one knee.
    • Look over there on the other side.
    • Hold this position for a few seconds.
    • Then return to your neutral position.
    • Then relax.
    • Gradually switch sides.
    • Repeat this exercise three to six times.
    lower-back-rotational-stretch
    lower-back-rotational-stretch

    Bridges

    • To start, take a comfortable position on the mattress.
    • With your feet flat on the mattress, flex your knees now.
    • Next, contract your abdominal muscles.
    • Lift your upper body.
    • Kindly keep your arms at your sides.
    • Hold this posture for a few seconds.
    • Next, lower your body.
    • Then return to your neutral position.
    • Then relax.
    • Repeat this exercise three to six times.
    Hip bridge exercise
    Hip bridge exercise

    Hip flexor stretch

    • On a yoga mat or exercise mat, bend both knees.
    • With the heel of your feet firmly placed against the mat, your bottom should be on your heels.
    • Fold your arms over and place your palms on the mat.
    • To avoid them locking, keep your elbows slightly bent and your hands shoulder-width apart.
    • Forming a 90-degree angle, bring your left knee forward through the opening between your arms and plant your left foot flat on the mat in front of you.
    • For stability and balance, keep your upper body straight and rest both hands on your left knee in front of you.
    • Now extend your right leg.
    • Your right knee should be pushed into the surface while the top of your right foot is resting on the mat.
    • Hold this position for a few seconds.
    • Then return to your neutral position.
    • Then relax.
    • Repeat this exercise three to six times.
    Hip flexors strech
    Hip flexors strech

    Superman

    • Lay down on your stomach and take a moment to relax.
    • Keep your legs straight and lift your arms in front of you.
    • Maintaining an upright head position.
    • After that, gradually elevate your legs and arms to a comfortable height above the floor.
    • By raising your stomach a little off the ground, you may tighten your core muscles.
    • Your lower back muscles are tensing up.
    • Hold this position for a few seconds.
    • Then return to your neutral position.
    • Then relax.
    • Repeat this exercise three to six times.
    Superman-Move-Exercise
    Superman-Move-Exercise

    Straight Leg Raise

    • Start by lying down on the floor or a table in a comfortable position.
    • Now bend your knee lightly.
    • Then slowly elevate your leg.
    • The knee on the other side stays straight in the meanwhile.
    • After that, hold for a few seconds.
    • Next, lower your leg.
    • Then return to your neutral position.
    • Then relax.
    • Repeat this exercise three to six times.
    Straight-leg-raise
    Straight-leg-raise-

    Chin Tucks

    • Take a straight seat, place your ears properly over your shoulders, and face front.
    • Put one of the fingers on the jaw.
    • Pull the chin and head straight back without moving the finger until the top of the neck and base of the head feel well stretched.
    • Hold for five seconds, if you can.
    • Once more, bring the chin forward to the finger.
    • Then return to your neutral position.
    • Then relax.
    • Repeat this exercise three to six times.
    Chin-tuck
    Chin-tuck

    Shoulder rolls

    • To start, take a comfortable seat.
    • Maintain a relaxed arm position.
    • Lift your shoulders up till they are parallel to your ears.
    • Pull the shoulders back and squeeze them together.
    • Hold this position for a few seconds.
    • Then return to your neutral position.
    • Then relax.
    • Repeat this exercise three to six times.
    Shoulder Roll
    Shoulder Roll

    Doorway stretch

    • Make a 90-degree angle with your arms and elbows while you stand in a doorway.
    • Press your palms into the door frame’s sides and step your right foot forward.
    • Go forward and contract your abs.
    • Hold this position for a few seconds.
    • Stretch again by placing your left foot forward.
    • Then return to your neutral position.
    • Then relax.
    • Repeat this exercise three to six times.
    Doorway Pectoral Stretch
    Doorway Pectoral Stretch

    Standing Leg Raises

    • Place your hand on a stable surface, such as a table or countertop, while standing with one side facing it for balance.
    • With your leg straight and your toes pointing forward (not up toward the ceiling), raise the opposing leg out to the side.
    • While you pause at the top of the exercise, concentrate on tightening your hip and glute muscles.
    • Slowly bring your leg back to its starting position.
    • Then relax.
    • Repeat this exercise three to six times.
    • You should feel the muscles in your butt, thigh, and hips activating with each repetition.
    Standing-hip-abduction
    Standing-hip-abduction

    Prone press up

    • With your hands facing you and your palms down, lie on your stomach with your elbows under your shoulders.
    • As you elevate your head and chest, gently contract your thighs, lower back, and buttocks.
    • Breathe deeply and keep your abdomen and lower back strong.
    • You can either look straight ahead or slightly close your eyes.
    • Hold this posture for a few seconds.
    • Then return to your neutral position.
    • Then relax.
    • Repeat this exercise three to six times.
    Prone press up
    Prone press up

    Bird dog

    • Beginning on all fours, enter the tabletop position.
    • Bend at the knees and place your hands under your shoulders.
    • To maintain a neutral spine, make sure your abs are contracting.
    • Press the blades of your shoulder together.
    • Maintaining your shoulders and hips parallel to the floor, raise your left leg and right arm.
    • Stretch the back of your neck and lower your chin toward your chest to gaze at the ground.
    • After a short while, hold this position and then return to the starting position.
    • Extend your left arm and raise your right leg, then hold this position for a little duration.
    • Then relax.
    • Repeat this exercise three to six times.
    Bird-dog Exercise
    Bird dog with elbow-to-knee

    Seated Rotation

    • Start with a relaxing seating posture on the chair.
    • Turn your body so that your left shoulder is visible and you feel a little stretch, but not too much that it bothers you.
    • Keep your position for a short while.
    • Then return to your neutral position.
    • Then relax.
    • Repeat this exercise three to six times.
    Seated Chair Rotation
    Seated Chair Rotation

    Child pose

    • Step onto the yoga mat and get on your hands and knees.
    • With your big toes touching and the tips of your feet flat on the ground, extend your knees as wide as your mat.
    • Hold your stomach between your thighs while keeping your forehead firmly planted on the ground.
    • Lower your shoulders, jaw, and eyes.
    • If resting the forehead on the ground bothers you, place it atop a block or between two stacked arms.
    • To get the most from this calming effect, the forehead must be positioned in a comfortable spot.
    • You can extend your arms forward with palms facing up for a shoulder release, or you may bend your elbows. 
    • In this position, a little your elbows forward.
    • You can also extend your arms in front of you with the palms facing the floor, or you can bring them back alongside your thighs with the palms facing upward.
    • Hold this position for a few seconds.
    • Then return to your neutral position.
    • Then relax.
    • Repeat this exercise three to six times.
    Childs-Pose
    Childs-Pose

    Walk

    • Elevating your heart rate causes your body to release beneficial compounds.
    • All types of exercise are beneficial, but when your joints have to support your weight, weight-bearing activities like walking offer you something new and different.
    • It can stimulate your heart most days of the week and help nourish the cartilage in your spine and joints, which is incredibly beneficial.
    • Initially, spend 5 to 7 minutes daily.
    • Aim for a 30-minute workout, but it’s okay to work for five to ten minutes at a time, a few times a day.
    Brisk Walking
    Brisk Walking

    Ankylosing spondylitis: Posture Training

    People with ankylosing spondylitis may try to alleviate their backache by changing their posture. Changes in posture over time may relieve pain, weakness, and stiffness in the muscles and joints. Exercises that target the back and abdominal muscles, or the core, can help improve posture and minimize pain in the back.

    People can achieve and keep proper posture through;

    • Regular exercise
    • Integrating particular core-supporting workouts into their routine and doing them out twice or multiple times a week
    • Being aware of their posture and making an effort to correct it when performing daily tasks including walking, sitting at a desk, and watching TV
    • Stretches for posture training

    When someone with ankylosing spondylitis has trouble with their posture, certain exercises, like the two below, can help.

    Posture exercise 1:

    • Place your back, heels, bottom, and shoulders as close to the wall as you can while standing against it.
    • Push the head back against the wall, but do not elevate it.
    • Hold this position for a few seconds.
    • Then return to your neutral position.
    • Then relax.

    Posture exercise 2:

    • Laying on your stomach, look straight ahead.
    • Position your hands at your sides.
    • Lift one leg off the ground while maintaining a straight knee.
    • Raise the other arm so that it is in front of it.
    • Hold this position for a few seconds.
    • Then return to your neutral position.
    • Then relax.

    Posture exercise 3:

    • Put your back on a wall while standing.
    • Step away from the wall and apart with your feet shoulder-width apart.
    • Move your back along the wall slowly.
    • Try to reach the position where your thighs are parallel to the floor, as though you are sitting in a chair. 
    • Hold this position for a few seconds.
    • Then return to your neutral position.
    • Then relax.

    Make use of these suggestions for safe exercise:

    By using these precautions, you may reduce your risk of injury and maintain safe and effective exercise therapy.

    • Before working out, make sure your body is properly warmed up.
    • Stop exercising if it causes you pain.
    • To avoid overtraining and sore muscles, gradually increase the number of repetitions and duration of your exercises.
    • Always use the right form when working out, as using the wrong form might harm your body and not achieve the desired benefits.
    • Put on comfortable shoes and loose-fitting clothing.
    • To allow your muscles to repair themselves, it’s important to give yourself enough time off in between workouts.

    When did you stop exercising?

    • In the case that your doctor advised you to relax for a few days.
    • If you suddenly develop pain while working out, consult a doctor.
    • Fever
    • Headache

    Summary

    There are several benefits to exercising for people with ankylosing spondylitis. It improves posture, strength, flexibility, and cardiovascular health. Regular exercise may improve mobility and lower the risk of fusion.

    Since ankylosing spondylitis is a degenerative condition, it may get worse with time. A loss of flexibility and mobility may result from the spine’s joints and bones fusing as the condition worsens. It’s possible for other symptoms, such as tiredness and pain, to get worse.

    A physical therapist can help people create a customized plan that fits their needs, interests, and lifestyle.

    FAQs

    Which joint experiences the most damage from ankylosing spondylitis?

    Ankylosing spondylitis (AS) is a chronic inflammatory condition that affects the axial spine. The most common signs of this illness are persistent back pain and increasing spinal stiffness. Features include involvement of the spine, sacroiliac joints, fingers, peripheral joints, and entheses.

    What separates spondylosis from ankylosing spondylitis?

    Your spine’s joints are impacted by spondylitis, a type of inflammatory disease. Not inflammation, but rather the degeneration of your spine leads to spondylosis.

    Which spondylosis treatment is the most effective?

    For the most part, conservative methods work well for treating spondylosis symptoms. Painkillers and physical therapy are non-operative measures. However, if spondylosis has restricted the spinal cord or spinal nerve roots, surgery can be necessary to relieve pressure.

    Which ankylosing spondylitis symptoms are more prevalent?

    Back pain and stiffness
    Arthritis

    How long does ankylosing spondylitis take to recover?

    Everybody’s healing process varies depending on the disease’s severity and the joints that are impacted. A full recovery may take anything from one month to a year.

    Can someone with ankylosing spondylitis benefit from walking?

    For those who have ankylosing spondylitis, walking is a low-impact exercise that can be quite beneficial. This is the ideal method for getting the body to exercise. Walk for 5 to 15 minutes at first, and then gradually extend your walks to 30 minutes at a time.

    With ankylosing spondylitis, what kind of exercise is beneficial?

    The best exercises for those with painful joints are low-impact, pain-free activities like yoga, tai chi, swimming, strolling, or cycling.

    When you have ankylosing spondylitis, which exercises should you avoid?

    Stay away from joint-stressing, high-impact workouts like running. Avoid using excessive amounts of painkillers right before working out, as this may make it difficult for you to tell whether you’re in pain.

    For ankylosing spondylitis, is stretching beneficial?

    For those with ankylosing spondylitis, regular, mild stretching is recommended. Doing these twice a day is beneficial. Avoid performing them right away in the morning as you can feel more rigid.

    How should someone with ankylosing spondylitis sleep?

    Raising your neck might cause joint pain and cause your spine to be twisted. Ideally, you should avoid using a pillow when sleeping, but if that’s not an option for you, you can try using a folded towel or a small pillow. In general, it was not advisable to put cushions behind your back or legs.

    How can the progression of ankylosing spondylitis be stopped?

    Being active helps prevent your spine from getting tight and painful, as well as improve your posture and range of motion. Physiotherapy is an important component in treating AS in addition to staying active. A physiotherapist can create an exercise program that works for you and offer advice on the best activities.

    How often should I work out if I have spondylitis?

    For optimal effects, balance exercises should be done three to five times a week. It has been proven that completing a 20-minute daily program addressing strength, balance, aerobic conditioning, and flexibility can considerably reduce pain, stiffness, and exhaustion, and improve function and mood.

    What is the benefit of exercise for spondylitis?

    It can reduce pain and maintain your range of motion and flexibility. Additionally, it appears to alleviate symptoms associated with fatigue, stiffness, posture, and breathing capacity. For this reason, it’s a good idea to try to get in some physical activity each day.

    Which posture is ideal for people with ankylosing spondylitis?

    Sit in a chair with a firm, high back to maintain a straight spine. Verify that your tailbone rests against the chair’s back. For additional support, try placing a tiny cushion, rolled-up towel, or lumbar support behind your lower back. Your knees should be at a straight angle and your feet should be flat on the ground.

    Is yoga beneficial for spondylitis?

    Regular yoga practice helps to stretch and strengthen the back muscles, which support the spine. Ankylosing Spondylitis sufferers may find it beneficial for managing their pain.

    What is spondylitis’ primary cause?

    Spinal wear over time leads to spondylosis. This includes the disks or protects that sit between the neck vertebrae and the joints that connect the bones of the cervical spine. Over time, these changes could compress or put pressure on one or more nerve roots. In more severe situations, the spinal cord gets involved.

    How does ankylosing spondylitis straighten the spine?

    Exercise: To keep your range of motion unaltered, create a routine for exercising. Your spine is supported and kept in perfect alignment by the muscles you stretch and strengthen. Be careful to stretch your hip and hamstring muscles as well as develop your core muscles.

    Which workout is ideal for those with spondylosis?

    Plank
    Lower back rotational stretch
    Bridges
    Doorway stretch
    Hip flexor stretch
    Superman

    Can someone with ankylosing spondylitis have a regular life?

    Nearly many ankylosing spondylitis sufferers are capable of enjoying typical, enjoyable lives. Though ankylosing spondylitis is a chronic illness, very few people will develop significant disability from it.

    Ways to make ankylosing spondylitis better?

    Self-care;
    Keep moving forward. You can straighten your posture, preserve flexibility, and lessen pain by exercising.
    Avoid smoking. Give up smoking if you do.
    Maintain proper posture. You can prevent some of the issues related to ankylosing spondylitis by practicing standing straight in front of a mirror.

    References:

    • On December 13, 2023, P. Tirgar. Mobile Physiotherapy: The Best Exercise for Ankylosing Spondylitis? A mobile clinic for physical therapy. The best exercises for ankylosing spondylitis can be found at https://mobilephysiotherapyclinic.in.
    • Top Workouts for People with Ankylosing Spondylitis. (n.d.). WebMD. https://www.webmd.com/ss/slideshow-exercises-for-ankylosing-spondylitis
    • 2019 February 8; Cherney, K. Ankylosing Spondylitis Self-Care Tips: 5. The website Healthline provides self-care suggestions for people with ankylosing spondylitis.
    • On September 13, 2023, Franks, I. Ankylosing spondylitis exercises and postures. medicalnewstoday.com/articles/317854#summary
    • Exercise for ankylosing spondylitis that will keep you active. July 14, 2023. Take Care of Yourself. Exercises for Ankylosing Spondylitis: A Guide to Help You Stay Active
    • Image 8, Sutherland, M. (2020, June 5). 4 Best Neck Stretches for Tension Headaches. Morgan Massage – Best Mobile Massage in Boston MA. https://morganmassage.com/2020/01/05/neck-stretches-for-tension-headaches/
    • Image 12, August 24, 2023; Singh, S. The Top 10 Sciatica Stretches to Help You Work Without Pain. Vantage Fit is a corporate platform for global employee wellness. Best stretches for sciatica: https://www.vantagefit.io/blog/
  • Bell’s Palsy

    Bell’s Palsy

    Bell’s palsy is a disorder that results in a sudden weakening of one side of the face’s muscles. Usually, the weakness is temporary and gets better over a few weeks. The weakening gives the face a drooping appearance on half of it. It’s possible that you won’t be able to close your eyes or that your smile may be uneven.

    Another name for Bell’s palsy is acute peripheral facial palsy of unknown cause. It is possible at any age. The specific cause is unknown. Swelling and irritation of the nerve that regulates the muscles on one side of the face are considered to be the primary causes. A reaction following a viral infection may be what causes Bell’s palsy.

    The majority of the time, full recovery occurs in around six months, and symptoms improve in a few weeks. A small percentage of people develop lifelong symptoms of Bell’s palsy.

    What is The Facial Nerve?

    The facial nerve serves as a path between your brain and specific facial muscles. It regulates the muscles that enable you to make facial expressions like frowning, smiling, and raising an eyebrow. The majority of the taste sensations on your tongue are also received by this nerve.

    What is the anatomy of the Facial Nerve?

    In your neurological system, the seventh cranial nerve is the facial nerve. There are two facial nerves in your head, one on each side. The nerve in the face:

    • Begins in the brainstem.
    • Passes through the base of your skull close to the eighth cranial nerve, the vestibulocochlear nerve, which aids in hearing and balance.
    • Enters your face via a bone aperture close to the base of your ear.
    • It branches off through a hole next to your parotid gland, an important salivary gland.

    What are the Facial Nerve branches?

    Five branches of the face nerve carry out different motor functions:

    • Frontal (temporal): Regulates the muscles in your forehead.
    • Zygomatic: Helps with eye closure.
    • Buccal: Makes it possible for you to smile by lifting the corners of your lips and your upper lip while also moving your nose and blinking.
    • Marginal mandibular: To help you react to loud noises, it pulls your lower lip down (like a frown) and passes into your middle ear.
    • Cervical: Regulates the mobility of your mouth’s lower corners and chin.

    What is the function of the Facial Nerve?

    These sensory and motor functions are carried out by the facial nerve:

    • Regulates the muscles responsible for creating your facial expressions.
    • Regulate the inner ear muscle which is responsible for regulating sound intensity.
    • Helps to release tears.
    • Transmits taste information from your tongue to your brain.

    What is Bell’s Palsy?

    • Bell’s palsy is a disorder that results in temporary facial paralysis. Usually, it only affects the facial muscles on one side. You might not be able to close an eyelid or have an uneven smile completely. It rarely damages your face on both sides.
    • Bell’s palsy is caused by swelling and inflammation of the seventh cranial nerve, which regulates the muscles in your face. While some illnesses, like viral infections, can induce inflammation, many occurrences of Bell’s palsy are idiopathic, meaning they have no known cause.
    • Any age can be affected by Bell’s palsy. However, those between the ages of 15 and 60 are the most likely to be affected. 40 years old is the typical onset age.
    • The 19th-century Scottish surgeon Sir Charles Bell is credited with giving the disorder its name.

    What are the causes of Bell’s palsy?

    Bell’s palsy is primarily caused by inflammation and compression of your seventh cranial nerve. The nerve signals that regulate your facial expressions and movements are transmitted by the seventh cranial nerve. It also transmits nerve signals which is important in taste and eye tear production. Each of these two nerves regulates one side of your face. The muscles on one side of your face become less mobile when inflamed. Researchers have discovered that Bell’s palsy may be caused by specific viral infections that inflame the seventh cranial nerve.

    A few of these are :

    • Herpes simplex 1 (a virus that causes cold sores and other oral illnesses).
    • The varicella-zoster virus causes shingles and chickenpox.
    • The Epstein-Barr virus causes mononucleosis.
    • COVID-19.

    Additional factors could be due to immune system weakness caused by

    • Stress
    • Diseases.
    • Lack of sleep.
    • Physical injury.
    • Autoimmune disorders.
    • Generally, doctors cannot identify a specific cause of Bell’s palsy.

    What signs and symptoms are present with Bell’s palsy?

    The main sign of Bell’s palsy is facial muscle paralysis, usually affecting one side of the face. It appears to be drooping on one side of your face. Among them are:

    • The foreheads.
    • Eyebrow.
    • The eye and eyelid.
    • Corner of your mouth.

    Bell’s palsy symptoms typically start suddenly and peak in severity in 48 to 72 hours. Others experience moderate facial muscular weakness. Some people have complete facial muscular paralysis.
    Bell’s palsy makes it difficult to produce complete expressions. On the affected side, raising your eyebrows, blinking, or making other facial expressions could be difficult or impossible. You can experience a heavy or numb face. But on the affected side of your face, you can still feel touch and temperature (such as heat and cooling).

    Additional signs of Bell’s palsy could be: 

    • Drooling.
    • Dry eyes.
    • Speaking, eating, or drinking difficulties.
    • Pain in the ears or face.
    • Headache.
    • Taste loss.
    • Tinnitus (Feeling of ringing in the ears is called tinnitus).
    • Hyperacusis (Hearing sensitivity).

    Are there any warning signs of Bell’s palsy?

    Bell’s palsy warning signs, or early symptoms, can include mild fever and soreness behind your ears. But once Bell’s palsy starts, there’s little you can do to stop it from developing. Furthermore, you can experience similar symptoms for some other reason without developing Bell’s palsy.

    How common is Bell’s palsy?

    Bell’s palsy occurs frequently. Every year, between 15 and 30 persons out of 100,000 are affected. It will affect 1 in 60 persons at some time in their lives. It is the predominant etiology of unilateral facial paralysis.

    Which conditions are at risk for Bell’s palsy?

    Having any of the following could make you more susceptible to Bell’s palsy:

    What is the diagnosis of Bell’s palsy?

    Based on your symptoms, a doctor can diagnose Bell’s palsy. Your symptoms and whether they have changed will be questioned. Furthermore, a physical examination may be conducted and you may be asked to perform certain muscle movements on your face. The primary physical examination finding for Bell’s palsy is either whole or partial forehead weakness.

    Similar facial paralysis to Bell’s palsy can occasionally be caused by other disorders such as stroke, sarcoidosis, Lyme disease, middle ear bacterial infections, multiple sclerosis, and tumors close to your facial nerve. Your doctor typically diagnoses Bell’s palsy correctly based only on your medical history and physical examination. However, occasionally they might advise getting one or more of these tests done:

    • Blood tests to look for diseases like sarcoidosis or Lyme disease.
    • Electromyography (EMG) for assessing nerve injury and activity. Your doctor may be able to determine how quickly you heal from this test.
    • Computed tomography (CT) or magnetic resonance imaging (MRI) scans can rule out multiple sclerosis, stroke, tumors, and other causes of nerve injury.
    • Spinal taps, or lumbar punctures, are used to screen for sarcoidosis, meningitis, and Lyme disease.

    What are the treatments for Bell’s palsy?

    Bell’s palsy improves on its own in the majority of instances. However, for symptom relief and a quicker recovery, your healthcare professional can suggest one or more of these treatments:

    Eye care: Artificial tears and other eye drops are used to relieve dry, irritated eyes. You might need to use an eye patch to shield that eye from injuries, dryness, and irritants if your eyelid won’t close. Taking good care of your eyes is crucial to avoiding corneal damage, which is a major side effect of Bell’s palsy.

    Medications: Your doctor might prescribe medications including these:

    • Corticosteroid medications: these reduce inflammation.
    • Antiviral or antibacterial medications: these treat infections or viruses that may be the cause of your Bell’s palsy.
    • Over-the-counter painkillers: these include acetaminophen and ibuprofen.
    • Eye drops: these keep the affected eye lubricated.

    How to manage Bell’s palsy?

    Other measures can you take to manage Bell’s palsy to go away, aside from taking your medication is:

    • During the day, use artificial tears or eye drops. Exposure keratitis, another name for severe dry eye, can occur if your eyelid is unable to close all the way or if you are unable to blink it. If you don’t get treatment, your cornea could get damaged. You can get more detailed instructions on how often to take the drops each day from your eye doctor. Use preservative-free lubricating eye drops, which won’t irritate your eyes, if you must use them more than four times a day.
    • At night, apply a thick lubricating ointment to your eye. While you sleep, this type of thicker ointment will keep moisture from running through your eyes, but it may cause cloudy vision. Apply just before turning in for the night.
    • Cover the affected eye with tape at night. When you go to bed, apply surgical tape to shut your eyelid to avoid drying it out over the night. When you wake up, remove the tape gently to avoid damaging your eyelid or surrounding skin.
    • Consider wearing an eye patch. To stop moisture loss and avoid dry eyes, some specialists advise covering your eye with a patch or moisture chamber.
    • Make use of a straw. Drinking from a glass can be challenging at times if your mouth is drooping. Try using a straw to lessen the chance of dropping liquids down your chin, such as water.
    • Speak with someone. Talking to a trusted friend or even a counselor or therapist about your feelings is a good idea if you’re feeling self-conscious about the way you look.
    • Consider other forms of treatment. Although they won’t eliminate your Bell’s palsy symptoms, complementary therapies may make you feel better. For instance, think about using your preferred method of relaxation or other stress-reduction tactic.
    • Try your best to gain as much sleep as you can. It might be difficult to adjust to the changes that come with facial paralysis. Make an effort to obtain as much rest as you can, get lots of sleep, and concentrate on eating a healthy, balanced diet.

    Physical therapy: Muscles that are paralyzed may shorten and weaken permanently. You can avoid this by learning how to massage and train your facial muscles from a physical therapist.

    Surgery

    • Nerve decompression surgery: In the past, the bony channel that the facial nerve travels through was opened during decompression surgery to release pressure on the nerve. Decompression surgery is not advised today. Possible dangers of this operation include irreversible hearing loss and harm to the facial nerve.
    • Plastic surgery: In rare cases, long-term facial nerve issues may require plastic surgery to manage. Surgery for facial reanimation can restore facial movement and help the face appear more even. Facial implants, nerve grafts, eyelid lifts, and eyebrow lifts are a few examples of this kind of surgery. After a few years, some surgeries, like an eyebrow lift, might need to be redone.

    Physical-Therapy for Bell’s palsy

    Physical therapy is suggested. Your physical therapist will show you a selection of facial exercises that will help you strengthen your face’s muscles and increase their range of motion. Numerous cases of Bell’s palsy have also shown success with physical therapy treatments.

    Exercises for Bell’s Palsy Patients

    Bell’s palsy patients can regain facial coordination and muscular power by engaging in facial exercises and physical therapy after experiencing a brief period of facial paralysis. The majority of exercises should be performed in brief sessions three or four times a day, with a maximum of thirty repetitions for each exercise.

    Facial Stimulation

    It’s crucial to warm up and activate your muscles before starting the facial workouts. Experts advise sitting in front of a mirror so that you can see your face and observe your muscle movements when performing these facial exercises appropriately.

    • Try moving every portion of your face slowly and softly to start.
    • Raise your eyebrows slightly with your fingers. Although one side will rise higher than the other, the drooping side shouldn’t be very forceful.
    • Massage your forehead, nose, cheeks, and mouth with your fingertips in a gentle manner.

    Eye Blinking Exercise: Using your fingers, gently close and open the inflamed eye as needed. Try to blink completely and as quickly as is comfortable and within control.

    Exercise Your Smile: Try to draw the affected side of your mouth’s corner upward with your fingertips in a gentle smile. After a few moments of maintaining the position, release. Repeat several times.

    Exercise to Raise Your Eyebrows: Try to lift the affected side of the eyebrow by placing your fingers above it. Try to raise the eyebrow by gently applying resistance with your fingertips. After a brief period of holding, release. Repeat several times.

    Eye Closure Resistance Exercise: Gently close the injured eyelid and apply pressure with your palm to the closed eyelid. After a few seconds of holding, let go of the pressure. Repeat many times.

    Exercise for Cheek Puffs: On the side that is affected, puff up your cheeks and hold it for a few seconds. Next, relax and perform the puffing motion a few more times.

    Exercise for Tongue and Lip Mobility: Move your tongue up, down, and side to side within your mouth gently. Make an effort to contact your tongue to the corners of your mouth. Additionally, to encourage flexibility, move your lips in different directions.

    Keep in mind that you should perform these exercises lightly and without exhausting yourself. You can progressively increase the repetitions and intensity as your facial muscles regain coordination and strength over time.

    Biofeedback: To assist patients in visualizing and monitoring their muscular movements, several physical therapy treatments make use of biofeedback. This can help with learning how to coordinate and activate your muscles correctly for more expressive facial expressions.

    Manual Massage: Massage therapy can be used in addition to other forms of medical treatment. Enhancing one’s perception abilities is feasible. Facial massage techniques include:

    • Effleurage.
    • Kneading using thumb or finger.
    • Hacking.
    • Tapping.
    • Stroking.

    Additional therapy options include

    • Applying moist heat to the paralyzed area to help with relief from pain.
    • Try drinking through a straw.
    • Consume food with the side of your mouth that is most comfortable.

    Electrical Stimulation: Electrical stimulation is another technique used in physical therapy treatments. You will need to see a physical therapist for electrical stimulation, unlike with face exercises, which you mostly do at home.

    Small amounts of electricity are used in electrical stimulation to cause your face’s muscles to contract. The sensation of electrical impulses from your brain causing your muscles to twitch is caused by this. This can be your only option to use these facial muscles when your face is at its most paralyzed, during the last stages of Bell’s palsy.

    What are the complications for Bell’s Palsy?

    The majority of Bell’s palsy patients recover fully and without any issues after experiencing an episode. On the other hand, Bell’s palsy in more severe forms may result in complications. Among them are the following:

    • Damage to your face nerve that cannot be repaired.
    • Irregular nerve fiber regeneration. When attempting to move other muscles, this may cause an involuntary contraction of some muscles, a condition known as synkinesis. For instance, the affected eye may close when you smile.
    • Partial or total blindness caused by an unresponsive eye. The cornea, the transparent layer that covers the eye’s protective layer, is scratched and overly dry.

    The prognosis for Bell’s Palsy

    • For those who have Bell’s palsy, the prognosis is typically favorable. Depending on how severe the nerve injury is, recovery times can change. After two to three weeks from the beginning of symptoms, you might start to see an improvement if the nerve damage is not too severe. It can take three to six months to see any recovery if the nerve damage is more severe. Rarely, the symptoms might not go away or might come back permanently.
    • If you experience any Bell’s palsy symptoms, give your doctor a call right once. Early intervention can reduce healing time and avoid problems.

    Prevention for Bell’s palsy

    • As for Bell’s palsy, there is nothing you can do to prevent it.
    • Although there is an interaction, Bell’s palsy does not always result from those viral infections.
    • Taking good care of your risk factors, such as diabetes, obesity, or high blood pressure, may help lower your chance of developing the illness.

    Summary

    Bell’s palsy can cause you to feel self-conscious about the way your face appears. Fortunately, these symptoms typically get better with time. From the moment you begin experiencing symptoms, speak with your doctor. If corticosteroid therapies are initiated within 48 hours after symptom onset, they can speed up the healing process. Additionally, other, more serious illnesses that cause facial paralysis can be ruled out by your doctor.

    FAQs

    What Is Bell’s Palsy’s Primary Cause?

    Bell’s palsy is mostly caused by inflammation or compression of the facial nerve, which is frequently caused by viral infections, especially those caused by the herpes simplex virus.

    Is Bell’s palsy curable?

    The majority of Bell’s palsy cases are temporary. You’ll probably regain full use of your usual facial muscles after some time. About 80% of cases are like this. For some, however, facial weakness may not go away.

    What is the duration of Bell’s palsy symptoms?

    The majority of the time, full recovery occurs in around six months, and symptoms improve in a few weeks. A small percentage of people develop lifelong symptoms of Bell’s palsy. Bell’s palsy rarely happens more than once.

    Is Bell’s palsy a stroke?

    The difference between a stroke and Bell’s palsy: “Bell’s palsy resembles the symptoms of a stroke because it affects only one nerve, the facial nerve.” Bell’s palsy is associated with injury to the facial nerve, whereas a stroke is caused by a blood clot that obstructs blood flow to the brain or by a blood vessel that bursts inside the brain.

    What should be avoided in Bell’s palsy?

    Stay away from foods that are stringy, chewy, or have husks, skins, pips, or shells (such as raw tomatoes, lettuce, chewy meats, sweet corn, peas, or baked beans). Rice and other dry, crumbly meals may be difficult for you to eat and may make you cough.

    What is the quickest way for Bell’s palsy patients to recover?

    Due to their anti-inflammatory properties, corticosteroids may aid in the treatment of Bell’s palsy. Studies have shown that corticosteroids can speed up and improve the full recovery process for Bell’s palsy patients.

    What is the best way to sleep with Bell’s palsy?

    Bell’s palsy may result in drooping of the lower eyelid and dry eyes. If you find it difficult to close your eye entirely, you might want to attempt taping it closed with clear medical tape while you sleep. To protect your eyes from dust and debris, put on goggles or glasses.

    References

    • Bell’s Palsy. (2023, March 8). Johns Hopkins Medicine. https://www.hopkinsmedicine.org/health/conditions-and-diseases/bells-palsy
    • Professional, C. C. M. (n.d.-b). Bell’s Palsy. Cleveland Clinic. https://my.clevelandclinic.org/health/diseases/5457-bells-palsy
    • Bell’s Palsy. (n.d.). National Institute of Neurological Disorders and Stroke. https://www.ninds.nih.gov/health-information/disorders/bells-palsy
    • Kahn, A. (2023, April 26). What is Bell’s Palsy? Healthline. https://www.healthline.com/health/bells-palsy#summary
    • Brazier, Y. (2023, April 21). What to know about Bell’s palsy. https://www.medicalnewstoday.com/articles/158863#what-is-bells-palsy
    • Healthdirect Australia. (2022, August 25). Bell’s palsy. Causes, Symptoms, and Treatments | Healthdirect. https://www.healthdirect.gov.au/bells-palsy
    • What is Bell’s Palsy? (2023, May 2). American Academy of Ophthalmology. https://www.aao.org/eye-health/diseases/bells-palsy
    • WebMD Editorial Contributors. (2022, November 6). Best exercises for Bell’s Palsy. WebMD. https://www.webmd.com/brain/best-exercises-bells-palsy
    • Clinic, M. R. (2023, August 31). Physical therapy for Bell’s Palsy: Techniques and exercises. Miracle Rehab Clinic. https://www.miraclerehabclinic.com/blog/physical-therapy-for-bells-palsy
  • 33 Best Deltoid Muscle Exercises

    33 Best Deltoid Muscle Exercises

    Deltoid muscle exercise is a vital component of any comprehensive strength training regimen, particularly for those aiming to develop well-rounded shoulder strength and aesthetics. The deltoid muscle, commonly known as the deltoid or delts, is a prominent muscle group located on the shoulder.

    Comprising three distinct heads – the anterior (front), medial (middle), and posterior (rear)—the deltoids are responsible for a wide range of shoulder movements, including lifting, pushing, and rotating the arm. Strengthening exercises targeting the deltoids play a crucial role in enhancing shoulder stability, mobility, and overall upper-body strength.

    What are the deltoid muscles?

    • The glenohumeral joint is covered by the massive, triangular Deltoid muscle, which is responsible for the rounded appearance of the shoulder.
    Deltoid Muscle
    Deltoid Muscle
    • The ball-and-socket joint in your shoulder that joins your arm to your body’s trunk contains your deltoid muscles. Additionally, they stabilize and protect your shoulder joint.
    • The deltoids are skeletal muscles, just like the majority of other muscles in your body. Tendons bind them to the skeleton. You can choose to move your skeletal muscles since they are voluntary muscles. Smooth, or involuntary, muscles—like the heart—that function automatically are not the same as skeletal muscles.
    • The anterior, or clavicular, middle, or acromial, and posterior, or spinal, segments make up its three separate sections.
    • It functions primarily as the humeral head stabiliser and shoulder abductor. It also aids in forward elevation.
    • The deltoid is a powerful muscle that is used in a variety of ADLs (such as carrying shopping bags and brushing your hair) as well as sports (such as swimming, water polo, netball, and volleyball).

    What function do the deltoid muscles provide?

    Along with other shoulder muscles like the rotator cuff muscles, the deltoid muscles enable you to perform a range of actions. Functions of the deltoid muscles include:

    • One of the deltoid’s primary roles is to stabilize the shoulder joint, especially when bearing weight, by avoiding subluxation or even dislocation of the humeral head. The primary force behind shoulder abduction is the deltoid.
    • The abduction of the shoulder joint is produced by the cooperation of all the deltoid heads. It aids in raising the arm’s front, side, and posterior. Deltoid soreness can affect anyone who engages in repetitive overhead activity. Examples of these people are house painters, swimmers, water polo players, and pitchers. In order to avoid subluxation or dislocation, it is also active when carrying goods, such as bags, or reaching for objects.
    • Recompense for diminished upper limb strength in the event of an injury, like a rotator cuff tear.
    • Extension (extending your arm backward, behind your body) and Flexion (pushing your arm forward, into an above position).

    What is the importance of deltoid muscle exercises?

    Shoulder Stability: One of the body’s most dynamic and intricate joints, the shoulder depends on the deltoid muscles for stability. By keeping the shoulders stable and in the right position, strengthening these muscles lowers the chance of shoulder injuries from everyday activities and sports.

    Functional Movement: A range of arm and shoulder functional movements, including lifting, pushing, pulling, and rotating, are made possible by strong deltoid muscles. Smoother and more efficient actions are facilitated by having well-developed deltoids, whether you’re throwing a ball or reaching for something on a high shelf.

    Athletic Performance: For peak performance, athletes in sports like tennis, basketball, volleyball, swimming, and biathlon significantly depend on their deltoid muscles. Robust shoulders enhance throwing precision, upper body strength, and the capacity to produce force during upper limb motions.

    Support for Posture: Rounded shoulders and a forward head posture might result from weak deltoid muscles. Frequent deltoid exercise helps build stronger shoulder girdle muscles, which improves posture and lowers the chance of postural abnormalities and the pain they cause.

    Injury Prevention: Rotator cuff strains, impingement syndrome, and shoulder dislocations are among the common shoulder injuries that can be avoided by strengthening the deltoid muscles. Deltoid exercises enhance the stability and muscle balance of the shoulder complex, making it more resistant to injuries.

    Aesthetic Benefits: A well-defined deltoid muscle mass improves the upper body’s overall appearance, resulting in the desired “V-shaped” physique. In addition to enhancing symmetry and proportion, well-defined and toned shoulders also increase self-assurance and self-worth.

    Exercises for Deltoid Muscles:

    1. Deltoid strengthening exercises

    Isometric Deltoid Contraction

    keeping back and elbows straight when standing close to a wall. As hard as you can without hurting yourself, gently press the arm against the wall. Hold for 10 seconds and repeat 5 to 10 times on each side as long as there is no pain.

    Isometric Shoulder Abduction
    Isometric Shoulder Abduction

    The advancement

    Appropriate dumbbell weight and anterior, lateral, and posterior arm lifts. As long as there is no pain, repeat ten times on each side.
    Resistance band pullbacks, lateral raises, and forward increases. If there is no pain, repeat each side ten times.

    Additional advancement

    There are many different versions. activities such as high-side plank walking, forward arm lifts with squats, and shoulder-diagonal PNF with a band.

    Anterior Deltoid Raise

    Benefits: This exercise, which focuses on the anterior head of the deltoid muscle, is one of the best anterior deltoid exercises. It aids in developing the strength required to raise things in front of you.

    Lateral Raises
    Anterior Raises

    How to perform this workout for strengthening:
    The patient must perform this exercise by standing with their feet hip-width apart and holding a dumbbell in each hand while keeping their arms by their sides.
    With your hands facing each other, slowly raise a dumbbell straight in front of you to shoulder height while maintaining a straight-arm posture.
    progressively Return to the beginning position and repeat.
    Perform one to two sets of ten to twenty repetitions.

    Front lift in a neutral grip

    How to Proceed:

    Dumbbell-Front-Raise
    Dumbbell-Front-Raise

    Hold a dumbbell in both hands.
    Tension your abdominal muscles while keeping your back straight.
    Lift the weights until your arms are shoulder height in front of you and your palms are facing one another.
    Gradually move the weights back to where they were initially.
    There should be ten attempts.

    Shoulder press at an angle

    How to Proceed:

    Angled-shoulder-press
    Angled-shoulder-press

    Your feet should be hip-width apart.
    Using both hands, raise a dumbbell.
    Raise the dumbbells to shoulder height and twist them outward at a 45-degree angle while keeping your elbows tucked up at your sides.
    With your elbows straight, raise your arms above your head.
    Gradually revert to your initial position.
    There should be ten attempts.

    Y-raises 

    Arm-raise
    Arm-raise

    How to perform Y-raises:

    Your feet should be hip-width apart.
    Using both hands, raise a dumbbell.
    Let your arms fall to your sides organically.
    With your palms facing out to the sides, form a 45-degree angle.
    With your arms extended to your sides, shoulder height, and a slight bend in your elbows, form a wide “Y.”
    Throughout every movement, keep your hands facing away from you.
    Gradually revert to your initial position.
    This should be done ten times.

    Plank ups and downs

    How to Proceed:

    Plank-up-downs
    Plank-up-downs

    The workout routine targets other muscles in addition to your shoulders and core, working your entire body!
    Start with your hands in a full plank.
    Use your core to prevent your hips from swaying throughout this workout.
    Gradually bring your left elbow down to the floor.
    Bend your elbow to the right after that.
    You should be in an elbow plank right now.
    Put your left hand on the mat first, then your right, to return to a full plank position.
    This should be done ten times.

    Single-arm cross-body front lift

    standing position.
    Hold a dumbbell in each hand, palms facing away from the body.
    Starting with your right hand, raise your arm straight up and across your body while keeping your core tight.
    Gradually revert to your initial position.
    To execute, use your left arm.
    Continue to alternate between the two sides, doing 10 reps on each.

    One-arm bent-over row: 

    What to do:

    Single-arm-bent-over-row
    Single-arm-bent-over-row

    Put one hand and one knee on the bench. Retain your left elbow straight.
    Slightly stretch your right leg behind you while keeping your foot firmly planted on the floor for support.
    Stretch your right arm to the floor and bring it up to a medium-to-heavy dumbbell grasp.
    Bend and pull your right elbow up and back until your upper arm is about in line with your lower chest.
    When you reach the peak of the exercise, firmly squeeze your shoulder blades together.
    Slightly lessen the weight.
    Switch to the other arm after 10 to 12 repetitions on the first side.
    Use no more than three sets.

    Standing bend with a lateral lift

    How to Proceed:

    Standing-bent-over-lateral-raise
    Standing-bent-over-lateral-raise

    Hold a pair of dumbbells with your hands facing in opposing directions.
    Place your feet shoulder-width apart, slump forward at the hips, and slightly bend your knees while maintaining a straight back.
    The weights should be together beneath your chest, with your elbows relaxed.
    Spread your arms wide like wings and raise them until they are parallel to the ground.
    When the workout reaches its peak, tense your shoulder blades.
    Slowly and carefully return the weights to their initial places.
    Weights that are sufficiently light should enable 10–12 repetitions. Go up to 2-4 sets.

    Callahan Press

    callahan-press
    callahan-press

    Benefits: The Callahan press aids in full-shoulder development, and this exercise targets all three heads of the deltoids.

    How to perform this workout for strengthening:
    The patient must perform this exercise while standing with their feet hip-width apart and holding a dumbbell in each hand.
    With the elbows bent up to ninety degrees, extend the arms out to the sides.
    The hands should point up towards the roof, and the upper arms should be parallel to the shoulder joint. This is where you embark.
    Stretch your forearms out in front of you and bring your palms up to your face.
    Use the opposite motion to go back to the beginning position.
    Move the weights straight past your shoulders and then back to your starting position by doing the opposite action.
    That indicates a single repeat.
    Perform one to two sets of ten to twenty repetitions.

    Arnold Press standing

    Advantages: It targets the three heads of the deltoid muscle and engages the triceps during the pressing motion.

    How to perform this workout for strengthening:
    Positioning their feet hip-width apart, the patient must grasp a dumbbell with both hands just below the chin, with their palms facing you.
    Dumbbells should be pressed above you, and you should rotate your palms out until they are facing away from you.
    After pausing at the peak, rotate your palms back towards yourself and descend the dumbbells down to the beginning.
    Perform one to two sets of ten to twenty repetitions.

    Jerk Press 

    Benefits include: This exercise works the patient’s deltoids, trapezius, and triceps in addition to helping to develop strength and power.

    Jerk-Press-exercise
    Jerk-Press-exercise

    How to carry out this reinforcement:
    The patient must perform this exercise by standing with their feet hip-width apart and grabbing two dumbbells in front of their shoulders with their hands facing each other. It is the initial position.
    Press the weights aloft as you leap with your right foot forward and your left foot back in one powerful motion to land in a high lunge.
    Returning to the embarkation posture with the front foot stepped, raise the weights to shoulder height.
    Perform one to two sets of ten to twenty repetitions.

    Hammer, curl, and press.

    Benefits: This combination action works the deltoids as well as a variety of other upper-limb muscles, such as the triceps, biceps, and forearms.

    How to perform this workout for strengthening:
    The patient must stand with their feet hip-width apart, both hands on a dumbbell, and their arms at their sides with their palms facing each other in order to complete this exercise.
    Keep your upper arms still while curling dumbbells up towards your shoulders with your elbows tucked in.
    When the arms are stretched and the palms of the hands are facing each other, press the dumbbells above the head.
    After lowering the weights back to the shoulders, extend the arms out to the sides in a straight line.
    Perform one to two sets of ten to twenty repetitions.

    Lateral Raises with the Standing Band

    lateral raise
    lateral raise

    Stand shoulder-width apart, holding a resistance band in each hand at your side. Raise the band laterally, elbows locked at shoulder height. Slowly lower the band back to its starting position and repeat the action for ten reps three times.

    TRX for the rear deltoid row

    Hold the handles shoulder width apart, hands neutral, and lean backwards at a 45-degree angle. Pull the shoulder blades together and downward, then bend your elbows to pull your body towards your hands. Slowly return to the beginning posture while maintaining strong muscular control. Repeat 10–15 times for three sets.

    The Military Press

    This exercise targets the front deltoids and the key muscles in the upper arm region. To finish the exercise, stand with your feet hip-width apart and a dumbbell in each hand. Press the weights above the level of your head until your arms are fully stretched. Slowly return the weights to their initial position and repeat. Repeat for 5–10 reps over three sets.

    Flies with alligator mouths

    How to Proceed:

    Alligator-mouth-flies
    Alligator-mouth-flies

    Place your feet hip-distance apart and stand with a dumbbell in each hand.
    Bend your knees slightly and slant your hips forward.
    Bring your abs in. Keeping your other arms hanging down, raise your right arm straight up in front of you until it is in line with your right ear.
    Then, extend your left arm back behind you to contract your left tricep.
    Imagine forming a single, diagonal, straight line with both arms.
    Return to the starting point.
    Alternate between reaching out with your right arm back and your left arm forward.
    Continue for 15 reps on each side.

    Tilted-Over Lateral Rise (Reverse Fly)

    Benefits: This whole-body exercise works the obliques, glutes, quads, and all three segments of the deltoid muscle.

    Reverse Dumbbell Flyes
    Reverse Dumbbell Flyes

    How to carry out this strengthening activity:
    The patient must perform this exercise while standing with their legs wide apart and their toes turned 45 to 50 degrees. They must also hold a dumbbell in front of their chest with both hands. That is where things begin.
    When descending slowly into a sumo squat, push your hips back; your back should remain straight.
    Legs can be extended by pushing through the heels.
    Dumbbells should be rotated around the head, starting from the right and going back to the right.
    Continue the movement and turn both feet to the right as the patient brings the dumbbell to the front.
    With both knees bent into a lunge, slowly descend a dumbbell in front of the front knee by straightening your arms.
    Stretch your legs wide, turn your face forward again, and bring the dumbbell back up to your chest. On the left side, repeat.
    Perform one to two sets of ten to twenty repetitions on each side.

    EZ Bar Underhand Press while Seated

    Benefits: Although this exercise may seem easy, it strengthens and stabilizes the shoulder by targeting the triceps, serratus anterior, and anterior head of the deltoid, the muscle that protects the ribs beneath the shoulder blade.

    Seated-EZ-Bar-Underhand-Press
    Seated-EZ-Bar-Underhand-Press

    How to perform this workout for strengthening:
    Sit on the seat after adjusting an inclined bench so that the back is vertical.
    Use an underhand grip to hold an EZ Bar that has been loaded in the middle. Bringing the bar under the chin required bending the arms.
    Pull a bar straight up above your head to lengthen your arms.
    Return the barbell to just below the chin with a gradual motion, then repeat.
    Perform 2 sets of ten to twenty repetitions.

    Straight Row to Hip Lift

    Benefits: This two-part exercise strengthens the biceps, trapezius, and medial heads of the deltoids, all of which contribute to the development of pulling strength.

    Upright-Rows
    Upright-Rows

    The patient must stand with their feet hip-width apart and grasp a pair of dumbbells in front of their thighs with their palms facing you in order to perform this strengthening exercise.
    Raise the dumbbells to your chin in an upright row while keeping your chest up and your core active.
    It is not appropriate to lift the elbows over the shoulders.
    Lower your arms to your sides, bend your knees, push your hips back, and bend forward into a flat back.
    With the palms facing back, let the arms hang straight.
    Dumbbells should be raised behind you, arms straight, and shoulder blades drawn back.
    Lower your arms and do it again.
    Perform 3 sets of ten to twenty repetitions.

    Lateral Raise with a dumbbell

    Dumbbell Lateral Raise
    Dumbbell Lateral Raise

    How to perform this workout for strengthening:
    This exercise works the anterior and medial deltoid muscles, and it is quite efficient. The exercise also works the core, trapezius, and upper back.
    Regarding this procedure Position your feet shoulder-width apart and stand upright. Dumbbells should be held in both hands using a pronated grip.
    When the dumbbells are in line with the shoulders, slowly elevate the arms in an arc to the sides. Make sure your arms are parallel to the ground and avoid bending at the elbows.
    Take a brief break and go back to the starting position.
    Perform 1 to 3 sets of ten to twelve repetitions.

    Push-ups in the decline position

    Decline push-ups exercise
    Decline push-ups exercise

    How to perform this workout for strengthening:
    The push-up is a well-known exercise for strengthening the chest’s pectoral muscles. A more difficult version of the push-up that targets the anterior deltoids more vigorously is the decline push-up.
    The patient must perform this exercise while lying on the floor in a prone position with their hands shoulder-width apart.
    Assume that the body is at an acute angle with the floor by placing the feet on an elevated platform.
    The body should be just centimeters from the floor, and the elbows should be bent.
    Raise the upper limb until the arms are parallel to the floor and completely straight. Return to the starting position after two seconds of holding that position.
    Perform one to two sets of ten to twenty repetitions.

    Lateral Cable Raises

    Connect a low-pull cable machine to a D-handle.
    With your feet shoulder-width apart, take a sideways stance towards the machine and grasp its handle with the hand that is furthest away from it.
    Raise your arm straight out to the side until it is parallel to the floor, maintaining a small bend in your elbow.
    Return the handle to its initial position by lowering it gradually.
    After the specified number of repetitions, switch sides and repeat.

    Cable-face Pulling

    Cable Face Pull
    Cable Face Pull

    How to perform this workout for strengthening:
    Left foot forward on a knee in front of the cable machine.
    Grasp the handles with your palms pointing inward, then drag them towards your face to separate your hands.
    After a few seconds of holding that position, return to the embarking position.
    Perform one to two sets of ten to twenty repetitions.

    External rotation on the side

    This image has an empty alt attribute; its file name is side-lying-external-rotation-1.webp

    How to perform this workout for strengthening:
    The posterior deltoid’s outside motion is the main emphasis of the side-lying external rotation. Additionally, this exercises the teres minor and infraspinatus, two rotator cuff muscles.
    The patient must perform this exercise while lying on their right side and carrying a light dumbbell in their left hand.
    With the elbows bent at a 90-degree angle, place the left arm on the side. Position the towel roll in between the patient’s upper arm and trunk if their shoulders are broad.
    As much as the patient is able to do so while keeping the upper arm on the body, rotate the arm on the trunk.
    After holding for two to four seconds, gradually return this to its original position. Perform 1 to 3 sets of 15 repetitions.

    Assisted Pull-ups

    Assisted-pullup
    Assisted-pullup

    How to conduct this strengthening exercise: Although most people lack the upper limb strength to accomplish this exercise motion without assistance, it is a very effective one.
    This exercise engages the latissimus dorsi, trapezius, and biceps, in addition to the posterior deltoids.
    Adjust the weight calculation on the machine’s side. Decide on the right quantity and set. Climb onto the knee pad and press it down until the patient can comfortably rest both knees on it.
    Make sure your knees are hip-width apart. With your palms facing away from the center, hold the outer handles above your head.
    Lift your arms straight and descend to the starting position.
    Raise your chin to meet or beyond the handles by pulling your torso upward.
    Hold the posture for a few seconds before carefully lowering yourself.
    Maintain the constricted shoulder blades as your main goal. They need to be lowered and pressed back.
    Work your way up to ten repetitions by beginning with ten to twenty.

    Push-Up (Pike Inverted Shoulder Press):

    With your hands slightly wider than shoulder-width apart and your hips raised in the air to form an inverted V, begin in the push-up posture.
    To keep your body stable, contract your core muscles.
    Bending your elbows while maintaining their outward orientation, lower your head towards the floor.
    Arms straightened, press through your palms to raise your body back up to the starting position.
    When performing the activity, concentrate on engaging your deltoid muscles and shoulders.
    Continue until the desired number of times.

    Rows with barbells upright

    Barbell Row
    Barbell Row

    How to perform this workout for strengthening:
    The anterior and middle heads of the deltoids are worked during the barbell upright row.
    The patient must stand with their feet shoulder-width apart for this exercise. Next, take hold of the barbell and let it hang in front of you at arm’s length. Maintain your hands in line with your thighs and your palms towards your body.
    Breathe deeply and tense your abdomen. The posture should be straight back, chest elevated, and forward-gazing eyes.
    Exhale and raise a bar straight up, towards the chin.
    Hold the barbell close to your body and guide with your elbows.
    It is acceptable for the arms to extend slightly below the shoulder height, but no higher.
    Take a minute or two at the top of the lift.
    As you inhale, lower the bar to return to the starting position.
    Perform 1 to 3 sets of ten to fifteen repetitions.

    When did the patient stop doing the Deltoid strengthening exercise?

    The patient should not perform this exercise if he already has shoulder pain.
    if a recent fracture to the arm bone happens.
    Stay away from weightlifting activities if the patient has back pain.
    If, throughout this workout, the patient experiences any pain or discomfort in their shoulders.

    2. Deltoid muscle stretching

    Throughout the day, the shoulders exert a lot of effort. The patient requires them to reach, pull, lift, push, sit up straight, and even walk. They may have discomfort or stiffness after an exercise in addition to feeling tight or even exhausted at times. Deltoid stretches are a suitable means of maintaining shoulder suppleness.

    The patient has a slight risk of shoulder pain and injury if these muscles are flexible and loose. Stretching for the three deltoid muscle groups—the anterior deltoids, which are located on the front of the shoulders, the lateral deltoids, which are located on the top of the shoulders, and the posterior deltoids, which are located in the lower back of the shoulder joints—will help prevent imbalance. These three components each have distinct purposes.

    How do you stretch your deltoid?

    The ideal exercise for the patient to perform at home to release the tight deltoid muscles is the one that follows.

    Anterior deltoid stretch

    What is the process?
    Maintain a straight posture with your feet hip-width apart. Your shoulders should be relaxed, tucking your scapulae down to match your spine on either side.
    Keeping the elbows straight, grasp the hands behind the back and elevate them away from the body. Stop the patient there and hold them there for 15 to 30 seconds if they start to feel stretched.
    When moving, avoid bending your body in any way; instead, remain upright.
    Hold the towel between the patient’s palms if they are having trouble clasping them together.
    Repeat the stretch 3 times.

    anterior deltoid stretch

    There are several versions to the anterior deltoid stretch:

    1. Isolation of internal rotation
    2. Doorway stretching
    3. Bridge position stretch
    1. Isolating internal rotation

    Target just the anterior deltoids by isolating internal rotation.
    How to carry out Place yourself in a supine position and extend your arms past your shoulders. Raise one hand such that the forearm and elbow are at a straight angle to the body and the elbow is 90 degrees from the body. The hand should descend gradually until it rests at the side of the body. After a few moment of holding that stretch, go back to your beginning posture.
    Execute three to four sets of twenty reps. Apply to a different arm.
    As far as the patient can reach without experiencing pain, lower the arm. As much as the patient is able, perform repeats; gradually, get better. The patient can raise weight in advance, specifically with a dumbbell, while stretching.

    2. Stretching a doorway

    Doorway stretch
    Doorway stretch

    How to carry out Place your feet hip-width apart and stand upright in the doorway.
    With the elbow slightly bent, place the right hand on the doorway, just below shoulder level.
    Shift your torso away from your right arm. Hold the position for ten to twenty seconds once the patient feels stretched. Next, proceed to the left side.
    Any stationary item, like a wall or vertical bar, can be used by the sufferer to grasp.

    3. Stretch in the bridge position

    Method: Assume a seated posture. Both the knees and the feet should be bent so that they are flat on the ground.
    The fingers of the hand are pointing forward and it is placed next to the body.
    Inhale, raise your body from the floor into a bridge position, and press your hands and feet into the ground. Both the thighs and upper body are parallel to the ground. One at a time, straighten your legs without lowering your hips into a bridge stance. Now let your head drop and relax your neck.
    After holding that posture for thirty seconds, take the starting position and reverse the motion.
    Beginning with 5-second holds and working their way up to longer durations.
    Breathe slowly and deeply while the patient maintains the position, inhaling through the nose and exhaling through the mouth.

    Stretch of the lateral deltoid

    Standing lateral Stretch
    Standing lateral Stretch

    Another name for this is the cross-body deltoid stretch.
    How to carry out Place your feet hip-width apart and stand upright. With the elbow slightly bent, place the left hand across your body or even horizontally in relation to it.
    Using your right hand, grasp the end of the upper arm just above the elbow.
    Now use your right hand to press the left hand against your body.
    Hold the position for 30 seconds when the patient starts to feel stretched. Next, proceed to the right side.
    The shoulder remains relaxed throughout the motion.

    Variations in lateral deltoid stretch include:

    Method: Assume a standing position adjacent to a table or bench, with your hips approximately hip-width apart.
    With your left hand resting on the table for support, bend forward. Now, slowly swing your right arm in both directions, just like a pendulum hanging on a tabletop.
    While performing the action, do not move your body. The knee is slightly bowed, but the back is straight. Proceed to repeat the circular motion in a side-to-side manner.
    Not only do it on the left arm, but also turn around.
    Perform ten repetitions in three sets.

    How to do it: Place your feet hip-width apart, stand upright, and maintain a straight back.
    With your right arm behind your back and your elbow flexed 90 degrees, pose. Hold that elbow now with your left elbow.
    Next, use the left hand to draw the right elbow towards the left back.
    Hold the position for 15–30 seconds once the patient feels stretched.
    Do the same with your left hand.
    Work on each side for three sets.

    Posterior deltoid stretching

    Posterior deltoid stretch

    How to do it: Begin with stretching your crossover. Pull back your shoulders gently so that your scapulae rest on either side of your spine.
    Grab one hand horizontally across the body and place the other hand over the upper arm.
    Start slowly drawing that arm and the other side up against your chest. Stop there as soon as the patient feels overextended.
    Repeat on the opposite side after holding the position for 30 seconds.
    Perform three iterations on each side.

    Variations in posterior deltoid stretch include:

    1. Stretching when sleeping
    2. bent over in the horizontal abduction position
    Sleeper-stretch
    Sleeper-stretch

    1. Stretching when sleeping
    Ways to carry out This makes the muscles that support it active. To ensure that the forearm is at the proper angle to the body, assume a side-lying position with the lower arm 90 degrees bent.
    To push the arm downward, use the other arm. After 30 seconds of holding the position, if the patient feels stretched, offer them a 30-second break.
    On a different side, repeat the stretch. During the wrist stretch, avoid bending or applying any pressure.

    2. Bent over the stretch of horizontal abduction
    How to accomplish it: Assume the prone posture with one arm dangling out of a bench or even the edge of a bed.
    Without bending the arm, begin by holding the dangling arm straight and gently raising it to eye level.
    At this point, gradually return to the beginning position.
    Perform three sets of ten repetitions, then go on to the opposite arm.
    Lift the arm just to the extent that the patient is able to tolerate pain. It then adds some weight after the patient masters it.

    Stretch a bear hug dynamically

    Dynamic bear hug stretch
    Dynamic bear hug stretch

    A vigorous bear hug stretches the chest and the anterior and posterior deltoid muscles.
    It’s the ideal motion to do right before working out.
    How to perform this exercise: Place your feet shoulder-width apart and stand upright. Make sure your posture is upright and that your core is active.
    Extend your arm widely and at a 90-degree abduction.
    Bring the arms across the chest when the patient feels a slight stretch in front of the shoulders and chest. Attempt to give yourself a hug with your left arm resting on top of your right. The rear of the patient’s shoulder feels stretched.
    Swing the arm in the embarking position in a controlled motion. Prior to the arms returning to a hugging posture, try to reach the end of the range of motion. The right arm is over the left arm this time.
    After 30 seconds, stop and take a break. Do two more rounds of this.

    Downward dog with modifications

    Both the anterior deltoids and the chest have been targeted with a modified downward dog. Additionally, because it stretches the hamstrings, glutes, and low back, it is the finest method for improving posture.
    Additionally, because it is comfortable to stretch, it is simple to perform at work.
    How to perform a stretch Take a straight stance behind the sturdy chair, desk, or even table. Set your feet hip-distance apart.
    Now, contract your core and maintain proper posture while standing.
    Place the arms outstretched and the hands flat on a desk.
    While doing a stretch, make sure your arms, back, and legs are all straight; just your hips should be flexing.
    Breathe deeply, then start moving backward until your body forms the inclination. Now tilt your hips downward and your upper body forward. As the patient reclines, extend the arms above the head.
    Hold this position until the patient feels stretched in both the chest and the front of the shoulders.
    For thirty seconds, hold that. Do it 2 more times.

    What are the health benefits associated with stretching the deltoid muscle?

    Stretching the deltoid muscle can have several advantages.
    Here are a few of them:
    Both the deltoid muscle’s range of motion and flexibility should be increased.
    Reduce your level of stress and shoulder tightness.
    Boost your posture with your body.
    Reduce the likelihood of both a sprain and an injury to the shoulder.
    Enhance sports performance.

    When should I not perform the Deltoid muscle exercise?

    If you already have shoulder pain, avoid doing uncomfortable exercises.
    If your arm bone was recently shattered,
    If you have back pain, avoid weightlifting exercises.
    Avoid excessive exercise.
    Avoid doing hard-lifting workouts. Gradually increase the number and weight of dumbells.
    If you feel any soreness or discomfort in your shoulder while performing this workout,
    If you have pain, a sprain, or bursitis, do not do it.

    Deltoid workouts at home

    Walking plank. Begin with a high plank stance 
    Upright row. Hold a dumbbell with both hands, resting in front of your thigh.
    Rear Delt Fly
    Lateral Raise 
    Plank with Shoulder Taps
    Burpee
    Single-Arm Dumbbell Press, 
    Rear Delt Fly.

    Deltoid Exercises for Women

    Dumbbell Front Raise. It is stabilised by the core and targets the pectoralis and anterior deltoid muscles.
    Dumbbell Lateral Rais 
    Overhead Shoulder Press.
    Bent Over: Reverse Fly
    Dumbbell Arnold Press & Upright Row

    Deltoid exercises with dumbbells:

    Side lateral press
    Overhead press
    Arnold press
    Dumbells shoulders press
    Reverse fly
    Front rise

    Deltoid exercises without weights:

    Push-ups. This exercise starts in a push-up position with your arms straight and hands shoulder-width apart
    Handstand Push-ups.
    Begin the workout by standing in front of a wall.
    Wall Walks
    Incline Push-ups
    Shoulder Taps
    Bear Crawls
    Plank Rockers
    Plank Walks

    Rear deltoid exercises:

    Dumbbell Reverse Fly
    Resistance Band Face Pull
    Inverted Row
    Dumbbell Bent-Over Row
    Dumbbell Y-T-I Raise
    Dumbbell Arnold Press
    Bodyweight Cobra on Stability Ball

    FAQs:

    What are the deltoid muscles and their locations?

    The deltoid muscles, often known as the delts, are placed on the outside of the shoulder and have three heads: anterior (front), lateral (middle), and posterior (rear). They define the rounded curve of the shoulder.

    Why is it necessary to exercise the deltoid muscles?

    Exercise of the deltoid muscles is beneficial for shoulder stability, functional mobility, sports performance, posture support, injury prevention, and aesthetics. Strong deltoids improve overall shoulder health and physical performance.

    What exercises work the muscles of the deltoid?

    Shoulder presses, lateral rises, front raises, reverse flyes, Arnold presses, and upright rows are all good workouts for strengthening the deltoid muscles. These workouts, which can be done with dumbbells, barbells, or machines, focus on various deltoids.

    How often should my deltoid muscles be trained?

    Deltoid muscles can be worked out two to three times a week, but in order to allow for muscular growth and recovery, there should be at least one day off in between sessions. To prevent injury, it’s critical to pay attention to your body and refrain from overtraining.

    Is it possible to train the deltoid muscles at home without any equipment?

    Yes, you can use bodyweight exercises like wall walks, plank push-ups, pike push-ups, and shoulder taps to conduct deltoid exercises at home without any equipment. Resistance bands can also be used to increase resistance in exercises like front rises and lateral raises.

    Are there any safety measures I should follow when performing deltoid muscle exercises?

    Yes, it’s crucial to complete deltoid exercises with the correct form and technique to prevent injury. As you acquire strength, progressively increase resistance by starting with lighter weights. Before beginning a new workout regimen, speak with a healthcare provider if you have a history of shoulder pain or injury.

    How can I strengthen my deltoid muscles without risking shoulder injuries?

    It’s critical to warm up properly before working out, to use correct technique when performing exercises, to avoid lifting excessively high weights, and to progressively raise the intensity of your workouts over time in order to prevent shoulder problems. Furthermore, including rotator cuff exercises can help enhance shoulder stability and lower the chance of injury.

    If I experience pain or discomfort in my shoulder, can I still engage in deltoid muscle exercises?

    It’s important to consult a healthcare provider if you have shoulder pain or discomfort before doing more deltoid exercises. To prevent aggravating the condition, specific adjustments or different workouts could be advised, depending on what’s causing the pain.

    How long do deltoid muscle exercises take to show results?

    Exercises targeting the deltoid muscles might yield different outcomes over time, based on a variety of factors, including frequency of training, intensity of workouts, diet, and genetics. It usually takes a few weeks to several months to see significant gains in shoulder strength, size, and shape with regular training and a healthy diet.

    Reference:

    Cscs, J. C. M., & Cscs, J. C. M. (2024, February 13). Deltoid Workouts. ATHLEAN-X. https://athleanx.com/articles/shoulders-for-men/deltoid-workouts

    Cnc, E. R. C. (2024, February 14). The 8 Best Deltoid Exercises for Your Shoulder Workout. Transparent Labs. https://www.transparentlabs.com/blogs/all/deltoid-workouts

    Cpt, K. S. (2023, March 10). 6 Exercises to Improve Posterior Deltoid Strength. Healthline. https://www.healthline.com/health/fitness-exercise/rear-delt-exercises

    12 deltoid exercises to tone and strengthen your shoulders. (2023, November 28). TODAY.com. https://www.today.com/health/diet-fitness/best-deltoid-exercises-rcna43495

    Deltoid. (n.d.). Physiopedia. https://www.physio-pedia.com/Deltoid

    D. (2022, November 15). Deltoid muscle exercise. Mobility Physiotherapy Clinic. https://mobilephysiotherapyclinic.net/deltoid-muscle-exercise/#Health_benefits_of_Deltoid_exercise

    Prajapati, N. (2022, August 23). Deltoid muscle stretching exercise: Health Benefits, How to Stretch? Samarpan Physiotherapy Clinic. https://samarpanphysioclinic.com/deltoid-muscle-stretching-exercise/

    Prajapati, N. (2022, December 28). Deltoid muscle strengthening exercise has health benefits. How to do? Samarpan Physiotherapy Clinic. https://samarpanphysioclinic.com/deltoid-muscle-strengthening-exercise/#google_vignette

  • Posterior Pelvic Tilt

    Posterior Pelvic Tilt

    What is Posterior Pelvic Tilt?

    Posterior pelvic tilt refers to a condition where the pelvis rotates backward, causing the lower back to flatten and the hips to thrust forward. This alteration in pelvic positioning can lead to a cascade of musculoskeletal imbalances and discomfort.

    Typically, the pelvis is in a neutral position when standing, allowing for an even distribution of weight and proper alignment of the spine and lower extremities. However, a posterior pelvic tilt disrupts this equilibrium, often resulting in reduced lumbar curvature (lordosis), tight hamstrings, and weakened hip flexors.

    The top of the pelvis is moved forward in an anterior pelvic tilt. Spinal extension is increased by the anterior tilt.

    A condition known as posterior pelvic tilt occurs when your pelvis shifts away from its neutral position and toward the rear. The anterior part of the hips tilt up and back in this pelvic posture, while the tailbone is tucked beneath the torso. A flat back is the outcome of the lumbar lordosis, or rounding of the lumbar spine, caused by the posterior pelvic posture.

    A posterior pelvic tilt is a hip motion characterized by a small range and closed chain in which the pelvis rotates posteriorly around femurs that are immobile.

    When the front of the pelvis falls relative to the rear of the pelvis, this is known as the anterior pelvic tilt. For example, this happens when the hip flexors shorten and the hip extensors extend. The posterior pelvic tilt occurs when the front of the pelvis rises and the back of the pelvis descends. For instance, this occurs when the hip extensors, especially the gluteus maximus, the main hip extensor, shorten and the hip flexors lengthen.

    A force pair generated by the hip extensors and abdominal muscles causes a posterior pelvic tilt.

    Lateral pelvic tilt, which is linked to scoliosis and individuals with varying leg lengths, is the term used to denote tilting to the right or left. It can also occur when one leg is bent while the other is straight; in this scenario, the hip on the bent leg may descend towards the ground together with the femur.

    When the right side of the pelvis is higher than the left, this condition is known as the left pelvic tilt.
    When the left side of the pelvis is higher than the right, this condition is known as the right pelvic tilt.

    Body imbalances are frequently the result of inactivity, particularly for those who spend most of their days sitting down. This inactivity is a factor in:

    • Tight and weak leg muscles.
    • Reduced tendon length around the pelvic bones.
    • Imbalanced properly.
    • Bad positioning.

    Causes of posterior pelvic tilt:

    Most frequent: Bad posture when sitting
    You have a higher chance of developing a posterior pelvic tilt if you sit incorrectly, even if you spend the whole day sitting down. The natural curve of your spine is distorted when you spend the whole day slumped over at your desk, putting unnecessary pressure and tension on all the wrong places. The result is a weakening of the back and hip flexor muscles. Additionally, the abdominal, gluteal, and hamstring muscles all become quite tight.

    Other causes consist of:

    Abnormal Posture while Standing
    Appropriate sitting posture is not as crucial as correct standing posture. When standing, if you notice that your shoulders hunch and your lower back round, you may have a posterior pelvic tilt posture. Your abs will probably feel shorter and your upper body will probably be tilting back more.

    Taking up/Transporting Heavy Things (Like a Baby!)
    A posterior pelvic tilt posture may also occur if you are carrying heavy things for extended periods. When you attempt to use your hips to hold the “heavy object,” your tailbone typically tilts forward. Your back gets longer as a result, while your stomach muscles get shorter. This will eventually result in severe poor posture.

    Incorrect Exercise Program
    You may be increasing your risk of posterior pelvic tilt if your workout regimen emphasizes building your hamstrings, abdominal muscles, and gluteal muscles. A flattening of the natural curvature in the lumbar spine can result from overdeveloped abdominal muscles pulling the pelvis posterior to the counterbalancing back muscles.

    Position for Sleeping.
    A pelvic tilt may occur if your mattress or sleeping posture interferes with your spine’s natural curve.

    reasons for the posterior pelvic tilt that are muscular.
    A posterior rotation of the pelvis may result from tight abdominal muscles, either alone or in conjunction with tight hamstrings.

    Symptoms of Posterior Pelvic Tilt:

    When your pelvis tilts backward, away from its neutral position, it is referred to as posterior pelvic tilt. The hips’ anterior (front) parts tilt up and back in this pelvic posture, while the tailbone is tucked under the torso.

    A flat back is caused by rounding of the lower spine, which is the result of the pelvis positioned posteriorly, or forward.

    A posterior pelvic tilt puts a great deal of tension on the lower back, much as an anterior pelvic tilt causes the lower back to arch inward. One kind of pain that might ultimately come from this is sciatica or pain that runs down the back of one’s thigh or glute.

    Shortened tendons around the pelvic bones, weak and tight leg muscles

    • imbalanced properly
    • bad positioning
    • Decreased Thoracic Lordosis
    • Lower Back Pain
    • Knee pain or hip pain combined

    Any of these factors may result in a posterior pelvic tilt. This is the moment when your upper body turns back and your glutes tuck inward.

    Posterior Pelvic Tilt leads to:

    • Your whole posture is impacted because your neck and upper back are forced forward in an attempt to correct the improper pelvic position.
    • A forward head posture and a more rounded shoulder, often known as thoracic kyphosis, are common symptoms of posterior pelvic tilt.
    • The compressive strain on the mid and lower back will gradually rise due to posterior tilt. Due to the unequal loading of the spine caused by this increased compression stress, problems such as disk prolapse or disk herniation may result.
    • In addition, the lumbar curve’s rounding places undue strain on your spine and raises the risk of hip, back, and leg pain. It may even have an impact on your confidence levels and how well your clothing fits you.

    How to Diagnose Posterior Pelvic Tilt?

    Your physician will examine you physically and keep an eye on you.

    Thomas test

    Take a seat on a table. The legs must be hanging off the table at the knees.
    Raise one leg to your chest while bending at the knees. If the pelvis is not positioned correctly, the back of the resting leg will lift off the table.
    If the leg in rest needs to be turned or stretched in any manner to keep it from rising off the table, a pelvic tilt is recommended.

    Negative Test: When your thigh touches the table with its back, there should be no gap between it and the surface.
    No Space.

    Positive Test: If there is remaining space between your thigh muscle and the table even after straightening your leg, you may have posterior pelvic tilt.
    Space.

    Investigation: 

    x-ray
    The pelvic tilt is one of the elements that determines the unique pelvic orientation. Anteroposterior pelvic radiographs are used to measure the distance between the mid-section of the sacrococcygeal joint and the upper border of the symphysis pubis.

    Treatment of Posterior Pelvic Tilt:

    After starting symptomatic medical treatment and using a mix of physical therapy and posture-correcting exercises, surgery is the final recommended course of action in cases with severe symptoms.

    Medical Treatment:

    Pain can be reduced by anti-inflammatory medications.
    Over-the-counter pain relievers include acetaminophen (Tylenol), ibuprofen (Advil, Motrin IB), and naproxen (Aleve).

    Physical Therapy Treatment of Posterior Pelvic Tilt:

    Correcting Posterior Pelvic Tilt via Stretching and Strengthening.

    The ideal strategy for treating a posterior pelvic tilt is to balance the muscles that are responsible for the pelvis’ abnormal alignment. To restore the flexibility of too-tight muscles, stretching is required. On the other hand, weak muscles require strengthening.

    Stretches/Releases to Correct Posterior Pelvic Tilt:

    Rebalancing the muscles that are causing the abnormal pelvic position is the most effective technique to repair a posterior pelvic tilt. Restoring the flexibility of muscles that have been too tight requires stretching.

    The primary regions in need of stretching are the hamstrings and stomach/abs. Strengthening is mostly needed in the lower and middle back, as well as the hip flexors and quadriceps.

    Stretches and Releases to Adjust Pelvic Posterior Slant:

    • Static hamstring stretch
    standing-hamstring-stretch
    standing hamstring stretch

    Extended durations of standing and sitting can lead to a hamstring strain, which can exacerbate unfavorable postures such as posterior pelvic tilt. Stretching will cause your hamstrings to lengthen, which will support your body in maintaining a more neutral pelvic position.

    To execute, sit down in a hard chair. Step forward and stretch your left leg. Bend forward and reach for your toes until you feel a slight stretch. Slowly return to the starting position. Repeat on your right side. Try to complete 3 repetitions on each side.

    Take caution: If you extend the stretch too far, you risk pulling a muscle in your back. Take care not to go overboard. Try transferring this exercise on the floor if sitting in a chair is too challenging for you.

    • Abdominal Press Up (Cobra Pose)
    cobra-pose
    cobra pose

    Bhujangasana
    Your constricted abdominal muscles will extend and become more pliable with the aid of this stretch, which will enable a more neutral pelvic posture.

    How to do it:

    • Start by resting on the ground with your hands flat at shoulder level. – Gradually press your hands up to lift your shoulder off the floor until you feel a little stretch.
    • Exhale as you press further into the lumbar extension to extend your range of motion.
    • Aim for five times through.
    supine-piriformis-stretch
    supine piriformis stretch

    An external rotator of the hip, the piriformis muscle can tense up after extended periods of sitting. Stretching this muscle will enable the hip to move normally, which aids in achieving a neutral pelvic posture.

    How to do it:

    • Put your right ankle over your left knee to start. Then, grab your left knee and draw it in toward your chest for a few seconds, until your right gluteal muscles stretch. Repeat on the other side. Try to complete three repetitions on each side.
    • Doorway Stretch (Bilateral Pectoral stretch)
    Doorway Pectoral Stretch
    Doorway Pectoral Stretch

    Since sitting makes the abs and chest extremely tight, the doorway stretch will help release tension in those areas.

    • The correct way to accomplish this is to line up your hands and elbows with a doorframe.
    • Gently push open the door until you feel a stretch.
    • Take a few seconds to hold this last position, then take a few more to get back to the beginning.
    • Do this three times.
    • Glutes Release

    Prolonged sitting can cause your glutes, or buttocks, to become extremely tight. By releasing tension in that area, massage therapy can assist the pelvis return to its proper position.

    How to carry it out:

    • Sit on the ground with your knees bent in the beginning.
    • Place a massage ball beneath your right buttock and lay your hands behind your back on the floor.
    • Raise your right leg off the floor and roll on the ball in tiny circles, paying special attention to the sore spots.
    • Use your left side for this workout.

    Strengthening exercises for Posterior pelvic tilt

    • Lunges:

    Your quadriceps will get stronger with lunges. It may be possible to rectify a posterior pelvic tilt by strengthening these muscles.
    Start by placing your feet together; – Step your left leg out in front of you; – Bend your left leg to a 90-degree angle (your right knee should contact the floor at this point)  To return to the beginning position, push up on your left leg. Repeat on your right. Try to complete three sets of ten lunges on each side.  When in the lunge position, make sure your knee doesn’t go past your toe because this puts more strain on your knee.

    • Superman:
    Superman-Move-Exercise
    Superman Exercise

    Superman assists in correcting improper pelvic position by strengthening your lower back and glutes, which are linked to your pelvis.

    The exercise may be performed as follows:
    Lay on your stomach on the floor with your arms extended in front of you; – Slowly raise your chest off the ground and attempt to hold this posture for 30 seconds; – Slowly return your body to the beginning position; – Try to complete three repetitions.

    • Standing Hip Flexion
    Standing-hip-flexion
    Standing hip flexion

    hip flexor
    In addition to helping to rectify the muscular imbalance associated with posterior pelvic tilt, this exercise also serves to strengthen the hip flexors and improve your balance.

    How to carry out:

    • Starting with your feet slightly apart and your hands placed on your hips (you can use the back of a chair for support if necessary), shift your weight to your left leg and lift it slowly, bending your right leg to a 90-degree angle. Lift your knee as high as you can, aiming to have it parallel to the floor or slightly higher. As you progressively drop your leg without touching the floor, hold the final posture for three seconds. Try to perform ten repetitions on each side.
    • In addition to helping to address the muscular imbalance associated with a pelvic tilt, this exercise also serves to strengthen the hip flexors and improve your balance.

    How to do it:

    • Start with your feet slightly apart and your hands on your hips (you can use a chair’s back for support if necessary). Transfer your weight to your left leg, bending it slightly at the knee.
    • Lift your right leg slowly, bending the knee to a ninety-degree angle. – Lift your knee as high as you can, aiming to place it either slightly above or parallel to the floor. Maintain the end posture for three seconds before lowering your leg gradually without touching the ground. Try to finish ten reps on each side.
    • Leg Raises

    Leg raises assist in strengthening your hip flexors, which become incredibly weak due to the pelvic posterior tilt.

    How to do it:

    • Place yourself lying on the ground, legs extended straight.
    • Contract your core muscles to slowly raise your legs off the ground while maintaining your arms straight at your sides.
    • Return your legs to the beginning position slowly.
    • Rowing
    Prone rowing exercise
    Prone rowing exercise

    All of the main back muscles, such as the rhomboids and trapezius, are strengthened by this exercise, which will aid in regaining your shoulders.

    How to carry it out:

    • To start, wrap your Theraband around a stable piece of furniture (you may wrap it around your feet if you don’t have any solid furniture).
    • To assume the beginning posture, hold the ends of the Theraband with your palms facing each other and stretch your arms straight.
      Keep your arms close to your body and avoid bending forward or backward. Pull the ends of the Theraband towards you as you bend your elbows and slide them slightly behind your chest by pressing your shoulder blades together.
      As soon as your hands touch your torso, stop tugging.
    • Maintain this posture for a little while before straightening your arms to go back to the beginning position.
      Try to complete three sets of ten reps.
    • Foam rolling for calves (relaxation)
    • Self-myofascial release, commonly referred to as foam rolling, is comparable to receiving massage therapy. This stretch is excellent for releasing tenseness in several body parts following an exercise. Sports goods retailers on the internet carry foam rollers. The fascia, or connective tissue beneath the skin, is broken up by foam rolling, which is essential for healthy mobility. While foam rolling may be applied to any part of the body, focusing on your legs can help reduce posterior pelvic tilt.
      Lying on your side, place the foam roller under your calf area.
    • Slowly move the foam roller up your calf, focusing on any “hot spot.” This area feels tighter or more tense than usual.
    • Change legs and repeat the motion.
      For better pelvic concentration and benefits, roll the foam roller up the back of your leg while lying on your back.
    • Roll the foam toward your glutes and up your hamstrings. Select a warm spot to sit and focus your rolling there. Change legs and repeat.
    • In the end, shift the foam roller to your back and roll it up, pausing to concentrate on any particularly tense spots.
    • Foam rolling can feel soothing and act as a kind of massage, even if you could occasionally experience pain. You may also use foam rolling around your middle back and give yourself a massage on your spine.
    • The glute bridge
    BRIDGE
    BRIDGE
    • This exercise targets the muscles in the buttocks and hamstrings.
    • The feet should be hip-width apart.
    • Tighten your abdominal muscles so that your back is flat on the ground. Throughout the workout, keep the muscles in your abdomen (stomach) active.
    • Breathe out and lift your hips off the ground, aligning your upper body and thighs in a straight line.
      Taking a breath, slowly lower your body to the floor.
      Ten to twenty times, repeat.
    • The plank
    PLANK
    PLANK

    Even though it can appear difficult at first, the patient should attempt to maintain the plank position for as long as they can, up to one minute.
    The plank exercise works the muscles in the back and abdomen.
    Place your face down on a workout mat.

    • Place your hands on the mat, palms down.
    • Tighten the muscles in your abdomen and thighs.
    • After lowering your upper body and thighs to the floor, gradually lift them into a push-up position. Keep your body rigid and upright.
    • Make sure the entire exercise makes use of the stomach (or abdominal) muscles.
    • For as long as you can, try to stay in the plank position—up to 60 seconds. Lower your body to the ground gently.


    Modifications to Sleeping

    • To help you sleep with appropriate posture:
    • Keep away from sleeping on your stomach.
      Place a little pillow below your knees if you prefer to sleep on your back.
    • A pillow should be placed between your knees if you are a side sleeper.
      Put a little cushion or wrapped towel beneath your back’s arch if you sleep on your back.
      Verify that the cushion and mattress suit the natural curve of your spine.

    Posterior Pelvic Tilt While Sitting

    • Whether you sit all day at work or just a lot of it, it’s important to make sure that:
    • You are sat on a posture-supporting chair.
      Your choice of workstation or table should enable you to sit upright and prevent slouching.
    • You may either utilize an integrated lumbar support chair or use a pillow for this type of assistance.
      You make the effort to move around and stretch, especially if you spend a lot of time seated.

    Complications of Posterior Pelvic Tilt:

    Pressure is increased on the lower back bones by a posterior pelvic tilt (reliable source). Not only may this pressure cause tension in the muscles of the neck, but it can also lead to muscular tiredness.

    • lower back pain.
    • Hip and knee inward rotation.
    • Hip Pain
    • knee pain.
    • Sciatica is caused by strain on the hip flexors.

    Prevention

    Keep away from lengthy stretches of sitting. People who work at desks or in other occupations where they must sit for extended periods of time should Take regular breaks to walk or stretch.
    Take part in regular exercise. It’s crucial to have a comfortable, healthy workstation with the ideal desk, screen, and chairs.

    Conclusion

    An abnormal posture in which the pelvis is inclined backward is called a posterior pelvic tilt. The primary cause of it is a muscular imbalance that affects your body, activities, everyday posture, and work habits. The imbalance is between the muscles in your legs and core.

    The range of symptoms, which include low back pain, stiffness in the hamstring and abdominal muscles, and slouched posture, depends on the severity. Exercises that target weak muscles and stretch tight muscles are the mainstay of treatment, along with changes to one’s sleeping position and sitting posture.

    FAQs

    How can posterior tilt be strengthened?

    The Best Stretches & Exercises to Treat Posterior Pelvic Tilt
    Correcting Posterior Pelvic Tilt via Stretching and Strengthening
    Stretch your hamstrings while seated. Prolonged sitting and standing can stretch the hamstrings, which can cause bad posture, including a posterior tilt of the pelvis.
    Leg raises glute bridge, lunges, planks, dead bug (alternating sides), and abdominal press up (cobra pose).

    Why is an anterior pelvic tilt harmful?

    An excessive inward or outward curvature of the lower back might result from an anterior or posterior pelvic tilt, which modifies the way the pelvic muscles pull on your spine. Your spine is under excessive pressure because of this bend. You can therefore feel lower back aches and pains. overextended hamstring muscles.

    How can one adjust their pelvis?

    Squats: Maintain a neutral pelvis while lowering yourself into a squat by engaging your core and standing with your feet shoulder-width apart. Contract your glutes, being careful to maintain your pelvis in place, to push your pelvis forward, and to stand back up. Make fifteen to twenty of these.

    Does yoga correct pelvic tilt?

    Lunges and warrior postures are two excellent yoga poses and stretches that work the hip flexors. In order to get the pelvic bones to sit more neutrally rather than lean forward, we may also perform some balance exercises

    How can pelvic tilt be quickly healed?

    According to a 2014 study, employing a resistance band and doing a glute bridge with isometric hip abduction greatly reduced anterior pelvic tilt. For this exercise, you will lie on your back with your legs bent. Just above the knees, a resistance band is wrapped around the lower thighs.

    Does posterior pelvic tilt improve with squats?

    Pelvic tilt and squats: posterior Pelvic tilt and butt winking…
    Yes, it could be helpful in certain cases, but there are other things to think about as well, such as the general form of your squat technique and the previously mentioned proper motor control. When performing squats and posterior pelvic tilt, keep all of this in mind.

    How can a posterior pelvic tilt affect sleep?

    Sleeping Position Adjustments
    Keep away from sleeping on your stomach.
    A little cushion should be placed behind your knees if you plan to sleep on your back.
    If you are a side sleeper, place a cushion between your knees.
    If you are a back sleeper, position a little cushion or wrapped towel under your back’s arch.

    Which muscles in the posterior pelvic tilt are weak?

    Your posterior pelvic tilt [PPT] might have three probable causes: weak hip flexors and lower back muscles, stiffness in the hamstring muscle and muscles in the abdomen, or possibly a mix of all three.

    Is pelvic tilt reversible with physical therapy?

    Physical treatment, which mostly consists of muscle-strengthening exercises, stretches, and massages, may usually cure a pelvic tilt. Shoe inserts could be advised in cases when one leg is longer than the other to enable more comfortable mobility. To control pain, medications may also be used.

    Can a posterior pelvic tilt be corrected by a chiropractor?

    Because they address the underlying cause of pelvic tilt rather than merely its symptoms, chiropractic adjustments are quite helpful in treating the condition. The most common cause of pelvic tilt is a misalignment of the pelvis and spine, which may be corrected with a chiropractic adjustment.

    Can the posterior pelvic tilt be corrected?

    Five Exercises to Address Posterior Pelvic Tilt
    One way to treat a posterior pelvic tilt is through exercise. Discover five exercises that will help strengthen your core and legs to aid with posture.

    What is normal versus posterior pelvic tilt?

    Pelvic tilt in the posterior vs the anterior
    In relation to appropriate spinal curvature, the pelvis slides forward (called anterior pelvic tilt) and backward (called posterior pelvic tilt). Increased spinal curvature relative to the normal lumbar curvature—the S-shaped spine—occurs in anterior pelvic tilt, whereas posterior pelvic tilt results in a decrease in the lumbar spine’s curvature.

    What sensation does a posterior pelvic tilt have?

    A posterior pelvic tilt causes your lower back to curve abnormally outward by altering the pelvic muscle’s grip on your spine. Your spine experiences abnormal pressure as a result. As a result, you could experience hip, knee, and lower back pain in addition to a heaviness that extends from the lower back to the back of the thigh.

    How quickly can posterior pelvic tilt be corrected?

    Under the supervision of a physical therapist, quickly correct the posterior pelvic tilt by doing the following exercises: strengthening exercises for the hip flexors and back extensorsStretching the Tight Abdominal and Hamstring MusclesUse hot and cold packs twice a day if there is pain. Keep away from activities and exercises that hurt. It’s important to sit, stand, and sleep in the right positions.

    References

    • Patel, D. (2022, July 14). Posterior Pelvic Tilt – Cause, Symptoms, Treatment, Exercise. Samarpan Physiotherapy Clinic. https://samarpanphysioclinic.com/posterior-pelvic-tilt/
    • Physiotherapist, N. P. (2023, December 25). Posterior Pelvic Tilt: Cause, Symptom, Treatment, Exercise. Mobile Physiotherapy Clinic. https://mobilephysiotherapyclinic.in/posterior-pelvic-tilt-exercise/
  • Hamstring Muscles

    Hamstring Muscles

    Introduction

    The hamstring is a group of 3 muscles located at the back of the thigh. These muscles include the biceps femoris, semitendinosus, and semimembranosus. Together, they play a crucial role in various movements of the hip and knee, such as walking, running, and jumping.

    The hamstrings are a group of three muscles that primarily help to flex the knee. The hamstrings consist of three muscles:

    The muscles connect two joints and have long proximal and distal tendons, resulting in long muscle-tendon junctions (MTJ). MTJs extend into muscle bellies, overlap, and allow forces to be transmitted and dissipated as muscles contract and relax.

    The hamstrings are a group of muscles located in the thigh’s posterior compartment. They work together to extend at the hips and flex at the knee.

    The sciatic nerve (L4-S3) innervates these muscles, and the inferior gluteal artery and perforating branches of the deep femoral artery supply them with blood vessels.

    The hamstring muscles are prone to injury, particularly in athletes who run and sprint. These muscles are put under a lot of strain when you suddenly stop, slow down, or change direction. Extending your leg while running can also overstretch these muscles. It’s common to refer to a hamstring injury as a “pulled hamstring.”

    Anatomy of hamstring muscles

    The muscles in the thigh’s posterior compartment are the biceps femoris, semitendinosus, and semimembranosus.

    The hamstring portion of the adductor magnus functions similarly to these muscles but is located in the medial thigh.

    Biceps Femoris.

    The biceps femoris has two heads (long and short) and is the most lateral muscle in the posterior thigh. The common tendon of the two heads can be palpated laterally in the popliteal fossa (posterior knee region).

    • Origin:
      The long head develops from the superior medial quadrant of the posterior surface of the ischial tuberosity.
      The femur’s middle third linea aspect, lateral supracondylar ridge, is where the short head originates.
    • Insertion:
      It inserts into the fibular head and extends to the lateral collateral ligament and lateral tibial condyle.
    • The main action is flexion of the knee. It also extends the thigh at the hip and rotates laterally at the hip and knee joints.
    • Innervation: The tibial part of the sciatic nerve innervates the long head, while the common fibular part innervates the short head.

    Semitendinosus

    The semitendinosus muscle is primarily made up of tendons. It is located on the medial aspect of the posterior thigh, superficial to the semimembranosus.

    • Origin: It is derived from the superior medial quadrant and posterior surface of the ischial tuberosity.
    • Insertion: It inserts into the superior and medial tibial shafts.
    • Leg flexion at the knee joint is the action. Thigh extension at the hip joint. At the hip joint, the thigh rotates medially, as does the leg at the knee joint.
    • The sciatic nerve innervates the tibia.

    Semimembranosus

    The semimembranosus muscle is flat and broad. It is situated deep to the semitendinosus on the medial aspect of the posterior thigh.

    • Origins: It originates from the superior lateral quadrant of the posterior surface ischial tuberosity.
    • Insertion: It attaches to the posterior surface of the medial tibial condyle.
    • Leg flexion at the knee joint is one of the actions. Thigh extension at the hip joint. At the hip joint, the thigh rotates medially, as does the leg at the knee joint.
    • The sciatic nerve innervates the tibia.

    Embryology

    A significant portion of lower extremity development takes place between weeks 4 and 8 of embryogenesis. The embryonic mesoderm gives rise to all skeletal muscle tissue, including the hamstrings. The initial limb bud develops from the lateral plate mesoderm.

    Mesodermal cells migrate from the somites in the early embryonic phase and differentiate into myoblasts, which replicate and coalesce to form functional muscle tissue. This is due to a complex array of physiological signals that govern the subsequent organisation and symmetry of the structures formed, including fibroblast growth factors, sonic hedgehog, and Wnt7a.

    Anatomical variations

    Surgeons must be aware of anatomical variations in the hamstring muscle, even if they are rare. Except for the small head of the biceps femoris, the hamstring muscle group is typically formed by a joint muscular tendon that originates from the ischial tuberosity.

    It’s worth noting that some accounts describe variations in which the long head of the biceps femoris and the semitendinosus appear to have distinct tendinous origins. A third head of the biceps femoris and an abnormal muscle inserted into the semimembranosus were discovered, according to a 2013 report.

    A patient with a bilateral lack of semimembranosus muscles has also been documented. This discovery was made by chance during an MRI after the patient complained about knee pain after a fall. Given that hamstring autografts are a popular option for ACL restoration, this finding may be relevant in the context of ACL repair, even though the study did not specify whether or not the patient had experienced symptoms as a result of this unusual finding before his presentation.

    Common peroneal nerve entrapment neuropathy most commonly affects the fibular head and neck. A 2018 study discovered that variations in the short head of the biceps femoris are associated with common peroneal neuropathy. The gastrocnemius and the short head of the biceps femoris were separated by a 4.4 cm tunnel containing the common peroneal nerve.

    Function of the Hamstring Muscle Complex

    The hamstrings are muscles that extend the hips and flex the knees. The hamstrings play an important role in the complex gait cycle of walking, which includes kinetic energy absorption and knee and hip joint protection. During the swing phase of walking, the hamstrings slow the forward motion of the tibia. The contraction of the hamstring and the contraction of the quadriceps, the hamstring’s antagonist muscle, interact in a complex way.

    Blood Supply

    The vascular supply to the hamstring muscle complex comes from the perforating branches of the deep femoral artery, also known as the profunda femoris. A branch of the femoral artery is the profunda femoris artery. The inguinal ligament separates the external iliac and femoral arteries.

    In general, the thigh’s deep veins are named after the major arteries they follow. The femoral vein is responsible for the majority of the thigh’s venous drainage. It travels alongside the femoral artery and receives additional venous drainage from the profunda femoris vein. The femoral vein, like the femoral artery, joins the external iliac vein near the inguinal ligament.

    Common injuries of hamstring muscles

    Hamstring muscle injuries are common among athletes who run at high speeds. This includes sprinters, as well as soccer, basketball, and football players. They can also occur in skiers, skaters, dancers, and other athletes who frequently bend their knees in deep squat positions.

    You can also get hamstring muscle injuries if you:

    • Are a young athlete who is still developing.
    • Are over the age of 40.
    • Have previously suffered a hamstring injury.
    • I have hamstring muscle fatigue.
    • Have weak or tight hamstrings or quadriceps (the muscles in the front of your thighs).
    • Do not warm up and stretch properly before starting an activity.

    Hamstring strains

    A hamstring strain is a pull or tear in the muscle fibres. Muscle overload is the most common cause of strain. A strain can affect the tissue in the muscle’s belly or where it connects to the tendons.

    A hamstring muscle strain is caused by overstretched muscle fibres. Hamstring strains can vary from mild to severe.

    • Grade 1: The muscles overstretch but do not tear. You may experience mild hamstring muscle pain or swelling, but you can usually continue to use your leg.
    • Grade 2: One or more hamstring muscles are partially torn. You may be unable to use your leg due to pain or swelling.
    • Grade 3: Muscle tissue tears completely away from the tendon or bone. The tendon can even pull a piece of bone away (avulsion). The swelling and pain are severe, and you may have difficulty moving your leg.

    Risk Factors

    Several factors can increase the likelihood of having a muscle strain, including:

    • Muscle tightness. Tight muscles are susceptible to strain. Athletes should maintain a year-round stretching routine.
    • Muscle imbalance. A strain may arise from an imbalance where one muscle group is noticeably stronger than the other. This is frequently seen with the hamstring muscles. The quadriceps muscles in the front of the thigh are usually stronger. The hamstrings may tyre out during high-speed exercises more quickly than the quadriceps. This fatigue can result in a strain.
    • Poor conditioning. If your muscles are weak, they are less able to withstand the stress of exercise and are more prone to injury.
    • Muscle fatigue. Fatigue reduces muscle’s energy-absorbing capabilities, making them more vulnerable to injury.

    Choice of activity. A hamstring strain can affect anyone, but those who are particularly vulnerable include:

    • Athletes who play sports such as football, soccer and basketball
    • Runners or Sprinters
    • Dancers
    • Older athletes whose exercise programme primarily involves walking
    • Adolescent athletes are still growing.

    Hamstring strains are more common in adolescents because bones and muscles do not develop at the same rate. A child’s bones may grow more quickly than their muscles during a growth spurt. The growing bone causes the muscle to tighten. A sudden jump, stretch, or impact can tear the muscle’s connection to the bone.

    Symptoms of a hamstring muscle injury

    Hamstring muscle injuries may result in:

    • Hamstring muscle pain is a common issue, often resulting from strains or tears in the muscles located at the back of the thigh.
    • An unusual lump or indentation behind the thigh.
    • Discoloration or bruises on the rear leg.
    • Burning or stinging behind the thigh, also known as gluteal sciatica.
    • Difficulty supporting weight on your leg.
    • The hamstring muscles are weak.
    • The inability to bend your knee may result in walking with a stiff, straight leg.
    • A popping sensation on the back of the thigh.
    • a sharp, unexpected pain in your thigh’s back.
    • Swelling immediately after the injury.

    Examination

    Patient History and Physical Exam

    • People with hamstring strains frequently seek medical attention after experiencing a sudden pain in the back of their thighs while exercising.
    • During the physical exam, your doctor will inquire about the injury and examine your thigh for tenderness or bruising. He or she will palpate, or press, the back of your thigh to determine whether there is pain, weakness, swelling, or a more serious muscle injury.

    Imaging tests

    The following imaging tests can help your doctor confirm your diagnosis:

    • X-rays. An X-ray can help your doctor determine whether you have a hamstring tendon avulsion. This occurs when an injured tendon pulls away a small piece of bone.
    • Magnetic resonance imaging (MRI). This research can produce more accurate images of soft tissues such as the hamstring muscles. It can help your doctor assess the severity of your injury.

    Treatment

    The kind of injury, its severity, as well as your requirements and expectations, will all influence the course of treatment for hamstring strains.

    The goal of any treatment, whether nonsurgical or surgical, is to allow you to return to all of your favourite activities. Following your doctor’s treatment plan will help you recover faster and prevent future problems.

    Nonsurgical Treatment.

    The majority of hamstring strains heal quickly and without surgery.

    RICE. The RICE protocol is effective for the majority of sports-related injuries.

    • Rest. Take a break from the activity that has caused the strain. Your doctor may advise you to use crutches to avoid putting weight on your leg.
    • Ice. Use cold packs for 20-minute intervals several times per day.
    • Compression. Wear an elastic compression bandage to help prevent swelling and blood loss.
    • Elevation. Recline and elevate your leg above your heart while resting to reduce swelling.

    Immobilisation. Your doctor may advise you to wear a knee splint for a short time. This will keep your leg in a neutral position while it heals.

    Physical therapy. Physical therapy can start after the initial period of pain and swelling has passed. Specific exercises can help restore range of motion and strength.

    A therapy programme prioritises flexibility. Gentle stretches will help you improve your range of motion. As your recovery progresses, you will gradually incorporate strengthening exercises into your routine. Your doctor will advise you on when it is safe to return to sports activity.

    Surgical Treatment

    Surgery is most commonly used for tendon avulsion injuries, in which the tendon has completely separated from the bone. Tears from the pelvis (proximal tendon avulsions) occur more frequently than tears from the shinbone.

    Tears in the muscle belly are rarely repaired surgically.

    Procedure. To repair a tendon avulsion, your surgeon will pull the hamstring tendon back into place and remove any scar tissue. The tendon is then reattached to the bone with small devices known as anchors.

    Rehabilitation. To protect the repair, you must keep your leg elevated after surgery. In addition to crutches, you may need a brace to keep your hamstring relaxed. The length of time you will need these aids will be determined by the nature of your injury.

    The physical therapy programme will begin with gentle stretches to increase flexibility and range of motion. Strengthening exercises will be gradually introduced into your plan.

    Due to the severity of the injury, rehabilitation for proximal hamstring reattachment usually takes at least 6 months. Distal hamstring reattachments require about three months of rehabilitation before returning to athletic activities. You can find out when it’s safe to resume sports from your doctor.

    Hamstring Strengthening Exercises

    Stair climbing and descending, walking, and running are activities that enhance the function of the hamstring muscles. Hamstring exercises can benefit anyone, but they are especially beneficial for people who run or cycle, both of which use the quadriceps. Quadriceps development must be balanced with cross-training that includes adequate hamstring strength and conditioning.

    Various isolation and compound hamstring exercises can also be used in rehabilitation or bodybuilding. Knee flexion and hip extension exercises are commonly used to strengthen the hamstrings.7 Here are some fundamental moves to practice.

    • Basic bridges: This simple exercise isolates and strengthens the hamstrings and gluteus muscles. Press your feet into the floor and contract your glutes to activate your hamstrings and lift your hips.
    • Single-leg bridges, like basic bridges, target the hamstrings and glutes while also incorporating leg lifts to promote core stability. Maintain hip and pelvic lift by activating your glutes and hamstrings rather than your back muscles.
    • Leg curls: Also known as hamstring curls, these exercises are commonly performed with gym equipment to strengthen the hamstrings and calves. They can also be done with an exercise ball: lie on your back, place your heels on the ball, and then roll the ball in towards you while bending your knees and lifting your hips.
    • Squats: This classic exercise can be done with or without weights to strengthen the hamstrings, glutes, and quadriceps. As you lower yourself into a squat, keep your back straight and your head upright.
    • Walking lunges: This stability exercise works the hamstrings, quadriceps, glutes, calves, and core muscles while challenging your balance. As you take forward and backward steps, keep your torso upright.

    Basic stretches for the hamstring

    Hamstring flexibility is important for runners because it can help prevent injury and delayed onset muscle soreness (DOMS) following exercise.8 Tight hamstrings may limit your ability to straighten your knee. You may also feel a cramp at the back of your knee.

    Hamstring stretches can be worked into almost any regular stretching and flexibility routine. The hamstring stretches listed below can be done daily to improve flexibility, promote recovery, and prevent injury.

    Seated Stretch

    • Sit on an exercise mat with both legs extended in front of you, and feel your sitting bones make contact with the floor.
    • Bend one knee and slide your foot in towards the opposite knee, flat on the floor.
    • Hinge at your hips and bring your hands to the toes of the straightened leg. If the knee is very tight, you can bend it slightly.
    • Stretch for a duration of 15 to 30 seconds.
    • Switch sides.

    Supine Stretch

    • Lie on your back on an exercise mat, knees bent, feet about hip-distance apart.
    • Lift one leg towards the ceiling while keeping the spine neutral.
    • Reach behind the back of the thigh and gently pull the leg closer. Optional: Allowing the knee to bend slightly will increase the range of motion.
    • Hold for 15–30 seconds.
    • Lower the leg, then switch sides.

    Standing Stretch

    • Begin standing tall and upright, with your feet about hip distance apart.
    • Take a natural step forward with your heel, keeping your toes lifted.
    • Place your hands on your hips and sit back slightly, then hinge forward.
    • Allow your spine to naturally round forward as you reach for the elevated toes.
    • Allow your knees to soften as you move your seat back a little more and lower your chin to your chest.
    • Hold for 15–30 seconds.
    • Return your hands to your hips to stand up, and step your feet back together. Switch sides.

    Summary

    Hamstrings are voluntary skeletal muscles in the back of the thigh that help to flex the knee and are used in various leg exercises. They consist of three muscles: Semitendinosus, Semitendinosus, and Biceps Femoris. These muscles work together to extend at the hips and flex at the knee and are innervated by the sciatic nerve. Hamstring injuries are common among athletes who run at high speeds, such as sprinters, soccer, basketball, and football players. They can also occur in skiers, skaters, dancers, and other athletes who frequently bend their knees in deep squat positions.

    Hamstring strains are caused by muscle overload and can range from mild to severe. Risk factors for hamstring strains include muscle tightness, muscle imbalance, poor conditioning, muscle fatigue, and choice of activity. Hamstring strains are more common in athletes who play sports such as football, soccer, basketball, runners, dancers, older athletes, and adolescents.

    Hamstring muscle injuries can cause unusual lumps, bruises, burning, difficulty supporting weight, weak hamstring muscles, and difficulty bending the knee. Treatment options include non-invasive therapies like Rest, Ice, Compression, Elevation (RICE), immobilization, and physical therapy.

    Hamstring strengthening exercises, such as stair climbing, walking, and running, can enhance the function of the hamstring muscles. These exercises are especially beneficial for runners and cyclists, as they use the quadriceps. Hamstring flexibility is crucial for runners, as tight hamstrings may limit the ability to straighten the knee and cause cramps. Hamstring stretches can be done daily to improve flexibility, promote recovery, and prevent injury.

    FAQs

    What are the hamstrings used for?

    The hamstrings are muscles that extend the hips and flex the knees. The hamstrings play an important role in the complex gait cycle of walking, which includes kinetic energy absorption and knee and hip joint protection.

    Why are hamstrings the most important?

    The hamstring muscles facilitate knee bending, leg extension, walking, and running. However, these muscles are very prone to injury, particularly if you play football or soccer, or engage in other activities that require frequent stops and starts.

    Why are the hamstrings so weak?

    There are several reasons why hamstring weakness is so prevalent. First and foremost, the hamstrings are a small muscle group that is easily overlooked when it comes to strength training. Many athletes prioritise larger muscle groups, such as the quadriceps and glutes, over the hamstrings.

    What is the most common hamstring strain?

    Hamstring injuries are common in people who participate in sports that involve sprinting with sudden stops and starts. Soccer, basketball, football, and tennis are some examples. Hamstring injuries can affect both runners and dancers.

    What is the blood supply to the hamstrings?

    These muscles are innervated by the sciatic nerve (L4-S3) and receive arterial supply from the inferior gluteal artery and perforating branches of the deep femoral artery.

    How many muscles make up a hamstring?

    The hamstring muscle complex, which consists of three individual muscles, is located in the thigh’s posterior compartment. Together, they play an important role in human activities ranging from standing to explosive actions like sprinting and jumping.

    What are the symptoms of a hamstring strain?

    Other symptoms of a hamstring strain include sudden and severe pain during exercise, as well as a snapping or popping sensation.
    Walking, straightening one’s leg, or bending over can cause pain in the back of the thigh and lower buttocks.
    Tenderness.
    Bruising.

    References:

    • Hamstring Muscle Injuries – OrthoInfo – AAOS. (n.d.). https://orthoinfo.aaos.org/en/diseases–conditions/hamstring-muscle-injuries/
    • Professional, C. C. M. (n.d.). Hamstring Muscles. Cleveland Clinic. https://my.clevelandclinic.org/health/body/21904-hamstring-muscles
    • Hamstrings. (n.d.). Physiopedia. https://www.physio-pedia.com/Hamstrings
    • Muscles of the Posterior Thigh – Hamstrings – Damage – TeachMeAnatomy. (2024, February 11). TeachMeAnatomy. https://teachmeanatomy.info/lower-limb/muscles/thigh/hamstrings/
    • Cpt, A. A. (2024, January 23). Hamstring Muscles: Anatomy, Function, and Common Injuries. Verywell Health. https://www.verywellhealth.com/hamstring-muscles-296481
    • Hecht, M. (2019, August 27). Hamstring Muscles Anatomy, Injuries, and Training. Healthline. https://www.healthline.com/health/hamstring-muscles-anatomy-injury-and-training#the-3-muscles
    • Rogers, P. (2021, April 13). Hamstring Muscles: Anatomy, Injuries, and Exercises. Verywell Fit. https://www.verywellfit.com/hamstring-muscle-anatomy-and-stretches-3498372