Blog

  • Relaxation Techniques

    Relaxation Techniques

    Introduction

    Relaxation techniques are a diverse array of practices specifically designed to help individuals achieve a state of calm and balance, counteracting the effects of stress and anxiety.

    Stress can have physiological effects in addition to psychological ones, including elevated heart rate, palpitations, excessive perspiration, dyspnea, and tense muscles. Numerous varieties of relaxation techniques can be learned through self-help modalities or facilitated by a range of health experts.

    People who use relaxation techniques can manage their daily stress levels as well as stress caused by a variety of medical conditions, such as pain and heart disease.

    Benefits

    Reducing stress can provide several advantages, such as:

    • heart rate lowering
    • bringing down blood pressure
    • lowering the pace at which you breathe
    • Enhancing the process of digestion
    • preserving appropriate blood sugar levels
    • lowering the stress hormones’ level of activity
    • Increasing the blood supply to the main muscles
    • easing persistent pain and tense muscles
    • enhancing focus and mood
    • Increasing the caliber of sleep
    • reducing weariness
    • lowering irritability and aggravation
    • Gaining confidence to address problems

    Techniques

    Breathing exercises and muscular relaxation are popular relaxing methods.

    Techniques include:

    Deep breathing/diaphragmatic breathing and Box Breathing

    where your attention is brought back to your breathing. Box breathing is a technique for breathing exercises that can be used before, during, or after stressful situations to help people control their stress. Box breathing consists of four easy stages. The exercise’s title aims to assist the patient in visualizing a box with four equal sides. This is a flexible exercise that works well in many settings and doesn’t require a quiet one.

    • Step 1: Take four deep breaths in through your nose.
    • Step 2: Take a four-count breath hold.
    • Step Three: Exhale for four counts.
    • Step Four: Take a four-count breath hold.
    • Repeat.
    deep-breathing
    deep-breathing

    Note: To suit each person, the steps’ duration can be changed (e.g., 2 seconds instead of 4 seconds for each step).

    Guided Imagery

    A technique for relaxation aimed to help patients picture a peaceful setting. By diverting their attention from bothersome thoughts, patients might better manage their stress when they visualize peaceful environments. Using all five senses, the image creates a more profound state of relaxation. You can practice guided visualization alone or with the assistance of a story.

    Step 1: Take a comfortable seat or lie down. There should ideally be few outside distractions in the area.
    Step 2: Imagine yourself in a calm setting by either calling one up in your mind or envisioning one from memory (e.g., a day at the beach). Using the following indicators, elicit environmental elements through each of the five senses:

    • What observations do you have? (Take for example the water’s bright shade of blue.)
    • What sounds do you perceive? (For example, waves slamming against the beach)
    • Which smell are you picking up? ( As an example, fruity sunscreen scents)
    • What flavors do you experience? (As in the salt sea air)
    • How do you feel? eg. The warmth of the sun

    Step 3: Continue the imagery for as long as you can, keeping your attention on breathing deeply and slowly. Concentrate on the tranquility that comes from being in a soothing setting.

    Progressive Muscle Relaxation

    Involves tensing and relaxing muscles all over the body, with the relaxation phase being emphasized when the muscle is released. You can practice progressive muscle relaxation on your own or with a narrator’s assistance.

    • Step 1: Take a comfortable seat or lie down. There should ideally be few outside distractions in the area.
    • Step 2: Tighten the muscles in the feet and curl the toes under, starting at the feet. Hold for five seconds, then let go gradually for ten. Pay close attention to the sensation of relaxation and the release of tension as you release.
    • Step 3: Contract your lower leg muscles. Hold for five seconds, then let go gradually for ten. Pay close attention to the sensation of relaxation and the release of tension as you release.
    • Step Four: Contract your buttocks and hip muscles. Hold for five seconds, then let go gradually for ten. Pay close attention to the sensation of relaxation and the release of tension as you release.
    • Step 5: Contract your chest and stomach muscles. Hold for five seconds, then let go gradually for ten. Pay close attention to the sensation of relaxation and the release of tension as you release.
    • Step Six: Tense the muscles in the shoulders. Hold for five seconds, then let go gradually for ten. Pay close attention to the sensation of relaxation and the release of tension as you release.
    • Step Seven: Tense the muscles in the face (e.g., squeezing your eyes shut). Hold for five seconds, then let go gradually for ten. Pay close attention to the sensation of relaxation and the release of tension as you release.
    • Step 8: Make a fist by tensing the hand’s muscles. Hold for five seconds, then let go gradually for ten. Pay close attention to the sensation of relaxation and the release of tension as you release.

    Note: Throughout the exercise, be conscious of breathing deeply and slowly to avoid becoming too stiff and uncomfortable.

    Autogenic relaxation.

    Autogenic refers to something that originates within. You can reduce tension with this relaxation exercise by using both body awareness and visual images.

    You mentally repeat words or ideas that could aid in relaxation and reduce tenseness in your muscles. For example, you might picture a peaceful environment. After that, you can concentrate on calming down your breathing or lowering your pulse rate. Alternatively, you might experience several physical sensations, like individually relaxing each arm or leg.

    Body scan

    This method combines progressive muscular relaxation with breath awareness. Deep breathing for a few minutes is followed by concentrating on one muscle group or area of the body at a time and mentally releasing any tension you may be experiencing physically. You can raise your awareness of the mind-body connection link by doing a body scan.

    If you just had surgery that negatively affects your body image, or if you have other concerns linked to your body image, this strategy might not be as effective for you.

    Mindfulness meditation.

    In order to engage in this exercise, you need to choose a comfortable position, pay attention to your breathing, and keep your thoughts from wandering to the past or the future. This kind of meditation has become more and more popular in recent years. According to research, it might be beneficial for those who are depressed, anxious, or in pain.

    Yoga, tai chi, and Qigong.

    These three ancient disciplines consist of a series of postures or flowing movements combined with rhythmic breathing. These exercises’ physical components provide a mental focus that can help you stop your mind from racing. They can also help you become more flexible and balanced. However, these relaxing methods may be too difficult for you if you are not typically active, suffer from health issues, or have a severe or incapacitating disease. Consult your physician before beginning them.

    Types Of Yoga Postures To Reduce Stress

    Certain yoga poses, according to experts, are especially helpful for lowering stress. The most popular and simple poses to practice are:

    • Prasarita Padottanasana
    • Standing Forward Bend
    • Uttanasana, Easy Pose with Forward Bend
    • Rabbit pose (Sasangasana) and Thunderbolt pose (Vajrasana) combined with Eagle pose (Gadurasana)
    • Side Extension: Plow Pose (Halasana) and Corpse Pose (Savasana)

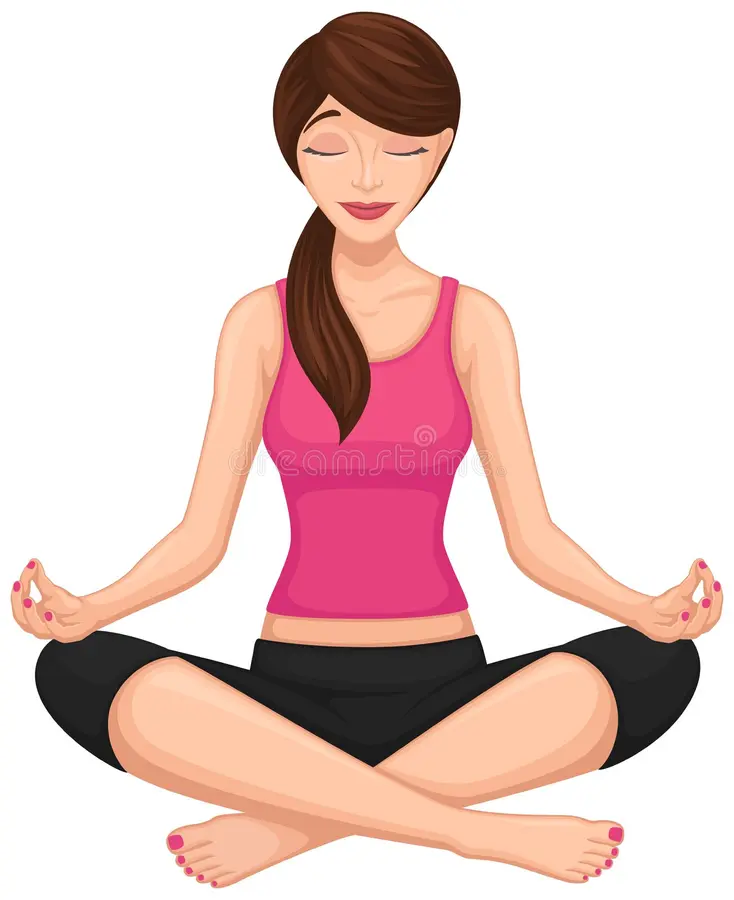
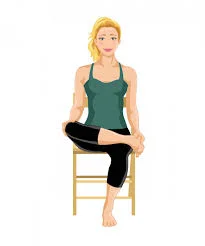
    Sukhasana (Easy Pose):

    Sukhasana
    Sukhasana
    • Sukhasana will assist elongate your hips and extend your spine. In addition, it aids in relaxation and lessens the impact of worry. This kind of yoga can also assist lessen physical and mental tiredness.
    • With your legs out in front of you and your back straight, take a seat.
    • With your left foot under your right knee and your right foot under your left knee, bend your knees.
    • Keep your knees and palms together.
    • Adjust your neck, spine, and head.
    • Keep your head straight and focus on your breathing.
    • After holding this posture for sixty seconds, switch up your crossed legs.

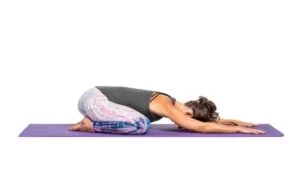
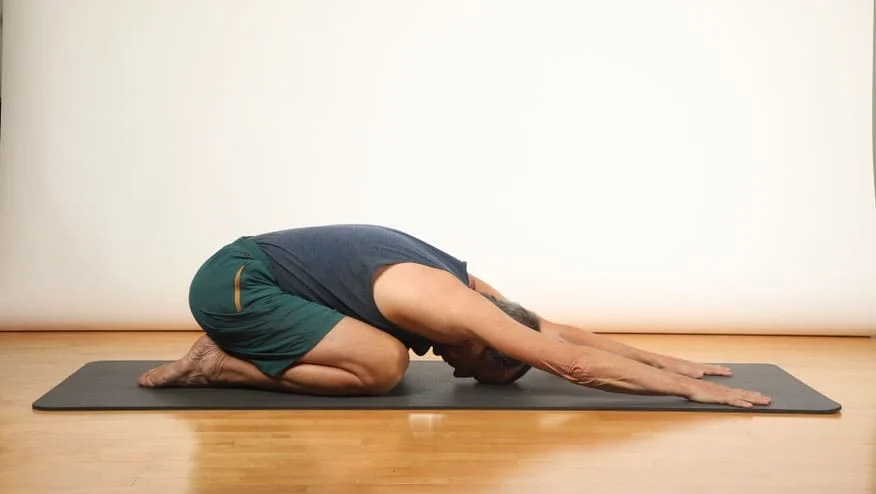
    Balasana (Child’s pose):

    Childs-Pose
    Childs Pose
    • This kind of yoga is beneficial to your nervous and lymphatic systems. It releases tension from the body and calms the mind while stretching your thighs, ankles, and hips.
    • On your knees, sit on your heels.
    • Bend forward to the point where your thighs and chest meet.
    • Extend your hands out in front of you.
    • Breathe deeply and hold this position as long as you can.

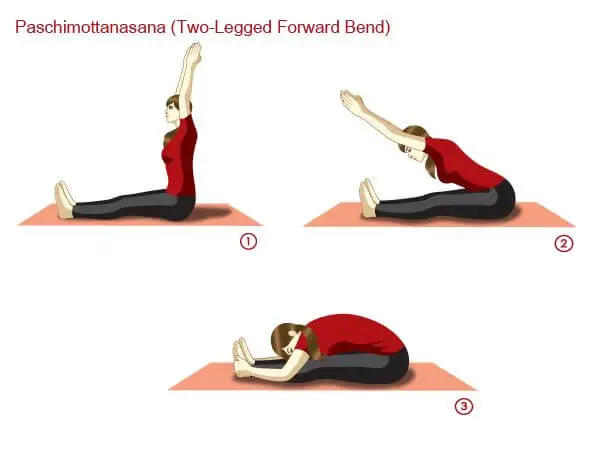
    Paschimottanasana (Seated forward bend):

    seated forward bend
    seated forward bend
    • This pose is ideal for opening up your lower back and spine. In addition to the general stress-relieving effects of most asanas, this one lessens PMS symptoms, enhances digestion, lessens exhaustion, and eases menopause symptoms.
    • With your feet facing front, take a seat.
    • Bend forward so that your thighs and stomach meet.
    • With your hands, grasp your feet.
    • After maintaining this posture for 30 seconds, go back to your starting position.

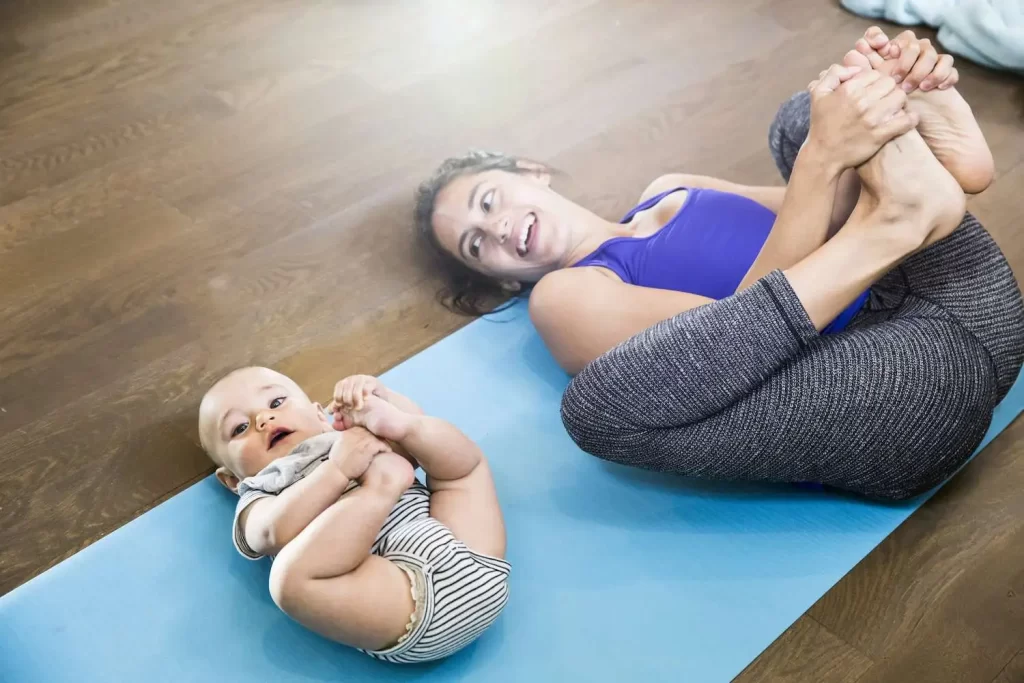
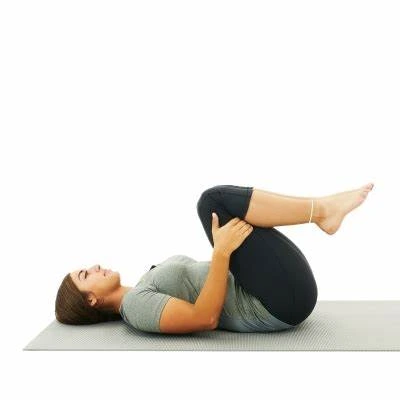
    Ananda Balasana (Happy baby pose):

    happy-baby-pose
    happy baby pose
    • This pose is very beneficial for the groin and the spine. It also aids in anxiety and stress management.
    • With your arms by your sides and your legs outstretched, take a flat, back position.
    • Bring your knees up to your abdomen.
    • Hold your feet and extend your hands.
    • Stretch your knees wide and hold this posture for a full minute.

    Repetitive prayer.

    Using breath concentration exercises, you recite a brief prayer or a sentence from a prayer silently. If you find significance in religion or spirituality, you could find this approach especially interesting.

    Experts advise trying out a few different approaches to determine which one suits you the best rather than settling on just one. Although even a little time might be beneficial, try to practice for at least 20 minutes each day. However, the advantages and degree of stress reduction increase with the duration and frequency of various relaxation practices.

    Self-massage

    I’m sure you already know how much a professional massage in a spa or fitness center can do to remove tension in the muscles, reduce stress, and relieve pain. You might not know, though, that self-massaging, massaging a loved one, or using an adjustable bed with an integrated massage function might provide you with some of the same advantages at home or at work.

    Whether you’re trying to decompress on the couch after a long day, at your desk in between tasks, or in bed before bed, consider spending a few minutes massaging yourself. Use scented lotion or oil, or combine self-messaging with mindfulness or deep breathing exercises, to further promote relaxation.

    A five-minute self-massage to relieve stress

    Combining strokes is a good way to release tense muscles. Try tapping with your fingers or your palms cupped, or try making light chops with the edge of your hands. Apply pressure with your fingers on tense muscles. Try massaging across your muscles with long, gentle strokes that glide. Any area of the body that is easily within your reach can be treated with these strokes.

    Try concentrating on your head and neck during a brief session like this one:

    Knead the muscles in your shoulders and the back of your neck to begin. Grasp a loose hand and quickly drum the back and sides of your neck. Next, make small circles around the base of your skull using your thumbs. With your fingertips, gently massage the remaining portion of your scalp.

    Now give your face a massage. Using your thumbs or fingertips, draw a succession of little circles. Focus especially on the muscles in your jaw, forehead, and temples. Start by massaging the bridge of your nose with your middle fingers, then move them outward across your eyebrows and into your temples.

    Lastly, shut your eyes. For a little period of time, lightly cup your hands over your face and take easy breaths in and out.

    Rhythmic movement and mindful exercise

    While the thought of working out might not sound very calming, the relaxation response can be triggered by rhythmic activity that puts you into a state of repetitive movement flow. For example, consider: Walking, jogging, swimming, dancing, rowing, and climbing

    When working on exercise, incorporate mindfulness for optimal stress reduction.

    Even though rhythmic exercise alone might help you decompress, incorporating mindfulness practices into your routine can have even greater advantages.

    Similar to meditation, mindful exercise necessitates complete present-moment awareness, focusing on how your body feels at that precise time rather than on worries or concerns from the previous day. During your workout, pay attention to your breathing and how it coordinates with your activity rather than dropping off or looking at a TV.

    For example, whether you’re running or walking, pay attention to the feel of the wind on your face, the rhythm of your breathing, and the sensation of your feet hitting the ground.

    When doing resistance training, concentrate on breathing in rhythm with your motions and be mindful of your body’s sensations as you raise and lower the weights. And if your thoughts are lost, gently bring them back to your breathing and movement.

    Biofeedback-Assisted Relaxation:

    Through feedback, which is typically given by an electronic device, you become adept at identifying and controlling your body’s reactions. You may watch how your blood pressure, heart rate, and muscular tension vary when you feel worried or relaxed thanks to the electronic equipment.

    Self-Hypnosis:

    Through self-hypnosis programs, individuals learn how to initiate the relaxation response on their own, using a spoken or nonverbal signal known as a “suggestion.”

    Music therapy

    when a therapist uses music to achieve wellness objectives.

    Art therapy

    which improves your mental, emotional, and physical health via the use of art.

    Aromatherapy

    or the use of essential oils as a therapeutic method.

    Hydrotherapy

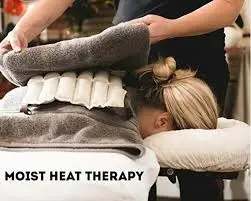
    It can involve steam baths, compresses, or even bathing.

    Relaxation techniques take practice

    You might become more conscious of tense muscles and other physical responses your body makes to stress as you master relaxation techniques. You can attempt to practice a relaxation method as soon as you begin to experience the signs of stress if you are aware of how the stress response feels. By doing this, you can keep stress from spiraling out of control and deteriorating your life’s quality.

    Recall that methods for relaxing are skills. Your ability to relax becomes better with practice, just like any other talent. Have patience with yourself. Try not to let trying relaxing techniques lead to additional tension.

    Try a different relaxation method if the first one doesn’t work for you. Consult your healthcare provider about other choices if you are experiencing no success in reducing your stress.

    Additionally, keep in mind that certain people may experience psychological pain when using certain relaxation techniques, particularly those who have severe mental health problems and a history of abuse or trauma. It is rare, so stop what you’re doing if you experience emotional distress when using relaxation techniques. Speak with your healthcare practitioner or a mental health specialist.

    Can relaxation techniques help during labor and childbirth?

    Many women would want to manage their labor and delivery pain without the use of drugs.

    Five studies with 1,248 participants in total that used different relaxation techniques and gauged the level of pain experienced by laboring women were included in a 2018 review. Overall, the research revealed that relaxation methods could assist women in managing their labor pain; however, the quality of the studies ranged from extremely low to low.

    It’s also difficult to determine which particular relaxation techniques might be helpful because numerous approaches were applied.

    In a 2019 review, women’s opinions and experiences with non-drug (massage, relaxation) and pharmaceutical (epidurals, opioids) pain management during labor and delivery were compared. Eight research with ninety-nine women examined relaxation. The total results revealed inconsistent results for the two pain management techniques.

    Certain ladies who used non-pharmacological techniques stated that the results were not as good as they had hoped.

    Can children and adolescents benefit from relaxation techniques?

    Children and teenagers experiencing pain, anxiety, sadness, headaches, or trouble with needle-related procedures may find relief with certain relaxation techniques. However, a large portion of the supporting data was deemed to be of low quality, so our understanding of the potential advantages is still incomplete.

    Can relaxation techniques lower blood pressure?

    Serious health issues like heart attacks, strokes, heart failure, and renal failure can be caused by high blood pressure. Preventing high blood pressure can be achieved by leading a healthy lifestyle. Understanding how to relax and handle stress is one aspect of leading a healthy lifestyle.

    According to a 2019 evaluation of 17 research with 1,165 participants, slow breathing exercises reduced blood pressure somewhat and could be a good starting point for patients with low-risk high blood pressure or prehypertension.

    However, the research included in this review varied greatly in their methods, had brief follow-up times, and had a high potential for bias. In addition, the trials did not examine the potential impact of slow breathing exercises on health outcomes, such as heart attacks or strokes.

    According to a 2018 study, biofeedback and relaxation techniques may help lower blood pressure, however, only modest recommendations were provided for its use because the quality of the data from the 29 research varied from very low to low.

    It’s critical to adhere to the treatment plan your healthcare practitioner has recommended if you have high blood pressure. It is essential to adhere to your treatment plan as it has the potential to avert or postpone major issues caused by hypertension. Talk to your healthcare physician about any alternative or integrative methods you are thinking about using to treat your high blood pressure.

    Techniques for relaxation may be helpful for headaches, low back pain, post-operative pain, and pain associated with arthritis. However, some of the supporting data has received a low-quality rating. It’s uncertain if relaxing methods are helpful for fibromyalgia pain.

    Are relaxation methods beneficial before, during, and after cancer treatment?

    Two professional societies advise using relaxation techniques both during and after breast cancer treatment. Other cancer forms have not been the subject of as much investigation, and the findings of that research have occasionally been contradictory.

    The Society for Integrative Oncology revised its clinical practice recommendations for integrative therapy use in breast cancer treatment in 2017 and beyond. The revised recommendations have the endorsement of the American Society of Clinical Oncology.

    The guidelines suggested using relaxation techniques to treat depression and improve mood. Additionally, according to the guidelines, relaxation techniques may be recommended to certain individuals in order to help manage their nausea and vomiting during chemotherapy, as well as to help them cope with stress and anxiety.

    Can relaxation techniques help you sleep?

    As the first line of treatment for chronic insomnia, cognitive behavioral therapy for insomnia, or CBT-I, is highly advised by the American College of Physicians’ 2016 practice guidelines. At times, CBT-I may include relaxation methods. However, it doesn’t appear that relaxing methods by themselves are very effective for promoting sleep.

    The American College of Physicians (2016) practice guidelines state that not enough research has been done to determine how relaxation techniques might impact the sleep of the general public and older persons who suffer from chronic insomnia.

    A 2018 study examined 27 research that attempted to enhance sleep using psychological therapies. 2,776 college students, ranging from those who slept normally to those who had a sleep condition diagnosed, participated in the trials.

    This review suggested cognitive behavioral therapy to help college students sleep better, in keeping with the American College of Physicians’ recommendations. The analysis also discovered that relaxation techniques, particularly for mental health, were moderately helpful with both poor sleep quality and sleep issues.

    The authors suggested combining cognitive behavioral therapy with “relaxation, mindfulness, and hypnotherapy” treatments to maximize the positive effects on mental health.

    According to a 2015 review, autogenic training and guided imagery reduced the amount of time needed to fall asleep, but they were ineffective when compared to a placebo. A total of 284 participants from seven research were taken into consideration.

    Do relaxation techniques have any side effects?

    This review suggested cognitive behavioral therapy to help college students sleep better, in keeping with the American College of Physicians’ recommendations. The analysis also discovered that relaxation techniques, particularly for mental health, were moderately helpful with both poor sleep quality and sleep issues.

    The authors suggested combining cognitive behavioral therapy with “relaxation, mindfulness, and hypnotherapy” treatments to maximize the positive effects on mental health.

    According to a 2015 review, autogenic training and guided imagery reduced the amount of time needed to fall asleep, but they were ineffective when compared to a placebo. A total of 284 participants from seven research were taken into consideration.

    Conclusion

    To sum up, relaxation methods are useful tools for stress management, anxiety reduction, and improvement of general mental and physical health. Techniques like progressive muscle relaxation, deep breathing, guided imagery, and meditation all contribute to mental calmness, reduced tension in the muscles, and enhanced emotional resilience. These methods are useful for those who want to improve their quality of life because they are easily obtainable, simple to learn, and adaptable to everyday activities.

    Regular use of relaxation techniques can result in long-term advantages that support a happier and more balanced lifestyle. These advantages include better mood, better sleep, and stronger coping skills.

    FAQ

    What are five relaxation techniques?

    Progressive relaxation, guided imagery, biofeedback, self-hypnosis, and deep breathing exercises are a few activities that fall under the category of relaxation techniques.

    What are three relaxation techniques?

    In order to tackle stress, you must trigger your body’s innate relaxation reaction. Methods like yoga, meditation, deep breathing, and visualization can be beneficial.

    What is the most basic effective relaxation technique to reduce anxiety?

    Concentrate on your breathing. You take long, slow, deep breaths (sometimes called abdominal or belly breathing) in this easy yet effective technique.
    Scan your body.
    Oriented visualization.Repetitive prayer, yoga, tai chi, qigong, mindfulness meditation, etc.
    Photograph by FatCamera/Getty Images.

    What is the 5 4 3 2 1 relaxation method?

    Five objects must be identified, four must be touched, three must be heard, two must be smelled, and one must be tasted. This helps you turn your attention from thoughts that make you anxious to the here and now.

    How many types of relaxation techniques are there?

    Deep breathing exercises come in a variety of forms, such as timed respiration, diaphragmatic breathing, and abdominal breathing. These exercises can be coupled with other stress-relieving activities, such as aromatherapy and music. The best part is that it is portable and simple to learn.

    What is the most relaxing technique?

    To tackle stress, you must trigger your body’s natural relaxation reaction. Methods like yoga, meditation, deep breathing, and visualization can be beneficial.

    References

    • Relaxation Techniques. (n.d.). Physiopedia. https://www.physio-pedia.com/Relaxation_Techniques
    • Relaxation techniques: Try these steps to lower stress. (2024, January 24). Mayo Clinic. https://www.mayoclinic.org/healthy-lifestyle/stress-management/in-depth/relaxation-technique/art
    • Six relaxation techniques to reduce stress. (2022, February 2). Harvard Health. https://www.health.harvard.edu/mind-and-mood/six-relaxation-techniques-to-reduce-stress
    • Robinson, L. (2024, February 5). Relaxation Techniques for Stress Relief. HelpGuide.org. https://www.helpguide.org/articles/stress/relaxation-techniques-for-stress-relief.htm
    • Relaxation Techniques for Health. (n.d.). NCCIH. https://www.nccih.nih.gov/health/relaxation-techniques-what-you-need-to-know
    • Erdman, S. (2021, April 9). Relaxation Techniques: Learn How to Manage Stress. WebMD. https://www.webmd.com/balance/stress-management/features/blissing-out-10-relaxation-techniques-reduce-stress-spot
    • Toshi, N. (2024, May 7). 7 Types Of Relaxation Techniques That Help You Fight Stress! PharmEasy Blog. https://pharmeasy.in/blog/7-types-of-relaxation-techniques/
  • Genu Recurvatum

    Genu Recurvatum

    What is a Genu Recurvatum?

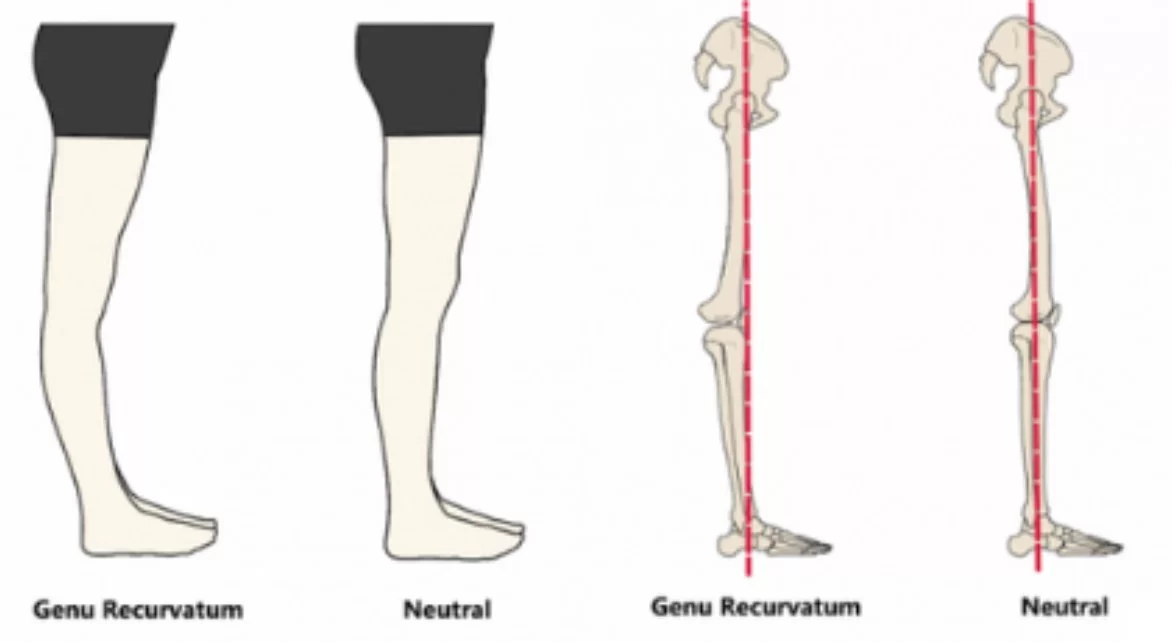
    The disorder known as genu recurvatum, or knee hyperextension, is characterized by excessive knee joint extension or backward bending beyond its normal range of motion. When standing straight, the lower leg is positioned behind the thigh due to the knee joint’s extension backward.

    • A malformation in which the knee bends backward is called knee recurvatum. The tibiofemoral joint experiences excessive extension as a result of this abnormality.
    • In women, this malformation is more prevalent.
    • An adult’s knee joint’s typical range of motion (ROM) is 0 to 135 degrees. There should be no more than 10 degrees of full knee extension. Normal extension increases in genu recurvatum.
    • The development of osteoarthritis and pain in the knee can result from genu recurvatum.

    Incidence

    Congenital genu recurvatum is an uncommon disorder that occurs around 1 in 100,000 births. However, it is a common feature of certain diseases, including joint hypermobility, which affects 1 in 30 people.

    Pathophysiology

    The following are the primary determinants of knee stability:

    Knee ligaments: There are four primary ligaments that support the knee joint: Anterior cruciate ligament (ACL). Through its ability to stop the knee from hyperextending, the ACL plays a crucial part in stabilizing the knee extension action.

    • Posterior cruciate ligament (PCL)
    • Medial collateral ligament (MCL)
    • Lateral collateral ligament (LCL)

    Articular or joint capsule (particularly the posterior knee capsule) muscular quadriceps femoris muscle proper femur and tibial position, particularly while in the knee extension position.

    Types of Genu recurvatum

    Genu recurvatum is categorized as acquired (occurring later in life) or congenital (existing from birth).

    Congenital genu recurvatum can be caused by intrauterine placement or hereditary reasons. It is frequently linked to other musculoskeletal disorders.
    On the other hand, a number of conditions, including ligamentous laxity, muscle imbalances, joint hypermobility, and prior knee injuries, can cause acquired genu recurvatum.

    There are three forms of genu recurvatum, with severity ranging from mild to severe:

    • External rotary deformity (ERD)
    • Internal rotary deformity (IRD)
    • Non-rotary deformity

    Causes of Knee recurvactum

    • Ligament laxity in the knees by heredity
    • Muscle weakness in the biceps femoris
    • knee joint instability caused by damage to the ligaments and joint capsule
    • An improper tibial and femur position
    • malunion of the knee’s proximal bones
    • weakness in the hip extension muscles
    • weakness of the gastrocnemius muscle (standing)
    • injury to an upper motor neuron (such as hemiplegia following a cerebrovascular event)
    • Lesion of the lower motor neurons (post-polio disease, for example)
    • A joint proprioception deficiency
    • disparity in lower limb length
    • Birth defect genu recurvatum
    • cerebral palsy
    • Limited dorsiflexion (plantar flexion contracture) in muscular dystrophy
    • weakening of the popliteus muscle
    • diseases of the connective tissue. Joint hypermobility, or excessive joint mobility, is an issue with many illnesses.

    Symptoms of Genu recurvactum

    • Posterolateral ligamentous pain is the term used to describe pain on the outside of the knee.
    • An acute pain in the tibiofemoral area on the inside.
    • During the midstance phase, the knee extends to its maximum length.
    • A severe sensation in the front of the knee pain when walking or standing for long periods of time, as well as compensating alterations in gait
    • Due to excessive extension, individuals with this disease may find it difficult to fully bend the knee joint.
    • knee flexing to become hyperextended
    • Having trouble with endurance exercises
    • The front of the knee is being pinched.

    To ascertain whether there is a medial knee injury, including the superficial medial collateral knee and posterior oblique ligament, or a cruciate ligament rupture, a thorough examination must be conducted. There are situations where all of the injuries occur at the back of the knee and none of these better-known structures are damaged.

    Our anatomical and biomechanical studies have identified the oblique popliteal ligament’s tibial connection, which can lead to greater knee hyperextension in the event of an injury.

    Measuring the patient’s heel height is the most effective method of making a clinical diagnosis about the degree of knee hyperextension. An increase in heel height may serve as a diagnostic marker for genu recurvatum if there is a normal contralateral (opposite) knee to compare to.

    A lengthy leg x-ray must be taken in order to carefully evaluate the patient’s total knee position. On a lateral knee x-ray, their posterior tibial slope must also be determined. Compared to patients with greater posterior tibial slopes, those with lower posterior tibial slopes typically experience more issues with knee hyperextension. This is something that we have also learned from our studies.

    Treatment of Genu recurvatum

    The underlying cause and severity of genu recurvatum determine the course of treatment. Physical therapy is one conservative treatment option that can help to address muscular imbalances, strengthen the muscles around the knee, and improve joint stability.

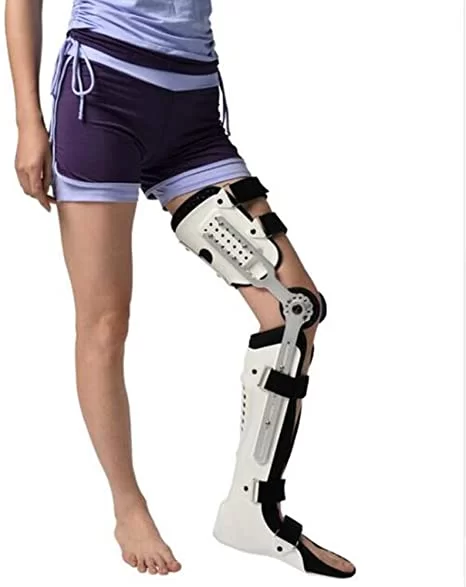
    It may be advised to use orthotic devices, such as braces or knee immobilizers, to support the knee joint and avoid hyperextension. Surgical surgery may be explored to treat the underlying structural abnormalities or repair ligamentous laxity in situations when conservative therapies prove to be unsuccessful.

    Physical Therapy Treatment

    Depending on how severe the deformity is, an orthosis will be given: 

    KNEE ANKLE FOOT ORTHOSIS
    KNEE ANKLE FOOT ORTHOSIS
    • ankle foot orthosis, 
    • knee orthosis,
    • ankle, knee, and foot orthoses.

    The methods for reducing pain

    Short wave diathermy, or SWD is a deep heating technique that uses heat to enhance blood flow to specific muscles, reduce pain, and eliminate waste.

    Stretching of calf muscle:

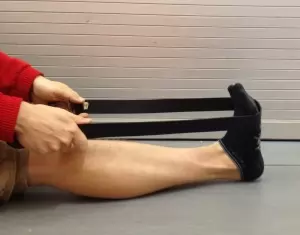
    • seated calf stretch:
    Long sitting Calf Stretching
    Long sitting Calf Stretching

    Take a long seat on the floor.
    Grasping both sides of one foot with your hands, loop a long towel (or whatever implement you’re employing) around it.
    Till your calf stretches, slowly bring your toes nearer your shin.
    Continue on the opposite side.

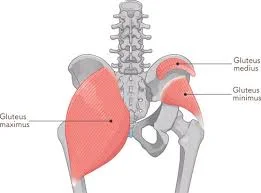
    Strengthening of gluteus muscle:

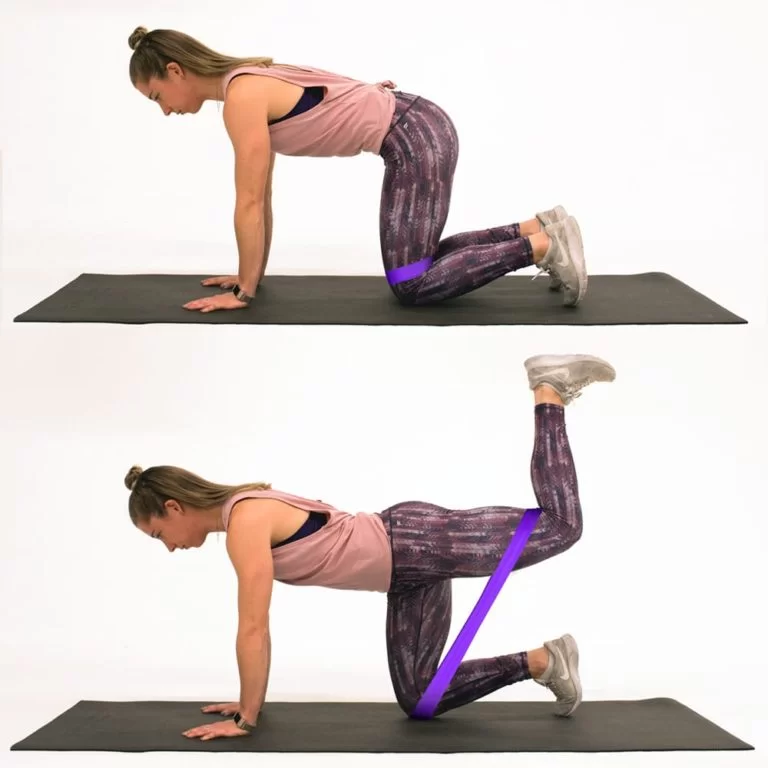
    • hip extension in a quadruped:
    hip extension in a quadruped
    hip extension in a quadruped

    How to: Lie on all fours with your knees behind your hips and your hands firmly beneath your shoulders. Assume a flat back and dip your chin slightly so that your neck’s back faces the ceiling.
    Cinch in your lower abs without hunching your back. Lift your right knee to a 90-degree bend and gently raise it straight back toward the ceiling.
    Just before your hips twist or your back begins to arch, that’s when you reach your maximum height. Go back to where you were before. After completing each repetition on one side, swap legs.

    Strengthening of knee muscles:

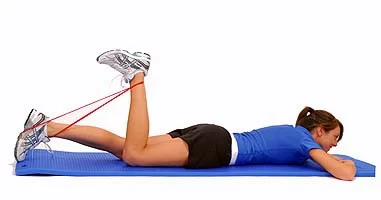
    • Prone Theraband Knee Flexion:
    Hamstring strengthening
    Hamstring strengthening

    A wonderful instrument for hamstring strengthening exercises is the Theraband.
    Starting Position: Wrap the theraband around both the ankle of the leg you wish to train and the foot of your healthy leg. Stretch your legs straight out while lying on your stomach.
    How to carry out: Pull as hard as you can against the theraband by bringing your heel towards your buttocks. Release the leg with caution after holding it for three to five seconds.

    Strengthening of calf muscles:

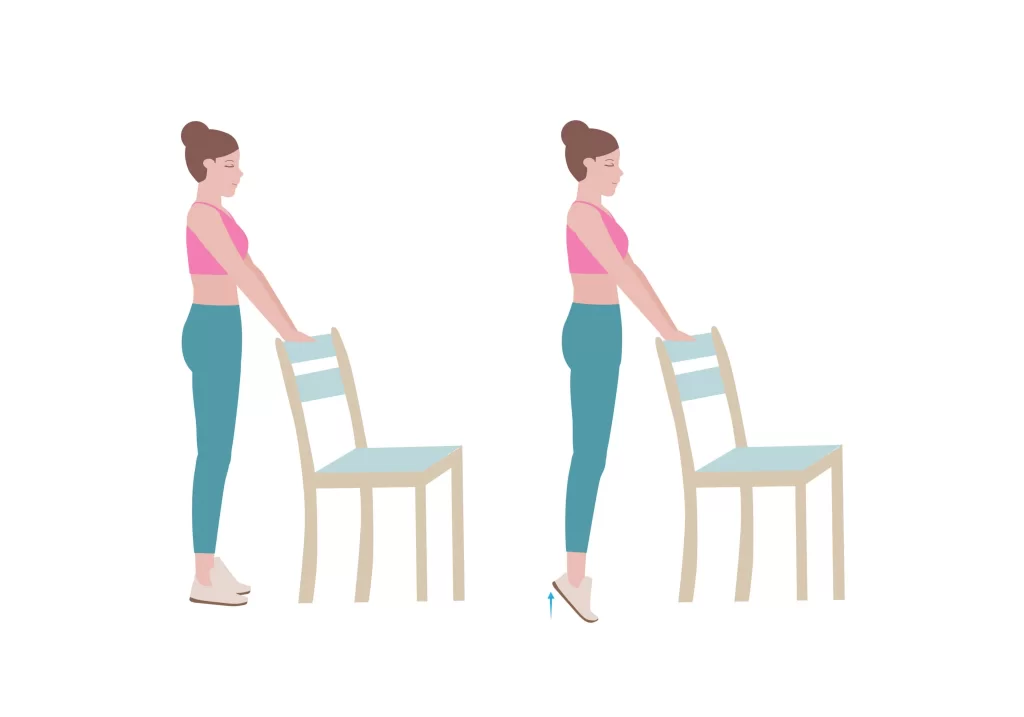
    • Double-Leg Heel Raise:
    Heel Raises
    Heel Raises

    increases calf strength mainly.
    How to perform it: Just like in the assessment exam, place your heels hanging off a step while standing barefoot on the balls of your feet. Take a minute to relax in between each set of four or five sets of full-range-of-motion heel lifts (with both legs).

    • single-leg heel raise:

    How to do it: Place your heels hanging off a step while standing barefoot on the balls of your feet. If you need balance, grab onto a wall or doorframe; do not raise yourself up with your hands. Elevate one leg off the floor and use the other leg to do single-leg heel rises, sometimes referred to as calf lifts.

    Go from the lowest possible position to the highest possible position by using your whole range of motion. With your whole range of motion, try to complete as many as you can. On the opposite leg, repeat.

    For a proper diagnosis and treatment of genu recurvatum, it is crucial to speak with a medical expert, such as an orthopedic physician or physical therapist. They are able to evaluate the situation, pinpoint any underlying causes of the hyperextension, and suggest a specific course of action.

    Surgical Treatment

    If there are no associated cruciate ligament and/or collateral knee injuries, the usual course of therapy is to undertake a rehabilitation program to see if the patient can raise their total quadriceps strength to compensate for the symptomatic knee hyperextension.

    A biplanar proximal tibial osteotomy, which entails elevating the patient’s posterior tibial slope, would be required if this doesn’t work. These operations have been demonstrated to lessen knee hyperextension and allow patients to return to their prior high level of functioning, despite the fact that they necessitate extensive surgery.

    A proximal anteromedial or anterolateral osteotomy is used as a treatment for isolated genu recurvatum in order to raise the patient’s posterior tibial slope. These treatments have been proven to be highly useful in minimizing patients’ knee hyperextension and enabling them to resume greater levels of exercise once the osteotomy heals.

    Post-Operative Treatment

    When developing a treatment plan for a patient who presents with genu recurvatum, it is essential to include the results of the clinical examination with the radiographs stated above. If there is no obvious collateral or cruciate ligament damage, a patient may benefit from a physically supervised quadriceps strengthening program.

    Patients who have had previous therapy and/or who still have problems with knee hyperextension may be advised to wear a brace designed to prevent knee hyperextension. Based on our observations, most patients with this problem may improve momentarily from a brace that limits hyperextension, but eventually, they will still have symptoms and will need surgery.

    Conclusion

    In genu recurvatum, also known as knee hyperextension, the knee joint extends posteriorly beyond its typical range of motion. Its causes might range from hereditary reasons to muscle imbalances or past knee traumas. It can be congenital or acquired. The symptoms include pain, instability, and trouble walking due to excessive knee bending rearward.

    Depending on the underlying reason and severity, treatment options include surgery, physical therapy, and orthotic devices. A medical professional’s advice is crucial for a precise diagnosis and suitable treatment.

    FAQs

    What is the post-stroke genu recurvatum?

    In those with hemiparesis from a stroke, abnormal knee hyperextension during the stance phase (genu recurvatum) is a typical gait anomaly. Ankle-foot orthoses (AFOs) decrease ankle joint mobility even though they are frequently used to avoid genu recurvatum by preserving ankle dorsiflexion during the stance phase.

    What is the degree of recurvatum genu?

    Operationally, genu recurvatum is defined as a knee extension of more than five degrees. Genu recurvatum patients may have inadequate proprioceptive control over terminal knee extension, an extension gait pattern, and knee pain.

    Is hyperextension of the knee permanent?

    When your knee bends too much backward in a straightened position, it is called a hyperextended knee. It is important to take notice of a hyperextended knee. Your range of motion may be restricted for several months due to this injury. However, with medical intervention, it is treatable.

    Do you have genu recurvatum from birth?

    In Latin, genu recurvatum means knee bending backward. The illness may be acquired or congenital. Congenital genu recurvatum is visible from birth and can cause significant concern for medical professionals and family members. It may exist alone, in conjunction with other musculoskeletal disorders, or as a component of a syndrome.

    How is genu recurvatum measured?

    The angle formed in the sagittal plane by the femur (from the most lateral point of the proximal joint line of the knee through the lateral malleolus) and the shank (from the central point of the greater trochanter to the central point of the lateral epicondyle) is known as the genu recurvatum.

    In what brace is genu recurvatum used?

    The customized knee immobilizer brace Thuasne ROM-R
    Without the usage of Genu Recurvatum Knee Braces, this issue can cause severe pain in later life and perhaps result in osteoarthritis. Our range is specifically made to avoid overextending the knees when moving.

    Are you able to walk in a genu recurvatum?

    Similar to pes planus, genu recurvatum can arise alone or as a component of a global hypermobility syndrome. The symptoms improve when walking or standing, and they go away when you relax. Athletes could struggle especially.

    Does genu recurvatum cause pain?

    Operationally, genu recurvatum is defined as a knee extension of more than 5′. Genu recurvatum patients may have inadequate proprioceptive control over terminal knee extension, an extension gait pattern, and knee pain.

    Which muscles suffer from genu recurvatum weakness?

    The causes of genu recurvatum include weak knee extensors and flexors, increased anterior pelvic tilt, reduced lumbar lordosis, ankle dorsiflexion deficiency, and ligament laxity.

    How is genu recurvatum diagnosed?

    The genu recurvatum is a deformity of the knee joint that causes the knee to bend backward. In this deformity, the tibiofemoral joint stretches excessively. This deformity is more common in women and people with a familial history of ligamentous laxity.

    Does genu recurvatum occur naturally?

    The genu recurvatum is a very intricate knee joint malformation. Under these conditions, the tibiofemoral joint extends significantly and the knee bends backward. Women are primarily affected. One in every 100,000 babies is born with congenital genu recurvatum, an unusual condition.

    Which element causes the most frequently acquired genu recurvatum?

    Polio is the most common cause of acquired genurecurvatum. Compensatory: One may use hyperextension to make up for the opposing side’s reduction in length. Upper motor neuron lesions such as hemiplegia, lower motor neuron lesions such as post-polio syndrome.

    How can the degree of their genu recurvatum be ascertained?

    The best method for figuring out how much genu recurvatum a person has is rather easy. The most efficient way to measure heel height, which is related to genu recurvatum, is to get a ruler, place your thigh against the examination table with your great toe lifted, and measure the distance in centimeters between the bottom of your heel and the table. For the purposes of the knee motion evaluation, a negative sign indicates one degree of hyperextension, which is often correlated with a heel height of one centimeter. Consequently, a person with “-5” degrees of hyperextension would have a heel height of 5 cm.

    Who treats genu recurvatum and how frequent is it?

    Because genu recurvatum instances are rare, incorrect diagnoses are frequently made. The majority of cases are therefore handled in referral centers. Furthermore, many doctors may feel uneasy doing an osteotomy to treat the recurvatum since they are uncommon. One of the most frequent problems we find with patients who are sent to us is that one. However, strengthening the quadriceps muscles, using a brace to prevent hyperextension (which is frequently quite bulky and poorly tolerated by patients), or moving forward with a proximal tibial osteotomy—which increases the tibia’s slope in order to decrease or eliminate the genu recurvatum—are actually the main treatments for genu recurvatum.

    To what extent is genu recurvatum surgery effective?

    When it comes to genu recurvatum surgery, accuracy of the clinical diagnosis is paramount. Patients who have a chronic injury and bend their knee backward most frequently have functional problems that can be incapacitating. Due to the chronic nature of the injury, a workup in the majority of these patients will reveal that an osteotomy is necessary because the tibial slope in the sagittal plane is excessively flat. In these cases with symptomatic genu recurvatum, we have discovered that a proximal tibial osteotomy, which slopes the tibia posteriorly, is highly beneficial.

    Genu recurvatum affects me. How is genu recurvatum corrected?

    The goal of treating genu recurvatum should always be to identify its underlying etiology. Should the cause be a problem with muscular weakness, a bracing or muscle strengthening program can be necessary. Genu recurvatum was highly prevalent in the past due to quadriceps muscle weakness caused by polio. If an injury is the cause and genu recurvatum develops immediately after the accident, it’s critical to identify the damaged structures and assess if reconstruction or repair is an option to treat the knee hyperextension. Research indicates that patients with both an anterior cruciate ligament rupture and injury to the lateral (fibular) collateral ligament have a roughly 3-centimeter increase in heel height. Reconstructing both the ACL and the LCL is the basic treatment for this kind of genurecurvatum. Bracing or surgery to enhance the tibia’s sagittal slope or sideways angle may be the sole option if the damage is persistent or if the tibia has a bony issue (where one fractures a bone and changes the angle of the shin bone).

    What is genu recurvatum?

    The condition known as genu recurvatum occurs when a person hyperextends their knee. There are various reasons why knee hyperextension may occur. These include weakening in the muscles, particularly the quadriceps, which can be caused by an accident or by problems with the knee bones.

    References

    • LaPrade, R. (2021, October 11). Genu Recurvatum. Robert LaPrade, MD | Minnesota Knee Specialist | Twin Cities, Minneapolis-St.Paul, Edina, Eagan. https://drrobertlaprademd.com/genu-recurvatum-hyperextension-of-the-knee-twin-cities-minnesota/
    • Genu recurvatum. (2023, July 31). Wikipedia. https://en.wikipedia.org/wiki/Genu_recurvatum
    • Physiotherapist, B. (2023, December 13). Genu recurvatum: Causes, Symptoms, & Treatment, Exercise. Mobile Physiotherapy Clinic. https://mobilephysiotherapyclinic.in/knee-recurvactum-and-physiotherapy-treatment/
  • 38 Best Brachioradialis Muscle Exercises

    38 Best Brachioradialis Muscle Exercises

    Brachioradialis muscle exercises are essential for improving forearm strength, enhancing grip endurance, and supporting overall arm functionality.

    Strengthening this muscle not only aids in everyday tasks but also contributes to better performance in various sports and physical activities where a strong and stable forearm is advantageous.

    Additionally, a well-developed brachioradialis can add to the aesthetic appearance of the arm, providing a balanced and muscular look.

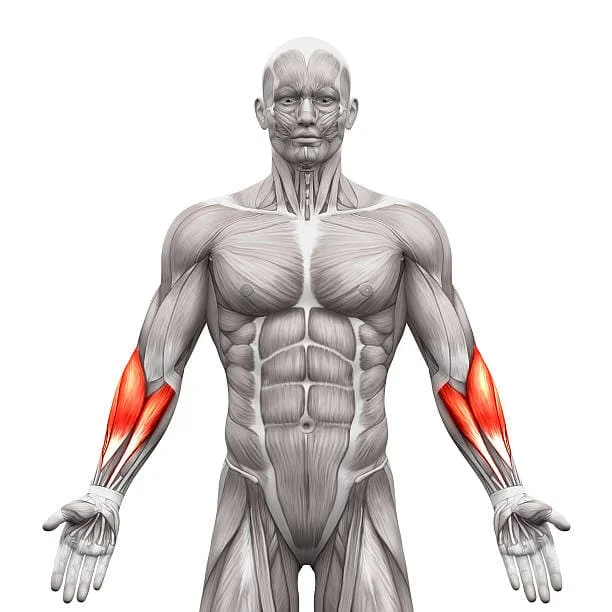
    What is the brachioradialis?

    Brachioradialis muscle
    Brachioradialis muscle

    The strongest and most prominent muscle in your forearms is the brachioradialis. It extends from your wrist’s beginning to the beginning of your upper arm.

    Although multiple forearm muscles combine to carry out different tasks, elbow flexion is mostly accomplished by the brachioradialis.

    You must use exercises that specifically target the brachioradialis if you want to strengthen your forearms.

    Understanding of the Brachioradialis:

    The lateral supracondylar ridge of the humerus is the source of the brachioradialis muscle, which inserts into the distal radius. Its main purpose is to flex the forearm at the elbow, particularly during hammer curls or other exercises where the forearm is in a neutral position (thumbs up). It is a flexible muscle that may be used for a variety of grips and activities because it also helps with forearm pronation and supination.

    Functions of the brachioradialis muscle:

    The brachioradialis muscle assists in stabilising the wrist joint during specific activities, such as lifting or tugging objects, in addition to allowing the elbow to bend.
    It is most active when the arm is required to be in a semi-pronated position, which is when the hand’s palm is angled downward.

    When the forearm is rotated so that the palm faces downward, a condition known as pronation, the brachioradialis muscle can help.
    As the brachioradialis muscle joins the radius bone in the forearm and crosses the elbow joint, it can also function as a secondary flexor of the wrist joint.

    The brachioradialis muscle is a crucial forearm muscle that serves multiple vital purposes.

    1. Elbow Flexion: The brachioradialis muscle’s main job is to flex the forearm at the elbow joint. The brachioradialis aids in the movement that occurs when you bring your hand to your shoulder, as in a bicep curl.
    2. Forearm Supination and Pronation: Although it is not the main muscle involved in forearm rotation, the brachioradialis does play a role in supination, or moving the palm upward, and pronation, or rotating the palm downward, to some extent, especially when the elbow is flexed.
    3. Elbow Joint Stabilization: During a variety of forearm-related motions, the brachioradialis assists in maintaining the elbow joint’s stability. When lifting and transporting goods, for example, this stabilization is essential to preserving correct alignment and avoiding overstressing the joint.
    4. Grip Strength: The brachioradialis helps with wrist extension and flexion, which indirectly enhances grip strength even though it is not directly responsible for it. A stronger brachioradialis can improve wrist and hand stability and support, strengthening the grip during tasks requiring holding or grasping objects.
    5. Assistance in Fine Motor Movements: The brachioradialis is involved in fine motor movements of the hand and fingers, especially when they include wrist extension or flexion, even though it is mainly involved in bigger, more dynamic motions of the forearm.

    This indicates that it can help bend the wrist in the palm’s direction or downward.
    Generally speaking, the brachioradialis muscle’s job is to produce movement and offer stability when performing a range of arm and forearm motions, such as grasping, raising, tugging, and turning the forearm.

    Benefits of brachioradialis exercise:

    There are various advantages to brachioradialis muscle exercise:

    1. Enhanced Arm Function: The brachioradialis is important for forearm pronation and supination, as well as elbow flexion. By strengthening this muscle, you can improve the effectiveness of your arms overall and make daily tasks like gripping, lifting, and carrying goods easier.
    2. Increased Grip Power: Strengthening the brachioradialis can help with wrist flexion and extension, which in turn can enhance grip strength. Those who exercise, are athletes, or work physically will find this especially helpful.
    3. Decreased Risk of Injury: By stabilising the elbow joint, strengthening the brachioradialis helps lower the risk of overuse injuries, sprains, and strains—particularly while engaging in repetitive arm movement exercises.
    4. Balanced Arm Development: A lot of arm workouts concentrate mostly on the triceps and biceps, which may cause muscular imbalances. Exercises targeting the brachioradialis guarantee more balanced arm muscle growth, which is critical for overall strength and stability.
    5. Enhanced Athletic Performance: Robust brachioradialis muscles are advantageous for athletes, particularly those participating in activities like rock climbing, gymnastics, and martial arts. These muscles support a range of arm actions by providing strength, dexterity, and control.
    6. Functional Fitness: You can increase your functional fitness and your ability to carry out daily duties more easily and effectively by strengthening your brachioradialis muscle with exercises like hammer curls and reverse curls.
    7. Tennis Elbow Prevention: By giving the joint more support and stability, strengthening the muscles surrounding the elbow, particularly the brachioradialis, might help avoid disorders like tennis elbow (lateral epicondylitis).
    8. Improved Aesthetic Look: By providing definition and symmetry, well-developed brachioradialis muscles enhance the arms’ overall aesthetic look.

    Strengthening the Brachioradialis: Essential Exercises for Forearm Power

    One of the forearm’s most noticeable muscles, the brachioradialis, is essential for elbow flexion and for building total forearm strength. Training the brachioradialis can help you achieve a number of goals, including increased forearm muscle, improved functional fitness, and improved sports performance. The greatest workouts to work this important muscle will be covered in detail in this article.

    Best Exercises for Building Brachioradialis Strength

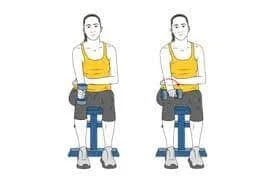
    Pronation of the forearm:

    With the palm facing up, place the forearm on a table while gripping a small dumbbell in your hand.
    Turn the palm over gently so that the bottom side is facing up.
    Take 30 seconds to hold this position, then return to the starting position.
    Five to ten times, repeat.

    Pronation/supination with dumbbell
    Pronation/supination with dumbbell

    Supination of the forearm:

    With the palm of your hand pointing downward, place your forearm on a table and grasp a small dumbbell.
    Once the palm is facing up, turn it over.
    Take 30 seconds to hold this position, then return to the starting position.
    Five to ten times, repeat.
    Stop moving the brachioradialis immediately and consult with the physical therapist if any movement produces pain.

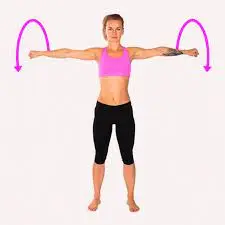
    Arm-circles
    Arm-circles

    Arm Rotations:

    How to Do It: Stand with your feet shoulder-width apart, then raise your arms to shoulder height in the sides.
    Using your hands, create little circles that gradually get bigger.
    Reverse the direction of the circles after 15 repetitions.

    Advantages: Arm circles increase strength and flexibility by using the brachioradialis and other arm and shoulder muscles.

    Dumbbell Forearm Rotation

    Dumbbell Forearm Twist
    Dumbbell Forearm Twist

    Keep your hands in a neutral position while holding a somewhat heavy dumbbell in each hand.
    Maintain a straight stance while you rotate your wrists, first in a pronated and then a supinated position.
    After 20–30 repetitions for one or two sets, aim for muscular failure.

    Pull-Up with Close-Grip

    Your delicate overhand grasp secures the pull-up bars.
    Put your head forward and tighten your lats.
    Squeeze your back muscles, bend your arms and keep your legs still while you pull your upper chest towards the bar.
    Feel your arms extend as you return to your starting position.
    Perform a set or two of six to twelve repetitions.

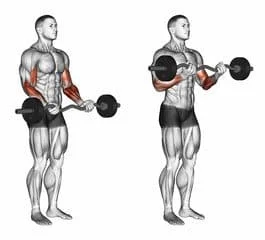
    Barbell Curl in Reverse:

    Barbell-Reverse-Wrist-Curl-Exercise
    Barbell-Reverse-Wrist-Curl-Exercise

    This brachioradialis workout, also called the overhand curl, works your biceps and forearms directly.

    Setup: a) Hold a barbell with your palms pointing in your direction and your hands about shoulder width apart.
    b) Stand up straight and tall, keeping your back straight.

    Action: a) To curl the barbell upward, contract your biceps.
    b) At the peak of the rep, firmly squeeze your biceps and slowly lower yourself back to the starting position.
    c) Carry out this movement as many times as you like.

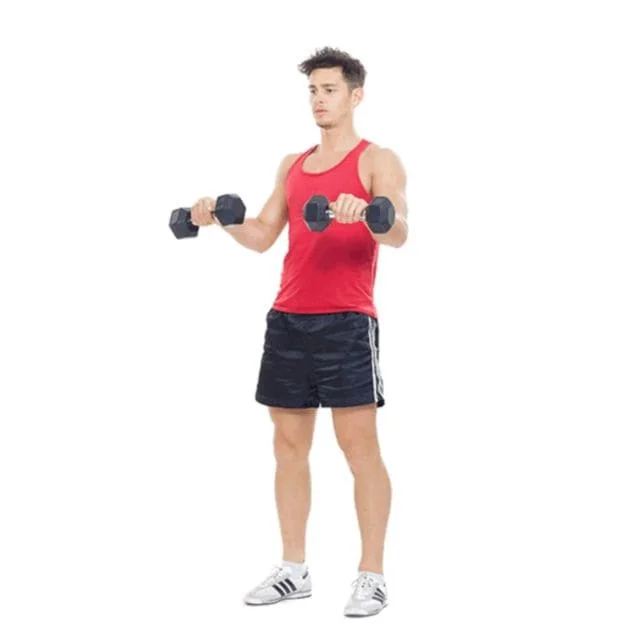
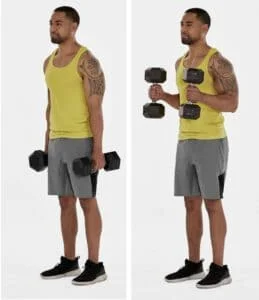
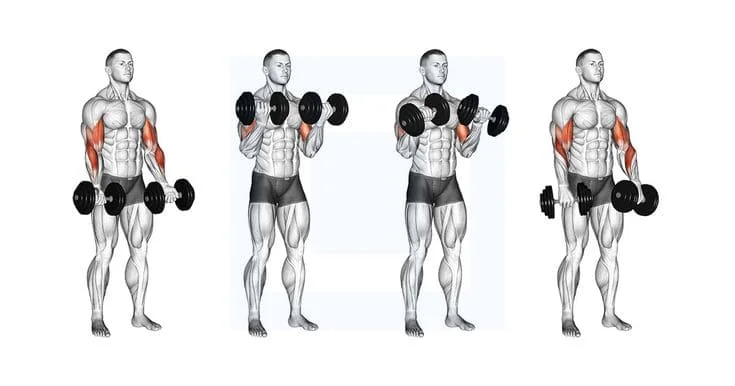
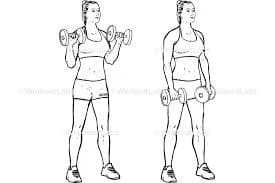
    Dumbbell Hammer Curl:

    Hammer curls
    Hammer curls

    One of the most well-liked bicep curl varieties is the hammer curl. The brachioradialis is called upon by the hammer grip in order to maintain weight control during the movement.

    Setup: a) With your hands facing each other, grab a pair of dumbbells.
    b) Stand up straight and tall, keeping your back straight.

    Action: a) To curl the dumbbells upward, flex your biceps and engage your core.
    b) At the peak of the exercise, firmly contract your biceps and gradually bring the dumbbells back down to the beginning position.
    c) Carry out this movement as many times as you like.

    Rotations from the rear to the front

    In order to flex your elbow at the end of each repetition in this dumbbell brachioradialis exercise, concentrate on squeezing your brachioradialis.

    Setup: a) Hold a set of dumbbells with your hands pointing in the same direction. Grip the shafts by their very bottoms.
    b) Take a strong stance and maintain your arms by your sides.

    Action: a) Flex your wrists upward and raise the front end of the dumbbells by contracting your brachioradialis.
    b) Firmly contract your brachioradialis and raise the dumbbells back to their initial position.
    c) Continue for the required number of repetitions.

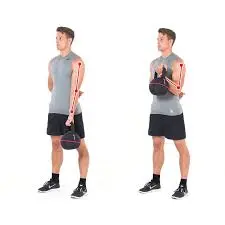
    Kettlebell-Reverse-Curl-with-1-Arm
    Kettlebell-Reverse-Curl-with-1-Arm

    Kettlebell Reverse Curl with 1-Arm

    With this brachioradialis workout, you may work on both arms at the same time.

    Setup: a) With one hand, hold a kettlebell with your palm pointing in your direction.
    b) Stand up straight and tall, keeping your back straight.

    Action: a) To curl the kettlebell upwards, contract your bicep.
    b) At the peak of the rep, firmly squeeze your biceps and slowly lower yourself back to the starting position.
    c) Carry out this movement as many times as you like.

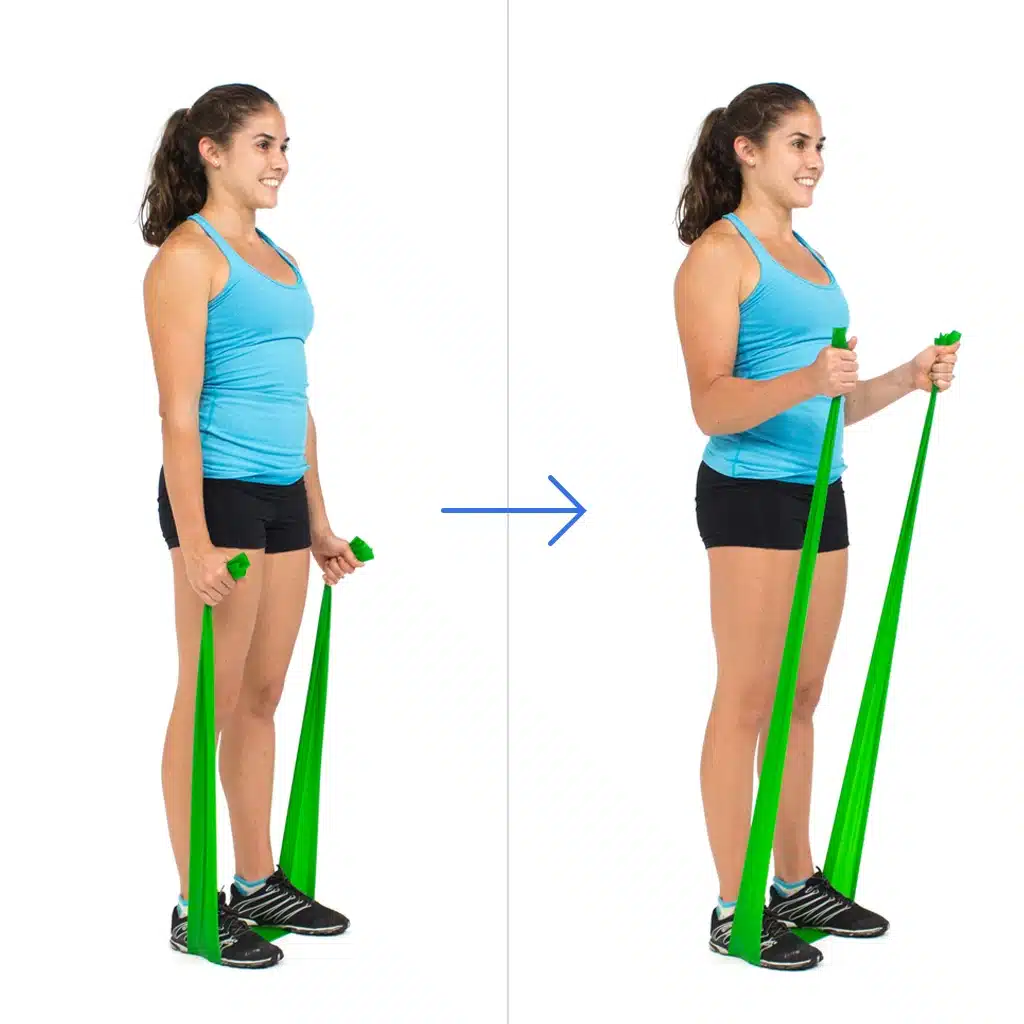
    Hammer Curl Resistance Band

    The banded hammer curl puts more strain on your brachioradialis as you curl upward.

    Standing-Hammer-CurlsWith-Bands
    Standing-Hammer-CurlsWith-Bands

    Setup: a) With your hands facing each other, grasp the ends of a resistance band, right below the handles.
    b) With your back straight, take a strong standing position on the resistance band.

    Action: a) Curl your hands upward by using your core and biceps to contract.
    b) At the peak of the exercise, firmly contract your biceps and then gradually bring your hands back to the beginning position.
    c) Carry out this movement as many times as you like.

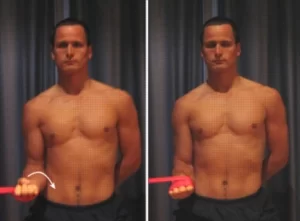
    Supination with resisted band

    Start this workout by encircling the hand with a resistance band.
    The elbow position should be sideways and at a 90-degree angle.
    Turn your forearm slowly so that the palm is facing up against the resistance band.
    Try to avoid pain as much as possible and complete three sets of ten repetitions.

    Resisted-band-Pronation
    Resisted-band-Pronation

    Pronation with resisted band

    Start this workout by encircling the hand with a resistance band.
    The elbow position should be sideways and at a 90-degree angle.
    Turn your forearm slowly so that the palm is facing downward against the resistance band.
    Try to avoid pain as much as possible and complete three sets of ten repetitions.

    Grip Reverse EZ Bar Curls

    Reverse Grip EZ Bar Curls
    Reverse Grip EZ Bar Curls

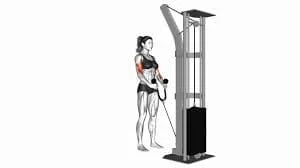
    Place your feet and stand in a manner similar to the Cable Hammer Curl.
    Hold onto the EZ-curl bar by facing down on the angled part of the bar, which is attached to the bottom of the cable.
    Curl the bar up and down like you would with a typical bicep curl exercise.

    When you perform the cable hammer curl, keep your elbow and shoulder stances firmly in place.
    Repeat for 2-4 sets of 10–20 reps.

    Hammer Curl with Cable

    A well-known workout that targets the arms is the cable rope hammer curl, which involves using a rope or cable handle that is attached to a weight stack via a cable. It uses a neutral grip (palms facing each other) and works primarily the brachialis and forearm muscles, as well as the biceps.

    How to Do a Hammer Curl With Cables

    Cable Hammer Curl 
    Cable Hammer Curl 

    Position yourself facing the machine and fasten a cable attachment to a low pulley.
    Using a neutral grip (palms in), grab hold of the rope.
    For the duration of the exercise, position your elbows sideways and remain there.
    Pull the arms till the forearms and biceps meet.
    Hold on for a moment.
    Start lowering the weight gradually to its starting position.
    Repeat for the indicated number of repetitions.

    Advice

    Maintain the natural arch of your back and your torso while standing upright.
    Recall to keep your upper arms still and your elbows tucked in.
    Exercise should be done carefully to prevent momentum from influencing the movement.

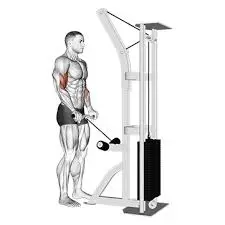
    Reverse Curl on Cable

    A workout using a machine that targets the brachioradialis is the reverse cable curl. Nonetheless, one can experiment with a variety of reverse cable curl adjustments, some of which may call for specific kinds of reverse cable curl gear. Exercises for the brachioradialis must include this cable bicep exercise.

    The Cable Reverse Curl: How to Do It

    Reverse-Curl-on-Cable
    Reverse-Curl-on-Cable

    Start by standing upright and maintaining a straight posture while holding onto a bar attachment that is fastened to a low pulley with a pronated (palms down) and shoulder-width grip.
    Keep your elbows bent and flex them to bring the bar to your chest.
    Make a contraction and hold the position for a while.
    Return the bar to the extended position by lowering it gently.
    Repeat ten times.

    Advice

    The body needs to stay in place. The weight should only be moved using the biceps.
    Squeeze your biceps after stopping at the peak of the movement.
    Make sure your hands are firmly gripping the bar, your knees should be slightly bent, and your elbows should remain close to your sides.

    Reverse Zottman Curl Dumbbell

    Zottman Curl
    Zottman Curl

    Along with several other forearm muscles, the brachioradialis is the focus of the reverse zottman curl.

    Setup: a) Hold a pair of dumbbells in front of you with your palms facing up.
    b) Take a stance and place your feet about hip-width apart.

    Action: a) Curl the dumbbells upward by contracting your biceps while maintaining a straight back.
    b) Twist your hands so that the palms face forward and firmly squeeze your biceps at the top.
    c) Twist your hands to bring your palms back towards you after lowering the dumbbells to the beginning position slowly.
    d) Carry out this movement as many times as you like.

    Rear-front rotations: 

    The patient is grasping two dumbbells, their palms facing in the direction of one another.
    Grip the shafts by their very bottoms.
    The patient is standing up and keeping their arms by their sides.
    To flex the wrist joint upward and raise the front end of the dumbbells, contract the brachioradialis muscle.
    Firmly contract the brachioradialis muscle and raise the dumbbells back to their initial position.
    Perform this exercise three times in a single session and two to three times a day.

    Dumbbell Reverse Curl

    A variation of the classic bicep curl in which the barbell is grasped palm-up is called the dumbbell reverse curl. It targets numerous forearm muscles, including the brachioradialis. The same movement is made, but by switching up the grip, particular arm muscles can be worked on.

    Reverse curls
    Reverse curls

    The Dumbbell Reverse Curl: How to Do It

    To begin, maintain a straight posture and place your feet shoulder-width apart.
    With your arms fully extended, take an overhand grip on a dumbbell in each hand.
    Curl the weights up towards the shoulders while maintaining a straight back and fixed upper arms.
    This movement requires only the forearms.
    Dumbbells should be kept coiled until they reach shoulder height and the biceps are completely tensed.
    Breathe in while the person makes a clean arc back to the starting position.

    Advice
    Gently rotate your forearms; too much force can strain your elbows or wrists.
    In order to enhance tension and the mind-muscle connection, try performing the exercise with a gradual eccentric.
    Throughout this workout, pay close attention to appropriate weight and body mechanics at all times.

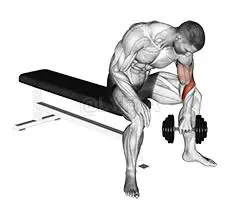
    Dumbbell Concentration Curl with Reverse-Grip

    One of the best brachioradialis workouts is the reverse grip dumbbell concentration curl, which focuses on squeezing the brachioradialis to flex the elbow at the end of each repetition. It’s an isolation exercise that works the brachioradialis and brachii biceps.

    The Dumbbell Reverse-Grip Concentration Curl: How to Do It

    Dumbbell Concentration Curl with Reverse-Grip
    Dumbbell Concentration Curl with Reverse-Grip

    To begin, take a seat with your legs apart on a bench and hold a dumbbell in one hand.
    Place the elbow against the inner of the left thigh when the arm is nearly completely extended.
    Turn your wrist so that the palm is facing the back.
    Breathe in while lowering the dumbbell to its starting position.
    Use the other arm to perform the same movement.

    Advice
    At the bottom of the workout, do not lock out.
    Maintain a straight back.

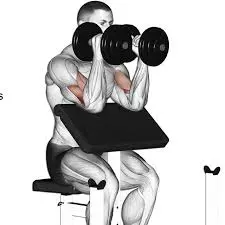
    Hammer Preacher Curl using Dumbbells

    A great workout that works the brachioradialis, brachialis, and biceps is the dumbbell hammer preacher curl. Focus more on the brachioradialis and brachialis than the biceps when using a hammer/neutral grip. It is the ideal alterations to the preacher’s curl.

    How to Do the Hammer Preacher Curl With Dumbbells:

    Hammer Preacher Curl using Dumbbells
    Hammer Preacher Curl using Dumbbells

    Arms should be level with the top of the preacher bench seat after adjusting the seat.
    With both hands, take a neutral or hammer grip on a dumbbell, and rest your arm fully down against the bench.
    As you perform the exercise, slowly curl the dumbbells up towards your head while keeping your arms resting on the bench until you reach the highest position.
    Squeeze, hold, and isolate the biceps for a count.
    Do the ten-number repetitions again.

    Advice
    To achieve the finest results, perform this exercise slowly and deliberately.
    Avoid locking out your elbows to avoid tearing your biceps.

    Preacher Curl Reverse Dumbbell

    A variation on the normal preacher curl, the reverse preacher curl targets the brachialis muscle, which is located deeper in the upper arm than the biceps brachii. The wrist flexors contract to serve as stabilising muscles, while the brachialis and brachioradialis muscles help with elbow flexion.

    How to Perform the Reverse Preacher Curl with Dumbbells

    Arms should be level with the top of the preacher bench seat after adjusting the seat.
    With both hands, take a pronated (palms down) hold on a dumbbell and lay your arm fully down against the bench.
    As you slowly curl the dumbbells up towards your head, maintain your arms on the bench until you reach the highest position.
    Squeeze, hold, and isolate the biceps for a count.
    Do the ten repetitions again.

    Advice
    Make sure the person uses controlled repetition time and a gentle approach to the action.
    At the conclusion of the reverse curl, avoid locking out your elbows, as this might tear your bicep and release tension in the muscle.
    Use a lighter to moderate weight, if possible.

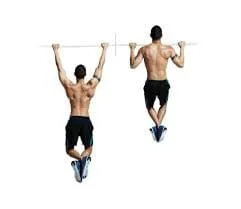
    Chin-ups:

    Along with several other upper body muscles, the brachioradialis muscle can be effectively worked out with chin-ups.

    How to execute chin-ups:

    chinup
    chinup

    With your hands somewhat closer together than shoulder-width apart, hang from a chin-up bar using an underhand hold. Your body should be erect with your core activated, and your arms should be fully extended.
    Bend your elbows and raise your chin above the bar to pull yourself up towards the bar. Throughout the exercise, keep your chest high and contract your back muscles.
    With your arms extended to their maximum length, carefully return to the starting position.
    Make sure to engage the brachioradialis and other upper body muscles as you repeat the movement for the necessary number of repetitions.

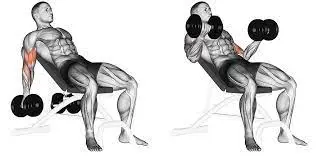
    Incline curls:

    Exercises like incline curls work the biceps brachii and activate the brachioradialis, a secondary muscle.

    incline-curl
    incline-curl

    First, set an incline bench to a 45-degree angle in order to perform incline curls. Grasp a pair of dumbbells with an underhand grip, palms facing upward, while seated on the bench. With your feet flat on the ground, lean back on the bench and stretch your elbows fully, letting your arms dangle straight down towards the floor. Next, release the air and carefully curl the dumbbells towards your shoulders while maintaining the motionless position of your upper arms.

    When you lift the weights, concentrate on tensing your brachioradialis and biceps. Squeeze your muscles and hold for a little while at the peak of the exercise.
    Extend your elbows fully as you slowly lower the dumbbells back to the starting position. To properly target and strengthen the brachioradialis muscle, complete the required number of repetitions while maintaining correct form.

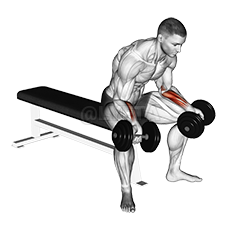
    Wrist Curls (Palms facing up)

    The brachioradialis muscle and other forearm flexors are targeted by wrist curls performed with the palms facing up.

    To complete this task,

    Wrist Curls (Palms facing up)
    Wrist Curls (Palms facing up)

    With your feet flat on the ground, take a seat on a bench or chair. With your palms facing up, hold an underhand grip dumbbell in each hand. Place your arms on your thighs so that your wrists cross your knees.
    Exhale and flex your wrists towards your forearms to curl the dumbbells upward without raising your forearms off your thighs.

    Squeeze your forearm muscles while holding the top position for a short while, then take a breath and gradually drop the dumbbells back down to the beginning position.
    Execute the targeted quantity of reps while maintaining precise form and controlled motions.

    By specifically working the brachioradialis and other forearm flexor muscles, this exercise helps increase grip strength and forearm endurance. Dumbbell weight should be adjusted based on your current level of strength. During the workout, pay attention to keeping the targeted muscles tense.

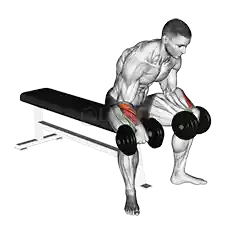
    Reverse Wrist Curls (Palms facing down)

    The brachioradialis muscle and other forearm extensors are the main targets of reverse wrist curls performed with the palms facing downward.

    To complete this exercise:

    Wrist curls
    Wrist curls

    Place your feet flat on the ground while you sit on a chair or bench to begin. With your hands facing down and your arms resting on your thighs, raise your wrists over your knees to hold an overhand grip dumbbell in each hand.
    Exhale and curl the dumbbells upward by extending your wrists, bringing them as close to your forearms as you can without lifting your forearms off your thighs. Keep your palms facing down and your forearms lying on your thighs.

    Feel the contraction in your forearm extensor muscles as you hold the top position for a little while.
    Breathe in, then gradually return the dumbbells to the beginning position so that your wrists can fully extend.

    For the required number of repetitions, repeat the activity, paying close attention to controlled motions and keeping the targeted muscles tense throughout.

    The brachioradialis muscle and other forearm extensors are successfully targeted by reverse wrist curls performed with the hands facing downward.
    This workout enhances grip strength, wrist stability, and general forearm endurance. To get the most out of the exercise and optimise its effects, modify the weight of the dumbbells based on your current level of strength.

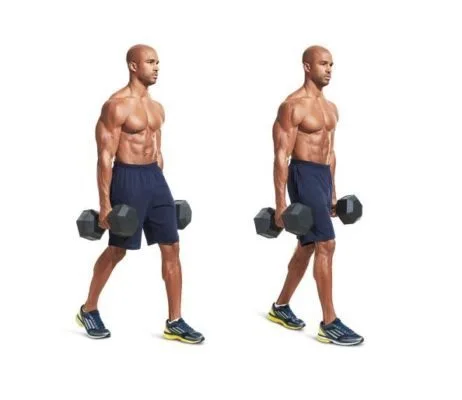
    Farmer’s walk:

    The brachioradialis and other upper body muscles, as well as the muscles of the lower body and core, are the main objectives of the easy-to-do yet powerful Farmer’s Walk exercise. The Farmer’s Walk can be executed as follows:

    Farmers Walks with Weights
    Farmers Walk with Weights
    • Hold a dumbbell or kettlebell in each hand and take a tall stance. Select weights that are difficult but doable. The weight has to be substantial enough to offer resistance without causing you to lose form.
    • Keep the kettlebells or dumbbells at your sides in a neutral hold, with your palms pointing inward.
    • To keep your posture stable and erect, contract your core muscles. Throughout the exercise, maintain a neutral spine, chest up, and shoulders back and down.
    • Start moving ahead deliberately, one rapid step at a time.
    • Keep the weights towards your sides and your arms outstretched.
    • When you walk, concentrate on keeping your body balanced, and try not to sway or lean too much. Maintain your head in line with your spine and your eyes forward.
    • Depending on your goals and degree of fitness, you can walk a specified distance or for a predetermined length of time. As you gain strength and comfort with the workout, progressively increase the distances or periods you begin with.
    • When the allotted time or distance has passed, carefully stop and return the weights to the starting position.

    The farmer’s walk is a fantastic practical exercise that enhances grip strength, core stability, and general muscular endurance in addition to strengthening upper body muscles, particularly the brachioradialis.

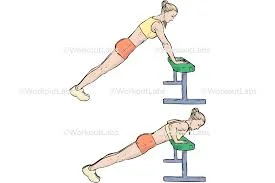
    Pushups using your fingers:

    Bring your fingertips down to the surface while kneeling next to a bench or other stable object.
    Bring your chest to the bench slowly and deliberately, bending your elbows to a 90-degree angle.
    Go back to where you were before.
    Perform 1-3 sets of 8–12 reps.
    Try this exercise with your fingertips on the floor for added difficulty.

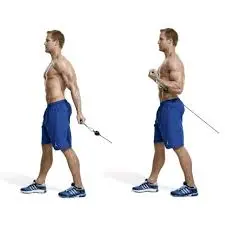
    Behind-the-back cable curl:

    One exercise that works the brachioradialis and biceps is the behind-the-back cable curl.

    Behind-back-curl
    Behind-back-curl

    To execute it, face a cable machine that has a low pulley attached to a straight bar.
    With your hands shoulder-width apart and your palms pointing back, take an overhand grip on the bar.
    Take a step back to tighten the cable, then release your breath and bend your elbows to curl the bar upward.
    Throughout the exercise, keep your elbows close to your sides and your upper arms still.
    After a little period of time, carefully lower the bar back to the beginning position.

    Execute the targeted quantity of reps while maintaining precise form and controlled motions.
    The cable resistance in this exercise creates continuous strain on the brachioradialis and biceps, which can enhance arm strength and definition. To guarantee appropriate resistance, adjust the weight on the cable machine based on your level of strength.

    Dead Hangs:

    Dead hangs are a basic yet powerful exercise that works the core and grip strength in addition to the upper body muscles, such as the brachioradialis.

    dead-hang
    dead-hang

    How to execute a dead hang:

    • Look for a strong structure or overhead bar to swing from.
    • To get to the bar, leap up or, if needed, use a step stool.
    • Use either an alternate grip—one palm facing away from you, the other towards you—or an overhand grip to hold the bar. Slightly broader than shoulder-width apart is how your hands should be placed.
    • Lean back and relax your shoulders while letting your body hang loosely from the bar. You should not put your feet on the floor.
    • Keep your head and heels in a straight line and your core active. Avoid kicking and swinging your legs.
    • For as long as you can, hold the position while concentrating on taking deep breaths and remaining calm.
    • When you’re ready to stop, release the air and slowly return to the floor while keeping control of your descent.

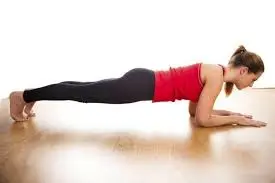
    The plank with shoulder taps:

    It works the core muscles, such as the transverse abdominis, rectus abdominis, and obliques, but it also works the brachioradialis, a stabilizing muscle.

    During the shoulder tap plank:

    The plank with shoulder taps
    The plank with shoulder taps
    1. Stabilization: Your body should remain in a straight line from your head to your heels as you hold the plank posture. As you balance on your hands, the brachioradialis supports your upper body weight by stabilizing your elbows and wrists.
    2. Anti-Rotation: Your body will automatically rotate to the side when you tap your shoulders alternately. Because it stabilises the arms and limits excessive movement at the elbow joint, the brachioradialis aids in the resistance against this rotational force.

    The plank with shoulder taps is an exercise that primarily targets core stability and strength, but it also has the added benefit of working the brachioradialis and other arm muscles. It is a useful supplement to your exercise regimen since it increases the stability and strength of your upper body generally.

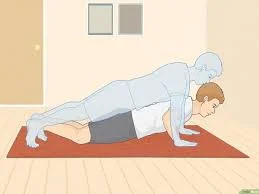
    Push-ups with the finger tips:

    An advanced kind of push-up, fingertip push-ups require you to support your body weight with your fingertips rather than your palms. Because this exercise requires more grip strength and wrist stability, it also significantly uses the brachioradialis muscle and other forearm muscles.

    It is a useful exercise for developing the upper body and forearms since it works the muscles in the chest, shoulders, triceps, and forearms. However, to prevent wrist injuries, it’s crucial to advance cautiously and use the correct form.

    To execute push-ups with the fingers:

    Fingertip push ups
    Fingertip push ups
    1. Assume a plank position, with your body in a straight line from your head to your heels and your hands directly beneath your shoulders.
    2. Take a stance on your fingertips, with your fingers spread wide and your fingertips supporting your body weight, as opposed to laying your palms flat on the ground.
    3. Throughout the workout, keep your body upright and stable by using your core muscles. Avoid hunching over or arching your back, and maintain a hip-to-shoulder alignment.
    4. Bending your elbows to keep them close to your sides, lower your body towards the floor. Reduce the height of your chest till it is slightly over the floor, or as low as it is comfortable for you to go without compromising form.
    5. Let out a breath and use your elbows and fingertips to bring yourself back up to the starting position. Throughout the exercise, keep your body in a straight line and avoid sagging or elevating your hips.
    6. Continue performing the exercise for the required number of times, being sure to keep your muscles tense and your motions controlled.
    7. Activity caution is advised when performing fingertip push-ups, especially if you’re new to the activity, because it puts more strain on the wrists and forearms. As your strength increases, work your way up to more difficult varieties like incline fingertip push-ups before gradually moving on to full fingertip push-ups.

    Crush your grip:

    Start sitting and place the left wrist, palm up, on a good horizontal surface.

    With a dumbbell in your left hand, spread and loosen your grip such that the weight rolls closer to your fingertips.
    Squeeze the dumbbell back up as tightly as you can by curling your wrist and tightening your hand as soon as it hits your fingertips. One rep is awarded for this.

    Grip Strengthening Exercise with Hand Gripper
    grip forearm

    Repeat on the right side after completing the required number of reps.

    Squeeze your forearm.

    Start with a forearm grip.
    Squeeze the forearm grip while extending and flexing your fingers.
    Let go of the fingers after three to five seconds of holding.
    Go on for ten to fifteen minutes. In this, there is just one set.

    Crab walk:

    Start by easing yourself into a tabletop inverse position.
    Align the ankles directly under the knees and the hands directly under the shoulders, with the fingers pointing towards the feet.
    Use your hands and feet to move ahead for a maximum of one minute. One rep is awarded for this.

    Stretching exercise for brachioradialis:

    Exercises that stretch the body are essential for preserving flexibility, enhancing mobility, and avoiding injuries. The following are some efficient stretches that target the brachioradialis muscle specifically:

    Brachioradialis-Stretch
    Brachioradialis-Stretch

    Brachioradialis stretch:

    Raise your right arm straight and make a fist. Using the left hand, grasp the right fist.
    Turn the right arm such that the thumb is clenched and facing the body.
    Flex your right wrist gently with your left hand while maintaining a straight arm. This is the same motion used to bring the palm closer to the forearm during wrist curls.
    Breathe normally while holding the stretch for 15 to 30 seconds, then switch to the other side.

    Brachioradialis stretch while standing

    Stretch your arms out in front of you while keeping your elbows firmly locked out.
    Interlock your fingers after putting one hand over the other.
    Bend the wrist of your lower hand.
    Rotate your wrist to the left until a noticeable brachioradialis stretch is felt. Revolve your hands to the right and repeat with the other arm after holding it for ten to thirty seconds.

    Brachioradialis stretch with arms down

    Arms down brachioradialis stretch
    Arms down, brachioradialis stretch

    Place your wrists across each other and clasp your fingers together.
    Next, keep your elbow locked out and rotate your upper wrist away from your body.
    While you repeat each stretch with your opposite arm, try to hold it for ten to thirty seconds.

    Brachioradialis stretch with arms extended back

    Arms back brachioradialis stretch
    Arms back brachioradialis stretch

    Maintain good posture and raise yourself up tall.
    Pronate your hands by your sides, pointing your palms back.
    Now, without bending your waist or moving your hips, extend your arms behind your body (as if you were rowing with straight arms) until you feel the deep brachioradialis stretch that I previously mentioned.
    Do one or two additional sets after holding it for ten to thirty seconds.

    Tips for stretching:

    • After a thorough warm-up or at the conclusion of your workout, perform these stretches.
    • Reach for the point of tension rather than soreness. There should be a slight tug, but not any pain.
    • Inhale deeply, and focus on letting go of any tension in your muscles as you perform each stretch.
    • After holding each stretch for 15 to 30 seconds, repeat each side two or three times.
    • When stretching, try to avoid jumping or jerking movements, as this might cause harm.
    • Stretching should be a frequent part of your regimen to keep your muscles loose and flexible.

    Including These Workouts in Your Daily Routine

    These are some exercises you may do as part of your normal training routine to help strengthen your brachioradialis. For every exercise, try to complete two to three sets of eight to twelve repetitions, varying the weight and intensity according on your level of fitness. To optimize the advantages and lower the danger of damage, it is imperative to concentrate on appropriate form and control.

    Advantages of a Strong Brachioradialis

    There are various advantages to brachioradialis strengthening:

    Enhanced Grip Strength: Capable hands are essential for a variety of sports and everyday tasks like tugging, lifting, and transporting.
    Injury Prevention: In sports where repetitive arm motions are a component of the activity, having strong forearm muscles helps to prevent injuries by supporting the wrists and elbows.
    Balanced Arm Development: By emphasizing the brachioradialis, one can achieve balanced muscular growth in the arms, which enhances the overall strength and appearance of the arms.

    Integrating Brachioradialis Training in an Exercise Program

    A Balanced Approach

    Arm strength and functionality can be improved with a well-rounded training programme that targets the brachioradialis and other forearm muscles. To guarantee thorough development, it’s critical to incorporate exercises that target the forearm flexors, extensors, and other supporting muscles.

    Volume and Frequency

    For most people, brachioradialis exercises can be beneficial twice or three times a week. For each exercise, aim for two to three sets of eight to twelve repetitions, making sure to give yourself enough rest time in between sessions. Depending on your fitness level and objectives, change the frequency and volume. As your strength increases, progressively increase the intensity.

    Tracking Development

    Effective training requires frequent progress tracking. To record the exercises done, the weights used, and any observations about form or discomfort, keep a workout notebook. Make necessary adjustments to your routine and strength periodically to keep pushing the brachioradialis and encouraging muscle growth.

    Adaptability and Mobility

    Forearm flexibility and mobility exercises, in addition to strength training, can improve general muscle function. After working out, stretching the forearm muscles can help keep them flexible and avoid getting tight. Mobility exercises can increase range of motion and guarantee that the brachioradialis and related muscles perform at their best.

    Brachioradialis Exercise at Home

    Easy Equipment

    To train the brachioradialis efficiently, you don’t need a gym. For a variety of exercises that target this muscle, simple tools like dumbbells, resistance bands, and even everyday objects like water bottles can be utilized.

    Exercises Using Your Bodyweight

    Push-ups and pull-ups are examples of bodyweight workouts that are an excellent way to activate the brachioradialis. Forearm muscles can be targeted specifically by modifying these workouts to include other grips (e.g., neutral or reverse grips).

    Consistency and Variation

    Include a range of exercises that work the brachioradialis from various perspectives. Since consistency is essential, try to complete these exercises two to three times a week, paying attention to form, and stepping up the intensity as you gain strength.

    Exercises for the Brachioradialis: Risks and Precautions

    Possible Risks:

    Overuse Injuries: Pain and swelling in the forearm and elbow can result from tendinitis and muscle strains caused by repetitive movements.

    Incorrect Form: Inadequate technique can cause stress on the wrist and elbow joints, raising the possibility of imbalances in the muscles and injuries like tennis elbow.

    Inadequate Warm-Up: Ignoring the warm-up can lead to pain and tightness in the muscles, as well as a higher chance of strains.

    Excessive Load: Overtraining or excessive weightlifting can cause joint tension, persistent pain, and muscular exhaustion.

    Inadequate Recovery: Skipping workouts too often can lead to chronic pain, diminished performance, and stunted muscular growth.

    Preventive Actions:

    Correct Cool-Down and Warm-Up: To prepare and heal your muscles, always begin with dynamic stretches and light cardio, and finish with static stretches.

    Correct Form: To reduce the risk of injury and guarantee successful workouts, concentrate on keeping appropriate form.

    Gradual Progression: In order to prevent overstressing muscles and joints, increase weights and intensity gradually.

    Balanced Training: To avoid imbalances and increase general strength, incorporate workouts that work all of the forearm muscles.

    Adequate Rest: Make sure you get enough food and water in between sessions, and give your muscles enough time to recuperate.

    Listen to your body: Quickly address any pain or discomfort and discern between minor aches and pains and possible injuries.

    People can develop improved overall arm strength and functioning, lower their risk of injury, and promote optimal forearm function by incorporating these exercises into a comprehensive fitness routine.

    Conclusion

    In conclusion, brachioradialis muscle exercise is critical for preserving forearm strength, enhancing grip performance, and promoting general arm health. Forearm pulls, dead hangs, wrist curls, reverse wrist curls, pull-ups, and other exercises can be used to target and strengthen the brachioradialis without the need for specialized equipment.

    Stretching techniques such as pronation and supination stretches, as well as wrist flexor and extensor stretches, are also essential for preserving flexibility and avoiding injuries in the brachioradialis and adjacent muscles. A good brachioradialis workout program must include appropriate form, consistent and balanced training, and enough rest and recuperation.

    FAQs

    What is the muscle known as the brachioradialis?

    On the lateral side of the forearm lies a muscle called the brachioradialis. It penetrates into the distal radius after emerging from the lateral supracondylar ridge of the humerus.

    How does the brachioradialis muscle function?

    At the elbow joint, the brachioradialis muscle flexes the forearm. It facilitates the flexion of the forearm during supination or when the forearm is being used for activities like hammering or pronating.

    How can I exercise at home to strengthen my brachioradialis muscle?

    A number of exercises, such as chin-ups, pull-ups, wrist curls, reverse wrist curls, dead hangs, and forearm pulls, can be performed at home to develop the brachioradialis muscle. These exercises, which focus on the brachioradialis, require little to no equipment to perform.

    Is there a particular brachioradialis muscle stretch?

    Indeed, there are a few stretches that work on the brachioradialis muscle and increase the range of motion in the forearm. These consist of pronation and supination stretches, forearm flexor and extensor stretches, and wrist flexor and extensor stretches.

    How frequently should I work out the brachioradialis muscle?

    The brachioradialis muscle should be worked out two to three times a week, with enough time for rest and healing in between. Making progress and preventing overuse problems require consistency.

    Is it possible to prevent injuries by strengthening the brachioradialis muscle?

    Absolutely, by increasing forearm strength and stability, brachioradialis muscle training can aid in the prevention of accidents. When engaging in physical activity, a robust brachioradialis muscle supports the elbow and wrist joints, lowering the chance of strains and overuse problems.

    Should I exercise the brachioradialis muscle with any safety precautions?

    To prevent injury, it’s crucial to perform brachioradialis exercises with the right form and technique. As your strength increases, start with lighter weights and progressively increase the intensity. If you feel pain or discomfort during exercising, pay attention to your body and stop.

    Can brachioradialis muscles benefit from stretching exercises?

    Indeed, brachioradialis muscles benefit from stretching workouts since they increase muscle flexibility and decrease muscle tension. Stretching keeps the forearm joints in their ideal range of motion and helps avoid stiffness, which can result in injuries when engaging in physical activity.

    For what duration should I hold brachioradialis muscle stretches?

    When performing brachioradialis muscle stretches, hold the poses for 15–30 seconds to give the muscles time to lengthen and rest. For optimal effect, repeat each stretch two to three times on each side.

    Is it possible to include brachioradialis workouts in my normal fitness regimen?

    Absolutely, you can include brachioradialis exercises in your normal training regimen to increase the strength and functionality of your forearms. These exercises help strengthen the arms generally and can be used in conjunction with other upper body workouts.

    Are there any brachioradialis muscle exercises that don’t require the use of equipment?

    Yes, there are a number of equipment-free exercises that work the brachioradialis muscle well. These exercises include dynamic motions like arm circles and wrist rotations, as well as bodyweight exercises like push-ups, pull-ups, and dead hangs.

    Are there any particular brachioradialis workouts that are advised for sports enthusiasts or athletes?

    Exercises for the brachioradialis muscle can help athletes and sports lovers enhance their forearm strength, grip efficiency, and general athletic performance. Brachioradialis strength and endurance can be developed by exercises like farmer’s walks, rope climbs, chin-ups, and kettlebell swings. This can improve performance in sports like weightlifting, tennis, golf, martial arts, and climbing. It’s critical to adjust workout selection and intensity to meet the demands of a certain sport as well as personal training objectives.

    Reference:

    • Cronkleton, E. (2023, May 31). 13 Forearm Exercises to Do at the Gym or at Home. Healthline. https://www.healthline.com/health/forearm-exercises
    • Aliens, A. (2020, December 9). 7 Intense Brachioradialis Exercises | How To Build Bigger Forearms! Anabolic Aliens. https://anabolicaliens.com/blogs/the-signal/7-intense-brachioradialis-exercises
    • Cscs, J. C. M., & Cscs, J. C. M. (2024, February 16). Forearm Workouts. ATHLEAN-X. https://athleanx.com/articles/forearm-workouts
    • Rees, M. (2022, August 31). What are some of the best forearm exercises to try? https://www.medicalnewstoday.com/articles/forearm-exercises
    • B. (2023, July 20). The 5 Best Exercises to Increase Forearm Size and Strength. Built with science. https://builtwithscience.com/fitness-tips/forearm-exercises/
    • Romine, S. (2020, April 23). Are You Working Your Forearms? Because you should be. Greatist. https://greatist.com/health/forearm-exercises
    • Ladva, V. (2022, March 26). Brachioradialis Muscle Pain: Cause, symptoms, Treatment, Exercise. Samarpan Physiotherapy Clinic. https://samarpanphysioclinic.com/brachioradialis-muscle-pain/
    • Thakkar, D. (2023, March 25). Brachioradialis Muscle – Origin, Insertion, Function, Exercise. Samarpan Physiotherapy Clinic. https://samarpanphysioclinic.com/brachioradialis-muscle/
    • V. (2023, October 29). Brachioradialis muscle. Mobility Physiotherapy Clinic. https://mobilephysiotherapyclinic.net/brachioradialis-muscle/#1_Resisted_band_supination
    • Bamaniya, V. (2024, April 1). Brachioradialis Muscle – Origin, Insertion, Function. Physical Therapy Treatment and Exercise. https://physical-therapy.us/brachioradialis-muscle/
  • Knee Injuries

    Knee Injuries

    Knee injuries are a common, frequently painful medical condition that can impact people of all ages and activity levels. The knee joint is a complex structure comprised of bones, ligaments, tendons, and cartilage, all of which cooperate to support and facilitate a range of movements.

    However, the knee may suffer injuries from a variety of sources, including overuse, degenerative diseases, and traumatic events.

    Due to their pain and limited movement, these injuries can significantly affect a person’s day-to-day functioning. Due to the repeated strain of sports activities on the knee, athletes are especially at risk for knee injuries. In addition, the aging process and other medical problems might eventually cause the knee to weaken.

    Many types of moderate knee pain are effectively treated with self-care strategies. Orthopedic braces and physical therapy are other choices for pain management. However, there are situations where knee surgery is necessary.

    Introduction:

    Damage to one or more of the tissues that make up the knee joint, such as the muscles, tendons, cartilage, bones, and ligaments, causes injuries to the joint. These injuries may result from high impact from an automobile crash, falling, quickly twisting the knee, or other traumas. Sprains, dislocations, and fractures are common knee injuries.

    The knees stabilize the body and allow the legs to bend and straighten. Since the knee is the body’s largest joint, injuries frequently arise. The four main tissue types that make up the knee are ligaments, cartilage, tendons, and bone. Damage to any of these important tissue types can result from an injury.

    Two common sports-related knee injuries are meniscus tears and anterior cruciate ligament (ACL) tears. High-impact trauma can result in patella (kneecap) fractures, though they are less common in sports. Most knee injuries require immediate medical attention; some may even require surgery.

    The knee can lead to a broad variety of injuries because of its complex structure and variety of parts. Among the most common injuries to the knee are sprains, tears in the ligaments, fractures, and dislocations.

    Many knee problems can be easily treated with straightforward measures like bracing and rehabilitation exercises. Other injuries can require surgery to be repaired.

    Knees give the body stable support while allowing the legs to bend and straighten.
    Since the knee is the body’s largest joint, injuries frequently happen. In the knee, cartilage, tendons, ligaments, and bones are the four main tissue types. Any of these basic tissue types can be harmed.

    Typical knee injuries include:

    • A sprain is an excessive tearing of the ligaments in the knee.
    • Pain in the kneecap region.
    • Excessive stretching of the muscles and tendons or strains.
    • Meniscus tear (the shinbone and thighbone are separated by cartilage).
    • Ligament rupture, such as the anterior cruciate ligament or posterior cruciate ligament.
    • Injury to the knee’s protective cartilage.

    Less frequent knee injuries include:

    • Fractures (usually caused by landing on the knee, twisting, or being hit directly).
    • Dislocations of the kneecap.
    • Since they require a lot of force, dislocations of the knee are rare.

    Anatomy:

    The knee is the largest and most commonly damaged joint in the body. Its four primary structural elements are cartilage, tendons, ligaments, and bones.

    Bones

    • The femur (thighbone), tibia (shinbone), and patella (kneecap) combine to form your knee joint.
    • The patella lies in front of the joint to provide a little protection.

    Articular cartilage

    • This tissue lines the back of the patella, the femur, and the tibia. Your knee bones can move more smoothly as you stretch or compress your leg due to the smooth surface mentioned earlier.
    • The meniscus between your femur and tibia are two wedge-shaped sections of meniscal cartilage that act as shock absorbers.
    • Compared to articular cartilage, the meniscus, which helps in stabilizing and supporting the joint, is stronger.
    • When someone refers to a torn meniscus, they typically mean a torn fragment of knee cartilage.

    Ligaments

    • A bone is joined to another bone by ligaments.
    • The four main ligaments in your knee function as strong ropes to keep the bones of your knee together and your knee solid.

    Tendons

    • Tendons help with joining muscles and bones.
    • The quadriceps tendon serves as a connection between the patella and the front leg muscles.
    • In contrast, the patella and tibia are joined by the patellar tendon.

    Collateral ligaments

    • Both of these sides of your knee have them.
    • The medial collateral ligament is found inside your knee, whereas the lateral collateral ligament is found outside.
    • They control how your knee moves from side to side.

    Cruciate ligaments

    • These are found inside the knee joint.
    • The anterior cruciate ligament and posterior cruciate ligament cross each other to form an X with the anterior in front and the posterior in back.
    • The cruciate ligaments control the front and posterior motions of your knee.

    The mechanism of injury:

    Given the potential seriousness of both acute and chronic knee injuries, many investigations have attempted to explain the extrinsic and intrinsic components that contribute to these injuries.

    Extrinsic effects include shoe wear, training surface conditions, and training program; intrinsic factors include ligamentous laxity, reduced muscular flexibility, muscle weakness, and foot shape.

    Studies on acute knee injuries have mostly focused on American football and soccer players. One extrinsic aspect studied in American football players is shoe type. In the 1970s, high school football players reported fewer knee and ankle problems when they wore “soccer-style” shoes.

    Compared to conventional footwear, these athletes’ shoes featured more cleats, which were larger and shorter. Following the establishment of cleat size and length standards by the National Collegiate Athletic Association and the National High School Athletic Union, these results led to the measurement of torque forces.

    Overuse injuries can result from using running shoes that are too small or large for the runner’s foot type or from failing to replace the midsole of an old shoe when it begins to lose its ability to absorb pressure. Chronic injuries can result from running on the same banked edge of a road or track, training on hard surfaces, or running on difficult surfaces like sand or hills.

    Overuse injuries usually appear in the first few weeks after starting a new training program or significantly increasing its intensity. Injuries can also occur to athletes who move from high school to university competition and whose training becomes more intense. It’s important to counsel athletes to progressively improve the volume and intensity of their workouts.

    Benign hypermobility syndrome and consequently common ligamentous laxity have been connected to several overuse injuries, including patellofemoral pain syndrome. However as multiple studies have shown, there is no link between benign hypermobility syndrome and the prevalence of ligamentous laxity in football players or injuries to the knee.

    Weakness of the core (abdominal, paraspinal, and buttock muscles) may result in instability that may need increased knee activation and loading. Quadriceps weakness is another complication of acute knee effusions and is frequently associated with overuse injuries to the knee.

    Weaker calf muscles, hip flexors, iliotibial band syndrome, and hamstrings might lead to decreased knee stress and the risk of overuse injury. Knee injuries may be more common in athletes with pes planus, pes cavus, or unusual foot shapes.

    Common Injuries to the Knee:

    The most common injuries to the knee include sprains and tears of soft tissues (such as ligaments and meniscus), fractures, and dislocations. Injuries frequently involve more than one knee structure.

    When a knee injury happens, pain and swelling are the most typical symptoms. Moreover, the knee may lock or catch. Some types of knee injuries, such as anterior cruciate ligament tears, can cause instability, or the feeling that your knee is giving way.

    Many moving elements make up the knee joint. People can sit, squat, jump, and run using it since it functions similarly to a door hinge and allows users to bend and straighten their legs.

    The knee consists of four parts;

    • Ligaments
    • Bones
    • Tendons
    • Cartilage

    The femur, often known as the thighbone, is located at the apex of the knee joint. The tibia or shinbone makes up the basis of the knee joint. The femur and tibia joint is covered by the patella, commonly known as the kneecap.

    The substance that protects the knee joint’s bones is called cartilage. It also protects the bones from impact and supports the movement of ligaments over them.

    The four ligaments of the knee work like ropes to provide stability and hold the bones together. The muscles that support the knee joint are attached by tendons to the lower and upper leg bones.

    Here is a list of the most typical knee injuries,

    Injury to the Knee Ligament

    A joint is surrounded by strong bands of connective tissue called ligaments that support and control mobility. Ligament injuries, often known as knee sprains, can result from sports injuries that create instability in the knee joint. They also make it difficult for you to move your knee as much.

    The knee is stabilized by four primary ligaments that connect the thigh and shin bones;

    An anterior cruciate ligament (ACL): The middle knee ligament, known as the anterior cruciate ligament (ACL), controls how the shin bone rotates and moves forward. Tears or sprains of the anterior cruciate ligament caused by sudden pauses, changes in direction, jumping, and landings are known as anterior cruciate ligament injuries. It’s common in sports like basketball, football, and downhill skiing.

    A posterior cruciate ligament (PCL): The ligament in the middle of the knee that controls the shin bone’s rearward mobility is called the posterior cruciate ligament (PCL). A strong, sharp impact, usually from a football hit or other comparable activity, can strain or tear your knee’s strongest ligament, the posterior cruciate ligament (PCL) causing injury.

    Lateral collateral ligament (LCL): The ligament responsible for supporting the inside knee is called the lateral collateral ligament (LCL). The lateral collateral ligament can become injured during activities that require twisting, bending, or sudden changes in direction. A football player getting hit on the inside of the knee is one example.

    Medial collateral ligament (MCL): The medial collateral ligament (MCL) is an outside knee ligament that promotes stability. An injury known as a medial collateral ligament sprain can happen to someone who gets hit on the outside of the knee, like in a football or hockey match.

    In the direction that the wounded ligament stabilizes, the knee becomes unstable when any one of these four is damaged. The four particular tests used to evaluate injuries are the Varus Stress Test ( lateral collateral ligament ), the Valgus Stress Test for (medial collateral ligament ), the Anterior Dawer Test for (anterior cruciate ligament), and the Posterior Dawer Test for (posterior cruciate ligament).

    Signs and symptoms of an injury to the knee ligament:

    • There was a loud pop, or snap, at the scene.
    • Sudden, unbearable pain that sometimes prevents you from practicing your sport.
    • Black and blue discoloration surrounding the knee.
    • Instability of the knee.
    • Swelling that appears within the first twenty-four hours after an injury.
    • Pain restricting the damaged joint from supporting weight.
    • Bending the knee with the outside inward.

    To identify ligament damage, a doctor first performs a physical examination. They will examine the knee to look for swelling and pain. The technique may cause pain because of the many knee movements that are utilized to evaluate your range of motion and the external pressure that is given to your knees.

    Although ligament injuries happen often, there is variation in the degree of the injury;

    Grade I:

    • A Grade I injury results in a little overworked fiber, which causes ligament spraining.
    • There won’t be many bruises or any swelling at all.
    • A prime example of this type of injury is a medial collateral ligament sprain.

    Grade II:

    • This is the result of partial, but incomplete, rupture of the ligament fibers.
    • Compared to Grade I, there will be more pain, joint limitation, bruising, and swelling.

    Grade III:

    • A whole tear in the ligament generates a Grade III injury, which is usually quite painful.
    • The area around the knee will be severely swollen and bruised.
    • An example of this type of damage is a lateral collateral ligament tear.

    The degree of damage is divided into three categories using a grading system: Grade I (mild), Grade II (moderate), and Grade III (severe). The type of sprain, the severity of the injury, your recovery strategy, and the type of sport you play all affect how long a knee sprain lasts.

    Many times, minor to moderate wounds heal on their own. For most collateral ligament tears, surgery is usually not required (medial collateral ligament and lateral collateral ligament). However, in situations where the cruciate ligaments (anterior cruciate ligament or posterior cruciate ligament) have been severely ripped and strained, reconstructive injury will be the only option. Should you obtain proper medical attention and engage in a high-quality physical therapy treatment, a full recovery should to be achievable.

    Injury to the Anterior Cruciate Ligament (ACL):

    Sports participation frequently results in anterior cruciate ligament injury. Sports involving eliminating and turning, such as soccer, football, and basketball, are more likely to cause anterior cruciate ligament injuries in athletes.

    An anterior cruciate ligament tear can be caused by sudden changes in directions or by landing from a jump incorrectly. About 50% of anterior cruciate ligament injuries also involve damage to other knee components, such as articular cartilage, the meniscus, or other ligaments.

    The stability of the joint depends on the anterior cruciate ligament (ACL), which runs diagonally down the front of the knee. Surgery may be required for anterior cruciate ligament injuries, which can be rather dangerous.

    Anterior cruciate ligament injuries have a numerical value that goes from one to three. A grade 3 sprain is an anterior cruciate ligament tear, while a grade 1 sprain is regarded as a moderate injury.

    Anterior cruciate ligament injuries are common among athletes who play contact sports like football or soccer. However, contact sports are not the primary cause of this illness.

    Posterior cruciate ligament (PCL):

    The posterior cruciate ligament is commonly injured when the knee is bent and pushed in the front. This usually happens in crashes between sports vehicles and automobiles. The majority of tears in the posterior cruciate ligament are partial tears that could heal on their own.

    The posterior cruciate ligament is situated behind the knee. This ligament is one of several that connects the thighbone to the shinbone. This ligament restricts the amount of backward movement of the shinbone.

    A posterior cruciate injury requires force when the knee is bent. This kind of stress is typically experienced after serious falls onto a bent knee or after being injured in an incident that results in a bent knee.

    Injury to the Collateral Ligaments:

    In most cases, collateral ligament injuries are caused by an external force that forces the knee sideways. These are often contact-related injuries.

    Sports-related trauma is a common cause of medial collateral ligament injuries, which are primarily caused by direct impacts to the outside of the knee.

    An injury to the inside of the knee that results in the knee bending outward can harm the lateral collateral ligament (LCL). Compared to other kinds of knee injuries, lateral collateral ligament tears happen less commonly.

    The shin and thighbone are joined by collateral ligaments. Athletes frequently suffer these injuries, especially those who participate in contact sports.

    Direct hits or accidents with other persons or objects frequently result in tears to the collateral ligaments.

    Patellofemoral Pain Syndrome:

    Pain near the patella, or kneecap, is the feature of patellofemoral pain syndrome, also referred to as “runner’s knee.” This illness is caused by imbalances and abnormalities in the surrounding muscles and tissues. It is common among athletes who perform knee flexion exercises repeatedly, such as running, leaping, and cycling.

    Signs and Symptoms of Patellofemoral Pain Syndrome:

    • A dull, sharp pain in the front of the knee.
    • Pain that worsens with prolonged sitting, squatting, and climbing stairs.
    • Buckling or bending to the knee irregularly.

    Physical therapy can be used to strengthen the muscles surrounding the knee, increase flexibility, and deal with imbalances. Orthotics or shoe inserts can also be used to support the feet and reduce stress on the knee joint.

    Meniscal Tears:

    Meniscal tears resulting from sports are prevalent. Meniscus tears are possible when a person is tacking, twists, cuts, or pivots for movement. Arthritis and age can also cause meniscal tears. A simple awkward twist when getting out of a chair could cause an injury if your meniscus becomes weaker with age.

    When someone refers to torn knee cartilage, they most likely point to a meniscal tear.
    Menisci are the two flexible cartilage wedges that rest between the shin and thighbones. These cartilage parts may suddenly burst during sports. They may also tear more slowly as they get older.

    Natural aging-related meniscus tears are referred to as “degenerative meniscus tears.”
    A meniscus tear that happens suddenly can cause a pop in the knee. The pain, swelling, and tightness may worsen in the days that follow the initial injury.

    An elastic cartilage that supports the knee with a crescent-like shape is called the meniscus. Often suffered in sporting locations meniscal tears are a common kind of knee injury that can result from severe trauma or abrupt twists.

    The injury and ligament damage can happen at the same time. The degree of the injury might also vary, ranging from mild to severe, depending on how far it goes.

    Signs and Symptoms of A Meniscal Injury;

    • Localized pain on the medial or lateral surfaces of the knee.
    • Locking and clicking noises.
    • A delayed onset of intermittent swelling.

    Diagnosing a torn meniscus begins with a thorough history and physical examination. To confirm a diagnosis, imaging tests such as an MRI, X-ray, or arthroscopy could also be required.

    It is recommended that meniscal injuries be treated early with the RICER approach, which stands for rest, ice, compression, elevation, and reference. This strategy needs to be followed within 48–72 hours to receive quick medical attention and pain relief. In addition, you must follow the No HARM plan, which restricts the use of heat, alcohol, running, and massage. It reduces the bleeding and edema in the wounded knee.

    Physical therapy can help you strengthen the muscles in your legs and around your knees, which can provide stability and support for your knee joints. The patient may need to wear a knee brace designed specifically for helping a meniscus tear. If, however, your knee locks up and the pain doesn’t go away after treatment, the doctor might recommend surgery.

    A good prognosis can be obtained after a meniscal tear. To achieve this, patients might either have surgery or get conservative therapy. Athletes can compete in their original sports. It’s also true that once damage happens, cartilage cannot be repaired to its original state. To avoid a torn meniscus, everyone needs to check out preventative measures (such as strengthening the surrounding muscles, keeping a healthy weight, or employing proper body mechanics).

    Bursitis:

    Little sacs filled with fluid called bursae protect the knee joints and make it easier for tendons and ligaments to pass over them.

    These sacs have the potential to expand and become inflamed when they are overused or frequently compressed while kneeling. This is referred to as bursitis.

    For the most part, bursitis is not serious and can be treated with self-care. However, aspiration a procedure using a needle to remove excess fluid as well as antibiotics can be required in specific situations.

    The knee bursae are little sacs that are filled with fluid and are situated near the knee joint. When they are in good working order, they help guide joints smoothly and keep tendons, ligaments, and muscles from rubbing against the bones.

    Knee bursitis arises from injury, inflammation, or irritation of one or more bursae. Bursitis can be caused by grating friction created by repeated activity such as jogging, strong blows, and chronic pressure. This worsens if the joint is immobilized for an extended amount of time.

    Signs and Symptoms of Knee Bursitis:

    • A sharp or stabbing sensation followed by a slow, aching pain.
    • Swelling and redness in the anterior part of the knee.
    • Warmth in the area surrounding the joint.
    • Pain when bending over.
    • Greater pain after a prolonged period of joint immobility.

    Sometimes bursitis is mistaken for other illnesses, such as tendinitis, arthritis, and stress fractures. To correctly identify the problem, the orthopedic doctor or physical therapist will do a thorough examination and prescribe specialist testing such as an MRI, ultrasound, or X-ray.

    Knee bursitis typically resolves on its own with little to no help from a doctor. The goal of an intervention is to reduce symptoms, however, in some cases, medical care can be required. This includes over-the-counter drugs, home remedies, and basic therapy including lifestyle modifications. Injections of corticosteroids, aspiration, and surgery are other possibilities for chronic problems.

    Tendonitis:

    Knee tendinitis or inflammation is known as patellar tendinitis. The tendon that connects the shinbone and kneecap gets damaged in this way. The patellar tendon works in conjunction with the front of the thigh to extend the knee, allowing for running, jumping, and other athletic activities.

    A common ailment among athletes who jump frequently is tendinitis, commonly referred to as “jumper’s knee.” All those who are physically active, however, are at risk for tendinitis.

    Patellar tendinitis, sometimes referred to as “jumper’s knee” or patellar tendinopathy, is characterized by overstressed knees. Athletes commonly get this form of injury in sports like the long jump, basketball, and volleyball where they frequently jump or fall hard. It also occurs when you increase your exercise routine unexpectedly or train on hard surfaces like concrete. The increased strain on the tendon results in tiny tears, which inflame the muscle.

    Pain from patellar tendinitis typically goes away gradually. Athletes with mild to severe symptoms could potentially train and compete. When originally damaged, the wound often healed quickly and without any problems. However, if it happens frequently, the tears may start to form before the body heals. More damage will eventually take place, resulting in pain and malfunction.

    Signs and Symptoms of Patellar tendinitis:

    • Pain and soreness below the kneecap.
    • Pain gets worse as you run, leap, jump land, and rest for extended periods.
    • The knee is weak.

    To diagnose the issue, your doctor will feel and inspect various portions of your knee to find painful regions. If you have patellar tendinitis, this will be located at the front of your knee, just behind the kneecap.

    Doctors will often use imaging tests like MRIs, ultrasounds, and X-rays to get a more definitive diagnosis.

    Additional medical procedures for this injury include physical therapy and maybe longer recovery. With the proper treatment and rehabilitation for your injuries, you may go back on the field, court, or track as soon as possible.

    Tendon Tears:

    The quadriceps and patellar tendons can be torn and stretched. Middle-aged adults who participate in sports involving running or jumping are more likely to experience tears, while injuries to these tendons may happen to anybody. Following jumping, an awkward landing, falls, and crashes direct force applied to the front of the knee are all frequent causes of injuries to the knee tendon.

    The tendons, which are soft structures, are what attach the muscles to the bones. Knee injuries involving the patellar tendon are common. A middle-aged or athletic person who exercises regularly and often tears or overstretches their tendons. Additionally, a fall or attack that affects the tendon may cause it to rip, for example.

    Iliotibial band syndrome:

    It is common for long-distance runners to experience iliotibial band syndrome. It comes on by the iliotibial band, which is located outside the knee, sliding on the outside of the knee joint.

    Pain is almost always the result of a minor issue. It may eventually get so severe that a runner has to stop running just to give their iliotibial band a chance to recover.

    The iliotibial band (ITB) or iliotibial tract is the thick band of fascia that extends from the top of your shin to the length of your thigh. This structure is made up of dense fibrous connective tissue that inserts at the knee and begins at the iliac crest. The lateral rotation, abduction, and extension of the hip are controlled by the iliotibial band (ITB) and the muscles it engages.

    Iliotibial band syndrome is thought to be caused by non-traumatic overuse injuries that result from underlying weakness in the hip abductor muscles. Running and cycling are the most common sports where people have outside-of-the-knee pain, This develops as a result of excessive knee flexion and extension. Sports like basketball, swimming, hockey, cycling, and hiking are also associated with it.

    Iliotibial Band Syndrome Symptoms:

    • Felt soreness or tightness on the outside of the knee.
    • Pain that persists after exercising.
    • A clicking sound.
    • Warm, red skin surrounds the knee.

    A diagnosis can be made with the help of your medical history, which details the symptoms and issues you are now experiencing. This will also include a physical examination and a thorough assessment of your knees’ strength and range of motion. Using certain tests, your doctor can rule out iliotibial band syndrome, meniscal tears, osteoarthritis, and other potential reasons for your knee pain. An X-ray or MRI would be required to reach an exact diagnosis.

    Most people respond well to stretching, strengthening, applying cold compresses, and taking anti-inflammatory medications. It is also important to temporarily limit one’s activities to reduce pain, prevent further injury, and allow the knee to heal fully. It is occasionally advised to use ultrasound and electrotherapy to relieve stress. In the interim, some may even require surgery to treat the injury.

    Most individuals with iliotibial band syndrome recover, however it usually takes them several weeks or months to return to their regular activities without pain.

    Fractures:

    Patellar fracture

    The bone that breaks closest to the knee most often is the patella. The point where the tibia and femur unite to form the knee joint is also at risk of fracturing. The majority of fractures around the knee are caused by high-energy trauma, which includes car crashes and falls from significant heights.

    Any of the bones in or around the knee could fracture. High-impact trauma, including falls or car accidents, is the main cause of knee fractures. For someone with underlying osteoporosis, even a minor mistake or fall might cause a knee fracture.

    Patellar fractures are serious injuries to the knee that can seriously impede function. This may result from a direct landing on your kneecap, from overusing your knee, or from a direct hit or trauma. A fracture could occur if the tension builds up beyond what the bone can support. The site, degree, and kind of these injuries are subject to variation.

    Signs and symptoms of patellar fracture;

    • Suddenly, there is painful, stabbing pain at the front of the knee.
    • An obvious problem in the knee.
    • Inability to raise the foot.
    • Visible abnormality (in extreme situations)

    A physical examination, radiological results, and an analysis of the injury’s route of origin are used to make the diagnosis. Treatment may include repositioning, surgery, or the use of functional and protective devices (e.g., crutches, plaster casts, or knee braces). Gradual patellar conditioning is a safe and effective way to help athletes recover.

    Patients with patellar fractures usually heal well if they receive the proper care. They can resume sports in a matter of weeks or months under the close supervision of their physical therapist or another specialist. If the rehabilitation following this type of fracture is not sufficient, conditions such as osteomalacia, patellofemoral pain syndrome, and post-traumatic arthritis may develop.

    Osgood-Schlatter Disease:

    This common overuse injury results in pain and inflammation in the growth plate located in the tibial tuberosity. It is particularly common in teenagers who play sports where they must sprint, jump, or change direction quickly, and it usually affects them at times of rapid development.

    Signs and symptoms of Osgood-Schlatter Disease:

    • Tibial tuberosity and swelling of the patellar tendon.
    • The bony protrusion below the kneecap, known as the tibial tuberosity, is the source of the soreness, swelling, and stiffness.
    • Pain that gets worse when you run, jump, or squat.
    • Temporary relief from pain during bed rest.

    Treatment usually includes rest, ice, compression, and elevation (RICE) together with anti-inflammatory medications and physical therapy to strengthen the surrounding muscles. Usually, the issue is resolved by the growth plate closing on its own.

    Dislocation:

    A dislocation happens if there is a partial or complete displacement of the knee’s bones. For instance, there could be a cause for the patella to shift or the tibia and femur to misalign.

    Dislocations could be the result of a structural abnormality in the knee. When it comes to those with normal knee structure, high-energy trauma such as automobile crashes, sports injuries, and falls is the most common cause of dislocations.

    Knee dislocation can occur when the knee’s bones are misplaced or out of alignment. A dislocated knee may result in one or more bones being displaced. Trauma or structural issues, such as those suffered in falls, car crashes, or contact sports, can cause a dislocated knee.

    Knee dislocations can be classified as either high-velocity or low-velocity. High-velocity knee dislocations are most frequently caused by a violent force, such as a car accident. Conversely, low-velocity dislocations of the knee are common in displaying situations.

    An athlete stands the danger of dislocating their knee when they quickly change direction after planting their foot on the ground. A twisting motion is present. In sports like gymnastics, long jumping, cycling, soccer, and skiing, this is typical.

    Signs and symptoms of Dislocated Knee:

    • Sudden and severe edema.
    • Extreme stiffness and pain.
    • Hypermobile patella, or “sloppy” kneecap.
    • A noticeable abnormality of the knee.
    • Below the knee, weakness or absence of pulse.

    The doctor will initially check distal pulses, particularly on the foot, to rule out injury because vascular damage is frequently linked with knee dislocation. They may also recommend an X-ray to figure out the extent of bone injury. An arteriogram, or X-ray of the artery, may be given to patients to check for arterial damage, while an ultrasound may be used in certain cases to evaluate arterial blood flow.

    Treatment consists of immobilization, surgery (which includes knee reconstruction and vascular repair to protect blood flow), and relocation (placing the lower leg back into position through a process called reduction).

    One considers a dislocation to be a significant injury. The wounded knee usually loses its ability to endure stress, however recovery is possible. Bracing wraps or additional supports are often recommended by doctors to protect the knee and prevent it from being overused.

    Hamstring & Quadriceps Strains:

    Your thigh is made up of two primary muscle groups: the hamstrings and the quadriceps. The three muscles that form the hamstring are the biceps femoris, semitendinosus, and semimembranosus. From your thigh to your knee, they go along the back of your leg.

    When these muscles work together, knee flexion and hip extension are possible. The quadriceps muscles are located in the area between your hip and knee on the anterior part of your thigh. They are joined to your pelvis, femur (thigh bones), patella (kneecaps), and hip bones through the related tendons.

    Strains in the hamstrings and quadriceps are common ailments that arise from overstretching the tearing muscle fibers. These injuries are common in sports where players must sprint, jump, or change direction quickly.

    Signs and symptoms of Hamstring And Quadriceps Strains:

    • Acute, sharp pain that affects the thigh’s quadriceps or hamstrings.
    • Both bruising and swelling.
    • It is challenging to walk or bear weight on the injured limb.

    Rest, Ice, Compression, and Elevation (RICE) is the standard therapy for these injuries to minimize pain and swelling. Physical treatment could also be necessary to help the affected muscles regain their strength and flexibility.

    Which types of knee injuries following a fall are most common?

    The most common knee injuries that can occur following a fall are these, which range in severity from mild to serious.

    Contusion

    • A bruise or contusion to the knee is a typical injury suffered from falling onto a hard surface.
    • The impact may cause blood to leak into the surrounding tissue from a blood artery or capillary in the skin or muscle below, resulting in an unusual black and blue bruise.
    • The usual at-home treatments for a bruised knee include rest, ice, elevation, and, if necessary, over-the-counter anti-inflammatory medications like ibuprofen.

    Abrasion

    • An abrasion is another name for a tear.
    • This happens when the skin comes into contact with a rough surface, such as asphalt or cement.
    • A small abrasion can be healed at home since it just removes the skin’s outer layer or epidermis.
    • Medical attention may be necessary for severe abrasions that involve blood and several layers of skin.

    Laceration

    • A laceration is a wound that tears or punctures skin as a result of a cut or pierces as well.
    • Falling and landing on something sharp, like a nail, might cause a laceration.
    • Similar to abrasions, lacerations can range in severity from very shallow, requiring medical attention, to small, with little to no blood.

    Sprain

    • A sprain can result from one or more knee ligaments being overextended.
    • One kind of structure that connects two bones is called a ligament.
    • A severe fall or getting hit by anything heavy or powerful, such as a football attack, can result in a sprained knee.
    • Usually, you may treat your sprain and recover at home.

    Speak with a doctor if;

    • A lot of swelling is present.
    • Terrible pain.
    • You have extreme difficulty moving your knee.

    Meniscus tear

    • The meniscus is an element of flexible cartilage that fits between the femur and tibia and acts as a support for those two bones.
    • Meniscus tears tend to happen after a hard fall, but they are also common in sports like football or basketball following a hard turn.
    • Chronic pain and swelling may be signs that your torn meniscus needs to be medically repaired, even though some meniscus tears can be handled conservatively, meaning no surgery is necessary.

    Tendon tear

    The two main tendons in the knee are as follows;

    • The tendon that connects the patella (kneecap) to the quadriceps muscle in the front of the thigh is known as the quadriceps tendon.
    • The patellar tendon connects the base of the patella to the tibia (shinbone).
    • A fall that lands awkwardly or a fall that impacts the front of the knee might result in either injury.
    • Patellar tendon tears are the most frequent.

    Torn ligament

    Four primary ligaments in the knee unite the tibia and femur, or thighbone, allowing for side-to-side rotation as well as forward and backward motion.

    • An anterior cruciate ligament (ACL)
    • Posterior cruciate ligament (PCL)
    • Medial collateral ligament (MCL)
    • Lateral collateral ligament (LCL)

    Signs and symptoms of knee injuries:

    The location and degree of knee pain may vary depending on the underlying cause of the issue.

    Sometimes, knee pain will be along with the following signs and symptoms;

    • Popping or crunching sounds.
    • Unable to extend the knee to its maximum range.
    • Stiffness as well as swelling.
    • Not having a full range of motion in the knee.
    • Redness and warmth that is touch-sensitive.

    Mechanical challenges:

    A few examples of mechanical problems that can cause knee pain are as follows;

    • Loose body

    If there is damage or degeneration, an element of bone or cartilage can break off and float in the joint space. This may not be a problem unless the loose body limits the knee’s range of motion. That would make things like a pencil jammed in a door hinge.

    • Iliotibial band syndrome

    The reason for this is that severe tightness in the iliotibial band, a solid band of tissue extending from the outside of your hip to the outside of your knee, pushes against the outside of your thighbone. Prolonged-distance runners and cyclists are especially susceptible to iliotibial band syndrome.

    • A dislocated kneecap

    The patella, the triangle-shaped bone covering the front of the knee, slips out of place, usually to the outside, resulting in this. In certain cases, the dislocated kneecap may still be noticeable.

    • Pain in the hips or feet

    You can alter your gait to spare the sore joint if you have foot or hip pain. On the other hand, knee pain could result from this altered gait putting more strain on your knee.

    Arthritis:

    Knee pain is most commonly caused by osteoarthritis. Adults in their middle and later years are often impacted. Osteoarthritis may be caused by excessive joint stress, such as being overweight or experiencing recurrent injuries.

    Types of arthritis:

    • Gout: This type of arthritis comes on by crystals of uric acid building up in the joint. Gout may affect the knee, even though it usually affects the big toe.
    • Osteoarthritis: Also known as degenerative arthritis, osteoarthritis is the most common type of arthritis. It is an age and use-related wear and tear condition caused by the degradation of knee cartilage.
    • Rheumatoid arthritis: This autoimmune disease, which can affect almost any joint in the body, including the knees, is responsible for the most painful kind of arthritis. Though it may vary in severity and even flare up and disappear, rheumatoid arthritis is a chronic illness.
    • Pseudogout arthritis: Pseudogout is often confused with gout and is caused by calcium-containing crystals that form in the joint fluid. The knee is the joint that is most frequently affected by pseudogout symptoms.
    • Septic arthritis: Swelling, pain, and redness in your knee joint can sometimes be caused by an infection. Fever is a common symptom of septic arthritis, and pain rarely follows trauma. Septic arthritis has the potential to quickly cause deep damage to the knee cartilage. See your doctor right away if you experience knee pain in addition to any of the symptoms of septic arthritis.

    Risk factors:

    • Genetics and Family History

    Some people are more likely to get osteoarthritis because it increases the risk of knee damage. Moreover, a less stable knee is experienced by those who are born with excess joint space.

    • Past injury

    If you have previously experienced a knee injury, your chances of getting another one rise.

    • Particular athletic activities or fields:

    Knee strain from sports is higher than from other sports. Basketball jumps and pivots, snow skiing (with its stiff ski boots and potential for falls), and running/jogging (which repeatedly pounds your knees) all raise the possibility of a knee injury. Jobs requiring repetitive knee strain, such as farming or construction, may also raise your risk.

    • Overweight

    Being overweight or obese puts additional strain on your knee joints, even during everyday activities like walking or stair climbing. Additionally, because of how quickly joint cartilage decreases, it raises the risk of developing osteoarthritis.

    • Jobs

    Just like when you play sports, kneeling or squatting a lot at work increases your chance of developing knee problems.

    • Insufficient strength or flexibility in the muscles

    People who have weaker muscles may be more likely to have accidents with their knees. Flexible muscles allow you to move through your full range of motion, while strong muscles protect and support your joints.

    Diagnosis

    During the physical examination, your doctor might;

    • Look for obvious bruises, warmth, soreness, pain, and swelling on your knee.
    • Take a range of motion measurement of your lower leg in different directions.
    • Put pressure or tension on the knee joint to figure out how stable its structures are.

    Imaging examinations:

    In particular situations, your doctor might suggest tests such as;

    • X-ray: An X-ray may be the first test your doctor suggests to check for bone fractures and joint damage.
    • Computerized tomography (CT) scan: By combining X-rays from different angles, CT scanners create cross-sectional images of your inside body. CT scans are useful for detecting small bone fractures and issues. With a particular kind of CT scan, gout can be correctly diagnosed even in situations where there is no joint inflammation.
    • Ultrasound: This method creates real-time images of the soft tissue structures in and around your knee using sound waves. During the ultrasonography, your doctor might want to move your knee around to check for any specific issues.
    • Magnetic resonance imaging (MRI): Using radio waves and a powerful magnet, an MRI creates three-dimensional images of the inside of your knee. When checking damage to soft tissues like muscles, tendons, ligaments, and cartilage, this test is especially helpful.

    When to see a doctor for advice:

    You must get medical advice from a doctor,

    • Hearing a “pop” sound during the fall, since this is typically an indication of a torn ligament.
    • Another common symptom of a ruptured knee ligament is a feeling of instability, buckling, or giving way.
    • You cannot bend your knees and walk.
    • Your knee is not completely flexible.
    • It may be a sign of structural damage to the knee if you are unable to bear weight on it.
    • Have edema in the knees that is noticeable.
    • Find a noticeable deformity in your leg or knee.
    • Your knee may feel warm to the touch following a fall. This may be a sign of inflammation resulting from a muscle or tendon tear.
    • Warmth can also be a sign of an infection or bursitis.
    • Experience acute knee pain related to an accident.
    • If the bleeding from a cut or scrape doesn’t stop after a few minutes, you might need to visit a doctor.

    Treatment:

    Initial medical care should be managed within 48 to 72 hours following a knee injury.

    Here are some guidelines for administering basic medical care for a knee injury;

    • Quit your activity right away.
    • Stop from “working beyond” your pain.
    • Give the joint some time to rest first.
    • Ice packs should be applied to pain, edema, and internal bleeding for fifteen minutes each day for a few hours.
    • Start by applying strong knee tape to the lower leg.
    • Lift the injured leg.
    • Stay out of heating the joint.
    • Avoid alcohol as it exacerbates bleeding and edema.
    • Refrain from rubbing the joint as this could make the swelling and bleeding worse.

    In-home care:

    R.I.C.E. has a major healing effect on knee injuries. Your injury will determine your course of action. Most mild to moderate issues resolve themselves.

    The simplest method for expediting the healing process is to;

    • Let your knee rest.
    • Take a few days off from any physically demanding activities.
    • Use ice to relieve pain and swelling.
    • Every three to four hours, give it a quarter to a half hour. Continue doing this until the pain slows down, which should take two to three days.
    • Apply force to your knee. To wrap the joint, use straps, long sleeves, or an elastic bandage. It will either encourage or lessen edema.
    • Raise your knee and put a pillow under your heel to reduce swelling when you sit or lie down.

    Medicine treatment:

    • Put painkillers to use.
    • It is possible to reduce pain and swelling by taking nonsteroidal anti-inflammatory drugs (NSAIDs) like naproxen or ibuprofen.
    • These medications have the potential to cause side effects, so you should only use them occasionally unless directed otherwise by your doctor.

    Injections:

    In certain situations, your doctor may recommend injecting medications or additional components directly into your joint.

    Take, for instance,

    • Corticosteroids: A corticosteroid injection into your knee joint may help lessen the symptoms of an outbreak and offer temporary pain relief. Not every time do these injections function as planned.
    • Hyaluronic acid: You can receive an injection of hyaluronic acid, a thick fluid that resembles the fluid that lubricates joints naturally, to increase the range of motion and reduce pain. Relief after a single or series of shots may last up to six months, even though conflicting results in research on the effectiveness of this treatment.
    • Platelet-rich plasma (PRP): PRP appears to reduce inflammation and promote healing because of its high concentration of growth factors. Further research is necessary, but some patients with osteoarthritis may benefit from PRP, according to some research.

    Physical Therapy treatment:

    You can increase the stability of your knee by strengthening the surrounding muscles. Depending on the specific ailment that is causing the pain, your physician may recommend physical therapy or different strengthening exercises.

    If you play a sport or engage in physical activity, you may need to perform exercises to improve movement patterns that could be damaging to your knees and to establish proper technique during your activity. It’s also essential to perform exercises that improve your flexibility and balance.

    Arch supports, which sometimes feature wedges on one side of the heel, can help relieve pressure on the side of the knee affected by osteoarthritis. Certain brace types can help protect the knee joint in specific conditions.

    Surgical treatment:

    For many fractures and injuries close to the knee, Often, surgery is necessary to fully restore leg function. In certain situations during arthroscopic surgery, like multiple anterior cruciate ligament tears, small instruments and tiny incisions may be used.

    On the other hand, fractures often require open surgery, which involves a larger incision and allows your surgeon easier access to the injured structures.

    If you have an injury that may require surgery, you usually don’t have to have it done right away. Consider the most important things and the advantages and disadvantages of nonsurgical rehabilitation and surgical reconstruction before making a decision.

    If you decide to have surgery, you may be able to choose from the following options:

    • Arthroscopic surgery: Your doctor may be able to examine and repair joint damage around your knee using a fiber-optic camera and long, narrow tools inserted through a few tiny incisions, depending on the type of injury you have. Arthroscopy can be used to replace torn ligaments, repair or replace damaged cartilage, and, if your knee is locking, remove any loose bodies from the joint.
    • Partial knee replacement surgery: Your surgeon will replace only the damaged portion of your knee with metal and plastic components. Because this procedure typically involves making small incisions, you should recover from it more quickly than from surgery to replace your entire knee.
    • A total knee replacement involves the surgical removal of your kneecap, shinbone, and thighbone as well as any damaged bone or cartilage. An artificial joint made of premium plastics, metal alloys, and polymers is placed in their place.
    • Osteotomy: By removing bone from the shin or thighbone, this procedure intends to improve knee alignment and reduce pain associated with arthritis. This surgery may allow you to delay or even prevent a total knee replacement.

    What is the treatment for knee pain following a fall?

    The standard treatments for knee injuries caused by falls include rest and, if necessary, bracing the injured joint to maintain stability. In most cases, anti-inflammatory painkillers such as ibuprofen (Advil, Motrin) may be helpful.

    Many times, small knee injuries can be handled at home. However, it’s imperative to see a doctor if symptoms worsen or if the pain gets worse by any of the following;

    • A significant amount of joint swelling.
    • An inability to keep up weight.
    • Additional signs of ligament or tendon damage.
    • If the damage is severe, surgery might be necessary to relieve pain and restore function.

    How long does it take for an injury to heal on the knee?

    The duration of healing for a knee injury depends on its type and severity. A lengthier recovery time may be necessary if the injury involves surgery and/or physical treatment.

    • A straightforward strain or sprain could last for a week or two.
    • It can take one to three months for more serious injuries that require arthroscopic surgery to heal.
    • knee injury so bad that it takes a year to recover.

    Following your doctor’s instructions for immobilization, rest, staying off your feet, and avoiding strenuous exercise that might worsen the injuries could speed up your recovery.

    Physical therapy is another way to speed up the healing process. Following your physical therapist’s instructions is important to ensure that you are doing the exercises correctly and getting the best results.

    Non-surgical chronic knee problems could come up frequently. Anti-inflammatory medications, physical therapy, and cortisone injections can all provide short-term relief.

    Prevention:

    Although preventing knee injuries isn’t always possible, some things can be taken to lower the risk. For example, people who run or play sports should wear suitable footwear and safety equipment.

    In cases of iliotibial band syndrome or overuse injuries, one may want to consider reducing their running mileage.

    Several exercises are also used to strengthen the muscles in the smaller legs, which reduces the risk of injury. Last but not least, stretching can help avoid knee injuries both before and after exercise.

    Eating a healthy diet is also important, especially for athletes. Protein, calcium, and vitamin D are necessary for the upkeep of strong bones, muscles, and ligaments.

    Although it’s not always possible to avoid knee pain, the following methods can help stop injuries and degeneration of the joint;

    • Avoid gaining any additional body fat.
    • One of the finest things you can do for your knees is to keep up a healthy weight. Your risk of developing osteoarthritis and other disorders rises with each extra pound you put on.
    • Get dressed up to participate in your sport.
    • To prepare your muscles for the demands of playing sports, spend some time working them out.
    • Improve your ability to perform.
    • Ensure that your sports or activity-specific movement patterns and skills are at their best.
    • Getting professional advice can be very helpful.
    • Develop your strength without sacrificing your flexibility.
    • Weak muscles are one of the primary causes of knee injuries.
    • You will benefit from strengthening the quadriceps and hamstrings, the muscles on the front and back of your thighs that support your knees.
    • Engage in suitable physical activities.
    • If you have osteoarthritis, chronic knee pain, or a history of injuries, you may need to adjust your exercise routine. At least a few days a week, think about moving to low-impact activities like swimming, water aerobics, or other comparable options.

    When Will My Knee Feel Better Again?

    It also depends on what nature of injury. Furthermore, some people naturally heal faster than others. Find out from your doctor if there’s anything you can do to keep your knee pain from getting worse while you recover. Be patient in everything you do.

    You should wait to resume your regular exercise therapy until you experience these symptoms;

    • Your knee does not hurt when you bend or straighten it.
    • There is no pain in your knee when you run, walk, jump, or sprint.
    • The strength of the injured knee is equal to that of the uninjured knee.

    Prognosis:

    • The prognosis for a knee injury depends on the type and severity of the damage.
    • With conservative care, most mild knee injuries like strains and mild sprains heal on their own. The prognosis is good for these kinds of injuries.
    • If damage to the ligaments or cartilage results in the knee malfunctioning or becoming unstable, surgery might be required.
    • These injuries usually heal well with surgery, allowing patients to eventually regain their full or nearly full range of motion in their knees.

    Summary:

    Knee pain affects people of all ages regularly. An injury like a torn cartilage or ruptured ligament may be the source of your knee pain. Diseases such as gout, arthritis, and infections can also cause knee pain. Numerous forces, strong knee twists, or high impacts from auto accidents can result in these injuries. It reduces shock and provides a smooth, moving surface for joint mobility.

    An injury like a torn cartilage or burst ligament could be the cause of your knee pain. Other conditions that can aggravate the knee include infections, gout, and arthritis. These injuries can result from a variety of forces, strong knee twists, falls, or high impacts from auto accidents. Sprains, tears, dislocations, and fractures are among the common injuries to the knee.

    Self-care techniques are an effective treatment for many types of moderate knee pain. Physical therapy and knee braces are more choices for pain relief. In addition to pain, you should see a doctor if you have severe swelling, a buckling or giving way sensation, or difficulty bearing weight on the injured knee. On the other hand, there are situations in which knee surgery is required.

    While a knee brace and rest are often enough to treat minor injuries to the knee, surgical intervention may be required if a ligament or tendon is torn. Following a knee injury, you must attend any recommended physical therapy sessions to ensure a full recovery. You’ll get your knee’s strength and range of motion back, lessen pain, and heal more quickly if you do this.

    FAQ:

    Which three types of knee injuries are the most common?

    The most common injuries to the knee include sprains, fractures, dislocations, and tears of the soft tissues (meniscus and ligaments). Many times, injuries affect multiple knee structures. When a knee injury occurs, pain and swelling are the most common symptoms. Furthermore, the knee may lock or catch.

    What is the process to evaluate the level of a knee injury?

    You can’t put weight on your knee.
    You’re in excruciating pain.
    Suddenly, your knee developed swelling.

    Do knee injuries recover naturally?

    Even if small injuries to the knee heal on their own, a doctor or physical therapist should evaluate and determine the problem. For chronic knee pain, medical care is necessary. Any knee injury that receives prompt medical attention raises the likelihood of complete recovery.

    How much time does it take to recover from a knee injury?

    The amount of time it takes for a knee injury to heal depends on many factors. Common knee injuries may take anywhere from two weeks to nine months to fully heal. Certain wounds heal fast and don’t need much medical care. Surgery, physical therapy, or a lengthy recovery period may be necessary for other injuries.

    If someone has a knee injury, should they walk?

    Try to walk normally by putting your heel down first if you aren’t instructed to put any weight through your knee. While it’s important to keep moving as much as possible, overdoing it too soon after your accident could make the swelling and pain worse.

    Can heat be applied to a knee injury?

    A single useful method for relieving joint stiffness and tightness is the application of heat.

    Should I put a bandage on my knee if it hurts?

    For support, wrap your knee or use a knee brace. This is known as compression. Enough tightness to fit, but not too tight. Knee swelling ought to be managed with the right compression.

    Which exercises should you avoid doing if you’re injured in your knee?

    Exercises that put a lot of strain on the knees, such as deep squats, running, and jumping, should be avoided if possible. Select more gentle workouts that will keep your knees from getting any worse while still keeping you in shape.

    What is the ideal sleeping posture for pain in the knees?

    If you have knee pain, you may need to elevate your leg and knee while you sleep. If so, sleeping on your back is the best position. Put a pillow under both legs to elevate one’s knee above the level of the heart. If edema is present in the knees, the elevation can help reduce it.

    Do I need to put some ice on my knee?

    The freezing temperature reduces blood vessel enlargement and inflammation in the knees. It also numbs the area, which could minimize pain. When applying ice to a knee injury, it is important to cover the area with a towel or piece of cloth to avoid skin contact.

    What is causing my knee pain when I bend it?

    Many people have knee pain when bending over, which might have a variety of underlying causes. Meniscus tears, bursitis, strained ligaments, osteoarthritis, and tendinitis are a few of the most common reasons. Joint infections or bone fractures can also cause knee pain.

    Why is my knee injury not healing?

    You may have incorrectly estimated the severity of your knee injury or not given it enough time to heal and relax if it doesn’t appear to be healing. Going back too soon after a knee injury might worsen the pain and damage to the tissue. Moderate soft-tissue injuries typically take two weeks or longer to heal.

    I have a knee injury; is it still safe to exercise?

    Exercise shouldn’t exacerbate your knee pain. However, when you practice new exercises, you may experience some temporary soreness in your muscles as your body gets used to the new movements.

    How long does a serious knee injury take to heal?

    The time it takes to heal from a knee injury can vary depending on several factors. Less serious wounds may heal on their own without requiring a lot of medical attention. Surgery, physical treatment, and a lengthier recovery period may be necessary for some injuries.

    Which symptoms are associated with knee damage?

    There is a deformity or curve in your knee. You can’t flex your knee fully and worry to extend it fully. High levels of swelling, redness, or warmth are felt near the knee. You experience pain in your calves, edema, tingling, numbness, or bluish pigmentation below the sore knee.

    How much knee injury can you tolerate?

    Your knee condition won’t get worse while you walk. Whenever you can, try to walk as simply as possible, with your heel down. Excessive weight bearing in the early stages following an injury may increase pain and swelling. You might be given crutches that can help you with this for only a short amount of time.

    Is it possible to avoid experiencing knee pain?

    It’s possible.
    Stretching strengthens the muscles surrounding your knees, which supports and relieves pressure and strain on your joints. If you do not like stretching, especially before working out, you can prevent injury to your knees by increasing the intensity of your workout rather than jumping right into it. Strengthening your thighs, calves, and the front and keep of your thighs in addition to reducing weight might help prevent knee problems.

    Is it better to walk or rest when experiencing knee pain?

    If you have arthritis or a minor knee injury, treating the pain when it returns is essential. Pain should be treated as soon as it manifests itself to help manage it. The “RICE” protocol which includes rest, ice, compression, and elevation will help you relieve your knee pain.

    Why are injuries happening so frequently?

    Recurrent injuries can occur when you overuse the same muscles without giving them enough time to heal. Simply put, using weak muscles longer raises the chance of reinjury. This is simple body mechanics.

    What kind of substance hurts the knees?

    The location of knee pain may help identify its cause. Pain at the front of the knee can be caused by bursitis, arthritis, or chondromalacia patella, which is a weakening of the patella cartilage. Pain on the outside of the knee is often associated with collateral ligament injuries, meniscus tears, and arthritis.

    What kind of treatment is there for knee pain caused by inactivity?

    Stretching and strengthening exercises performed at home, however, can help with most knee pains. To prevent the pain that comes with sitting all day, take a walk and stretch every 30 to 60 minutes. Stretching and strengthening exercises done in the right order can help reduce pain by improving joint function and movement.

    Can someone with a knee injury bend their knee?

    Most knee injuries cause pain. “Giving way,” “locking,” or experiencing weakness in the knee are additional signs of a knee injury. A person’s ability to fully bend or straighten their knee may be limited by a knee injury. The injured knee may have swelling or bruises.

    References:

    • Injury to the Knee. (n.d.). Johns Hopkins Medicine. Fractures are among the common injuries to the knee, resulting from trauma and injury sustained in a high-impact fall.
    • OrthoInfo – AAOS – Common Knee Injuries (n.d.). Common knee injuries are listed under diseases and conditions at https://orthoinfo.aaos.org/en.
    • “Mayo Clinic: Knee Pain Symptoms and Causes.” www.mayoclinic.org/diseases-conditions/knee-pain/symptoms-causes/syc-20350849.html, Mayo Clinic, January 25, 2023.
    • Knee injuries, no date. Causes, Symptoms, and Treatments | Stretching of muscles and tendons is one of the common knee injuries, according to Health direct (https://www.healthdirect.gov.au/knee-injuries#:~).
    • orthoinfo.aaos.org Conditions–diseases %2Fen%2F2Fcommon-knee-injuries%2F&psig=AOvVaw0fd-e_BwevS2S5O4FPVDoP&ust=1706529350280000&source=images &cd=vfe & opi=89978449&ved=0CBMQjRxqFwoTCJD0h8CDgIQDFQAAAAAdAAAAABAD.
    • El-Feky, Mostafa, and Andrew Dixon. “Entrapment of the Popliteal Artery.” 15 Apr. 2010, Radiopaedia.org, https://doi.org/10.53347/rid-9410.
    • Jenna Fletcher. Ten Typical Knee Injuries and How to Treat Them. www.medicalnewstoday.com/articles/319324, September 9, 2017.
    • Knee pain causes and treatments: a comprehensive guide from WebMD. Why Am I Experiencing Knee Pain? (December 22, 2016). http://www.webmd.com/pain-management/knee-pain/knee-pain-causes is the WebMD website.
    • Blauvelt, C. T., and Nelson, F. R. (2015, January 1). Musculoskeletal Conditions and Associated Words. eBooks from Elsevier. doi:10.1016/b978-0-323-22158-0.00002-0.
    • n.d. Knee injuries. Channel for Better Health. Knee injuries can be found at https://www.betterhealth.vic.gov.au/health/conditionsandtreatments
    • Jim Roland. “The Eight Most  frequent Knee Injuries related  with Falls.” The eight most common knee injuries experienced from falls appeared on www.healthline.com/health on September 22, 2020.Wellline.
    • J. P. C. D. Facoep (2023, July 13).Meniscus tears and knee injuries: symptoms, interventions, and recovery. Knee injuries and meniscus tears. MedicineNet.com. https://www.medicinenet.com/article.htm.
    • A. A. Dutton (2023, April 21). Ten Typical Knee Injuries, Particularly for Athletes. Singapore’s Dr. Dutton Orthopaedic & Sports Medicine Clinic. knee injuries at https://www.drandrewdutton.com/blog/.
    • Spine, N. October 19, 2023. These Are The Top 9 Knee Injuries. NJ Orthopedic & Spine. The nine most common knee injuries are listed at https://www.njspineandortho.com/.
    • In n.d., Willigmann, A. Rothman Orthopaedic Institute: The Top 5 Most Common Knee Injuries. The five most common knee injuries are listed at https://rothmanortho.com/stories/blog/.
    • Knee Injury Types and Their Reasons. (For the time being). Visit https://www.osmifw.com/orthopedic-diseases-disorders/knee-injuries-disorders/ to learn about the types and causes of common knee injuries and problems. The in-text citation is Common Knee Injuries: Types and Causes.
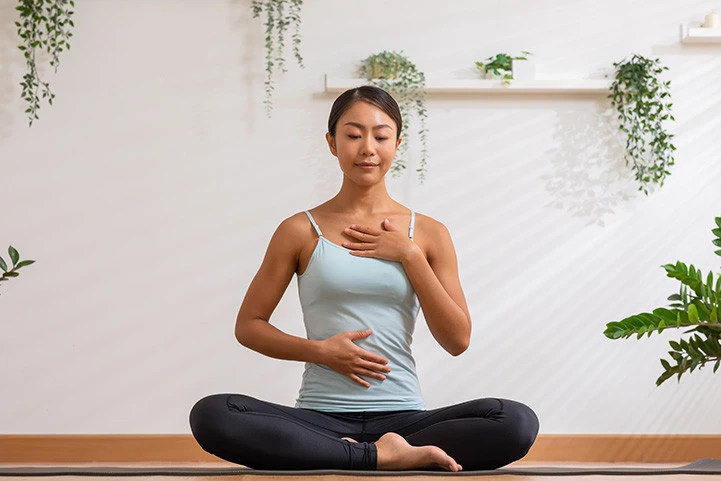

  • Rigidity

    Rigidity

    What is Rigidity?

    Rigidity refers to a condition characterized by an increased resistance to passive movement, which remains constant regardless of the position or velocity of the movement. This type of muscular hypertonia is distinct from other forms of muscle stiffness, such as spasticity, where resistance varies with the speed of motion.

    Many authors use the term “rigidity” to refer to a usual condition of muscular tone in which there is resistance to passive movement regardless of position or velocity.
    It is typically seen in extrapyramidal conditions and is one of the hallmarks of Parkinson’s disease. It has an equal impact on the muscles of the antagonist and the agonist.

    One example of this is,

    • Parkinson’s Disease
    • Corticobasal Degeneration
    • Huntington’s Disease
    • Multiple System Atrophy
    • Stiff Man/limb Syndrome
    • Niemann-Pick Disease – Type A
    • Orthostatic Hypotonia Shy-Drager Disease
    • Spinocerebellar Ataxia – type 43, 17, 2.

    Definition

    A hypertonic condition known as rigidity is defined by constant resistance throughout the range of motion that is unaffected by movement velocity. Alpha motor neurons are the target of excessive supraspinal drive; spinal reflex systems are normally functioning. Tendon jerks with Parkinsonian stiffness are usually typical.

    Hypertonia is defined as a state in which each of the following is true:

    • There is resistance to externally forced joint movement even at extremely low (gentle) movement rates; it is independent of the imposed speed and does not show an angle or speed limitation.
    • It’s possible for agonists and antagonists to simultaneously co-contraction, which manifests as an instantaneous resistance to a change in movement direction inside a joint region.
    • The limb does not frequently revert to an excessive joint angle or one specific stationary position.
    • Although stiffness may develop, voluntary exercise in distant muscle groups does not cause involuntary movements around the rigid joint region.

    Related Anatomy

    A collection of subcortical nuclei known as the “basal ganglia” are mostly in charge of motor control activities, but they also play a part in other roles and functions including motor learning, executive functions and behaviors, and emotions. The conventional basal ganglia model illustrates how information passes through the brain and returns to the cortex through two distinct pathways that result in differently performed movements.

    Pathology

    Alpha motor neurons are the target of excessive upper motor neuron facilitation, which causes rigidity; spinal reflex mechanisms are often normal. The regular reciprocal inhibition is disturbed. An imbalance between inhibition and excitement in the motor cortex and basal ganglia can cause anomalies in posture and related activities, as well as symptoms and indications of involuntary movements and tight muscles. However, stiffness and tremor—the other two hallmarks of Parkinson’s disease—cannot be sufficiently explained by the pathophysiology of the basal ganglia as it is now understood.

    Rigid muscles can result from a number of reasons, some of which are criteria –

    • the patient’s incapacity to relax and totally stop using any muscles
    • increased stiffness as a result of all muscles’ changed elastic characteristics
    • abnormal agonist-antagonist muscle group co-activation
    • increased elasticity reflexes
    • reduced amounts of dopamine

    Types of Rigidity

    Parkinson’s disease rigidity can be described as “cogwheel rigidity” or “lead pipe rigidity.”

    • Cogwheel rigidity, which is typically observed in upper extremity motions such as wrist/elbow flexion and extension, is a hypertonic condition with superimposed ratchet-like jerkiness. The stiffness of a cogwheel is a hybrid of tremor (shaking) and lead-pipe rigidity.
    • Lead Pipe Rigidity: This term describes the hypertonic condition that occurs throughout the range of motion (ROM), which is the simultaneous co-contraction of agonists and antagonists. It is characterized by an instantaneous resistance (load) to a reversal of movement about a joint region.

    Different between lead pipe rigidity & cogwheel rigidity :

    A consistent resistance to motion over the whole range of motion is referred to as lead pipe stiffness.
    The resistance that fluctuates in intensity as the limb moves through its range of motion is referred to as cogwheel stiffness.

    Difference Between Spasticity and Rigidity

    Usually occurring only when muscles are stretched, or not at rest, spasticity is characterized by increased tendon reflexes and a Babinski’s sign reaction. Resistance in one direction of movement is typically different from that in the opposite direction, and some patients may exhibit the Clasp-Knife phenomena (sudden release at end ROM).

    Even while at rest, stiffness is characterized by elevated muscle tone, which is often observed during passive range of motion (ROM) in all directions across individual joints. Both the tendon and plantar reflexes are normally functioning. There isn’t any cooperation.

    What is the Cause Of Rigidity?

    • Stress is frequently the cause of muscle stiffness.
    • A prevalent disease that causes pain and stiffness in older persons is polymyalgia rheumatica.
    • weariness and unexplained weight loss.
    • Reduced dopamine levels are considered to throw off the balance of Parkinsonism patients, causing their muscles to contract and relax in response to different movements.

    What Are The Symptoms Present in Rigidity Muscles?

    • muscles that are rigid or stiff.
    • pains and spasms in the muscles.
    • turning when walking, turning in bed, and getting out of a chair or bed might be difficult.
    • The etiology of cogwheel stiffness is thought to be a mix of increased tone and tremor.
    • Joint pain may be linked to rigidity.

    Diagnosis

    Physical Examination

    With one hand, the observer should hold the patient’s hand above the wrist and hold it there. He spins the hand gently along its long axis while holding the fingers and palm in another hand. During the activity, the examiner will encounter resistance if there is stiffness.

    The observer will perceive an interruption or repeated catch if the cogwheel phenomenon is positive; if it is present throughout the action without any disturbance or change in velocity, it is lead-pipe stiffness. Only unilateral stiffness that may be compared to the contralateral side during an examination is often observed in cases with idiopathic Parkinson’s disease.

    Treatment of Rigidity

    Medical treatment

    Levodopa (L-Dopa) treatment for Parkinson’s disease in these different combinations is very beneficial in lowering stiffness and bradykinesia.
    It has been demonstrated that deep brain stimulation in the globus pallidus and subthalamic nucleus improves rigidity.

    Physical Therapy Treatment of Rigidity

    Most patients respond better to therapy when stiffness is decreased early in the session. Therefore, when movement therapy is administered during the “on” period of a pharmaceutical cycle, it seems to have even more long-lasting effects.

    Relaxation techniques, such as slow, moderate rocking, trunk, and extremity rotation, and yoga poses, seem to be helpful in lowering stiffness. Because supine postures might make people more stiff, it may be easier for people with Parkinson’s disease to relax when they are sitting or standing. Relaxation may be more easily attained by moving from the distal to the proximal group of muscles, as the proximal muscles are often more involved.

    • Exercises with rhythm have been demonstrated to reduce stiffness. For example, clapping your hands and circling with your feet or hands.
    • To assist in relaxing the tense muscle region, apply a warm compress or heating pad to the affected muscle.
    • To aid with muscular relaxation, gently stretch any tense muscles.
    • Keep away from demanding activities that might cause the muscles to stiffen up again.
    • To assist your stiff muscle relaxation, gently stretch it.
    • Keep away from demanding activities that might cause the muscles to stiffen up again.
    • Gentle rocking exercises and gentle, rhythmic rotating exercises.
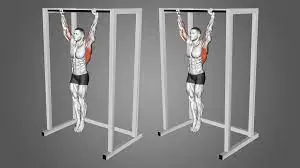
    • rhythmic initiating method wherein movements go from being passive to being helped and active.
    • Slowly rotate your head from side to side while supine.
    • Lower trunk rotation in hooking.
    • Rotate your trunk upper and lower when you’re sideways.

    Relaxation & Stretching exercise :

    MET EXECISE
    MET EXERCISE
    • Easy rocking exercises and gentle, rhythmic rotation exercises.
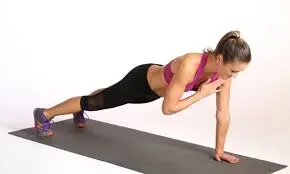
    • Rhythmic initiating technique that advances passive movement into active, supported, and active movement.
    • When lying down, slowly rotate your head from side to side. Reduce trunk rotation activity during hooking.
    • Rotation of the upper and lower trunk during side laying.

    Balance training

    Balance Training
    Balance Training

    Develop reactive joint stability, dynamic neuromuscular efficiency, and high levels of eccentric strength.

    Programs for balancing training aim to:

    • Develop better balance control with each step, which will increase walking speed, lessen fear of falling, and enhance fall-related self-efficacy.
    • Increase physical performance
    • Improve living standards

    Gait Training

    The workouts target your lower extremity joints (hip, knee, and ankle), enhance your strength and balance, and simulate the repeated action of your legs when walking.

    Exercise for Gait Training

    • use a treadmill to walk.
    • raising your limbs.
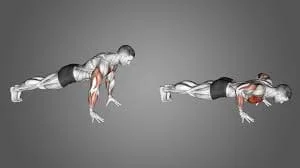
    • Taking a seat.
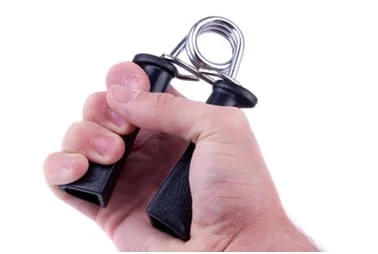
    • Getting up.
    • stepping on objects.

    FAQs

    What is health is rigidity?

    Definition. continuous, involuntary contraction of muscles that is ongoing. No matter how quickly the damaged muscle is stretched, the degree of resistance is constant when it is passively extended.

    What distinguishes stiffness from rigidity?

    A quality of matter that keeps it from altering form in response to an external force is known as rigidity in physics. “Rigid bodies” are bodies that exhibit the quality of rigidity. They are distinct in size and form and are hard, solid items.

    How is rigidity measured?

    Three methods were used to objectively evaluate rigidity: inertial sensors, servomotors, and biomechanical and neurophysiological studies of muscles. All of the techniques demonstrated strong validity and reliability, a strong association with clinical scales, and the capacity to identify stiffness and track its development.

    Which two types of rigidity are there?

    Lead pipe and cogwheel stiffness are the two varieties. A consistent resistance to motion over the whole range of motion is referred to as lead pipe stiffness. The resistance that fluctuates in intensity as the limb moves through its range of motion is referred to as cogwheel stiffness.

    Mental rigidity: what is it?

    Similar to repressing ideas, mental rigidity involves limiting the range of ideas and feelings you let yourself. You deny yourself the right to experience such joy or sorrow.

    What does the medical term “rigidity” mean?

    Definition. A hypertonic condition known as rigidity is typified by unchanging resistance over the whole range of motion, regardless of the movement’s velocity. Alpha motor neurons are the target of excessive supraspinal drive or upper motor neuron facilitation; spinal reflex mechanisms are usually normal.

    Physical rigidity: what is it?

    Your muscles feel rigid and automatically tighten when they are rigid. Your neck, back, arms, legs, and even the tiny muscles in your face might all experience it. While some individuals only feel it on one side of their body, others feel it on both.

    What is the best way to handle rigidity?

    To assist in relaxing stiff muscles, apply a warm compress or heating pad to the affected area. To assist your stiff muscle relax, gently stretch it. keep away form demanding activities that might cause the muscle to stiffen up again. using massage, tai chi, or yoga to encourage the muscles to become more relaxed.

    High rigidity: what is it?

    Less Elastic Deformation in Rigidity as Compared to Metals
    The term “advanced ceramics” refers to fine ceramics because of their high stiffness, which may be assessed by examining a specimen’s elasticity upon the application of a load. Rigidity is higher in materials that show less elastic deformation under stress.

    Is being rigid typical?

    If a person’s father, supervisor, or instructor exhibited rigidity toward them, for instance, it might be a taught behavioral characteristic. Rigidity has a hereditary component and is linked to diseases on the autistic spectrum.

    What do rigidity and stiffness mean?

    Stiffness, another name for rigidity, is an elasticity parameter that expresses a material’s resistance to long-term deformation.

    Simple rigidity: what is it?

    A material is said to be rigid when its constituent particles are fixed in place. The ability of a solid to maintain its form in the face of external force application is known as rigidity. Rigidity is simply the state of being stiff.

    How does one define rigidity in medicine?

    Muscles that are rigid are inflexible or stiff. It may prevent your muscles from extending and contracting, which may result in pain, cramping, and issues with equilibrium. Your muscles may be too tight and stiff to allow you to swing your arms freely if you suffer from stiffness.

    What does it mean for someone to be rigid?

    rigidity or inflexibility, especially in the case of muscles. a personality characteristic defined by a great unwillingness to change one’s actions, beliefs, or attitudes, or by an incapacity to do so.

    What rigidity do you mean?

    Rigidity and inflexibility are similar terms that characterize unyielding, rock-solid individuals and materials. definitions of inflexibility. the quality of being unyielding and unbending physically. synonymous with: inflexibility. kinds include rigidity and rigidity.

    References

    • Rigidity. (n.d.). Physiopedia. https://www.physio-pedia.com/Rigidity
    • Patel, D. (2022, August 19). Rigidity Cause, Symptoms, Treatment, Exercise | Samarpan Physio. Samarpan Physiotherapy Clinic. https://samarpanphysioclinic.com/rigidity-treatment-exercise/
    • Dhameliya, N. (2022, August 19). What are Spasticity and Rigidity? Spasticity – Rigidity Comparison-Treatment. Samarpan Physiotherapy Clinic. https://samarpanphysioclinic.com/spasticity-rigidity
  • Chest Muscles

    Chest Muscles

    The chest muscles, also known as the pectoral muscles, play a crucial role in the upper body’s strength and functionality. These muscles are primarily responsible for movements of the shoulder joint, including flexion, adduction, and rotation of the arm.

    The pectoral region is found on the anterior chest wall. The serratus anterior, subclavius, pectoralis major, and pectoralis minor are the four muscles that apply force to the upper limb. “Pecs” is the term for the chest muscles.

    Chest muscles connect the front of the human chest to the upper arm and shoulder bones. The pectoral region contains four muscles that control movement in the upper limbs or ribs.

    Pectoralis Major.

    The muscle closest to the skin in the pectoral region is the pectoralis major. It is large and fan-shaped, consisting of a sternal and clavicular head:

    • Attachments:
      The anterior surface of the medial clavicle is the source of the clavicular head.
      The anterior surface of the sternum, the superior six costal cartilages, and the external oblique muscle’s aponeurosis combine to form the sternocostal head.
      Both heads have a distal attachment to the humerus’ intertubercular sulcus.
    • Function: Adducts and medially rotates the upper limb, drawing the scapula anteroinferiorly. The clavicular head also functions independently to flex the upper limb.
    • Innervation: the lateral and medial pectoral nerves.
    • Blood supply: The pectoral branch of the thoracoacromial trunk provides arterial supply to the pectoralis major muscle.

    Pectoralis Minor.

    The pectoralis minor muscle is located beneath its larger counterpart, the pectoralis major. Both muscles are located in the anterior wall of the axilla.

    • Attachments: Comes from the third to fifth ribs and inserts into the coracoid process of the scapula.
    • Function: The scapula is stabilised by drawing it anteriorly against the thoracic wall.
    • Innervation: medial pectoral nerve.
    • Blood supply: The pectoral branch of the thoracoacromial trunk provides arterial supply to the pectoralis minor as well.

    Serratus Anterior

    The medial border of the axilla region is formed by the serratus anterior, which is situated more laterally in the chest wall.

    • Attachments: The lateral aspects of ribs 1–8 are the starting points for the multiple strips that make up the muscle. They attach to the scapula’s medial border’s costal (rib-facing) surface.
    • Function: Rotates the scapula, allowing the arm to be raised more than 90 degrees. It also protracts the scapula, securing it against the rib cage.
    • Innervation: The long thoracic nerve.
    • Blood supply: The serratus anterior receives arterial supply from the lateral thoracic artery, superior thoracic artery (upper half), and thoracodorsal artery (lower half).

    Subclavius

    The subclavius is a small muscle located directly underneath the clavicle and running horizontally. It offers the underlying neurovascular structures some minimal protection (e.g., in cases of trauma such as clavicular fractures).

    • Attachments: Originates at the junction of the first rib and its costal cartilage. It attaches to the inferior surface of the middle third of the clavicle.
    • Function: Secures and depresses the clavicle.
    • Innervation: Nerve to the subclavius.
    • Blood supply: The subclavius’ arterial supply comes from the clavicular branch of the thoracoacromial trunk.

    Embryology

    Skeletal muscle tissue is formed from the mesoderm of the original three germ layers. From here, the mesoderm differentiates into the paraxial and lateral plate mesoderm. The paraxial mesoderm, specifically those organised in the trunk, is divided into individual tissue blocks called somites. These somites, which are concentrated more dorsolaterally, aggregate into the dermatomyotome and are induced into myoblasts.

    The modification employed by a family of basic Helix-Loop-Helix transcription factors, most notably MyoD1, is thought to be responsible for the mesoderm’s differentiation to eventual myoblast formation. The continuous expression of MyoD transcription factors is required for the genetic expression of genes involved in muscle development.

    The cells of the dermatomyotome subdivide, and one of the resulting structures is the hypomere. The hypomeres differentiate into three layers: external intercostals, internal intercostals, and innermost intercostals, also known as the transverse thoracic muscle. A portion of the hypomere-derived myoblasts give rise to the anterior chest’s pectoral muscles, which include the pectoralis major, pectoralis minor, serratus anterior, and subclavius.

    Exercises for chest muscles

    Strengthening exercises

    Incline pushups

    Incline pushups
    Incline pushups

    This is a good warmup to get the chest ready for work. According to research, a dynamic warmup before training can help prevent injury.

    • Begin by placing your hands on the wall or a counter-height surface. Walk your feet back so that your body forms a roughly 45-degree angle with the floor.
    • Keep your body straight and your spine neutral, then lower your chest to the surface you’re leaning against.
    • Take a brief break, then go back to where you were before.
    • Make sure the resistance is light enough for up to 20 repetitions. To make it easier, step closer to your hands; to make it more difficult, step further away.

    Flat bench press.

    • Lie back on the bench, knees bent and feet flat on the floor. Hold the barbell with your palms facing your feet and your thumb encircling it. To lift the weight off the rack, press your arms straight up towards the ceiling.
    • Move the weight to the chest level.
    • Slowly lower the weight to your chest while keeping your elbows bent at a 45-degree angle. Keep the bar roughly in line with your nipples.
    • Pause for a moment, then return the weight to the starting position.
    • Finish the three sets of eight to twelve repetitions.

    Incline bench press.

    Incline bench press
    Incline bench press
    • Lie back on the incline bench, knees bent and feet flat on the floor. Hold the barbell with your palms facing your feet and your thumb encircling it. To lift the weight off the rack, press your arms straight up towards the ceiling.
    • Place the weight above your collarbone.
    • Slowly lower the weight to your chest, roughly mid-chest to just above your nipples.
    • After stopping, move the weight back to its initial position.
    • Finish the three sets of eight to twelve repetitions.
    • As with the flat bench, keep your back and feet flat throughout the movement. Again, it is strongly advised that you complete this exercise with someone spotting you.

    Pushup

    Pushup
    Pushup
    • Start on your hands and knees, then step back into a high plank position. Your arms should be slightly wider than your shoulders, and your legs should be straight with your quads. Your spine should be neutral and your hamstrings should be tight.
    • Bend your elbows at a 45-degree angle to lower your chest to the floor while keeping your core tight. Match your body from head to toe.
    • Aim to go as low as possible while maintaining core support and spine and pelvic alignment.
    • Push your chest away from the ground until your elbows are straightened.
    • Repeat for 8-12 repetitions. Do three sets.

    Resistance band pullover

    Resistance band pullover
    Resistance band pullover
    • Anchor the band to something solid. Then, lie on your back, head facing the anchor point. The band should be approximately 1-2 feet higher than your head.
    • Grasp the band overhead with slight tension. Keep your thumbs pointing upward and your palms facing away from each other.
    • Keep your core tight and your elbows straight as you pull the band towards your hips. Return carefully and slowly to your starting posture.
    • Do three sets of eight to twelve repetitions.

    Stretching exercises

    Child’s Pose.

    Child’s Pose
    Child’s Pose

    Child’s Pose is a great way to gently stretch the chest wall while maintaining proper alignment. To do this stretch:

    • Consider a position on the table by putting yourself on your hands and knees.
    • Ensure that the wrists are directly beneath the shoulders and the knees are beneath the hips.
    • Gently walk your arms forward until your forehead rests on the mat, then sit your buttocks back on your heels.
    • Hold for a few seconds, as directed by the physiotherapist.
    • To exit, take a deep breath in and return your hands to your knees.

    Chest Opener Stretch

    Chest opener stretch
    Chest opener stretch

    The chest opener stretch targets the chest and front shoulder muscles and is used by physiotherapists to relieve muscle tension and increase flexibility. There are several variations of this stretch, but the basic one can be performed as follows:

    • When you sit or stand, keep your shoulders relaxed and your back straight.
      With your palms pointing inside, interlace your fingers behind your back.
    • Lift your arms gently, keeping them straight and your chest open, and feel the stretch in your chest and shoulders.
    • Keep your neck and jaw relaxed.
    • Release the stretch slowly and repeat as directed by the physiotherapist.

    This stretch is especially beneficial for those with muscle tension in the front of their shoulders and chest.

    Doorway Stretch

    Doorway stretch
    Doorway stretch

    Physiotherapists commonly prescribe the doorway stretch to stretch both the pectoralis major and minor muscles, resulting in increased chest mobility. To do this stretch:

    • Stand in a doorway, feet together.
    • Bend your elbows to a 90-degree angle and place your forearms on the doorframe, keeping your elbows at shoulder height.
    • Take a small step forward with one foot, gently leaning into the doorway until you feel a comfortable stretch across your chest.
    • Keep your spine neutral and avoid excessive arching in the lower back.
    • Repeat the stretch on the opposite side, stepping forward with the other foot.

    Stretch your pectoralis major muscle.

    The pec major is the larger of the two chest muscles, and it consists of two muscles:

    Clavicular Portion

    The pec major is the larger of the two chest muscles, and it is composed of two muscles: the clavicular portion on top and the sternal portion on the bottom. Stand in a room corner, palms and forearms against each wall, to stretch the clavicular portion. Slide your arms up so that your elbows are at 90-degree angles and align with your armpits. Lean forward to feel a stretch.

    Sternal Portion

    The pectoral major sternal portion is larger than the clavicular portion. The clavicular stretch is more common than the sternal stretch, but both are necessary. To perform this stretch, stand in the corner with your arms against the walls, just like in the other stretch. Open the forearms outward, pointing at 45-degree angles away from the body. Lean forward until the stretch is felt, then hold.

    Summary

    The pectoral region on the anterior chest wall consists of four muscles: pectoralis major, pectoralis minor, serratus anterior, and subclavius. These muscles control movement in the upper limbs or ribs. The pectoralis major is the largest and fan-shaped muscle closest to the skin, while the pectoralis minor stabilizes the scapula.

    The serratus anterior forms the medial border of the axilla region and rotates the scapula. The subclavius is a small muscle beneath the clavicle, providing minimal protection to underlying neurovascular structures. Strengthening exercises for chest muscles include incline pushups, flat bench presses, pushups, and resistance band pullovers.

    FAQs

    What muscle surrounds the chest?

    The pectoralis major muscles are fan-shaped muscles that connect your armpits to the centre of your breastbone, or sternum. The pectoralis minor muscles are smaller than the pectoralis major and run along your ribs just below your collarbone.

    What purpose do chest muscles serve?

    Your chest contains many of the structures required for life, such as your oesophagus, windpipe, lungs, and heart. The chest muscles move the arms across the body as well as up and down.

    How do you stretch your chest?

    Raise the left arm to shoulder height and place the palm and inside of the arm against the wall surface or doorway.You should have a 90-degree bend in your elbow. To feel the stretch, gently press the chest through the open space. Moving the arm higher or lower allows you to stretch different areas of the chest.

    What is a chest stretch?

    Through the palms facing up, clasp your hands behind your back. Pull your hands down and bring your shoulder blades together. Your chest should stand out. Hold for 10-20 seconds. The chest area and upper arms should feel stretched.

    References:

    • Muscles of the Pectoral Region – Major – Minor – TeachMeAnatomy. (2024, January 18). TeachMeAnatomy. https://teachmeanatomy.info/upper-limb/muscles/pectoral-region/
    • Baig, M. A., & Bordoni, B. (2023, August 28). Anatomy, Shoulder and Upper Limb, Pectoral Muscles. StatPearls – NCBI Bookshelf. https://www.ncbi.nlm.nih.gov/books/NBK545241/
    • Mpt, T. E. P. (2023, March 29). 7 Top Chest Exercises for a Strong and Functional Upper Body. Healthline. https://www.healthline.com/health/fitness-exercise/best-chest-exercises#8-best-exercises
    • Jey, T. (2023, August 9). The 4 Best Stretches For A Strained Chest Muscle | Physiotherapists in Toronto | Yorkville Sports Medicine Clinic. Physiotherapists in Toronto | Yorkville Sports Medicine Clinic. https://www.yorkvillesportsmed.com/blog/the-four-best-stretches-for-a-strained-chest-muscle
    • Egypt, C. E. L. C. (n.d.). IPC Physical Therapy Center. ipcphysicaltherapy.com. https://www.ipcphysicaltherapy.com/Exercise-full.asp?ExercisesID=357#:~:text=Slide%20the%20arms%20up%20so,until%20you%20feel%20a%20stretch.&text=The%20pec%20major%20sternal%20portion,stretch%2C%20yet%20both%20are%20important.
  • Lumbar Radiculopathy

    Lumbar Radiculopathy

    Lumbar radiculopathy refers to a condition where the spinal nerve roots in the lower back, specifically the lumbar region, are compressed or irritated. This compression can result from various factors, such as herniated discs, bone spurs, degenerative disc disease, or spinal stenosis.

    Definition

    The condition known as lumbar radiculopathy is an inflammation of a nerve root in the lower back, resulting in back and leg discomfort or irritation. A condition that frequently affects the sciatic nerve, hence it is also known as sciatica.

    Anatomy of the lumbar spine

    To comprehend this condition, it is helpful to grasp the following spine components:

    Lumbar-Spine
    Lumbar-spine
    • Vertebrae. The spine is made up of these bones arranged together. The lumbar spine contains five vertebrae.
    • Discs- These are soft tissue cushions that sit between the vertebrae. They act as shock absorbers in the spine.
    • Spinal Canal. This is an opening developed inside the arranged vertebrae. This canal is where nerves flow in the lumbar spine.
    • Nerves. These branch out and go away from the spinal canal, traveling to various body regions. Nerves get out of the spinal canal through holes between the vertebrae. The nerve root that is nearest to the spinal canal.
    • Sciatic Nerve. This big nerve originates from multiple nerve roots in the lower back. This nerve travels down the back of the leg to the foot.

    What causes lumbar radiculopathy?

    Several causes may lead to lumbar radiculopathy:

    Aging, injuries, bad posture, excess body weight, and other factors can all contribute to lower back problems. These disorders may irritate nerve roots. They include:

    • A lumbar spinal disc has been damaged. The injured disc may then push on neighboring nerve roots
    lumbar spondylosis pathophysio.
    lumbar spondylosis pathophysiology
    • Degeneration due to wear and tear, as well as aging. This can cause narrowing (stenosis) of the spaces between the vertebrae. The restricted holes press upon nerve roots as they exit the spinal canal.
    • Unstable spine (spondylolisthesis) This is when a vertebra slips forward. It might then impinge on the nerve root.
    spondylolisthesis
    spondylolisthesis
    • Injuries such as falls, car accidents, or sports-related incidents can damage the spine and soft tissue around it.
    • poor posture (lordosis) is excessive curvature of the lumbar spine that may further lead to damage to discs or nerves.
    • Other, less common things can put pressure on nerves in the lower back. Diabetes, infection, and tumors are a few examples.
    • spinal tumors or other inflammatory conditions like AS may put pressure on the spinal canal and put pressure on the nerves which results in radiculopathy.

    What are the risk factors for Lumbar Radiculopathy? 

    • Age is the most important risk factor for lumbar radiculopathy. The highest age range is 45 to 64. Men have the greatest impact in their 40s, while women are affected in their 50s and 60s.
    • Men have a higher risk than women in general, although particular subgroups of women are at a higher risk.

    Other modifiable risk factors include: 

    • Obesity: Carrying more weight affects the mechanics of the spine, making nerve compression more likely to occur
    • Occupation: Occupation: your profession involves hard lifting and twisting actions.
    • Sedentary lifestyle: inactivity can result in weak core muscles, putting more strain on the spine.

    Non-modifiable risks include: 

    • Arthritis: any degenerative joint condition can affect the lumbar vertebrae
    • Previous injury: Spinal trauma can alter bone and disc tissue.
    • Pregnancy: Hormones impact the strength of ligament tissue during pregnancy.
    • Congenital factors: gaps in the spine through which nerves travel might be smaller owing to hereditary reasons.

    What are the Symptoms and Signs of Lumbar Radiculopathy?

    Lumbar radiculopathy also known as sciatica when it involves the sciatic nerve can cause a range of signs and symptoms that often affect one side of the body. 

    The symptoms could appear anywhere throughout the sciatic nerve’s path.  This is substantial since branches of the nerve reach your feet. 

    the most common complaints are: 

    • Lower back pain can be followed by other symptoms and experiences.
    • Tingling or numbness following the nerve’s route, frequently across the buttock, back of the thigh, and calf on the affected side
    • Muscle weakness
    • sensation or reflex changes, hypersensitivities such as hyperesthesia, or hypothesis
    • symptoms worsening with movements such as Activities that involve bending, twisting, lifting, or prolonged sitting or standing can exacerbate symptoms of lumbar radiculopathy. Coughing, sneezing, or straining may also worsen pain due to increased pressure on the nerve roots. 
    • Pain can range from dull, aching to intense, electric-shock feelings, which are frequently triggered by unexpected movements, coughing, or sneezing. You may also feel like your lower back movement is limited.

    How to diagnose Lumbar Radiculopathy?

    Lumbar radiculopathy is diagnosed with a full assessment that includes a medical history, a physical examination, and, in particular situations, imaging (MRI, CT-myelogram) and nerve conduction investigations.

    Physical Examination: 

    The physical examination for lumbar radiculopathy is a way to assess nerve function, muscular strength, reflexes, and signs of nerve compression in the lower back, buttocks, thighs, and legs.

    Lower Back Examination:

    Range of Motion: The provider will assess your ability to move your lower back in different directions, such as flexion (forward bending), extension (backward bending), lateral bending (side-to-side), and rotation. Restricted range of motion or pain during movement may indicate lumbar spine issues.

    Tenderness: Palpation of the lower back area helps identify areas of tenderness, muscle spasms, or localized pain that may be associated with nerve compression or spinal abnormalities.

    Imaging Studies: 

    X-ray: X-rays can reveal degenerative changes in the lumbar spine, such as osteoarthritis, disc space narrowing, bone spurs (osteophytes), and facet joint degeneration.

    Magnetic resonance imaging (MRI) or computed tomography (CT): These imaging studies can reveal herniated discs, spinal stenosis, soft tissue injury, Bulging, Herniated discs, bone spurs, or other abnormalities that may be causing nerve compression and radiculopathy.

    Nerve Conduction Studies: nerve conduction studies or electromyography (EMG) may be performed to evaluate nerve function, These tests can help determine the severity of radiculopathy and identify the specific nerve roots affected.

    Special Tests:

    • Straight Leg Raise Test: This test involves raising one leg while lying down with the knee straight. Pain radiating down the leg (sciatic nerve distribution) at an angle of less than 60 degrees is considered a positive test for lumbar radiculopathy.
    SLR-test
    SLR-test
    • Lasegue’s Sign: Similar to the straight leg raise test, Lasegue’s sign is positive if raising the leg while lying down reproduces leg pain or sciatic nerve symptoms.
    • Lumbar Extension Test: The provider may ask you to lean backward (extend) while standing to reproduce or exacerbate symptoms of radiculopathy, such as leg pain or tingling

    Treatment of Lumbar Radiculopathy

    Medications

    Medications commonly used to manage the symptoms of lumbar radiculopathy (lower back pain due to nerve compression) include:

    • Nonsteroidal Anti-Inflammatory Drugs (NSAIDs): medications like ibuprofen (Advil, Motrin) and naproxen (Aleve), as well as prescription NSAIDs. They aid in decreasing pain, inflammation, and discomfort.
    • Acetaminophen: Also known as paracetamol, acetaminophen (Tylenol) is an over-the-counter pain reliever that can be used to alleviate mild to moderate pain associated with radiculopathy.
    • Topical Analgesics:  creams, gels, or patches containing medicines such as lidocaine or capsaicin that may be administered directly to the painful area to provide localized pain relief.

    Physical therapy treatment

    Physical therapy is an effective and safe treatment option for relieving discomfort, strengthening your muscles, and even preventing future harm.

    Physical therapy activities that may be effective in treating your lumbar radiculopathy include:

    hands-on manual therapy to your spinal joints, muscles, or nerves to reduce inflammation of nerve roots by restoring normal mechanics around the nerve. Once the nerve root inflammation improves, you will begin workouts to strengthen the muscles surrounding the nerve root, which will aid in maintaining proper nerve mechanisms. Finally, you will be taught how to do activities with proper ergonomics to safely return to activities of daily life or activities that have been restricted because of this condition.

    Assessment

    The physical therapist begins by conducting a comprehensive assessment to understand the patient’s medical history, current symptoms, functional limitations, and specific goals for treatment.

    Physical examination includes evaluating posture, range of motion, muscle strength, sensation, reflexes, and any neurological deficits related to nerve compression.

    Pain management

    Teach strategies for pain management, including the use of heat or cold packs, proper body mechanics, ergonomic adjustments at work or home, relaxation techniques, and contributing factors such as Poor posture, poor lifting techniques, or sedentary living habits.

    Modalities:

    Soft-tissue modalities are typically integrated into a back pain program. These methods use particular manual techniques, such as myofascial release therapy or massage therapy, to relieve the patient’s soft-tissue discomfort.

    • Heat Therapy:
      • Application of heat packs or warm compresses to the lower back to relax muscles, increase blood flow, and reduce pain.
    • CryotherapyCold Therapy:
      • Ice packs or cold therapy for acute pain or inflammation management, are applied controlled to avoid skin damage.
    • Infra-red Radiation:
      • Application of IRR for improving the blood flow at the lower back area and decreasing muscle tension.
    • Electrical Stimulation:
    • Transcutaneous Electrical Nerve Stimulation (TENS) or Interferential current therapy (IFC) used to alleviate the pain 

    Traction

    Traction involves applying a pulling force to the spine, which aims to create space between vertebrae, reduce pressure on spinal discs, and alleviate nerve root compression. Lumbar traction takes around 1.5 times the person’s body weight to bring about vertebral body separation. However, this treatment is complicated and time-consuming; also, most people find lumbar traction difficult to handle.

    Exercise

    • isometric exercise for the back and abdomen will ease the pain and strengthen the back and core muscles.
    • Pelvic tilt
      • Pelvic tilts activate pelvic floor muscles and strengthen your abdominal muscles. and improve lumbar stability.
      • Lie back on the floor with your knees bent. Flatten your back on the floor by squeezing your abdominal muscles and slightly bending your pelvis upward. Hold for up to several seconds. and Repeat
    • Back extension in standing
      •  performing a standing lumbar extension to quickly get pressure off the spinal nerves and rapidly reverse symptoms.
    Backward-Bend
    Backward-Bend
    • Lumbar flexion with rotation (trunk rotation)
      • The rotating feature of this stretch improves spinal mobility. It allows for greater rotation and movement between the vertebrae, which can release the compressed nerve and contribute to a healthier and more functional spine
    • Lumbar flexion in sitting and standing position
      • bending forward will increase the mobility of the lumbar spine
    • hip flexion-extension exercise
      • hip flexion in supine lying and extension in prone lying.
    • Knee to chest
      • this exercise will increase the strength of the lower back muscle and help to improve the full range of motion in both the pelvis and lower back vertebrae.
      • this exercise loosens up any stiffness and improves posture
    Double Knee to Chest
    Double Knee to Chest
    • Cat and cow
      • The cat-cow is a mobilization of the lower back area, to bring proper movement into the lower back and pelvis.
    cat-cow exercise
    cat-cow exercise

    Core strengthening exercise

    • curl-ups
      • Abdominal curl-ups or sit-ups to strengthen the rectus abdominis.  
    Partial Sit Up Curl
    Partial Sit Up Curl
    • Bridges
      • Lie on your back, legs bent, feet flat on the floor, with your pelvis apart, Lift your hips off the floor.
      • Hold for 10-20 seconds, then lower back down. Repeat 10-15 times
    BRIDGE
    BRIDGE
    • Prone press up
      • Increase the stability and strength of your erector spinal muscles. They also increase the range of motion in your lower back.
    back-extensions-exercise
    Back-extensions-exercise
    • Plank
      • Plank variations (front plank, side plank) to engage abdominal and back muscles
    copenhagen-side-plank
    Copenhagen-side-plank
    PLANK
    PLANK

    Goals of exercise

    • Reduce radicular pain rapidly (leg or arm discomfort caused by a pinched nerve in the spine).
    • Restore spine mobility
    • Restore body balance and improve spinal stability
    • Learn to maintain a supported spinal posture
    • Treat the underlying cause of pain in the spine
    • Sustain activities longer
    • To reduce the chance of repeated discomfort, avoid painful postures and actions.

    Splints

    • Lumbosacral orthosis (LSO) is a typical care for back discomfort.
      • this splint will restrict the movement in the lumbar spine region and support the surrounding muscles during movement.
      • which helps to reduce pain and swelling around the lower back region.

    Flexibility and Stretching Exercises:

    • Hamstring stretches to improve flexibility in the back of the thighs.
    • Quadriceps stretches to relieve tension in the front of the thighs.
    • Hip flexor stretches to reduce tightness in the hip muscles.
    • Lumbar and thoracic spine stretches to promote mobility and relieve stiffness.
    • Abductor stretch (Butterfly stretch) improves flexibility in the pelvic region.
    • Iliotibial band stretch improves stability in the hip and knee.

    Postural Correction and Ergonomic Training:

    • Assess and correct posture during sitting, standing, and lifting activities to reduce strain on the spine.
    • Guide ergonomic adjustments in workstations, chairs, and sleeping positions to maintain a neutral spine alignment.

    Surgical Management

    Surgical management for lumbar radiculopathy, also known as sciatica, is typically considered when conservative treatments like medications, physical therapy, and injections haven’t provided sufficient relief. Here are some common surgical options:

    1. Laminectomy: In this procedure, a portion of the bone above the nerve root and/or disc material from beneath the nerve root is removed to ease pressure on the impacted nerve.
    2. Artificial disc replacement: In cases where a disc is causing symptoms and needs to be removed, an artificial disc can be inserted to maintain normal motion and function of the spine.
    3. Microdiscectomy: This is a minimally invasive procedure where a small portion of the herniated disc that is pressing on the nerve root is removed.
    4. Foraminotomy: This procedure enlarges the space where the nerve exits the spinal canal, reducing pressure on the nerve root.

    Do’s & Don’ts

    Dos:

    • Exercise Regularly: Engage in low-impact exercises like walking, swimming, or cycling to improve flexibility and strength in the lower back and core muscles.
    • Maintain Good Posture: Pay attention to your posture while sitting, standing, and lifting objects to avoid putting excessive strain on your lower back.
    • Use Proper Lifting Techniques: When lifting large things bend your knees while keeping your back straight, correct-sleeping-positions, weight-lifting
    • Apply Heat or Cold Therapy: Use heat packs or cold packs to relieve pain and reduce inflammation in the affected area.
    • Practice Relaxation Techniques: Incorporate relaxation techniques such as deep breathing, meditation, or yoga to manage stress, which can worsen pain.
    • Stay Active: Avoid prolonged periods of inactivity or bed rest, as it can lead to muscle stiffness and weakness. Instead, stay active within your pain limits.
    • Wear an Orthosis Belt: always wear an orthosis while driving or walking.

    Don’ts:

    • Avoid High-Impact Activities: Refrain from activities that involve repetitive bending, twisting, or high-impact movements that can exacerbate symptoms.
    • Don’t Ignore Pain: Listen to your body and avoid pushing through severe pain or discomfort. Rest when needed and modify activities as necessary.
    • Limit Prolonged Sitting: Minimize prolonged sitting or standing in one position. Take regular pauses to stretch and change postures.
    • Avoid Heavy Lifting: Steer clear of lifting heavy objects or performing strenuous activities that strain your lower back muscles.
    • Don’t Smoke: If you smoke, consider quitting, as smoking can impair blood flow to the spine and hinder healing.
    • Don’t Self-Medicate: Avoid self-medicating with over-the-counter painkillers for prolonged periods without consulting a healthcare professional.

    Summary

    Lumbar radiculopathy discomfort is a common, self-limiting damage to the nerve roots of the lumbar spine. The illness affects millions of individuals and causes discomfort. Thus, a team of professionals is ideally suited to managing the disease.
    Rarely, the disease can lead to serious problems such as spondylolisthesis and cauda equina syndrome. These problems frequently involve surgical intervention and modern imaging techniques.

    Lumbar radiculopathy discomfort is a common, self-limiting damage to the nerve roots of the lumbar spine. The illness affects millions of individuals and causes Severe symptoms that must be treated quickly to avoid lasting damage, which can lead to a worse quality of life and higher medical expenses. As a result, it is critical to identify risk factors, conduct a complete examination of the patient with radicular pain, and monitor for the course of symptoms. A team effort is the best method to reduce the difficulties of such an accident.

    The suggested initial step for patients experiencing lumbar radicular discomfort is to have their primary care doctors evaluate them for severe radiculopathy or warning signs When symptoms are minor or moderate, conservative treatment should begin, which may include slight exercise, stretches, and medication. A chemist should examine dose and undertake medication reconciliation to avoid interactions between medicines, and potential trust on particular pain drugs, and to notify the healthcare team of any issues.

    • The patient should see a primary care physician one to two weeks after the first accident to assess the course of the nerve damage.
    • If symptoms increase or significant radiculopathy is suspected, consider referral to neurosurgery or hospitalization for spinal decompression.
    • If radicular problems remain three weeks following the accident, a physical therapy referral may be an option.
    • When symptoms last more than six weeks, imaging tests such as an MRI or CT scan can help see the nerve roots.
    • The patient should see a dietician and follow a healthy diet to maintain a healthy weight.
    • The chemist should advise the patient to quit cigarette smoking since this might aid in the healing process. Furthermore, the chemist should educate the patient on pain treatment and easily available solutions.
    • Continuous discomfort after six weeks may need a referral to interventional pain management or neurosurgery for an epidural steroid injection.
    • If mild to severe symptoms persist three months after start, referral for surgical surgery should be considered.

    FAQ

    Why is lumbar radiculopathy worse at night?

    Lying down puts a load on your sciatic nerve. This pressure might be increased if you have a soft mattress that encourages your spine to bend when sleeping.

    What happens if you don’t treat lumbar radiculopathy?

    The condition is caused by discomfort or injury to one of the spinal nerves going out of the spinal cord in the lower back. If ignored, untreated lumbar radiculopathy can injure the sciatic nerve.

    What are the common symptoms of lumbar radiculopathy?

    Common symptoms include sharp or shooting pain in the lower back, buttock, and leg, numbness or tingling sensations, weakness in the leg or foot, and difficulty with leg movements or walking.

    Can lumbar radiculopathy be prevented?

    While it may not be entirely preventable, maintaining a healthy weight, practicing good posture, avoiding activities that strain the back, and staying physically active can reduce the risk of developing lumbar radiculopathy.

    What not to do with radiculopathy?

    The following behaviors and habits may worsen lumbar radiculopathy:
    Prolonged sitting.
    Coughing and sneezing, place a sudden impact on the spine.
    Twisting the spine (i.e. golf, gymnastics, some yoga poses)
    High-impact exercise, including Running or jogging. Weightlifting

    References

    1. Results Physiotherapy | Physical therapy for Lumbar Radiculopathy. (n.d.). https://www.resultspt.com/lumbar-radiculopathy
    2. Ocs, N. U. P. D. (n.d.). 7 McKenzie Method Exercises for back pain and sciatica. Spine-health. https://www.spine-health.com/wellness/exercise/7-mckenzie-method-exercises-back-pain-and-sciatica
    3. CMSadmin. (2023, November 24). Cat Camel Exercise | Transform Chiropractic. Transform Chiropractic. https://transformchiropractic.com/back-pain/cat-camel-exercise/
    4. Ben-Yishay, A., MD. (n.d.-c). Lumbar radiculopathy. Spine-health. https://www.spine-health.com/conditions/lower-back-pain/lumbar-radiculopathy
    5. Lumbar radiculopathy. (n.d.-d). Physiopedia. https://www.physio-pedia.com/Lumbar_Radiculopathy
    6. Alexander, C. E., Weisbrod, L. J., & Varacallo, M. (2024, February 27). Lumbosacral radiculopathy. StatPearls – NCBI Bookshelf. https://www.ncbi.nlm.nih.gov/books/NBK430837/
    7. Dydyk, A. M., Khan, M. Z., & Singh, P. (2022b, October 24). Radicular back pain. StatPearls – NCBI Bookshelf. https://www.ncbi.nlm.nih.gov/books/NBK546593/
    8. Lumbar radiculopathy. (n.d.-e). www.aapmr.org. https://www.aapmr.org/about-physiatry/conditions-treatments/musculoskeletal-medicine/lumbar-radiculopathy
    9. School, M. M. (2022b, July 14). Lumbar Radiculopathy | UTHealth Neurosciences. Neurology, Neurosurgery, Spine Care | UTHealth Neurosciences. https://med.uth.edu/neurosciences/conditions-and-treatments/spine-disorders-and-back-pain/lumbar-radiculopathy/
    10. Abhishiek Sharma, MD, FAANS. (n.d.-b). 7 Treatments for lumbar radiculopathy: Atlas Neurosurgery and Spine Center: Neurosurgery. https://www.atlasneurosurgery.com/blog/7-treatments-for-lumbar-radiculopathy
    11. Apnp, P. V. (n.d.). Radiculopathy, radiculitis, and radicular pain. Spine-health. https://www.spine-health.com/conditions/spine-anatomy/radiculopathy-radiculitis-and-radicular-pain
    12. Sciatica Vancouver – Dr. Craig Best. (2023, September 22). Dr. Craig Best. https://www.drcraigbest.com/spine-neck-pain/lumbar-radiculopathy-vancouver/
    13. Ocs, N. U. P. D. (n.d.-b). What is the McKenzie method for back pain and neck pain? Spine-health. https://www.spine-health.com/wellness/exercise/what-mckenzie-method-back-pain-and-neck-pain
  • Gluteal Muscles

    Gluteal Muscles

    Introduction

    The gluteal muscles, commonly known as the glutes, comprise a group of three muscles located in the buttock region. These muscles play a pivotal role in a variety of movements involving the hip and thigh, contributing significantly to posture, stability, and locomotion.

    Anatomically significant, the gluteal region is located on the posterior aspect of the pelvis and contains muscles necessary for human dynamic movement and upright stability. It is a vital conduit for several important neurovascular structures that enter the lower limb.

    The gluteus maximus, gluteus medius, and gluteus minimus are the three muscles that make up the gluteal region, sometimes referred to as the buttocks. The term “glutes” refers to the group of gluteal muscles.

    The three muscles originate in the ilium and sacrum and insert into the femur. The muscles’ functions include extension, abduction, external rotation, and internal rotation of the hip joint. The superior and inferior gluteal arteries, which branch off the internal iliac artery, supply blood to the gluteal muscles.

    Gluteus Maximus.

    The gluteus maximus is the largest gluteal muscle. It is also the most visible, creating the shape of the buttocks.

    • Origin: the gluteal (posterior) surface of the ilium, sacrum, and coccyx. The fibres slope across the buttock at a 45° angle.
    • Insertion: the femur’s gluteal tuberosity and iliotibial tract.
    • Actions: It is the primary extensor of the thigh and aids in lateral rotation. However,
      it is only used in situations where force is required, such as running or climbing.
    • Innervation: The inferior gluteal nerve.
    • Blood supply: This muscle receives blood from the muscular branches of the inferior and superior gluteal arteries.

    Gluteus Medius

    The gluteus medius muscle is fan-shaped and located between the gluteus maximus and minimus. It has a similar shape and function to the gluteus minimus.

    • Origin: the gluteal surface of the ilium.
    • Insertion: the greater trochanter’s lateral surface.
    • Actions: Lower limb abduction and medial rotation. It stabilises the pelvis during locomotion, preventing the pelvis from ‘dropping’ on the opposite side.
    • Innervation: Superior gluteal nerve.
    • Blood supply: The superior gluteal artery’s deep branch supplies blood to this area.

    Gluteus Minimus.

    The gluteus minimus is the superficial gluteal muscle with the greatest depth and smallest size. It has a similar shape and function to the gluteus medius.

    • Origin: the ilium converged to form a tendon.
    • Insertion: the greater trochanter’s anterior side.
    • Actions: Lower limb abduction and medial rotation. It stabilises the pelvis during
      locomotion, preventing the pelvis from ‘dropping’ on the opposite side.
    • Innervation: Superior gluteal nerve.
    • Blood supply: the superior gluteal artery’s deep branch.

    Functions of the gluteal muscles

    gluteal muscles help to stabilise the upper body and pelvis, facilitate locomotion, and extend the hip. The gluteal muscles act on the hip joint, primarily to facilitate abduction and extension of the thigh, but some also help with adduction, external rotation, and internal rotation of the leg.

    The gluteus maximus muscle is important for daily activities, explosive athletic performance, and joint stability. It’s our most powerful hip extensor.

    If the gluteus medius and minimus muscles did not contract properly, the pelvis would drop to the opposite side, and the trunk would lean to the opposite side. This is because the gluteus medius and minimus muscles stabilise the pelvis during single leg stance, which accounts for 30% of our normal gait cycle. See the Trendelenburg Sign.

    Embryology

    The gluteus maximus, like all other limb muscles, develops from somites, which are bilaterally paired blocks of paraxial mesoderm. Myoblasts migrate into limb buds during the fifth week of development. These cells condense to form either the dorsal or ventral limb buds. The gluteus Maximus is one of the extensors and abductors that are composed of the dorsal limb buds of the lower extremity.

    At around four weeks, the lower limb bud forms, which corresponds to embryonic stage 14. By stage 17, the lower limb has a flattened footplate, an identifiable hip joint, and no true knee. The digits separate between stages 20 and 23, with the toes clearly defined by stage 23, which corresponds to the end of week eight. The gluteus medius, like other skeletal muscles, is made up of cells derived from somites located in the lower limb bud. These cells demyelinate along the dermomyotome’s hypaxial edge. They then migrate to the limb bud and multiply there. When myogenic determination factors are expressed, they eventually differentiate into the gluteus medius muscle.

    The gluteus minimus muscle develops from myoblasts that surround the developing bone. Myoblasts form as a result of nearby tissues releasing molecular signals that cause somites to differentiate into myoblasts. Myoblasts then fuse to form myotubes, which are distinguished by their long, tubular, and multinucleated shape. As the myotubes grow, they start to form layers that separate the muscle from the surrounding connective tissue.

    The lower limb buds begin to form around the end of the fourth week, slightly later than the upper limb buds. Furthermore, the lower limb will rotate medially while the upper limb rotates laterally.

    Gluteal muscles injury

    The majority of gluteal injuries are caused by trauma, such as a fall or a direct blow to the buttocks. Hip overuse injuries can cause inflammation and damage to the gluteal muscles, which help move the hip, as well as the tendons that connect the gluteal muscles to the hip’s greater trochanter.

    • A gluteal strain is a stretch injury or tear in one of these critical muscles that occurs as a result of sudden trauma or repetitive overuse over time.
    • Running injuries frequently involve inflammation of the hip, piriformis, iliotibial band, and gluteus muscles.
    • In athletes, gluteal tendinopathies can mimic hip bursitis. Overtraining can lead to injuries, particularly in weightlifting and squats.
    • Gluteal tendinitis: Repetitive movements cause small micro tears in your tendons, resulting in inflammation and tendinitis. You may experience severe
    • Gluteal tendinopathy: This type of hip pain is caused by a tendon injury that causes tissue breakdown or deterioration.
    • Trochanteric bursitis is inflammation of a bursa sac (bursitis) in your hip. These fluid-filled sacs fill the gaps between bones, muscles, and tendons. Some patients with trochanteric bursitis develop greater trochanter pain syndrome (GTPS).
    • Lack of flexibility
      Limited hip and pelvic flexibility significantly increases the risk of gluteal strain. Tightness in muscles such as the hip flexors, hamstrings, and calves causes the gluteal muscles to be chronically shortened. This harms the optimal length-tension relationship in muscle tissue, forcing the glutes to work at a mechanical disadvantage. Then, when it comes into action for tasks like hip extension, external rotation, or pelvic stabilisation, it strains beyond its capacity. Stretching and mobility exercises help to normalise muscle length and reduce strain risk.
    • Muscle imbalances
      The gluteal muscles do not work alone; they are part of a synergistic group of hip muscles that share the load during movement. Imbalances or weakness in certain synergistic muscles, such as the deep hip external rotators, cause glute overload. For example, weak external rotators increase the torque required by the glutes to control rotation, predisposing to tissue failure. Addressing flexibility and strength deficits through personal training can help prevent gluteal injuries.
    • Blunt trauma to the buttocks can cause tears in the gluteal muscles. Forces from falling and landing directly on the bottom muscles, as well as a blow to the back of the thigh, can strain tissue.
    • Overuse
      Running, cycling, and other sports require a repetitive hip extension, rotation, and pelvic stabilisation from the glutes, which can lead to fatigue. When distance or intensity is increased too quickly, the cumulative demand can exceed tissue capacity, particularly when combined with poor flexibility. Even after prolonged activity at submaximal levels, a sudden increase in load, such as sprinting to the finish line, frequently causes a strain. Slow progression in training allows for tissue adaptation and prevents overload.

    Symptoms

    The most common signs of a gluteal muscle injury are:

    • Pain is typically localised in the buttocks near the strained muscle.
    • Tenderness and palpation may occur directly over the muscle.
    • Stiffness – A strained muscle may feel tight and stiff, particularly after rest.
    • Bruising – Some severe muscle strains result in bruising over the injured area as blood leaks into the muscle tissue.
    • Spasms – Muscle spasms occur when strained muscles involuntarily contract.
    • Weakness – Difficulty activating the injured muscle due to pain and dysfunction, which prevents activities that require a hip extension, such as climbing stairs.

    Treatment

    If the gluteal injury is caused by a direct blow or fall that results in a contusion, the treatment goal is to reduce inflammation in the area.

    • Rest
      Restrict sporting activity and avoid aggravating movements such as stair climbing during the early stages of recovery. Relative rest allows torn muscle fibres to recover. Continue modified activity as tolerated to prevent the area from becoming too stiff.
    • Ice
      Ice therapy for 10-15 minutes per day helps to reduce pain and swelling. Ice inhibits local blood flow to the injured tissue. Apply ice directly to the painful muscle belly, taking care not to burn the skin.
    • Anti-inflammatory medications
      NSAID pain relievers like ibuprofen can have anti-inflammatory properties that help control swelling. Always follow medication precautions and instructions.
    • Compression
      Wrapping elastic bandages around the hips can help to reduce swelling and increase comfort. Ensure that the bandages are not too tight, allowing airflow to the skin beneath. It can be difficult to bandage the gluteal region, though.
    • Elevation
    • Some patients with gluteal injuries have difficulty sitting on the commode and develop constipation. A stool softener may be used for a short time.
    • If the gluteal injury is the result of overuse or an abnormal gait (walking pattern), physical therapy may be recommended to prevent further injury and inflammation.
    • Physical therapy can also help treat tendinopathies and other inflammation of the gluteus muscles that are not caused by trauma. Massage and ultrasound are two possible treatment modalities. To avoid future injury, rehabilitation may include exercises that strengthen muscles and maintain range of motion.

    In some cases, medical professionals may consider giving steroid injections. Using ultrasound, a long needle is guided near the injury site so that the injected steroid can work directly on the inflammation.

    Surgery is rarely considered, but it may be an option if nonsurgical treatments fail and torn muscles must be repaired.

    Exercises of the gluteal muscles

    • Stretching exercises
    • Strengthening exercises

    Stretching exercises

    Seated glute stretch

    Seated glute stretch
    Seated glute stretch

    This simple stretch helps to relieve tightness in the glutes, hips, and back. If your hips require additional support, sit on a yoga block or folded towel.

    To perform this stretch:

    • Using your legs out in front of you, take a seat on the floor.
    • Lift your left leg and place its ankle on your right knee while keeping your back straight. Lean slightly forwards to deepen the stretch.
    • After 20 seconds of holding, switch to the other side and repeat.

    Seated figure-four stretch.

    Seated-FOUR-FIGURE-STRETCH
    Seated-FOUR-FIGURE-STRETCH

    The seated figure-four stretch, also known as the Seated Pigeon Pose, helps to loosen the glutes and surrounding muscles.

    To perform this stretch:

    • Sit upright in a sturdy chair. Just above the knee, place your right ankle on top of your left thigh. Put your hands on your shins.
    • Keep your spine straight and lean slightly forward to deepen the stretch.
    • Hold for 20 to 30 seconds.
    • Return to your starting position. Repeat for the other leg.
    • In addition to chair stretches, you can stretch your glutes while sitting on the ground or standing.

    Standing figure-four stretch.

    STANDING-FOUR-FIGURE-STRETCH
    STANDING-FOUR-FIGURE-STRETCH

    This exercise is a standing version of the seated figure-four stretch. It’s an excellent way to relieve tightness in your glutes, hips, and back.

    • Stand up straight. Cross your left ankle over your right thigh, just above your knee, forming a “4” shape. Hold onto a desk or a wall for support.
    • Slowly bend your right knee and lower your hips into a squat position.
    • Hold for 20 to 30 seconds.
    • Return to your starting position. Repeat with the other leg.

    Knee to the opposite shoulder.

    knee-to-opposite-shoulder
    knee-to-opposite-shoulder

    If you’re experiencing sciatica pain, try this glute stretch. Pulling your knee towards your opposite shoulder can help to relax your glutes and relieve tension around your sciatic nerve.

    To perform this stretch:

    • Begin on your back, legs extended and feet flexed upwards.
    • Bend, lift your right knee and wrap your hands around it.
    • Reach up to your left shoulder with your right knee.
    • Hold for 20 to 30 seconds.
    • Straighten your right leg, then repeat with your left.

    Downward Facing Dog.

    Downward-Facing Dog
    Downward-Facing Dog

    Downward Facing Dog is a popular yoga pose for stretching the glutes, hamstrings, and lower back. It involves the following steps:

    • Assume a tabletop position by putting yourself on your hands and knees.
    • Extend the tailbone away from the ground as you slowly raise the knees off the floor.
    • Press the thighs back and gently push the heels as close to the floor as possible while keeping the knees straight. There should be a stretch, but it shouldn’t hurt.

    Strengthening exercises

    Squats

    SQUATS
    SQUATS

    One of the greatest workouts for targeting the gluteus maximus, the largest muscle in the lower body, is the squat. They also target the hips, thighs, calves, and core.

    How To Do Squats

    • Stand with your feet hip distance apart. Hold weights at shoulder level or by your sides to increase the intensity.
    • Bend your knees and lower into a squat.
    • To stand, press into your heels.
    • Repeat for two or three sets of eight to sixteen reps.

    Lunges

    lunges
    lunges

    Lunges are a popular buttock exercise. In a staggered stance, you must rely heavily on your glutes to maintain balance. The stance also causes the glutes on the front of your legs to work harder. Lunges also work other muscles such as your hamstrings, quads, and calves.

    How to do lunges.

    • Stand with your feet staggered, one forward and one back (about three feet apart).
    • Bend both knees and lunge straight down, bringing your back knee to the floor.
    • Do not lunge forward over your front toes. Remember to keep your front heel planted.
    • To stand, press into your heel.
    • Repeat 1–3 sets of 12–16 repetitions. Hold some weights to increase the intensity.

    Step-Ups

    The way to do step-ups

    • Stand in front of the step or platform.
    • Keep your foot on the step
    • Step up by pressing into your heel and touching your left toe to the step.
    • Keep your right foot on the step and bring your left foot down to the floor. For added intensity, bend your knees into a lunge position.
    • Repeat for 1 to 3 sets of 12 to 16 reps per side. To increase the intensity, place weights or a resistance band under your standing foot.
    • Push into your heel to lift the body and focus your entire weight on your stepping leg.

    Hip Extensions

    Hip extensions
    Hip extensions

    While the previous compound exercises are great for working multiple muscles at once, hip extensions are ideal for targeting the glutes more specifically. Shoulder and core exercises are also beneficial.

    How To Do Hip Extensions

    • Get on your hands and knees, placing your hands directly under your shoulders and your knees directly beneath your hips.
    • Lift your right leg until it reaches your glutes while keeping the right knee bent.
    • Lower your leg.
    • Repeat each side 12–16 times.
    • To increase the intensity, squeeze a weight in the back of your knee or use ankle weights.

    Glute Bridge

    elongated gluteal bridge
    gluteal bridge

    Most people can safely perform glute bridges, which are an excellent beginner exercise. To perform one:

    • through both feet, flat on the ground and bent knees, lie on your back.
    • Perform the muscles of your abdomen and raise your hips gradually. Aim for a knee angle of approximately 90 degrees.
    • Maintain the raised position for a few counts, then lower your hips and repeat.

    Side-lying hip abduction.

    side-lying-hip-abduction
    side-lying-hip-abduction

    The side-lying hip abduction, also known as a leg lift, is a simple exercise that most beginners can do without using any equipment. To make it more difficult, a person can add an ankle weight to their upper leg.

    To do a side-lying hip abduction:

    • Lie on one side, legs straight. Support the head with one hand while resting on the elbow.
    • Flex the foot of the upper leg and lift it while engaging the core. Keep the upper leg straight. Lower it slowly.
    • Repeat 10 to 12 times.
    • Lie on the opposite side and repeat.

    Clamshells

    Clamshell exercise with a resistance band
    Clamshell exercise with a resistance band

    How to Do It:

    • Just above the knees, wrap a resistance loop band around your thighs.
    • Lie on your left side. Place your knees atop each other. assure that the angle between both of your legs is ninety degrees.
    • Lift your right knee towards the ceiling, pushing against the resistance of the band. Rotate your hips to open your groin.
    • Squeeze your heels together and raise your feet a few inches off the ground for an extra challenge. Keep your feet in this position throughout the workout.
    • Complete 10 to 15 repetitions.
    • Switch sides and repeat.

    Summary

    The gluteal region, located on the posterior aspect of the pelvis, is essential for human dynamic movement and upright stability. It contains three muscles: gluteus maximus, gluteus medius, and gluteus minimus. These muscles help stabilize the upper body and pelvis, facilitate locomotion, extend the hip, and assist with adduction, external rotation, and internal rotation of the leg. They develop from somites, bilaterally paired blocks of paraxial mesoderm.

    Gluteal injuries are primarily caused by trauma, such as falls or direct blows to the buttocks. Overuse injuries can cause inflammation and damage to the gluteal muscles, which help move the hip and connect the gluteal muscles to the hip’s greater trochanter. Limited hip and pelvic flexibility increases the risk of gluteal strain.

    Treatment for a gluteal muscle injury includes rest, ice therapy, anti-inflammatory medications, compression, elevation, and physical therapy. Stretching exercises can relieve tightness in the glutes, hips, and back, while strengthening exercises like seated glute stretch, seated figure-four stretch, and knee to the opposite shoulder can be beneficial.

    Exercises for the gluteal muscles include stretching exercises, squats, lunges, step-ups, and hip extensions.

    FAQs

    What are the three major muscles in the glutes?

    The gluteus maximus, gluteus medius, and gluteus minimus are three of the muscles that make up the gluteal region, which is responsible for the formation of the buttocks. The gluteus maximus is the most superficial and largest of the three muscles, contributing significantly to the shape and form of the buttocks and hips.

    Which is the most important glute muscle?

    The gluteus maximus is one of the strongest and most well-known muscles in the body. However, it could not reach its full potential unless it strengthened two lesser-known, but potentially more important, glute muscles: the gluteus medius and gluteus minimus.

    What is the function of the glutes?

    Their primary function is to keep us upright and propel our bodies forward. Good pelvic alignment, propulsion during walking and running, and even standing on one leg all depend on having strong gluteals. Gluteals also support the lower back while lifting and help to prevent knee injuries.

    What is the most frequently injured gluteal muscle?

    With all of the work that the gluteus maximus muscles do, they are susceptible to injury. Some of the most common gluteus maximus injuries are: Sprains occur when the ligaments that connect the gluteus maximus to the bone stretch or tear.

    What is the main gluteal nerve?

    The superior gluteal nerve is located in the lower pelvis and is formed by the dorsal divisions of the sacral plexus’s L4, L5, and S1.

    Where exactly are the glutes located in the body?

    The muscles around the hip joint including the gluteal muscles are located at the back of the hip (buttocks).

    References:

    • Robertson, K. (2024, January 29). Gluteal Strain – Injury Symptoms & Treatment. ProPhysiotherapy. https://prophysiotherapy.co.uk/conditions/gluteal-strain/#:~:text=The%20most%20common%20symptoms%20of,stiff%2C%20especially%20after%20rest%20periods.
    • Faaem, B. W. M. F. (2022, April 12). Gluteal Injury Symptoms, Treatment, Recovery Time & Diagnosis. MedicineNet. https://www.medicinenet.com/gluteal_injury/article.htm
    • Elzanie, A., & Borger, J. (2023, April 1). Anatomy, Bony Pelvis and Lower Limb, Gluteus Maximus Muscle. StatPearls – NCBI Bookshelf. https://www.ncbi.nlm.nih.gov/books/NBK538193/#:~:text=The%20gluteal%20muscles%20are%20a,the%20buttock%20and%20hip%20area.
    • Muscles of the Gluteal Region – Superficial – Deep – TeachMeAnatomy. (2024, May 15). TeachMeAnatomy. https://teachmeanatomy.info/lower-limb/muscles/gluteal-region/
    • Gluteal Muscles. (n.d.). Physiopedia. https://www.physio-pedia.com/Gluteal_Muscles
    • Gluteal muscles. (2023, October 30). Kenhub. https://www.kenhub.com/en/library/anatomy/gluteal-muscles
    • Professional, C. C. M. (n.d.). Gluteal Tendinopathy. Cleveland Clinic. https://my.clevelandclinic.org/health/diseases/22960-gluteal-tendinopathy
    • Greco, A. J., & Vilella, R. C. (2023, May 22). Anatomy, Bony Pelvis and Lower Limb, Gluteus Minimus Muscle. StatPearls – NCBI Bookshelf. https://www.ncbi.nlm.nih.gov/books/NBK556144/#:~:text=The%20gluteus%20minimus%20predominantly%20acts,known%20as%20the%20Trendelenburg%20sign.
    • Shah, A., & Bordoni, B. (2023, February 17). Anatomy, Bony Pelvis and Lower Limb, Gluteus Medius Muscle. StatPearls – NCBI Bookshelf. https://www.ncbi.nlm.nih.gov/books/NBK557509/
    • Kandola, A. (2020, October 1). What glute stretches can improve flexibility? https://www.medicalnewstoday.com/articles/glute-stretches#summary
    • Cpt, P. W. (2024, May 13). 7 Best Glute Exercises for a Stronger Butt. Verywell Fit. https://www.verywellfit.com/best-butt-exercises-1230773
  • Vestibular Neuritis

    Vestibular Neuritis

    The condition known as vestibular neuritis damages the inner ear’s vestibulocochlear nerve. This nerve transmits data from your inner ear to your brain regarding your head posture and balance. When the vestibular nerve in your inner ear is swollen or gets inflamed, vestibular neuritis develops.

    Your brain’s ability to process information is disrupted when this nerve is swollen or inflamed. This causes symptoms related to balance, such as vertigo and dizziness. See below for information on vestibular neuritis causes, diagnosis, treatment, and prognosis.

    What is a Vestibulocochlear Nerve?

    A cranial nerve called the vestibulocochlear nerve carries information from the inner ear to the brain about equilibrium (balance) and sound. Additionally, it sends motor and modulatory data from the brainstem’s superior olivary complex to the cochlea via olivocochlear fibers.

    The vestibulocochlear nerve is also known as:

    • Auditory vestibular nerve
    • Acoustic nerve
    • Eighth paired cranial nerve
    • Cranial nerve eight (CN VIII)

    The internal auditory meatus, also known as the internal auditory canal, is the location of the vestibulocochlear nerve. The nerve is in charge of hearing and balance. Acoustic neuroma, labyrinthitis, and vestibular neuritis are disorders of the vestibulocochlear nerve.

    Anatomy of the Vestibulocochlear Nerve

    The cochlear nerve, which is involved in hearing, and the vestibular nerve, which is involved in balance, combine to form the vestibulocochlear system. One of the twelve cranial nerves passes between the medulla oblongata, the lower portion of the brainstem, and the pons, the middle of the brainstem.

    Next, a collection of nerve cells known as the vestibular ganglion carries the vestibular portion of the nerve out of the inner ear. From the cochlea in the inner ear, the cochlear portion of the nerve passes through the spiral ganglion.

    Function of the Vestibulocochlear Nerve

    • The vestibulocochlear nerve serves only sensory purposes. It doesn’t have any motor functions. It transmits information about sound and balance from the inner ear to the brain.
    • Sound waves are detected by the cochlea, the portion of the inner ear from which the cochlear portion of the nerve originates. After that, they proceed to the brain from the spiral ganglion.
    • The vestibular apparatus, which is the source of the vestibular portion of the nerve, senses variations in the head’s position concerning gravity. The brain then receives information regarding balance from the head’s posture.

    What is the Vestibular Neuritis?

    Vestibular neuritis, or vestibular neuronitis, is a neurological disorder resulting from inflammation of the inner ear nerves. It can cause dizziness, imbalance, nausea, and vision issues. This constitutes the third most prevalent etiology of vestibular disorders and may result in minor symptoms or significant difficulties with everyday functioning.

    Your vestibular system helps in your perception of position and motion and enables you to respond to these feelings by activating reflexes in your arms, legs, trunk, and eyes. It consists of your brain (the processor), the vestibular nerve, and the vestibular organ in your inner ear (the sensor).

    What are the symptoms of the Vestibular Neuritis?

    People with vestibular neuritis usually experience both acute and chronic phases. This usually involves sudden, intense symptoms that last for about a week, followed by milder symptoms that can continue for a few weeks to several months. Although it’s uncommon, some people experience vestibular neuritis symptoms that persist for years.

    Acute(Initial) phase of Vestibular Neuritis

    Vestibular neuritis might have an initial phase that lasts several days. There are numerous potential symptoms, including:

    • Sudden, severe vertigo (a spinning sensation).
    • Severe dizziness (lightheadedness or unsteadiness).
    • Severe balance difficulties.
    • Vomiting as well as nausea.
    • Difficulty concentrating.
    • Motion sensitivity.
    • The disorder known as nystagmus causes loss of eye control.

    Chronic(post-acute) phase of Vestibular Neuritis

    Vestibular neuritis’s chronic phase may last for a few weeks to many months and present with symptoms like: 

    • Lightheadedness.
    • Mild vertigo that involves head and body motions.
    • Mild nausea.
    • Some people have trouble walking, particularly in crowded places.
    • A sensation of ear fullness.
    • Mild motion sensitivity.
    • Fear and anxiety.

    Remember that symptoms of vestibular neuritis are different from person to person. Your medical history, the specific cause, and the location of the nerve damage will all influence your symptoms.

    What are the causes of the Vestibular Neuritis?

    • The most frequent cause of vestibular neuritis is an inner ear viral infection. The vestibular nerve is similarly damaged as a result of the herpes zoster virus-1. Auto-immune deficiencies and localized blood clots (thromboses) are possible other reasons.
    • These stimuli cause an inflammatory process at the vestibular nerve level, which impairs vestibular nerve cells and reduces the local blood supply. This first inflammation produces the above-mentioned Acute Phase symptoms. The post-acute symptoms are then caused by a local vestibular nerve injury that occurs after a few days as the inflammation goes down.

    Vestibular neuritis can have a variety of causes, such as :

    • The flu.
    • A cold.
    • Rubella is a virus that can result in a rash, a fever, and body pain.
    • Mumps is a virus that can result in headaches, body aches, and a fever.
    • Measles is a virus that can result in a cough, rash, and high fever.
    • Chickenpox is a virus that can result in painful, itchy blisters.
    • Shingles is a virus that arises from chickenpox and can result in a painful rash, chills, and fever.

    How uncommon is Vestibular Neuritis?

    About 4 out of every 100,000 Americans suffer from vestibular neuritis. It ranks as the third most typical cause of peripheral vertigo. Although they have trouble balancing, people with peripheral (inner ear) vertigo can usually still walk. While vestibular neuritis can affect persons of any age, it is less frequent in young children.

    Is it possible to spread vestibular neuritis?

    There is no spread of the illness itself. In other words, vestibular neuritis cannot be transmitted from another person. However, the viruses that cause vestibular neuritis can spread to other persons.

    Which factors put one at risk for vestibular neuritis?

    • Typically between 30 and 60 years old, with the majority being between 40 and 50.
    • Both men and women experience the same effects.
    • Thirty percent get a common cold right before they experience dizziness.

    How to diagnose Vestibular Neuritis?

    Vestibular neuritis cannot be correctly diagnosed by any specific test or scan. The mix of factors that rule something in and those that rule it out determines the diagnosis. Among these diagnostic components are:

    • History: Which particular symptoms, and when did they start to occur? For example, you most likely do not have vestibular neuritis if you experience severe episodes of vertigo regularly (after the initial acute phase).
    • Manual neurological examinations are used to rule out other neurological reasons while examining vestibular function.
    • Tests of balance and gait: do they match with the possible loss of vestibular function?
    • Nystagmus are there errors in vestibular eye reflexes? Do they also correspond with vestibular neuritis patterns?
    • During positional testing, are the nystagmus patterns and symptoms consistent with vestibular neuritis or do they point to other vestibular issues or non-vestibular causes?
    • Do calorie-based studies that include injecting warm or cold water or air into the inner ear detect alterations in vestibular nerve function?

    Specialists in vestibular physical therapy can evaluate your vestibular system and assist with diagnosis, including determining whether vestibular neuritis is the cause of your symptoms.

    What differentiates labyrinthitis from vestibular neuritis?

    • Both labyrinthitis and vestibular neuritis are closely related illnesses with comparable symptoms. In contrast to vestibular neuritis, which is inflammation of the vestibular nerve, labyrinthitis is inflammation of the labyrinth, which is the portion of the inner ear that houses the organs responsible for balance and hearing.
    • Hearing loss is not experienced by someone who has vestibular neuritis. They will have vertigo, tinnitus, and some hearing loss if they have labyrinthitis.

    What are treatments for Vestibular Neuritis?

    Exercise, diet modifications, and the use of specific medications could all be beneficial.

    Medication for Vestibular Neuritis

    A physician may recommend medication during the acute phase of vestibular neuritis.

    • Antihistamines, like meclizine or diphenhydramine.
    • Antiemetics, like metoclopramide or promethazine.
    • Benzodiazepines, including lorazepam and diazepam.
    • These drugs might lessen dizziness and nausea.

    It is essential to take these medications for no more than three days. Persistent use may result in persistent vertigo by preventing the brain from making up for the dizziness. The physician may also prescribe antiviral or antibiotic drugs to treat any underlying infections.

    Physical-Therapy for Vestibular Neuritis

    In case you’ve been dealing with symptoms such as vertigo for more than a few weeks, your physician can advise you to begin a balance rehabilitation program. Some exercises must be practiced to assist in recovering balance and lessen vertigo.

    These exercises can be useful:

    • Spread your legs slightly wider than your shoulders while standing.
    • Raise one hand straight up and turn your head slightly to look at the hand.
    • Maintain eye contact with the raised hand while bending at the waist.
    • Gently extend the other hand till it makes contact with the opposing ankle while still bent.
    • Repeat the same action on the other side.

    Swinging forth and backward is another exercise.

    • To do it: Place your feet together and stand erect.
    • Lean back on your heels slowly while putting your arms out front to maintain balance.
    • Next, move forward by shifting your center of gravity to your toes.
    • Hold this posture with your arms hanging by your sides, your back slightly arched and your hips pushed forward.
    • Make repeated back-and-forth movements.

    These are exercises that one can perform at home. Furthermore, walking for thirty minutes a day can help individuals whose symptoms have persisted for more than three months. It may decrease anxiety related to the condition and reduce dizzy symptoms.

    Dietary advice and other strategies

    Reducing or eliminating vestibular neuritis symptoms can be achieved by:

    • Avoid foods and beverages that are heavy in sugar or salt.
    • Stay away from nicotine.
    • Keep yourself hydrated.
    • Stay away from alcoholic beverages.
    • Take rest.

    Avoiding solid foods and sipping on frozen snacks to stay hydrated might be an ideal choice for someone who is throwing up and feeling nauseous. As soon as the symptoms start to get better, you should consider trying clear fluids, such as:

    • Sports drinks
    • Water
    • simple soups
    • Desserts made with gelatin
    • plain Ginger tea
    • Coconut juice
    • Peppermint leaves tea

    But, those who experience nausea should only consume 1-2 ounces of drink every 10-15 minutes.
    A person should start eating simple foods like toast or soup and crackers as soon as they feel well enough. Stay away from anything that has dairy or caffeine.

    Prognosis

    Your particular situation will determine this. The severity of your disease and the location of the injury to your vestibular nerve will determine how long it takes you to recover. A week may be all it takes for some people to heal. Some people could experience persistent symptoms for several weeks, months, or even years. See your doctor about further treatment choices if your symptoms aren’t getting better.

    What are the complications of Vestibular Neuritis?

    • Vestibular neuritis can cause sudden, acute symptoms that are very difficult for people to manage during the day and frequently end up in the emergency room.
    • Over the following several weeks, the symptoms start to get better, while some people may still have dizziness or trouble balancing, as well as difficulty walking, standing, or even turning their heads. Falling can result from difficulty balancing, which makes it risky as well.

    What are the prevention of Vestibular Neuritis?

    • Whether vestibular neuritis may be prevented is unknown. Although viruses are thought to be the disorder’s origin, studying viral infections of the inner ear can be more challenging than studying bacterial infections.
    • Vestibular neuritis is caused by viruses, thus it’s not always preventable. Nonetheless, by making sure all of your vaccinations are current, you can lower your risk.
    • Studying the labyrinth, which consists of the fluid-filled tubes and sacs that comprise the inner ear, can also be challenging.

    Summary

    Vestibular neuritis frequently develops together with or following a bacterial or viral infection. Vertigo, nausea, blurred vision, and headaches are some of the symptoms. Vestibular neuritis matches symptoms with more serious illnesses that a physician should rule out. Vestibular neuritis usually resolves on its own, while prescription drugs, dietary modifications, and certain exercises might be helpful.

    FAQs

    What are vestibular neuritis’ primary causes?

    According to experts, viral diseases such as viral hepatitis or chickenpox that originate in the body might cause vestibular neuritis. These infections can also originate in the inner ear.

    What is the duration of vestibular neuritis?

    Vestibular symptoms of vestibular neuritis continue for one to two days before gradually decreasing. Vestibular neuritis is a self-limiting illness. The disease rarely lasts longer than a few days to a few weeks. It is thought that central compensation is mostly responsible for early symptom relief.

    How is vestibular neuritis treated?

    Early on in the course of vestibular neuritis, corticosteroids, a class of anti-inflammatory drugs, can be used as a treatment. If necessary, nausea and vertigo-inducing drugs may also be used.

    What aggravates the symptoms of vestibular impairment?

    A diet heavy in sugar, coffee, or alcohol can cause balance problems and exacerbate feelings of dizziness. Additionally, dehydration might exacerbate symptoms.

    How is vestibular neuritis tested?

    Numerous diagnostic procedures are used, including the vestibular-evoked myogenic potential test, bi-thermal caloric test, and head impulse test, to precisely detect vestibular neuritis.

    What is the quickest way for vestibular neuritis patients to heal?

    Walking and other cardiovascular exercises are examples of vestibular rehabilitation exercises. Balance training, initially performed while stationary and then while moving. Activities meant to strengthen vestibulo-ocular reflex Ideally. Vestibular rehabilitation should ideally begin as soon as the acute period is over.

    What medicine works the best for vestibular neuritis?

    In the acute phase of vestibular neuritis, a physician could recommend: Antihistamines, like meclizine or diphenhydramine.
    Antiemetics, like metoclopramide or promethazine.
    Benzodiazepines—like lorazepam and diazepam.

    Can vestibular nerve healing occur on its own?

    The brain has a limited capacity for healing and may need vestibular rehabilitation to assist in recalibrating in recognizing incorrect signals from the vestibular nerve.

    References

    • Fletcher, J. (2020, March 24). What is vestibular neuritis? https://www.medicalnewstoday.com/articles/vestibular-neuritis
    • Masters, M. (2024, May 9). What is vestibular neuritis? Symptoms, causes, diagnosis, treatment, and prevention. EverydayHealth.com. https://www.everydayhealth.com/vestibular-neuritis/guide/
    • Professional, C. C. M. (n.d.-u). Vestibular neuritis. Cleveland Clinic. https://my.clevelandclinic.org/health/diseases/15227-vestibular-neuritis
    • Valeii, K. (2023, August 21). Anatomy of the vestibulocochlear nerve. Verywell Health. https://www.verywellhealth.com/vestibulocochlear-nerve-5095249
    • Physio, C. (2021, September 28). What is vestibular neuritis? Cornerstone Physiotherapy. https://cornerstonephysio.com/resources/what-is-vestibular-neuritis/
    • Ms, K. a. M. M. (n.d.). Vestibular neuritis: practice essentials, background, pathophysiology. https://emedicine.medscape.com/article/794489-overview?form=fpf
    • Booth, S. (2023, December 20). What are vestibular disorders? WebMD. https://www.webmd.com/brain/vestibular-disorders-facts
  • Spasticity

    Spasticity

    What is a Spasticity?

    One aspect of upper motor neuron syndrome is spasticity, a motor condition characterized by a velocity-dependent increase in tonic stretch reflexes (muscle tone) with heightened tendon jerks as a result of the stretch reflex’s hyperexcitability.

    Lance’s 1980 physiological definition of spasticity is the most well-known and frequently used explanation of the condition.”Spasticity, a motor condition defined by a velocity-dependent increase in tonic stretch reflexes (muscle tone) with excessive tendon jerks due to hyperexcitability of the stretch reflex, is one facet of upper motor neuron syndrome.”

    An upper motor neuron lesion (UMN) can cause disordered sensorimotor control, which manifests as sporadic or persistent involuntary muscle activations.

    In patients with a range of neurological diseases, spasticity can lead to substantial difficulties with participation and activity. Among the numerous diverse characteristics of upper motor neuron (UMN) syndrome, spasticity is just one.

    One of the characteristic features of spasticity is that the hypertonia is reliant on the speed at which the muscle is stretched; that is, more resistance is experienced with quicker stretches, leading to the clinical manifestation of a “spastic catch.” Thus, muscular lengthening and stretching are resisted by spasticity. There are two important ramifications to this.

    First, there is a propensity for the muscle to stay in a shortened position for extended periods of time. This can lead to alterations in the soft tissue and eventually contractures. Secondly, there is a clear restriction on attempted motions. For instance, if the person tries to fully extend their elbow by contracting their triceps, this will cause their biceps to get stretched, which would create resistance and maybe prevent the elbow from extending all the way.

    It is important to note, nevertheless, that the circumstances are typically more complicated. In the aforementioned case, biceps spasticity alleviation could not result in an improvement in arm function since other aspects of the UMN syndrome, like muscular weakness, might also be involved.

    Damage or interference to the part of the brain and spinal cord in charge of regulating muscle and stretch responses is often the cause of spasticity. The imbalance between the excitatory and inhibitory impulses that the muscles receive, which causes them to lock in place, maybe the cause of these disturbances. The spasticity is due to lesions in the upper motor neurons.

    Categorization of Spasticity into Different Components and Sub-Definitions

    • Increased tonic component of the stretch reflex (intrinsic spasticity); exaggeration of the phasic component of the stretch reflex (intrinsic phasic spasticity; manifests as tendon hyperreflexia and clonus); and
    • Exaggeration of extrinsic flexion or extension spinal reflexes is known as extrinsic spasticity.

    Anatomy and Etiology:

    A UMN lesion causes the spinal cord’s reflex arc to become hypersensitive and lose its downstream inhibition.

    Proprioceptive, cutaneous, and other neurological functions are affected by the loss of supraspinal regulation of descending pathways that control excitatory and inhibitory Deficits arising from an upper motor neuron injury usually stemming from nociceptive spinal reflexes (UMNL).

    The Inhibitory System

    Corticoreticular Spinal Tract: These tracts, which are distinct from the Corticospinal Tract but travel alongside it, are in charge of facilitating the ventromedial reticular formation, an inhibitory region in the medulla. This is the site of the genesis of the Dorsal Reticulospinal Tract, which inhibits the flexor and stretch reflexes.

    The Excitatory System

    The bulbopontine tegmentum is the source of the Medial Reticulospinal Tract. It also functions in a weaker manner with the Vestibulospinal Tract, being both excitatory and inhibitory to the stretch and extensor reflexes, as well as the dorsal reticulospinal tract.

    Different Lesions and Their Presentations

    Depending on where the disruption has occurred, cortical UMN lesions and spinal cord UMN lesions have different indications and symptoms.

    Normal

    Due to the dynamic balance of the excitatory (Medial Reticulospinal and Vestibulospinal Tract) and inhibitory (Corticospinal Tract and Dorsoreticulospinal Tract) systems, the inhibition of the spinal cord may be readily altered in response to demand.

    Corticospinal Tract Lesion

    Stretch and flexor reflexes are inhibited by the Corticospinal Tract, while the major inhibitory system generated by the Dorsal Reticulospinal Tract is unaffected, maintaining the balance between excitatory and inhibitory forces.

    Internal Capsule Lesion

    causes a partial loss of inhibition to flexor stretches and the disruption of the Corticospinal Tract and Corticoreticular Tract pathways, which are in charge of the inhibitory response. Extensor and stretch reflexes are facilitated while flexors are inhibited due to the greater dominance of the excitatory systems from the Medial Reticulospinal and Vestibulospinal Tract.

    Incomplete Spinal Cord Lesion

    The location and severity will determine the signs and symptoms. There will be an unimpeded excitatory drive to stretch and extensor reflexes with partial suppression of flexor reflexes if the inhibitory system is compromised.

    Complete Spinal Cord Lesion

    The total lack of supraspinal control results in the absence of opposition to spinal reflexes. People may get both flexor and extensor spasms because both flexor and extensor reflexes are disinhibited.

    Spasticity is seen as a positive indicator of the upper motor neuron syndrome (UMNS), which is defined as motor disorders arising from lesions in the brain or spinal cord that are close to the alpha motor neuron. Two more beneficial features of UMNS include heightened muscle stretch reflexes and upward-moving plantar reflexes.

    Motor weakness, slower movement, lack of dexterity, or selective motor control are examples of negative traits. A UMN lesion causes the spinal cord’s reflex arc to become hypersensitive and to lose its downstream inhibition. Spasticity can be a symptom of a number of clinical conditions, such as multiple sclerosis (MS), stroke, cerebral palsy (CP), anoxia, traumatic brain injury (TBI), spinal cord injury (SCI), and other neurodegenerative diseases.

    Epidemiology

    Spasticity affects over 35% of stroke patients, over 90% of CP patients, roughly 50% of TBI patients, 40% of SCI patients, and between 37% and 78% of MS patients among the aforementioned disorders.

    Caused Of Spasticity:

    • An imbalance in the impulses sent to the muscles by the brain and spinal cord, which make up the central nervous system, is the cause of spasticity.
    • People with multiple sclerosis, cerebral palsy, traumatic brain injury, stroke, and spinal cord injuries are frequently found to have this imbalance.

    Symptoms Of Spasticity:

    • Spasticity symptoms can range from simple muscular tightness or stiffness to excruciating, uncontrolled spasms. Joint pain or tightness is another typical symptom of spasticity.
    • wrist spasticity
    • stiffness in the muscles, which results in fewer accurate motions and makes some jobs hard to complete.
    • spasms in the muscles, resulting in uncontrollably painful contractions.
    • a reflexive crossing of the legs.
    • Muscle fatigue.
    • inhibition of the development of muscles over time.
    • Muscle cell inhibition of protein production.
    • increased tone in the muscles.
    • Reflexes that are too rapid.
    • involuntary movements, such as clonus (a sequence of rapid involuntary contractions) and spasms (a quick and/or persistent involuntary muscular contraction).
    • pain and discomfort.
    • reduced capacity for function and postponed motor development.
    • a challenge to hygiene and caring.
    • unusual position.
    • Contractures are defined as permanent muscle and tendon contractions caused by extreme, ongoing stiffness and spasms.
    • joint and bone abnormalities.
    • Breakdown of skin shear.
    • inhibits the breathing process.
    • inhibits movement and gait.
    • Additional effort for the caregiver.
    • inadequate security.
    • difficulties in sexuality.
    • insomnia.
    • Poor posture.

    Differential Diagnosis

    The conditions of rigidity, catatonia, and contractures are among the differential diagnoses for spasticity. Reduced suppleness of a muscle, tendon, ligament, joint capsule, and skin results in a contracture, which is characterized by greater resistance during passive stretching and is analogous to spasticity. The distinction between the two, though, is that contractures now exhibit any velocity-dependent alterations in limb posture or movement. Most often, damage to the basal ganglia is linked to rigidity.

    Unlike spasticity, rigidity has a high tone that is non-selective and equally affects all the muscles surrounding a given joint. Like a contracture, stiffness remains constant throughout its range of motion regardless of movement speed.

    The psychiatric illness known as catatonia is characterized by abnormal posture in the patient; the degree of force exerted on the affected muscle determines the degree of muscle tone increase observed. In contrast to spasticity, catatonia often exhibits comorbid symptoms such as stupor, impulsivity, perseverance, grimacing, gazing, echolalia, echopraxia, and withdrawal.

    Diagnosis:

    History and Physical

    A patient may experience new-onset spasticity following a traumatic brain injury, stroke, or SCI. Alternatively, they could have had CP from childhood or a previous MS diagnosis, in which case their current spasticity may be new or worsening. The high muscular tone in the forearm pronators, elbow, wrist, finger flexors, and shoulder adductors are characteristic of physical exam findings. One common malformation in the hand is a “thumb in palm” deformity, in which the thumb clenches the fist and the fingers wrap around it due to excessive finger bending and adduction. The enhanced tone is particularly noticeable in the plantar flexors and invertors of the lower limbs, hip adductors, and knee flexors and extensors.

    Patients experiencing spasticity including persistently high tone in the extensor hallucis longus or long toe flexors may report difficulties wearing shoes. During a physical examination, the physician will see that spasticity is correlated with movement speed; that is, the quicker a muscle is stretched or moved, the more resistance to passive elongation or stretch is observed. Clonal movements, spastic co-contractions, and spastic dystonia are other physical exam findings.

    The definition of clonus is the agonist and antagonist muscles contracting and relaxing alternately. Abnormal antagonist contractions that occur during intentional agonist effort are known as spastic co-contractions. Muscle contraction that occurs at rest is known as spastic dystonia, and it results in a persistent clinical posture that is extremely sensitive to stretching.

    • Elevated muscular tone in the adductors of the shoulder, flexors of the elbow, wrist, and fingers, and pronators of the forearm. The hip adductors, knee flexors and extensors, plantar flexors, and ankle invertors are the lower extremities where the increased tone is most noticeable. The muscles involved in antigravity are mostly impacted.
    • Patients experiencing spasticity including persistently high tone in the extensor hallucis longus or long toe flexors may report difficulties wearing shoes.
    • Because spasticity is velocity-dependent, a muscle will resist stretch or passive elongation more readily when stretched or manipulated more quickly.
    • It’s possible to see clonus, spastic co-contractions, and spastic dystonia. i.e., Clonus is characterized by the agonist and antagonist muscles contracting and relaxing alternately. Abnormal antagonist contractions that occur during intentional agonist effort are known as spastic co-contractions. Muscle contraction that occurs at rest is known as spastic dystonia, and it results in a persistent clinical posture that is extremely sensitive to stretching.
    • The phenomenon of clasp knives: Limb refuses to move at first, but then abruptly yields
    • Grabbing Effect: Applying pressure to the antagonist muscle’s surface may lessen spasticity’s tone.

    Evaluation

    Healthcare professionals may encounter a patient who exhibits either newly developed spasticity as a preliminary sign of an underlying neurological disorder, or pre-existing spasticity that has gotten worse due to the advancement of a recognized chronic neurologic disease or an exacerbating factor. A patient’s history and the course of their symptoms, including any motor weakness, altered sensation, pain, bladder and/or bowel dysfunction, and sexual dysfunction, are important information for a physician to gather while examining a patient who has recently developed spasticity.

    A thorough history should also cover dietary habits, travel history, family history, and any weakened immune systems. A neurological assessment of the patient’s muscle tone, motor function, reflexes, and sensibility should be included in the physical examination.

    A doctor must assess for triggers, illness progression, and the possibility of a new disease in a patient whose persistent spasticity is deteriorating, which is sometimes a more prevalent reason for consultation than spasticity with a recent beginning. Skin, visceral, drug-related, or device-related problems are examples of triggers.

    Skin problems can manifest as infections, boils, ingrown toenails, and ulcers. Urinary tract infections, calculi, and constipation are examples of visceral problems. Spasticity may intensify if antispasmodic medications are stopped abruptly. Last but not least, triggers relating to the device may include inadequate seating, an improperly fitted orthotic, or an intrathecal baclofen pump failure. Other harmful triggers including deep vein thromboses (DVT), wounds, infections, or stress can also exacerbate spasticity.

    CLINICAL PRESENTATION:

    Mobility:

    elevated muscular tone in the forearm pronators, elbow, wrist, and finger flexors, and shoulder adductors. The hip adductors, knee flexors and extensors, plantar flexors, and ankle invertors are the lower extremities where the increased tone is most noticeable. The muscles involved in antigravity are mostly impacted.

    Walking difficulties are perhaps the most prevalent side effect of the UMN condition. Falling might become a regular occurrence, and the gait can become awkward and uncoordinated. Walking may eventually become difficult due to a combination of spasms in the flexor or extensor muscles, soft tissue contractures, and ineffective responses.
    Even in cases when the affected person is unable to walk, the UMN syndrome may exacerbate their inability to maintain proper sitting posture. Having spasticity might make it challenging to push a wheelchair by yourself.

    While seated on a chair, extensor spasms may propel the person forward repeatedly, increasing the possibility of shear pressures that might result in pressure sores. To keep the individual in a functional and comfortable posture, seating frequently calls for a wide range of bracing, supports, and modifications.

    Loss of dexterity:

    The UMN syndrome in the arm can lead to further challenges with tasks including writing, eating, taking care of oneself, and self-catheterization. Loss of arm dexterity may make it difficult to self-ambulate in a wheelchair and may limit mobility in bed. All of these issues have the potential to gradually develop dependency on a third party and impair independence.
    Patients experiencing spasticity including persistently high tone in the extensor hallucis longus or long toe flexors may report difficulties wearing shoes.

    Bulbar and trunk problems:

    It is important to keep in mind that truncal spasticity can lead to difficulties with sitting and keeping an upright position, which is essential for eating and communicating, even if the majority of the functional effects of spasticity are felt in the arm or leg. Difficulty swallowing may result from bulging discs, increasing the risk of aspiration or pneumonia. Further communication difficulties may result from both improper posture and spastic types of dysarthria.

    Pain:

    The intense p associated with spasticity and other kinds of UMN syndrome is not well acknowledged. This is especially true for flexor and extensor spasms, when analgesia alone may require therapy in order to prevent further impairment of function. A higher risk of musculoskeletal issues and osteoarthritic joint changes can also result from abnormal postures. There can be a vicious cycle of increasing pain and greater stiffness if there is any peripheral stimulation from issues like minor pressure sores or ingrowing nails.

    • Because spasticity is velocity-dependent, a muscle will resist stretch or passive elongation more readily when stretched or manipulated more quickly.
    • It’s possible to see clonus, spastic co-contractions, and spastic dystonia. i.e., Clonus is characterized by the agonist and antagonist muscles contracting and relaxing alternately. Abnormal antagonist contractions that occur during intentional agonist effort are known as spastic co-contractions. Muscle contraction that occurs at rest is known as spastic dystonia, and it results in a persistent clinical posture that is extremely sensitive to stretching.
    • The clasp knife phenomenon is the limb’s initial resistance to movement followed by a quick yielding.
    • Effect of Stroking: Applying pressure to the antagonist muscle’s surface can lessen spasticity’s tone.
      It is crucial to identify spasticity early in the diagnostic process so that it may be monitored and treated as needed. Permanent loss of joint mobility has been observed to happen 3-6 weeks following both stroke and brain damage.
    • Hemiplegics have lower limb patterns that include adductor spasticity and hamstring tightness restricting knee range of motion. They also exhibit plantar flexion and inversion of the ankle. Shoulder adduction, internal rotation, elbow flexion, and forearm pronation with wrist and elbow flexion are typical upper limb presentations.

    Measurement techniques based on neurophysiology:

    Three commonly employed methods for clinical measurement include F-wave studies, H-reflex studies, and spasticity tendon jerks.

    Tendon jerks:

    An example of a spinal response that is most frequently employed is the tendon jerk, which is produced by quickly (but slightly) stretching a muscle. It has been proposed that oligosynaptic routes may have an impact on the subsequent reaction, which is said to be mostly mediated by the monosynaptic pathway.

    Tendon jerks have been shown to be more easily elicited in individuals with spasticity, meaning that they can be elicited at lower stimulus levels than usual and that the response to these stimuli is more diffuse and has a larger amplitude, meaning that it can involve muscles that were not initially stimulated. As a result, the tendon jerk has been proposed as a possible quantitative indicator of spasticity.

    It’s crucial to remember that tendon jerk increases are not just related to spasticity. It also has to be determined if the rise in the tendon jerk response is caused by a drop in threshold, an increase in gain, or a combination of the two.

    H –REFLEX

    A mixed nerve is electrically stimulated submaximally to elicit the long-latency reaction known as the H reflex.

    The subsequent muscular reaction is the outcome of conduction across the Ia afferent pathways. While oligosynaptic reflex pathways may possibly be implicated, the majority of these reflexes are assumed to be monosynaptic. The H-reflex response has been represented as a percentage of the M-reaction, or the stimulus of a muscle to supramaximal stimulation, in order to account for this variability.

    It should be mentioned that the afferent component of the reflex reaction is assumed to be fixed when utilizing this ratio. Although investigations have indicated an increase in H/M ratios in spasticity, it has also been shown that the ratios did not drop once spasticity was treated. Additionally, it has been shown that there was little relationship between the severity of spastic hyperreflexia and H/M ratios. It has been proposed that in spastic limbs, there should be less inhibition of H-reflex activity due to the fact that in normal people, muscle vibration suppresses this activity.

    F waves

    F waves, which are produced by stimulating a mixed nerve above its maximum potential, are utilized to gauge the excitability of motor neurons. The F wave, in contrast to H reflexes, is the outcome of antidormic activation of the -motor neuron rather than stimulation of a sensory nerve.

    Furthermore, the F wave, which comes after the M wave, has no link with M-wave amplitudes, in contrast to the H reflex, which has an inverse relationship with the M wave. Furthermore, the Fwave’s amplitude is substantially less than the H reflex’s. The average F-wave response from many tests is frequently employed due to fluctuations in latency and amplitude, even though the F-wave gives a more stable signal that is less affected by resting position and a subject’s capacity to relax. higher F-wave amplitudes in spastic people have been shown, which may indicate higher motor neural excitability.

    Outcome measures:

    The following are some helpful, objective metrics to track changes in spasticity:
    Personal:

    Pain:
    Pain Numeric Scale (e.g. for stiffness, comfort, and pain)
    noticing a grimace or retreat
    Arms A and B
    LegA

    Objective: 

    Resting position: measurements, descriptions, and photos of bony landmarks
    range of motion in passive mode
    Rating of Adductor Tone
    Range of motion that is active
    Strength of muscles: Oxford Measure of
    Modified Penn Spasms Scale of Spasm Frequency
    The score for Clonus and Spasm

    Description:

    Walking: a ten-meter stroll
    Transfers: There is a time lag
    The function of the Upper Limb: 9-Hole Peg Test
    Speech: The score for speech comprehension
    Strolling and Dropping Result
    Ashworth Scale or Modified Ashworth Scale for muscle tone

    ASHWORTH SCALE:

    The Ashworth scale is the measuring method most frequently applied in a clinical context. The Ashworth test is predicated on the doctor evaluating the patient’s resistance to passive stretch using the motion.
    The following is the scale:

    Grade Description:

    • 0 No increase in muscle tone; 
    • 1 small improvement in tone that causes a catch when the limb is moved.
    • 2 A greater rise in tone, yet the limb moved with ease.
    • 3 Significant tone increase; difficult to move passively.
    • 4 The limb is stiff while extending or flexing.

    MODIFIED ASHWORTH SCALE:

    When testing the upper extremities compared to the lower, the Modified Ashworth Scale scores showed improved reliability. The following is the scale:

    Grade Description: 

    • 0 No increase in muscle tone; 
    • 1 Slight increase in muscle tone, exhibited by a catch and release or by very little resistance when the affected portions are moved in flexion or extension near the end of their range of motion.
    • 1+ A little rise in muscle tone, indicated by a catch, and then very little resistance for the remaining portion of the range of motion (less than half).
    • 2 A further notable rise in muscular tone across the majority of the range of motion, yet the affected area or parts are readily moved
    • 3 Significantly higher muscular tone, difficult passive movement
    • 4 Affected part(s) inflexible in any direction.

    Tardieu Scale

    This scale measures how a muscle responds to a stretch delivered at a given speed in order to quantify muscular spasticity. Grading is done consistently at the same time of day and with the body in the same posture for each leg. Reaction to stretch is assessed at a given stretch velocity for every muscle type.

    Stretching

    • V1 at Tardieu’s velocity as slowly as feasible
    • V2 The limb segment’s falling speed (against gravity)
    • V3 quickly (>gravitational pull)

    Muscle Reaction Quality

    • 0: There is no resistance during passive motion
    • 1 Mild resistance the entire time, lacking a distinct catch at a certain angle.
    • 2 Clear catch at an exact angle, then release
    • 3 Attainable Clonus (less than 10 seconds) at a certain angleFatiguable Clonus (less than 10 seconds) at a certain angle
    • 4 Identifiable Clonus (> 10 seconds) at a certain angle
    • 5 Joint immobilized

    Angle of Spasticity

    • R1Angle of catch observed at V2 or V3 Velocity
    • R2 When a muscle is evaluated at V1 velocity when at rest, its full range of motion occurs.

    Spasticity Treatment:

    The doctor must evaluate the patient’s support network, medical comorbidities, the date of the spasticity’s development, its etiology, and the overall management goals when deciding how best to treat spasticity.

    Treatment choices for this condition are similar to those for other disorders in that they are step-wise, progressing from more conservative approaches to more invasive surgical treatments. One modality is identifying and avoiding uncomfortable stimuli, such as pain, infection, heterotopic ossification, pressure ulcers, urinary retention or stones, and ingrown toenails.

    Physical modalities and therapies, including serial casting, heat and cold modalities, functional electrical stimulation, vibration, biofeedback, and stretching and splinting, must then be used. The Food and Drug Administration (FDA) has authorized a number of choices for pharmacotherapy at this time. These consist of diazepam, tizanidine, baclofen, and dantrolene. The most common conditions for which these systemic medications are used to treat spasticity are multiple sclerosis (MS) and spinal cord injury (SCI). They may also relieve mild to moderate spasticity. These medications have not been demonstrated to considerably enhance performance, despite the possibility that they will lessen tone and pain.

    Medical Treatment:

    Medication may be helpful for some people in controlling their spasticity. These interventions might be intrathecal, targeted, or generalized.
    Systemic medicine is utilized if the spasticity is broad. This comprises:

    Botox treatment for spasticity

    For the treatment of spasticity, local injections of phenol or botulinum toxin (Botox) into spastic muscles can be quite beneficial. The muscles generating the most stiffness or spasm might have their tone specifically reduced by these injections.

    In order to calm spastic muscles, your doctor will inject botulinum toxin into specific locations within your muscle. This might enhance function, posture, and comfort. Usually, the results take seven to ten days to become apparent, and they usually persist for three months.

    When only a few muscular groups need to be alleviated of spasticity, this therapy is typically taken into account. It can be used in conjunction with other spasticity therapies.

    Baclofen
    By acting as a gamma-aminobutyric acid (GABA) agonist at GABA receptors, increases the reflex pathway’s overall inhibitory effects. Presynaptic GABA receptor activation decreases calcium influx and inhibits excitatory neurotransmitter release from the presynaptic axon. It becomes more difficult to depolarize the postsynaptic cell and lessens the impact of any excitatory neurotransmitters delivered from the presynaptic axon when postsynaptic GABA receptors are activated. This increases potassium outflow and preserves membrane polarization. Consequently, input to muscle fibers and muscle spindle sensitivity are both reduced as a result of this reduction in neuron excitability. Baclofen is side effects include tiredness and sedation, to which the patient may eventually get acclimated. Additionally, baclofen may induce gastrointestinal problems, muscular weakness, and a lowering of the seizure threshold.

    Tizanidine:
    Alpha-2 adrenergic agonists like this medication are chemically linked to clonidine. It functions by enhancing the presynaptic inhibition of the spinal reflex. Up to 50% of patients experience sedation and sleepiness as one of its adverse effects, along with liver damage, hypotension, dry mouth, bradycardia, and dizziness. Tizanidine is equally effective as oral baclofen or diazepam, but it is more tolerable overall, according to clinical studies.  Because tizanidine is processed by the liver, there are precautions to follow when taking medication, such as routinely monitoring liver function tests (LFTs). Tizanidine’s short half-life necessitates frequent doses, and concurrent intravenous ciprofloxacin use is prohibited owing to cytochrome P450 inhibition.

    Dantrolene Sodium:
    Compared to other medicines, this is specific to the treatment of spasticity because it inhibits the release of calcium from the sarcoplasmic reticulum at the muscle’s peripheral level.[17] This leads to a decrease in the strength of extrafusal muscle fiber contraction and a loss in muscle spindle sensitivity. Dantrolene has little effect on cardiac or smooth muscle. The fact that 1% of people have liver damage is a significant side effect. Female patients over 30 who have been taking larger dosages for longer than two months are at the biggest risk. LFTs should be continuously monitored since liver toxicity entails a risk of hepatonecrosis. Sleepiness, sedation, weakness, exhaustion, paresthesias, diarrhea, nausea, and vomiting are other side effects.

    Diazepam:
    This works by enhancing the actions of GABA on GABA receptors, which ultimately results in membrane hyperpolarization and reduced neuronal activity. Overall, it results in decreased reflexes and enhanced presynaptic inhibition. Diazepam is the most sedative of the previously described antispasmodic medications. It may also result in less REM sleep and cognitive impairment. It has, however, been demonstrated to be helpful for spasticity caused by SCI and MS. Because of its side effect of impairing memory, it is frequently inappropriate for TBI patients. Due to its hepatic metabolism, diazepam can have a relatively lengthy half-life because of its active metabolites and the concomitant use of other hepatically metabolized drugs may alter its clearance.

    Diagnostic Nerve Blocks:
    Using electrostimulation as guidance, a local anesthetic is given perineurally to inhibit nerve transmission for a few hours. Because of the transient reduction in spasticity, the doctor can analyze the prospective advantages of longer-lasting therapies, such as chemo-neurolysis, botulinum toxin, or possibly surgery, in order to plan for more permanent interventions. These local anesthetics work by obstructing the voltage-gated sodium channels on the axon, which stops the signal from traveling down the axon and prevents the axon membrane from depolarizing. It is not recommended to inject local anesthetics into skin that is infected or cannot be thoroughly cleaned. Commonly used substances are bupivacaine and lidocaine.

    Chemoneurolysis:
    Chemical neurolytic treatments can work for several months or even years. Through axonal necrosis and protein denaturation, these substances induce demyelination and axonal damage. Additionally, electrostimulation or electromyography (EMG) guidance is used to inject these medicines. Phenol and ethyl alcohol are agents utilized in these processes. Usually, phenol is utilized in quantities between 2% and 7%. Lower amounts produce minor axonolysis but demyelination, which produces a momentary anesthetic effect. Higher doses have neurolytic effects that persist longer than six months and damage axons. To produce neurolytic effects, ethyl alcohol should be administered at concentrations between 45% and 100%. It is less hazardous and used less often than phenol.

    Chemodenervation with Botulinum Toxin:
    This is an additional course of therapy. For clinical usage, the FDA has licensed one type B toxin, rimabotuinumtoxin B, and three type A toxins, onabotulinumtoxin A, incobotulinumtoxin A, and abobotulinumtoxin A. At present, onabotulinumtoxin A is authorized for the treatment of spasticity in the upper and lower limbs in five distinct muscles, whereas incobotulinumtoxin A is permitted for the treatment of spasticity in the upper limbs. Every serotype works at the neuromuscular junction, where it prevents acetylcholine from being released presynaptically. It cleaves to the host protein SNAP-25, which is in charge of fusion, in the cytoplasm. SNAP-25 cannot fuse vesicles once they have been cleaved.

    Intrathecal Baclofen Pump:
    An intrathecal baclofen (ITB) pump is an additional alternative for treatment. Baclofen may now be administered directly into the intrathecal space’s cerebrospinal fluid (CSF) thanks to this gadget. With a ratio of 100:1 for the baclofen concentration at the spinal cord level when taken intrathecally vs orally, enables a patient to get a high concentration of the medication straight to the spine while reducing the CNS hazards associated with large oral dosages of the drug. The parts consist of an intrathecal catheter and a pump and reservoir that are subcutaneously implanted into the abdomen wall.

    Spasticity Surgical Treatment:

    Surgery for Spasticity: Dorsal rhizotomy with selection
    The first line of treatment for spasticity is non-invasive, nonsurgical methods that may enhance the quality of life and function. Nevertheless, surgery could be suggested as part of the therapy approach in cases when the spasticity is severe and persistent.

    Orthopedic procedures: In order to preserve function as a child develops, orthopedic surgery may entail modifying bone, muscle, and tendon. This allows for the restoration of mobility and flexibility.

    Neurological surgeries: One type of neurosurgical treatment is known as selective dorsal rhizotomy, in which the damaged nerves that supply sensory data from the spastic limbs are severed at the spinal cord’s entry point. Nerves in good health are not damaged. Children with mild cerebral palsy benefit greatly from this technique, which has been demonstrated to enhance leg function and independent walking.

    Intrathecal baclofen for spasticity: The insertion of a pump and a catheter to provide liquid medicine to the fluid around the spinal cord is another successful surgical procedure. This therapeutic method, known as intrathecal baclofen therapy, applies a continuous, steady supply of the spasticity-relieving medication baclofen via a pump beneath the skin. Just a brief hospital stay is necessary for the surgery to install the pump and catheter, and subsequent doctor visits are necessary to check the dose.

    Intrathecal baclofen (ITB) therapy: This procedure includes putting a pump under general anesthesia in your abdomen so that it may continuously discharge a dosage of the drug baclofen into the spinal fluid via a catheter that is attached to the pump. Compared to taking baclofen orally, this can result in a considerable reduction in pain and spasticity with a decreased risk of sleepiness.

    Dorsal rhizotomy with selection (SDR): An imbalance in the electrical impulses that go to certain muscles might result in spasticity. SDR physically removes certain nerve roots to correct the electrical impulses transmitted to your spinal cord. Surgeons only perform this procedure on patients whose legs have significant spasticity. Precisely slicing problematic nerve roots may reduce muscular stiffness while maintaining other functions. Typically, medical professionals recommend SDR to patients who have cerebral palsy.

    PHYSICAL THERAPY TREATMENT FOR SPASTICITY :

    Long stretches, positional stretches, weight-bearing exercises, exercises to strengthen the muscles in the opposing group, and the use of ice and cold packs are the primary physical therapy treatments used to alleviate spasticity. The consequences of these exercises are as follows:
    minimizing alterations to the connective tissue’s viscoelastic features;
    modifying the brain circuitry underlying spasticity or spasms, and preserving the person’s functional levels.

    Standing:

    tilt table/standing frame: It is hypothesized that the advantages of standing on a tilt table or standing frame stem from the following: decreasing lower limb spasms, maintaining or improving soft tissue and joint flexibility, stimulating anti-gravity muscle activity in the trunk and lower limbs, modulating the neural component of spasticity through prolonged stretch and altered sensory input, and having a positive psychological impact.

    Stretching Exercise to Reduce Spasticity :

    Unwind Long-term muscular stretching and passive movement are very helpful in lowering spasticity.
    Stretch therapies work by affecting the extensibility of the soft tissues that cover the joints in an effort to preserve or improve joint mobility. Stretch therapies can be physically done by therapists or self-administered by patients.

    Soft tissues are mechanically extended for variable lengths of time in all procedures. Certain procedures have a limited duration of application. Stretches may be applied over extended periods of time using several methods, such as placement. When it comes to providing continuous stretch for several days or even weeks, splints or serial casts are utilized to supply stretch for even longer durations.

    How ICE is Used for Reducing Spasticity?

    Ice Therapy
    Ice Therapy

    Ice Pack: Clinically, localized application of ice is used to lessen or completely eliminate clonus and to lessen the resistance of spastic muscle to fast stretching. Three methods exist for applying cold to the body:

    • (1) soaking in cold water; 
    • (2) massaging with ice cubes or packs; or 
    • (3) employing evaporative sprays, such as ethyl chloride. It has been claimed that a safe intramuscular temperature of 30°C can prevent a full conduction block of nerve fibers. The change in muscle caused about by cold treatment may have a retrograde effect on the spinal cord’s excitability, reducing spasticity.

    The change in muscle caused about by cold treatment may have a retrograde effect on the spinal cord’s excitability, reducing spasticity. This might be proposed as one of the ways that cold treatment reduces spasticity. Decreased spasticity may also result from modifications made to the mechanical characteristics of muscles during cryotherapy.

    How HOT PACK are used for reducing spasticity?

    Hot Packs Used in Physical Therapy
    Hot Packs Used in Physical Therapy

    Patients with spasticity benefit greatly from hot pack therapy, or taking a bath in hot water. This method has been utilized to modify motor neuron excitability in stroke survivors experiencing spasticity. Following the use of thermotherapy (e.g., submerging muscles in water at 41°C for 10 minutes), alterations in spastic muscles have been illustrated using the F-wave characteristics (amplitude, F-wave/M-wave ratio) of motor-neuron excitability. Following thermotherapy, a drop in F-wave characteristics has demonstrated the treatment’s anti-spastic properties.

    Static Positioning:

    The impact of a muscle’s length on stretch reflex activation is referred to as muscle length positioning. Given that spasticity is known to be length-dependent, patients’ positions during testing may have an impact on the assessment’s findings, especially when bi-articular muscles are involved. It has been shown that varied postures affect stretch reflex activity, with supine positions showing greater Root mean square (RMS) values of muscular activity in spastic muscles than seated positions.

    A muscle in an extended condition has more stretch reflex activity than a muscle in a shortened state, which may be the result of changes in intrinsic muscle properties. This issue needs to be considered while using various strategies to assess and treat spasticity.

    Reflex inhibitory thermoplastic splinting/orthotics:

    orthosis
    orthoses

    The goal of splinting is to modify muscular extensibility, depending on the degree of stretch produced by the splint. Wrist splints are supposed to prevent or minimize contracture. It has been demonstrated that stretching and static passive motions of spasticity-affected joints improve motor neuron excitability, increase flexibility, and lessen tensile stress on soft tissues. Thus, reduced spasticity seems to be the outcome of both reflexive and mechanical processes working together. Whether passive exercises or stretching in a weight-bearing or non-weight-bearing position is better for decreasing spasticity is not well understood.

    Mechanical gait trainer (treadmill training)

    The patient walks on a treadmill while wearing the mechanized gait trainer, which supports a portion of the patient’s body weight via a harness and overhead suspension system. The apparatus regulates the center of mass in both vertical and horizontal directions, stimulates the phases of gait, and supports the patients in accordance with their capacities. It has been shown to lessen stiffness by enabling postural and stepping response training at an early age. It makes gait cycle motor relearning easier.

    • reduction of uncomfortable stimuli.
    • Positional stretching and activities involving weight bearing.
    • Extended Stretching of Muscles.
    • Physical techniques such as heating, cooling, and icing.
    • Electrical stimulation:
      In order to restore the proper balance between your flexor and extensor muscles, electrical stimulation is occasionally utilized to re-educate muscles. When stimulation is first administered, the effects typically persist for around ten minutes, although they may continue longer after a few months.
    • Orthoses: Also referred to as casts, braces, or splints, orthoses are any devices that are used to improve the function of the body’s moveable components or to support, align, prevent, or repair abnormalities. Orthoses can decrease muscular tone, enhance or maintain range of motion, and shield the skin from harm—such as the deterioration that would happen in your palm if your hand were always clenched—when used to treat spasticity.

    Postoperative and Rehabilitation Care

    In many cases, rehabilitation is essential to controlling a patient’s spasticity. In addition to pharmaceutical treatments, it is important to consider the utilization of the physical modalities and therapies previously discussed. It is vital to include the patient, the family, and any other caregivers in controlling spasticity and to agree on the intended goals of treatment and management. It is essential to recognize and keep away from any potentially harmful stimuli while continuing regular range-of-motion and stretching activities.

    Prognosis

    From patient to patient, the prognosis for spasticity might vary greatly. In terms of symptomatic spasticity management, a patient may have a good prognosis if their spasticity responds well to treatment, whether it be physical modalities, therapy, or pharmaceutical intervention. Furthermore, as was already indicated, spasticity may benefit the patient in other ways, such as assisting with walking and avoiding deep vein thrombosis (DVTs), preserving muscular mass, and preventing osteoporosis through weight bearing.

    Complications

    The consequences of spasticity might differ. When severe, spasticity can make it difficult to go about daily tasks. It can interfere with cleanliness and the caregiver’s ability to deliver care, as well as cause the patient to experience excruciating agony or suffering. Thus, there may be a higher chance of pressure ulcers forming, which may result in infection and sepsis. In addition, it raises the risk of heterotopic ossification and can result in dislocation, subluxation, and bone fractures.

    Conclusion

    Spasticity is a prevalent sign and characteristic of several neurological disorders. The degree of spasticity you experience might vary from a small annoyance to a major hindrance to your daily routine. Fortunately, there are several approaches to treating spasticity. Your healthcare team and you will collaborate to choose the most appropriate course of therapy for you.

    FAQs

    Does spasticity disappear by itself?

    It is caused by damage to the spinal cord in patients suffering from stroke, traumatic brain injury, cerebral palsy, or other disorders affecting the brain or spinal cord. Since the damage in cerebral palsy is irreversible, real spasticity in the condition does not go away on its own.

    When is the onset of spasticity?

    In the first month following a stroke, spasticity occurred in around half of the patients. Post-stroke spasticity, however, can appear more than three months following the commencement of the stroke. Thus, even in the chronic stage, it is critical to evaluate spasticity.

    Do you have spasticity when walking?

    Spasticity, a condition where muscles feel heavy, tight, and difficult to move, may be an indication of multiple sclerosis. When spasticity affects the lower limbs, walking and other activities may become more challenging.

    Does heat help with spasticity?

    Muscle spasms as a result of nerve root irritation or musculoskeletal disease have decreased. Heat also lessens spasticity, although its effects are transient and unhelpful for muscle retraining. Cold efficiently diminishes the spasticity of upper motor neuron origins.

    Does spasticity damage the nerves?

    Damage to the area of the brain responsible for controlled movements is a common cause of spasticity. Damage to the spinal cord’s nerves may possibly be the cause. Among the signs of spasticity are: unusual posture.

    How can leg spasticity be stopped?

    Drugs for spasticity
    There are several drugs used to treat spasticity, such as the injection of botulinum toxin directly into muscles that spasm. Baclofen: a sedative. The sedative diazepam.

    In physical treatment, how may spasticity be reduced?

    Using ice to lessen the frequency and pain of spasms is one way that physical therapy treatments might help reduce spasticity. extending muscles to their maximum length to reduce stiffness in the surrounding tissue and joints.

    How painful is spasticity?

    Spasticity-related pain can range in intensity from a dull sensation akin to taut muscles to excruciating spasms in the limbs, notably the legs. In addition to causing sensations of pain or stiffness in and around joints, spasticity can also result in lower back pain.

    How can someone who is spastic sleep?

    It could help to sleep on one side or with a pillow beneath your knees. Perhaps an occupational therapist can provide assistance. To ensure that your medication is at its most effective when you need it, try taking it around 30 minutes before going to bed if you take it for muscle stiffness or spasms.

    How can muscular spasticity be prevented?

    You can learn stretches, postures, and exercises from physical and occupational therapy that can help you keep your range of motion. The treatments can aid in preventing contracture, or the shortening and tightening of muscles. oral medications. A few oral prescription medications may be able to lessen muscular stiffness.

    How is spasticity treated?

    The most popular treatments for spasticity are injections and oral medications; however, your doctor may suggest further physical rehabilitation based on the severity of your spasticity.

    What sorts of spasticity are there?

    Exaggeration of the phasic component of the stretch reflex, which can cause tendon hyperreflexia and clonus, is known as intrinsic phasic spasticity. Exaggeration of extrinsic flexion or extension spinal reflexes is known as external spasticity.

    How is spasticity measured?

    tests for spasticity and its severity will involve a physical examination and neurological tests. Imaging techniques like magnetic resonance imaging (MRI) can reveal more details about the degree of damage-causing spasticity as well as its etiology.

    Which exercise is ideal for those with spasticity?

    Imagine a thread tugging from the top of your head as you begin by sitting on a chair. With your fingers pointing inside, place your hands on your thighs and start to alternately shift your weight. After a few seconds of holding the posture on each side, repeat six to ten times.

    Can spasticity be treated?

    The outlook for spasticity
    But spasticity resulting from other disorders, including cerebral palsy, is irreversible damage, meaning the spasticity symptoms will not go away on their own. However, certain therapies could reduce pain and enhance functionality.

    Which is better, spasticity or spasm?

    A sign of spasticity is that your muscles seem heavy, rigid, and difficult to move. A muscle spasm is an abrupt, uncontrollable tightening or contracting of the muscle. The interior springiness of muscles is similar to that of a gently wrapped spring. It feels like the spring is wound too tightly in a spastic muscle.

    What causes a spastic reaction?

    Damage or interference to the part of the brain and spinal cord in charge of regulating muscle and stretch responses is often the cause of spasticity. The imbalance between the excitatory and inhibitory impulses that the muscles receive, which causes them to lock in place, may be the cause of these disturbances.

    What do rigidity and spasticity mean?

    Furthermore, faster movement elicits a greater involuntary contraction, or “catch,” of the affected muscles in cases of spasticity. Rigidity causes the elevated muscle tone to stay consistent across the affected joint’s range of motion.

    What signs of spasticity are present?

    Among the signs of spasticity is: Improper posture.
    owing to tense muscles, carrying the arm, finger, wrist, and shoulder at an unusual angle.
    heightened deep tendon reflexes (such as the knee-jerk reflex)
    clonus, or repeated jerky movements, especially in response to touch or movement.

    References

    • Professional, C. C. M. (n.d.). Spasticity. Cleveland Clinic. https://my.clevelandclinic.org/health/symptoms/14346-spasticity
    • Spasticity. (n.d.). Physiopedia. https://www.physio-pedia.com/Spasticity
    • Rivelis, Y., Zafar, N., & Morice, K. (2023, August 8). Spasticity. StatPearls – NCBI Bookshelf. https://www.ncbi.nlm.nih.gov/books/NBK507869/
    • Dhameliya, N. (2023, April 27). Spasticity : Cause, Symptoms, Physio Treatment, Exercises. Samarpan Physiotherapy Clinic. https://samarpanphysioclinic.com/spasticity-treatment/
    • Physiotherapist, N. P. (2022, February 17). Spasticity of Muscles : Grades, Treatment, Exercise. Mobile Physiotherapy Clinic. https://mobilephysiotherapyclinic.in/techniques-to-inhibit-spasticity-with-physiotherapy-treatments/