7 Easy Exercises for Spinal Decompression
Introduction:
Easy Exercises for Spinal Decompression help relieve pressure on the spine, reduce back pain, and improve overall mobility.
You can strengthen your back muscles, increase your stability, and correct your posture with spinal decompression exercises.
Discuss the best workouts for your needs with a medical professional or trained personal trainer to get the most out of your spinal decompression regimen. They might make adjustments and provide advice on appropriate form and technique.
The goal of those of us who experience lower back pain is to remove this painful ache. The relief that many of us experience after seeing a chiropractor or physiotherapist may only last a few days. It has been demonstrated that spinal decompression, a cutting-edge therapy option, offers numerous advantages to people with lower back pain.
Unfortunately, most of us don’t have a spinal decompression table at home because they are very costly and need to be operated by medical professionals. Therefore, it is highly advantageous to identify strategies to maintain the advantages of spinal decompression at home.
The essential stretches, exercises, and home spinal decompression tools that will enable you to experience the comfort of spinal decompression at home are listed below. Speaking with your healthcare provider is crucial to ensuring that spinal decompression is appropriate for your situation and that you are performing the exercises correctly. Make sure to see your physician because spinal decompression should not be utilized for certain illnesses.
Exercises for Spinal Decompression Video:
Exercises for Spinal Decompression You Can Do Daily:
Knee-to-Chest Stretch:
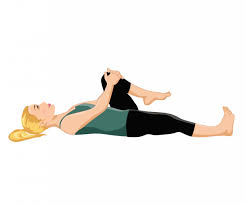
- With both knees bent and your feet flat on the floor, lie flat on your back.
- Stretch your right leg straight out along the floor while maintaining a bent left knee.
- With your hands clasped behind your thigh at the top of your shinbone, pull your right knee towards your chest.
- Lengthen your spine towards your tailbone and avoid lifting your hips.
- Hold this posture for thirty to sixty seconds.
Cat-Cow Stretch:
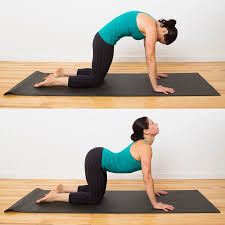
Cat-Cow Stretch steps:
- Start on your hands and knees with your knees under your hips and your wrists beneath your shoulders while maintaining a calm and straight back.
- Take a breath, raise your chin and chest, and arch your back like a cow while you lower your belly toward the floor.
- Tuck your chin into your chest like a cat, round your spine, and exhale as you raise your belly button toward your spine.
- Ten repetitions should be performed, matching your breath with the exercise.
- Instead of starting from your lower back, concentrate on engaging your core muscles to flex and stretch the spine.
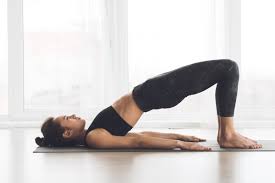
Glute Bridges:
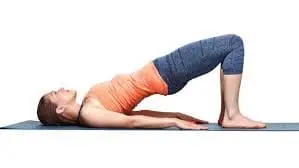
- With your arms by your sides, lie on your back with your feet flat on the floor, hip-width apart, and your knees bent.
- Get your core and glutes moving. When your knees, hips, and shoulders are all in a straight line, place your feet firmly on the floor, release your breath, and raise your hips.
- Hold the bridge position without allowing your hips to sag for five seconds while squeezing your glutes.
- Breathe in, then slowly return your hips to the beginning posture, one vertebra at a time.
- Keep your back flat and your abdominals active while you perform 10–15 repetitions. Don’t strain your lower back too much.
Child’s Pose:
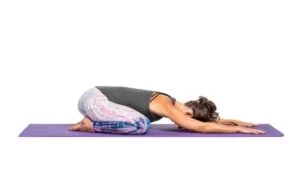
- Stretching your back and hip muscles is aided by the child’s position. Kneel and sit on your knees in this stance. With your forehead resting on the floor, lean forward while maintaining your buttocks on your heels. With your hands facing up, place your arms beside your legs. Breathe in and out for a minimum of eight deep, calm breaths.
- Try this version if you have trouble placing your forehead on the ground. With your knees slightly apart, sit on your knees. Place your forehead on your arms, fold your arms in front of you on the floor, and lean forward. Breathe in and out for a minimum of eight deep, calm breaths.
- Before beginning a yoga program, speak with your healthcare physician if you have any injuries or if you’re worried about working out.
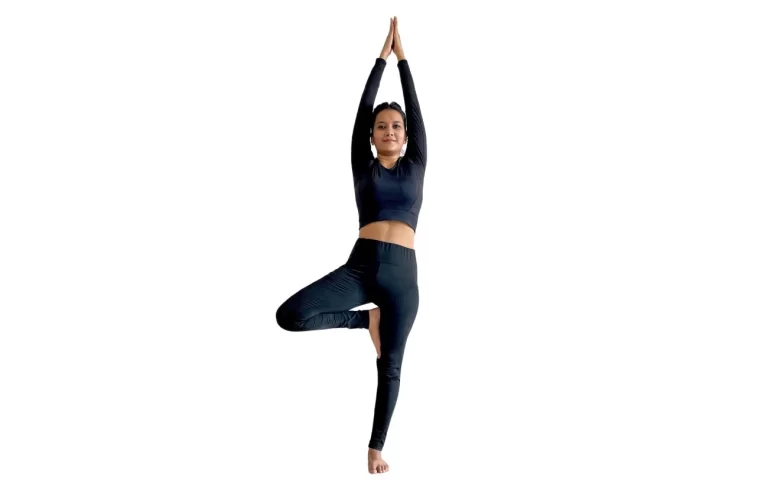
Standing Forward Bend:
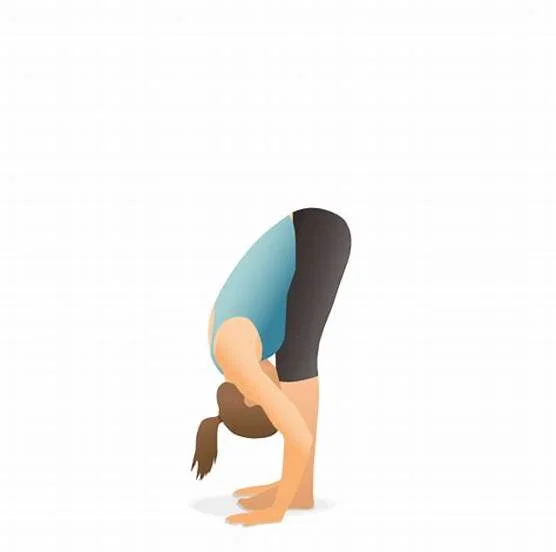
- With your legs together, take a tall stance. Take a breath and lift your arms above your head, placing them beside your ears. Breathe out and lead from your heart center as you bend forward from your hips. With your arms and upper body, form a straight line. Continue to exhale. Grab your calves or ankles while bending forward.
- Advanced possibilities include placing your hands behind your feet, palms up, or placing your arms behind your knees while holding your elbows. Hold this position for approximately one minute. Take deep, deliberate breaths. Then take a breath and slowly raise yourself back up until you are upright, keeping your head and arms hanging.
- Before beginning a yoga program, speak with your healthcare physician if you have any injuries or if you’re worried about working out.
Seated Forward Fold:
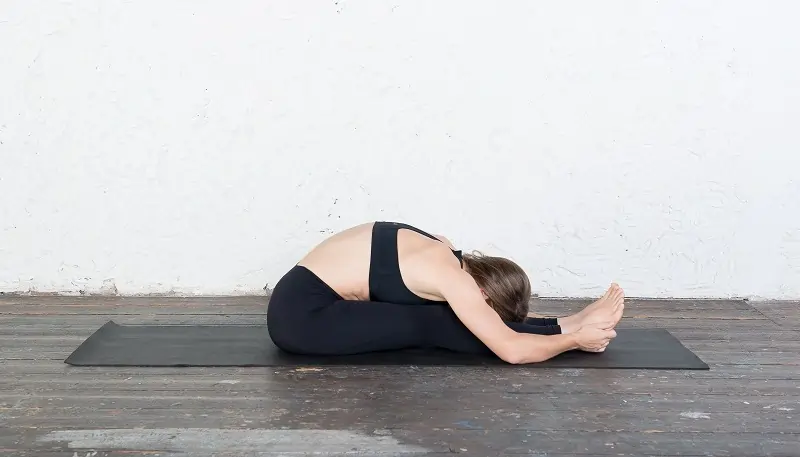
- With your spine straight and your toes contracted toward you, sit up with your legs extended straight in front of you.
Stretch up while inhaling and lifting both arms above your head. - Exhaling causes the chin to go toward the toes as you bend forward from the hip joints. Keep your back straight and concentrate on going forward toward your toes instead of downward toward your knees.
- Without exerting any force, place your hands wherever your legs will go. To help you move forward, try to grab hold of your toes and pull.
- Inhale, raise your head a little, and extend your back.
- Move the navel slightly in the direction of the knees while exhaling.
- Make two or three repetitions of this motion.
- For 20 to 60 seconds, lower your head and take deep breaths.
- Extend your arms in front of you.
- Inhale, then raise yourself back up to a sitting position using your arm power.
- Exhale and drop your arms.
Thread the Needle Stretch:
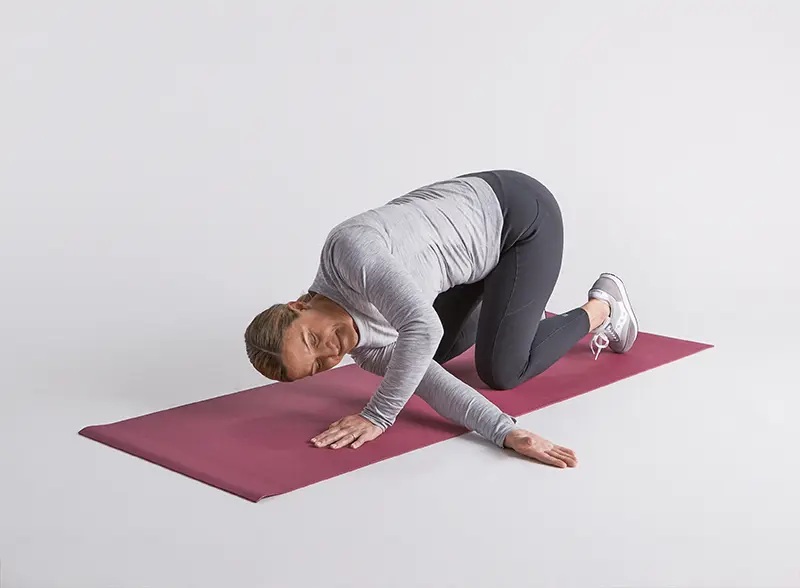
Thread the Needle Stretch steps:
- Begin on all fours and use your body to create a tabletop.
- Place your elbows, shoulders, and wrists in a straight line to the floor while stacking your hips just above your knees.
- Raise your right hand so that your eyes rise with it, then thread it under your left arm and follow it down.
- Maintain a high hip position and let your chest rest on or near the floor.
- While maintaining some pressure in your left palm, push your hips back and upward.
- As long as necessary, maintain the position, and then transfer sides.
- To emerge, firmly press into your left palm, then slowly unthread your right arm, extending it back toward the sky so that the eye may follow.
- Put your right hand back on the floor of the table.
Continue on the left side.
Cobra Pose:
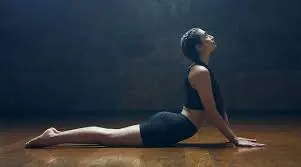
- Start by placing your forehead and the tops of your feet on the ground or yoga mat while lying on your abdomen on the floor.
- Aim to keep your feet no more than hip-width apart, but close enough for your heels to touch.
- Depending on what seems most comfortable, place your palms flat on the ground beneath or to the sides of your shoulders. You should be pointing your fingers forward.
- Keep your elbows toward your sides.
- Maintain your pelvis and belly button pressed to the ground.
- Maintaining a relaxed posture, drop your shoulders away from your ears and draw your shoulder blades back. The muscles in the chest will become more open as a result.
- Depending on your desire and degree of flexibility, you can either keep your neck straight or turn your head toward the sky.
- As you raise your chest off the floor, keep your elbows straight. Maintain your thighs and pelvic bone firmly planted on the floor.
- Concentrate on raising your chest to the heavens.
Supine Spinal Twist:
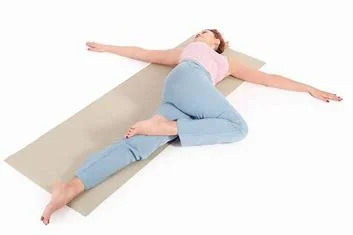
Supine Spinal Twist steps:
- Lie down on your back.
- With your knees facing upward toward the ceiling, place the soles of your feet on the floor while bending them.
- Lift your hips slightly off the ground by pressing into your feet, then move them an inch to your right. This step is crucial because it positions your hips so that when you enter the twist, they stack one on top of the other.
- Exhale, then flatten your left leg on the floor and bring your right knee into your chest. Throughout the position, keep your left foot actively flexed. Breathe.
- Breathe out, then cross your right knee over your midline to the left side of your body’s floor. If you’d like, you can hook your right foot behind your left knee.
- Place your left hand on your right knee or reach out and form a T with your arms. Your palms should face the ceiling.
- Take five to ten deep breaths to hold the stance. Pull your right knee into your chest as you roll onto your back after taking a breath to exit the pose. To neutralize your spine, let both legs drop to the floor for a few breaths, then switch to the other side.
Conclusion:
Simple yet effective exercises for spinal decompression can ease back pain, lessen stiffness, and enhance spinal health in general. You can improve posture, increase flexibility, reduce pressure on nerves and discs, and gradually create space between the vertebrae by performing these exercises every day.
Proper form and consistency are crucial; the finest results are obtained with slow, deliberate motions. You might feel lighter, more mobile, and more at ease in your regular tasks if you incorporate these exercises into your regimen. In the event of severe or ongoing pain, always pay attention to your body and seek medical advice.
FAQs:
What would happen if you decompressed your spine daily?
Decompressing your spine can increase mobility, significantly reduce pain, and improve general functionality by reducing the strain on your spinal nerves and discs.
Which muscles are controlled by the L5 L4 lumbar region?
The thigh and knee muscles are controlled by the L4-L5 nerve roots. Additionally, they give a feeling to the top part of the foot and the lower legs. The sciatic nerve, which runs from the lower back through the legs, is made up of the L4-L5 nerves and additional sacral nerves.
What drawbacks does spinal decompression have?
Some lumbar decompression surgery patients have new weakness or numbness in one or both legs after the procedure. One rare yet dangerous side effect of lumbar decompression surgery is paralysis.
What would happen if I decompressed my spine daily?
Decompressing spine aches and pains reduces the stress that pushes discs out of alignment by generating negative pressure inside the spinal discs. This technique gradually creates a more stable spine by releasing strain on surrounding nerves.
How can I determine whether spinal decompression is necessary?
Compressed spinal structures may be the cause of your back pain and stiffness if you have trouble bending, twisting, or moving normally. By treating the underlying source of these restrictions, decompression treatment can aid in the restoration of regular movement patterns.
Which vitamin is beneficial for spinal stenosis?
Because of its role in nerve function, vitamin B12 may help prevent or reduce neurological symptoms, including tingling, weakness, and numbness that are linked to spinal stenosis. Supplementing with vitamin B12 can also assist patients in preventing a vitamin B12 deficit, which has been linked to spinal stenosis.
What is the recommended frequency of spinal decompression?
Spinal decompression therapy typically involves 12–20 appointments over a period of four to six weeks. This implies that you might attend two to five sessions every week. After the first few sessions, most clients see a considerable reduction in their pain.
What is the duration required for the complete decompression of the spine?
Although complete decompression may take several weeks, patients typically begin to feel better after a few treatments.
What adverse consequences might spinal decompression cause?
There have been few documented significant dangers associated with spinal decompression therapy, which is generally safe and non-invasive. During the first few sessions, the most frequent adverse effects are moderate, transient pain, aching, or muscular spasms in the treated area. Rarely, when the body adjusts, patients may feel more shooting pain down their arms or legs.
For whom should spinal decompression be avoided?
It is not advised for pregnant women to undergo spinal decompression. those who have malignancies or fractures in their spines. those whose spines have metal implants.
Which position is ideal for decompressing your spine while you sleep?
Sleep on your side with a pillow between your knees or on your back with a pillow beneath your knees to preserve neutral posture and decompress your spine. Avoid sleeping on your stomach, use a firm mattress, and attempt stretches like knee-to-chest before bed to ease tense muscles.
Can you decompress your spine daily?
For acute disc issues or chronic spinal compression, therapy is typically recommended three to four times per week during the first phase, which typically lasts four to six weeks. As the patient improves, the frequency is reduced to reduce dependence and promote long-term recovery.
Is it possible to decompress your spine every day?
Therapy is often advised three to four times a week during the first phase, which usually lasts four to six weeks, for acute disc problems or persistent spinal compression. The frequency is decreased as the patient gets better to minimize reliance and encourage long-term healing.
How can my spine be naturally decompressed?
By employing gravity and light traction to release pressure on your discs and nerves, you can naturally decompress your spine. Important techniques include lumbar support stretches, practicing the child’s pose, hanging from a bar, and inverting on a table. Back pain and stiffness are lessened by doing these exercises on a regular basis.
References:
- SportsMed, Y. (2024, September 18). Spinal Decompression at home | Physiotherapists in Toronto | Yorkville Sports Medicine Clinic. Physiotherapists in Toronto | Yorkville Sports Medicine Clinic. https://www.yorkvillesportsmed.com/blog/spinal-decompression-at-home
- Cronkleton, E. (2025, August 1). 12 Spinal decompression exercises for all skill levels. Healthline. https://www.healthline.com/health/spinal-decompression-exercises
- Professional, C. C. M. (2026, January 26). Spinal decompression therapy. Cleveland Clinic. https://my.clevelandclinic.org/health/treatments/10874-spinal-decompression-therapy
- Cscs, N. L. P. D., & Cscs, N. L. P. D. (2023, July 3). Spinal decompression at home – Benefits & exercises. Back Intelligence. https://backintelligence.com/spinal-decompression-at-home/
- Pohlman, D., & Pohlman, D. (2024, July 8). Back Decompression at Home: A Comprehensive Guide. Man Flow Yoga. https://manflowyoga.com/blog/spinal-decompression-at-home/