Blog

  • Piriformis Syndrome

    Piriformis Syndrome

    What’s piriformis syndrome?

    In piriformis syndrome, the sciatic nerve presses against the piriformis muscle, resulting in back and buttock pain and numbness. The primary symptoms of the illness are pain in the buttocks and pain that travels down the lower limb. Other symptoms include weakness, numbness, and issues with the bladder and bowel.

    A little muscle that extends deep into the buttock region and joins to the hip is called the piriformis. This muscle directly borders the sciatic nerve, which can entrap it and cause Piriformis Syndrome. This is a disorder that causes pain to travel down the leg from the hip. Walking, sitting, and other everyday tasks may become difficult due to the severe pain.

    When standing on one leg, this muscle aids in maintaining balance and in turning your leg outward. The piriformis muscle can become tight or spastic following an injury, which is typically the cause of piriformis syndrome. A disorder known as diastasis symphysis pubis, or the separation of the pelvic bones, may be the cause in certain instances.

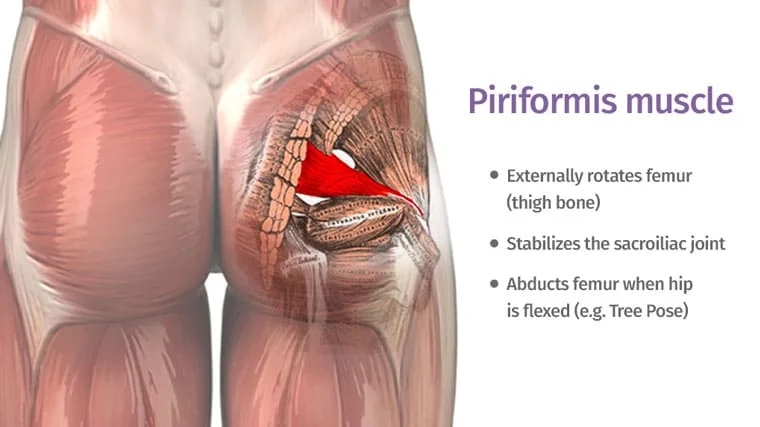
    Piriformis Muscle Anatomy:

    The muscle, which is triangular in shape, originates from the anterior surface of the hip joint capsule as well as the posterior surfaces of the sacrum and coccyx. The femur’s greater trochanter receives its insertion. The hips are externally rotated, abducted, and partially extended by the Piriformis muscle.

    Pathology:

    • One of the following conditions might produce secondary piriformis syndrome: microtrauma, microtrauma, ischemic mass effect, or local ischemia.
    • Most frequently, microtrauma to the buttocks results in soft tissue inflammation, muscular spasm, or both, and ultimately nerve compression, which causes piriformis syndrome.

    Piriformis syndrome causes:

    The following conditions may produce piriformis syndrome in one or more cases:

    • damage to the hips and buttocks region.
    • spasm in the piriformis muscle.
    • injuries following surgery, for example. replacement of the hip joint
    • Pathologies of the lumbar and sacroiliac joints
    • muscular tightness caused by changed lower limb biomechanics
    • the piriformis muscle hypertrophy.
    • arthritis in the sacroiliac joint
    • “Wallette neuritis,” or bursitis of the piriformis muscle, is a result of repeated stress from extended periods of time spent sitting on hard surfaces.
    • During weight-bearing activity, the excessive hip movement primarily adducts and internally rotates; as a result, a larger eccentric load may be transferred to the piriformis muscle due to gluteal muscle weakness.
    • Following laminectomy surgery, myositis, hematoma, and abscess may occur.
    • Klippel-Trénaunay Syndrome.
    • intraluminally injection.
    • Sciatica: Sciatic nerve neuropathic pain.

    Piriformis syndrome symptoms and signs:

    Additional related typical signs and symptoms include:

    • Numbness that tingles in the back of the hip may spread to the leg.
    • Comfortable long-term sitting is difficult
    • lower back pain.
    • Sciatica is a pain that radiates.
    • stiffness in the hip joint.
    • walking a long distance can be difficult.
    • swelling in the legs and ankles if the situation gets worse.
    • There have also been reports of sexual life disturbances.

    The pain that radiates down your legs and buttocks can be more acute and even incapacitating in the most extreme circumstances. You can lose the ability to do simple, daily activities including walking, crouching, and prolonged sitting.

    Differential Diagnosis:

    • Sacroiliac joint inflammation, lesion, and dysfunction
    • Inferior gluteal artery pseudoaneurysms after gynecological surgery
    • Blood clot in the iliac vein
    • intervertebral disc herniation
    • Coccygodinia post-laminectomy syndrome
    • False positive pelvic fracture
    • Osteochondrosis of the back
    • Unidentified kidney stones
    • Radiculopathies of the lumbar region
    • Osteoarthritis of the lumbar spine
    • sacroiliac joint syndrome
    • Degenerative disc disease Fractures caused by compression
    • Hip joint intra-articular pathologies include femurs-acetabular impingement (FAI) and labral tears.
    • lumbar Spine stenosis
    • cysts and tumors
    • gynecological disorders
    • diseases including pyelitis, hypernephroma, appendicitis, prostate, uterus, and pelvic visceral cancers etc.
    • Psychogenic disorders include physical exhaustion, despair, and annoyance.
    • sacroiliac disease

    Diagnosis:

    MRI/CT scans, X-rays, EMG investigations, and physical examinations by physical therapists or doctors are the primary methods used to diagnose Piriformis syndrome.

    Investigation:

    Studies using radiographic X-rays are not very important for diagnosis.
    To rule out the other possibility that the patient’s symptoms are related to the lumbar spine or the hip region, anteroposterior (AP) x-rays of the pelvis and hips, lateral hip views on x-ray, and/or CT scans or MRIs of the lumbar spine are advised.

    Electromyography (EMG): Muscles close to the piriformis muscle will exhibit aberrant EMG responses due to compression of the intervertebral nerve root.

    When diagnosing piriformis syndrome, physical examinations involving active movements, like the FAIR test, maybe more valuable and specific than other tests currently in use.

    Physical Examination:

    a physical structural examination, paying particular attention to any disparities in leg length and the lumbar spine, pelvis, and sacrum.
    examinations for diagnosis.

    Test for piriformis syndrome:

    • Palpation:

    A careful, deep probing can reveal the presence of a Piriformis muscle spasm.
    Deep digital probing of the gluteal and retro-trochanteric regions may reveal pain and tenderness, as well as an aggravation of tightness and numbness in the legs.

    • Pace sign:

    This exam measures how uncomfortable and weak the hip external rotation and abduction are when sitting.

    • Lasèque sign / Straight Leg Raise Test:

    The patient experiences radiating pain in the buttocks and leg that gets worse as the examiner raises his or her leg passively.

    • FAIR sign:

    Stretching the piriformis causes pain in the hip joint’s flexion, adduction, and internal rotation
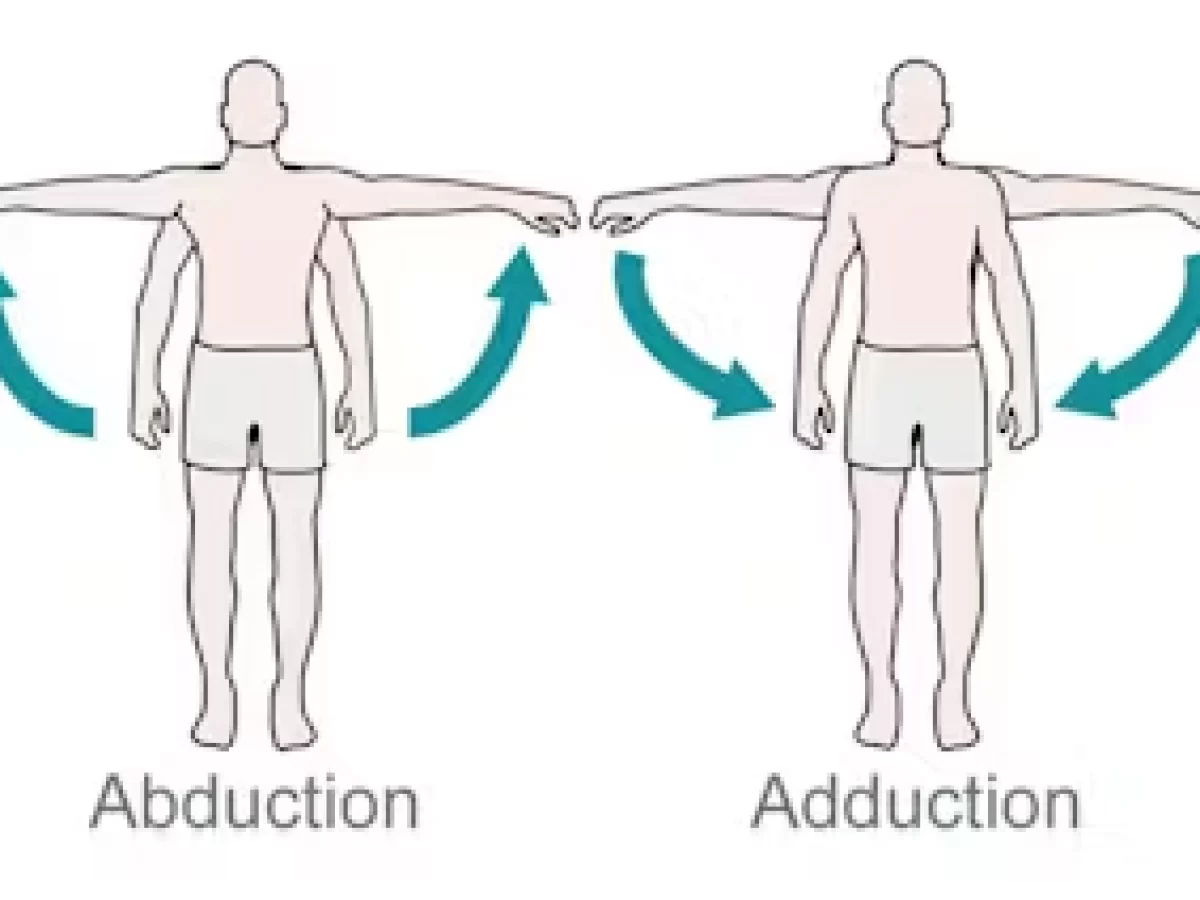
    • Hip Abduction Test:

    The patient may be instructed to slowly abduct their leg while the examiner stands in front of them at the level of their feet and watches without touching them.
    Hip abduction to 45° is normal.
    Along with limb shortening on the affected side, patients with PS may also exhibit gluteal muscular atrophy.
    Muscle hypotrophy is observed on the side of the body that is affected in chronic situations.

    • Positive Trendelenburg signs are also possible.

    Piriformis Syndrome Treatment:

    The three major treatments for piriformis syndrome are physical therapy, medicine, which is sometimes referred to as a conservative course of treatment, and surgery as a last resort.

    Medical Treatment:

    The mainstays of medical treatment for post-stroke syndrome (PS) are non-steroidal anti-inflammatory drugs (NSAIDs), muscle relaxants, neuropathic pain medication, physical therapy, active lifestyle alterations such as avoiding activities that exacerbate pain and other symptoms, and adequate rest.

    Applying a hot or ice pack to the back of the leg or hip. To avoid using an ice pack that comes into contact with your skin, cover it with a cotton towel. Next, apply a hot pack for approximately the same duration. To help with the pain and spasms, try doing it every two to three hours. Applying a combination of ice and heat packs to your legs or buttocks may help ease pain.

    The limitations of procedures and anatomical variances should be known to the doctors. It has been demonstrated that this method is useful for both the diagnosis and treatment for treating PS.

    Surgery may be recommended to relieve the piriformis muscle’s pressure on the sciatic nerve if you are still unable to find relief. However, this is rarely needed.

    Physical therapy Treatment:

    • Pain-relieving electrotherapy techniques used in physical therapy treatments include ultrasound therapy, TENS/IFT, soft tissue mobilization, stretching and strengthening of the piriformis muscle, and the application of hot or cold packs.
    • In addition, the treatment included functional exercise therapy for the hips, which aims to strengthen the hip extensors, abductors, and external rotators in addition to correcting improper movement patterns and posture.
    • The patient typically attends 4 to 5 sessions each week for around 6 to 8 weeks in order to get decent outcomes.
    • Ultrasound Therapy
    • Hot Pack/Cold Pack: Before exercising, applying a hot or cold pack might help minimize pain and muscular spasms.
    • The intervention’s main goals were to strengthen the hip extensors, abductors, and external rotators and to address improper movement patterns. It also included functional exercise treatment for the hips.
    • The patient typically has 2-3 treatments per week for 2-3 months in order to see a 60–70% improvement.
    • The patient must initially be positioned in the FAIR posture (Flexed Adducted Internally Rotated) and in contralateral decubitus.
    • Start with a 10-to 14-minute ultrasound treatment at 2.0–2.5 W/cm2.
    • To reduce pain, it is highly helpful to apply heat and cold before stretching. Subsequently, commence the piriformis stretching exercise, which can be performed in multiple methods.
    • The therapist can also offer several suggestions to prevent the symptoms from getting worse. Included in this is: Keep away from prolonged sitting.
    • Every twenty minutes, get up and stroll.
    • When driving, stop frequently to stretch and stand up.
    • Avoid causing harm to the gluteal area.
    • keep away from more offensive actions.
    • It is advised to stretch every day to prevent the piriformis syndrome from returning.
    • Additionally, the patient can exercise and receive treatment at home by rolling from side to side while flexing and extending their knees while lying on either side.
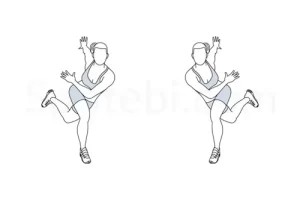
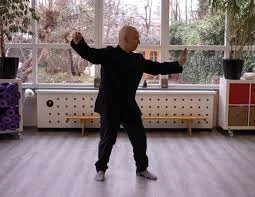
    • Every few hours, spend a minute rotating side to side while standing with your arms relaxed.
    • Have a hot bath.
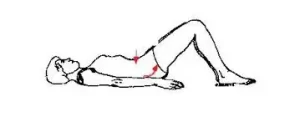
    • Lay flat on your back and use your hands to raise your hips while using your legs to pedal like you’re on a bicycle.

    A few pointers to prevent the symptoms from getting worse might also be provided by the physical therapist. These are:

    • Avoid spending a lot of time sitting down during regular activities.
    • Avert abrupt movements towards the gluteal area.
    • keep away from anything uncomfortable to do.
    • It is advised to perform stretching exercises on a regular basis to prevent the piriformis issue from returning.

    Other workouts and therapies that you can perform at home are as follows:

    • Regularly take a warm bath.
    • Supine Knee bends: lie flat on your back, lift your hips with your hands, and pedal with your legs as though you were riding a bike.

    Piriformis syndrome exercises:

    • Gluteal stretch:
    Gluteal Stretch
    Gluteal Stretch

    A slight stretch will be felt in your buttocks and potentially on the outside of your hip on the upper leg. Do this twice or three times.

    • Standing hamstring stretch:
    standing-hamstring-stretch
    standing-hamstring-stretch

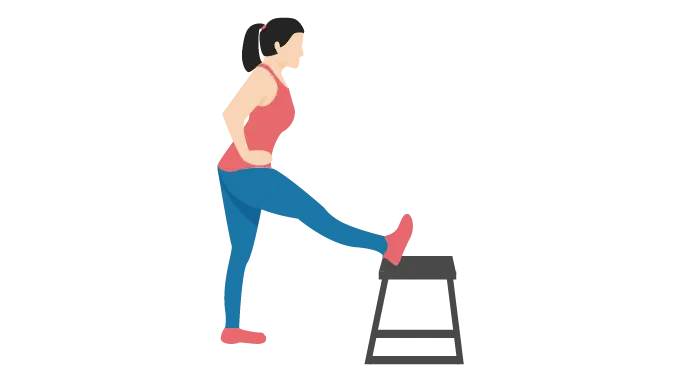
    Be cautious about maintaining a straight knee. When performing this exercise, make sure to bend only at the waist and avoid moving your shoulders as this will stretch your lower back rather than your leg. Stretch for eight to ten seconds. Three times, repeat.

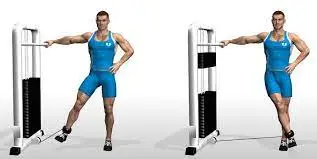
    • Resisted hip abduction:

    in a sideways stance next to a doorway. Wrap an elastic bandage over your affected leg’s ankle, facing away from the entrance. After tying the theraband’s opposite end, shut the knot inside the door. Maintaining a straight knee, abduct your leg to the side.

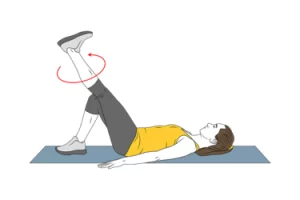
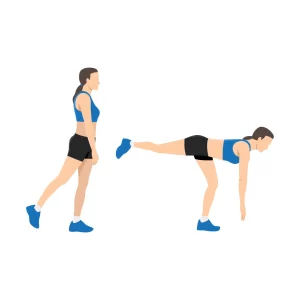
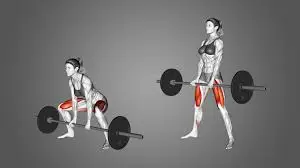
    • Prone hip extension (Knee flex):
    Prone-Hip-Extension
    Prone-Hip-Extension
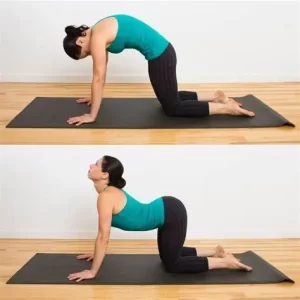
    • Quadruped arm/leg raise:

    Raise one arm and the opposing leg away from you while tensing your back muscles to maintain a straight spine. Slowly Lower your leg and arm gradually, then repeat on the other side.
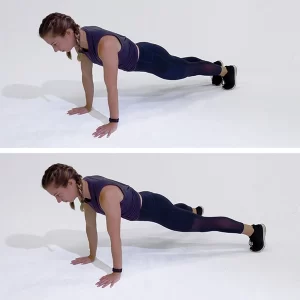
    • Partial curl:
    Partial Sit Up Curl
    Partial Sit Up Curl

    Squeeze the muscles in your abdomen. Put your chin down against your chest. Arrange your hands in front of you and curl your upper body forward until your shoulders are off the ground. Keep your posture for three seconds. Avoid holding your breath. Exhaling while you raise your shoulders aids in this process. Calm down. Ten times, repeat. Up to three sets of ten.

    • Stretch IT band supine hip rotation:

    Only extend yourself as far as you can. Keep your knee from going all the way to the floor. Maintain a floor-level back and hips.
    On your back, bend your knees. Proceed with the opposite leg. Hold the exercise for ten seconds.
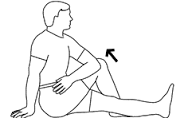
    • Stretch hip/knee:

    On your back, bend your knees. Transfer left ankle to right knee. Proceed with the opposite leg. Hold the exercise for ten seconds.

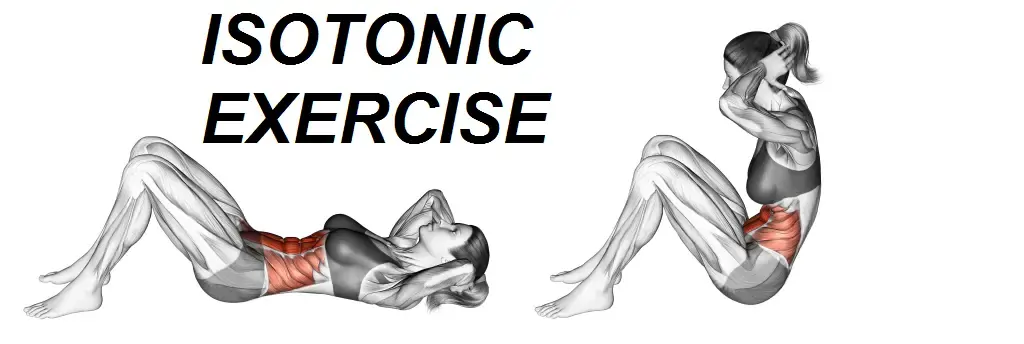
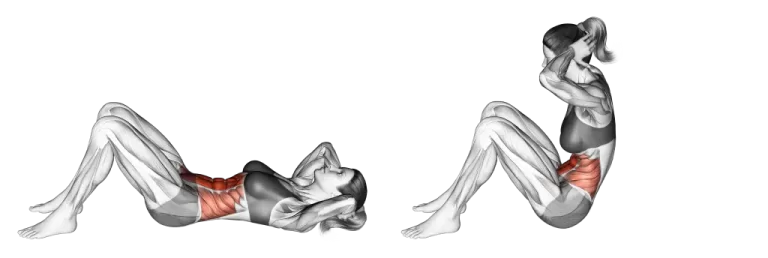
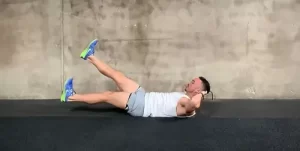
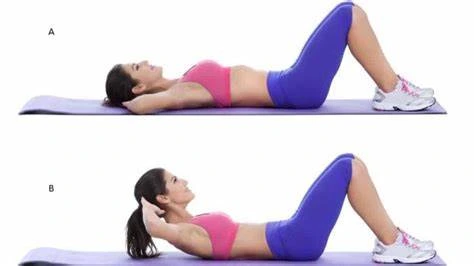
    • Partial sit-up exercise:

    incline With your knees bent and your feet flat on the ground, assume a prone position on a comfortable mat. After 2 to 5 seconds of holding this posture, progressively relax. 8–10 times, repeat. Up to three sets of ten. Gripping your hands behind your head and extending your elbows to the side can make things more tough for you.

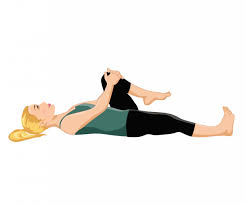
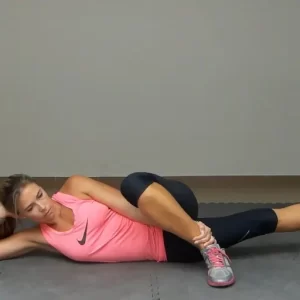
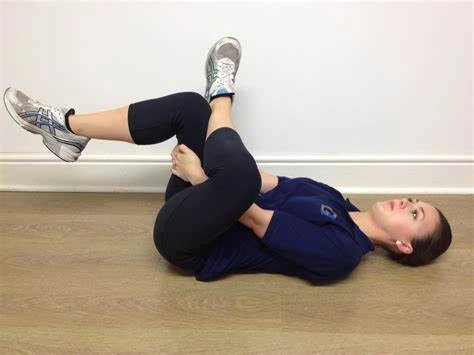
    • Stretch piriformis supine crossed leg:
    Outer-hip-piriformis-stretching
    Stretch piriformis supine crossed leg

    incline laying on your back on a comfortable surface with your ankle crossed over your opposing leg and your knee bent. Until a little stretch is felt in the affected buttocks area, grab the knee and pull the thigh across while consciously attempting to shift the right knee inside. Remain calm and repeat. Twice a day, perform one set of eight to ten repetitions. For 8–10 seconds, hold the exercise.

    • Stretch Piriformis Long sitting:
    Piriformis-stretch
    Stretch Piriformis Long sitting

    With the injured knee bent and the ankle on the outside of the left leg, assume a lengthy sitting position. Holding onto the knee, drag the thigh across the chest and toward the other shoulder. Relax little by little. For 8–10 seconds, hold the exercise.

    • Resist hip external rotation(ER) stand with elastic:

    Secure something at waist level by attaching elastic. As you balance on the involved leg, contact your toes with the uninvolved leg. Take a minute off in between each set. Every 4 seconds, perform one repetition.

    • Resist hip with elastic:

    Secure something at ankle level by attaching elastic. Replicate from the beginning position. Once every other day, perform three sets of 210 repetitions. Take a minute off in between each set. Every 4 seconds, perform one repetition.

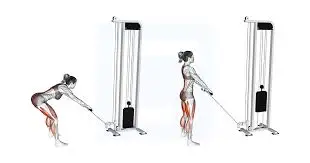
    • Resist hip extension stand with elastic:

    encircle the ankle with a loop. Faced toward the pull, stand. Take a minute off in between each set. Every 4 seconds, perform one repetition.

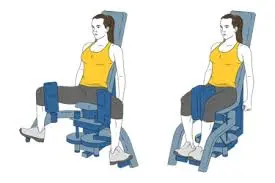
    • Resist hip abduction sit with elastic:

    occupy a chair. Replicate from the beginning position. Take a minute off in between each set. Every 4 seconds, perform one repetition.

    Piriformis syndrome surgery:

    • It is only appropriate to offer surgical treatment in cases where non-medical treatments have failed and the symptoms are becoming incapacitating.
    • Another potential source of sciatica pain to be taken into account is the obturator internus muscle.
    • Active range-of-motion (ROM) exercises and crutches for two to three weeks are part of the postoperative care. The surgical procedure mentioned above produced immediate benefits.

    Conclusion on Piriformis Syndrome:

    The usual approach to treating piriformis syndrome consists of physical therapy, stretching exercises, and, occasionally, medicine or injections to lessen pain and inflammation. Although conservative treatment works well most of the time, persistent cases could need more sophisticated measures like surgery. For better results and less suffering, an all-encompassing treatment strategy and an early diagnosis are essential.

    To stop a recurrence, patients are advised to continue their normal exercise regimen, abstain from activities that could make their symptoms worse, and adhere to a customized rehabilitation program.

    FAQs

    How Can I Tell the Difference Between Piriformis and Sciatica?

    It is important to understand that these are two different illnesses, mostly characterized by the type of pain you feel. Therefore, if you only experience pain in your hips and buttocks, you probably have piriformis syndrome. If your legs hurt more and your lower back hurts less, it’s most likely sciatica.

    For whom is piriformis syndrome most likely to occur?

    Sedentary lifestyle: Piriformis syndrome is more common in those whose employment or manner of life requires them to spend most of their days sitting down.

    Is there a cure for piriformis syndrome?

    Undoubtedly, piriformis syndrome is entirely curable. For the most part, physical therapy combined with rest is sufficient to reduce pain; but, if it persists, you should consider seeking medical attention. It could be necessary for certain people to take medication, engage in activities, and employ heat or ice therapy in order to totally and completely heal.

    What are piriformis’s primary symptoms?

    Primary signs of piriformis include:
    a chronic ache in the buttocks.
    Sciatica pain radiating to the foot, leg, and back of the thigh
    Excruciating Stair Climbing or Walking
    Long periods of sitting cause more pain.
    Hip stiffness (reduced range of motion in the hip joint)

    What is the piriformis syndrome’s best course of treatment?

    Physical therapy, botulinum toxin injections, steroid injections, and dry needling are available forms of treatment. If conservative treatment is ineffective for piriformis syndrome, there are less intrusive treatments.

    Which three factors frequently lead to piriformis syndrome?

    Three typical reasons for piriformis syndrome
    Inappropriate lifting that damages the piriformis muscle
    Not warming up sufficiently before or after an activity session.
    Putting forth a lot of effort or doing repetitive activities, such as jogging a long distance. prolonged periods of time spent sitting (like someone who works from a desk all day).

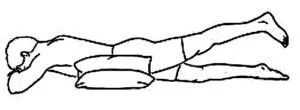
    With piriformis syndrome, how should one sleep?

    If you have piriformis syndrome, the key to improved sleep is to support your hips and spine. You can achieve this by sleeping on your side or back, using a medium-firm mattress, and placing support pillows beneath or between your knees. Throughout the day, stretching exercises can be helpful as well.

    Is the piriformis condition irreversible?

    The majority of piriformis syndrome patients recover with treatment and lifestyle modifications. Make sure you follow your doctor’s advice as treating this issue might result in irreversible nerve damage if left untreated.

    References

    • Dhameliya, N. (2024, July 31). Piriformis Syndrome: Physiotherapy Treatment, Exercise. Samarpan Physiotherapy Clinic. https://samarpanphysioclinic.com/piriformis-syndrome-physiotherapy-treatment-exercise/
    • Physiotherapist, N. P. (2023c, December 13). Piriformis Syndrome and Physiotherapy Treatment. Mobile Physiotherapy Clinic. https://mobilephysiotherapyclinic.in/piriformis-syndrome-physiotherapy-management-and-rehabilitation/
  • Axonotmesis

    Axonotmesis

    What is an Axonotmesis?

    The term “axonotmesis” describes the anatomical disruption of an axon that does not, or only partially, disturb the framework of connective tissue. Axonotmesis is a condition in which a peripheral nerve in one of the body’s limbs is injured.

    This type of injury results in damage to the axons and their myelin sheath, but leaves the endoneurium, perineurium, and epidermis intact. With time, distal motor and sensory capabilities are lost completely, resulting in Wallerian degeneration from ischemia, or blood supply loss. Typically, a more severe crush or contusion than that which causes neuropraxia results in Axonotmesis.

    Axonotmesis is primarily caused by a stretch injury. These strain injuries have the potential to break bones or dislocate joints, which can result in the tearing of peripheral nerves. If the exposed nerve axon does not cause acute pain, an individual can recognize a nerve injury by experiencing odd sensations in the affected limb.

    A nerve conduction velocity (NCV) test may be requested by a physician to fully diagnose the problem. Electromyography, which is done after three to four weeks and is used to diagnose nerve injury, reveals symptoms of denervations and fibrillations, or abnormal connections and contractions of muscles. Regrowing the axon to the target muscle is necessary for this kind of nerve damage, and it takes time.

    Pathophysiology of the Axonotmesis

    Understanding the overall structure and function of peripheral nerves is an essential component of understanding axonotmesis. The myelin sheath, a protective covering, surrounds the axons that make up peripheral nerves. Rapid nerve impulse transmission depends on the myelin sheath. When an axon is injured but the surrounding connective tissues such as the endoneurium, perineurium, and epineurium remain intact, this condition is known as axonotmesis.

    Axonotmesis most often results from traumatizing traumas such as crush or strain damage. Loss of sensory and motor functions may result from these injuries, which can impair the axon’s capacity to send messages. When an axon undergoes damage, a process known as Wallerian degeneration may take place. The axon that is farthest from the cell body degenerates throughout this process and is subsequently destroyed by macrophages. Axons are still alive and may even regenerate in their proximal region, which is the region nearest to the cell body.

    Causes of the Axonotmesis

    Peripheral nerve injuries such as axonotmesis are usually caused by percussion, crush, or strain traumas. The Seddon classification criteria have assigned this injury a second-degree categorization. Other factors are:

    • Compression
    • Traction
    • Direct blunt injuries.
    • Fractures
    • Dislocations
    • Contusions
    • Injection of harmful chemicals.

    Signs and Symptoms of the Axonotmesis

    Depending on the location and severity of the nerve lesion, axonotmesis can manifest differently clinically. Typical signs and symptoms include:

    • Sensory Loss: Individuals may feel tingling or numbness in the places where the injured nerve innervates. Depending on the nerve implicated, a certain pattern of sensory loss is typically observed.
    • Motor Dysfunction: Patients may suffer from weakness or paralysis in the muscles that the afflicted nerve supplies. This could lead to issues with coordination and the ability to move.
    • Autonomic Dysfunction: Patients may suffer from abnormalities in blood flow regulation, sweating, or other involuntary activities if the damaged nerve has autonomic functions, although these are less common.
    • Pain: Patients may have neuropathic pain, which is characterized by searing, shooting, or aching feelings, depending on the type of injury they sustained.

    Diagnosis of the Axonotmesis

    A combination of clinical assessment, neurophysiological testing, and imaging techniques is used to diagnose axonotmesis:

    • Physical Examination: It is significant to perform a complete physical examination together with a thorough history. Assessing sensory and motor function as well as determining the pattern of abnormalities are the main goals of the clinical examination.
    • Neurophysiological Tests: Electromyography (EMG) test and nerve conduction studies (NCS) are important for checking the level of nerve injury. These tests aid in distinguishing between neuropraxia, a less severe nerve injury where just the myelin sheath is affected, and other forms of nerve injuries such as axonal injury. The NCV study states that distal sensory-motor responses are absent in axonotmesis. An electromyography device is used in electromyography (EMG), a medical diagnostic procedure, to assess and record the electrical activity of skeletal muscles.
    • Imaging Studies: To determine the amount of the damage and identify any structural damage to the nerve or surrounding tissues, imaging studies like MRIs and ultrasounds may be used for specific situations.

    Treatment for the Axonotmesis

    Axonotmesis can be treated in a variety of ways, which may involve conservative care, surgery, and rehabilitation:

    Conservative Treatment:

    To stop further damage, the affected area is usually immobilized and rested during the initial phase of treatment. Pain control and symptomatic therapy are also necessary components of treatment. One option for treating pain is to utilize analgesics, such as nonsteroidal anti-inflammatory drugs (NSAIDs) or others.

    Surgical Intervention:

    Surgery might be required if conservative treatment seems to be failing or if there has been a large amount of damage. If there has been a major disruption in nerve continuity, procedures may involve nerve decompression or repair, in which the nerve is surgically repaired.

    Physical Therapy for the Axonotmesis

    To recover, physical therapy rehabilitation is essential. Increases in strength, coordination, and function are the key goals of physical therapy. Physical therapy assists in the following:

    • Pain relief
    • Keep your range of motion intact.
    • lowering the rate of muscle atrophy
    • Education of Patients
    • Utilizing assistive technology (Orthotic needs)

    Occupational therapy may be required to assist patients to adjust to functional limitations and enhance their quality of life.

    Prognosis

    • When it comes to healing, the prognosis is typically favorable when proper care and rehabilitation are received. Some factors that influence the nerve’s ability to regenerate are the extent of the lesion, the patient’s age and general health, and the effectiveness of therapy.
    • After an injury, nerve regeneration usually starts a few weeks to months later. The healing rate depends on how far the injury is from the site; axonal regeneration can happen as quickly as one inch every month. The recovery process can take range from six months to a year.
    • Not every sufferer, though, will fully recover. Some may develop long-term issues such as residual weakness or sensory deficiencies. When nerve restoration is done early and there is less accumulation of scar tissue, the results are frequently better.

    Summary

    An important peripheral nerve injury known as axonotmesis is characterized by axon destruction that does not compromise the surrounding connective tissues. Optimizing patient outcomes requires a comprehensive knowledge of the cause of the disease, clinical symptoms, and suitable treatment options. To maximize healing and minimize long-term disability, early diagnosis, efficient treatment, and thorough rehabilitation are essential.

    FAQs

    What happens during axonotmesis?

    A more serious kind of peripheral nerve damage called axonotmesis typically happens by pushing, stretching, or crushing. Issues in axonotmesis can affect the endoneurium and perineurium, but not the epineurium. The axon is detached from the soma, and the axon and the myelin sheath are damaged.

    What are the three types of nerve injuries?

    Classification of nerve injuries. Seddon identified three types of nerve damage:
    neurotmesis
    axonotmesis
    neurapraxia.

    How long does it take to recover from axonotmesis?

    Sunderland II axonotmesis occurs when an axon is damaged while the endoneurial tube remains normal. A full recovery follows in 1-6 months on average. Sunderland III axonotmesis is caused by injury to the endoneurial tube; in this instance, recovery is less definite, with a partial return anticipated in 12 to 24 months.

     Is surgery necessary for axonotmesis?

    The number of damaged axons and the amount of scar formation at the site of nerve injury determine whether or not individuals with axonotmesis require surgical intervention.

    How may axonotmesis be treated?

    The gold standard for treating axonotmesis and neurotmesis is direct nerve restoration utilizing microsurgical procedures because this method provides endurance or continuity between the distal and proximal sections of the nerve.

    References

    • Chaney, B., & Nadi, M. (2023, September 4). Axonotmesis. StatPearls – NCBI Bookshelf. https://www.ncbi.nlm.nih.gov/books/NBK562304/
    • Axonotmesis. (2023, July 5). Wikipedia. https://en.wikipedia.org/wiki/Axonotmesis
    • Axonotmesis – Knowledge and References | Taylor & Francis. (n.d.). Taylor & Francis. https://taylorandfrancis.com/knowledge/medicine-and-healthcare/axonotmesis/
    • axonotmesis. (n.d.). In Merriam-Webster Dictionary. https://www.merriam-webster.com/medical/axonotmesis
  • Lower Back Pain when Sitting: Cause, Treatment, Exercise

    Lower Back Pain when Sitting: Cause, Treatment, Exercise

    Introduction:

    Lower back pain when sitting is a common and frequently painful condition that affects people of all ages and lifestyles. It has a significant impact on everything from daily activities to work productivity and can be caused by a variety of factors. Since this pain can range in intensity and be both temporary and persistent, it’s critical to understand the causes, signs, and potential treatments.

    We will explore the topic of lower back pain while sitting for a while in this article, including potential causes, symptoms, and management and relief techniques. This information will be helpful whether you are someone who occasionally feels uncomfortable or someone who wants to prevent or manage persistent lower back pain.

    Causes of Pain in the Lower Back During Sitting:

    Many things can lead to lower back pain during prolonged sitting, and to effectively treat and prevent the condition, it is crucial to identify the underlying reasons.

    The following are some typical reasons why sitting causes lower back pain;

    • Being overweight

    Extra weight bearing while seated can put a strain on the lower back, particularly if the abdominal muscles are weak. This could cause pain.

    • Pelvic Problems

    When there are problems in the pelvic area, including pelvic inflammatory disease or dysfunction of the sacroiliac joint, sitting becomes uncomfortable.

    • Ineffective Ergonomics

    The body might be forced into unusual positions and the lower back can be strained by poorly designed workstations or seats. It’s essential to practice good ergonomics when sitting to avoid back pain.

    • Herniated disk

    A disc in the spine that has burst and is pressing on a spinal nerve is known as a herniated disk. Any spinal disk could be affected. Medication and physical therapy are frequently used when combined with dealing with the illness.

    • Poor Posture

    One of the most common reasons for lower back pain when seated is bad posture. Bending over, hunching over a desk, or sitting with an excessively curved lower back can all cause pressure on the muscles, ligaments, and discs in the lumbar region.

    • Imbalanced Muscles

    Pain in the lower back can be caused by weakness or imbalances in the muscles of the lower back, abdomen, and pelvis. Weak or strained muscles might put an uneven amount of strain on the spine when you’re sitting.

    The sciatic nerve, which runs from the lower back into the legs, can become inflamed or compressed, leading to the illness known as sciatica. Sciatica symptoms can aggravate sitting, leading to lower back and leg pain.

    • Spinal Disorders

    Herniated discs, degenerative disc disease, spinal stenosis, and spondylolisthesis are a few examples of underlying spinal problems that may cause lower back pain when sitting. This type of situation could cause structural issues or aggravate existing nerves.

    • Injury

    An individual may sprain or strain their lower back when lifting something improperly. Alternatively, the injury can have been caused by trauma received during a car accident or while engaging in sports.

    Treatment for Pain in the Lower Back During Sitting:

    Numerous treatment options for lower back pain happen when sitting, depending on the underlying cause, specific factors, and severity of the pain.

    The following therapeutic modalities are useful in controlling and reducing lower back pain during sitting;

    • Relaxation and Changing Your Activities

    Initial treatment measures include resting and avoiding activities that aggravate the pain. Avoid prolonged sitting and return to light movement gradually to prevent stiffness.

    • Treatment with Physical Therapy

    A physical therapist may build an exercise program to help with muscle imbalances, improve flexibility, and build stronger core muscles. In addition, techniques including manual treatment, heat or cold therapy, and massage may be applied.

    • Medications

    Pain and inflammation can be reduced with the use of non-steroidal anti-inflammatory medications (NSAIDs). If there are underlying illnesses or more severe pain, prescription medication may be recommended.

    • Postural Training

    Practice a good sitting position to help release tension in your lower back. Use pillows or lumbar supports wherever necessary. Think about wearable technology that offers feedback or devices that train your posture.

    • Exercise and Yoga

    You may increase your flexibility and release muscle tension by practicing yoga and exercising regularly.

    • Therapy with Heat and Cold

    To lessen swelling and pain in the lower back, apply heat or cold compresses. To find out which is most effective for you, try both.

    • Bracing

    A medical expert may recommend a support belt or back brace to provide extra stability and support in certain situations.

    You must consult a physician to receive an accurate diagnosis and a personalized treatment plan suitable for your particular medical condition and requirements. Remember that the best approach to treating lower back pain during sitting may involve a combination of therapies, including lifestyle modifications, exercise, and pain management methods.

    Exercise for Lower Back Pain when Sitting:

    Exercise is a good way to prevent and lessen lower back pain put on by extended sitting. Increasing flexibility and strengthening the muscles that support your lower back will help you feel less uncomfortable and sit more upright.

    Here are some effective exercises specifically to reduce back pain when sitting;

    Pelvic tilts

    • With your feet flat on the ground and your knees bent, take a supine position on the floor.
    • Spread your arms out in front of your body, palms down.
    • Your neck and spine should be in alignment, and the back of your head should be in contact with the mat.
    • Maintain the natural curve of your back by giving your lower back some space from the mat.
    • It ought to be possible for you to reach your hand into this area.
    • Take a breath. Upon exhaling, contract your abdominal muscles to raise your backbone and compress the area between your lower back and the mat or floor.
    • This will cause your lower back to gently expand.
    • Hold this position for a few seconds.
    • Breathe in and let your pelvis and spine return to their starting positions.
    • Then relax.
    • Five to ten times through, do this exercise.
    PELVIC TILT
    PELVIC TILT

    Cat-cow

    • Initially, place your hands on the ground in the tabletop position.
    • Ensure your back is straight.
    • Remain connected by using both hands and feet.
    • Lean your head back and fill your belly with air while inhaling deeply.
    • Hold this position for a few seconds.
    • After that, release the air, raise your chin into your chest, and move to face upward.
    • Your lower back is slightly extended.
    • Hold this position for a few seconds.
    • Then return to your neutral position.
    • Then relax.
    • Five to ten times through, do this exercise.
    Cat-and-Cow-Stretching
    Cat-and-Cow-Stretching

    Bridges

    • As you lay in bed, position yourself such that you are comfortable.
    • Bend your knees after that, keeping your feet flat on the bed.
    • Next, tighten your abdominal muscles.
    • Lift your head and upper body.
    • Maintain your arms at your sides.
    • Hold this position for a few seconds.
    • Then return to your neutral position.
    • Then relax.
    • Five to ten times through, do this exercise.
    Hip bridge exercise
    Hip bridge exercise

    Plank

    • Take a prone lying position on the ground.
    • Position your forearms straight beneath your shoulders.
    • Next, elevate your body off the ground gently while exerting pressure on your forearms and knees.
    • Take a comfortable posture with your body.
    • About your body, that forms a straight line.
    • Keep your posture like this for a few seconds.
    • Next, return to your neutral position by taking a step back.
    • Then, relax.
    • Five to ten times through, do this exercise.
    PLANK
    PLANK

    Knee to chest

    • To begin, take a comfortable supine position and lie down on the ground.
    • One knee should be bent.
    • Position your hand slightly below your kneecap or behind your knee.
    • Bring your knee up to your chest at this moment.
    • Hold this position for a few seconds.
    • Then release your leg.
    • Then return to your neutral position.
    • Next, relax.
    • Five to ten times through, do this exercise.
    One-Knee-to-Chest
    One-Knee-to-Chest

    Child’s pose

    • Start by kneeling comfortably.
    • Maintaining the position of your knees and hips.
    • Breathe deeply and bring your body down by bending forward.
    • Press your forehead firmly onto the ground.
    • Your arms can be raised straight up in front of you.
    • Hold this position for a few seconds.
    • Then return to your neutral position.
    • Then relax.
    • Five to ten times through, do this exercise.
    Childs-Pose
    Childs-Pose

    Bird dog

    • Make sure your body is comfortable by taking a kneeling position to begin.
    • Keep your shoulder blades firmly together.
    • Next, raise your right arm and left leg toward the ceiling.
    • Maintain a parallel hip and shoulder alignment.
    • Hold this position for a few seconds.
    • Then return to your neutral position.
    • Then relax.
    • Five to ten times through, do this exercise.
    Bird-dog Exercise
    Bird dog with elbow-to-knee

    Sphinx pose

    • With your hands facing front and palms down, position yourself on your stomach with your elbows beneath your shoulders.
    • Step slightly apart with your feet.
    • You’re probably going to touch your big toes.
    • With your head and chest raised, gently contract your thighs, lower back, and buttocks.
    • Breathe deeply and keep your abdomen and lower back strong.
    • Your pelvis has to be firmly positioned on the ground.
    • You have two options: close your eyes slightly or look directly ahead.
    • Hold this position for a few seconds.
    • Then return to your neutral position.
    • Then relax.
    • Five to ten times through, do this exercise.
    Salamba Bhujangasana or Sphinx Pose
    Salamba Bhujangasana or Sphinx Pose

    How Can Lower Back Pain Be Prevented While Sitting?

    A combination of healthy habits, proper ergonomics, and lifestyle modifications are needed to prevent lower back pain when sitting.

    The following practical tips will help you prevent or lessen lower back pain when you sit;

    • Keep a Healthy Weight

    Sitting could worsen the strain on your lower back if you are overweight. Exercise regularly and a balanced diet are essential for managing your weight. Remember that the best way to avoid pain in the lower back is to stay regular. Take these routines into your everyday life to protect your back and reduce the likelihood of experiencing pain when sitting.

    • Stay Active

    Regular exercise can help strengthen your core and back muscles. Particularly beneficial are swimming, Pilates, and other water-based exercises. Walking should be a regular part of your routine to keep your muscles toned and your spine in alignment.

    • Take Frequently Arranged Breaks

    Every thirty to sixty minutes while seated, stand up, stretch, and go for a little walk. It relieves some of the pressure on your lower back. Practice fundamental stretches including forward bending, backward arching, and body rotation during your breaks.

    • Make Use of Proper Sitting Methods

    With your back straight and your legs and hips bent, take a seat. Lower yourself into the chair by using your leg muscles rather than your waist. Soft seats and couches may not offer sufficient back support, so try to avoid sitting on them for extended periods.

    • Make Workspace Adjustments

    Your computer and workstation should be set up so that the keyboard and mouse are easily found and the monitor is at eye level. This will not cause tension on your shoulders or neck. Whenever possible, use an adjustable sit-stand desk to alternate between standing and sitting during the day.

    • Keep Your Posture Correct

    When sitting, maintain your back and let your shoulders relax. Lean on your lower back’s natural curve for stability.  Maintain your feet flat on the ground and your knees at or slightly below hip level. Make use of a footrest if required. Avoid crossing your legs as this may lead to slouching.

    When to visit a doctor for advice:

    Even though exercise and improved sitting posture typically relieve lower back pain, you should consult a doctor if;

    • The feeling of pain is continuous and doesn’t seem to be getting any better.
    • You have numbness or tingling in your legs or back.
    • Fever
    • You’re feeling not well
    • You experience bowel or bladder loss.

    These signs may indicate a serious medical condition that needs immediate attention.

    Summary:

    In summary, lower back pain from sitting is a frequent problem for a variety of reasons, but it may be controlled and avoided with proper posture, ergonomic changes, consistent exercise, and stress reduction. Maintaining healthy habits and obtaining medical care when required are essential for long-term relief and spinal health.

    The key to spinal health and long-term comfort is to maintain good habits and receive professional advice as needed.

    FAQ:

    How come sitting makes my lower back hurt?

    Sitting Back Pain: Leaning excessively during a meal can cause the spinal ligaments to overstretch and the spinal discs to become strained. Bad posture when sitting and poor office ergonomics can damage spinal structures over time, leading to chronic neck or back pain in addition to being uncomfortable.

    How may lower back pain caused by sitting be relieved?

    Proper posture while seated, with lumbar support.
    Take a seat at the end of the chair and lean back.
    As much as you can, draw yourself up and emphasize your back curve.
    Give the position a little leeway.
    Settle into a sturdy armchair with a high back.

    What is the best way for me to sit without experiencing back pain?

    Avoiding Pain in the Neck and Back While Sitting. To align your upper arms with your spine, start by finding a comfortable spot as close to your desk as you can. Put your hands down on your workspace (such as a desktop or computer keyboard). Adjust the chair up or down if your elbows aren’t at a 90-degree angle.

    Does walking help with back pain?

    A consistent walking routine can be quite helpful in reducing repeated episodes of pain in the back. adults with a history of low back pain; compared to the control group, those who routinely walked had nearly twice as long intervals without experiencing a return of back pain.

    Can someone who has lower back pain exercise?

    Making regular exercise a priority and maintaining as much physical activity as possible in daily life are two of the most important things persons with low back pain can do. Exercises that target the core muscles as well as specific poses from yoga, tai chi, and pilates are beneficial.

    How is lower back pain initially treated?

    Apply cold packs to relieve some back pain, and hot packs to improve blood flow and encourage the repair of the back’s muscles and tissues. Instead of using bed rest, limit to painful activities or exercises. Increase your level of physical activity gradually as you can.

    Does back pain go down when you exercise?

    Pain in the back can be avoided with regular exercise. But maintaining it in the long run is important. This can be simplified in several ways. Pain in the lumbar and sacral areas of the spine, which make up the lower back, is extremely common: Up to 80% of individuals experience this type of pain at some point.

    References:

    • N. P., the physiotherapist (2023, December 13). Why Do I Have Lower Back Pain When Sitting? What Can I Do to Help? Clinic for Mobile Physiotherapy. Lower back pain during sitting: https://mobilephysiotherapyclinic.in/
    • 2020 October 14 Ames, H. Information on pain in the lower back while sitting. Lower back pain while sitting: https://www.medicalnewstoday.com/articles
    • R. G. Morse (2019, May 20). How can I relieve the pain in my lower back and why does it hurt when I sit? Healthline. When sitting, lower back pain can be experienced.
  • Isotonic Exercise

    Isotonic Exercise

    What is an Isotonic Exercise?

    Isotonic exercise is a type of physical activity in which muscles contract and expand throughout their range of motion.

    Isotonic workouts need the muscles engaged in the activity to operate against continual resistance, often given by free weights, weight machines, or one’s body weight. The purpose is to produce muscular contractions that cause movement and improve muscle strength, endurance, and general fitness.

    Force is produced when muscles contract tightly, shortening them.

    Conversely, isometric contractions cause muscles to lengthen without altering in length.

    In contrast to isokinetic exercise, an isotonic contraction maintains force constant as velocity varies. On the other hand, because of the length-tension link that occurs during a contraction, an isokinetic contraction keeps velocity constant even when force varies.

    Forms of Isotonic contractions:

    Auxotonic contractions are similar to isotonic contractions.

    Isotonic exercises fall into two categories:

    During a concentric contraction, a muscle shortens and increases internal tension to overcome resistance. In an eccentric state, resistance leads to muscular elongation.

    • Concentric:

    Although there is an external force tugging on the muscle, it is not as strong as the force the muscle produces during a shorter contraction. Tension peaks at the level parallel to the floor; tension diminishes above and below this point. This is known as a concentric contraction. This is the form that all exercises adopt.

    • Eccentric:

    Eccentric training is a type of strength training in which the target muscles are employed to control weight as it moves downward. Tension-induced lengthening begins in the muscle.

    There are two key elements of eccentric contractions to be aware of. To begin with, tensions obtained might be far higher than the muscle’s full capability for producing tone tension. Second, increasing velocity does not affect tension.

    Eccentric contraction has been linked to muscular damage and discomfort. activities with eccentric contractions have a smaller impact on muscular strength than activities with concentric contractions. However, because higher levels of tension are easier to achieve during eccentric contraction exercises, muscle hypertrophy may be superior to concentric contraction exercises, albeit at a higher level of resistance, because it generates more signals for muscle strength.

    • Auxotonic contraction:

    The previously built-up load diminishes as the blood flows out, necessitating less force to evacuate the remaining blood. Thus, stress is lessened.

    What kinds of exercises are isotonic examples?

    The majority of the things you do now are most likely isotonic. You may execute an isotonic workout by moving your joints and contracting your muscles in reaction to resistance.

    This comprises:

    • Resistance training exercises include pull-ups, curls, bench presses, and squats.
    • Aerobic workouts include cycling and jogging.
    • The bulk of sports movements (e.g., using a bat or football).
    • Even seemingly insignificant tasks like painting a fence likely qualify as isotonic activities.

    Difference between isometric and isotonic exercises:

    Difference between isometric and isotonic
    The difference between isometric and isotonic

    Isotonic exercise appears to encompass practically everything. Is there an exercise that isn’t isotonic? Yes, there is an isometric workout.

    When you activate a muscle isometrically, your joints do not move, nor does the muscle lengthen or shorten.

    Isometric muscular contraction workouts are less common than they previously were, but you should be aware of some of them.

    Stationary workouts that emphasize continual muscular tension include planks, wall sits, and other yoga positions.

    These exercises still perform a muscular function, but not in the same way as isotonic workouts do, whereas isometric activities contract and then extend the muscle.

    Who is appropriate for Isotonic exercises?

    The majority of people can benefit from isotonic exercises. You may feel that isotonic workouts are simply strength training and are solely useful for developing huge biceps or pecs.

    Depending on whether you want to bulk up or lose weight, you may modify these exercises by adjusting the weight, number of sets, repetitions, and rest periods.

    You may also tailor the intensity to your current level of athletic growth, whether you’re a professional athlete or just getting started in the fitness sector.

    Isotonic exercises are particularly significant as people age. Obstruction preparation targets bone thickness, which often decreases with age and leads to osteoporosis.

    The one exception, and those who may wish to avoid isotonic workouts, are individuals who are healing from an injury, particularly one to the joint. Isometric exercises may still be a safer alternative to some low-intensity isotonic workouts.

    How to perform isotonic exercises?

    Isotonic exercises have various forms that need mastery, especially when dealing with higher resistance.

    However, the foundations are often the same. Throughout the exercise, try to keep your tension level consistent.

    After all, the term “isotonic” implies this.
    If you maintain your speed constant, the same movement might be used to conduct an isotonic workout.

    To do so, raise and lower the weight (whether it’s a barbell, free weights, or your body weight) gently and methodically. Focus on how the eccentric and concentric contractions interact throughout the movement.

    Examples of isotonic exercises:

    Depending on your overall training goals, there are different methods to include isotonic workouts.

    If you’re just starting, here’s an example workout targeting several muscle groups.

    You’ve probably previously done some or all of these exercises throughout your workouts.

    • Exercise 1: bench press
    Bench press
    Bench press

    Despite stimulating various smaller stabilizer muscles and supplementary muscle groups, the bench press focuses largely on your pectoral muscles. This activity benefits anyone looking to improve their fitness.

    To achieve your goals and reach your ideal level of fitness, change your weight. You can substitute push-ups if you prefer a bodyweight workout or lack the equipment for bench presses.

    • Exercise 2: pull-ups
    Pull-Ups
    Pull-Ups

    Pull-ups will mostly work your back and arms. The most amazing part about pull-ups is that they use your body weight, making it far more difficult to be hurt than putting a massive free weight on top of you.

    • Exercise 3: squats
    SQUATS
    SQUATS

    Squats: Squats are a great exercise to work on your lower body. dy. As with the bench press, adjust the weight or even do the exercise unweighted if required.

    • Exercise 4sit-ups
    sit-ups
    sit-ups

    Lastly, to strengthen your core and abdomen, try some sit-ups. The isotonic movement of sit-ups stimulates your abdominal muscles to contract, which, if done frequently, will most likely result in a six-pack, which most of us desire.

    Benefits of isotonic exercise:

    Many isotonic workouts are well-maintained since they do not require any specialized equipment or supplies that are not commonly found in gyms. Furthermore, because many isotonic workouts are simple for most individuals to complete, they may be applied to everyday activities outside of the gym. 

    You can maintain your weight loss by exercising. According to research, people who lose weight and keep it off permanently participate in regular physical activity.

    • Enhanced muscular growth and strength.
    • Improved muscle endurance
    • Strengthening the whole range of motion (ROM).
    • Improved range of motion during functional tasks.
    • Increasing bulk by lifting heavy weights and progressively increasing resistance
    • Practicing the movements your body needs for daily activities.
    • Higher bone density.
    • Improves cardiovascular health.
    • Reduced body fat
    • An increase in fat-free mass
    • helps to keep your metabolism running smoothly as you become older.

    So, you may incorporate a few isotonic exercises into your routine. Either way, you probably already work out in an isotonic manner.

    Disadvantages of isotonic exercise:

    While isotonic exercise has many benefits, there are certain drawbacks to consider:

    1. Injury risk: Isotonic workouts may exert a lot of strain on the muscles and joints, raising the risk of injury if proper form and technique are not used. Overuse injuries, such as tendinitis and muscular strains, can occur when the same muscles are overused and do not receive adequate rest and healing time.
    2. Limited muscle work and activation: Isotonic exercises frequently target only one or a few muscle groups at a time, which limits overall muscle activation and development. This might be a disadvantage for those looking to enhance their general strength and endurance.
    3. Plateauing: The body can adjust to isotonic activities over time, resulting in a plateau in progress. This suggests that it may be difficult to continue producing increases in physical strength, endurance, or other fitness goals without modifying the routines or adding higher resistance after a certain point.
    4. Requirement of types of equipment: It is necessary to employ equipment like dumbbells, resistance bands, or weight machines for many isotonic activities. For people who do not have access to a gym or home training equipment, this may be a disadvantage.
    5. Not for everyone: Isotonic workouts are not suitable for everyone, particularly those who have serious medical conditions or injuries. People who have joint problems may need to refrain from engaging in physical activities that put an undue amount of strain on their joints. Before starting any new exercise regimen, talk with a healthcare practitioner.

    Risks associated with isotonic exercises:

    Isotonic exercise involves significant risks, especially if done incorrectly or if the person has underlying medical conditions.
    Isotonic exercise has various dangers, including:

    • muscular strain: Overuse or poor technique during isotonic training can induce muscle tension, resulting in pain, edema, and a limited range of motion.
    • Joint injury: Sprains, strains, and dislocations can develop in joints that are not properly supported during isotonic exercise.
    • Cardiac events: Isotonic exercise, especially in individuals with underlying cardiac difficulties, can be taxing on the cardiovascular system.
    • Dehydration: If someone does not drink enough fluids before, during, and after an isotonic exercise session, they may get dehydrated as a result of sweating.
    • Overtraining: Participating in isotonic exercise too regularly or for too long can lead to overtraining, which can degrade performance and increase the risk of injury while also producing fatigue.

    To reduce the risk of these potential risks, warm up properly before beginning any isotonic exercise routine, use good technique, and gradually increase the intensity and duration of the workout, Keep yourself hydrated and aware of your body’s signals to avoid overworking yourself. Before beginning any new fitness program, it is also recommended that you consult with a healthcare medical practitioner, particularly if you have any underlying medical conditions.

    Summary

    Isotonic workouts are one type of strengthening exercise that might benefit your health. The preceding article describes how to comply with isotonic exercises as well as which exercises to perform. The ideal type of exercise is one that you love and can perform regularly, and those who combine different activities reap the most benefits. Choose the workouts that are most appropriate for your objectives, present health, and personal preferences.

    FAQ

    What are the isotonic exercises?

    Isotonic contractions change the length of a muscle while maintaining the same tension.

    What are examples of isotonic exercise?

    You might include the following isotonic workouts in your fitness plan.
    Perform push-ups and pull-ups.
    Sit-ups or crunches
    Dumbbell tricep and bicep curls
    Squats (knees behind toes, good technique)
    Russian twists.

    What is an isometric and isotonic training?

    Isometric training keeps the muscle length constant while causing muscular development; in contrast, isotonic training modifies the muscle length while maintaining the same tension.

    Which are two forms of isotonic contractions?

    A concentric. A contraction is when a muscle shortens and tension builds to meet resistance. Eccentric contraction causes the muscle to stretch because the resistance is greater than the muscle’s power output.

    Why is it called an “isotonic” contraction?

    The ancient Greek term “isotonic” approximately means “same tension” or “same tone.” Isotonic training maintains constant muscular tension throughout the movement.

    Is yoga isometric or isotonic?

    Yoga uses both isometric and isotonic contractions. When you transition from one yoga pose to the next, your muscles become isotonic, which means they move. Isometric contractions are used to hold yoga positions in place. They do not move, and their muscle lengths and joint angles remain constant.

    References:

    • Parmar, D. (2023, December 13). Isotonic exercises – Type, Benefits, Examples – Mobile Physio. Mobile Physiotherapy Clinic. https://mobilephysiotherapyclinic.in/isotonic-exercises/
    • Isotonic Training: Perfect Your Squats and Pushups. (2016, December 19). Healthline. https://www.healthline.com/health/fitness-exercise/isotonic-training
    • Zieminski, S. (2023, June 12). 7 Isotonic Exercises Examples. Naked Nutrition. https://nakednutrition.com/blogs/fitness/isotonic-exercise-examples?srsltid=AfmBOopIWOikKH3uY5QsWmGx9CqfYaNCtmHZ0m54k8alOttWICw2TA9N
  • Shoulder Abduction

    Shoulder Abduction

    Introduction

    The movements of the shoulder joint, known as adduction and abduction, permit the arm to move either inward or outward toward the body. For a variety of everyday tasks and upper-extremity sports, these movements are crucial.

    What is Shoulder abduction?

    Shoulder abduction is a fundamental movement of the shoulder joint, where the arm is lifted away from the body in a sideways motion. Abduction is the separation of your arms from the center of your body.

    Shoulder abduction is essential for various daily activities, such as reaching out to the side, lifting objects overhead, and performing athletic movements. Understanding shoulder abduction is crucial for diagnosing and treating shoulder injuries, improving mobility, and enhancing overall upper-body function.

    Workers can use this action when reaching for supplies, tools, or merchandise. Uncomfortable location, repeated motion, and overloading increase the risk of musculoskeletal injuries related to work.

    Because you are moving in the frontal plane, you are only moving laterally when your shoulders are abducted. The particular mechanism known as abduction allows you to move your arm away from your body, like when you raise it in a jumping jack exercise.

    This exercise can be used to mimic the stretch for your internal rotators (exercise #1 from the mobility section). Hold a stick in front of you at about hip height with one hand on either end. Maintaining a relaxed upper back and shoulders, move the stick across your body using your unaffected arm.

    If you don’t resist the push, your damaged arm will be pushed up and to the side. To ensure that you are simply executing abduction at the shoulder joint, avoid twisting your torso or slouching your shoulders. (This is not always a bad thing, but the purpose of these exercises is to focus on specific shoulder range of motion components to ensure adequate control in every plane of motion.)

    Once your shoulder has reached its maximum abduction, use the opposing action, “adduction,” to return it to its initial position while carefully managing the fall of your arm.

    Testing for Shoulder Abduction

    Arm expansion away from the body is known as shoulder abduction; arm movement toward the center of the body is known as shoulder adduction.

    The middle deltoid and supraspinatus shoulder muscles work together during shoulder abduction to raise the arm away from the side of the body. The glenohumeral joint, which links the scapula and humerus, is the site of articulation for shoulder abduction.

    A healthy shoulder can extend to 180 degrees when abducted; however, if the rotator cuff, the primary muscle supporting the shoulder, is damaged, this range of motion will be significantly reduced. Weakened, irritated, or damaged shoulder tendons or muscles will impair shoulder abduction.

    Exercises for strengthening the shoulders should be promoted, and workers who perform occupations that frequently require shoulder abduction should be given adequate time to recover in order to avoid injuries.

    Shoulder abduction is the opposite of shoulder adduction. Shoulder adduction occurs when you move the arm toward the midline of the body.

    Shoulder abduction involves the Glenohumeral Joint. The Head of the Humerus is located in the Glenoid Fossa of the Scapula. It is impossible to conduct shoulder abduction without this joint and the stabilizing muscles.

    Shoulder Abduction Test

    Shoulder abduction tests, also known as “shoulder abduction signs,” are physical examinations used to diagnose certain conditions, like cervical root disease, in patients. A shoulder abduction test should be conducted with the patient sitting upright.

    As you raise the patient’s hand to the crown of their head, give them instructions on how to abduct their shoulders. Relieving symptoms during shoulder abduction indicates a positive test.

    Shoulder Horizontal Abduction

    Shoulder horizontal abduction is the term used to describe the abduction of the shoulder in the horizontal plane. Assume a straight arm position in front of you, shoulder-to-shoulder. Next, horizontally extend your arm out to the side, always maintaining the hand parallel to the shoulder.

    Shoulder horizontal abduction is demonstrated by performing the Banded Pull Together exercise, which begins with both arms in front of the body and ends with both arms extended out to the sides of the body. Strengthening exercises for the Deltoids, Infraspinatus, and Teres Minor are highly recommended. These exercises involve horizontal abduction of the shoulders.

    Shoulder Abduction Muscles

    Shoulder abduction engages a number of muscles in the upper back and shoulder. The main muscles involved in shoulder abduction are:

    • Anterior Deltoid
    • Medial Deltoid
    • Posterior Deltoid
    • Supraspinatus
    • Serratus Anterior
    • Trapezius

    When performing the exercise, every major muscle participates in the abduction of the shoulder in a different way. The trapezius and serratus anterior collectively abduct the shoulder to a maximum beyond 90 degrees, the supraspinatus from 15 to 90 degrees, and the Deltoid up to 15 degrees.

    Shoulder Abduction Exercises

    Some exercises include shoulder abduction. A few exercises for abduction of the shoulder are:

    • Lateral Raises
    • Shoulder Press
    • Jumping jacks
    • Arm Circles
    • Shoulder Fly
    • Wall Slides

    Isometric Shoulder Abduction

    • Place yourself about six inches away from the wall, keeping your body perpendicular to it.
    • The shoulder you wish to work on should be positioned close to the wall.
    • Press a hand up against the outside. You might wish to use a folded towel for a little extra comfort.
    • While softly pressing against the wall, try to lift your arm out to the side and hold it there for five seconds.
    • Gradually release the weight on the wall.

    After ten to fifteen repetitions of the first exercise, move on to the next one, which is designed to activate your rotator cuff muscles.

    Exercise with an exercise band

    Close to your foot, encircle a large, stiff object with the exercise band. You should hold the bar with a hand that isn’t damaged on your shoulder. Keep your arm straight.
    Holding up your thumb, gradually abduct your arm to the side. Then, without injuring yourself, slowly draw the bar as far over your head as you can.

    Always keep your arm below your head unless your PT or doctor gives the okay. Avoid shrugging your shoulders. For the time given, maintain your body in this position. Gradually make your way back to the starting point.

    Exercise with a weight

    Standing, hold a weight in your hand with your palm facing your body. Your thumb is directed upward and gradually raise your arm to the side.

    Then raise your arm over your head as high as you can without getting hurt. For the time given, maintain your body in this position. Always keep your arm below your head unless your PT or doctor gives the okay.

    AAROM Shoulder Abduction – Wand Exercise

    As you carefully elevate your affected arm to the side, hold a wand or cane with the palm of the injured side facing up and the uninjured side facing down.

    • Repeat 8 Times
    • Hold 12 Seconds
    • Complete 2 Sets
    • Perform 2 Times a Day

    Lateral Raises

    • Begin by placing your feet hip-width apart and your knees slightly bent while standing in a calm posture.
    • Hands facing inward, keep a pair of dumbbells by your sides.
    • Pull your shoulders back and down while contracting your core.
    • Raise your arms to shoulder height, straight out to the sides.
    • Slowly and gently drop the weights back down to your sides.
    • As many times as required, repeat.

    Dumbbell Shoulder Press

    • Below are the brief instructions for performing the dumbbell shoulder press while standing:
    • Place your feet shoulder-width apart and flex your legs slightly to stand.
    • Raise the weights until they are parallel to your ears while holding a dumbbell in each hand with your palms pointing outward and away from you. Although bent, your elbows won’t be locked out.
    • Simultaneously take a deep breath and lift the weights to your shoulders. Breathe and gradually return the dumbbells to the ear level.
    • Repeat the movement for as many sets and repetitions as required.

    Jumping Jacks

    Jumping jacks are an easy workout to become good at. It’s simple to execute a jumping jack by following these steps:

    • To begin, assume a high stance and maintain your arms by your sides.
    • Take a deep breath and bend your knees to prepare your body for a higher jump. Stretch your knees to jump, then raise your arms. and the legs were separated from the body.
    • When you land from a leap, your arms should form an arch over your head and your feet should be about shoulder-width apart. Remember that this is one continuous motion, so you are also spreading your arms and feet apart while you jump.

    A second jump can be performed by bending at the knees. As you jump, bring your arms and legs back together. When you land back in the starting position, you should be tall, with your feet together and your arms by your sides.
    Continue bouncing back and forth between the stretched position and the original position for as long as you like!

    Arm Circle Exercise

    Start by swinging both of your arms behind you, then move them both forward in a circle. While keeping a safe range of motion, make them as big as you can. After the forward circles, be sure to complete the opposing ones as well.

    Shoulder Abduction Pain

    Issues with Shoulder Abduction Pain may arise from a shoulder impingement. This occurs when a muscle or tendon becomes caught in the shoulder bones. This may result in pain and make shoulder abduction difficult. Shoulders shrugged Pain can be caused by both overusing the shoulder joint and other Rotator Cuff problems. Some people have subacromial gaps that are too narrow, which increases the risk of shoulder impingement.

    Shoulder abduction pain symptoms include decreased range of motion, pain during movement, pain during sleep, swelling, and radiating pain. In order to diagnose shoulder impingement and establish the best course of treatment, your doctor can perform specialized tests.

    Mover for Shoulder Abduction

    The main muscle worked in abduction is the deltoid. The Medial Deltoid, to be exact.

    Pillow for Shoulder Abduction

    A shoulder abduction pillow is a kind of arm sling used to provide support following surgery or other injuries. The cushion on these shoulder abduction pillows allows the arm to be removed from the body without activating the shoulder abduction muscles.

    Degrees of Shoulder Abduction

    As we previously set up, the muscles that abduct the shoulder will contribute to a specified amount of degrees of abduction. Shoulder adduction is initiated by supraspinatus at a 15-degree angle. The shoulder will then be abducted by the Deltoid at an angle ranging from 15 to 90 degrees. Lastly, the serratus anterior and trapezius will abduct the shoulder past ninety degrees.

    Sling for Abduction of the Shoulder

    The phrases “sling” and “shoulder abduction pillow” are interchangeable. It helps to release the muscles involved in shoulder abduction after surgery or an injury to the shoulder.

    Relief Sign for Shoulder Abduction

    Relief from Abduction of the Shoulders Another name for the Shoulder Abduction Test is a Sign, which we discussed before. When the patient is sitting up straight, ask them to place the affected arm over their head. If the patient experiences fewer symptoms, the cervical root pathology test is considered effective.

    Abduction of the Shoulder Goniometry

    The range of mobility of a joint is evaluated using a device known as a goniometer. To do shoulder abduction goniometry, position the axis in relation to the Acromion Process, the stationary arm parallel to the Sternum, and the moving arm above the Humerus. The normal range of motion for the shoulder abduction is 180 degrees.

    Shoulder Abduction Stretch

    Abduction of One Shoulder Stretching can be done with a wall or table slide. Sit down at a table that is just a little higher than your shoulders. To bring the head and armpit closer to the surface when extending the arm across the table, the wrist should be brought forward. Return to your starting position and repeat the exercise. It could be helpful to place a piece of cloth beneath the wrist to facilitate the arm’s motion.

    Sit close to a wall and place your fingertips shoulder-level on the wall to perform the wall side. Gradually climb the wall with your fingertips until you get shoulder pressure. You should hold this position for 30 seconds, and then exchange sides.

    Abduction Brace Shoulder

    The term “Abduction Brace Shoulder” can be used to refer to both the Shoulder Abduction Sling and the Shoulder Abduction Pillow.

  • 20 Best Workouts for Inner Thighs

    20 Best Workouts for Inner Thighs

    Welcome to the world of fitness, where you can achieve the goal of having toned, muscular inner thighs. Your body’s ability to stabilize and support itself greatly depends on the adductor muscles located in your inner thighs. You can improve your strength and appearance by creating a well-rounded workout routine that works these muscles.

    We’ll look at good Workouts for Inner Thighs in this article that combines focused movements, good form, and progressive development.

    What is an Inner Thigh?

    The inner thigh is the area of your legs that contacts when your feet are squeezed together. The inner thigh is the region inside your leg that starts at the pelvic bone and ends just above the knee. Even though the inner thighs are not usually the center of attention during a workout, they are an important part of the leg to work on to build muscle.

    Furthermore, they are necessary for easy everyday mobility.

    What Muscles Are in the Inner Thigh?

    The inner thighs are composed of five different types of hip muscle groups: the gracilis, pectineus, adductor brevis, adductor longus, and adductor magnus. They extend up to the thigh bone from the pelvic region.

    • Gracilis

    This muscle contracts to flex the leg at the knee and adduct the thigh at the hip. It is necessary to bend and twist.

    • Pectineus

    A minor muscle located in the inner thigh that facilitates hip flexion and adduction.

    Hip flexion and adduction are helped by this muscle, which is situated under the adductor longus.

    • Adductor Longus

    This big, flat triangle muscle that adducts the thigh partially covers the adductor brevis and Magnus. It also comprises the most anteriorly located adductor muscle.

    Situated in the medial section, this muscle is the largest of the inner thighs. Its shape is a fan. Together with the hamstrings, it adducts the thigh to produce hip flexion.

    The benefits of Inner Thigh Workout:

    • Having strong inner thighs makes it easier to keep other body parts stable and reduces your risk of injury.
    • Workouts for the Inner Thighs focus on the adductor muscles, helping in their tone and strength. This could lead to improved muscle definition and flexibility in the inner thigh area.
    • Workouts for the inner thighs help stabilize your pelvis, improving your ability to run fast and change directions.
    • Leg power can be improved by inner thigh workouts, particularly those that involve resistance or weight bearing. Powerful inner thigh muscles help to produce force and strength when doing actions like kicking and jumping.
    • Age-related changes in muscles and bones can affect movement. Older persons can avoid falls by strengthening their inner thighs, which contributes to hip and knee stability and balance.
    • Strong and well-conditioned inner thigh muscles are advantageous for athletes who play lateral movement sports like basketball, soccer, or skating. These routines can help with speed, flexibility, and overall athletic performance.

    Workouts for Inner Thighs:

    Training the inner thigh muscles can help increase the overall strength and stability of the lower body since they support the hips and core during a variety of motions.

    Lateral lunges

    • Begin in a comfortable standing position on the ground.
    • Lean your left leg out to the side as you take a step forward.
    • Both feet should be flat on the floor with all toes pointing in the same direction.
    • As you step forward, maintain a straight back and flex your left knee.
    • Your lower body should feel as though you are attempting to find comfort on a chair with only one side being supported.
    • Hold this position for a few seconds.
    • To get back to where you initially were, push off with your left foot.
    • Then relax.
    • Repeat this workout 5 to 10 times in a day.
    lateral-lunges-
    lateral-lunges-

    Seated hip adduction

    • All you need to concentrate on is pressing your thighs together because the seated hip adduction separates the hip adductor muscles.
    • Sit with your back resting on the machine’s backrest.
    • To avoid overstretching your adductor muscles, adjust the length of the knee pad such that it gives your inner thighs a good stretch.
    • Set up a lightweight for the first set so as not to go overboard.
    • Breathe out, then press your thighs together until your knees meet in the center of your body.
    • Hold this position for a few seconds.
    • Then return to your neutral position.
    • Then relax.
    • Five to ten times through, repeat this workout.
    seated-hip-adduction
    seated-hip-adduction

    Cable Hip Adductions

    • The pulley is closest to you when you choose an attachment that you can secure to your ankle.
    • Get the ankle and calf to pulley at the same level.
    • Put your body next to the pulley.
    • Support yourself by pressing your hand against the machine in a safe spot where your fingers won’t hurt.
    • Extend the leg that is being used the most, facing the pulley.
    • Step the leg in the direction of your waist, away from the pulley.
    • Then return to your neutral position.
    • Then relax.
    • Repeat this workout five to ten times.
    cable-hip-adductor exercise
    cable-hip-adductor

    Sumo squat

    • Keeping your feet wider than hip-width apart, take a toe step outward.
    • Hold a dumbbell or kettlebell between your legs with both your left and right hands if you’re utilizing weights.
    • Pull your knees out and bend them in until your thighs are parallel to the floor.
    • As a result, you will be able to drop to the ground gradually.
    • Maintaining your weight in the middle, tap your knees repeatedly without releasing them as you bend them.
    • Hold this position for a few seconds.
    • Then slowly raise yourself back up, expand your glutes, tighten your inner thighs, keep your spine neutral, and straighten your knees.
    • Then relax.
    • Repeat this workout five to ten times.
    sumo squat posture
    sumo squat posture

    Side-Lying Hip Adduction

    • Lay on your left side on the mat or the floor with straight legs.
    • Cross your right leg over your left, keeping your right foot flat on the floor and your right knee pointing toward the ceiling.
    • Place your left hand beneath your head and your right hand on the ground in front of you.
    • Raise your left leg toward the ceiling while keeping your leg straight at all times.
    • Gently lower the left leg back down after a short while.
    • Then return to your neutral position.
    • Then relax.
    • Repeat this workout five to ten times.
    Hip Adduction
    Hip Adduction

    Skater

    • Make sure to have your abs tight, your feet together, and your knees slightly bent.
    • Push off with your right leg and leap to the left, allowing yourself to leave the ground.
    • Bending forward at the hips, perform a small curtsy lunge by lifting your right leg slightly behind while landing on your left leg.
    • To finish the first complete repetition, go back to the right side for a brief moment.
    • Then return to your neutral position.
    • Then relax.
    • Repeat this workout five to ten times.
    Skater
    Skater

    Single leg circle

    • Arms at your sides, palms down, as you lie down.
    • Extend your left leg along the mat and your right leg up toward the ceiling.
    • Take a breath to get ready.
    • Breathe out and move your right leg in a circle away from your midline, keeping it extended.
    • To finish the circle, inhale as you circle the leg inward.
    • Draw a circle and circle it five times in a clockwise direction and five times counterclockwise.
    • Then return to your neutral position.
    • Then relax.
    • Repeat this workout five to ten times.
    leg circles
    leg circles

    Criss Cross Flutter Kicks

    • Lie flat on your back and place your arms under your head.
    • Straightening and elevating your legs off the floor is better.
    • Stretch your legs across the floor, putting one foot on top of the other, and then bring them back together.
    • Stretch your legs apart once you’ve brought them together, then alternate which foot is on top.
    • Then return to your neutral position.
    • Then relax.
    • Repeat this workout five to ten times.
    Criss Cross Flutter Kicks
    Criss Cross Flutter Kicks

    Pile squat

    • When standing, place your feet wider apart than shoulder-width apart.
    • Place your feet at an angle of 45 to 90 degrees so that they face the same direction as your knees.
    • Sit comfortably with your knees slightly bent and your back upright.
    • Tighten your abdominal muscles. 
    • Once you’re comfortable going no farther, squat down until your thighs are parallel to the floor.
    • Maintain a straight posture for a few seconds more.
    • Then return to your neutral position.
    • Then relax.
    • Repeat this workout five to ten times.
    Plie Squat
    Plie Squat

    Glute bridge with prop squeeze

    • On the ground, lie down. 
    • Place your feet firmly on the ground.
    • Position the prop so that it sits between your legs.
    • Release the tension in your hamstrings and glutes by raising your hips.
    • Firmly press down on the prop so that it hits your inner thighs.
    • Hold this position for a few seconds.
    • Then return to your neutral position.
    • Then relax.
    • Repeat this workout five to ten times.
    Glute bridge with prop squeeze
    Glute bridge with prop squeeze

    Lateral Squat Walk

    • Apply a resistance band around your ankles or just above your knees, extending across your lower thighs.
    • Maintain this position with your feet hip-width apart.
    • Keep your spine tall and your chest upright while you push your bottom back and bend down.
    • To maintain your squat position, make 10 gradual movements to the right while maintaining band tension.
    • After you’ve reset, take ten steps to the left while you’re still squatting.
    • Then return to your neutral position.
    • Then relax.
    • Repeat this workout five to ten times.
    Lateral Squat Walk Workout
    Lateral Squat Walk Workout

    Scissor Legs Plank

    • Begin in the push-up position, with your feet together, your body straight from your head to your heels, and your arms parallel to your shoulders but a little wider.
    • This is where everything begins.
    • Like you would in a horizontal jumping jack, extend your legs while maintaining your core engaged.
    • Then return to the starting position without allowing your hips to drop.
    • Then relax.
    • Repeat this workout five to ten times.
    Scissor Legs Plank
    Scissor Legs Plank

    Single Deadlift

    • Standing with your feet hip-distance apart, your knees should be slightly bent.
    • When using weights, always keep your arm straight and the weight in your right hand at waist level.
    • Lean forward from the waist and extend your left leg past your body while keeping your hips in alignment.
    • Bend only until the weight touches the floor or until your hips start to rotate.
    • Get back into an upright posture, maintaining a neutral spine and shoulders away from your ears.
    • Hold this position for a few seconds.
    • Lift yourself to the beginning position, allowing the toes of the left foot to move across the floor.
    • Then relax.
    • Repeat this workout five to ten times.
    single-one-leg-deadlift
    single-one-leg-deadlift

    Step up

    • When standing, keep your back straight and your trunk upright.
    • When using weights, place dumbbells at your sides and hold one in each hand, or place one in the center of your chest and hold it with both hands.
    • Gently lift your left foot and plant it firmly on the box or bench.
    • Apply pressure through your left leg to your left heel to raise your entire body to a standing position on your left leg.
    • Step back with your right foot and place both feet back on the ground.
    • After that, lift your right foot and plant it firmly on the bench.
    • You should then be able to stand straight on your right leg by applying pressure through it.
    • Put your left foot down and lower yourself.
    • Alternate legs during the workout until you reach the desired number of repetitions.
    • Then relax.
    • Repeat this workout five to ten times.
    step-ups
    step-ups

    Clamshell

    • When lying on your side, bend your knees to a 45-degree angle.
    • To activate your core, pull the belly button in the direction of your spine.
    • Maintaining your feet together, progressively raise your upper leg.
    • Keep your hips from twisting.
    • Hold this position for a few seconds.
    • Then return to your neutral position.
    • Then relax.
    • Repeat this workout five to ten times.
    Clamshells
    Clamshells

    Curtsy Lunge

    • Arrange your arms at your sides and maintain a shoulder-width distance between your feet.
    • Step back and around with your left foot, almost like you’re curtsying, while shifting your weight into your right foot.
    • This will allow your arms to comfortably come up in front of you.
    • Make sure your chest remains firm.
    • You should stop lunging when your right thigh is level to the floor.
    • As you push through your heel to straighten your right leg, bring your left foot back to the beginning position.
    • Then relax.
    • Repeat this workout five to ten times.
    curtsy-lunge
    curtsy-lunge

    Jefferson Squat

    • Use a barbell on the floor and select your desired weight.
    • As you widen the position and hold the barbell horizontally, your rear hip and foot should rotate outward.
    • Stretch your back foot outward to almost a 90-degree angle.
    • Direct your upper body towards the leg that is facing forward.
    • Your posture may need to change to lower yourself into a squat.
    • As the barbell passes between your legs, place one flat foot on either side of the object.
    • Your posture should be upright with your knees slightly bent and your feet shoulder-width apart.
    • Shoulders should be positioned just above hips.
    • Do not bend your elbows; instead, keep your arms straight.
    • Make sure you are engaging your core.
    • Drop to a squat and use a mixed grip to pick up the barbell.
    • You should hold the barbell with your front hand in an underhand grip facing you and your backhand in an overhand grip behind you.
    • Your legs should be straight and your chest elevated.
    • Lift the barbell and stand up straight to begin the workout.
    • Bending your hips, knees, and ankles is the first step towards lowering yourself into the bottom position.
    • Keep your knees over your toes as you lower to the bottom of the squat.
    • Lower yourself once your upper legs are parallel to the floor.
    • Hold for a few in the lowest position.
    • Start the upward movement by placing your feet firmly on the floor and extending your hips, knees, and ankles.
    • Standing upright, keep your chest high, bend your knees, and push your hips forward, all while contracting your glutes.
    • Then relax.
    • Repeat this workout five to ten times.
    Jefferson Squat
    Jefferson Squat

    Bulgarian Splint Squat

    • To begin, place yourself about two feet in front of a step or bench that is knee-level.
    • Place your right foot on the bench with the top of your foot raised behind you.
    • To ensure an easy lunge, position your right foot far enough in front of the bench.
    • Adjust your feet.
    • Your feet should still be approximately shoulder-width apart.
    • If placing your feet closer together helps, just make sure that your left knee does not cross your toes as you lower.
    • Lean slightly forward at the waist and pull your shoulders back while contracting your core.
    • Then, start lowering your left leg and bending its knee.
    • Hold this position for a few seconds.
    • To get back up to standing, push through your left foot and use your hamstrings and quadriceps for strength.
    • Then relax.
    • Repeat this workout five to ten times.
    Bulgarian-split-squat
    Bulgarian-split-squat

    Reverse lunge

    • Start with your arms by your sides, your feet standing hip-width apart, and a straight posture.
    • Feel free to use a dumbbell or kettlebell for an added challenge. 
    • Step back with the right foot, keeping your core tight.
    • With the right heel up and the right toes curled under for balance, bend both knees until the rear knee just barely touches the floor.
    • To bring both feet back to the beginning position, push through them.
    • Then relax.
    • Repeat this workout five to ten times.
    Alternating-Reverse-Lunge
    Alternating-Reverse-Lunge

    Cossack Squats

    • Spread your toes slightly apart and stand with your feet wider than shoulder-width apart.
    • Move your weight to that side and bend your knee to lower yourself into a lateral squat on that side.
    • Hold the other leg straight and the foot flat on the floor with the toes directed upwards as you squat to the other side.
    • Maintain a straight back and raised chest while lowering as far as is comfortable for you.
    • Hold this position for a few seconds.
    • Use the heel of the lowered leg to move yourself back to the starting position.
    • Then relax.
    • Repeat this workout five to ten times.
    cossacks squat
    cossacks squat

    What safety precautions are required when working out?

    • During your workouts, make sure to maintain a straight posture.
    • Between workouts, give yourself a rest.
    • When working out, stop if you get any sudden pain.
    • Wearing loose, carefree attire that encourages movement and relaxation is ideal for working out. Don’t dress in fashionable or tight apparel.
    • Every workout must be performed according to the protocol, which calls for warm-ups and cool-downs in addition to the correct amount of repetitions for each movement.

    When do you not work out?

    • Fever
    • Headache
    • You don’t feel good
    • Severe pain in muscles

    Summary:

    Finally, general lower body strength, stability, and aesthetic goals can all benefit from efficient inner thigh training. You can achieve muscular tone and definition in the inner thigh region by including particular workouts such as leg lifts, squats, lunges, and lateral motions.

    For optimal results in terms of inner thigh toning and overall fitness, a comprehensive program that includes cardiovascular workout, full-body strength training, and a balanced diet is recommended. Maintaining regularity is essential for tracking progress. Achieving your inner thigh goals requires gradually increasing the resistance and intensity of your workouts, keeping good form, and allowing your muscles enough time to recover.

    In the end, while working out your inner thighs might help you achieve the right muscle tone, it’s still crucial to have an overall approach to fitness and prioritize your general health and well-being. Before beginning any new workout program, always get advice from a fitness expert or healthcare provider, particularly if you have any underlying medical issues or concerns.

    FAQ:

    Can I lose fat in specific areas of my inner thighs?

    Reducing fat in one place at a time is usually ineffective. A balanced diet and frequent aerobic exercise are necessary for total fat loss to remove fat in any location, including the inner thighs.

    Do squats affect the inner thighs?

    By mastering the barbell back squat, you may increase your physical condition and gain great strength in your lower body. By adding it into a sumo squat, you may efficiently target the adductors and inner thighs.

    Do inner thighs benefit from walking?

    Fantastic for burning calories and reducing body fat overall, including inner thigh fat, walking is an excellent cardiovascular activity. To exactly target inner thigh fat, walking alone might not be sufficient, it is vital to highlight.

    How can inner thighs be toned the best?

    Curtsy Lunge
    Sumo Squats
    Lateral Lunges
    Scissor Legs Plank
    Criss Cross Flutter Kicks
    Clamshell

    What advantages come with having strong inner thighs?

    Strong inner thighs support stability, movement, and injury prevention. All you’ll need is your body weight and the area of a workout mat.

    Why do workouts for the inner thighs?

    Legs can be shaped and muscled up using workouts that target your inner thighs. To help you, the muscles in your inner thighs must be powerful. Keep your balance. Adjust your legs and hips.

    How does the inner thigh work?

    The muscles in your inner thighs called the adductors, are essential for maintaining your balance, stability, and safety while you move. Your hips, knees, low back, and core all need to be stabilized, therefore they’re really important.

    References:

    • H. Sutariya (2023, Dec. 13). 20 Greatest Inner Thigh Exercises – Mobile Physio. Mobile Clinic for Physiotherapy. The 20 best exercises for inner thighs are available at https://mobilephysiotherapyclinic.in.
    • On June 9, 2024, Anderson, A. How to Perform Inner Thigh Exercises. Web Medical. How to Perform Inner Thigh Exercises: https://www.webmd.com/fitness-exercise
    • July 25, 2023b, Patel, D. Tones and strengthens your inner thighs with these 40 exercises. Samarpan Clinic for Physiotherapy. The top 40 exercises for inner thighs are available at https://samarpanphysioclinic.com.
    • Nied, J., and A. Breitowich (2024, June 27). A Trainer Shares 16 Inner-Thigh Exercises You Can Do During Your Leg Day Workout. The Health of Women. Exercise for the inner thighs: https://www.womenshealthmag.com/fitness/g25996674
    • On July 8, 2024, Smith, J., and Nasm-Cpt, K. G. Which Inner-Thigh Exercises Are Good for Targeting Those Hard-to-Target Adductors? The best inner thigh physical activity ever discovered at https://www.shape.com/fitness/workouts
    • Image 6, Daisy. (10 June, 2021). Skaters | Detailed Workout Instructions. Skaters exercise guide by SPOTEBI. https://www.spotebi.com/
    • Image 10, Knee squeeze and mini ball bridge with Thera-Band (n.d.) Performance Health Academy. Thera band mini-ball bridge with knee squeeze: https://www.performancehealthacademy.com/
    • Image 11, GoFitnessPlan. (n.d.): Squat lateral walk. Squat-lateral-walk exercise from GoFitnessPlan: https://www.gofitnessplan.com
    • Image 12, (2024, January 23). Millard, E. BODi: How to Perform the Plank Jack. The plank-jack exercise is available at https://www.beachbodyondemand.com.
    • Image 16, Daisy. [5 June, 2021a]. Exercise Guide with Illustrations for Curtsy Lunge. The Curtsy Lunge exercise is available on SPOTEBI.
    • Image 17, M, Y. (5 July 2021). Comment utiliser le Jefferson squat pour mettre du feu à ses quads et fessiers? Space Muscle. Jefferson Squat information on https://www.espace-musculation.com
    • Image 20, (2013, November 18) FitnessFAQs. Tutorial & Progressions for the Cossack Squat Mobility Exercise [Video]. YouTube. YouTube: https://www.youtube.com/watch?v=tpczTeSkHz0
  • Neurapraxia

    Neurapraxia

    The mildest type of peripheral nerve injury, known as neurapraxia, is frequently caused by focal demyelination or ischemia. Neurapraxia makes nerve impulse conduction harder in the damaged location.

    There is either whole or partial loss of motor and sensory conduction. When you have neurapraxia, you experience burning, stinging, and pain due to damage to your peripheral nerve or nerves.

    These little nerve damage normally heal on their own with time and rest. Your risk of neuropraxia can be decreased by donning protective gear when participating in contact sports and physical activities like cycling.

    What is the Neurapraxia?

    • Neurapraxia is a modest type of nerve injury that can cause temporary loss of motor and sensory loss.
    • The mildest form of peripheral nerve injury (PNI) is neurapraxia. Grades I through V make up PNIs, which are divided into five levels. Growing amounts of nerve injury are the basis for the differences between these levels.
    • Neurapraxia refers to grade 1 PNIs. Under certain circumstances, neither the surrounding connective tissue nor the nerve axon the long segment of the cell that transmits electrical signals are harmed.
    • The symptoms of neurapraxia are caused by a block that forms along the nerve, preventing electrical signals from traveling through. The injured area of the nervous system cannot communicate with other areas of the nervous system until this block is removed.
    • Nerve injury most commonly occurs as a result of neuropathy. Although PNIs are underreported, the approximate annual incidence is 13–23 cases per 100,000 persons.

    What are the causes of the Neurapraxia?

    Neurapraxia typically arises by compression and ischemia, or a lack of blood supply to a tissue or area. Generally, inflammation is a common reason.
    Although the actual mechanism of nerve blockage is unknown, neurapraxia is more common in nerves that travel via small bodily apertures.

    One frequent consequence of surgery is neurapraxia. During surgery, it is usually caused by:

    • Incorrect body positioning throughout the procedure.
    • Inadequate body support cushioning.
    • The application of tourniquets and several more surgical tools.
    • Side effects of anesthesia can include nerve damage from chemicals or blood vessel narrowing that stops your blood supply.

    Neurapraxia is more common after certain procedures than others. For instance, all anterior cruciate ligament (ACL) reconstruction surgeries include a 75% risk of neurapraxia, yet hip replacement surgeries carry a less than 1% risk.

    Neurapraxia also affects particularly specific nerves in and around the mouth in certain dental scenarios, such as:

    • Some molar extraction procedures
    • oral illnesses
    • Anesthesia injections

    Outside of a medical context, additional potential causes of neurapraxia include:

    • Car crashes
    • Falling 
    • sports injuries
    • injuries from gunshots

    If the neurapraxia occurs outside of a medical facility, you must inform your physician of the precise moment the event occurred about the onset of your symptoms. This will assist them in determining the extent of the injury and whether compression or blood loss is most likely to be the cause.

    If the neurapraxia occurs outside of a medical facility, you must inform your physician of the precise moment the event occurred concerning the onset of your symptoms. This will assist them in determining the extent of the injury and whether compression or blood loss is most likely to be the cause.

    What are the symptoms of the Neurapraxia?

    Neurapraxia symptoms vary depending on which nerve and at which location is blocked. They may consist of:

    • Muscle Weakness.
    • Pain.
    • Sensitivity to touch.
    • lack of sensation.
    • loss of motor skills.
    • tingling.
    • Numbness.

    Neurapraxia symptoms may not show up right away following the injury. It could take weeks for symptoms to manifest. In this instance, inflammation is typically the root cause, squeezing the nerve and resulting in injury.

    Generally speaking, compression-induced neurapraxia creates the neural blockage more slowly and has longer-lasting symptoms than blood-loss-induced neurapraxia. Blood loss is the cause when the blockage and symptoms appear and go more quickly.

    How is Neurapraxia diagnosed?

    Diagnosing neuropraxia and other forms of acute peripheral nerve damage can be challenging. This indicates that cases are frequently not reported enough. Additionally, they could need blood tests to determine your

    • Complete blood count (CBC).
    • Renal function.
    • Liver function.
    • Thyroid function.

    However, your doctor can use nerve conduction testing to pinpoint the precise position of the block along a specific nerve. The tests gradually focus on an area of your nerve where the electrical signal is unable to travel any farther.

    It may be necessary to use some imaging tests, such as magnetic resonance imaging (MRI), to confirm that your symptoms aren’t being caused by even more serious nerve or tissue damage.

    Your doctor may prescribe tests for nerve and muscle function as well as imaging exams. These tests evaluate the extent of nerve injury. They could employ: 

    • CT scan.
    • EMG.
    • MRI.
    • ultrasound of the muscles and peripheral nerves.
    • X-ray.

    What Neurapraxia Treatment Is There?

    For neurapraxia, you often won’t require any extra care. If you leave the nerve injury alone for a few days or weeks, it will recover on its own.
    Additional potential therapies consist of:

    • Analgesics
    • Putting the afflicted area to rest
    • Stay away from aggravating activity
    • Replacing outdated equipment with newer models or fortifying current models. Athletes might
    • Have to wear braces or alter their training equipment, for instance.
    • Your doctor may suggest range-of-motion exercises as part of a neuropraxia physiotherapy treatment plan. Acupuncture and massage may also be beneficial, but only if prescribed by your physician.

    Prognosis

    For neurapraxia, recovery rates are excellent. In one to four weeks, the nerves should be able to mend on their own. You will have fully restored all of your senses and abilities by this point.
    Tell your doctor how the healing of your neurapraxia is going. They will want to ensure that you restore all of your sensory and motor skills as soon as possible.

    Are there any complications that result from Neuropraxia?

    The majority of neurapraxia sufferers fully recover. However, some people experience issues like:

    • Inflammation.
    • Persistent numbness, weakness, or discomfort in the nerves.
    • Tissue scars close to the site of damage.
    • If scar tissue develops, surgery can be required. For your nerve to heal, surgeons must remove scar tissue to remove nerve compression.

    What are the physical therapies for the Neurapraxia?

    Physical therapy’s most important goals are to:

    • Modalities: Pain and inflammation-relieving therapies using heat, ice, or ultrasound.
    • Reduce pain. Massage, heat therapy, and ultrasound are some of the techniques that can help with this.
    • Improving range of motion: Light exercise and stretches can prevent stiffness and contractures.
    • Muscle strengthening: Exercises aim to strengthen the weakening muscles and enhance their functionality.
    • Balance and coordination: The goal of the exercises is to retrain the damaged area to move smoothly.
    • Functional training: To help you restore your independence, exercises center on commonplace tasks.
    • Neuromuscular re-education: Activities aimed at retraining the brain and nerves to function in concert are known as neuromuscular re-education.

    Summary

    A little injury to the peripheral nerves, known as neurapraxia, normally recovers on its own with time and relaxation. For advice on how to effectively manage pain and other symptoms, consult your healthcare professional.

    Depending on the extent of their injuries, patients may benefit from neuropraxia to fully recover in a few days to several months. During your recuperation, you can have a decreased range of motion and weakness. The best indicators that you’ve healed include not experiencing any symptoms and possessing the same level of strength and flexibility as before the accident.

    A nerve should not relapse to neurapraxia if it heals completely. But any physical damage, whether from sports or another source, can result in a fresh instance of neurapraxia.

    FAQs

    Neurapraxia: What is it?

    Peripheral nerve injury is known as neurapraxia. Your brain and spinal cord send electrical impulses to these nerves, which then distribute those signals to the rest of your body.

    Who is affected by neurapraxia?

    Neurapraxia can affect anyone. The illness may develop following a trauma, such as a fall, auto accident, or sports-related injury.

    How can one experience neurapraxia?

    When you have neurapraxia, you experience burning, stinging, and pain as a result of damage to your peripheral nerve or nerves. Minor nerve injuries normally heal on their own over time and with rest. Your risk of neurapraxia can be decreased by wearing protective gear when participating in contact sports and physical activities like cycling.

    How can I reduce the possibility of neurapraxia complications?

    To stop more nerve damage, ensure the wounded area is protected while it heals. Sports and other physical activities may need to be put on hold while you recover.

    How much time does neurapraxia take to recover?

    Depending on the severity of your injury, neurapraxia may last for a few days or several months. The majority of neurapraxia sufferers fully recover. However, some people particularly older adults may require more time to heal.

    Does neuropraxia always exist?

    Most people fully recover as soon as the myelin in their nerves heals itself. However, neurapraxia can recur in the event of another accident.

    References

    • Professional, C. C. M. (n.d.-b). Neurapraxia. Cleveland Clinic. https://my.clevelandclinic.org/health/diseases/22608-neuropraxia
    • Anderson, A. (2024, March 7). What Is Neurapraxia? WebMD. https://www.webmd.com/brain/what-is-neurapraxia
    • Neurapraxia. (2024, April 19). Wikipedia. https://en.wikipedia.org/wiki/Neurapraxia
    • Roland, J. (2017, August 10). What Is Neurapraxia? Healthline. https://www.healthline.com/health/neurapraxia#outlook
    • Neurapraxia – What You Need to Know. (n.d.). Drugs.com. https://www.drugs.com/cg/neurapraxia.html
  • What Muscles Do Deadlifts Workout?

    What Muscles Do Deadlifts Workout?

    Comprising several muscle groups, Deadlifts Workout is an excellent full-body workout that works the entire body.

    Introduction:

    It’s a popular belief that deadlifts are the first complex movement. And for a valid reason. It works several muscle groups at once, improves posture, and increases general strength. We examine the main and secondary muscle groups in detail in this blog post, as we examine which muscles are used in deadlifts.

    Deadlifts, if you favor heavy lifting, are an excellent addition to any weekly workout routine. Deadlifts work multiple muscular groups at once, which helps you gain strength and increase your level of fitness quickly. workout-wise, deadlifts support the development of the muscles required to do everyday tasks like reaching down to grab groceries or picking up your kids or pets.

    Among all the conventional workouts, deadlifts have a very high functional duration. Deadlifting “transfers into our day-to-day lives of being able to pick stuff up off the ground and do so effectively and safely” due to the strength and technique learned. Deadlifting improves our movement patterns and is an effective workout we can include in our routines because it exercises so many different muscles at once. In such movements, most of the muscles in the body are used.

    It’s hard to learn workouts like deadlifts properly. Speak with a trainer or other fitness expert if you use a gym. They can demonstrate the correct procedure. Make sure you are doing the workout correctly by having the trainer observe you. To perform a deadlift, you will bring up the barbell with a flat back and push back with your hips. Deadlifts may be beneficial since they are an effective exercise for progressively strengthening multiple large muscle groups.

    Main muscles worked during deadlifts:

    The deadlift is a difficult multi-muscle workout. Deadlifts are a very effective workout for working out multiple muscle groups. Exercises such as the deadlift help with posture and lower the chance of injury from routine work. Exercises that concentrate a single muscle group, such as leg extensions and curls for the hamstrings and quadriceps, are less likely than deadlifts to promote overall muscular growth and a well-rounded body type. Because they use many muscles, they might increase calories burned while promoting fat loss.

    The several muscles involved in deadlifts and their functions are listed below.

    Primary muscles

    • Erector Spinae

    The erector spine in the lower back is responsible for spinal extension and maintaining the body’s erect position while lifting. The erector spine is a group of muscles that runs the length of the spine, connecting the base of the skull to the pelvis. They provide the spine with support, which is crucial for maintaining good posture. They support and stabilize the spine during the deadlift by helping to maintain its locked posture.

    • Gluteus Maximus

    The main muscle is used when extending the hips during an activity. Large muscles found in the buttocks are called gluteal muscles. Turns from the outside are essential for the hip portion of the deadlift as well as hip extension and abduction.

    • Quadriceps

    Your quadriceps can help you push the weight off the ground. Remember to “push your feet through the floor” to fully engage your quadriceps when completing deadlifts. Four muscles in the front of the leg make up the quadriceps. For knee extensions, they are necessary. The quadriceps support the deadlift motor by supporting knee extension, also known as leg extension. Because the knee is just slightly bent, the quads need to be in a firm position, just like the glutes.

    • Hamstrings

    Supports in the lift by helping with hip extension and knee flexion. You can use your hamstrings to push your pelvis forward. Once the bar is several feet above the ground, they start to get active. The hamstrings help the glutes extend their hips during the lockout. Pulling on the hamstrings increases as the knees straighten, bringing the hips up to the bar.

    • Hip adductors

    keeps the hips and thighs stable during lifting. The pelvis moves forward by your adductors as well. If you can get your hips “over the bar” faster, you’ll be more strong.

    • Gastrocnemius

    The rear of the lower leg has a muscle called the gastrocnemius, which is also referred to as the calf muscle. Its primary function is to lower the foot or plantarflex. It also helps in knee flexion, which is the shortening of the knee that happens during a deadlift.

    Secondary Muscles

    • Latissimus Dorsi

    The latissimus dorsi, or lats, are responsible for stabilizing the upper back. Your Latissimus Dorsi also helps the bar stay close to your body by tracking down your shins. The Latissimus Dorsi and the rhomboids work together to stop the bar from tracking forward in front of your toes, which could cause harm.

    The muscles of the trapezius stabilize the scapula and upper back. To have a strong deadlift lock, you need a strong trapezius.

    • Abdominal

    The core, or abdominal muscles, are responsible for stabilizing the spine and preventing any motion that can injure or create pain.

    Deadlifts Workout advantages:

    • Develop Your Functional Movement

    The deadlift is a physical workout that resembles a common daily task: lifting objects off the ground or a low surface. You’ve performed a deadlift (even if maybe not a safe one) if you’ve ever leaned to grab something from the floor without ever setting foot on a lifting platform. Training deadlifts gives us the strength and hip-hinging biomechanics we need to safely lift objects that are low on the body.

    • Bone density

    The deadlift can increase bone density and reduce the risk of injury by putting the right amount of stress on the bones. Resistance workouts, like deadlifts, are especially crucial for bone health as people age.

    • Increase strength and size of muscles

    A good workout is the deadlift. An effective way to develop muscles in both the upper and lower body. That means it can help with improving general strength and athleticism. When a person gains muscle mass, their metabolism may also rise.

    • Availability

    The deadlift is a workout that can be done by people of various fitness levels because it can be done with a range of weights. Similar to bottles of water, deadlifting is a workout that can be performed at home using handmade weights, resistance bands, or weights. A gym visit is not necessary for this type of exercise.

    • Posture

    The deadlift is used to train the shoulder and back muscles to work together. This could improve your posture. The posterior chain is the group of muscles that make up your back. It is responsible for core protection, spinal alignment, posture, and basic strength.

    • Training That Works

    The long list above shows that the deadlift works a variety of muscles at once. The gold standard for compound lifts involves many joints. You’ll maximize your gym time by working many muscles at once. Furthermore, you’ll be able to lift a lot of weight, which will help you gain strength, due to the quantity of muscle activation.

    Deadlifts Workout:

    The deadlift can be a little complicated for someone who isn’t skilled because the more muscles involved, the harder the lift. That suggests that it could also quickly cause harm if done incorrectly.

    Follow this guide to ensure that your deadlifting stays perfect.

    • Step forward toward the barbell, keeping your feet clearly beneath it.
    • Bend your hips to grab onto the barbell.
    • It’s crucial to have a straight back and hips below the shoulders while performing this.
    • Lift the weight off the ground by squeezing your shoulder blades together as though you were trying to hold a pencil between them.
    • To help with this, gently pull the bar to remove any excess space.
    • Right before you raise, utilize a deep breath and tense your core.
    • Ensure that while you perform, your hips and knees open at the same time.
    • As soon as your hips are exactly beneath your shoulders, stand up straight.
    • As you lower the weight back to the floor, maintain control over it.
    • Then relax.
    barbell deadlift
    barbell deadlift

    Different variations to deadlift:

    To target different muscular areas, there are several ways to do the deadlift. To keep up a well-rounded training program, it’s important to change up your deadlift method. The amount of weight you use will vary based on your level of fitness. Additional weight should only be added when you are comfortable with the correct form.

    Among these variations are;

    Hex Bar Deadlift

    The hex bar is shaped like a large hexagon and has handles on both sides. Hex bar deadlifts use more leg and less back muscle than a straight barbell.

    • Right into the center of the hexagon bar, place your feet hip-width apart and take a step.
    • As soon as hands can hold handles with straight arms, bend at the knees and push back a bit.
    • Bringing your shoulders down, expand your chest.
    • You should then lock out your arms and keep your back flat as you stand up straight.
    • To gently lower the bar back to its starting position, tilt at the hips, bend the knees, and keep your back flat.
    • Then relax.
    deadlift
    deadlift

    Sumo Deadlift

    This is an easy-to-use variety that allows you total control over the weight as you work out.

    • In front of a weighted barbell, take a wide posture.
    • Pose yourself with your arms inside your legs, elbows just inside your knees, toes pointing slightly out, and hands on the bar inside your feet.
    • Keep your shins level to the floor, shoulders over the bar, and back straight.
    • It is important to have wide, pushed-out legs, firm, connected knees, and an upright body posture.
    • While maintaining core stability, engage your legs, glutes, and lower back.
    • Extend your quadriceps, raise and lower your shoulder blades, and hold the bar strongly.
    • Kindly inhale deeply, plant your feet firmly, and pull yourself up using the bar without raising it off the ground.
    • Maintain a low hip and a high chest as you take the bar down the length of your legs.
    • Upon reaching the highest point, flex your glutes and lock your hips and knees.
    • Hold onto the bar tightly as you slowly reverse the action.
    • Then relax.
    sumo deadlift
    sumo deadlift

    Romanian deadlift

    This is a popular form that targets the hamstrings and most of the posterior muscles. Instead of bending their knees, the person keeps their legs reasonably straight during the entire workout.

    • Starting at hip level, grasp the bar with your palms facing down.
    • Keep your back straight.
    • Your back may develop a slight arch as a result of this motion.
    • In order to keep the bar close to your body as you lower it toward your feet, push your hips back during the exercise.
    • It is recommended to have either straight legs or slightly bent knees.
    • Your hamstrings ought should be able to move naturally.
    • Lean forward from the hips and keep the barbell in front of your thighs to stand tall.
    • Then relax.
    Romanian Deadlift
    Romanian Deadlift

    Romanian Single-Leg Deadlift

    This workout increases core strength, stability, and balance.

    • While standing on one leg, hold a dumbbell in the same hand as your leg.
    • With your arms straight, prepare to drop your body toward the floor by bending your standing knee slightly and pressing your hips back.
    • That would be a good place for you to begin.
    • As your rear leg moves up behind you, bring your upper body down to the ground.
    • Push your chest out and go down the dumbbell as far as you can without rounding your back to keep it near your shin.
    • Once you’re in the starting posture, squeeze your glutes and hold it for a short while.
    • Then relax.
    Romanian Single-Leg Deadlift
    Romanian Single-Leg Deadlift

    Cable Romanian deadlift

    This is a suitable alternative for someone who lacks balance and coordination. A dumbbell or barbell is replaced with cables in this device. It is performed using the same technique as the Romanian deadlift, except the resistance is provided by cables rather than weights.

    • If you’re not comfortable using weights and are a beginner, try the cable deadlift.
    • Manage a cable machine from a low position using a medium resistance cable.
    • Step your feet shoulder-width apart and set both hands on a rope.
    • Gently extend your knees while bending your hips forward.
    • Let your hands gradually rise to the top of your feet as a result of the cable resistance.
    • To get back to starting posture, extend from hips and adopt a tall stance.
    • Then return to your neutral position.
    • Then relax.
    Cable-Romanian-deadlift
    Cable-Romanian-deadlift

    Stiff-legged deadlift

    • Maintaining shoulder-width distance between your feet, take an overhand grip on the barbell.
    • Bend your knees so that all of your weight is supported by your feet.
    • To improve your balance, now grasp the ground with your feet.
    • To remove the bar from your body, now tilt your hips.
    • Your barbell will eventually approach your knees if you keep moving downward.
    • With the device now pulled closer to your body, start your upward movement.
    • Squeeze your lower back muscles, especially your glutes, and press your feet through the floor.
    • Then return to your neutral position.
    • Then relax.
    • As you perform each repetition, keep your spine neutral.
    Stiff-legged deadlift
    Stiff-legged deadlift

    Remember these important safety measures when working out:

    • Make sure you warm up properly before working out.
    • Remember that an incorrect form might hurt you during a workout and prevent you from getting the results you want.
    • Stop working out if you get unbearable pain.
    • To keep your muscles healthy in between workouts, it’s crucial to allow yourself enough time off.
    • Stay away from activities that make you nervous.
    • When you work out, take your time. moving fast is not necessary.
    • Use of the proper instruments is required.
    • To avoid overtraining and muscle pain, gradually increase the number of repetitions and duration of your workouts.
    • Working out in loose, casual attire that promotes relaxation and movement is best. Avoid wearing clothes that are too tight or stylish.
    • Consume sufficient amounts of water to stay hydrated and maintain good muscle function.

    When are you not working out?

    • Fever
    • Headache
    • You’re not feeling well
    • If a workout causes pain

    Summary:

    Workouts such as deadlifts are compound movements that simultaneously engage the hamstrings, glutes, and core muscles. The deadlift is a complex workout that targets the muscles in the back, shoulders, and legs. When done correctly, it can improve posture and help to grow and strengthen muscles.

    All fitness levels can use it, and it can be adjusted to target different muscle groups. To make deadlifts easier, for example, one can use less weight or remove the weight entirely. You will perform better on the field, improve your general fitness level, and maintain better posture and spinal health if you add the deadlift into your workout routine.

    To maximize the benefits and prevent injury, perform the exercise with proper form and technique. An excellent sport for building stability and functional strength is the deadlift. For anyone looking to improve their overall physical functioning and level of fitness, this is an essential workout.

    FAQ:

    Is deadlifting beneficial over the long term?

    Workouts involving deadlifts also have long-term advantages. Having more muscle raises your resting energy expenditure because it burns more calories and has a higher metabolic activity than fat.

    How come a woman should deadlift?

    Encouraging weight loss and fat burning.
    Workouts like deadlifts are a great way to burn calories. People can lose fat and get a leaner body by using this compound movement because of its high energy expenditure and benefits for muscle strengthening. It further increases metabolic rate, which boosts resting-state calorie expenditure.

    How might deadlifts affect the way your body looks?

    Developing your body’s general muscle mass is one of the biggest and most obvious benefits of deadlifting. The deadlift is a multi-joint, complex workout that targets the quads, upper back, hamstrings, lower back, and glutes, among other muscular groups.

    Which three components go into a good deadlift technique?

    A solid deadlift technique consists of three key elements: maintaining a tight core and pressing down through the legs and feet to promote leg muscle activity. Keep these three things in mind throughout every deadlift practice, especially when moving on to higher loads.

    May I perform deadlifts daily?

    To increase your health, mobility, muscle growth, and fat reduction, all you need to do is engage in deadlift training once a week with a full focus on deadlifts. For long-term training, this form of instruction needs to be conducted using an effective method. Doing deadlifts as a daily kind of workout is not a good idea. It does not have any advantages.

    Which muscles are developed by deadlifts?

    If you include deadlifts in your training routine and execute them correctly, you will gain more lean muscle mass in your arms, shoulders, back, legs, and program. You’ll also develop stronger abdominal muscles. Larger muscles and stronger cores are linked to increased strength and stamina as well as better sports performance.

    What separates a squat from a deadlift?

    Your lower body is targeted differently by full-body workouts like deadlifts and squats. For example, when performing a deadlift, you have to push your hips back and bend at the waist, whereas when performing a squat, you must bend at the hip and knee joints.

    What is the safest kind of deadlift workout?

    They are great for those who have back pain and also relieve pressure on the lower back. You may get more lower back strength from traditional deadlifts. For those who suffer from low back pain, Romanian deadlifts are the most secure choice.

    What is the safest kind of deadlift?

    These are great for those who have back pain because they relieve pressure on the lower back as well. Lower back strength may be increased with traditional deadlifts. When it comes to low back pain, Romanian deadlifts are the safest choice.

    Who is not fit for deadlifts?

    Deadlifting has the potential to worsen the back problems that you currently have. The deadlift, being a powerful full-body workout, may overstress your lower back, increasing the risk of a slipped disc or fracture.

    What’s the effective number of deadlifts?

    In a session, perform three to six deadlift sets. This holds for both 1–5 repetition strength training and 6–12 repetition hypertrophy training. If you perform 8–12 sets of quality deadlifts twice a week, you should see amazing results over time.

    References:

    • D. Bariya (2023d, Dec. 29). Which Muscles Are Used in Deadlift Exercises? – Mobile Physical Therapy. Mobile Physio Clinic. What muscles do deadlifts? https://mobilephysiotherapyclinic.in/
    • Z. S. Mph, Oct. 27, 2022. Important details about the act of deadlifting. How Do Muscles Get Affected by a Deadlift? through Medical News Today Inside text reference: (Mph, 2022)
    • November 13, 2019 / Chertoff, J. What Muscles Are Employed in Deadlift Exercises? Work Your Muscles with These Strengthening Exercises for the Deadlift Reference in the text: 2019’s Chertoff
    • Sept. 27, 2023, CSCS, C. R. Every Muscle Applied to a Deadlift Is This. The health of men. Reference inside text: (CSCS, 2023) What muscles are used for deadlifts? https://www.menshealth.com/fitness/a44715137
    • October 30, 2023: Wilkinson, H. What muscles are worked during a deadlift? | BulkTM. The muscles used in the deadlift may be found at https://www.bulk.com/uk/the-core/. Citation within text: (Wilkinson, 2023)
    • Image 2, 2018 January 11; A, J. Workout Labs Exercise Guide on Pinterest are: a hex, Trap Bar, and Squats to Cage Deadlifts. Pin/716705728172935037 is available on Pinterest.
    • Image 3, 2023, April 17; Luna, D. The advantages, muscles used, and more of the sumo deadlift. Motivate America. A URL for the Sumo Deadlift is https://www.inspireusafoundation.org.
    • Image 4, Neudecker, K., and Hayes, A. (2023, June 2). How to Perform the Romanian Deadlift to Build Larger, More Powerful Legs. Male Health. Roman Deadlift Beginners Guide: https://www.menshealth.com/uk/building-muscle/a29202950
    • Image 5, On July 24, 2024, Moves, A. How to Do a Romanian Deadlift with Just One Leg Alo Steals. Alo Swings. A single-leg Roman deadlift: https://blog.alomoves.com/movement/how-to
    • Image 6, Cable Romanian Deadlift: Overview, Advantages, and Application (2023, May 5). https://liftmanual.com/cable-romanian-deadlift/ Lift Manual
    • Image 7, Deadlift with stiff legs. (2021, May 7). [Visual]. Power and Toughness. Exercises like the Roman deadlift, or stiff-leg deadlift, can be found at https://www.muscleandstrength.com.
  • Tai Chi: Improve Balance and Flexibility

    Introduction

    Tai chi is an ancient Chinese form of mind-body training, often known as tai ji quan or tai chi chuan. It is mostly recognized as a movement meditation and is often done in a group setting.  It has been demonstrated to aid those with arthritis, lower blood pressure, increase cardiovascular fitness, and avoid falls. There are also significant psychosocial and emotional benefits.

    Slow-motion flow is an important part of tai chi training, and it offers several health advantages, including increased balance, mobility, and coordination. Tai Chi Chuan or Tai Ji Quan are some names for it.

    Tai chi originates in Chinese culture. Tai chi has several physical and mental health advantages. Tai chi offers various benefits, including increased cognitive performance and reduced anxiety and melancholy. It may also help you manage the symptoms of some long-term diseases, such as fibromyalgia or chronic obstructive pulmonary disease.

    The ATCQA states that tai chi is a historic martial art that has its roots in China and dates back to the eleventh century A.D. Some believe it is the great-grandchild of the more conventional qigong practice.

    Although there are many distinct types of tai chi, they are all founded on a similar set of ideas, such as:

    • using the thought process to initiate motion
    • Using loose, basic joints to move
    • Body motion synchronization
    • Making circular motions with your movements
    • Maintaining a constant flow

    The head of the Osher Center for Integrative Medicine and assistant professor of medicine, tai chi has been becoming popular even though it is still a prevalent practice in Asian countries.

    Tai chi practitioners in the United States number about 3.75 million, as reported by market research firm Statista. Tai chi practitioners are more likely to be middle-aged and older, but more martial arts and sports versions of the art are drawing younger students.

    Types of Tai Chi:

    • YangThis popular method includes slower, more fluid movements and stresses balance.
    • Wu is a well-known style that emphasizes both backward and forward-leaning motions.
    • This type of Tai Chi accentuates footwork and is more akin to dance.
    • Hey, It is a more advanced kind that focuses on qi, or life energy, however, it is rarely utilized in modern times.

    How Tai Chi Works?

    Tai chi involves standing with your feet on the floor and shifting your weight from your right to your left leg while doing a series of flowing motions. In a single session, there may be thirteen activities (or positions) or as many as sixty.

    The mind holds our thoughts, feelings, attitudes, and beliefs, while the body represents our current physical condition and the soul is our breath. Tai chi has an impact on each of the areas of a person’s life.

    Tai chi integrates awareness, movement, and breath. Tai chi’s physical postures and breathing exercises involve concentration and relaxation while pushing your body through the stances. Your knee flexes slightly, showing that you are moving normally and that your joints are flexible rather than strained.

    It is carried out carefully and gradually. Some call it “mindfulness on wheels” or “meditation in motion.”You may benefit from tai chi by focusing your attention, breathing deeply, and being attentive in class.

    Tai chi can help increase fitness and strength, particularly in the lower body, for those suffering from illnesses such as cardiovascular disease, heart failure, hypertension, metabolic syndrome, or chronic obstructive pulmonary disease (COPD): Tai chi can sometimes be just as effective as vigorous jogging.

    Tai chi is also typically practiced in a social environment, which may enhance pleasure, foster a feeling of community, and support the promotion of physical activity.

    Benefits of doing a Tai Chi:

    Numerous advantages of tai chi include improved physical, mental, and emotional health as well as spiritual and therapeutic benefits. Although not all-inclusive, the following are some of the most well-known mental and physical benefits of tai chi.

    • It’s a safe and efficient way for beginners to get some workout in. The slow-moving, low-impact exercises are safe, and gentle on your body, and they improve flexibility and posture whether you are new to exercising or to this form of fitness.
    • Because it combines the advantages of stretching and relaxation into the exercise, it helps to alleviate stress-related anxiety. You’ll discover how to take breaks and breathe while advancing through the exercises gradually.
    • It might lift your spirits. Tai chi has been found by researchers to offer potential benefits in lowering anxiety, mood disorders, and depressive symptoms.
    • Your sleep quality will improve. Tai chi activity regularly may help you sleep better.
    • fitness levels and medical conditions.
    • You’ll sit more erect. Tai chi improves posture and alignment by combining slow, progressive motions.
    • It reduces discomfort. It’s possible that doing tai chi can exacerbate your fibromyalgia symptoms. According to a 2018 study, tai chi provided greater pain alleviation than other recommended workouts for fibromyalgia sufferers.

    Tai chi for seniors

    One of the more well-known forms of elder mobility is tai chi. That’s why the low-impact movements included in this mild exercise program can benefit both active seniors and those who are new to fitness.

    • Increases body awareness. Tai chi, also called slow-motion exercise, encourages deliberate, slow action and deep breathing. This combination helps seniors focus on how their bodies move, allowing them to pay attention and resolve any distress they are experiencing.
    • Improves cognition. A brief 2018 study found a link between tai chi practice and cognitive improvement in seniors with mild cognitive impairment. This is encouraging news for older folks looking to improve their memory and organizing skills.
    • Reduces risk and fear of falling. Holding balance, flexibility, and coordination becomes increasingly crucial as you age. While most physical exercises, particularly weight-bearing motions, can help seniors maintain and even improve their mobility, exercises like tai chi reduce the risk and fear of falling in older persons by improving balance and motor function.
    • Eases arthritis pain. Elders suffering from chronic pain caused by diseases such as arthritis may find that practicing tai chi helps to alleviate their symptoms.
    • May Improve Quality of Life in Coping With Chronic Diseases: There is evidence that tai chi may improve circulation, leading to higher blood pressure levels and a lower risk of heart disease.
    • May Strengthen Bones: Because tai chi requires weight-bearing postures, one potential advantage of the practice is that it may reduce bone loss.
    • May Improve the Experience of Aging: Although you’ve never been physically active, tai chi can help your body and brain age more effectively. Tai chi for older persons resulted in increased mobility, less joint stiffness, better sleep, less anxiety, improved cognitive process in those with mild cognitive impairment, and an overall higher quality of life.

    Those who should not do Tai Chi:

    Tai chi may be modified to accommodate everyone. If you wish to become more physically active or are currently suffering from a health condition (such as heart disease or COPD), consider tai chi training to meet your It’s important to exercise efficiently and softly.

    While no studies have been published on the safety of tai chi during pregnancy, the NCCIH advises that it is probably safe in most circumstances, as long as you take proper measures and check with your doctor before beginning a tai chi practice while pregnant.

    Advice for starting Tai Chi:

    Follow these recommendations to choose the ideal instructor and class for you.

    • Ask Around: There are no qualifications to become a federally licensed tai chi instructor. Until standards are developed, seek advice from community members and your healthcare provider (a doctor, massage therapist, acupuncturist, or integrative practitioner).
    • Look at a Teacher’s Credentials: If you’re starting tai chi to address an underlying health issue, remember that certain teachers may be medically trained, so choose one who suits your needs. Some may be acupuncturists, physical therapists, or medical professionals who can grasp your circumstances and alter your movements accordingly. When speaking with a teacher, you can also question if they believe their teaching approach is appropriate for you, given any limitations you may have, such as arthritis.
    • Give a Class a Chance: Ideally, choose a beginner-friendly course. Then, try a class (or a few) in your region to determine whether it aligns with your fitness goals. Consider taking an initial class before committing to a series of classes. Another option is to ask a teacher if you may observe one session to acquire a better understanding of what the practice entails before attempting it.
    • Talk to the Teacher: In addition to asking a teacher whether their class is appropriate for your physical ability, ask if they cover the fundamentals of alignment, grounding, training, and breathing. Explain that you are a beginner and inquire whether they offer any beginner classes.

    Here are the steps for Tai Chi exercises:

    Warm-Up

    Warming up the body, as with any exercise, is essential for injury prevention and the promotion of Tai Chi activities.

    • Keeping your feet level with the ground and a little wider than hip-width apart, position them.
    • Rest your arms at your sides.
    • Your arms should flap against your torso during each turn.
    • Repeat for 2-4 minutes, or until your body feels warmed up.
    • You can then keep your neck, shoulders, and spine stable during the rotations, allowing each action to flow smoothly.

    Commencing form 

    • Maintain a shoulder-width distance between your feet and split your weight equally over your two legs.
    • Your arms are at your sides, relaxed.
    • Inhale gently.
    • Raise your arms to your shoulders or into a relaxed position. Relax your wrists and elbows. The exhale
    • Relax and extend your wrists and arms.
    Commencing form 
    Commencing form 

     Broadening one’s chest 

    • Inhale slowly 
    • Take a comfortable stance or raise your arms to shoulder level. Relax your wrists and elbows. 
    • the exhale 
    • Let your shoulders unwind. 
    • Inhale slowly 
    • Keep your shoulders relaxed, please 
    • exhale 
     Broadening one’s chest 
     Broadening one’s chest 

    Dancing with Rainbows

    • Inhale gently.
    • Your weight should now be on your right side while you raise your right arm upwards, elbow bent.
    • At the same moment, extend your left arm straight out in front of you (like a teapot or an archer preparing to fire his bow).
    • Inhale gently.
    • Lift your hands above your head and move your weight to the center in one smooth stroke.
    • Exhale your breath.
    Dancing with Rainbows
    Dancing with Rainbows

    Circling arms

    • Breathe in gently.
    • Raise your right arm and flex your elbow to shift your weight to your right side.
    • At the same moment, extend your left arm straight out in front of you; this position is like that of an archer preparing to fire a bow or a teacup.
    • Breathe in gently.
    • In one smooth action, move your weight to the middle and raise your hands aloft.
    • Breathe out.
    Circling arms
    Circling arms

    Twisting waist and swing arms

    • Keep your knees slightly bent as you turn your torso to the right at the waist.
    • Breathe in gently.
    • With your palm facing up and your arm by your side, draw back your right arm in an arc, raising your elbow to shoulder height (or as high as feels comfortable).
    • the release of breath
    • Now that you are starting to rotate your wrist, your palm should be pointing forward. Think of this motion as being similar to a front crawl in swimming.
    • Repeat on your left side. Experienced practitioners will be performing the motions with both arms simultaneously, but for beginners, moving one side at a time is acceptable and makes it simpler to achieve high-quality movement.
    Twisting waist and swing arms
    Twisting waist and swing arms

    Rowing the boat

    • Breathe in gently.
    • Raise and extend your arms. You are holding your hands up.
    • the release of breath
    • To grab a ball, inhale, twist your body to the left at the waist, and raise your left arm to your desired level. After you’ve breathed, restore your left arm.
    • The sitting images demonstrate the form while holding a ball; a ball is unnecessary for this exercise.
    Rowing the boat
    Rowing the boat

    Carrying the moon 

    • Take a breath.
    • Now, stretch both arms to the left while keeping your head supported by your hands.
    • Release the breath
    • Bring your hands down. After that, bear right and proceed.
    Carrying the moon 
    Carrying the moon 

    Twisting waist and pushing palms

    • Take a deep breath, raise your hands to your waist, palms up.
    • Take a breath out, then turn your waist to the left.
    • Push with your right hand pointing front and your right arm out in front of you, as you’re attempting to stop traffic.
    • After you release your breath, adjust your posture so that your weight is evenly distributed in the center.
    • If it helps, you can practice the motion with just one arm at a time until you can coordinate both arms together.
    Twisting waist
    Twisting waist

    Playing with clouds 

    • Take a breath.
    • With your arms relaxed and extended out in front as if holding a baby, turn to your left. As you move your weight to your left foot, bend at the waist.
    • Breathe deeply and repeat the motion towards your right (your right hand will be the farthest from your midsection this time).
    Playing with clouds 
    Playing with clouds 

    Scooping from the sea

    • Inhaling
    • As you progressively separate your arms and move your weight to your right foot, raise your hands over your head or as far as you feel comfortable.
    • Let go of the air.
    Scooping  the sea
    Scooping the sea

    Playing with waves 

    • The back leg supports your weight.
    • Let out a breath, turn to your front leg, extend your arms, and maintain a forward-pointing posture with your hands.
    • After letting out a breath, keep your hands on the floor and shift your weight back to the center.

    Spreading your wings 

    • As you stand, place your left foot forward. Taking a breath, extend your arm forward and maintain it there. You should have a loose, slightly bent elbow position.
    • Try to reach as high as your arms will comfortably allow, or chest height. Bringing your hands together, form a fist. If you’re feeling secure, let your right heel rise off the ground as you go forward.
    • After letting out a breath, step back and shift your weight to your right foot. Spread your arms apart like wings while you work, reaching as far back as is comfortable for you.

    Punching 

    • By placing your feet shoulder-width apart and dividing your weight equally between your two legs, you can maintain your balance.
    • The arms remain at the sides, and the fists are soft.
    • Exhale, then bring your right arm up to your chest if you can.
    • Take a breath.
    • Similarly, move your left arm.

     Flying like a wild goose 

    • Take a deep breath, bend slightly forward so that your feet support your entire weight, and raise your arms above your head in a sideways motion.
    • Your wrists will extend out to the sides and away from your body during this move.
    • Throughout, your arms stay relaxed.
    • Breathe out and lower yourself to your knees, lowering your arms and wrists.
    • You’re flying high right now, like a wild goose.
    Flying like a wild goose
    Flying like a wild goose

    Spinning wheels 

    • Spread your weight equally between your legs and set your feet shoulder-width apart to maintain balance.
    • Inhale deeply, raise your arms above your head and twist your torso to the right to form a large circle with your palms facing each other.
    • Exhale, then move your arms to your left side, maintaining the same hand-to-hand spacing.

    Bouncing the ball

    • Roll over onto your right foot.
    • Take a breath.
    • Remove your left foot from the floor.
    • Proceed to the other side.

    What you should expect before, during, and after Tai Chi:

    It might be an amazing experience to take your first tai chi lesson. Every instructor has a different approach to teaching, but to stay relaxed in the classroom, try these general guidelines.

    Wear loose clothing. Put on loose-fitting clothing and shoes.

    Introduce yourself. Before class starts, let your instructor know if you have any health concerns (such as knee pain) so they can help you adjust any activities.

    Warm-up. Every educator will warm up individually. Standing with feet hip-width apart and knees slightly bent is a common instruction given to students. Next, have students walk side to side to get a sense of where they are, and urge them to picture their legs as a tree’s trunk—rooted and anchored.

    Go easy on yourself. If you’re unfamiliar with the maneuvers, that’s OK. I ask novices to do two things: one, try to focus as much as possible on their body, and second, attempt to keep their thoughts contained within the room. It’s also fine to feel uncoordinated. The most essential thing is to attempt to let go and be open; most individuals find that practicing tai chi helps them do so. It’s simply practice; you don’t need to be perfect.

    Take five, if necessary. Pushing that feels unpleasant has no explanation.

    You may feel changed. Anticipate feeling different after class. It’s [usually, for most people] a peculiar mix of feeling acutely aware, fully present, and invigorated. With further exercise, these feelings may gradually lead to a happier mental state.

    You may want more. The primary premise is that because tai chi increases self-confidence in one’s body’s ability to handle issues, some people may utilize it as a “gateway exercise.”

    Set your schedule. Although it can be challenging to begin a new exercise routine, my professional view is that practicing tai chi for the full benefits of one hour, three times a week, 12 weeks is the best length of time. Try aiming for an hour every other day for 16 weeks if that proves to be too difficult.

    Take it home. If you want to get better at tai chi but aren’t able to practice frequently enough, you can train at home. Follow the instructor’s instructions and spend ten minutes in the hip-width positions, going back and forth while maintaining soft knees and the backs of your hands on your lower back. Do this three times a week. It allows you to decompress and be physically present while relieving the strain of mastering the motions at home.

    Adjust your expectations. If you have been inactive or are new to exercise, tai chi may provide rapid benefits. On the other hand, it can take longer to experience these potential mental and physical advantages if you already exercise frequently.

    Tai Chi Risks:

    Tai chi is typically safe for most people who do not have any major medical issues. Wayne and colleagues found in a prior thorough analysis of 153 randomized controlled trials that although some patients have minor muscle aches and pains after tai chi, major adverse effects are unlikely to happen. That goes double for newbies. However, before beginning a new fitness plan, speak with a qualified healthcare professional.

    Precautions:

    Tai chi is seen to be among the safer forms of physical exercise, but it’s always a good idea to see your doctor before beginning anything new, especially if you have any health issues already.

    If you experience dizziness or fainting while taking a tai chi lesson, stop what you’re doing and sit down.

    FAQs

    How can you describe tai chi?

    Tai chi, also known as Tai Ji Quan or Tai Chi Chuan, is an ancient Chinese mind-body workout. It is mostly recognized as a movement meditation and is often done in a group setting.

    What are the health advantages of Tai Chi?

    Tai Chi enhances balance, strength, flexibility, and aerobic movement on a physical level. It has been demonstrated to aid those with arthritis, lower blood pressure, increase cardiovascular fitness, and avoid falls. There are even significant psychological and emotional benefits.

    What happens during a tai chi class?

    Your instructor will lead the class through each practice, guiding you to stay calm and breathe deeply, after a warm-up to prepare your body and mind for the lesson. The class will usually move as a unit since the moves are done slowly and deliberately.

    What is tai chi exercise good for?

    Practitioners of tai chi reported improvements in their mobility—walking, standing, getting out of bed, and getting in and out of a car—as well as in their degree of soreness and stiffness, balance, and physical and mental well-being.

    Which type of workout is tai chi?

    To begin, tai chi is a full-body workout that improves the muscles. You must stand upright, move gently as if you were pressing against a soft surface, transfer your weight, and hold certain postures, such as standing on one leg or staying in a squat.

    Why is tai chi so difficult?

    It might be difficult to start tai chi and include your entire body at once because the practice calls for full-body integration of training.

    References:

    • Tirgar, P. (2023b, December 13). Tai Chi: The Moving Meditation – How to Do Tai Chi Complete Guide. Mobile Physiotherapy Clinic. https://mobilephysiotherapyclinic.in/tai-chi/
    • Migala, J. (2024, August 1). What Is Tai Chi? A Guide to Tai Chi for Beginners. EverydayHealth.com. https://www.everydayhealth.com/wellness/tai-chi/guide/
    • Lindberg, S. (2019b, June 3). How to Do Tai Chi. Healthline. https://www.healthline.com/health/exercise-fitness/tai-chi-moves
  • Knee Flexion and Extension

    Knee Flexion and Extension

    Knee Flexion and Extension: What Is It?

    Knee flexion and extension are fundamental movements that play a crucial role in our daily activities, from walking and running to sitting and standing. These movements involve the bending (flexion) and straightening (extension) of the knee joint, which is one of the largest and most complex joints in the human body.

    The femur, or thigh bone, and the tibia, or shinbone, are joined by the knee joint, which is a hinge joint. The patella articulates with the femur bone and is also involved in knee movement.

    Flexion: The bending motion that brings the thigh and lower leg closer together by reducing their angle is referred to as flexion. Your knee joint is flexed when you raise your heel up to your buttocks. One of the basic movements utilized in sitting, kneeling, and leg lifting is flexion.

    Extension: Conversely, flexion is the opposite movement of extension. It refers to extending or straightening the knee joint to enhance the angle that the lower leg and thigh form. Your knee joint is extended when you bring your leg back to an upright position after it has been flexed. For actions like kicking, jumping, or standing up from a seated position, extension is essential.

    The coordinated activities of the muscles, tendons, ligaments, and other tissues surrounding the knee joint are necessary for both knee flexion and extension. The biceps femoris, semitendinosus, and semimembranosus muscles, which are situated in the rear of the thigh, make up the hamstrings, which are the main muscles used in knee flexion. They force the knee to flex when they contract. Knee flexion is also aided by other muscles, such as the gastrocnemius (calf muscle).

    The quadriceps muscles, which include the rectus femoris, vastus lateralis, vastus medialis, and vastus intermedius, are principally responsible for knee extension, on the other hand. The front of the thigh contains the quadriceps muscles, which are in charge of straightening the knee joint. Knee extension results from the contraction and stress of these muscles on the patellar tendon, which attaches the quadriceps muscles to the tibia.

    It is essential for healthy joint function and total lower limb movement to maintain a balance between knee flexion and extension. Any weakness, imbalances, or injuries that influence these movements can result in a restricted range of motion, impaired stability, or trouble going about daily tasks.

    What Is Knee Flexion?

    Knee flexion is defined as bending or moving the knee joint, which causes the angle between the femur (thighbone) and tibia (shinbone) to decrease. It is among the most crucial knee movements, enabling motions like sitting, squatting, walking, and sprinting.

    Knee flexion is the bending of the knee joint to move the heel closer to the buttocks as one is standing. The hamstrings in the rear of the thigh are one of the muscles that control this movement. As they contract to raise the lower leg toward the buttocks, the hamstrings are essential in bending the knee.

    Knee bending is necessary in daily life and for a number of functional activities. This gives the lower limb a broad range of motion, which helps with walking and running by forcing the body forward. Additionally, it makes it possible for people to bend, squat, climb stairs, and kneel.

    It’s critical to measure knee flexion in order to evaluate the joint function and spot any potential restrictions or anomalies. Physicians frequently measure a patient’s range of motion during knee flexion using a goniometer, a tool for measuring joint angles. This data can be used to monitor the course of healing from knee joint injuries or surgeries, diagnose illnesses, and create rehabilitation plans.

    Flexor muscles of the knee

    A collection of muscles called the knee flexors are found in the back of the leg and are crucial in knee flexion. Together, these muscles allow the knee to bend and the leg to rise toward the buttocks.

    The flexor muscles of the knee are:

    Three muscle groups on the back of the thigh are called the hamstrings. Among them are:

    • Biceps femoris: This muscle, which is found on the outside of the thigh, has two heads: a long head and a short head.
    • Semitendinosus: Inside the thigh lies a muscle called the semitendinosus.
    • Semimembranosus: The semimembranosus muscle is located on the inside thigh as well.
    • Gastrocnemius: Forming the calf, the gastrocnemius muscle is a big muscle in the rear of the lower leg. When the foot is off the ground, it helps to bend the knee when it crosses the knee joint (during walking or running).
    • Popliteus: A little muscle situated behind the knee joint is called the popliteus. Moving the tibia laterally to expand the knee joint before flexion, contributes to the start of knee flexion.

    These muscles cooperate to flex the knee joint, and they are essential for a variety of movements, including bending, walking, and sprinting. Maintaining health and preventing injuries to the knee requires proper fitness and flexibility of these muscles.

    Knee Flexion Range of Motion

    The range of motion or flexion that the knee joint may accomplish during flexion is known as the knee flexion range of motion (ROM). It shows the arc that the knee can bend through and is expressed in degrees.

    Adults are often thought to have a normal range of motion for their knees between 135 and 145 degrees. This implies that the knee joint may be bent in a way that causes the heel to approach or contact the buttock when the lower leg approaches it.

    It is crucial to remember that each person’s real range of motion will fluctuate according to their age, physical health, past injuries, and unique anatomical features. Depending on these variables, some persons may have more or less knee flexion.

    When diagnosing and tracking a number of disorders, including knee osteoarthritis, ligament damage, muscle strains, and postoperative rehabilitation, measuring the range of motion in the flexion of the knee is crucial. To precisely ascertain the range of motion in knee flexion, medical professionals typically utilize a goniometer and a joint angle tool. This measurement directs treatment and rehabilitation planning by assisting in assessing the degree of limits or anomalies.

    To measure the range of motion in your knee flexion:

    1. Set up the space: locate a large, peaceful spot where the person can comfortably sit or lie down. Ensure that there is sufficient room for your legs to move freely.
    2. Provide precise instructions: Give the person whose knee motion you are assessing an explanation of the procedure. As you move their leg gently, assure them that you will do so, and ask them to let you know if they feel any pain or discomfort.
    3. Begin by asking the subject to sit or lie on their back with their legs out in front of them on a sturdy surface.
    4. Ankle Support: While evaluating movement, place one hand behind the person’s ankle to support and stabilize the leg.
    5. Evaluation of extension (zero degrees): Upon maximal leg extension, note if the knee is entirely straight or flexed slightly. The knee should ideally be completely extended (straight), with no apparent bending.
    6. Flexion assessment: Bend the person’s knee slowly and cautiously, bringing the heel to the buttock. Urge them to relax and allow their legs to naturally move. Once bending the knee becomes difficult, pay attention to the degree of flexion.
    7. Measuring range of motion: The goniometer’s fixed arm should be placed on the subject’s thigh and aligned with the hip joint. Align the moving hand with the knee joint by placing it along the leg. At the point where the two arms meet, read the goniometer’s protractor.
    8. Note the measurement: Record the degree of bending attained by marking the measurement on the goniometer.
    9. Check for pain or discomfort: During the range of motion evaluation, inquire as to whether the patient is experiencing any pain, discomfort, or knee resistance.

    In the case that this occurs, cease the motion and avoid pushing past a safe distance. Recall that a physician should be consulted for an accurate assessment and advice if the patient has a history of knee problems or has just had an injury.

    Test of Knee Flexion

    The knee flexion test, sometimes referred to as the sit and stretch test, measures how flexible the lower back and thighs are. It is frequently used to evaluate the flexibility of various muscle groups in fitness and rehabilitation.

    The Knee Flexion Test Procedure:

    • Locate a level area, like a floor or rug, and take a seat with your legs extended in front of you.
    • Stretch a piece of tape measure or a tool for measuring flexibility between your legs, like a sit-and-reach box.
    • Verify that the zero mark is at the level of your heel and that the gadget is oriented according to your feet.
    • If you are wearing shoes, take them off as they may affect the test’s accuracy.
    • With your hands stacked on top of each other and your fingertips pointed toward your toes, keep your legs extended.
    • Breathe deeply, then slowly bend from the hips as far forward as you can while reaching.
    • Aim to keep your toes free as you move your hands around the stretcher or gauge’s surface.
    • At the furthest point, you are able to reach without bouncing or wobbling, hold for a few seconds.
    • Record the distance covered using a tape measure or an elastic device’s scale.
    • Take a little rest in between each test attempt and repeat the exam two or three times.
    • Finally, note the highest test results.

    The knee flexion test primarily evaluates hamstring flexibility, but it also partially evaluates hip and lower back flexibility. This can assist in locating any tension in these muscle groups that may be causing a decreased range of motion, postural issues, or an elevated risk of injury. It is crucial to keep in mind that each person’s resistance is unique, and outcomes should be evaluated in light of personal objectives and other variables.

    Exercises for Knee Flexion

    Exercises that strengthen the muscles involved in knee flexion, mainly the hamstrings and calf muscles, are important for improving knee flexion. The following exercises can aid in enhancing knee flexion:

    Hamstring stretches:

    Hamstring stretch on wall
    Hamstring stretch on wall

    Stretching your hamstrings will increase their range of motion and flexibility. Try stretching in various positions such as standing, sitting, or lying down to stretch your hamstrings. Repeat each stretch multiple times on each leg, holding it for 20 to 30 seconds at a time.

    Sliding walls:

    slide with the wall
    slide with the wall

    Stand with your feet hip-width apart and turn your back to the wall. Maintaining a bent knee and toe stance, carefully lower yourself down the wall into a squat. Aim for a 90-degree angle in your knees and descend as low as you can. After a brief period of holding still, drive your heel through to stand back up. Perform 2-3 sets of 10–15 repetitions.

    Calves Raise:

    Proper knee flexion requires strong calves. Place your feet shoulder-width apart and raise yourself up onto your toes as high as you can. Reduce your heel speed gradually. Leg lifts can be performed with both legs raised simultaneously or, for added difficulty, just one leg. Doing 2-3 sets of 10–15 repetitions is the aim.

    Knee bend while seated:

    Place your feet flat on the ground and settle onto a chair or bench.
    Bend the knee as much as you can as you slowly raise one leg off the floor and bring the heel up to your buttocks.
    After a little period of holding this position, carefully drop your legs back to the floor.
    Use the other leg for support.
    Do 10 to 15 reps. on each leg.

    Standing Hamstring Curls

    Place your feet shoulder-width apart and use a chair or wall for support if needed.
    As though attempting a butt kick, bend the opposite knee and bring your heel to your butt.
    After a little period of holding this position, carefully return your legs to the floor.
    Continue with the opposite leg.
    For each leg, begin with 10 to 15 reps, and as you gain strength, progressively increase.

    Prone Knee Flexion:

    With your legs straight, lie face down on a mat or bed.
    Keeping your thigh on the mat, bend the opposite knee and bring your heel to your glutes.
    After maintaining the position for a few while, slowly lower your legs back down.
    On the other leg, use the same method.
    Repeat 10 to 12 times.

    Seated knee flexion stretch:

    Sit on a chair or bench’s edge with your feet flat on the floor.
    Stretch one leg out in front of you, keeping the heel on the ground.
    Bring your heel closer to your glutes, flex your knee, and slowly glide your leg back towards you.
    After 15 to 30 seconds of holding the stretched posture, lightly touch the front of the thigh and knee.
    Release the strain gradually and return the leg to its starting position.
    With the opposite leg, repeat the stretch.
    Perform 2 to 3 times for each leg.

    Always begin with a weight or level of resistance that challenges you while letting you keep your form correct.

    Special Test For Knee Flexion

    When assessing knee flexion, medical professionals can utilize a variety of specialized tests to evaluate specific problems or injuries. These are a few popular customized knee flexion tests:

    Passive knee flexion test:

    The subject is put through this test while lying supine. In an attempt to maximize the patient’s range of motion, the examiner carefully flexes the knee. The test highlights potential restrictions and assists in determining the patient’s range of passive knee flexion.

    Heel-to-buttock test:

    The examiner attempts to move the patient’s heel to the buttock while the patient is in a prone position by bending the knee. This exam evaluates the capacity for complete knee flexion and can detect any restrictions or discomfort experienced during motion.

    Test of Gastrocnemius Length:

    One of the calf muscles, the gastrocnemius, may occasionally inhibit knee flexion. The patient stands with their hands up against a wall, one leg straight back, heel on the ground, and the other leg forward with a small bend in the knee during this test. In the extended leg, the patient will struggle to maintain full heel contact with the ground if the gastrocnemius muscle’s flexibility is restricted.

    Ober’s test:

    The purpose of this test is to evaluate the iliotibial (IT) band’s flexibility, which has an impact on knee flexion. With his lower leg stretched and his upper body flexible at the hips and knees, the patient is lying on his side. After stabilizing the patient’s pelvis, the examiner carefully extends and abducts the lower leg. The leg stays raised when the IT band is tight, suggesting a poor range of motion.

    Thomas’s test:

    While the primary objective of Thomas’ test is to evaluate hip flexion, it can also shed light on knee flexion. With one knee bent toward the chest and the other leg hanging on the table, the patient is lying on the table. Limited knee flexion may also be indicated if the hanging leg is unable to move to its entire range of motion because of tightness in the quadriceps or hip flexors.

    Goniometry:

    Goniometry is a measurement method for determining a joint’s range of motion, which includes knee flexion.
    The knee flexion angle is commonly measured using a goniometer, a specialized instrument.
    With their legs straight, the individual is lying on a level surface. After pointing the goniometer at the knee joint, the subject is instructed to bend their knee as much as they can.
    The measurement and recording of the knee joint’s angle is done.
    It is generally accepted that the knee flexion should be between 135 and 145 degrees.

    Sit And Reach Test:

    The sit and reach test’s primary goal is to measure lower back and thigh flexibility, although it can also provide a hazy indication of knee flexion degree.
    Lean back on your seat and spread your legs in front of you.
    In front of your heels, place a ruler or tape measure on the ground between your feet.
    Stretch your arms as far forward as you can to run them down the ruler or measuring tape.
    The hamstrings’ range of motion, which influences knee flexion, is indicated by the distance above the toes.
    This test gives a broad picture of the lower limbs’ total flexibility, including the capacity for knee bending.

    It is significant to remember that healthcare professionals with the required knowledge and experience typically conduct these examinations. They offer important information that aids in the identification of certain illnesses or accidents involving knee flexion.

    What is a Knee extension?

    Knee extension is the term for the action of straightening the knee joint to increase the angle formed by the thigh and lower leg. The quadriceps muscles at the front of the thigh, which are crucial for knee extension, are typically linked to this movement.

    A key component of numerous movements like walking, running, jumping, and kicking is knee extension. It is a crucial movement in lower body exercises like leg presses, pulses, and squats. It’s critical to strengthen the knee extension muscles, particularly the quadriceps, to preserve knee stability, guard against injury, and enhance functional range of motion.

    When evaluating the strength and integrity of the quadriceps muscles as well as the general function of the knee joint, knee extension is frequently measured in a clinical context. Knee flexion contracture, or the inability to fully extend the knee, is a term used to describe a number of diseases or injuries, including neurological issues, joint stiffness, and muscular weakness.

    It is important to understand that proper form and technique are required when extending the knee in order to prevent undue strain on the surrounding tissues and joints. It is advised that you speak with a licensed medical professional, such as a physical therapist or sports medicine expert if you have any specific questions or concerns regarding knee lengthening or rehabilitation.

    Knee Extensors Muscles

    The quadriceps are the main extensor muscles of the knee. These muscles are found on the front of the thigh and the main action is to extend the knee joint.

    The quadriceps is made up of:

    • Rectus Femoris: The only quadriceps muscle that crosses the hip and knee joints is the rectus femoris, which is situated in the center of the front of the thigh.
    • Vastus Lateralis: The largest, strongest, and located most lateral muscle in the quadriceps group. It encourages knee extension and is situated on the outside of the thigh.
    • Vastus Medialis: The response medialis, which is situated on the inside thigh, aids in stabilizing the knee (patella) during knee extension. It mainly focuses on exercises meant to address issues with patellar tracking.
    • Vastus Intermedius: The vastus intermedius, which is situated a considerable distance between the vastus lateralis and vastus medialis, aids in knee extension and enhances overall quadriceps strength.

    Together, these muscles produce the force required to fully extend the knee joint. The hamstrings, which are found at the rear of the thigh, are a muscle group that opposes the quadriceps. Together with the quadriceps, they function as knee flexors to stabilize and regulate knee joint movements.

    The maintenance of knee stability, the avoidance of injuries, and the enhancement of the functional range of motion all depend on the proper strengthening and rehabilitation of the knee extensors, including the quadriceps. These muscles are targeted by exercises including leg presses, squats, pulses, and leg extensions, which also serve to increase the muscles’ strength and endurance. As usual, for individual advice and workout recommendations, speak with a doctor or certified fitness trainer.

    Knee Extension Range of Motion

    Knee flexion contracture, another name for knee extension, typically has a normal range of motion (ROM) of 0 degrees. Put another way, the knee is at a 0-degree angle when it is fully extended.

    It’s crucial to remember that for certain individuals, even mild hypertension (over 0 degrees) is within the normal range. The capacity to stretch the knee joint past the neutral 0-degree position is known as hyperextension. Some people have a natural ability to extend their knee a few degrees above 0 degrees without experiencing any pain or issues.

    On the other hand, a variety of conditions, including injury, joint stiffness, and muscular tension, can result in restrictions in knee extension. Flexion contracture of the knee occurs when the knee is not fully stretched or cannot extend to 0 degrees. Conditions like muscle imbalances, ligament injuries, arthritis, or post-surgical problems can all lead to knee flexion contracture.

    A goniometer, a specialized instrument for measuring joint angles, can be used in a clinical environment to evaluate the range of motion in the knee extension. This assessment aids medical practitioners in determining any restrictions or anomalies and evaluating the knee joint’s flexibility and mobility.

    Consult a physician, such as an orthopedist or physical therapist, if you have problems moving your knees or if your range of motion is restricted. Based on your individual needs, they can offer a comprehensive evaluation, a diagnosis, and suitable treatment or rehabilitation techniques.

    Here’s how to measure the range of motion in your knee extension:

    1. Get the patient ready by having them lie down on a level surface, like a bed or examination table, with their legs outstretched.
    2. Position: Examine that the patient’s knee is fully straight and relaxed. The patient should be at ease and comfortable throughout the examination.
    3. Beginning stance: With one hand behind their back, support their knee, and with the other, their ankle.
    4. Active range of motion (AROM): Give the patient instructions on how to actively extend their leg and knee. Encourage yourself to perform these motions gently and slowly.
    5. Watch and measure: Watch how the patient’s knee joint moves while it is extended. Recognize any restrictions, pain, or discomfort the patient may be feeling. To determine the extent of knee extension, use visual cues.
    6. Goniometer measurement (optional): For a more precise measurement of knee extension, if one is available, you can use a goniometer, a specialized instrument for measuring joint angles. Align the goniometer’s stationary arm with the thigh’s long axis and its moving arm with the tibia, the lower leg’s long axis. Measure the angle that is created when the patient extends their knee by lining up the goniometer’s center with the axis of the knee joint.
    7. Repeat the process: To verify accuracy and spot any irregularities in the patient’s movement, repeat the process a few times.
    8. Document results: Write measurements and findings in the patient’s medical file or examination notes.

    Take note of any restrictions, discomfort, or anomalies found during the test of knee extension. It’s crucial to keep in mind that a licensed healthcare provider, such as an orthopedist, physical therapist, or doctor, should evaluate the knee extension range of motion. They are equipped with the skills and information needed to precisely evaluate the knee joint and interpret the results.

    Test of Knee Extension

    A clinical assessment used to evaluate the strength and range of the knee extension action is the knee extension test. It is sometimes referred to as the active knee extension test or the straight leg lift test. The evaluation of the integrity and function of the quadriceps and knee joints is often carried out by medical specialists, particularly those in the fields of orthopedics and sports medicine.

    Typically, the knee extension test is carried out as follows:

    • Preparation: Typically, the test subject rests on their back on a hard surface, such as an examination table. The ankles are relaxed and the legs are fully straight.
    • Test Execution: Grasping the heel and offering support beneath the thigh, the examiner delicately raises one leg off the table. Next, the leg is raised to the ceiling while maintaining its straightest possible position by progressively extending the knee.
    • Observation: During the knee extension, the examiner watches how the leg moves and is positioned. They record any pain or discomfort the patient feels, the angle at which the knee rests, and any accommodative movements or limits.
    • Range of motion assessment: Using a goniometer, a device for measuring joint angles, the examiner measures the angle of knee extension. In order to measure the angle reached during knee extension, a goniometer is often positioned in relation to the femur and tibia.
    • Strength Assessment: By using mild resistance or asking the subject to push their arm, the examiner may measure the subject’s strength during knee extension. This aids in evaluating the quadriceps’ capacity to produce force during knee extension.

    A person’s capacity to fully extend their knee joint, potential restrictions, muscle imbalances, and general quadriceps function can all be determined with the help of the knee extension test. Diagnoses for ailments including quadriceps strains, patellofemoral dysfunction, or issues following surgery that impair knee extension may benefit from this.

    It is significant to remember that healthcare professionals who are qualified to conduct and interpret these evaluations typically provide the knee extension test. It is advised that you speak with a trained medical professional, such as an orthopedist or physiotherapist if you are worried about the mobility or function of your knee. They may perform a thorough assessment and provide guidance based on your particular needs.

    Exercises for Extension of the Knee

    Numerous exercises are beneficial for strengthening the muscles involved in knee extension, particularly the quadriceps, and for enhancing knee extension. These are a few knee extension exercises that are frequently suggested:

    Straight leg raise:

    In the Supine Position, one leg is straight while the other is bent. Straighten the extended leg and raise it off the ground by contracting its quadriceps. Lower it once more after holding it for a short while. Repeat multiple times, then switch your legs.

    Quad Sets:

    Place your feet in front of you and sit or lie down. Maintaining a straight leg, press the back of the knee into the floor or other surface to contract the quadriceps. Continue for multiple sets.

    Short Arc Quads:

    While lying on your back, rest your knees on a towel or foam roller. As you raise your legs off the towel or roller, keep your thighs flat and gradually straighten your knees. After a few seconds of holding it in the stretched position, lower it. Repeat many times.

    Wall slide:

    Keep your back resting on a wall in a standing position with your feet shoulder-width apart. With your knees in line with your toes, take a partial squat as you slide up the wall. Gradually Straighten your knees. Repeat many times.

    Static Bicycle:

    Riding a stationary bike can help you develop your quadriceps and promote knee extension. Choose a resistance level that is comfortable for you to start with, and pedal carefully, making sure to completely extend your knees with each stroke.

    It’s crucial to begin these workouts at a level appropriate for your present flexibility and strength. It is advised that you consult a healthcare professional, such as a physiotherapist if you have knee problems or issues. They can offer individualized advice, identify the best workouts, and ensure correct form and technique to prevent future injury.

    Keep in mind to pay attention to your body, begin cautiously, and as you advance, progressively increase the exercises’ intensity or complexity. To minimize the chance of damage and get the best outcomes, consistency, and correct form are essential.

    Special Test For Knee Extension

    Various tests are used to assess knee extension and associated conditions. Here are a few illustrations:

    Test for the active knee joint:

    This exam evaluates an individual’s capacity for active knee extension. The individual tries to straighten their knee as much as possible while lying on their back with their legs fully extended. The researcher stretches the knee and notes the angle that is achieved using a goniometer.

    Passive knee extension test:

    During this test, the subject is asked to rest while the tester checks their leg and softly extends their knee joint. When doing a passive knee extension, the examiner watches the range of motion attained and looks for any restrictions or pain.

    Ober’s test:

    The purpose of this test is to evaluate the iliotibial (IT) band’s contracture or tightness. With his legs bent, a man is lying on his side. When the examiner lifts the leg, it falls effortlessly off the table. They then gradually droop their legs down to the table. A tight IT band is indicated if the leg stays vertical and does not come into contact with the table.

    Ely’s test:

    This test assesses the rectus femoris muscle’s tension or contraction. The examiner places the patient in a prone position and bends his knee so that the heel touches the buttock. Rectus femoris is indicated if a person’s hip lifts off the table while their knee is bent.

    Thomas’s test:

    This test aids in determining how tight the hip flexors are, which may have an impact on knee extension. With one knee pulled up to his chest, a man is lying on his back on a table’s edge. With one leg extended, it drapes over the table. Hip flexor strain is indicated if the extended leg lifts off the table or is unable to lie down.

    These exams are commonly used to evaluate knee extension, spot potential restrictions, and detect particular illnesses or muscular imbalances in addition to other clinical evaluations. These examinations are typically administered by medical experts with the necessary training, such as orthopedists or physical therapists, who are qualified to carry out and interpret them correctly.

    Conclusion

    Healthcare workers, physiotherapists, sportsmen, and anybody looking to restore knee function or cure injuries must all understand knee flexion and extension. Knee flexibility, stability, and general joint health can all be improved by strengthening the corresponding muscles and using the right techniques.

    FAQs

    What are knee flexion and extension?

    Flexion: Knee flexion is defined as bending or moving the knee joint, which causes the angle between the femur (thighbone) and tibia (shinbone) to decrease.
    Extension: Knee extension is the term for the action of straightening the knee joint to increase the angle formed by the thigh and lower leg.

    What is the normal knee flexion?

    Adults are often thought to have a normal range of motion for their knees between 135 and 145 degrees. This implies that the knee joint may be bent in a way that causes the heel to approach or contact the buttock when the lower leg approaches it.

    What is the normal knee extension?

    It’s crucial to remember that for certain individuals, even mild hypertension (over 0 degrees) is within the normal range. The capacity to stretch the knee joint past the neutral 0-degree position is known as hyperextension. Some people have a natural ability to extend their knee a few degrees above 0 degrees without experiencing any pain or issues.

    What happens during knee flexion?

    The quadriceps tendon, which is pulled by the quadricep muscles as you straighten your leg, pulls on the kneecap, causing the knee to extend. The hamstring muscles tighten when you bend it, bringing the tibia back and flexing the knee.

    What muscles flex and extend the knee?

    The knee is bent or straightened by the muscles surrounding the joint. The muscles that cause the knee to bend or unbend are known as the common knee muscles. These include the hamstrings and gastrocnemius, which flex (bend) the knee while the quadriceps extend the knee (straighten the knee).

    References

    Patel, D. (2023, July 11). Knee Flexion And Extension – Movement, ROM, Function, Exercise. Samarpan Physiotherapy Clinic. https://samarpanphysioclinic.com/knee-flexion-and-extension/