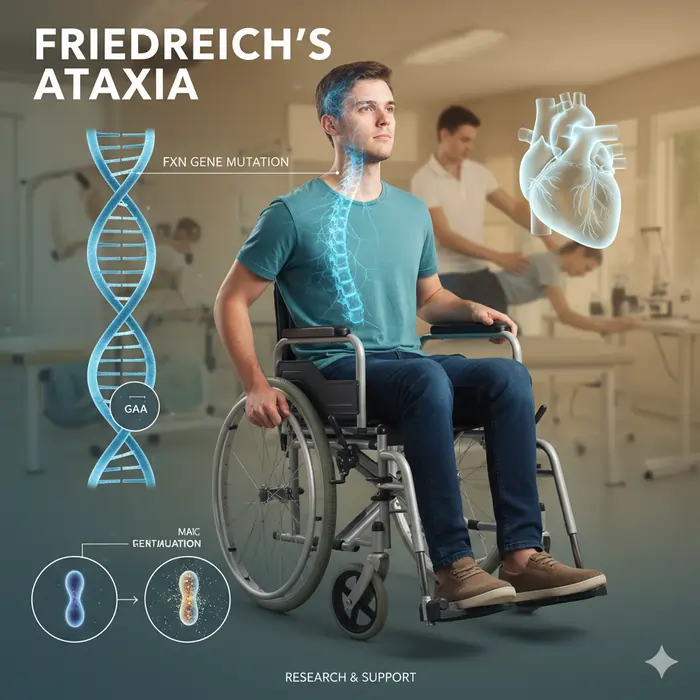
Blog

  • Central Nervous System (CNS)

    Central Nervous System (CNS)

    Introduction

    The central nervous system (CNS) is a division of the nervous system that analyses and integrates different intrapersonal and extrapersonal information and produces a coordinated reaction to these stimuli.

    The brain and spinal cord are the two continuous central nervous system (CNS) organs. They are contained in two bony structures, the skull, and the vertebral column, respectively, and are surrounded and shielded by three layers of meninges. The brain is made up of the brainstem, cerebellum, subcortical regions, and cerebrum. From the brainstem, the spinal cord extends inferiorly down the vertebral canal.

    Numerous neural channels allow the various sections of the brain and spinal cord to interact with one another while evaluating the data and planning appropriate bodily reactions. When the finished product is prepared, they send it directly from it to the rest of the body through peripheral nervous system (PNS) neurons.

    In particular, the spinal cord produces 31 pairs of spinal nerves, whereas the brain produces 12 cranial nerves that innervate the head, neck, thoracic, and abdominal viscera. Both the viscera and the rest of the body that is not innervated by the cranial nerves (upper and lower limbs) are innervated by the spinal nerves.

    Structure

    Grey and white matter

    Neurons are the primary cells that receive and send neural impulses in the brain and spinal cord. Under a microscope, the body of each neuron, which serves as its micro-command center, appears grey. Two or more neural processes that originate in the body and transmit the neural information are present in the neurons. There are two types of neuronal processes: long (axons) and short (dendrites). A material known as myelin envelops the majority of axons, giving them a recognizable white color.

    We refer to the components of neurons as grey and white matter. The myelinated axons of neurons make up the white matter, whereas clusters of neuronal bodies make up the grey matter. Instead of being haphazardly weaved throughout the brain tissue, the axons are arranged into bundles that link specific grey matter regions and provide the necessary impulses. These bundles are known as routes and tracts in the central nervous system (CNS) and nerves in the peripheral nervous system (PNS).

    The brain and spinal cord have a very unique distribution of grey and white matter.
    The cerebral cortex, which makes up the majority of the brain’s grey matter, is located on the outside, whereas the inside section is made up of white matter. Deep within the white matter that makes up the subcortical structures like the diencephalon and basal ganglia are smaller clusters of grey matter. The term “nucleus” (plural: “nuclei”) refers to any grey matter unit beyond the cortex in the brain.

    When seen in cross-section, the grey matter, which makes up the inner portion of the spinal cord, resembles a distinctive butterfly. The grey matter is surrounded externally by the white matter, which is made up of spinal cord tracts.

    Cortex and brain lobes

    The most noticeable area of the brain is the cerebrum, sometimes known as the forebrain. The corpus callosum connects the two brain hemispheres that make up this structure. The cerebrum has a very uneven surface made up of gyri (folds) and sulci (ridges). The cerebrum has the greatest processing capacity and cognitive abilities in the entire nervous system because of the sulci and gyri, which enhance its surface area. The five areas known as cerebral lobes—frontal, parietal, temporal, occipital, and insular—make up each hemisphere.

    Every lobe of the brain performs a distinct set of tasks. For this reason, the entire brain is mapped out and separated into functional regions like the sensory and motor cortex. These cortical regions are further separated into main, secondary, and associated areas according to their degree of function. These hierarchical subdivisions work closely together to interpret information and produce appropriate motor or sensory bodily reactions.

    Specific sulci delineate each lobe, which is in charge of various tasks. The central sulcus (of Rolando), which divides the precentral and postcentral gyri, is the most noticeable. The principal motor and primary somatosensory cortices are located there, respectively. These are the areas that sense feelings and activate motor processes. The white matter of the cerebrum, which makes up the majority of the deep cerebral structures, is surrounded by grey matter.

    Brain Lobe
    Brain Lobe
    Subcortical structures

    Deep within the brain is a collection of neuronal structures known as subcortical structures. They consist of the pituitary gland, limbic system, diencephalon, and basal ganglia.

    Diencephalon

    • Thalamus, comprises four groups of nuclei: the thalamic anterior, medial, lateral, and intralaminar nuclei. It is an oval nuclear mass. Sensory and motor data are sent to and received by the cerebral cortex via the thalamus.
    • Epithalamus stands for the diencephalon’s most posterior region. It is made up of the habenular trigone, stria medullaris, and pineal body. The epithalamus has a role in initiating and controlling movement as well as the circadian rhythm, or sleep-wake cycle.
    • Subthalamus, The thalamus is situated ventral to it. It includes the peri peduncular nucleus, zona incerta (of Forel), and subthalamic nucleus. The subthalamus is involved in the regulation, coordination, and precision of motor action.
    • Hypothalamus, is situated inferiorly to the thalamus. It is separated into three zones (periventricular, medial, and lateral) and three groups of nuclei (anterior, middle, and posterior). Through several hypothalamic axes and the hypophyseal portal system, the hypothalamus controls metabolism, reproduction, and the stress response.

    Basal ganglia

    The lowest portion of the cerebrum, diencephalon, and midbrain are home to a collection of grey matter nuclear masses known as the basal ganglia. The caudate nucleus, putamen, globus pallidus, substantia nigra, and subthalamic nucleus are some of these nuclei. The striatum is made up of the putamen and caudate nucleus.

    The extrapyramidal motor system includes the basal ganglia. To improve motor abilities, they use direct, indirect, and hyperdirect channels to connect with the thalamus.

    Limbic system

    The brainstem, subcortex, and cerebrum are all parts of the limbic system. The limbic cortex and deep limbic structures are its two divisions. The frontal, temporal, and parietal lobes’ many cerebral sulci and gyri combine to form the limbic cortex. The olfactory cortex, diencephalon, hippocampal formation, amygdala, brainstem, basal ganglia, and the basal portion of the cerebrum make up the deep portion of the limbic system.

    The limbic system’s overall job is to regulate emotions, smells, and homeostasis. The hippocampus formation, which is involved in long-term memory and spatial navigation, is one specific significant component of the limbic system. Furthermore, fear is processed by the amygdala.

    Brainstem

    The brain’s inferior region is known as the brainstem. It is made up of the medulla oblongata, pons, and midbrain and is located in the posterior cranial fossa. It is separated internally into the tectum, tegmentum, and basal region. There are three primary and significant roles for the brainstem:

    • Most of the cranial nerves’ nuclei are located there.
    • makes it easier for neuronal pathways to go from the brain to the spinal cord.
    • controls vegetative processes such as breathing, blood pressure, heart rate, and gastrointestinal activity.

    Midbrain

    The brainstem’s most superior region is the midbrain. It lies between the pons inferiorly and the thalamus superiorly. The midbrain controls body temperature, attentiveness, and visual and auditory responses. The mesencephalic branches of the basilar artery supply it.

    Two cerebral peduncles, the interpeduncular fossa, the red nucleus, and the oculomotor nerve (CN III) are among the significant structures found in the front portion of the midbrain. Conversely, the midbrain’s posterior region has four prominences known as colliculi (superior, inferior).

    The quadrigeminal plate (corpora quadrigemina) is made up of these colliculi. The posterior portion is also where the trochlear nerve (CN IV) arises.

    Pons

    The medulla oblongata and midbrain are separated by the pons, the central part of the brainstem. Numerous processes, including sleep, hearing, swallowing, taste, breathing, balance, and motor activities, are mediated by the pons. The basilar artery’s pontine branches provide its blood supply.

    Numerous significant landmarks may be seen on the anterior portion of the pons, including the basilar groove, the superior and inferior pontine sulci, and the striations made by the corticopontocerebellar tract fibers. From the anterior portion of the pons, four pairs of cranial nerves emerge: vestibulocochlear (CN VIII), facial (CN VII), abducens (CN VI), and trigeminal (CN V). The superior part of the rhomboid fossa, medial eminence, posterior median sulcus, facial colliculus, striae medullares, locus coeruleus, and vestibular regions are located on the other side of the pons, in the posterior portion.

    Medulla oblongata

    The brainstem’s most inferior region is called the medulla oblongata. It controls autonomic processes involved in reflex, vasomotor, respiratory, and cardiac functions. The anterior spinal artery and inferior cerebellar artery provide blood to the medulla oblongata.

    Numerous protuberances and developing cranial nerves may be found on the anterior portion of the medulla oblongata. These consist of the vagus nerves (CN X), hypoglossal (CN XII), glossopharyngeal (CN IX), pyramids, olives, and anterior median fissures. Numerous significant anatomical features, including the posterior medial sulcus, cuneate fasciculus, gracile fasciculus, cuneate tubercle, gracile tubercle, trigeminal tubercle, lateral funiculus, inferior part of the rhomboid fossa, and obex, are also visible on the posterior side of the medulla oblongata.

    Cerebellum

    The cerebellum is situated behind the brainstem and fourth ventricle in the posterior cranial fossa. The tentorium cerebelli divide it from the cerebrum. Furthermore, the superior, middle, and inferior cerebellar peduncles serve as the cerebellum’s anchors and channels of communication with the brainstem. The cerebellum is responsible for motor learning as well as motor activity coordination and accuracy. The anterior inferior (AICA), superior (SCA), and posterior inferior (PICA) cerebellar arteries provide blood to the cerebellum.

    The three components of the cerebellum are two hemispheres on either side of the central vermis. The inferior (occipital) surface faces inferiorly, whereas the superior (tentorial) surface points superiorly. The three lobes (anterior, posterior, and flocculonodular) and roughly ten lobules (I–X) that make up the cerebellum are separated horizontally.

    Spinal cord

    The medulla oblongata is the inferior continuation of the spinal cord. It reaches the level of the L1/L2 vertebrae from the skull’s foramen magnum. 31 pairs of spinal nerves emerge from the five segments that make up the spinal cord: the cervical, thoracic, lumbar, sacral, and coccygeal.

    Three sulci, one anterior fissure, and four surfaces make up the spinal cord. On the inside, it is made up of white matter around a center of grey matter. The vertebral and segmental arteries provide the spinal cord with its blood supply.

    Information transmission between the brain and the rest of the body is the spinal cord’s job. In addition, the spinal cord governs lower body processes independently from the brain, such as reflexes.

    Meninges

    The brain and spinal cord are surrounded by three membranes, which are represented by the meninges. The meninges of the spinal cord are known as spinal meninges, while the meninges of the brain are known as cranial meninges. Through the foramen magnum, the cranial and spinal meninges are joined together. The meninges support blood arteries, protect the central nervous system, and contain cerebrospinal fluid (CSF). The meninges, from superficial to deep, consist of:

    • Dura mater – The periosteal and meningeal dura mater make up its two-layered sheath. The periosteal layer of the brain securely attaches the dura mater to the skull. The epidural gap divides the spinal dura (theca), which envelops the spinal cord, from the vertebral column. The dural venous sinuses are located in a gap created by the layers of the cerebral dura diverging from one another in many places.
    • Arachnoid mater – Below the dura mater are the cranial and spinal arachnoid. The subdural space is the area between the dura and the arachnoid.
    • Pia mater -The surfaces of the brain and spinal cord are firmly adhered to by the cranial and spinal pia maters, respectively. The CNS’s surfaces are nourished by the many blood vessels that make up the extremely vascular pia mater. The spinal pia inferiorly continues the cranial pia mater, which covers the whole brain. Beyond the S2 vertebra, the spinal pia ends as the filum terminale, which is located above the spinal cord. The subarachnoid space is the area between the arachnoid and the pia mater. It includes the brain and spinal cord’s CSF and superficial blood vessels. Additionally, it has arachnoid granulations, which are mushroom-like protrusions through the dura mater that cover it and serve as the primary pathway for CSF removal.
    Brain ventricles and cerebrospinal fluid (CSF)

    The colorless fluid that surrounds the brain and spinal cord is called cerebrospinal fluid (CSF). The choroid plexus, a specialized tissue located inside the walls of the brain ventricles, produces it. Before being reabsorbed into the venous system via the subarachnoid granulations, the CSF passes successively via the ventricles and subarachnoid cisterns. The CSF’s roles include protecting the central nervous system, supplying it with nutrition, and absorbing mechanical force.

    The cavities filled with CSF that are buried deep inside the brain parenchyma are known as the brain ventricles. There are four ventricles in the brain: two lateral ventricles in the cerebrum’s lobes, one-third ventricle in the middle of the hemispheres, and a fourth ventricle behind the brainstem.

    Five foramina connect the ventricles and allow the CSF to flow through the ventricular system:

    • The space between the third ventricle and the lateral ventricles is known as the interventricular foramen (of Monro).
    • Sylvius’s cerebral aqueduct, which connects the third and fourth ventricles.
    • Between the cerebellopontine cistern and the fourth ventricle are two lateral openings (of Luschka).
    • Magendie’s median aperture (between the fourth ventricle and the subarachnoid space’s cisterna magna)
    Neural pathways and spinal cord tracts

    The axon bundles that link several neurons are known as neural pathways. The connections between the various components of the brain might be made only inside the brain, or they can be made between the brain and the spinal cord.

    The tracts are the names given to the passageways that go through the brain. Tracts are used to transfer information across the different areas of the brain as a stimulus is analyzed and integrated. The structures that the tracts link are typically used to determine their names. For instance, the corticonuclear tract is a passageway that links the cranial nerve nuclei to the cerebral cortex.

    The ascending (sensory) and descending (motor) tracts are neural channels that link the brain and spinal cord. They transmit motor and sensory data from the central nervous system to the peripheral nervous system. The spinal cord’s white matter contains spinal cord tracts. They are made up of three-order neurons that synaptically connect sequentially. The classification of spinal cord tracts is as follows:

    • Ascending tracts, spinocerebellar (proprioception, coordination, posture), spino-tectal (spin visual reflex), spino-reticular (consciousness), spino-olivary (cutaneous, proprioception), and dorsal column (fine touch, proprioception) are all examples of ascending tracts.
    • Descending tracts include the vestibulospinal (balance), reticulospinal (facilitating or inhibiting voluntary and reflex actions), tectospinal (auditory and visual reflexes), rubrospinal (fine involuntary movement), corticospinal (voluntary movements), and corticobulbar (influences cranial nerve activity) pathways.

    Function

    What are the central nervous system’s three primary roles?
    Your central nervous system performs the following three primary tasks:

    • Receive sensory information.
    • Process the information it receives (integration).
    • Respond with motor output.

    Your brain sends an electrical signal to your muscles and glands via your spinal cord to produce a motor output once it has received and processed the information gathered by your sensory neurons, or nerve cells. Desiring to cross the room is an illustration of this process. Your spinal cord relays a signal from your brain to your leg muscles. This signal is received by your muscles, which then enable you to finish the activity (motor output) of walking.

    How does the central nervous system work?

    Your ideas, emotions, and movements are all controlled by your brain. It controls your actions, including learning, talking, and bending your fingers. Additionally, it controls how your organs work by instructing you on how to breathe and digest food. Although you probably don’t, your central nervous system does.

    Messages are sent through your nervous system to accomplish this operation. A message is produced by your brain. That signal, or message, is transmitted to your spinal cord. To finish an action, your peripheral nervous system (PNS) receives a signal from your spinal cord. To keep your body working, signals are continuously sent to and from your brain and spinal cord to the rest of your body.

    Embryology

    In the third week of embryonic development, the adult brain and spinal cord develop. The neural plate is formed by the thickening of the ectoderm. The neural groove is then formed by the neutral region folding inward. The neural groove is flanked by laterally migrating neural folds. The CNS structures are formed by the neural tube, which emerges from the neural groove.

    The anterior and posterior ends of the neural tube split apart. The spinal cord develops from the posterior end, while the principal brain vesicles, prosencephalon (forebrain), mesencephalon (midbrain), and rhombencephalon (hindbrain) grow from the anterior end. Secondary brain vesicles are produced while the original brain vesicles continue to differentiate. The hindbrain divides into the metencephalon and the myelencephalon (spinal brain), whereas the forebrain divides into the telencephalon and diencephalon. The midbrain remains in the mesencephalon and does not split. The adult brain structures are created by the secondary brain vesicles developing.

    • Telencephalon to cerebrum
    • Diencephalon to hypothalamus, thalamus, retina
    • Mesencephalon to the brain stem (midbrain)
    • Metencephalon to the brain stem (pons), cerebellum
    • Myelencephalon to the brain stem (medulla oblongata)

    Ventricles are continuous, hollow chambers formed by the center portion of the neural tube. The cerebral hemispheres continue to expand throughout the sixth month of pregnancy, causing the cerebral cortex to transform from a smooth to a wrinkled, convoluted look. The grooves are called sulci, while the raised portions of the ridges are called gyri.

    The larger brain surface area can fit inside the skull thanks to the convolutions. There are white matter and grey matter regions all across the brain. Glia, unmyelinated neurons, dendrites, and neuronal cell bodies are all found in the grey matter. On the other hand, myelinated axons make up white matter.

    Grey and white matter make up the spinal cord, which is created from the caudal part of the neural tube. The dorsal alar and ventral basal plates are formed when the grey matter collects about 6 weeks of gestation. The basal plate gives rise to motor neurons, whereas the alar plate produces interneurons. Neural crest cells give birth to dorsal root ganglia, which transmit information from the periphery to the spinal cord.

    Clinical Importance

    Wernicke Aphasia

    The most prevalent cause of Wernicke aphasia is an ischaemic or hemorrhagic stroke. The Wernicke region cannot get oxygenated blood due to strokes in the left middle cerebral artery. A person with Wernicke’s aphasia can make speech and talk clearly. They struggle to grasp words, though, and their communication is meaningless.

    Broca Aphasia

    Brain injuries, brain tumors, or strokes can result in Broca aphasia, sometimes referred to as expressive aphasia. The Broca region of the brain loses oxygen when a stroke happens there. Damage from hypoxia is irreversible. When someone develops Broca aphasia, they have trouble speaking. They can understand and know what they want to express, but they are unable to put it into words.

    Traumatic Brain Injuries

    When normal brain activity is disrupted, as might happen in sports injuries, auto accidents, piercing objects, or even blunt objects, the result is a traumatic brain injury (TBI). Depending on how severe the injury was, TBI symptoms might change. For instance, although a contusion results in long-term brain damage, a concussion might produce momentary lightheadedness or unconsciousness. Coma is the outcome of brain stem contusions. TBI can result in cerebral edema and subdural or subarachnoid hemorrhage. The brain’s blood vessels shatter when the brain is traumatized. As the blood starts to accumulate, the brain tissue is compressed and the intracranial pressure rises.

    Cerebrovascular Accidents

    Strokes, another name for cerebrovascular accidents, happen when the brain cannot get oxygen-rich blood. Hypoxia results from low oxygen levels, and brain tissues begin to deteriorate. Strokes are frequently caused by a blood clot that has made its way to the brain’s cerebral artery from another part of the body.

    The symptoms of the stroke depend on where the clot settles. For instance, some persons may have slurred speech, while others may suffer left-sided paralysis. Since the symptoms of transient ischaemic attacks are more transient, they are regarded as little strokes. Time is of the essence in any cerebrovascular event. If required, doctors can surgically remove the clot or use tissue plasminogen activator to break it up. The length of time the brain’s oxygen supply has been interrupted is directly correlated with the intensity of symptoms.

    Alzheimer Disease

    A prevalent form of dementia called Alzheimer’s disease causes the brain’s cells and neural connections to deteriorate and eventually die. Cognitive impairment and memory loss are the symptoms of this illness. Alzheimer’s disease progresses over time, and its symptoms get worse. Researchers have discovered tau-based neurofibrillary tangles and beta-amyloid plaque aggregations in Alzheimer’s disease patients’ neurons. The misfolding of proteins within brain cells causes these plaques and tangles, which ultimately lead to the death of brain cells. Neural activity in the hippocampus, basal forebrain, and parietal cortex is reduced in Alzheimer’s disease patients.

    Parkinson Disease

    Parkinson’s disease is a condition of the nervous system that causes the substantia nigra’s dopamine-releasing neurons to deteriorate. Tremors, uneven movements, and loss of balance are caused by the decline in dopamine levels. Since Parkinson’s disease typically begins as a hand tremor, it progresses over time. As symptoms worsen, many patients experience bradykinesia, rigidity, a mask-like face, and a pill-rolling motion in their palms. After examining the patient’s symptoms, medical history, and neurological and physical examination, a Parkinson’s disease diagnosis is made.

    The condition has no known treatment, however it is possible to manage how severe the symptoms are. For usage in the central nervous system, levodopa can go through the blood-brain barrier and be converted into dopamine. One surgical approach for controlling tremors is deep brain stimulation, which can reduce aberrant brain activity. Deep brain stimulation, however, does not stop the condition from becoming worse.

    Huntington Disease

    A mutation in the huntingtin gene (HTT) causes Huntington’s disease, a degenerative, inherited brain condition. The HTT gene’s CAG region typically repeats up to 35 times. The CAG section, however, can be repeated up to 120 times in a person with Huntington’s disease. The huntingtin protein builds up in brain cells as a result of this big CAG region, ultimately resulting in cell death. Huntington’s disease first manifests as hand flapping, involuntary jerking, and chorea. Cognitive impairment happens as the illness worsens. Within 15 years after diagnosis, death occurs.

    Spinal Cord Traumas

    The location of spinal cord damage affects their symptoms. Sensation may be impacted if the sensory tracts sustain injury. However, paralysis results from injury to the ventral horns or roots. When nerve impulses fail to reach the targeted muscles, it results in flaccid paralysis. The muscles cannot contract if they are not stimulated. Involuntary contraction of the motor neurons due to irregular stimulation is known as spastic paralysis. If the spinal cord is severed between T1 and L1, the result is paraplegia or paralysis of the lower limbs. A cervical injury causes quadriplegia, which is paralysis of all limbs.

    Poliomyelitis

    The poliovirus causes poliomyelitis, an inflammation of the spinal cord. People can contract poliovirus from one another or contaminated food and water. It causes paralysis by destroying the neurons in the spinal cord’s ventral horn. It is possible to prevent poliovirus infection by administering the vaccination.

    Amyotrophic Lateral Sclerosis

    Motor neurons that regulate both voluntary and involuntary actions, such as speaking, swallowing, and breathing, are destroyed in amyotrophic lateral sclerosis, also referred to as Lou Gehrig’s disease and ALS. Unfortunately, there is no treatment for ALS, and its etiology is unclear. Researchers think that ALS patients’ elevated levels of extracellular glutamate are linked to cell death. Riluzole slows the course of ALS and lessens its excruciating symptoms by interfering with the production of glutamate.

    Multiple Sclerosis

    In multiple sclerosis, an autoimmune illness, the body targets the central nervous system’s myelin proteins, impairing the brain-body connection. In young people, multiple sclerosis is quite common and manifests as discomfort, weakness, loss of eyesight, and impaired coordination. Patients differ in how severe their symptoms are. Medication can assist manage the negative symptoms of this illness by suppressing the body’s immune system.

    Surgical Importance

    To execute unpleasant medical treatments that would otherwise be impossible, anesthesia is a controlled condition of temporary loss of feeling. Anesthesia comes in a variety of forms, including local, sedative, and general. Nonetheless, they are all employed to interfere with intracellular and cellular communication in the peripheral and central nervous systems.

    Amnesia, paralysis, and an analgesic are all used in general anesthesia, which causes the patient to go unconscious. General anesthesia results in a complete lack of feeling and full suppression of central nervous system activity. Intubation and subsequent mechanical breathing are necessary while using neuromuscular blockers.

    Depolarisation results from the binding of depolarising neuromuscular blockers, such as succinylcholine, to postsynaptic cholinergic receptors. Future depolarisations are avoided because succinylcholine is removed from the receptors much more slowly, which inhibits acetylcholine binding. Vecuronium and other nondepolarizing neuromuscular blockers disrupt postsynaptic cholinergic receptors by acting as acetylcholine inhibitors. These neuromuscular blockers do not alter the ion channels’ permeability when they bind, though.

    The anaesthesiologist simply numbs the area of the body that will be operated on during regional anesthesia. Spinal and epidurals are injected into the vertebral canal and utilized as local anesthetics. Whereas the epidural injection is administered into the epidural space, spinal anesthesia targets the spinal fluid.

    Undergoing anesthesia has a risk, just like any surgical operation. Obesity, diabetes, high blood pressure, and any respiratory or cardiovascular disease process raise the chance of problems.

    Neurosurgeons are trained to diagnose and treat conditions that impact the central nervous system. They offer surgical treatment for neurological conditions such as tumors, strokes, injuries to the head and spine, persistent pain, etc. There are dangers associated with every surgical treatment, particularly when working with sensitive brain and spinal cord nerve tissue. Brain hemorrhage, speech, memory, coordination problems, stroke, brain edema, and even coma are all consequences of brain surgery.

    FAQs

    Which seven major CNS components are there?

    The seven fundamental components of the central nervous system—which includes the brain and spinal cord—are generally accepted to be the cerebral hemispheres, the medulla, the pons, the cerebellum, the midbrain, the diencephalon, the spinal cord, and the medulla.

    What happens if the CNS is damaged?

    In general, mature neurons usually fail to recover after CNS damage, leading to a persistent loss of motor function.

    Can CNS nerves be repaired?

    The central nervous system of mammals cannot renew its neurons. Significant strides have been achieved in determining the molecular and cellular processes underlying regenerative failure and how modifying those pathways might support axon regeneration and/or cell survival.

    Which three problems of the neurological system are most prevalent?

    Among the most common nervous system disorders are Alzheimer’s disease, stroke, and epilepsy
    Here’s a more detailed look at these disorders: 
    Alzheimer’s Disease:
    memory, cognition, and behavior are the main areas affected by this progressive neurodegenerative disease.
    Stroke:
    A condition where blood supply to the brain is interrupted or reduced, leading to brain damage.
    Epilepsy:
    A neurological condition characterized by recurrent seizures, which are sudden, uncontrolled electrical disturbances in the brain.

    How is CNS treated?

    The following therapies may be used to treat recently discovered primary central nervous system (CNS) lymphoma: radiation treatment for the whole brain. Chemotherapy with or without radiation therapy. only targeted treatment (ibrutinib, nivolumab, or rituximab).

    References

    • Central nervous system. (2023, November 3). Kenhub. https://www.kenhub.com/en/library/anatomy/the-central-nervous-system
    • Professional, C. C. M. (2024f, December 19). Central Nervous System (CNS). Cleveland Clinic. https://my.clevelandclinic.org/health/body/central-nervous-system-cns
    • Thau, L., Reddy, V., & Singh, P. (2022, October 10). Anatomy, central nervous system. StatPearls – NCBI Bookshelf. https://www.ncbi.nlm.nih.gov/books/NBK542179/
  • Ankle Inversion

    Ankle Inversion

    Ankle Inversion

    Ankle inversion refers to the movement where the sole of the foot turns inward, typically towards the midline of the body. It involves the contraction of muscles like the tibialis posterior and anterior, and is essential for activities like walking, running, and maintaining balance.

    Ankle Eversion and Inversion: What Are They?

    Movements of the ankle joint are referred to as ankle inversion and ankle eversion. The tibia, fibula, and talus bones make up the ankle joint, which permits both dorsiflexion, lifting the foot upward, and plantarflexion, or turning the foot downward.

    Ankle inversion occurs when the foot’s sole moves inside, toward the body’s midline. During this action, the foot’s medial (inner) edge slides downward while its lateral (outer) edge rises. The lateral compartment muscles of the lower leg, such as the tibialis anterior, extensor hallucis longus, and extensor digitorum longus, are the main muscles involved in ankle inversion. Walking, running, and jumping are examples of common activities that include this action.

    The movement of the foot sole outward and away from the body’s midline is known as ankle eversion. While the lateral edge of the foot goes downward, the medial edge of the foot is raised during this action. The tibialis posterior and flexor digitorum longus are two muscles in the lower leg’s medial compartment that are mostly involved in ankle eversion. Although more uncommonly, ankle eversion usually happens during specific sports activities or when walking on uneven ground.

    Ankle eversion and inversion are both necessary for stability, balance, and healthy foot function. These motions assist in weight distribution during dynamic exercises and allow the foot to adjust to different surfaces. However, if the muscles, ligaments, or tendons around the ankle are weak or unbalanced, excessive or uncontrollable ankle inversion or eversion can result in ankle sprains or other problems.

    For athletes, physiotherapists, and anybody else doing activities that put a strain on the ankle joint, it is important to comprehend the biomechanics and appropriate regulation of ankle inversion and eversion. These motions are usually the focus of rehabilitation programs and exercises in order to enhance ankle stability, avoid injuries, and support ideal foot function.

    Ankle inversion: What Is It?

    One kind of movement or motion that takes place at the ankle joint is called ankle inversion. The ankle joint is produced by the articulation of the foot’s calcaneus and tibia (tibia and fibula). Specifically, ankle inversion refers to a tilting or inward movement of the foot when the sole bends inside toward the body’s midline.

    In a neutral standing position, the sole is somewhat outward and the foot is slightly rotated. Rolling the foot inward past the neutral position causes ankle rotation. The foot’s ability to turn and rotate is mostly due to the subtalar joint, which is situated below the ankle joint.

    Ankle sprains may occur unintentionally or intentionally. Ankle sprains can occur, for instance, when walking on uneven ground, changing directions quickly, or participating in sports that require quick motion changes. Sprains, strains, and other ankle injuries may result from this, particularly if the foot is forcefully rotated out of its natural range of motion.

    Notably, ankle Eversion is the reverse of ankle inversion, which involves moving the foot outward or away from the body’s midline. For the foot and ankle complex to remain balanced, stable, and function properly, both inversion and eversion of the ankle are critical.

    Ankle Invertor Muscle

    A group of muscles known as the ankle invertors are mainly responsible for controlling ankle inversion. Together, these muscles allow the leg’s internal mobility. These are the ankle joint’s primary invertor muscles:

    • Tibialis anterior: This muscle is situated at the front of the lower leg. It is situated on the foot’s medial fibula and first metatarsal and develops from the top two-thirds of the tibia. The primary muscle involved in ankle rotation and dorsiflexion (lifting the leg) is the tibialis anterior.
    • Tibialis Posterior: The tibialis posterior muscle, which is situated deep in the back of the lower leg, comes from the back surfaces of the tibia and fibula as well as the interosseous membrane that separates them. The navicular, metatarsals, and other foot bones make up those it extends. The tibialis posterior muscle assists in maintaining the foot’s arch and is a strong ankle joint inverter.
    • Flexor Hallucis Longus: This muscle is situated next to the back of the shin, deep within the lower leg. It attaches to the base of the big toe’s distal phalanx after emerging from the backbone. It helps rotate the ankle even though its primary purpose is to flex the big toe.
    • Flexor digitorum longus: Located deep in the back of the lower leg, this muscle is comparable to the flexor hallucis longus. The base of the smaller toes’ distal toes (second to fifth) is where it inserts after starting at the back of the tibia. The flexor digitorum longus assists in ankle rotation in addition to flexing the little toes.

    During walking, running, and other weight-bearing exercises, these muscles coordinate to create ankle rotation, which is important for preserving balance, stability, and appropriate foot and ankle alignment.

    Ankle Inversion Range of Motion

    The degree of inward movement or pronation of the foot at the ankle joint is known as the ankle’s reverse range of motion (ROM). Although it varies from person to person, the normal range of motion for an ankle inversion is within a certain range.

    The normal range of motion for an ankle inversion in a healthy ankle is between 20 and 30 degrees. This indicates that the leg can rotate or bend inward by around 20 to 30 degrees from its neutral position. Walking, running, and jumping are all of the activities that the right foot and ankle may perform due to this range of motion.

    It is important to remember that the range of motion can change depending on a person’s anatomy, flexibility, and any traumas or pre-existing disorders that may influence the ankle. Naturally, different persons may have varying degrees of reverse ROM.

    Ankle sprains and other problems can become more likely when ankles are inverted beyond their natural range of motion. To guarantee appropriate function and avoid damage, it is crucial to keep ankle mobility and stability in balance. It is advised that you speak with a physician, such as a physiotherapist or an orthopedist if you have concerns about how your ankle moves. They can evaluate your specific needs and suggest the right advice.

    You can use a simple exercise called the goniometric size to examine the ankle inversion’s range of motion (ROM). Here is a step-by-step guide on testing ankle inversion range of motion:

    • Comfortably sit or lie down with your leg extended straight in front of you.
    • To maintain your mobility, firmly support the leg that has lowered. As long as the ankle joint can move as much as possible, you can keep the leg in place with your palms or a strap.
    • Find where the ankle joint’s axis is. The bony protuberances at the inside (medial malleolus) and outside (lateral malleolus) of the ankle are often situated on the midway of the ankle.
    • A goniometer should be attached to the ankle joint axis. An instrument that measures angles, the goniometer has a desk-bound arm and a transferring arm.
    • Make sure the goniometer’s desk-bound arm is parallel to the long axis of the lower leg and the transferring arm is parallel to the long axis of the foot.
    • The person should be asked to aggressively invert their foot by tilting it inward as far as they can. Make sure that they perform the movement without compensating by shifting their leg or other body parts about.
    • Observe the position that the goniometer indicates, where the desk-bound and transferring fingers meet, and record it. In this view, the ankle inversion degree is represented.
    • In certain cases, repeat the measurement to ensure accuracy and consistency.

    It is important to note that goniometric measures are usually performed by qualified medical experts, such as physiotherapists. It is advised that you see a healthcare professional who can properly assess your ankle inversion range of motion and provide appropriate guidance based largely on your unique circumstances if you are unsure or have experienced difficulties performing the measurements on your own.

    Ankle Inversion Special Test

    Special tests are studies created especially to evaluate the body’s beneficial systems or characteristics. Although there are not any particular “special tests” for ankle inversion, there are a few that are typically done to assess ankle balance and competence since ligamentous accidents can occur during ankle inversion. These examinations help determine the lateral ligaments’ integrity and identify ankle instability. Here are a few commonly used, different tests for ankle instability linked to inversion:

    Anterior Drawer Test:

    • The person being evaluated should be sitting or in a supine position with their knee flexed to 90 degrees.
    • Maintain the foot with the other hand while using the other to stabilize the reduced leg.
    • To anteriorly translate the talus bone into the ankle joint, apply direct force at the heel while also supporting the lower leg.
    • Examine the joint for any excessive anterior translation or laxity in comparison to the unaffected side.
    • The stability of the anterior talofibular ligament (ATFL), which usually gets injured during ankle inversion, is examined and frequently assessed.

    Talar Tilt Test:

    • With the foot comfortable and the ankle in a neutral position, place the person for examination in a sitting or supine position.
    • To maintain your mobility, stabilize the leg that has reduced.
    • In an attempt to tilt the foot inward, apply an inversion pressure.
    • Compare the affected side to the unaffected side to check for any excessive inversion motion or joint laxity.
    • The stability of the ATFL and the calcaneofibular ligament (CFL) is examined and often assessed.

    It is important to understand that special tests must be performed by qualified medical experts, such as orthopedic specialists or physical therapists, who possess the critical knowledge to correctly analyze the findings. To end up with an accurate analysis and an appropriate treatment plan, these tests are frequently a component of a comprehensive examination and are combined with other body exam techniques and imaging investigations, if necessary.

    Manual Muscle Testing For Ankle Inversion

    A physical examination technique called ankle manual muscle testing, or MMT, is used to assess the strength and functionality of the muscles surrounding the ankle joint. Healthcare providers, including doctors and physical therapists, frequently do it to assess muscle weakness, track rehabilitation progress, or identify specific ankle issues.

    Muscle testing

    Tibialis posterior

    The position of the patient

    The position of the patient must be side-lying.

    Lie on your side, ankle off the bed’s edge, and examine.

    To evaluate grades 0–2, the patient should be in a supine or short sitting position.

    Position of the Therapist

    The therapist needs to be seated in front of the patient on a chair or stool.

    Assess the tibialis posterior muscle by palpating it.

    For resistance against the dorsum and medial part of the foot, use the other hand.

    What is the test procedure?

    • Place the patient with their ankle in a neutral posture while they are seated or in a supine position.
    • Use one hand to stabilize the lower leg and the other to hold the foot.
    • Maintaining a neutral ankle joint position, try inverting the patient’s foot (turning it inside) and instruct them to resist.
    • While determining how strong the patient’s resistance is, apply force gradually.
    • On a scale of 0 to 5, 0 represents no muscular contraction and 5 represents normal muscle strength with complete range of motion.
    • For comparison, repeat the test on the opposite ankle.
    • Record your results and include them in the patient’s therapy regimen.

    It is important to note that only qualified medical practitioners who have received the appropriate training and methods should do manual muscle testing. Furthermore, it is crucial to take note of any risks or contraindications before doing a patient assessment.

    Ankle Inversion Exercise

    Strengthening exercises for ankle inversion can help improve the stability and power of the muscles involved in regulating the foot’s inward motion. The following sports may assist with ankle inversion:

    Ankle Inversion with Resistance Band:

    Ankle inversion with Resistance Band
    Ankle inversion with Resistance Band
    • With your legs out in front of you, sit together on a chair or the floor.
    • Keep your hands and the ends of a resistance band together as you wrap it around the ball of your foot.
    • Together, place both of your feet in a neutral position (no longer inverted or everted).
    • Pull the band in the direction of your body to progressively invert your foot against its resistance.
    • Return to the starting position after holding the position for a few seconds.
    • On each foot, complete two to three units of ten to fifteen repetitions.

    Towel curls:

    Towel-curl
    Towel-curl
    • Place both of your toes flat on the floor while seated together on a chair.
    • Put something tiny, like a towel, under your foot.
    • To increase resistance, bend and compress the towel toward you with your feet.
    • Continue curling until the towel is completely pulled toward you.
    • On each foot, repeat for two to three sets of ten to fifteen repetitions while relaxing.

    Balance on One Leg with Ankle Inversion:

    • For stability, place yourself near a wall or other support.
    • Raise one foot off the ground while maintaining balance on the other.
    • Slowly invert the foot by tilting it inward while maintaining stability on the ground.
    • Return to a neutral position after a few seconds of holding the inverted position.
    • The aim is to gradually increase the amount of time you can keep the location.
    • Do two to three sets of ten to fifteen repetitions for each foot.

    Alphabet Writing:

    Alphabet
    Alphabet
    • Place both of your legs out in front of you while sitting on a chair or the floor.
    • Elevate one foot off the ground and visualize writing the alphabet with your foot written in the air.
    • Pay attention to the use of controlled and concentrated motions, with a focus on the inversion or inward movement.
    • Try to complete the entire alphabet by using each foot to complete the exercise.

    Keep in mind that sports may be appropriate for your current state of health and can help you progress gradually as you gain stability and strength. Seeing a medical practitioner, such as a physiotherapist, who can provide specific advice and sports based on your requirements, is usually a great idea if you have any recent ankle incidents or concerns.

    FAQs

    What is the difference between an inversion and eversion ankle fracture?

    The foot moving inward is a common feature of inversion injuries. Starting with the anterior talofibular ligament in front, it might result in tears in the outer ligaments. Eversion injuries, on the opposite the same direction, happen when the foot rotates outward and can cause ligament damage or fractures of the inner ankle bone.

    What is the normal amount of ankle inversion?

    Age, gender, and degree of physical activity can all affect an individual’s common range of motion for ankle inversion. Nonetheless, the typical ankle inversion range of motion is between 20 and 30 degrees.

    How to improve ankle inversion?

    Wrap an exercise band around the inside of the foot that is affected, holding both ends in one grasp. Next, apply pressure with your other foot on the band. With your legs crossed, gently press the injured foot on the band to cause it to separate from the other foot. Then slowly relax.

    What is the use of ankle inversion and eversion?

    For example, walking on uneven ground, ascending stairs, or running on a track, the foot may adjust to various surfaces and environments by using inversion and eversion. Additionally, particularly when standing or walking, they support maintaining of the body’s alignment and equilibrium.

    How long does it take for an ankle inversion to recover?

    The length of time it takes to heal from a sprained ankle depends on how serious the damage is. A mild sprain may recover in two weeks, whereas a major sprain may take six to twelve weeks.

    What is the most common ankle inversion injury?

    Inversion injuries, often known as lateral ankle sprains, are the most common type of ankle sprain. Anterior, calcaneofibular, and posterior talofibular ligaments are the ligaments of the outside ankle that are harmed when the foot slides inward.

    References:

    • Patel, D. (2023aa, July 13). Ankle inversion and ankle eversion – movement, ROM, muscles. Samarpan Physiotherapy Clinic. https://samarpanphysioclinic.com/ankle-inversion-and-ankle-eversion/
    • Patel, D. (2023j, May 29). Manual Muscle Testing of Ankle(MMT of Ankle Muscle) – Samarpan. Samarpan Physiotherapy Clinic. https://samarpanphysioclinic.com/manual-muscle-testing-of-ankle/#Ankle_Inversion

  • Knee Extension

    Knee Extension

    Knee Extension

    Knee Extension refers to the movement of straightening the knee joint, typically performed by the quadriceps muscles at the front of the thigh. It is a vital motion for activities like walking, standing, and climbing stairs. Knee extension exercises are often used in rehabilitation to restore strength and mobility after injury or surgery.

    Knee Flexion and Extension: What Is It?

    Important movements at the knee joint, such as knee flexion and extension, allow for various activities, including jogging, walking, and ascending stairs. The thigh bone (femur) and the shinbone (tibia) are joined by the knee joint, which is a hinge joint. There is also involvement of the patella, or kneecap, which articulates with the femur.

    Flexion: It’s utilized to describe the bending motion that pulls the lower leg and thigh closer together by reducing their angle. When you lift your heel to your buttocks, your knee joint is flexed. Flexion is a basic motion used in sitting, kneeling, and leg lifting.

    Extension: The opposed movement of flexion, likewise, is this. The angle between the thigh and the lower leg increases when the knee joint is stretched or straightened. When you flex your leg and then return it to its erect posture, you are extending your knee joint. Extension is needed for actions like jumping, kicking, and getting out of a seated position.

    Both knee flexion and extension need coordinated motions of the muscles, ligaments, tendons, and other structures that surround the knee joint. The hamstrings, which are made up of the biceps femoris, semitendinosus, and semimembranosus muscles near the back of the leg, are the main muscles involved in knee flexion. When they contract, the knee is forced to flex. Knee flexion can be assisted by other muscles, such as the gastrocnemius (calf muscle).

    The quadriceps muscles, which include the rectus femoris, vastus lateralis, vastus medialis, and vastus intermedius, on the opposite together, are mainly responsible for knee extension. The front of the thigh contains the quadriceps muscles, which are in the role of straightening the knee joint. Knee extension is the result of these muscles contracting and applying stress to the patellar tendon, which joins the quadriceps muscles to the tibia.

    For good joint function and normal lower limb movement, it is essential to maintain a balance between knee flexion and extension. Any injuries, weakness, or imbalances impacting these movements may result in a limited range of motion, decreased stability, or trouble carrying out daily tasks.

    Knee Extension: What Is It?

    The term “knee extension” means that the knee joint straightens out, increasing the angle between the lower leg and thigh. The quadriceps muscles at the front of the thigh, which are important in knee extension, are usually connected to this movement.

    Walking, running, jumping, and kicking are just a few of the activities that need knee extension. Additionally, it is a crucial movement in lower body exercises including leg presses, pulses, and squats. Maintaining knee stability, avoiding injuries, and improving the functional range of motion all depend on strengthening the muscles used in knee extension, particularly the quadriceps.

    Knee extension is regularly assessed in clinical settings to evaluate the quadriceps muscles’ strength and integrity as well as the knee joint’s general function. Knee flexion contracture, or the inability to fully extend the knee, can be a sign of several diseases or injuries, including neurological issues, joint stiffness, and muscular weakness.

    It’s important to understand that proper technique and form are necessary for knee extension in order to prevent excessive stress on the joint and surrounding tissues. It is advised that you consult with a certified medical professional, such as a physiotherapist or sports medicine expert if you have specific questions or concerns regarding knee lengthening or rehabilitation.

    Knee Extensors Muscles

    The quadriceps, as they are commonly known, are the primary extensor muscles of the knee. Located on the front of the thigh, these muscles work to extend the knee joint. There are four separate muscles in the quadriceps group:

    • Rectus Femoris: The Rectus Femoris is the only quadriceps muscle that crosses the hip and knee joints. It is situated in the center of the front of the thigh.
    • Vastus Lateralis: The quadriceps group’s largest and most lateral muscle. Situated on the outside of the thigh, it facilitates the extension of the knee.
    • Vastus Medialis: This inner thigh muscle assists in knee stability during knee extension by acting as a vastus medialis. Typically, it targets activities supposed to fix issues with patellar tracking.
    • Vastus Intermedius: The vastus intermedius, which is situated deep between the vastus lateralis and vastus medialis, assists in knee extension and improves quadriceps strength in overall.

    Together, these muscles provide the force required to extend the knee joint. It’s crucial to remember that the hamstrings, which are situated in the back of the thigh, also oppose the quadriceps. They give stability and control over the movements of the knee joint by acting as knee flexors and coordinating with the quadriceps.

    Maintaining knee stability, preventing injuries, and maximizing functional range of motion all depend on the proper strengthening and rehabilitation of the knee extensors, which include the quadriceps. These muscles are the focus of exercises including squats, leg presses, pulse, and leg extensions, which enhance their power and endurance. For individual advice and exercise recommendations, it is always advised to speak with a doctor or certified fitness instructor.

    Knee Extension Range of Motion

    Knee flexion contracture, another name for knee extension, is usually considered to have a normal range of motion (ROM) of 0 degrees. Stated differently, the knee is at a 0-degree angle when it is fully extended. This indicates that the leg and thigh are parallel.

    It’s crucial to remember, still that for some persons, even mild hypertension (over 0 degrees) stays within the normal range. Hyperextension is the ability of the knee joint to extend beyond the neutral 0-degree position. The knee may naturally extend a few degrees above 0 degrees in certain individuals without resulting in issues or discomfort.

    However, a variety of conditions, including joint stiffness, inflammation, and muscular strain, can limit knee extension. When the knee cannot extend to 0 degrees or is not completely stretched, flexion contracture of the knee develops. Conditions like arthritis, ligament damage, muscle imbalances, and post-operative problems can all result in knee flexion contracture.

    A goniometer, an experienced instrument for measuring joint angles, can be used in clinical settings to evaluate knee extension range of motion. This measurement helps medical practitioners in determining the knee joint’s range of motion and flexibility as well as any restrictions or abnormalities.

    It is advised that you consult with a physician, such as an orthopedist or physical therapist if you have issues moving your knees or are worried about your knee range of motion. Depending on your particular requirements, they can offer a comprehensive evaluation, diagnosis, and suitable treatment or rehabilitation plans.

    To determine your knee extension range of motion, follow these steps:

    • Preparation of the patient: Ask the patient to lie with their legs extended on a level surface, like a bed or examination table.
    • Position: Ensure that the knee is fully extended and the patient’s leg is relaxed and straight. While the examination is being performed, the patient should feel at ease and relaxed.
    • Beginning position: To stabilize the patient’s knee, place one hand behind it and place the other over the ankle.
    • Active range of motion (AROM): While extending the leg, instruct the patient to actively extend the knee. Instruct the use of gentle, fluid motions for these activities.
    • Measure and observe: Watch how the patient’s knee joint moves while it is extended. Recognize the patient’s limitations, pain, and discomfort. Determine the extent of knee extension using visual clues.
    • Measurement of the goniometer (optional): To gain a more precise measurement for knee extension, if one is available, you can use a goniometer, a specialized instrument for measuring joint angles. Position the goniometer’s moving arm parallel to the lower leg’s long axis (tibia) and its fixed arm parallel to the femur’s (thigh) long axis. Measure the angle created when the patient extends their knee after aligning the goniometer’s center with the knee joint’s axis.
    • Repeat the technique: To verify clarity and observe any irregularities in the patient’s movement, repeat the procedure a few times.
    • Document findings: Include measurements and findings in the patient’s examination notes or medical file.

    Any restrictions, discomfort, or abnormalities observed during the knee extension test should be noted. It is crucial to keep in mind that the range of motion of knee extension should be evaluated by a physician, physical therapist, or orthopedist. To properly evaluate the knee joint and interpret the results, they require the requisite skills and knowledge.

    Knee Extension Special Test

    In clinical settings, knee sprains and associated conditions are assessed using several specific tests. Below are a few examples:

    Active test for the knee joint:

    This test evaluates a person’s capacity for active knee joint extension. With their legs extended wide, the person tries to straighten their knee as much as they can while lying on their back. By extending the knee using a goniometer, the researcher examines and calculates the angle achieved.

    Knee extension test in a passive manner:

    During this examination, the examiner checks the subject’s leg and, when the subject relaxes, softly extends the knee joint. The examiner monitors the range of motion gained and looks for any restrictions or pain when passively extending the knee.

    Ober’s test:

    The purpose of this test is to evaluate the iliotibial (IT) band’s tightness or contracture. A man with his legs bent is lying on his side. Lifting the leg, the examiner allows it to hang loosely off the table. After that, they gradually bring their legs down to the table. If the leg remains upright and does not touch the table, it is a sign of a tight IT band.

    Ely’s testing:

    The rectus femoris muscle’s tension or contraction is assessed by this test. The examiner brings the heel to the buttock by bending his knee while the subject is lying prone. A person has rectus femoris if, when the knee is bent, the hip elevates off the table.

    Thomas’s test:

    This test helps in evaluating hip flexor tension, which may have an impact on knee extension. On the edge of a table, a man is lying on his back with one knee pulled up to his chest. With the knee outstretched, one leg hangs over the table. A hip flexor strain is indicated if the extended leg lifts off the table or is unable to lie down.

    To evaluate knee extension, identify possible restrictions, and notice specific conditions or muscular imbalances, these tests are usually combined with other clinical evaluations. Health professionals who have received the necessary training for performing and appropriately interpreting these tests, such as orthopedists or physical therapists, are usually carrying out procedures properly.

    Manual Muscle Testing For Knee Extension

    One method for evaluating the strength and functionality of specific muscles surrounding the knee joint is manual muscle testing. To assess a muscle group’s strength, resistance is applied to the group’s movement. The following is an introduction to manual muscle testing for the main knee muscle groups:

    Muscle testing

    Quadriceps muscle

    Position of the patient

    The patient must be able to sit comfortably.
    To perform all of the tasks without any limitations, patients must dress comfortably.

    The patient should sit for a brief period to evaluate grades 3 through 5.

    For the test, grades 0–2 The most suitable position for the patient is side-lying.

    Position of the Therapist

    Fixing the femur on the side being evaluated requires the therapist to kneel close to the patient.

    The lower limb should be supported by the therapist using movement when the patient is side-lying.

    What is the test procedure?

    Thigh stabilization: To stabilize the patient’s thigh, the therapist should put one hand below it.

    The therapist’s second hand should be placed on the patient’s lower leg, somewhat above the ankle.

    It is recommended that the therapist ask the patient to push their foot toward the ceiling in order to straighten their knee.

    Knee extension is done by the patient himself.

    Give the distal tibia and fibula resistance force in the opposite direction of knee extensions to evaluate grades 4 and 5.

    The therapist should apply pressure on the lower leg to prevent this movement.

    Increase resistance: Until the therapist determines that the patient is doing their best effort, gradually increase the resistance.

    Grade the strength: The knee extensor strength should be assessed by the therapist using the previously mentioned criteria, with a range of 0 to 5.
    Here is the grading method:

    • Grade 0: No feeling of contraction
    • Grade 1: There is no movement, only a noticeable flicker or contraction trace.
    • Grade 2: Motion that is gravity-free, such as horizontal
    • Grade 3: The motion must overcome gravity without becoming resistant.
    • Grade 4: There should be mild to moderate resistance to the movement as it goes against gravity.
    • Grade 5: Excellent strength in the face of complete resistance

    Make sure you use the correct technique: Make that the patient is solely using their knee extensors and not compensatory through using their back or hip extensors.

    Verify that there is no pain or discomfort for the patient during the test by checking for it.

    Precaution

    Check for contraindications: The therapist should look for any conditions that could prevent the knee manual muscle test from being performed, such as recent surgery, an acute injury, or inflammation in the knee joint.

    Warm-up: Before doing the test, the therapist should make sure the patient’s muscles are adequately warmed up to avoid any injuries.

    Proper positioning: To avoid putting unnecessary strain on the knee joint, the patient should be in a comfortable position with enough support.

    Resistance should be increased gradually by the therapist to avoid any injury-causing rapid movements throughout the test.

    Patient communication: To make sure the patient is not in any pain or discomfort during the test, the therapist should keep in touch with them.

    Safety precautions: To avoid any injuries or accidents during the test, the therapist should take the required safety measures, such as utilizing the appropriate tools and making sure the area is secure.

    Knee Extension Exercise

    Many exercises are available to improve knee extension and strengthen the quadriceps and other muscles involved in knee extension. The following exercises for knee extension are usually suggested:

    Knee Extension

    knee-extension
    knee-extension

    How to Do It:

    Sit in a chair or on a platform with your hips and knees at a 90-degree angle. To help you increase your range of motion, roll up a towel and place it under one knee. Then, straighten out the leg by using the towel below it. Squeeze the quad as much as you can, holding for two to three seconds before putting it back to rest. Repeat for three sets of ten reps on each side.

    Straight leg lift:

    Straight-leg-raise
    Straight-leg-raise-

    With one leg bent and the other extended, lie on your back. Lift the extended leg straight off the ground by contracting its quadriceps. Lower it once more after holding it for a few seconds. Repeat a few times, then change legs.

    Quad Sets:

    Place your feet in front of you and sit or lie down. Press the back of your knee onto the floor or another surface to contract your quads while maintaining a straight leg. Do this for several sets.

    Box Squat with Load

    box squats
    box squats

    The knee joint will be functionally straightened with this movement.  Focusing on slowing down this motion to guarantee appropriate muscle fiber recruitment.

    How to Do It:

    Stand in front of a box and hold a dumbbell or kettlebell in front of your chest to start.
    Completely lower the box until you are seated on it. Hold for a few seconds, then stand up again, contracting your quadriceps as you go.
    For three sets of ten reps, repeat.

    Step Up

    Dumbbell-Stepup
    Dumbbell-Stepup

    Another useful exercise for knee extension is the step-up. To make it more difficult, use a weight and hold it up to your chest, just like in the last exercise.

    How to Do It:

    To perform this exercise, locate a box or other stable surface, place one foot up on it, step up by firmly squeezing the quadriceps to straighten out the front knee, and then slowly lower the lower leg back to the floor. Repeat three sets of ten repetitions on each side.

    Terminal Knee Extension with Bands

    terminal knee extension
    terminal knee extension

    The goal of this exercise is to improve knee extension’s terminal end, or the final few degrees before the joint fully straightens. Build a thicker band or move farther away from the anchor point to increase the effect.

    How to Do It:

    Secure a lengthy loop band to a post or other solid object. Just behind your knee, hook your foot into the loop.
    Step back until the band is tense. Straighten the knee against the resistance after bending it to relieve part of the stress.
    Do this for three sets of ten reps on each side.

    Short Arc Quads:

    shorter arc quad
    shorter arc quad

    While lying on your back, place a towel or foam roller beneath your knees. Maintaining a flat thigh, slowly straighten your knees as you raise your legs off the towel or roller. Hold the extended posture for a little while before lowering it again, repeating several times.

    Wall slide:

    Place your back against a wall and place your feet shoulder-width apart. Slide up the wall into a partial squat while maintaining your knees in line with your toes. Repeat a few times.

    A stationary bicycle

    Strengthening the quadriceps and facilitating knee extension are two benefits of stationary bike riding. Focus on fully extending your knees with each pedal stroke and begin with a resistance level that is comfortable for you.

    It is crucial to begin these exercises at a level by your present degree of strength and flexibility. Speaking with a healthcare professional, such as a physiotherapist, is advised if you have knee conditions or issues. They can offer individualized advice, identify the best exercises, and provide the correct form and technique to stop additional injury.

    As you advance in the exercises, progressively raise the level of effort or difficulty while paying attention to your body. For best results and to lower the chance of damage, consistency and good form are essential.

    FAQs

    Which muscles extend the knee?

    The quadriceps muscle, which consists of the rectus femoris, vastus lateralis, vastus intermedius, and vastus medialis, is part of the primary extensors anatomy of the knee, which extends from proximal to distal.

    Why is my knee not fully extending?

    There are seven main reasons why your knee won’t straighten. Meniscus tears, injuries to the quadriceps and patellar tendons, ACL injuries, acute edema, osteoarthritis, patellar dislocation, and muscular imbalance are a few of them.

    What causes weak quads?

    An accident, muscular imbalances, aging, or underlying medical diseases including arthritis or neurological abnormalities are some of the causes of quadricep weakness.

    What are the benefits of knee extension?

    Knee extension exercises are used to develop thigh muscles (i.e. quadriceps muscles) to increase physical performance, reduce knee injury risk, and rehabilitate knee injuries. In other strengthening exercises, the body generates force through many different muscle groups.

    What is proper knee extension?

    Maintain a 90-degree angle between your thighs and lower legs, then slowly raise your lower legs until your knees are almost straight, then slowly lower yourself back to the beginning position. You will feel a strain in the muscles on the front of your thighs.

    References:

    • Patel, D. (2023c, July 11). Knee flexion and Extension – movement, ROM, function, exercise. Samarpan Physiotherapy Clinic. https://samarpanphysioclinic.com/knee-flexion-and-extension/
    • Patel, D. (2023b, May 27). Manual muscle testing of knee – quadriceps, hamstring muscles. Samarpan Physiotherapy Clinic. https://samarpanphysioclinic.com/manual-muscle-testing-of-knee/
    • CSCS, C. R. (2023, August 16). A physical therapist shares 4 exercises to strengthen knee extension. Men’s Health. https://www.menshealth.com/fitness/a44702238/knee-extension-exercises/
  • Pubofemoral Ligament

    Pubofemoral Ligament

    Introduction

    The pubofemoral ligament is a strong, triangular ligament located on the anterior side of the hip joint. It connects the pubic bone to the femur and helps prevent excessive hip abduction and extension, providing stability to the joint.

    Pain, stiffness, and trouble moving can also be symptoms of pubofemoral ligament injuries. Complete recovery requires the right diagnosis and care. By taking precautions such as maintaining a healthy weight and exercising with proper form, injury risk can also be reduced.

    Structure of the Pubofemoral Ligament

    A robust, thick band of connective tissue that connects the pubic bone to the femur is called the pubofemoral ligament. With a broad base that connects to the pubic bone and a narrow apex that connects to the femur, it has a triangular form. The strength and stability of the ligament come from the crisscrossed arrangement of collagen fibers that make up this structure.

    The capsule of the hip joint, a thin, fibrous membrane that envelops and supports the joint, merges with the pubofemoral ligament at the pubic bone. The ligament connects to the intertrochanteric line, a bony ridge on the upper portion of the thigh bone, at the femur.

    One of the three ligaments that aid in hip joint stability is the pubofemoral ligament. Ischiofemoral and iliofemoral ligaments are the other two ligaments. These ligaments cooperate to keep the hip joint from moving too much and to keep the femur and pelvis in the right position.

    Therefore, the pubofemoral ligament’s structure is ultimately appropriate for its function in maintaining the stability of the hip joint. The ligament can function slowly from the attachment points at the femur and pubic bone, and its strong collagen fibers and triangular shape allow it to withstand the forces applied during physical activity.

    Function of the Pubofemoral Ligament

    The pubofemoral ligament plays a crucial part in keeping the femur and pelvis in the correct alignment and stabilizing the hip joint. Together with the iliofemoral and ischiofemoral ligaments, it prevents the hip joint from moving excessively in all directions, including adduction, rotation, and abduction.

    The hip joint experiences a variety of forces during exercise, which may lead to instability. Through its strong and stable connection between the pubic bone and the femur, the pubofemoral ligament aids in the counteraction of these forces. This helps to avoid injuries and permits the hip joint to move smoothly and under control.

    Apart from its function in hip joint stability, the pubofemoral ligament also contributes to the preservation of appropriate pelvic alignment. The ligament keeps the pelvis level and stops it from tilting or rotating too much. When engaging in physical activity, is crucial for preserving appropriate posture and balance.

    All things considered, the hip joint’s pubofemoral ligament is a vital part that keeps the joint stable and in the right alignment. It is ideal for supporting the hip joint during physical activity because of its strength and stability.

    Blood supply of the Pubofemoral Ligament

    The blood supply to the pubofemoral ligament comes from a variety of sources. A branch of the deep femoral artery, the medial femoral circumflex artery provides the ligament with its primary blood supply. The pubofemoral ligament receives blood from the branches of the medial femoral circumflex artery, which runs along the medial aspect of the femur.

    The obturator artery, a branch of the internal iliac artery, provides blood to the pubofemoral ligament in addition to the medial femoral circumflex artery. The pubic bone receives blood from the obturator artery’s branches, which then deliver blood to the pubofemoral ligament.

    The pubofemoral ligament’s blood supply is crucial to preserving its health and functionality. The ligament may weaken or sustain injury in the absence of a sufficient blood supply, increasing the risk of injury and hip joint instability.

    In conclusion, the obturator artery and medial femoral circumflex artery supply blood to the pubofemoral ligament. These arteries support the ligament’s strength and functionality by supplying it with vital nutrients and oxygen.

    Symptoms of the Pubofemoral Ligament Injury

    The hip joint is stabilized by the pubofemoral ligament, a robust band of connective tissue that extends from the pubic bone to the femur (thigh bone). This ligament injury can result in a variety of symptoms, such as:

    • Pain: Groin or hip pain is the most typical sign of a pubofemoral ligament injury. The pain may be mild or severe, and it may worsen with movement or activity.
    • Stiffness: Hip joint stiffness resulting from pubofemoral ligament injuries can make walking and movement difficult.
    • Swelling: A pubofemoral ligament injury may result in swelling in the hip or groin region.
    • Weakness: Weakness in the hip and leg muscles can result from injury to the pubofemoral ligament, which stabilizes the hip joint.
    • Instability: Severe injuries to the pubofemoral ligament may result in hip instability, which makes it difficult to stand or walk unassisted.
    • Clicking or popping: Following a pubofemoral ligament injury, some people may feel as though their hip joint is clicking or popping when they move.
    • Limited range of motion: It may be difficult to carry out specific activities or movements due to a pubofemoral ligament injury that restricts the hip joint range of motion.

    As untreated pubofemoral ligament injuries can result in long-term complications like chronic pain and hip joint instability, you must seek medical attention if you experience any of these symptoms.

    Injuries of the Pubofemoral Ligament

    An injury to the pubofemoral ligament can result from a variety of activities, including:

    • Sports: Sports like basketball, volleyball, and soccer that require quick direction changes or jumping can strain the pubofemoral ligament and raise the risk of injury.
    • Running: Running puts a lot of strain on the hip joint and can cause injuries to the pubofemoral ligament, particularly if the runner overuses their muscles or has poor form.
    • Lifting weights: Lifting weights and performing leg exercises like lunges and squats. It raises the possibility of injury and may put a strain on the pubofemoral ligament.
    • Pregnancy: The pubofemoral ligament may become weaker and more prone to injury as a result of weight gain and hormonal changes.
    • Trauma: A pubofemoral ligament injury may result from trauma to the hip joint, such as a fall or auto accident.
    • Repetitive motions: Over time, the pubofemoral ligament may be strained by repetitive motions that involve the hip joint, such as prolonged standing or sitting.
    • Genetics: A person’s genetic composition or underlying medical conditions may make them more vulnerable to pubofemoral ligament injuries.

    It is vital to take preventative measures, such as warming up appropriately, using proper form, and wearing appropriate footwear, when engaging in activities that can raise the risk of a pubofemoral ligament injury. To avoid more injury and long-term issues, you must seek medical attention as soon as you notice any signs of a pubofemoral ligament injury.

    Treatment of the Pubofemoral Ligament

    There are two effective approaches for treating pubofemoral ligament injuries: conservative treatment and physical therapy.

    Conservative treatment

    Physical therapy, pain management, and rest are usually the three main components of conservative treatment for injuries to the pubofemoral ligament. Conservative treatment aims to heal the hip joint, lessen pain and inflammation, and return it to normal function.

    Rest: The healing of the injured pubofemoral ligament depends on rest. Avoiding activities like sports or heavy lifting that exacerbate the injury may be one way to do this.

    Physical therapy: Physical therapy has the potential to enhance hip joint strength, flexibility, and range of motion. This could involve stretches to increase flexibility as well as exercises to strengthen the muscles surrounding the hip joint. To aid in healing, a physical therapist may also use techniques like electrical stimulation or ultrasound.

    Pain management: If required, prescription painkillers may be used in addition to over-the-counter drugs like ibuprofen or acetaminophen. Pain and inflammation can also be lessened with the use of heat or ice therapy.

    Bracing: To help support the hip joint and lessen the strain on the pubofemoral ligament, a brace or other support may be suggested in certain situations.

    Surgery: The pubofemoral ligament may need to be repaired or rebuilt in rare instances when conservative treatment is ineffective. Surgery, however, is usually reserved for extreme cases and is only advised if conservative measures have failed.

    Even after symptoms subside, it is crucial to adhere to your doctor’s conservative treatment recommendations and perform any physical therapy or rehabilitation exercises as directed to avoid further injury or recurrence.

    Physiotherapy treatment

    To increase the hip joint’s range of motion, strength, and flexibility, physiotherapy treatment for pubofemoral ligament injuries usually consists of a mix of exercises, stretches, and manual therapy techniques. Physiotherapy aims to promote healing, lessen pain and inflammation, and get the hip joint back to its normal function.

    The following are typical physiotherapy interventions for injuries to the pubofemoral ligament:

    Strengthening exercises: By increasing the strength of the muscles surrounding the hip joint, strengthening exercises can support the pubofemoral ligament. Exercises for hip abduction, hip adduction, hip extension, and hip flexion are a few examples.

    Stretching exercises: By increasing hip joint flexibility, stretching exercises can lessen the strain on the pubofemoral ligament. Examples include stretches to strengthen the hamstrings, IT bands, and hip flexors.

    Manual therapy: Manual therapy methods like trigger point release, joint mobilization, and massage can help improve the range of motion and lessen hip joint pain and inflammation.

    Modalities: To encourage healing and lessen hip joint pain and inflammation, modalities like electrical stimulation or ultrasound may be used.

    Gait analysis: To find any anomalies that might be causing your pubofemoral ligament injury, a physiotherapist may examine your gait or the way you walk. To lessen the strain on the hip joint, they might suggest alterations to walking habits or footwear.

    Working with your physiotherapist regularly is crucial to creating a customized treatment plan that meets your unique needs and objectives. To get the best results from your physiotherapy treatments and exercises, you must be consistent.

    Risk factors of the Pubofemoral Ligament

    A robust band of connective tissue called the pubofemoral ligament joins the femur (thigh bone) to the pubic bone. It lessens excessive movement and stabilizes the hip joint. However, some things can make injuries to the pubofemoral ligament more likely. These consist of:

    • Overuse: The pubofemoral ligament may sustain microtrauma as a result of repetitive strain on the hip joint, resulting in pain and inflammation. Athletes who play sports that require running, jumping, or abrupt direction changes frequently exhibit this.
    • Trauma: A pubofemoral ligament injury, such as a sprain or tear, can result from a direct hit to the hip or from falling onto the hip.
    • Muscle imbalances: Having weak or taut hip-area muscles can change how the joint moves and put more strain on the pubofemoral ligament. The ligament may be strained, for instance, by excessive hip adduction (inward movement) brought on by weak gluteal muscles.
    • Joint hypermobility: People who have hypermobile joints—those that move outside of their typical range of motion—may be more susceptible to injuries to the pubofemoral ligament because of excessive hip joint movement.
    • Bad posture: Bad posture can put more strain on the pubofemoral ligament and other hip joint structures. One example of this is an excessive anterior pelvic tilt, or forward tilt of the pelvis.
    • Aging: Our joints’ connective tissue loses its elasticity and becomes more vulnerable to injury as we get older. Injury to the pubofemoral ligament may become more likely as a result.

    To lower the risk of pubofemoral ligament injuries, it is critical to address these risk factors through appropriate training, stretching and strengthening exercises, and postural correction.

    The ways to reduce the risk of pubofemoral ligament injury

    In the hip joint, a band of connective tissue called the pubofemoral ligament joins the femur and pubic bones. It aids in hip joint stabilization and protects against overuse that can lead to injury. The following methods can help avoid pubofemoral ligament injuries:

    • Maintain a healthy weight: Carrying too much weight increases the risk of injury by putting additional strain on the hip joint. It is possible to lower this risk by keeping a healthy weight.
    • Stretch and warm up: It’s critical to properly stretch and warm up the muscles before beginning any physical activity. By doing this, the risk of injury is decreased and the body is better prepared for the activity.
    • Use appropriate technique: To prevent undue strain on the hip joint, it’s critical to use appropriate technique when engaging in any physical activity. This can involve running with the right foot placement or lifting weights with the right form.
    • Wear the right shoes: When engaging in physical activity, wearing the right shoes can lessen the impact on the hip joint. Shoes with adequate cushioning and arch support can help absorb shock and lower the risk of injury.
    • Take breaks to rest: Overuse of the hip joint can cause injury. Regular rest intervals during exercise can help avoid this by giving the joint time to rest and heal.
    • Increase hip muscle strength: By strengthening the muscles surrounding the hip joint, you can lower your risk of injury by adding more stability and support. These muscles can be strengthened with exercises like lunges, squats, and leg lifts.
    • Seek medical attention: It’s critical to get medical help if you’re experiencing hip joint pain. Healing can be accelerated and additional harm can be avoided with early diagnosis and treatment.

    You can help keep your hip joint healthy and avoid injuries to the pubofemoral ligament by following these recommendations.

    FAQs

    The pubofemoral ligament: what is it?

    In the hip joint, a band of connective tissue called the pubofemoral ligament joins the femur and pubic bones.

    What is the pubofemoral ligament’s main function?

    The hip joint is stabilized by the pubofemoral ligament, which also helps to limit excessive movement that may lead to injury.

    How can I avoid sustaining a pubofemoral ligament injury?

    Maintaining a healthy weight, warming up and stretching, using the right technique, wearing appropriate footwear, taking rest periods, strengthening your hip muscles, and getting medical help for pain are all ways to avoid injuring your pubofemoral ligament.

    Which exercises are good for strengthening the hip muscles?

    The muscles surrounding the hip joint can be strengthened with exercises like leg lifts, lunges, and squats.

    References

    • Patel, D. (2023b, August 8). Pubofemoral ligament – structure, function, injury. Samarpan Physiotherapy Clinic. https://samarpanphysioclinic.com/pubofemoral-ligament/
  • Ankle Dorsi Flexion

    Ankle Dorsi Flexion

    Ankle Dorsi Flexion

    Ankle dorsiflexion is the movement of pulling the toes upward toward the shin, decreasing the angle between the foot and the lower leg. It is essential for walking, running, and maintaining balance.

    Ankle Dorsi Flexion and Planter Flexion: What Are They?

    Two essential ankle joint movements, ankle dorsiflexion, and plantarflexion, are necessary for various tasks, including walking, running, jumping, and maintaining balance. These motions require the foot to flex and extend at the ankle.

    To get the toes closer to the shinbone, a movement known as dorsiflexion requires moving the top of the foot toward the shin. Primarily, the tibialis anterior muscle and other muscles at the front of the lower leg control this activity. Ankle dorsiflexion facilitates a fluid and effective gait pattern by allowing the foot to clear the ground during the walking swing phase.

    Conversely, plantarflexion is the movement of the foot downward by pointing the toes away from the shinbone. The muscles in the back of the lower leg, such as the gastrocnemius and soleus muscles, are primarily responsible for this action. For tasks like pushing off the ground when jogging or walking and keeping your balance when standing on tiptoe, plantarflexion is important.

    To maintain a healthy and effective ankle joint, both plantarflexion and dorsiflexion are required. Effective mobility and injury prevention depend on appropriate foot and ankle position, which is made possible by the proper range of motion in these motions. Restricted dorsiflexion or plantarflexion range of motion can result in abnormal gait, decreased athletic performance, and a higher risk of ankle injury.

    Ankle dorsiflexion and plantarflexion can be affected by a variety of factors, such as joint mobility, prior injuries, muscle strength and flexibility, and specific medical disorders. To maximize ankle function and lower the risk of injury, it is critical to maintain a balanced range of motion and strength in both motions through consistent stretching and strengthening activities.

    Ankle Dorsi Flexion: What Is It?

    When the foot moves up toward the lower leg, or when the toes pull toward the lower leg, this action is known as ankle dorsiflexion. This action is the reverse of plantar flexion, which lowers the foot.

    The ankle joint, where the talus (foot bone) and tibia (shin bone) articulate, is where dorsiflexion mostly takes place. The tibialis anterior and other muscles in the front of the lower leg are the main muscles responsible for ankle dorsiflexion. Walking, running, and ascending stairs are made possible by the contraction and elevation of these muscles in the foot and toes.

    Regular walking and other physical activities require adequate ankle dorsiflexion. During the walking swing phase, this allows the foot to clear the ground, maintaining adequate clearance and avoiding toe drag. Lacking ankle dorsiflexion can cause problems with gait, make it harder to do tasks that need ankle mobility, and raise the risk of accidents such as ankle sprains.

    Ankle dorsiflexion can be improved by several stretching, strengthening, and range-of-motion exercises. Sports medicine specialists or physical therapists include the medical practitioners who could suggest these workouts. For a complete examination and individualized guidance on ankle dorsiflexion exercises, it is important to consult with a trained healthcare provider.

    Muscles of the Ankle Dorsi Flexors

    The primary muscles at the front of the foot are in the role of dorsiflexing the ankle, which raises the foot and toes. The following are the primary muscles used in ankle dorsiflexion:

    • Tibialis anterior: The main dorsiflexor of the ankle, this muscle is located on the front of the lower leg. It is in the role of pulling the leg up and running along the tibia (shinbone) to the inside of the leg.
    • Extensor Hallucis Longus: This muscle is situated on the outside of the lower leg. It extends from the big toe to the fibula, a bone in the lower leg. It plays a role in both the big toe’s extension and the ankle’s dorsiflexion.
    • Extensor Digitorum Longus: This muscle is situated on the outside of the calf, next to the extensor longus. With just the tip of the big toe, it extends from the fibula to the toes. It is in control of the extension and assists in ankle dorsiflexion.
    • Peroneus Tertius: The peroneus tertius muscle is situated between the extensors on the outside of the lower leg. It travels to the fifth metatarsal (outside the foot) along the fibula. This facilitates foot rotation (moving the foot outward) and ankle dorsiflexion.

    During ankle dorsiflexion, these muscles assist in raising the foot and toes. Particularly, additional muscles including the flexor hallucis longus and tibialis posterior also play a role in ankle dorsiflexion, but to a lesser degree. However, the main ankle dorsiflexion muscles are the same as listed above.

    Ankle Dorsi Flexion Range of Motion

    Although each person’s ankle dorsiflexion range of motion is different, it is generally agreed that an ankle dorsiflexion range of around 10–20 degrees beyond neutral is normal. Take it simply, the foot should be able to travel 10–20 degrees from the neutral position, which is flat on the ground, up to the calf.

    In order to measure ankle dorsiflexion and evaluate joint angles, a goniometer can be utilized. The subject commonly lies on their back, knee extended, leg relaxed, during the measurement. To align the goniometer, one arm must be outside the lower leg and the other arm must be in line with the metatarsals, or foot bones. The region of ankle dorsiflexion is shown by the angle created at the hand-hand intersection.

    It is essential to remember that different people may exhibit varying degrees of ankle dorsiflexion for a variety of reasons, including heredity, joint shape, prior injuries, and muscle stress. There are several causes of limited ankle dorsiflexion, such as soft tissue tension, joint stiffness, or muscle imbalances. A person’s functional activities and movement patterns may be impacted by limits in ankle dorsiflexion, which may raise their risk of injury or change their stride.

    A doctor, such as an orthopedist or physiotherapist, should be consulted if you have discomfort or difficulties moving your ankle or if you have concerns regarding its dorsiflexion region. If required, they can evaluate your particular circumstances, advise suitable solutions, and guide you through exercises or therapies to enhance ankle dorsiflexion.

    The ankle’s dorsiflexion range of motion can be measured by:

    • Positioning: Ask that the subjects sit with their legs out in front of them on a sturdy platform.
    • Stabilization: Make sure the heel stays on the ground or another sturdy surface.
    • Alignment: Confirm that neither the foot nor the leg are rotated in or out.
    • Zero point: Find the leg’s initial position when it is not dorsiflexed.
    • Measurement: To find the dorsiflexion angle, use a goniometer, a rotating arm, and a device with graduations.
    • Positioning the goniometer: Align the goniometer’s center of rotation with the ankle joint’s center of rotation.
    • Placement of the Stationary Arm: Point the goniometer’s fixed arm toward the hip joint by aligning it with the leg.
    • Placement of the moving arm: Point the goniometer’s moving arm toward the toes and line it up with the leg.
    • Range of Motion: As you hold the goniometer in place, ask the subject to slowly bend their leg up (dorsiflexion). Throughout the movement, make sure the leg remains in position.
    • Read the measurement. Check the goniometer’s degree reading once the subject has reached maximal dorsiflexion. The ankle’s dorsiflexion range of motion is represented by this measurement.
    • Again: To guarantee clarity and regularity, take the measurement two or three times.
    • Note the measurements: Measurements of the range of motion should be recorded for comparison or future use.

    If you want the person’s comfort and cooperation, keep in mind that it is critical to be kind and keep in touch with them during the procedure.

    Ankle Dorsi Flexion Special Test

    To measure ankle dorsiflexion and identify certain restrictions or dysfunctions, medical experts employ a variety of specialized tests. The following are some typical special ankle dorsiflexion tests:

    Silfverskiold Test:

    This test differentiates between soleus and gastrocnemius muscle tension. The knee of the person lying on the ground (image below) is bent at a 90-degree angle. After that, the examiner passively flexes the ankle while extending and dorsiflexing the knee. A strain in the gastrocnemius muscle is indicated if there is a noticeable increase in ankle dorsiflexion when the knee is extended as opposed to flexed. If the restriction is present in any knee position, it is a sign of plantar muscular tension.

    Weight-Bearing Lunge Test

    The test involves the subject standing with the front foot slightly off the wall in a split flea stance. The person tries to contact the wall with the front knee while maintaining the heel on the floor by placing it over the other toe. There is restricted ankle dorsiflexion if the knee cannot reach the wall without raising the heel.

    Heel-to-Wall Test:

    With both feet pointed directly ahead, the person stands with their toes about 5 inches (12 cm) from the wall. Then, while maintaining their heels on the floor, they bend their knees and try to contact the wall with them. Ankle dorsiflexion is limited if the heels are unable to remain in touch with the floor.

    Ankle Dorsiflexion Range of Motion Test: As mentioned before, this test measures the ankle dorsiflexion range of motion using a goniometer. To measure the angle between the metatarsals, the goniometer points at the fibula while the subject is lying supine with the knee extended. The degree of ankle dorsiflexion is indicated by the angle.

    Healthcare practitioners may evaluate ankle dorsiflexion with the use of these specific tests, which also provide useful data for diagnosis, treatment planning, and progress tracking. They are usually performed by qualified experts including orthopedists, sports medicine specialists, and physiotherapists. For a comprehensive assessment and appropriate testing, it is important to speak with a skilled doctor if ankle dorsiflexion is causing you any worry.

    Manual Muscle Testing For Ankle Dorsiflexion

    Ankle manual muscle testing, or MMT, is a physical examination method used to evaluate the function and strength of the muscles around the ankle joint. Healthcare providers, such as doctors or physical therapists, frequently do it to assess muscle weakness, record rehabilitation progress, or identify specific ankle issues.

    Muscle testing

    Position of the patient

    The patient should sit for a short period with their ankle hanging over the bed.

    The patient should be side-lying with minimum gravity to evaluate grades 0–2.

    Position of the Therapist

    In front of the patient, the therapist must take a seat on a chair or stool.

    Perform the anterior tibialis palpation.

    Resistance force over the dorsal foot is applied with the opposite hand.

    What is the test procedure?

    • Stabilize the joint: Place one hand on each side of the ankle to stabilize the joint being evaluated. This will avoid any uncomfortable movement during the test.
    • Apply resistance: As the patient presses down, provide resistance against the ball of the foot. Use sufficient pressure to create resistance without overloading the patient’s efforts.
    • Check for range of motion: As the patient presses down, check for a complete range of motion. Make a note of any incomplete ranges of motion.

    Muscle strength should be graded based on the patient’s effort and the amount of resistance used.

    • Grade 0: There is no visible contraction
    • Grade 1: There is no movement, just a flash or sign of contraction.
    • Grade 2: Perform the motion without using gravity, such as horizontal
    • Grade 3: Move against gravity without resistance.
    • Grade 4: Use mild to moderate resistance force when moving against gravity.
    • Grade 5: do the activity that goes against your strongest muscles.
    • Repeat on both sides: To compare the muscle strength and identify any variations, repeat the test on both sides.
    • Record: Record the muscular strength score and any test-related observations in the patient’s medical file.
    • Interpretation: A trained healthcare expert should interpret the data, taking into consideration additional variables including age, gender, medical history, and other clinical findings.

    Ankle Dorsi Flexion Exercise

    Ankle dorsiflexion can be enhanced using a variety of exercises. Here are a few examples:

    Towel stretching:

    Lying Stretch
    Lying Stretch

    While sitting on the ground, extend your legs in front of you. You can wrap a towel or a resistance band around your foot’s ball. Without bending your knee, gently pull the band or cloth in your direction. It should start to extend the back of your leg. Repeat many times for each leg after holding the stretch for 30 seconds.

    Calf Stretch on the Wall:

    heel-and-calf-stretch
    heel-and-calf-stretch

    With your hands shoulder-height against the wall, face it. Maintaining your foot on the ground, take a step back. Feeling the stretch in the back leg’s calf, gradually bend forward while maintaining the front knee bent. Repeat many times for each leg after holding the stretch for 30 seconds.

    Ankle Dorsiflexion Stretch:

    Place your feet hanging over the edge of a table or chair. Bend your ankles and slowly bring your toes toward your shins after pointing them as far down as you can. For a few seconds, hold the stretch at the top, and then let go. Do this movement ten to fifteen times.

    Heel-raising

    heel-raise
    heel-raise

    If necessary, utilize a sturdy platform for balance while keeping your feet hip-width apart. Raise your heels as high as you can while slowly rising to your toes. After that, gradually bring your heels down to the ground. Repeat ten to fifteen times.

    Ankle Alphabet

    One leg should be extended in front of you as you sit in a chair. With your foot in the air, “write” the alphabet while acting like your big toe is a pencil. Use your whole range of motion while moving slowly and purposefully. On the opposite leg, use the same method.

    By strengthening and stretching the muscles used to dorsiflex the ankle, these exercises assist improve flexibility and range of motion. It is essential to begin the exercises softly and increase their time and intensity progressively based on ability. For advice and individualized exercise suggestions, it is advised that you speak with a health expert, such as a physiotherapist, if you have any conditions or issues.

    FAQs

    What is dorsiflexion contracture?

    Dorsiflexion may be affected by contracture, a disorder in which muscles, ligaments, or tendons become stiff. Different joint traumas, conditions like muscular dystrophy and arthritis, or even something as basic as less joint usage can all result in a contracture.

    What causes poor dorsiflexion?

    Tightness in the lower-limb posterior structure muscles, namely in the calves, is one of the main causes of inadequate dorsiflexion. Another factor is limited ankle mobility, which usually arises from an earlier ankle injury. The other opponent has weak, rapidly fatigued anterior muscles.

    How much ankle dorsiflexion is normal?

    Ankle dorsiflexion normally ranges from 20 degrees. 50 degrees is the normal plantar flexion.

    What is the best exercise for ankle pain?

    Lift your foot to 20 inches off the ground. Rotate your foot to the left and then back to the right while keeping your toe elevated. Return to the starting position after ten seconds of holding. Do this 20 times per leg.

    How to remove ankle pain?

    RICE (Rest, Ice, Compression, Elevation), over-the-counter painkillers, and mild stretching techniques can all help reduce ankle discomfort.

    How to massage ankle pain?

    Begin by moving in little circles around the affected joint. To avoid causing further pain, be extremely gentle. To avoid applying too much pressure, you can use your fingertips instead. After seven days or so, you may wish to try a new massage method called cross-friction massage.

    References:

    • Patel, D. (2023y, July 13). Ankle dorsi flexion and planter flexion. Samarpan Physiotherapy Clinic. https://samarpanphysioclinic.com/ankle-dorsi-flexion-and-planter-flexion/
    • Patel, D. (2023i, May 29). Manual Muscle Testing of Ankle(MMT of Ankle Muscle) – Samarpan. Samarpan Physiotherapy Clinic. https://samarpanphysioclinic.com/manual-muscle-testing-of-ankle/#Ankle_Dorsiflexion

  • Iliofemoral Ligament

    Iliofemoral Ligament

    Introduction

    The iliofemoral ligament, also known as the Y-ligament of Bigelow, is a strong, triangular ligament that connects the ilium to the femur. It is located at the front of the hip joint and plays a crucial role in stabilizing the hip by preventing hyperextension. Its unique Y-shaped structure provides significant support during standing and walking, contributing to overall hip joint stability.

    It connects the femur bone to the pelvis at the hip joint. The Y-shaped ligament and the ligament of Bigelow are other names for the ligament. It is essential for keeping the hip joint stable and avoiding excessive movement that might cause injury or dislocation.

    The hip joint’s external rotation and extension are restricted by the iliofemoral ligament, which is made of thick, fibrous tissue. It is vital for maintaining appropriate posture and movement and is a crucial part of the body’s musculoskeletal system.

    Structure of the Iliofemoral Ligament

    The iliofemoral ligament sometimes referred to as the Y-shaped ligament or the ligament of Bigelow, is a robust ligament that joins the thigh’s femur bone to the pelvic ilium bone. It is the hip joint’s strongest and most vital ligament, and it is essential for maintaining stability and avoiding joint dislocation.

    The anterior, posterior, and intermediate bands are the three components that make up the iliofemoral ligament. These bands originate from various regions of the ilium and come together to form a Y-shaped structure that connects to the femur’s intertrochanteric line.

    The strongest and thickest portion of the iliofemoral ligament is the anterior band. It begins at the ilium’s anterior inferior iliac spine and travels laterally and downward until joining the femur’s intertrochanteric line. The anterior band is in the position of preventing the hip joint from being overextended.

    The anterior band is stronger than the posterior, which is also thinner. The acetabulum’s superior region is where it begins, and it travels laterally and downward before joining the femur’s intertrochanteric line. The hip joint’s hyperflexion is controlled by the posterior band.

    The iliofemoral ligament’s weak and thin intermediate band joins the anterior and posterior bands. Starting from the pubis’s body, it travels laterally and upward before joining the anterior and posterior bands.

    The crisscrossed pattern of thick collagen fibers makes up the iliofemoral ligament. This configuration makes the ligament incredibly strong and injury-resistant by enabling it to withstand tensile stresses from many directions.

    Ultimately, the femur bone of the thigh and the ilium bone of the pelvis are joined by the Y-shaped iliofemoral ligament. The anterior, posterior, and intermediate bands make up its three components. Their structure consists of crisscrossed, thick collagen strands. The strongest and most important ligament in the hip joint is the iliofemoral ligament. It is essential for maintaining stability and avoiding joint dislocation.

    Functions of the Iliofemoral Ligament

    In the hip joint, the iliofemoral ligament serves several vital purposes. Among these are the following:

    • Stability: The strongest and most crucial ligament in the hip joint is the iliofemoral ligament. Stopping the femur bone from moving too much or dislocating from the pelvic acetabulum, is essential for maintaining joint stability.
    • Limiting hyperextension: The iliofemoral ligament’s anterior band is at risk of preventing the hip joint from becoming overly extended. By doing this, the joint is kept from moving beyond its typical range of motion, which could lead to harm or injury.
    • Limiting hyperflexion: The hip joint’s hyperflexion is controlled by the posterior band of the iliofemoral ligament. By doing this, the joint is kept from moving beyond its typical range of motion, which could lead to harm or injury.
    • Weight support: By spreading the body’s weight uniformly over the hip joint, the iliofemoral ligament aids in weight support. This lessens the strain on the joint and protects against harm or injury.
    • Shock absorption: The iliofemoral ligament lessens the force’s effect and absorbs shock. When walking, sprinting, or jumping, the shock is transferred through the hip joint.
    • Maintaining alignment: By maintaining the femur bone centered in the pelvic acetabulum, the iliofemoral ligament aids in preserving the hip joint’s correct alignment. By doing this, abnormal joint wear and tear is avoided, and degenerative diseases like osteoarthritis are less likely to develop.

    In summary, the iliofemoral ligament supports body weight, limits hyperextension and hyperflexion, provides stability, absorbs shock, and preserves alignment, among other critical roles in the hip joint. These processes are essential for the hip joint’s healthy operation as well as for avoiding joint harm or injury.

    Blood supply of the Iliofemoral Ligament

    The deep artery of the thigh, the superior gluteal artery, and the medial and lateral femoral circumflex arteries are some of the blood vessels that supply blood to the iliofemoral ligament.

    A branch of the deep femoral artery, the medial femoral circumflex artery provides blood to the iliofemoral ligament where it attaches to the femur. Another branch of the deep femoral artery, the lateral femoral circumflex artery, provides blood to the ligament where it attaches to the ilium.

    The femoral artery branches out to form the deep artery of the thigh, which supplies blood to the midway of the iliofemoral ligament. Additionally, this artery provides blood to the thigh’s muscles, bones, and other components.

    The iliofemoral ligament receives blood from the superior gluteal artery, a branch of the internal iliac artery, where it attaches to the ilium. Additionally, the gluteal muscles and other pelvic tissues receive blood flow from this artery.

    All things considered, the iliofemoral ligament’s blood supply is critical to preserving its health and functionality. The stability and functionality of the hip joint may be impacted by ligament deterioration or injury brought on by an interruption in the blood supply.

    Symptoms of injuries of the Iliofemoral Ligament

    The severity of the injury can affect the symptoms of an iliofemoral ligament injury. Common symptoms include the following:

    • Pain: One of the most typical signs of an injury to the iliofemoral ligament is hip pain. The front of the hip or the groin region may experience either dull or acute pain.
    • Stiffness: An injury to the iliofemoral ligament may also cause stiffness in the hip joint. It could be difficult to move the hip joint or carry out specific tasks because of this stiffness.
    • Swelling: If the iliofemoral ligament ruptures, swelling may develop around the hip joint. The redness and warmth surrounding the wounded area may be signs of this edema.
    • Weakness: An iliofemoral ligament injury can also cause weakness in the hip joint. Certain activities that attach to hip joint strength may be difficult to execute due to this deficiency.
    • Instability: Injury to the iliofemoral ligament may result in instability in the hip joint. If the hip joint feels loose or unstable as a result of this instability, it may cause additional injury if left untreated.

    Immediately seeking medical treatment is crucial if you encounter any of these symptoms.

    Injuries of the Iliofemoral Ligament

    The hip joint is stabilized in large part by the iliofemoral ligament, a robust band of connective tissue. The hip joint cannot be overextended, which could cause dislocation or injury, thanks to this ligament. The following activities can have an impact on the iliofemoral ligament:

    • Running: The hip joint and the ligaments that support it may be stressed by the repetitive impact forces involved in running. Running’s repetitive action can injure the iliofemoral ligament, particularly if the runner overuses their hip joint or has poor technique.
    • Jumping: The iliofemoral ligament may be strained by the abrupt and violent movement of the hip joint that occurs during jumping. This ligament aids in limiting the hip joint’s excessive extension during jumping, although excessive force may cause injury.
    • Squatting: Squatting involves keeping the back straight while bending the knees and hips. The iliofemoral ligament may be strained by this exercise, particularly if the squat is done incorrectly or with excessive weight.
    • Dancing: A lot of different dance forms include hip-rotation and hip-extension movements, which connect for a lot of hip mobility. These motions, particularly if done frequently or incorrectly, can strain the iliofemoral ligament.
    • Sports: The iliofemoral ligament may be strained by sports involving abrupt direction changes or high-impact motions. Football, basketball, and soccer are a few instances.

    Treatment of the Iliofemoral Ligament Injury

    Conservative treatment

    Non-surgical techniques are used in the conservative treatment of iliofemoral ligament injuries to control pain, lower inflammation, and accelerate healing. For iliofemoral ligament injuries, the following conservative measures are frequently used:

    • Rest: To promote ligament healing, the affected hip joint must be rested.
      This may include avoiding activities that cause pain or discomfort and minimizing the amount of weight-bearing activity on the affected hip.
    • Ice therapy: Putting ice on the injured hip joint might help ease discomfort and inflammation. Applying ice should be done multiple times a day for 15 to 20 minutes at a time.
    • Compression: Applying an elastic bandage or compression sleeve to the affected hip joint might help reduce swelling and give the joint stability.
    • Elevation: Reducing edema and accelerating the healing process can be achieved by raising the injured hip above heart level.
    • Physical therapy: Physical therapy can assist increase the strength, flexibility, and mobility of the hip joints. To enhance hip joint function, a physical therapist may employ manual treatment techniques, stretches, and exercises.
    • Medication: Two over-the-counter drugs that can help manage pain and reduce inflammation are ibuprofen and acetaminophen. To treat pain and inflammation, a doctor may occasionally recommend stronger painkillers or corticosteroid injections.
    • Assistive equipment: By reducing weight-bearing on the injured hip joint, assistive aids like crutches or a cane can aid in rehabilitation.

    For iliofemoral ligament injuries, conservative treatment may be ineffective for weeks or months. It’s critical to adhere to the course of therapy that a physician or physical therapist has advised and to refrain from activities that could make the injury worse. Surgery to rebuild or repair the iliofemoral ligament may be required if conservative measures prove ineffective.

    Physiotherapy treatment

    Physiotherapy treatment for iliofemoral ligament injuries involves a combination of exercises, stretches, and manual therapy techniques to enhance hip joint function, reduce pain and inflammation, and promote healing.
    The following are typical physiotherapy interventions for injuries to the iliofemoral ligament:

    Range of motion activities: Range of motion exercises help increase hip joint mobility and flexibility. These exercises may involve moderate hip rotations, hip flexion and extension, and hip abduction and adduction.

    Exercises for strengthening the hip joints: These exercises help increase hip joint stability and stop more injuries. Leg presses, lunges, squats, and hip bridges are a few examples of these workouts.

    Manual treatment: A physical therapist may employ hands-on techniques to move the affected hip joint and surrounding muscles. Joint mobilization and massage are two manual therapy techniques that can help improve hip joint function and lessen pain and inflammation.

    Modalities: To assist lessen pain and inflammation and encourage healing, modalities like electrical stimulation, ultrasound, and heat or ice therapy may be employed.

    Gait training: Gait training involves assessing and modifying walking habits to improve hip joint function and prevent additional injury.

    Education: A physical therapist may advise on good posture, ergonomics, and body mechanics to help stop additional injuries.

    Home exercise regimen: To maintain the healing process outside of therapy sessions, a physical therapist may recommend a home exercise regimen.

    It’s critical to adhere to the therapy prescribed by a physical therapist and refrain from activities that might exacerbate the injury. With correct physiotherapy treatment, most patients with iliofemoral ligament injury can expect significant improvement in symptoms and function.

    Risk factors of the Iliofemoral Ligament

    The risk of iliofemoral ligament injury can be raised by several risk factors. They consist of:

    • Sports or activities requiring quick direction changes or jumping: Sports like basketball, soccer, and volleyball requiring quick direction changes or jumping can cause a lot of stress on the hip joint and raise the risk of iliofemoral ligament injury.
    • Overuse: Repetitive activities like dancing, cycling, and jogging can cause excessive strain on the hip joint, which raises the risk of iliofemoral ligament injury.
    • Trauma: The iliofemoral ligament may sustain injury as a result of hip joint trauma, such as a fall or impact.
    • Aging: The hip joint’s ligaments and other structures may deteriorate with age, making them more prone to injury.
    • Genetics: Some individuals may be genetically prone to ligament problems, particularly iliofemoral ligament injuries.
    • Inadequate technique: Inadequate running or jumping landing techniques, as well as poor form during weightlifting workouts, can all raise the risk of iliofemoral ligament injury.

    It is imperative to take the required actions to reduce these risk factors, such as employing adequate protective gear, progressively increasing the intensity and duration of exercise, and using optimal techniques during sports and activities. A healthcare provider should be consulted if you are worried about your risk of suffering an iliofemoral ligament injury.

    How to reduce the risk of injuries to the Iliofemoral Ligament?

    Preventing the iliofemoral ligament from being overstressed or injured is one way to lower the risk factors for injury. The following are some strategies to lower the risk factors:

    • Warm-up and cool-down: To prepare the muscles and joints for the strain of exercise, it’s crucial to warm them up before beginning any physical activity. This can include stretching, light aerobic exercises, and mobility drills. Likewise, to aid in the recovery of the muscles and joints, it is crucial to cool down with stretching and mild aerobic exercises after working out.
    • Employ good form: Using good form when lifting weights, avoiding abrupt direction changes, and employing appropriate landing techniques when running or jumping can all help lessen the strain on the hip joint and prevent iliofemoral ligament injuries through sports and activities.
    • Gradual progression: Gradually increasing the intensity and length of exercise can help prevent overuse injuries to the hip joint. This can involve gradually increasing the distance or pace of jogging or cycling or gradually increasing the weight or repetitions during weightlifting exercises.
    • Use suitable protective gear: Wearing adequate protective gear, such as hip padding or braces, can help lower the risk of hip joint injuries during sports and activities.
    • Keep your weight in check: Carrying too much weight can strain your hip joint and raise your risk of injury. Maintaining a healthy weight with regular exercise and a well-balanced diet can help lower this risk.
    • Seek medical attention: It’s critical to get medical help if you suffer from any hip joint pain or discomfort. Hip joint injuries can be prevented from getting worse and the risk of long-term problems can be decreased with early diagnosis and treatment.

    By making these important efforts to lower the risk factors of iliofemoral ligament injury, you may help protect your hip joint and maintain your general health and well-being.

    FAQ

    The iliofemoral ligament: what is it?

    Connecting the pelvis to the thigh bone (femur), the iliofemoral ligament is a robust ligament that aids in hip joint stability.

    What leads to injury to the iliofemoral ligament?

    Degeneration brought on by aging or underlying medical disorders, trauma, or repetitive overuse can all result in iliofemoral ligament injuries.

    What traits distinguish an injury to the iliofemoral ligament?

    An injury to the iliofemoral ligament can cause hip or groin pain, stiffness, swelling, and trouble standing or walking.

    How may an injury to the iliofemoral ligament be identified?

    A physical examination, medical history, and imaging tests like X-rays, MRIs, or CT scans are usually used to identify an iliofemoral ligament injury.

    How much time does it take to heal after an injury to the iliofemoral ligament?

    The length of recovery is determined by the extent of the injury as well as personal characteristics like age and general health. Most patients can anticipate a noticeable improvement in function and symptoms in a matter of weeks to months with appropriate physiotherapy treatment.

    Is it possible to avoid an injury to the iliofemoral ligament?

    A healthy weight, avoiding repetitive overuse activities, warming up before exercise, employing the right technique during physical activity, and wearing appropriate footwear are all examples of prevention strategies.

    References

    • Patel, D. (2023a, August 8). Iliofemoral ligament – structure, function, injury. Samarpan Physiotherapy Clinic. https://samarpanphysioclinic.com/iliofemoral-ligament/
  • Acute Bronchitis

    Acute Bronchitis

    Introduction

    Acute bronchitis is a temporary inflammation of the bronchial tubes, the airways that carry air to the lungs. It is typically caused by viral infections, such as the common cold or flu, and often follows an upper respiratory infection.

    Symptoms include a persistent cough, chest discomfort, mucus production, and sometimes mild fever or fatigue. While it usually resolves within a few weeks without specific treatment, supportive care like rest, hydration, and over-the-counter medications can help manage symptoms.

    Types of Bronchitis 

    • Acute bronchitis: It typically results from a viral infection and resolves on its own within a few weeks. The majority of people with acute bronchitis do not require treatment.
    • Chronic bronchitis: You have chronic bronchitis if you have a cough that usually produces mucus for three months of the year. This continues for a minimum of two years.

    Acute Bronchitis: What is it?

    Inflammation of the bronchi (large and medium-sized airways) of the lungs is the short-term form of acute bronchitis, commonly referred to as a chest cold.

    Coughing is the most prevalent symptom. Coughing up mucous, wheezing, dyspnea, fever, and chest pain are further symptoms. The duration of the infection could range from a few to ten days.

    The length of symptoms typically lasts three weeks, but the cough may continue for a few weeks after that. For up to six weeks, some people may have symptoms.

    A viral infection is the cause of 90% of cases. These viruses can be transferred by direct touch or through coughing. Exposure to dust, tobacco smoke, and other air pollutants are risk factors.

    A tiny percentage of cases are caused by bacteria like Bordetella pertussis or Mycoplasma pneumoniae, or by high levels of air pollution. Usually, a person’s symptoms and signs are used to make the diagnosis.

    The color of the sputum does not indicate if the illness is viral or bacterial. Generally, there is no requirement to identify the underlying organism. Similar symptoms can also be caused by COPD, bronchiolitis, pneumonia, asthma, and bronchiectasis. An X-ray of the chest could help identify pneumonia.

    Acute bronchitis is typically treated with rest, paracetamol (acetaminophen), and NSAIDs to reduce fever; cough medicine has little evidence to support its use and is not advised for children younger than six. Antibiotics should generally be avoided except in cases where pertussis is the cause of acute bronchitis.

    Prevention is achieved by staying away from smoking and other lung irritants; frequent hand washing and vaccination may also be protective; there is some evidence to support the use of honey and pelargonium as symptom treatments.

    Epidemiology

    Acute bronchitis is one of the most prevalent illnesses, affecting approximately 5% of adults and 6% of children, with a higher incidence during the winter months.

    Over 10 million Americans seek medical attention for acute bronchitis each year, and 70% of them receive antibiotics, the majority of which are unnecessary. Efforts are being made to reduce the use of antibiotics for acute bronchitis.

    Acute bronchitis can also be caused by a number of risk factors, such as a history of asthma, living in a crowded environment, living in a polluted location, and smoking. For those who are vulnerable, some allergens like pollen, perfume, and fumes may cause acute bronchitis.

    When the infection is bacterial in origin, the isolated pathogens often overlap with those associated with community-acquired pneumonia. These bacteria include Streptococcus pneumonia and Staphylococcus aureus.

    Pathophysiology

    Acute bronchitis, which is often caused by viral infections, is an inflammation of the large and mid-sized airways (bronchi). The various effects of these microorganisms on the respiratory tract are highlighted by the large number of anatomical locations within the respiratory tract where these pathogens can establish themselves.

    When viewed by positron-emission tomography (PET) scan, the inflammatory process causes elevated 18F-fluorodeoxyglucose (FDG) uptake due to increased blood flow and cellular activity within the affected bronchi.

    Furthermore, a number of factors can cause bronchial inflammation, although the most frequent ones include viruses, allergies, and pollution. Mucosal thickening, desquamation of epithelial cells, and basement membrane degradation are the results of bronchial wall inflammation.

    Acute bronchitis can occasionally develop from a viral upper respiratory illness that progresses to a lower respiratory tract infection.

    Acute bronchitis in children

    The risk of acute bronchitis is higher in children than in adults. This is partially caused by risk factors that are specific to individuals and could include:

    • Elevated viral exposure in places like playgrounds and schools
    • Asthma allergies
    • Chronic sinusitis
    • Enlarged tonsils
    • Inhaled particles, including dust

    Cause

    Most often, viruses, infectious organisms can cause acute bronchitis. Typical viruses include influenza, rhinovirus, respiratory syncytial virus, and others.

    Despite being rare pathogens, bacteria can include Haemophilus influenzae, Bordetella pertussis, Streptococcus pneumoniae, Mycoplasma pneumoniae, and Chlamydophila pneumoniae.

    Damage from irritated airways leads to inflammation and the entry of neutrophils into the lung tissue.

    Mucosal hypersecretion is encouraged by a chemical produced by neutrophils.

    More goblet cells in the small airways cause further obstruction of the airways.

    Although infection is neither the cause nor the source of chronic bronchitis, it is thought to be related to its support.

    Symptoms

    Acute bronchitis first presents with symptoms that resemble those of the flu or a cold.

    These signs may consist of:

    • Fatigue,
    • Sore throat, and runny nose
    • Sneezing,
    • Wheezing,
    • Back and muscle pain,
    • Feeling chilly easily, and
    • Having a temperature between 100°F and 100.4°F (37.7°C and 38°C)
    • Unexpected weight loss, loud cough, and breathing difficulties
    • Chest pain

    After the initial infection, you will probably have a cough. Frequently, a dry cough will develop into a productive one that produces mucus. The most typical sign of acute bronchitis is a productive cough, which may persist anywhere from 10 days to 3 weeks.

    A change in mucus color from white to green or yellow is another symptom you could observe. This does not mean that you have a bacterial or viral infection. It just indicates that your immune system is functioning.

    Risk factors

    The following variables raise your risk of developing acute bronchitis:

    • Inhaling secondhand smoke and cigarette smoke
    • Weak immune system or poor tolerance to diseases, gastric reflux
    • Regular contact with irritants, such as dust or chemical fumes
    • Absence of whooping cough, pneumonia, and flu vaccinations among those over 50

    Complications

    Complications associated with acute bronchitis include:

    • Secondary pneumonia
    • Acute respiratory distress syndrome
    • Prolonged symptoms
    • Spontaneous pneumothorax
    • Spontaneous pneumomediastinum

    Prevention

    By making every effort to maintain your health and the health of others, you can help prevent acute bronchitis. This includes:

    • Wash your hands.
    • Obtain recommended vaccinations, like the flu vaccine.
    • Avoid secondhand smoke and avoid from smoking.
    • When you cough or sneeze, keep your mouth and nose covered.

    Prognosis

    Acute bronchitis typically resolves on its own with symptomatic treatment. Clinicians should, however, continue to be mindful of possible secondary problems, like pneumonia. The medical staff should, therefore, be aware of potential side effects and be ready to administer the appropriate treatments if necessary, even though symptomatic treatment for acute bronchitis is often effective.

    Diagnosis

    Viral bronchitis is characterized by mild peri-bronchial cuffing.

    During a physical examination, wheezing, rhonchi, extended expiration, and diminished breath sound intensity are frequently observed. Physicians base their evaluation on the patient’s history and whether they have a persistent or sudden onset cough, a URTI, and no signs of pneumonia.
    Patients with an acute onset cough, which frequently occurs after a URTI without signs of pneumonia, should be suspected of having acute bronchitis, which is usually a clinical diagnosis based on the patient’s history and examination.

    A set of useful criteria has been offered for acute bronchitis despite the lack of a widely recognized clinical definition. These criteria include:

    • Fewer than three weeks of acute sickness.
    • Coughing is the most common symptom.
    • At least one additional lower respiratory tract symptom, like chest pain, wheezing, or sputum production.

    People who present with coughing and dyspnea may undergo a number of tests:

    To rule out pneumonia, which is more likely in those who have a fever, a fast heartbeat, a fast breathing rate, or are elderly, a chest X-ray is helpful.

    A culture containing pathogenic microorganisms like Streptococcus species and a sputum sample containing neutrophil granulocytes (inflammatory white blood cells) are both present.

    An elevated white blood cell count and elevated C-reactive protein would be signs of inflammation in a blood test.

    The chest may produce crackles, wheezing, rhonchi that clear with coughs, and a decrease in breath sounds. Pleural rub and dullness to percussion indicate that the illness has spread outside the bronchi, as in the case of pneumonia. Pertussis is suggested by coughing fits that are followed by vomiting and inspiratory whooping.

    Differential Diagnosis

    It is important to take into account additional possible causes of acute cough, particularly if it lasts longer than three weeks. The following are additional factors to take into account:

    • Asthma: Since about one-third of patients present with an acute cough, acute asthma worsening symptoms are commonly incorrectly diagnosed as acute bronchitis.
    • Acute or chronic sinusitis
    • Bronchiolitis
    • COPD
    • Gastroesophageal reflux disease (GERD)
    • Viral pharyngitis
    • Heart failure
    • Pulmonary embolism
    • Pneumonia

    Treatment

    The majority of cases resolve on their own within a few weeks. Medication for pain can help with symptoms. Additional advice might include getting enough sleep and drinking plenty of water.

    Antibiotics

    The widespread use of antibiotics for acute bronchitis is not supported by evidence. Antibiotics decreased cough by an average of 12 hours, out of a total average of roughly 14–28 days, according to a systematic review. In addition to causing more adverse effects like nausea and diarrhea, antibiotics may also encourage bacteria that are resistant to them. They might be helpful in vulnerable populations, like the elderly and the weak.

    Decrease smoking

    Alternative methods of treatment

    Children without restricted airways who have an acute cough do not respond well to salbutamol. Although there is little proof that salbutamol helps adults who are wheezing because of a narrowed airway, it can cause tremor, shakiness, or anxiety.

    Physical Therapy

    The physical therapist’s objectives should include education, enhancing exercise tolerance, decreasing hospitalization and exacerbations, helping to clear sputum, and increasing lung volume and thoracic mobility.

    Treatment for acute bronchitis should include both respiratory physical therapy and pulmonary rehabilitation.

    Education

    Morbidity and quality of life are significantly impacted by chronic bronchitis. The psychological effects of having a chronic condition may be decreased and an active approach to management may be encouraged if the treating clinical staff educates the person with acute bronchitis about the presenting condition, medication use, treatment options, and self-management.

    Quitting smoking is the most important nonpharmacological intervention. It reduces goblet cell hyperplasia and enhances mucociliary function. It has also been demonstrated that quitting smoking lessens airway damage, lowering the amount of mucus removed from tracheobronchial cells.

    Exercise

    Acute bronchitis and COPD can be effectively managed, treated, and prevented with regular exercise.

    Reduced airflow obstruction, airway clearance, enhanced functional abilities, elevated energy levels, and sputum expectoration have all been demonstrated to improve with aerobic exercise and upper and lower limb resistance training.

    Before beginning any exercise program, a consultation with the general practitioner should be held, and the treating clinical team (such as a physiotherapist) should oversee the program.

    Physical Fitness

    Upper and lower limb resistance training and aerobic exercise can improve energy levels, functional tolerance, and physical fitness while reducing hospitalizations, exacerbations, and shortness of breath.

    Particular advice are made regarding exercise for people with COPD and chronic bronchitis. Before beginning any exercise program, a discussion with the treating clinical team should be held.

    Secretion clearance:

    • Active Cycle of Breathing
    • Autogenic Drainage
    • Positive Expiratory Pressure (PEP)
    • Oscillating positive expiratory pressure
    • Effective / productive coughing techniques.
    • Postural drainage in sitting and lying.
    • Manual techniques, including percussion and vibrations

    Breathing techniques:

    • Controlling respiratory rate
    • Diaphragmatic breathing
    • Relaxation breathing exercises

    FAQs

    What is acute bronchitis’ primary cause?

    Although bacterial infections can also occasionally cause acute bronchitis, viruses such as the flu or a cold are the most common cause. You are more likely to contract a cold or acute bronchitis yourself if you are in close proximity to someone who has one. You have not received a flu vaccination.

    Can pneumonia develop from bronchitis?

    Pneumonia can sometimes develop from a bronchitis infection. Even though this can be frightening, there are things you can do to reduce your risk and make sure you get a diagnosis if it happens.

    How can a nighttime bronchitis cough be stopped?

    Be mindful of your body and get as much sleep as you can, especially in the initial days. If you have a cough that keeps you up at night, use a second pillow to support your head and keep mucus from building up in the back of your throat. Chicken soup can help break up mucus and calm a sore throat when you have bronchitis.

    Can tuberculosis develop from bronchitis?

    Both as a consequence in the some case and as a complication during the subacute and convalescent stages of the disease, the risk of bronchitis in conjunction with pulmonary tuberculosis is well known.

    How is acute bronchiolitis treated medically?

    Airway support, additional oxygen, and fluid and nutrition support are the key components of treatment. Patients with bronchiolitis have not been shown to benefit from commonly used pharmaceutical treatments, such as ribavirin, nebulized bronchodilators, and systemic corticosteroids.

    How is acute bronchitis generally treated?

    You can manage the symptoms of bronchitis at home with rest and over-the-counter medications. Breathing becomes easier when mucus is released through the use of a humidifier or warm showers.

    References

    • Singh, A., Avula, A., & Zahn, E. (2024, March 9). Acute bronchitis. StatPearls – NCBI Bookshelf. https://www.ncbi.nlm.nih.gov/books/NBK448067/
    • Acute bronchitis. (2024, October 10). Johns Hopkins Medicine. https://www.hopkinsmedicine.org/health/conditions-and-diseases/acute-bronchitis#:
    • Bronchitis. (2025b, January 6). Cleveland Clinic. https://my.clevelandclinic.org/health/diseases/3993-bronchitis

  • How Many Calories are in a Shot of Vodka?

    How Many Calories are in a Shot of Vodka?

    Introduction

    Vodka is an alcoholic drink that has been distilled and is transparent. Various types originated from Poland, Russia, and Sweden. Vodka primarily consists of water and ethanol, but it may also contain small amounts of impurities and flavors.

    Vodka contains few calories and no carbohydrates. Additionally, it does not contain gluten. Typically, a single shot contains fewer than 100 calories.

    • If you’re trying to manage your calorie intake or adhere to a low-calorie diet while consuming alcohol, vodka can be a low-calorie option worth considering.
    • Below is a compilation of several well-liked alcoholic drinks, their portion sizes, and the calorie counts for each.
    • With 0 grams (g) of carbohydrates, it is the preferred distilled spirit for many individuals on low-carb diets.

    It is worth mentioning, though, that mixers high in sugar can cause the calorie total to rise rapidly. Please continue reading to find out more about the nutritional aspects of vodka. Compared with other alcoholic beverages like beers, ciders, and wines, vodka has a relatively low-calorie content. Plain 80-proof vodka has approximately 96 calories in a 1.5 oz serving.

    Nonetheless, this does not imply that vodka is a suitable option for someone aiming to shed pounds. This article provides a comparison of the nutritional profiles of vodka and other alcoholic beverages. We also explain how alcohol consumption can hinder weight loss efforts.

    What is Vodka?

    Vodka, a transparent alcoholic beverage, is produced from fermented grains such as rye or wheat. It can also be created from potatoes and — well — essentially anything. If you have the determination, you can find a way to produce vodka. (But don’t attempt this at home.)

    In the United States, vodka has to be a minimum of 80 proof, which indicates that it has at least 40% alcohol content.

    Vodka is extremely popular and can be consumed straight as a shot, used in cooking, or mixed into drinks such as Cosmos, screwdrivers, and white Russians.

    What components are in vodka?

    Alone, it lacks sugar, protein, fat, vitamins, minerals, antioxidants, and so on. Certain types may include minor traces of contaminants, but these would not have a considerable impact on the nutrient content.

    • Nevertheless, vodkas with flavors are quite favored as well — featuring tastes from grapefruit to birthday cake. And, even if you may not realize it due to the absence of a nutrition facts label or ingredient list on the bottle, they can be packed with added sugar.
    • For example, Smirnoff offers a vast range of flavored vodkas, and there is no indication on their website or the label of a bottle whether a specific flavored vodka contains sugar or the amount it contains.

    They also offer a zero sugar infusions line, which consists of flavored vodkas that contain no sugar. This implies that you can safely presume all other flavored vodkas they provide include sugar.

    The precise calorie and sugar counts for each brand and flavor of vodka can only be determined by contacting the manufacturer directly. There’s no other way to know them. What a buzzkill.

    Vodka nutrition facts

    Vodka nutrition facts
    Vodka nutrition facts

    Since vodka consists solely of water and ethanol, it has minimal nutritional value. The alcohol itself accounts for all the calories.

    The following is the nutritional details for a 1.5-oz (42 g) serving of distilled vodka at 80 proof (40%):

    • Calories: 97
    • Sugar: 0 g
    • Fiber: 0 g
    • Cholesterol: 0 g
    • Fat: 0 g
    • Sodium: 0 g
    • Vitamins: 0 g
    • Minerals: 0 g

    Compared to other common choices like wine and beer, vodka is regarded as a low-calorie alcoholic drink. A serving of 80-proof (40%) distilled vodka, measuring 1.5 oz (42 g), contains 97 calories.

    The calorie content of vodka and other alcoholic drinks can, however, differ based on the concentration of alcohol. A liquor’s “proof” is a numerical value indicating its alcohol percentage: the higher the proof, the more calories it has, and the greater its impact on blood alcohol content.

    The proof can be halved to determine the percentage. To clarify, 100 proof contains 50% alcohol, whereas 80 proof has 40% alcohol.

    A 1.5-oz (42 g) serving of vodka contains the following number of calories:

    • 70 proof (35%):
    • 85 calories
    • 80 proof (40%): 97 calories
    • 90 proof (45%): 110 calories
    • 100 proof (50%): 124 calories

    Vodka’s caloric content is derived from the alcohol it contains. Pure alcohol has about 7 calories for each gram. As a point of reference, protein and carbohydrates each provide roughly 4 calories per gram, whereas fat provides approximately 9 calories per gram.

    • This indicates that alcohol contains almost double the calories per gram compared to carbohydrates or protein, and only slightly less than fat.
    • Vodka brands with identical proofs typically have equivalent calorie contents. As an example, a 42 g serving of Smirnoff, Grey Goose, and Absolut vodka with 40% alcohol by volume contains 97 calories.
    • As per the United States Department of Agriculture (USDA), a 1.5-ounce serving of plain, 80-proof (40 percent) vodka has 96 calories, while a 1-ounce serving has 64 calories.
    • Aside from trace amounts of impurities and nutrients, standard, plain vodka consists solely of water and alcohol (ethanol).

    Thus, the alcohol is the sole source of vodka’s caloric content. The calorie content of vodka rises with the concentration of alcohol it contains.

    The proof refers to the percentage of alcohol in this kind of liquor. A person can estimate the alcohol concentration by dividing the liquor’s proof value by two. A vodka with 80 proof will have approximately 40% alcohol content.

    Below are the caloric values of 1.5-ounce servings of vodkas with varying proofs:

    • A serving of 94-proof vodka contains 115 calories.
    • 123 calories in a serving of 100-proof vodka

    Aside from its caloric content, vodka lacks nutrients like fiber, protein, vitamins, and minerals. This is the reason why vodka and other kinds of alcohol are often called sources of “empty” calories by many individuals.

    The way the body metabolizes alcohol is completely different from how it processes the three macronutrients: carbohydrates, proteins, and fats.

    Are there any carbs in vodka?

    As they consist of alcohol, concentrated spirits such as vodka, rum, whiskey, and gin contain no carbohydrates.

    This might appear strange, as vodka is produced from carbohydrate-rich foods such as potatoes and wheat. The fermentation and distillation processes eliminate the carbohydrates, however. If you’re overseeing or attempting to restrict your carbohydrate consumption, vodka could be a preferable option compared to alternatives such as beer.

    Even though it is produced from carbohydrate-rich foods like potatoes or wheat, the processes of fermentation and distillation remove almost all of their nutrients, carbohydrates included. The sugars and starches present in the original foods are mainly transformed into ethanol.

    Carbohydrate and calorie content of vodka about other alcoholic beverages

    Other distilled spirits, such as rum, whiskey, gin, and tequila, have approximately the same calorie count as vodka and contain no carbohydrates.

    For instance, certain rum brands include additional sugar and spices, which alters both the taste and nutritional content.

    Is the caloric content of flavored vodka higher?

    Vodkas with added flavors can enhance the taste experience and remove the necessity for high-calorie mixers such as sodas or fruit juices.

    Whether natural or artificial, vodka can be flavored with virtually anything. Lemon, berry, coconut, watermelon, cucumber, vanilla, and cinnamon are favored choices. More unusual infusions consist of bacon, whipped cream, ginger, mango, and smoked salmon. A lot of infused varieties have the same calorie count as regular vodka.

    It is, however, crucial to avoid conflating flavor-infused vodka with vodka beverages that incorporate flavored sugary syrups added post-fermentation and distillation. These products frequently have a higher calorie and carb content than infused vodka.

    A lemonade vodka cocktail (286 g), for example, can contain nearly 200 calories and 26 g of carbohydrates, with 25 g being added sugars.

    Always study the labels with care. If the product label doesn’t provide nutrition details, consider looking on the manufacturer’s website.

    Low-calorie vodka drinks

    Vodka on its own has little flavor apart from the burning sensation of alcohol, which is off-putting to many. Rather, it is commonly combined with other drinks such as sweet juices, sodas, and bitters to create a delicious cocktail.

    However, a lot of these mixers contain high amounts of added sugars, carbohydrates, and calories. As an example:

    • Cola: A 12-oz (370 g) can contain 155 calories and 38.5 g of carbohydrates, with added sugars accounting for 36.8 g.
    • Orange juice: A serving size of 1 cup (248 g) provides 117 calories and contains 25.2 g of carbohydrates, including 20.3 g of sugar.
    • Cranberry juice: A serving size of 1 cup (253 g) contains 116 calories and 31 g of carbohydrates, almost entirely from sugar.
    • This can complicate calorie management and added sugars are linked to chronic health issues such as obesity, hypertension, and heart diseases.

    To lower your sugar consumption, think about combining vodka with one of these:

    Soft drinks with reduced sugar content club soda or soda water with a splash of lime or lemon watered-down lemonade or cranberry juice chilled tea club soda combined with mint leaves and a calorie-free sweetener (such as stevia)

    Vodka and weight loss

    If you’re trying to lose weight, vodka might appear to be a suitable alcoholic drink. Nevertheless, it should be acknowledged that it can affect weight management in various respects. Alcohol, such as vodka, disrupts the body’s ability to burn fat.

    Usually, the liver processes (decomposes) fats. However, when alcohol is present, the liver prioritizes its breakdown and uses it as an energy source. This halts the processing of fat, which can cause fat to build up in the liver and other areas.

    While your body uses alcohol for energy, fat metabolism comes to a standstill. This is known as “fat sparing,” which is not beneficial for those attempting to lose weight.

    Alcohol is deemed to be “empty calories” as well since it lacks any nutritional benefits.

    Studies indicate that the consumption of alcoholic beverages usually increases an individual’s daily caloric intake, potentially leading to weight gain. Alcohol can also boost your appetite and lessen sensations of satiety. More often than not, this results in the consumption of foods rich in fats and carbohydrates, which can rapidly elevate total caloric intake.

    • Although vodka is regarded as a low-calorie alcoholic beverage, it has more calories per gram than both protein and carbohydrates.
    • While ethanol has 7 calories per gram and fat has 9, both proteins and carbohydrates have about 4 calories per gram.
    • Alcohol also hampers the liver’s capacity to metabolize and eliminate fats.

    What is the body’s response to alcohol?

    Alcohol takes priority when it enters the body — the liver processes it before anything else, including fats and sugars. This results in the accumulation of fatty acids, which are the fundamental constituents of fats. The body frequently retains them for future use.

    Since the body prioritizes alcohol metabolism, it uses up the calories from alcohol before those from fats. It is called fat sparring.

    Additionally, the liver retains glucose as glycogen, serving as a reserve energy source. The liver metabolizes alcohol before supplying glucose to the body, which can lead to low blood sugar levels. This makes alcohol consumption especially perilous for those with diabetes.

    Can alcohol impede weight loss through other mechanisms?

    Indeed. Alcohol consumption can heighten the desire for indulgent, fatty foods—items that those attempting to shed pounds typically seek to avoid.

    Most people’s appetites are also augmented by alcohol. Alcohol consumption can foster eating behaviors that contribute to weight gain, like late-night snacking and excessive eating.

    What is the calorie content of mixers?

    A lot of people combine vodka with high-calorie drinks like sodas, juices, or other spirits. When vodka is included in a mixed drink, the calorie count can be two to three times greater than that of a straight serving of vodka.

    In an 8-ounce portion of the following well-liked mixers, there are:

    • Orange juice: 111 calories
    • Regular soda: 100 calories
    • Tonic water (regular), ginger beer, or quinine-rich water: 80 kcal

    Here are the average calorie counts for popular cocktails and coolers that often include vodka:

    • 2.25-ounce martini: 124 calories
    • 2.75-ounce cosmopolitan: 146 calories
    • 12-ounce Smirnoff ice: 241 calories

    Some individuals might opt for a flavored or infused vodka instead of mixing regular vodka with a high-calorie mixer.

    Those who are counting calories should scrutinize the labels of flavored vodkas. If the nutritional contents are not indicated, the company’s website might provide additional details. The majority of infused products have no extra calories, but those that include syrups will have a calorie count significantly greater than that of standard vodka.

    Ice, club soda, and plain water contain neither calories nor sugar. Incorporating lemon or lime slices can improve the taste of a vodka drink.

    Vodka vs. other types of alcohol

    The nutritional profile of vodka is similar to that of other distilled spirits, such as:

    • Gin
    • Tequila
    • Whiskey
    • Rum
    • Brandy
    • Cognac

    For a 1.5-ounce serving, most distilled spirits contain approximately 96–98 calories and no carbs. Just like with vodka, the exact calorie count per serving differs among brands and proofs. Compared to most other alcoholic beverages, vodka has a lower calorie count per serving.

    Although precise calorie counts vary based on the brand and whether flavoring is added, other well-known varieties of alcohol generally have around:

    • 153 calories per 12-ounce serving of beer
    • 103 calories in a 12-oz portion of light beer
    • Most liqueurs contain 165 calories per 1.5-ounce serving.
    • A 5-oz portion of red wine has 125 calories.
    • 121 calories per 5-ounce serving of white wine
    • Sweet wine contains 165 calories in a 3.5-ounce serving.
    • 75 calories per 2-ounce serving of sherry
    • 90 calories per 2-ounce serving of port
    • 84 calories per 4-ounce serving of champagne
    • Sweet vermouth contains 140 calories in each 3-oz serving.
    • 105 calories per 3-ounce serving of dry vermouth

    How to drink fewer calories

    To lessen the calorie content of an alcoholic drink, one can:

    • Certain tactics can assist individuals in lowering their alcohol intake.
    • Using low-calorie or calorie-free sodas or juices as mixers using plain water or club soda as a base adding ice to beverages enhancing the flavor with a squeeze of citrus, like lemon or lime infusing drinks with mint or sage leaves incorporating zero-calorie sweeteners, such as stevia extract.

    To drinks measure mixed drink ingredients carefully A few recommendations are:

    • A 1.5-ounce serving of 80-proof spirits
    • A 4-ounce glass of wine
    • A 12-ounce beer

    Keep in mind that mocktails and alcohol-free coolers can have significant sugar and calorie content as well, so make sure to examine the labels.

    Stop having these foods while drinking alcohol

    Dairy Products

    Dairy Products
    Dairy Products

    Mixing alcohol with drinks that are high in dairy content or eating foods rich in dairy can lead to digestive issues and discomfort. A lot of individuals have lactose intolerance, and alcohol can worsen these symptoms.

    Moreover, dairy products can create a coating on the stomach lining, which may hinder your body’s ability to process alcohol efficiently. To reduce the likelihood of digestive issues, avoid creamy desserts and cocktails made with dairy while consuming alcoholic beverages. Choose alternatives like nut milk or those derived from coconut milk instead.

    Chocolates

    Chocolates
    Chocolates

    Although chocolates may be alluring, they possess a high sugar content and can increase the negative effects of alcohol. As alcohol leads to dehydration, pairing it with sugary foods can worsen this effect and lead to headaches or fatigue. For those who crave sweets, fresh fruit or dark chocolate with a higher cocoa percentage is a better choice, as these options are lower in sugar and provide health benefits.

    Pizza

    Pizza
    Pizza

    Even though pizza is loved by many, it’s not the optimal option when drinking alcohol. Due to its high fat, carbohydrate, and sodium content, pizza can impede alcohol absorption and cause bloating or discomfort. If you desire something savory, choose a dish centered on a lean protein, such as grilled chicken or fish, accompanied by vegetables.

    Bread

    Bread
    Bread

    It is wise to refrain from consuming bread and beer at the same time since they can cause dehydration. This is due to the presence of yeast in beer and bread, which can impede the liver’s capacity to metabolize alcohol efficiently. Furthermore, high concentrations of yeast in the body can put pressure on the stomach’s digestive functions. For this reason, it is recommended to refrain from eating bread and drinking beer at the same time.

    Spicy Foods

    Spicy Foods
    Spicy Foods

    Although spicy foods can taste great, they might heighten alcohol’s effects. Dishes with a lot of spice can aggravate the stomach lining and increase acid reflux symptoms. Because alcohol already causes stomach irritation, mixing it with spicy foods can result in heartburn, indigestion, or even stomach ulcers. For the sake of your digestive system, consider opting for more easily digestible foods like grilled chicken, fish, or cooked vegetables.

    Nutritious food choices to accompany alcoholic beverages

    Nuts and seeds:

    Nuts and seeds
    Nuts and seeds

    Almonds, walnuts, pumpkin seeds, and other nuts or seeds without added salt are good options. These foods provide healthy fats, protein, and fiber that may aid in slowing down the absorption of alcohol.

    Salad: 

    Salad
    Salad

    A light salad featuring various leafy greens and vegetables, topped with a delicate dressing, can serve as a refreshing and healthful complement to your beverage. Choose a salad with vibrant veggies such as spinach, tomatoes, cucumber, and carrots to get your vitamins, minerals, and fiber.

    Popcorn:

    When drinking, air-popped popcorn (without too much butter or salt) can be a crunchy and satisfying snack. This is a whole grain that offers fiber and can serve as a healthier option compared to other salty snacks. Think about incorporating some herbs or spices to enhance the flavor.

    Grilled Paneer:

    Slice the paneer, then marinate it with seasonings such as chili powder, salt, turmeric, and cumin. Cook the paneer on the grill until it acquires grill marks and a bit of charring. Relish it as a protein-packed snack with your beverage.

    Grilled vegetables:

    Vegetables like bell peppers, tomato, and eggplant, when grilled or roasted, make for a delicious and nutritious side to your beverage.

    Olives:

    Olives are packed with healthy fats and are a source of antioxidants. They offer a satisfying salty flavor and pair wonderfully with cocktails.

    Conclusion

    Vodka is a low-calorie alcoholic beverage that contains no sugar, fat, or carbs, and has no nutritional value. If you’re looking for a low-calorie alcoholic drink, vodka is a solid option. It contains fewer calories and carbohydrates than beer, wine, champagne, and pre-mixed cocktails.

    • Combine vodka with soda water and a dash of lemon or a diet soda to maintain a low calorie and carb count, but be sure to control your alcohol intake. If you’re pregnant, avoid drinking vodka or any other alcoholic beverages.
    • In comparison to other alcoholic beverages, vodka has a lower calorie count and is carb-free. According to the USDA, a standard vodka serving has 96 calories.

    It is crucial to keep in mind that alcohol can hinder weight loss through various means, such as delaying the metabolism of fats and sugars.

    • For those who consume alcohol and wish to shed pounds, opting for low- or no-calorie mixers is advisable. Some tactics, like consuming water in between drinks with alcohol, can be beneficial as well.

    Unfortunately, the nutritional information for vodka is unclear. Because the FDA does not regulate vodka (including flavored varieties), these products are not mandated to include nutrition labels or lists of ingredients. Although vodka is simply a mixture of water and alcohol, flavored varieties and mixed drinks can have high-calorie counts due to added sugar. Keep this in mind the next time you feel like doing some tub-thumping.

    FAQs

    Does vodka have the fewest calories of all alcoholic beverages?

    If you’re weighing up a shot or mixing a cocktail, below is a detailed look at the calorie content of several widely favored spirits. Vodka, as demonstrated, has the fewest calories of all spirits; tequila is a close runner-up. Alcohol is not the sole factor that contributes to weight gain, however.

    Does vodka contain a lot of sugar?

    Vodka consists of negligible amounts of minerals and nutrients. Vodka contains no sugar and has a lower calorie count than that of some other liquors. If you already drink alcohol, vodka might be a somewhat healthier choice. However, be cautious when adding vodka to mixers, as they often contain a lot of sugar.

    Is it acceptable to consume vodka while on a diet?

    To enjoy vodka while keeping your weight goals intact, moderation and mindfulness in drinking are essential. Here are a few recommendations: Select a transparent, unflavored vodka: Many flavored vodkas include extra sugars, which can greatly boost the calorie content.

    Does vodka contain a lot of calories?

    In comparison to other alcoholic beverages, vodka has a lower calorie count and is carb-free. According to the USDA, a standard vodka serving has 96 calories. It is crucial to keep in mind that alcohol can hinder weight loss through various means, such as delaying the metabolism of fats and sugars.

    Which type of alcoholic beverage has the fewest calories?

    Calories is a vodka soda, consisting of 1.5 ounces of vodka mixed with club soda and a dash of fresh lemon or lime juice. There are 82 calories in this beverage, which is roughly equivalent to an 8-ounce serving.

    If I quit drinking vodka, will I lose belly fat?

    Alcohol consumption (particularly exceeding 1 to 2 drinks daily) contributes additional calories to your diet, intensifies food cravings, and reduces metabolic rate. One effective method for losing excess weight is to quit drinking alcohol (or reduce alcohol consumption).

    Can vodka lead to belly fat accumulation?

    Calories that are not needed will be kept in the body as fat. Weight gain can occur rapidly as a result of eating and drinking products with a high sugar content. We don’t have control over where all that extra weight accumulates. Nevertheless, the body tends to build up fat in the abdominal region.

    Does vodka affect your liver adversely?

    In 2019, alcohol was responsible for 50.3% of deaths due to cirrhosis. In the ongoing discussion about wine versus vodka, it is crucial to acknowledge that no alcohol is the worst for your liver; when drunk in large quantities, all kinds of alcoholic beverages can damage the liver.

    What is the reason for vodka’s high caloric content?

    With about seven calories per gram, alcohol is almost as calorically dense as pure fat. Therefore, due to vodka’s elevated alcohol content, its calorie count is also significant. A double vodka and cola using a 50ml measure of vodka has approximately 168 calories, which may surprise you.

    Is vodka a good choice of drink?

    Consuming vodka can enhance your body’s blood circulation. This can avert strokes and clots, along with other cardiovascular ailments. People can use vodka to reduce their cholesterol levels. Vodka is an excellent low-calorie beverage choice for individuals on a keto diet or those monitoring their calorie intake.

    What is the reason we consume vodka?

    Vodka is recognized for its ability to induce sleep and its calming effect on the brain. Among all alcoholic beverages, including red wine, vodka has a significantly greater effect on reducing the body’s stress factor. Moderate vodka consumption aids in relaxing both the mind and body.

    Reference

    • Cafasso, J. (2025, February 19). What to know about vodka Nutrition. Healthline. https://www.healthline.com/health/food-nutrition/vodka-calories#takeaway
    • Huizen, J. (2023, November 17). Which type of alcohol has the fewest calories? https://www.medicalnewstoday.com/articles/322568#takeaway
    • Calorie count – Alcoholic beverages: MedlinePlus Medical Encyclopedia. (n.d.). https://medlineplus.gov/ency/patientinstructions/000886.htm
    • Bh. (2022, August 25). Vodka, calories, and nutrition | An explainer — American Liquor Company Vodka. American Liquor Company Vodka. https://www.americanvodka.com/vodka-faq/how-many-calories-are-in-a-shot-of-vodka
    • How many units and calories are in vodka? | Drinkaware. (n.d.). Drinkaware. https://www.drinkaware.co.uk/facts/information-about-alcohol/alcoholic-drinks-and-units/units-and-calories-in-alcoholic-drinks/vodka
    • Ld, S. S. M. R. (2024, August 6). Vodka nutrition Facts, straight up. Greatist. https://greatist.com/eat/vodka-nutrition-facts#mixed-drink-nutrition-facts

  • Annular Ligament Injury

    Annular Ligament Injury

    What is a Annular Ligament Injury?

    An annular ligament injury involves damage to the strong band of tissue that encircles the head of the radius, securing it to the ulna and stabilizing the elbow joint. It often results from trauma, such as a fall or sudden pulling motion, commonly seen in young children (referred to as nursemaid’s elbow).

    Symptoms may include pain, swelling, and restricted movement in the elbow. Treatment typically involves rest, immobilization, and physical therapy, with severe cases occasionally requiring medical intervention.

    Causes of Annular Ligament Injury

    Numerous actions that strain the elbow joint might result in annular ligament injury. The following are a few typical reasons for annular ligament injuries:

    • Repetitive motions: The annular ligament and surrounding tissues may be severely strained by sports like tennis or baseball that require repetitive actions of the elbow joint. This can raise the chance of injury and cause the ligament to deteriorate over time.
    • Trauma: The annular ligament may be harmed by trauma to the elbow joint, such as a fall or a direct impact on the arm. Activities involving high-impact or contact sports are more likely to cause this kind of injury.
    • Overuse: Ankle ligament problems can also result from excessive elbow joint use, such as lifting heavy weights or typing a lot. This is due to the fact that these activities continuously pressure the ligament, which over time may result in inflammation or tearing.
    • Inappropriate technique: Inappropriate technique can also raise the risk of annular ligament injuries when engaging in specific activities, such as lifting weights or playing sports. This is due to the fact that improper form can cause the elbow joint and surrounding tissues to experience more stress.

    Therefore, it’s critical to take precautions against annular ligament injuries by utilizing appropriate techniques when performing tasks, taking breaks to relax and stretch the elbow joint, and getting medical help if you experience any pain or discomfort.

    Symptoms of the Annular Ligament Injury:

    Depending on how severe the injury is, annular ligament injuries can present with a variety of symptoms, but some typical ones include:

    • Elbow Pain: One of the most typical signs of an annular ligament injury is elbow joint pain. When engaging in activities that strain the elbow joint, one may experience either dull or severe pain.
    • Swelling: Another typical sign of annular ligament damage is swelling around the elbow joint. In addition to mild to severe swelling, the affected area may also be heated or red.
    • Stiffness: Another sign of an annular ligament injury is stiffness in the elbow joint. It may be challenging to move the arm or carry out specific tasks due to the mild to severe stiffness.
    • Weakness: Another sign of annular ligament damage is weakness in the affected arm. This could be the result of ligament damage or soreness, which can make it difficult to move the arm normally.
    • Clicking or popping: Another sign of an annular ligament injury is clicking or popping sounds in the elbow joint. The ligament may be torn or otherwise damaged, which could result in aberrant joint movement.

    In order to identify the cause and obtain the proper therapy, it is crucial that you seek medical assistance if you have any of these symptoms.

    Risk factors of the Annular Ligament Injury:

    A ring of tissue called the annular ligament helps hold the forearm’s radius bone in place within the elbow joint by encircling its head. Despite being a robust and resilient structure, the following risk factors can raise the possibility of an annular ligament injury:

    • Overuse: The annular ligament may sustain damage as a result of repetitive motions of the forearm and elbow, such as those found in sports like tennis or golf.
    • Trauma: The annular ligament may stretch or rupture as a result of direct trauma to the elbow joint, such as a fall or impact.
    • Age: Our tissues lose their elasticity and become more vulnerable to damage as we age. An annular ligament injury may be more common in older persons.
    • Genetics: Some people are more likely to sustain injuries because their ligaments are thinner or more brittle from birth.
    • Bad posture: Bad posture can increase the strain on the elbow joint and the ligaments that surround it, such as the annular ligament.
    • Poor technique: When playing sports or engaging in other physical activities, poor technique might raise the risk of harming the annular ligament and other elbow joint tissues.
    • Medical disorders: Rheumatoid arthritis and osteoarthritis are two examples of disorders that can weaken the annular ligament and increase its vulnerability to damage.
    • A diet deficient in vital nutrients, such as protein and vitamin C, can weaken bodily tissues and raise the risk of injury to the elbow joint’s annular ligament and other components.

    To lower the chance of an annular ligament injury, it is imperative to be aware of these risk factors and take action to lessen them. This could entail keeping a healthy posture, exercising with appropriate form, and making sure one eats a diet that is both balanced and nourishing.

    Diagnosis of the Annular Ligament Injury:

    Imaging tests and a physical examination are usually required to diagnose an annular ligament injury. The physician will assess the affected arm and elbow joint during the physical examination, searching for indications of pain, stiffness, and edema. In order to assess for weakness or instability, they could also move the elbow and arm joints in various directions.

    An annular ligament damage may also be diagnosed by imaging studies like MRIs, ultrasounds, or X-rays. While MRI or ultrasound can demonstrate the extent of ligament injury, X-rays can assist in ruling out other disorders such as fractures or dislocations.

    In order to check the annular ligament and surrounding components, the doctor may also perform an arthroscopy in certain cases. This procedure entails putting a tiny camera into the joint. This can assist in determining the best course of treatment and offering a more thorough diagnosis.

    Therefore, to identify annular ligament damage and choose the best course of treatment, an understanding of physical examination and imaging tests are usually utilized.

    Treatment of the Annular Ligament Injury:

    Medical Treatment:

    RICE, or rest, ice, compression, and elevation, is the standard conservative treatment for an annular ligament injury. This may lessen the wounded area’s pain and swelling.

    Avoiding activities that worsen the pain and resting the affected arm can help stop the annular ligament from getting worse. To lessen swelling and inflammation, use cold compresses or ice packs on the area for 15 to 20 minutes at a time, multiple times a day.

    Using a brace or bandage to compress the injured area can also assist in reducing swelling and provide support. Reducing edema and accelerating healing can also be achieved by elevating the arm above the level of the heart.

    To assist manage pain and inflammation, doctors may also prescribe nonsteroidal anti-inflammatory medicines (NSAIDs) or painkillers like acetaminophen.

    To help increase the affected arm’s strength, flexibility, and range of motion, physical treatment may also be suggested. In addition to manual therapy methods like massage or joint mobilization, this may entail activities to strengthen and stretch the muscles surrounding the elbow joint.

    A brace or splint may be advised in some situations to immobilize the affected arm and promote the healing of the annular ligament. If conservative treatment is insufficient or there is a chance of more harm, this can be required.

    Physical treatment may also be recommended to assist improve the strength, range of motion, and flexibility of the affected arm. This could involve exercises to stretch and strengthen the muscles around the elbow joint in addition to manual therapy techniques like massage or joint manipulation.

    In certain cases, it may be recommended to use a brace or splint to immobilize the affected arm and encourage the annular ligament to recover. This may be necessary if conservative treatment is not enough or if there is a risk of further damage.

    Physical Therapy Treatment:

    Exercises, manual therapy methods, and other modalities are commonly used in physical therapy treatment for annular ligament injuries in order to assist decrease pain and inflammation, increasing the range of motion, and restoring function to the injured arm.

    To ascertain the amount of the damage and create a customized treatment plan, the physical therapist will first do an understanding evaluation of the injury. This could consist of:

    • In order to allow the annular ligament to heal during the acute phase of the injury, the physical therapist may advise immobilizing the injured arm with a brace or splint and resting it.
    • Ice therapy: Applying cold compresses or ice packs to the affected region might help to reduce swelling and pain.
    • Manual treatment: Manual therapy methods including stretching, joint mobilization, and massage can help ease elbow joint muscular tension and increase range of motion.
    • Exercises to strengthen the muscles surrounding the elbow joint can assist increase stability and stop additional injuries.
    • Exercises for range of motion: These exercises can assist increase the affected arm’s flexibility and range of motion.
    • High-frequency sound waves are used in ultrasound therapy to encourage healing and lessen pain and inflammation in the affected area.
    • Electrical stimulation: This technique can be used to increase muscular strength and function and lessen pain.
    • To guarantee the best outcomes, the physical therapist will keep an eye on patients’ development during the course of treatment and modify the plan as necessary. Most patients with an annular ligament injury can anticipate a major improvement in their quality of life, function, and pain with appropriate physical therapy treatment.

    How to prevent of the Annular Ligament injuries?

    A mix of lifestyle modifications, appropriate form when exercising, and medical treatment of underlying issues are necessary to prevent annular ligament injuries. The following advice can help avoid damage to the annular ligament:

    • Keep your posture correct: Bad posture can increase the strain on the elbow joint and the ligaments that surround it, such as the annular ligament. Maintain good posture when standing, sitting, and engaging in physical activity to avoid injury.
    • Employ good technique when exercising: In sports or other physical activities, poor technique can raise the risk of injury to the elbow joint’s annular ligament and other components. Use the right form and technique for your chosen exercise on a regular basis to avoid injury.
    • Before engaging in any physical activity, stretch your muscles to help them warm up and assist you avoid injury. To get your forearm, wrist, and elbow muscles ready for action, concentrate on stretching them.
    • Develop stronger forearm muscles: These muscles can support the elbow joint and lower the chance of annular ligament damage. Include forearm muscle-focused activities in your training regimen.
    • Wear the right protective gear: Wearing the right protective gear, such as elbow pads, can assist prevent injury if you engage in high-risk activities like rock climbing or contact sports.
    • Handle underlying medical disorders: The annular ligament might become weaker and more prone to injury due to certain medical conditions including osteoarthritis or rheumatoid arthritis. To manage any underlying conditions that could raise your risk of injury, collaborate with your healthcare physician.
    • Keep up a healthy, well-balanced diet: A diet deficient in vital nutrients, such as protein and vitamin C, can weaken bodily tissues and raise the risk of injury to the elbow joint’s annular ligament and other components. Maintain a healthy, well-balanced diet rich in fruits, vegetables, lean protein, and whole grains to help prevent injury.

    You can lower your risk of elbow joint injuries, including those to the annular ligament, by adopting these lifestyle changes. See a doctor right away if you have elbow pain or discomfort in order to stop additional damage and encourage recovery.

    Complications of Annular Ligament Injury:

    • Chronic elbow instability
    • restricted range of motion, especially while rotating the forearms (pronation/supination)
    • Frequent dislocation or subluxation of the radial head
    • Contractures or stiffness in the joints
    • Changes in degenerative joints, such as early osteoarthritis
    • Chronic pain or agony
    • Nerve irritation or compression (rare, but possible in extreme situations)

    Prognosis:

    An annular ligament injury has a relatively favorable prognosis, particularly when diagnosed early and treated appropriately. Conservative measures like rest, immobilization, and physical therapy are effective in the healing of the majority of minor injuries.

    With the right reduction and care, children with radial head subluxation (also known as “nursemaid’s elbow“) have a very good prognosis. Although surgery may be necessary for severe or recurring injuries, full-functionrecovery is usually the conclusion. Chronic instability or restricted range of motion may result from postponed treatment or recurrent injuries.

    Conclusion:

    Annular ligament injuries can seriously impede forearm rotation and general arm function. These injuries are typically caused by trauma or repetitive stress on the elbow joint. Restoring joint stability and avoiding long-term consequences requires prompt diagnosis and appropriate management, which can range from conservative measures like rest and physical therapy to surgery in extreme cases. Most people can fully recover and resume their regular activities with prompt care.

    FAQs

    Can an annular tear be healed with massage?

    Many patients find that a range of conservative methods, such as physical therapy, hot or cold compresses, and painkillers, are effective in treating annular tears. Electrical nerve stimulation, hydrotherapy, massage, and epidural injections are possible additional forms of treatment.

    Does an annular tear benefit from walking?

    An annular tear can also be treated with exercise in addition to medicine. When the symptoms start to become worse, rest is crucial, but exercise is also necessary to maintain a strong and healthy spine. The important thing is to exercise without getting hurt any more.

    How should an annular rip be treated?

    Low-impact physical therapy and non-steroidal anti-inflammatory drugs are usually used to treat simple symptomatic annular fissures without disc herniation. Granulation tissue or nerve ending ingrowth, which is typically observed close to the dorsal root ganglia, may be the cause of chronic pain caused by annular fissures.

    What causes an annular tear?

    When a disc’s typically thick outer covering is pulled or torn due to tension, an annular tear results. A herniated disc is created when the soft inner “jelly” (nucleus pulposus) leaks out from the disc’s interior due to further stress on the disc following the formation of an annular tear.

    Which motions are permitted by the annular ligament?

    During supination and pronation of the forearm, the radial head rotates within the radial notch of the ulna, stabilized by the annular ligament.

    How can an annular ligament tear be detected?

    The doctor forcefully pronates the child’s wrist with one hand while holding the child’s elbow at a 90-degree angle with the other. The radial head is compressed by the doctor’s thumb, and when the radial head is reduced, a tactile click is frequently heard.

    What is the annular ligament injury mechanism?

    The radial head is held against the ulna by the annular ligament, which surrounds it. The annular ligament slips over the head of the radius and becomes stuck in the radiohumeral joint between the radial head and capitellum when axial traction is applied to a pronated forearm and extended elbow.

    Can ligament injuries be helped by physical therapy?

    Injuries to the knee ligament can significantly impact a person’s everyday activities and make it impossible for them to engage in activities they used to enjoy. Whether the injury has been treated conservatively or surgically, a course of physical therapy will help hasten the healing process and maximize recovery.

    How is an injury to the annular ligament treated?

    Resting the joint may be necessary as part of treatment for an annular ligament rupture in order to reduce pain and inflammation. Surgery to reattach or repair the ligaments may be required for severe injuries, such as tears in the ligaments. The degree of ligament damage will determine how much movement should be limited after the injury.

    What precautions may be taken to keep the annular ligament from getting injured?

    Wearing protective clothing during activities that put the elbow joint at danger, avoiding repetitive actions that strain it, and maintaining strong forearm muscles through exercise are all ways to prevent injuries to the annular ligament.

    How are annular ligament disorders and injuries identified and managed?

    A physical examination, imaging tests (such as MRIs or X-rays), and occasionally an arthroscopy are used to detect annular ligament injuries or disorders. Depending on the severity of the injury, treatment options may include physical therapy, surgery, immobilization, or rest.

    Which disorders or traumas are frequently linked to the annular ligament?

    Annular ligament tears, radial head subluxation (partial dislocation), and persistent elbow joint instability are common injuries or diseases related to the annular ligament.

    What is the annular ligament used for?

    Smooth forearm movement is made possible by the annular ligament, which stabilizes the head of the radius bone within the elbow joint.

    In what part of the body is the annular ligament located?

    The elbow joint contains the annular ligament, which is situated around the radius bone’s head.

    The annular ligament: what is it?

    The head of the radius bone is held in place within the elbow joint by a band of fibrous tissue called the annular ligament.

    References

    • Patel, D. (2023, August 19). Annular ligament – anatomy, structure, function. Samarpan Physiotherapy Clinic. https://samarpanphysioclinic.com/annular-ligament/
    • Ormond, S. (2025, March 17). Annular ligament injury symptoms – Atlas Pain Specialists. Atlas Pain Specialists. https://atlaspainspecialists.com/annular-ligament-injury-symptoms/
    • Chua, B. N. (n.d.). What is Elbow Annular Ligament Tear & Strain? https://phoenixrehabgroup.com/articles/physiotherapy/what-is-elbow-annular-ligament-tear-strain/
  • Electrolyte Imbalance

    Electrolyte Imbalance

    Introduction

    Electrolytes are minerals that regulate vital physiological processes in the body. An electrolyte imbalance happens when the mineral levels in your body are either excessively high or insufficiently low. This can have adverse effects on essential bodily systems. For your body to work properly, electrolytes must be in even balance. Serious electrolyte imbalances can lead to grave issues like coma, seizures, and cardiac arrest.

    An electrolyte imbalance happens when the levels of specific minerals in your blood become excessively high or low. Symptoms of an electrolyte imbalance can vary based on the severity and type of electrolyte involved, including weakness and muscle spasms. An electrolyte section blood test measures levels.

    Grasping the concept of imbalance and disorders of electrolytes Electrolytes can be found in your urine, blood, and bodily fluids. Food, drinks, and dietary supplements are other ways to consume them.

    Electrolytes include, for example:

    • Calcium
    • Chloride
    • Magnesium
    • Phosphate
    • Potassium
    • Sodium

    Most frequently, an electrolyte imbalance is caused by the loss of bodily fluids. This may occur after extended periods of vomiting, diarrhea, or sweating, often as a result of an illness. It may also be triggered by:

    • Loss of fluid associated with burns.
    • Certain drugs, including diuretics for conditions like acute or chronic kidney disease, cardiovascular issues, respiratory disorders, etc. The precise reason can differ based on the particular kind of electrolyte imbalance.

    What specifically are electrolytes?

    Electrolytes are charged minerals that occur when they dissolve in water or bodily fluids, such as blood. The electric charge may be either positive or negative. Your blood, urine (pee), tissues, and other bodily fluids contain electrolytes.

    Electrolytes play a crucial role as they assist in:

    • Regulate the quantity of water in your body.
    • Balance your body’s acid/base (pH) level.
    • Move nutrients into your cells.
    • Move wastes out of your cells.
    • Support your muscle and nerve function.
    • Keep your heart rate and rhythm steady.
    • Keep your blood pressure stable.
    • Keep your bones and teeth healthy.

    How can one define an imbalance of electrolytes?

    An electrolyte imbalance occurs when the concentrations of specific minerals in your body are excessively high or low. An imbalance of this kind might indicate an issue such as kidney disease.

    Electrolytes are minerals that generate an electrical charge upon dissolving in bodily fluids such as blood and urine. Your body produces electrolytes. You can also acquire these minerals from dietary sources, drinks, and dietary supplements. Electrolytes found in blood, tissue, urine, and other bodily fluids are essential for maintaining fluid balance, regulating heart rhythm, and supporting nerve and muscle function.

    What is the function of electrolytes?

    Electrolytes have various roles in your body:

    • Sodium plays a role in managing fluid levels and supporting nerve and muscle activity.
    • The functioning of the heart, muscles, and nerves is aided by potassium. It supports your metabolism, while also transporting nutrients into cells and waste products out of them.
    • Calcium aids in the contraction and expansion of blood vessels, which helps to stabilize blood pressure. Additionally, it releases hormones and enzymes (which are proteins) that aid the nervous system in transmitting messages.
    • Chloride is instrumental in sustaining healthy blood levels, blood pressure, and body fluids.
    • Magnesium supports the functioning of muscles and nerves. Additionally, it fosters the development of healthy teeth and bones.
    • Phosphate is important for the skeletal system and for the functioning of muscles and nerves.
    • Bicarbonate assists in regulating the balance between acids and basic alkaline compounds (bases) in blood, contributing to pH balance. Bicarbonate assists in transporting carbon dioxide (a waste product) through your blood circulation.

    Electrolyte imbalance in children

    Due to their smaller size and the quicker metabolism of fluids and electrolytes, children may face a higher risk of dehydration than adults.

    When a child either sweats excessively or becomes ill with severe vomiting or diarrhea, they might experience an electrolyte imbalance that requires medical treatment. Other risk factors consist of experiencing a high fever and using drugs that promote urination. A child who has a pre-existing health issue, like thyroid, heart, or kidney disease, might be more susceptible to an electrolyte imbalance.

    Kids with cancer, particularly those who have undergone a bone marrow transplant or are on specific chemotherapy drugs, are more prone to electrolyte imbalances.

    Signs of electrolyte imbalances in children include:

    • Dark urine
    • Confusion
    • Weakness
    • Cramping
    • Muscle spasms
    • Dizziness
    • Difficulty breathing
    • Rapid heart rate

    If a child shows any of these symptoms, particularly in conjunction with a fever or an existing health issue, a parent or caregiver should promptly obtain medical assistance for the child.

    Electrolyte imbalance in older adults

    Compared to younger adults, older adults may be more prone to dehydration and imbalances in electrolytes.

    This is assignable to several factors, among the following:

    • With aging, the kidneys may experience a decline in some of their functions.
    • Diuretics and other medications that can alter electrolyte levels are often taken by older adults.
    • Older adults may not consume sufficient food or drink due to handicaps, a lack of appetite or hunger, or irregular reach to food and beverages.
    • Caregivers need to observe older adults for indications of dehydration. They might need to assist in making sure that an individual consumes sufficient food and beverages.

    Indicators of dehydration in an elderly person may consist of the following:

    • Dryness of the mouth, including the lips and tongue
    • Stuck eyes
    • Skin that appears dry and less firm or elastic
    • Drowsiness
    • Confusion or disorientation
    • Dizziness
    • Low blood pressure

    Indications

    Indications to order serum electrolyte panels are numerous. Some indications are:

    • Regular blood examinations
    • Regular monitoring of hospitalized patients who are on medication, receiving fluid therapy, undergoing dietary changes, or being treated for chronic illnesses.
    • Any medical condition that can lead to imbalances in electrolytes, including malnutrition, gastrointestinal disorders, cardiac issues, kidney dysfunction, endocrine disorders, circulatory problems, lung disorders, and acid-base imbalances.
    • Arrhythmias
    • Cardiac arrest
    • Utilization of diuretics or any drugs that may affect fluid and electrolyte balance

    Types of electrolyte imbalance

    Health issues caused by electrolyte level imbalances include:

    • Calcium: hypercalcemia and hypocalcemia
    • Chloride: hyperchloremia and hypochloremia
    • Magnesium: hypermagnesemia and hypomagnesemia
    • Phosphate: hyperphosphatemia or hypophosphatemia
    • Potassium: hyperkalemia and hypokalemia
    • Sodium: hypernatremia and hyponatremia

    Calcium

    Your body relies on calcium, an essential mineral, to regulate blood pressure and manage skeletal muscle contractions. It is also utilized in the development of strong bones and teeth.

    Hypercalcemia occurs when there is an increase level calcium in the blood. This is generally caused by the following factors:

    • Kidney disease
    • Hyperparathyroidism
    • Lung diseases, such as tuberculosis or sarcoidosis
    • Certain types of cancer, including lung and breast cancers
    • Overuse of antihypertensive drugs and calcium or vitamin D supplements
    • Drugs like lithium, theophylline, or specific diuretics

    Hypocalcemia occurs as a result of insufficient calcium levels in the blood. Possible causes are:

    • Kidney failure
    • Hypoparathyroidism
    • Vitamin D deficiency
    • Pancreatitis
    • Prostate cancer
    • Malabsorption

    Specific medications, such as chemotherapy agents, osteoporosis treatments, and certain diuretics and anticonvulsants.

    Chloride

    Chloride is essential for the proper regulation of bodily fluids. Hyperchloremia is characterized by an elevated chloride level in the body. It can happen because of the following:

    • Severe dehydration
    • Kidney failure
    • Metabolic acidosis

    When the body lacks sufficient chloride, hypochloremia occurs.

    Further causes may include:

    • Metabolic alkalosis
    • Diuretics
    • Chronic respiratory acidosis
    • Severe fluid loss resulting from diarrhea or vomiting

    Magnesium

    Magnesium is an essential mineral that oversees numerous vital functions, including:

    • Muscle contraction
    • Heart rhythm
    • Nerve function

    Hypermagnesemia refers to an excess of magnesium. It mainly impacts individuals who have acute or chronic kidney disease. Addison’s disease and hypothyroidism can also affect hypermagnesemia, as they increase the absorption of magnesium into the bloodstream.

    Hypomagnesemia is a condition characterized by an insufficient level of magnesium in the body. Frequent causes are:

    • Alcohol use disorder
    • Malnutrition
    • Malabsorption
    • Diarrhea
    • Certain medications, including some diuretics and antibiotics

    Phosphate

    The kidneys, bones, and intestines work together to regulate the levels of phosphate in the body. Phosphate is essential for multiple functions and has a close interaction with calcium.

    The following factors can cause hyperphosphatemia:

    • Chronic kidney disease
    • Severe breathing difficulties
    • Underactive parathyroid glands
    • Severe muscle injury
    • Tumor lysis syndrome, a complication of cancer treatment
    • Excessive use of phosphate-containing laxatives

    Hypophosphatemia, characterized by low phosphate levels, can occur in:

    • Acute alcohol abuse
    • Severe burns
    • Refeeding syndrome
    • Vitamin D deficiency
    • Overactive parathyroid glands
    • Certain medications, such as some antacids

    Potassium

    It is especially vital for the regulation of cardiac activity. It also contributes to the upkeep of healthy nerves and muscles. High potassium levels can lead to the development of hyperkalemia. If undiagnosed and untreated, this condition can lead to death. It is usually activated by:

    • Serious dehydration renal failure acute acidosis, comprising diabetic ketoacidosis
    • Specific medications, such as certain antihypertensives and diuretics for adrenal insufficiency, are characterized by low cortisol levels Hypokalemia results from insufficient potassium levels.

    This occurs due to the following factors:

    • Eating disorders extreme vomiting or diarrhea specific medications, such as laxatives, diuretics, and corticosteroids

    Sodium

    Sodium is crucial for maintaining fluid balance in the body and is necessary for proper bodily functions. It aids in controlling nerve function and muscle contraction as well. The condition that results from increased sodium levels in the blood is hypernatremia. Abnormally high sodium levels are often due to severe dehydration, which can result from:

    Insufficient water intake and excessive bodily fluid loss due to extended vomiting, diarrhea, or perspiration Hyponatremia occurs when sodium levels are too low.

    Frequent reasons for diminished sodium concentrations comprise:

    • Vomiting or diarrhea
    • Poor nutrition
    • Alcohol use disorder
    • Overhydration
    • Thyroid or adrenal disorders
    • Liver, heart, or kidney failure
    • Certain medications, including diuretics and seizure medications
    • Situation of inappropriate antidiuretic hormone secretion (SIADH)

    Causes of an electrolyte imbalance

    More than 50% of your body’s weight is composed of water. Most of this water is contained in blood and fluid in and around cells, which are referred to as fluid compartments. Your kidneys and liver, along with other organs and tissues, constantly transport electrolytes in and out of cells to regulate fluid levels within the compartments.

    Your body’s ability to move and maintain electrolyte balance can be affected by certain health conditions. An electrolyte imbalance occurs when fluid compartments contain an excessive or insufficient number of electrolytes.

    When a person is dehydrated or has excess water in their body, it can lead to an electrolyte imbalance.

    The electrolyte balance of the body can be disrupted by several factors, including:

    • Dehydration: Heavy perspiration or insufficient fluid intake can lead to considerable loss of electrolytes. Dehydration happens due to extreme physical activity or in high-temperature environments. When the body experiences dehydration due to an insufficient amount of fluid, it loses more fluids than it takes in, disrupting the balance of sodium, potassium, and other electrolytes.
    • Kidney disease: The kidneys control electrolyte levels by filtering blood and removing waste via urine. Kidneys that are affected by disease can cause an imbalance in the concentrations of electrolytes such as sodium, potassium, and phosphorus. A long-term disturbance of electrolyte levels can result from chronic kidney disease.
    • Gastrointestinal Disorders: Conditions affecting the gastrointestinal tract, including diarrhea, vomiting, and malabsorption syndromes, lead to significant fluid and electrolyte loss. Chronic diarrhea or vomiting can reduce the body’s reserves of potassium, sodium, and chloride, resulting in imbalances.
    • Specific medications: Diuretics, laxatives, and chemotherapy drugs are examples of medications that can disrupt the body’s electrolyte balance. Diuretics are primarily utilized for controlling hypertension through the enhancement of urine production, which leads to the elimination of sodium and potassium. Laxatives work in the same way by speeding up the loss of fluids and electrolytes through the digestive system.
    • Endocrine Disorders: Conditions like adrenal insufficiency and diabetes may lead to electrolyte imbalances as well. Hormones that control sodium and potassium levels are produced at abnormal rates due to adrenal insufficiency. In diabetes, especially when poorly managed, there is an electrolyte imbalance caused by disruptions in the body’s ability to manage glucose and fluids.
    • Strenuous Exercise: strenuous physical activity during exercise leads to sweating, which causes the body to lose electrolytes like sodium and potassium. When these electrolytes are not replenished, an imbalance occurs, particularly among endurance athletes or those who engage in ongoing physical activities.

    Electrolyte imbalances can arise from multiple factors, including:

    • Vomiting
    • Diarrhea
    • Not consuming enough fluids.
    •  Not having sufficient food intake
    • Excessive sweating
    • Certain medications, such as laxatives and diuretics
    • Eating disorders
    • Liver or kidney problems
    • Cancer treatment
    • Congestive heart failure

    Symptoms of electrolyte imbalance

    Various kinds of electrolyte imbalance exist, depending on which compound is misbalanced. There may be no symptoms associated with a mild electrolyte imbalance. This may remain unnoticed until it is found out in a regular blood examination. Once a certain imbalance worsens, symptoms typically begin to manifest.

    While not every electrolyte imbalance leads to identical symptoms, numerous imbalances do exhibit overlapping symptoms.

    Possible signs of an electrolyte imbalance include:

    • Agitation
    • Dry mouth and hunger
    • Restlessness
    • Confusion or difficulty with cognition
    • Muscle weakness or spasms
    • Numbness or tingling
    • Fatigue
    • Heart palpitations
    • Constipation
    • Nausea or vomiting
    • Slow or irregular heart rate
    • Difficulty breathing
    • Low or high blood pressure
    • Itching

    Get in touch with your physician right once if you encounter any of these symptoms. If left untreated, disturbances in electrolytes can endanger life.

    Diagnosis

    Electrolyte levels in your body can be assessed through a straightforward blood test. It is also important to have a blood test that assesses your kidney function.

    A suspected electrolyte imbalance may lead your doctor to conduct a physical examination or request additional tests for confirmation. The extra tests will differ based on the specific condition being addressed. As an example, hypernatremia (excess sodium) can lead to a loss of skin elasticity because of serious dehydration. Your physician can carry out a pinch test to assess if you are affected by dehydration.

    An electrocardiogram (ECG or EKG), which provides an electrical tracing of your heart, can help detect any irregular heartbeats, rhythms, or changes in the ECG or EKG caused by electrolyte issues.

    Laboratory Values

    Serum Sodium

    • Normal range: 135 to 145 mmol/L
    • Mild to moderate hyponatremia is defined as sodium levels ranging from 125 to 135 mmol/L.
    • Severe hyponatremia: less than 125 mmol/L
    • Hypernatremia of mild to moderate severity: 145–160 mmol/L
    • Severe hypernatremia: greater than 160 mmol/L

    Serum Potassium

    • Normal range: 3.6 to 5.5 mmol/L
    • Mild hypokalemia: less than 3.6 mmol/L
    • Moderate hypokalemia: less than 2.5 mmol/L
    • Severe hypokalemia: less than greater than 2.5 mmol/L
    • Mild hyperkalemia: 5 to 5.5 mmol/L
    • Moderate hyperkalemia: 5.5 to 6.5 mmol/L
    • Severe hyperkalemia: 6.5 to 7 mmol/L

    Serum Calcium

    • Normal range: 8.8 to 10.7 mg/dL
    • Hypocalcemia: less than 8.8 mg/dL
    • Mild to moderate hypercalcemia: greater than 10.7 10 11.5 mg/dL
    • Severe hypercalcemia: greater than 11.5 mg/dL

    Serum Magnesium

    • Normal range: 1.46 to 2.68 mg/dL
    • Hypomagnesemia: less than 1.46 mg/dL
    • Hypermagnesemia: greater than 2.68 mg/dL

    Bicarbonate

    • Normal range: 23 to 30 mmol/L
    • Its level rises or falls based on the acid-base status.

    Phosphorus

    • Normal range: 3.4 to 4.5 mg/dL
    • Hypophosphatemia: less than 2.5 mg/dL
    • Hyperphosphatemia: greater than 4.5 mg/dL

    Treatment

    The treatment depends on both the type of electrolyte imbalance and the underlying condition responsible for it.

    Some therapies are usually used to reestablish the correct equilibrium of minerals within the body. Among them are:

    Intravenous (IV) fluids

    Intravenous (IV) fluids, which usually contain sodium chloride, can be beneficial for rehydrating the body. This treatment is frequently applied in situations where dehydration occurs due to vomiting or diarrhea. Electrolyte supplements can be incorporated into IV fluids to remedy deficiencies.

    Certain IV medications

    IV medications can help your body quickly restore its electrolyte balance and protect you from adverse effects when undergoing treatment with another approach.

    The treatment you get will be based on your specific electrolyte imbalance. Calcium gluconate, magnesium sulfate, and potassium chloride are examples of medications that can be administered. To address chronic mineral imbalances in your body, oral medications and supplements are frequently utilized. If you have a diagnosis of chronic kidney disease, this is more frequent.

    Based on your electrolyte imbalance, you might be prescribed medications or supplements like:

    • Calcium (lactate, gluconate, citrate, or carbonate) magnesium oxide potassium chloride
    • Phosphate binders, which consist of sevelamer hydrochloride (Renagel), lanthanum (Fosrenol), and calcium-based therapies like calcium carbonate can assist in replenishing depleted electrolytes either short-term or long-term, depending on the root cause of your condition. Your doctor will typically address the root cause of the issue to rectify the imbalance.

    Oral medications and supplements

    To address chronic mineral imbalances in your body, oral medications and supplements are frequently utilized. If you have a diagnosis of chronic kidney disease, this is more frequent.

    Based on your electrolyte imbalance, you might be prescribed medications or supplements like:

    • Calcium (gluconate, carbonate, citrate, or lactate)
    • Magnesium oxide
    • Potassium chloride
    • Phosphate binders, which consist of sevelamer hydrochloride (Reangle), lanthanum (Fosrenol), and calcium-based therapies like calcium carbonate can assist in replenishing depleted electrolytes either short-term or long-term, depending on the root cause of your condition. Your doctor will typically address the root cause of the issue to rectify the imbalance.

    Hemodialysis

    • A form of dialysis called hemodialysis uses a machine to filter out waste from your blood.
    • Your doctor can surgically create vascular access—a point of entry into your blood vessels—to facilitate blood flow to this artificial kidney.
    • This access point will facilitate a greater volume of blood to circulate through your body during hemodialysis treatment. This facilitates the filtering and purifying of a greater volume of blood.
    • An electrolyte imbalance can be treated with hemodialysis. If the electrolyte issue poses a threat to life, your physician might opt for hemodialysis treatment.

    Home remedies for electrolyte imbalance

    Individuals who suspect they might be mildly dehydrated can consume a rehydration beverage to restore their electrolyte levels. Nonetheless, individuals need to exercise caution when using sports drinks for this purpose. Certain specialists think that the sugar content of sports drinks is excessive, while their sodium content is insufficient to rectify an imbalance.

    However, certain research has discovered that the outcomes of using sports drinks and oral rehydration solutions for fluid replacement in individuals who exercised in high temperatures were comparable.

    Making oral rehydration solution Instead of purchasing powder packets or pre-made drinks, an individual can prepare an oral rehydration solution at home.

    For making a solution for oral rehydration:

    • Please go ahead and pour 1 liter (1000 milliliters) of water into the pitcher.
    • Mix in 8 teaspoons of sugar and 1/2 teaspoon of salt.
    • Ensures a quicker dissolution by spreading the solute particles across the solvent and ensuring that fresh water comes into contact with the solute.

    Serious or even life-threatening symptoms can result from imbalances in electrolytes. Individuals who experience severe symptoms or have preexisting health issues should avoid home remedies. Infants, toddlers, and seniors may be at greater risk for severe dehydration complications and should consult a healthcare provider.

    Drink water.

    Drinking-Water
    Drinking-Water
    • Ensure that you are hydrating for two hours prior to going to the gym or engaging in any other form of exercise. Furthermore, aim to consume four to six ounces of water after each 20-minute interval of exercise, and ensure you hydrate post-workout.
    • The easiest and most effective method for preventing complications from electrolyte imbalance is to drink water.

    Other beverages that assist in balancing your electrolytes include:

    Coconut water.

    Coconut water
    Coconut water

    With its low sugar content, coconut water will not lead to a spike in your blood sugar levels. Nonetheless, its calorie content exceeds that of tap water. If it is an option, choose unsweetened coconut water to reduce calorie intake.

    Electrolyte- or sports beverages.

    Electrolyte- or sports beverages.
    Electrolyte- or sports beverages.

    As they contain electrolytes, sports drinks also aid in replenishing those lost. The majority of them contain sodium chloride and potassium chloride. For workouts under 75 minutes, standard water should suffice.

    During longer exercise sessions, an electrolyte beverage will swiftly restore your electrolyte levels. Usually, an electrolyte beverage measuring eight ounces contains 100 mg of sodium and 30 mg of potassium. However, ensure you read the label to verify that the beverage contains electrolytes, as some do not.

    Eat electrolyte-rich foods.

    Eat electrolyte-rich foods.
    Eat electrolyte-rich foods.

    It is also possible to enhance the body’s electrolyte levels by eating specific foods, including potatoes, avocados, oranges, bananas, strawberries, turkey, and spinach. Carbonated and energy drinks are not suitable for rehydration. They can lead to a rapid increase in your blood sugar levels.

    To avoid an electrolyte imbalance, ensure you drink ample water while exercising. Consume a balanced diet with foods high in electrolytes. Refrain from engaging in vigorous outdoor activity when the weather is hot. If you are exercising indoors, make sure to have an air conditioner, particularly if you tend to sweat a lot.

    Risk factors for electrolyte disorders

    An electrolyte imbalance can develop in anyone. Due to their medical history, certain individuals are at greater risk. Factors that heighten your risk for an electrolyte imbalance include:

    • Alcohol use disorder
    • Cirrhosis
    • Congestive heart failure
    • Kidney disease
    • Eating disorders such as anorexia and bulimia
    • Physical trauma such as severe burns or broken bones
    • Thyroid disorders
    • Adrenal gland disorders

    Complication

    Serious, life-threatening problems can arise from a significant electrolyte imbalance, whether it is too high or too low. The complications comprise the following:

    • Coma.
    • Seizures.
    • Sudden cardiac death (sudden cardiac arrest).

    Takeaway

    An electrolyte imbalance occurs when the levels of one or more essential minerals in your body are either excessive or insufficient. This can arise from various causes and require different treatments based on the mineral involved.

    If you are undergoing extended vomiting, diarrhea, or perspiration, trying your utmost to remain hydrated is wise. If the electrolyte imbalance is due to medications or underlying conditions, your doctor will modify your medication regimen and address the root cause. This will aid in preventing electrolyte imbalances in the future.

    However, not all electrolyte imbalances are easy to prevent, and some may be due to a serious condition. If you are having typical symptoms of an electrolyte imbalance, consult your doctor.

    FAQs

    What is the way to remedy electrolyte imbalance?

    It may be beneficial to provide intravenous fluids and replace any necessary electrolytes. Minor electrolyte disturbances can be rectified with slight adjustments to one’s diet, such as consuming more fruits and vegetables or opting for a sports drink to enhance hydration and restore electrolyte balance.

    Can low levels of electrolytes lead to an increased heart rate?

    Abnormal electrolyte levels – Electrolytes, including minerals like sodium, potassium, and calcium, are essential for maintaining proper hydration. An electrolyte imbalance can lead to dehydration, which may manifest as a fast heart rate, quickened respiration, or hypotension. Palpitations can be caused by such changes.

    What is the way to verify my electrolyte balance?

    An electrolyte test involves analyzing a blood sample to determine whether the body has an imbalance of electrolytes. Electrolytes, which are present in the blood, include salts and minerals like sodium, potassium, chloride, and bicarbonate. They are capable of transmitting electrical impulses within the body.

    What leads to weak electrolytes?

    While strong electrolytes undergo complete ionization (100%), weak electrolytes experience only partial ionization, typically in the range of 1–10%. In other words, for strong electrolytes, the primary species in solution is ions, whereas for weak electrolytes, it is the un-ionized compound.

    Which fruit has a high electrolyte content?

    Fruits from tropical regions, such as mangoes, pineapples, and apricots, are likewise rich in vitamin C, antioxidants, and electrolytes. One cup of diced mango provides close to seven percent of your daily potassium requirement, along with small quantities of magnesium.

    Which 5 electrolytes are commonly found?

    Electrolytes are crucial for fundamental life processes, including the maintenance of electrical neutrality in cells and the generation and transmission of action potentials in nerves and muscles. Major electrolytes consist of sodium, potassium, chloride, magnesium, calcium, phosphate, and bicarbonate.

    Which organ is responsible for maintaining the balance of electrolytes?

    Therefore, the kidneys play a role in keeping the electrolytes ingested daily through food and drink in equilibrium with the water and electrolytes excreted in urine. When the electrolyte balance is disrupted, an individual can experience health problems.

    Does coconut water contain a lot of electrolytes?

    For rehydration, coconut water can be chosen as a drink with few calories. It contains a large amount of minerals and electrolytes, and it can enhance bone health as well as reduce muscle cramps post-workout. Although some individuals opt for it as a substitute for sports drinks after intense workouts, the juice typically contains low levels of sodium, which is an essential electrolyte.

    Is there an electrolyte content in lemon water?

    Lemon juice is rich in electrolytes such as sodium (Na), potassium (K), calcium (Ca), and magnesium (Mg). This makes lemon water an excellent choice for fitness enthusiasts. Lemon water serves as a rehydration aid, may enhance skin quality, and can help prevent kidney stones.

    Reference

    • Holland, K. (2022, December 15). All about electrolyte imbalance. Healthline. https://www.healthline.com/health/electrolyte-disorders#causes
    • Professional, C. C. M. (2024b, December 11). Electrolyte imbalance. Cleveland Clinic. https://my.clevelandclinic.org/health/symptoms/24019-electrolyte-imbalance
    • Wikipedia contributors. (2025b, January 17). Electrolyte imbalance. Wikipedia. https://en.wikipedia.org/wiki/Electrolyte_imbalance
    • Berry, J. (2024, November 20). Electrolyte imbalance symptoms and treatment. https://www.medicalnewstoday.com/articles/electrolyte-imbalance#summary
    • National Library of Medicine. (n.d.-a). Fluid and electrolyte balance. https://medlineplus.gov/fluidandelectrolytebalance.html#:~:text=An%20electrolyte%20imbalance%20means%20that,Drinking%20too%20much%20water
    • What Is an Electrolyte Imbalance? (n.d.). WebMD. https://www.webmd.com/a-to-z-guides/what-is-electrolyte-imbalance
    • Shrimanker, I., & Bhattarai, S. (2023, July 24). Electrolytes. StatPearls – NCBI Bookshelf. https://www.ncbi.nlm.nih.gov/books/NBK541123/
    • Narayana Health. (n.d.). Narayana Health. https://www.narayanahealth.org/blog/electrolyte-imbalance-types-symptoms-causes-and-treatment