Blog

  • Sural Neuritis

    Sural Neuritis

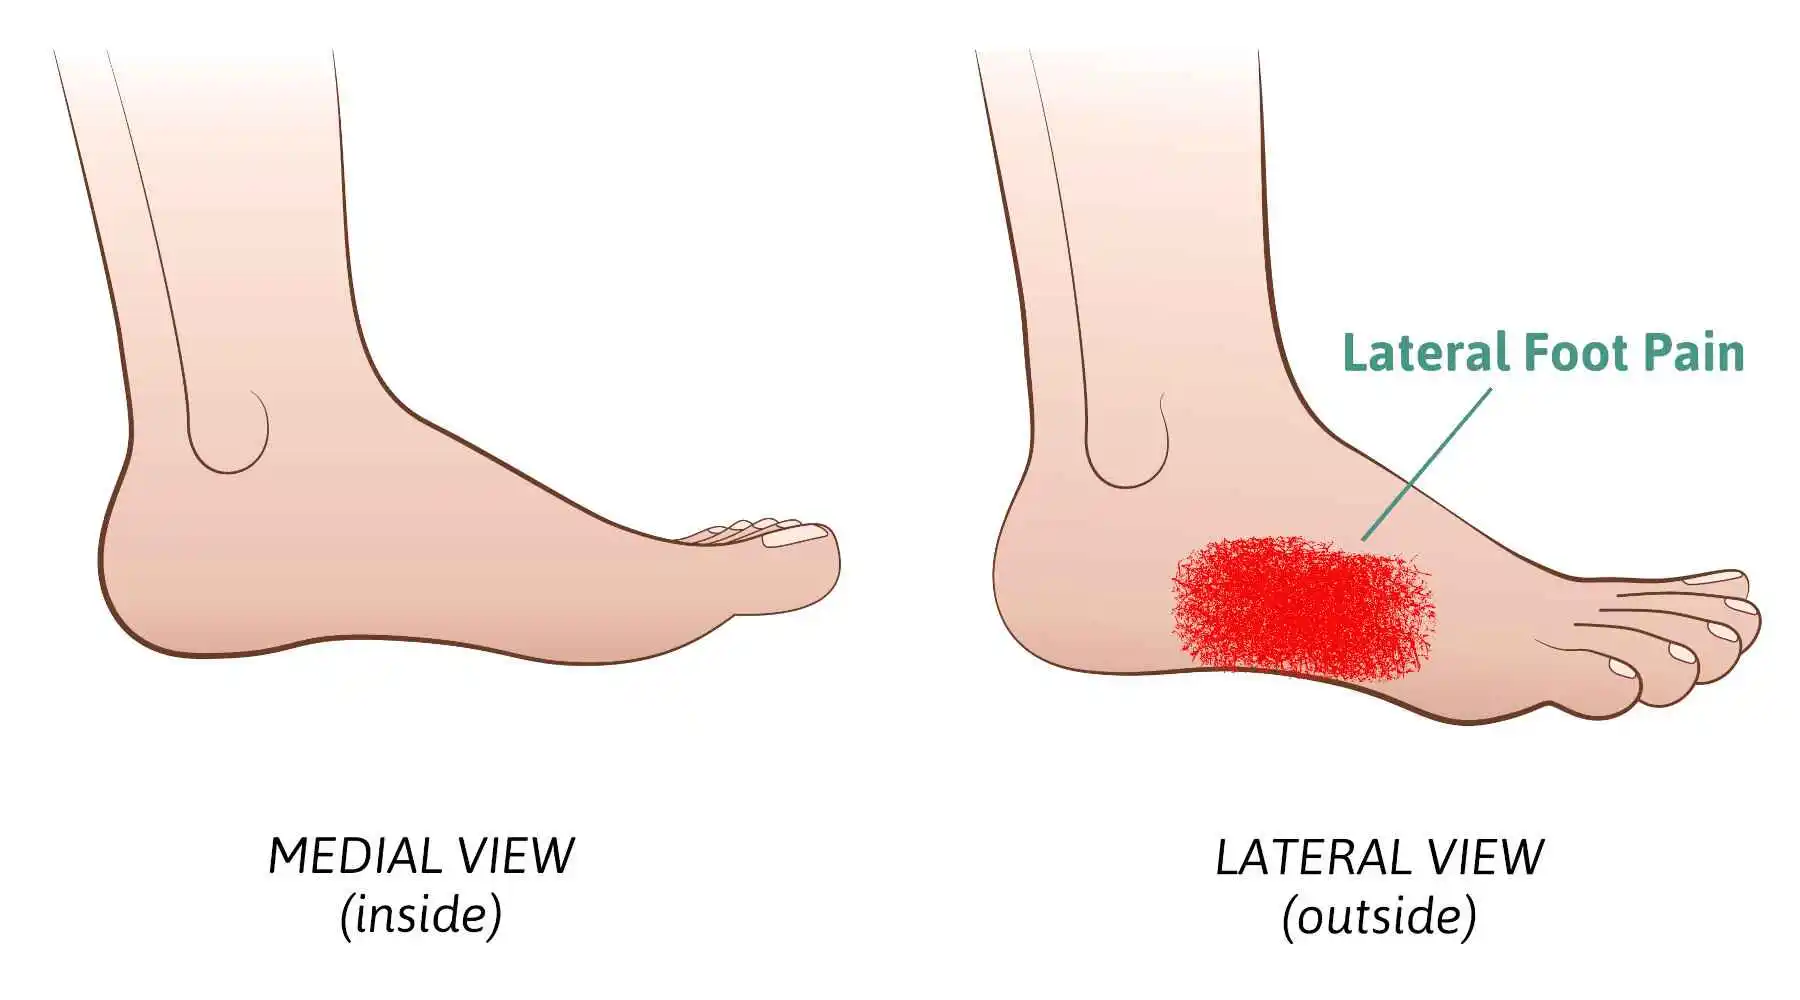
    Sural neuritis, also known as sural neuralgia, is a painful disorder caused by irritation or damage to the sural nerve. The most common description of the pain is a burning feeling on the outside of the foot and ankle.

    It can happen after surgery on the feet and ankles or if there is a nerve injury. Using an adverse massage method to desensitize the nerve, using oral drugs to reduce inflammation, and avoiding applying direct pressure on the nerve are examples of non-surgical therapy approaches.

    In some cases, surgery may be necessary to remove the damaged nerve or relieve the surrounding scar tissue if the symptoms are severe.

    What is the Sural Nerve?

    • Your sural nerve is located in the posterior part of your lower leg, just below the skin’s surface (calf). It’s a part of your peripheral nerve system, which enables your body and brain to communicate.
    • The outer heel, the back of your lower leg, and the skin on the outside of your foot are all sensed by the sural nerve. You can use it to sense touch, warmth, and pain in addition to foot position. Difficult nerve illnesses can be identified and treated with the help of the sural nerve.

    Which type of nerve is the sural nerve?

    As a sensory nerve, your sural nerve allows you to perceive and sense the following:

    • Touch.
    • Foot position.
    • Temperature.
    • Pain and vibration.

    Anatomy Of the Sural Nerve

    Your sural nerve begins where two nerves merge in your upper leg. It goes down the back of your leg, finishes right in front of your toes, and bends at the ankle.
    Two nerves influence how your sural nerve forms:

    • The tibial nerve supplies feeling and motor function to the back of your leg and foot.
    • The common fibular nerve, also known as the common peroneal nerve, supplies sensation, and motor function to the tissue just behind your knee and surrounding leg muscles.

    What composition makes up the sural nerve?

    Your sural nerve is made up of tiny, string-like fibers called axons. The fatty material known as myelin connects them to form nerve bundles. These bundles connect to the spinal cord once they enter the body. Your brain receives and sends nerve information quickly thanks to this network of nerve tissue.

    Function Of The Sural Nerve

    Your sural nerve detects skin color in the following regions:

    • Below the knee and at the back of your leg.
    • Your foot’s outside side.
    • The outside of the heel.
    • Ankle.

    In addition to providing you with feeling, your sural nerve helps with balance when standing. To treat and diagnose a variety of nerve disorders, it can also be utilized as donor tissue.

    What is Sural Neuritis?

    • When a portion of the sural nerve becomes trapped, inflamed, or injured, it can cause sural neuritis, also known as sural neuralgia.
    • All pain from an inflamed nerve is called neuritis. One of the five nerves that travel through the ankle and provide sensation to the foot is the sural nerve. The sural nerve senses only a small region on the outer edge of the foot and the fourth and fifth toes.
    • Shoes with features like thick straps or seams pressing against the Achilles tendon outside the heel or foot might irritate the sural nerve. Sural neuritis can be caused by pressure or mechanical irritation because the nerve is just beneath the skin. This may cause burning, tingling, or numbness along the nerve’s path.
    • The pain associated with a nerve injury may also radiate or shoot up the back of the leg, or out to the fourth and fifth toes. Additionally, it may result in pain along the outer surface of the heel bone.

    Causes of the Sural Neuritis

    • Trauma to the leg is the most frequent cause of damage to the sural nerve, but it can also occur following surgery if scar tissue ends up trapping part of the nerve.
    • The most frequent causes of nerve injury include a severe ankle sprain, a violent fall, an athletic collision, and a can accident.

    Symptoms of the Sural Neuritis

    • Ankle or foot pain on the outside.
    • The feeling of discomfort can be as burning.
    • Localized hypersensitivity.
    • Numbness.
    • Swelling.
    • Some types of footwear might make pain worse since pressure on the affected area aggravates symptoms.

    Diagnosis of the Sural Neuritis

    Physical Examination

    The diagnosing process relies heavily on physical examination. When you tap on a nerve, you will experience an “electrical” sensation known as the Tinel, which is especially noticeable in areas where the nerve is damaged. Along the nerve’s path, there may also be localized edema and discomfort on the outer surfaces of the foot and ankle.

    Imagine Test

    Simple X-rays are rarely useful in surgical neuritis diagnosis. Since it is a soft tissue structure, an x-ray will not reveal the nerve. Furthermore, an MRI is not likely to be helpful because the sural nerve is too small to be seen. However, some information about prior surgeries or other injuries to the area that might be connected to the current symptoms may be obtained from these imaging investigations.

    Treatment for the Sural Neuritis

    Whether it’s scar tissue or a sprained ankle, treating sural neuritis entails treating the underlying root cause of nerve injury.

    Conservative treatment

    The majority of sural neuritis cases either get better with time or can be effectively managed without surgery. For sural neuritis, there are numerous non-operative therapeutic options available:

    • Medicine. Two drugs called gabapentin and pregabalin may assist in stabilizing the irritated nerve.
    • Injection of corticosteroids. To reduce pain and inflammation and break up the scar tissue surrounding the nerve, a targeted corticosteroid injection may be helpful.
    • Wear comfortable shoes. Selecting the appropriate footwear can prevent direct pressure on the injured nerve region. The cushioning to the affected area can also reduce discomfort and decrease symptoms.
    • Desensitization. When direct massage is applied to an irritated nerve, the intention is to desensitize the nerve and break up any surrounding scar tissue. Desensitization is uncomfortable at first, but it usually gets better with time.

    Physical Therapy

    Physical therapy can be a very effective therapy for sural neuritis because it helps to treat underlying causes of nerve compression by reducing nerve pain and inflammation, improving nerve mobility, and preventing future recurrence.

    A physical therapist will treat sural neuritis using a combination of techniques, such as:

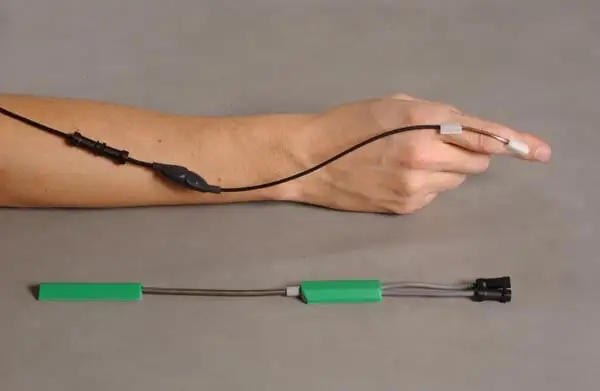
    • Electrotherapy: Inflammation and pain can be lessened with the use of ultrasound therapy. Pain can be decreased and nerve function can be improved by electrical stimulation.
    • Manual therapy: To help reduce inflammation and improve nerve gliding, this can include massage, friction massage, and nerve mobilization treatments.
    • Taping: Taping can reduce pain and support the calf and ankle.
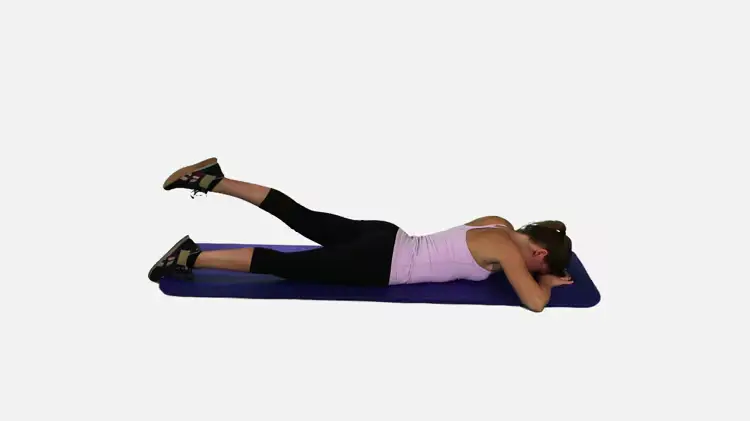
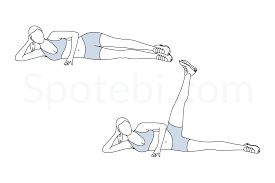
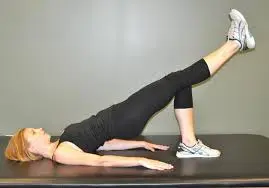
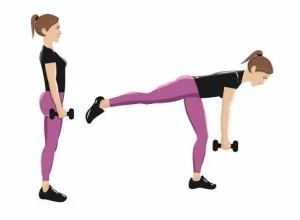
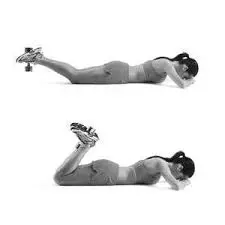
    • Exercises: An essential component of physical therapy for sural neuritis is exercise. Stretches, strengthening exercises, and nerve-gliding activities are a few different exercises.

    Exercises for sural Neuritis
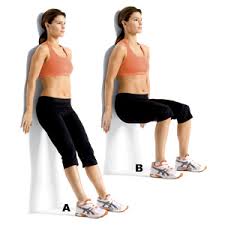
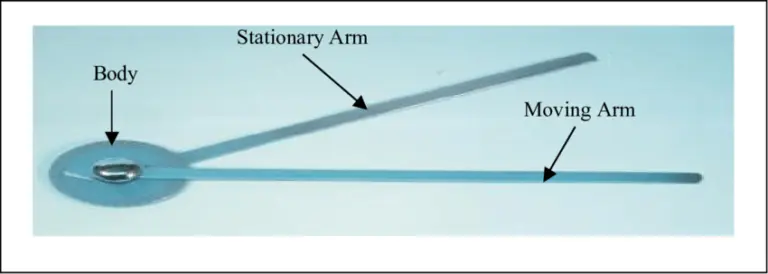
    Ankle Circle:

    • To begin, slowly rotate your ankle in circles, starting from the left and moving towards the right.
    • It might even appear easier to try drawing the letters while standing on your tiptoe. Point the path with your big toe.
    • Try to move as little as possible and focus on using your foot and ankle alone, not your entire leg.
    • Turn your ankle slowly, in one direction at first, then the other.
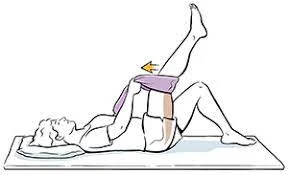
    Ankle Pump:

    Point your toes down after bringing them up toward your head while sitting or lying on your back. Ten repetitions of this exercise should be performed on both ankles at the same time, once an hour.

    Toe stretches:

    Wrap your toes in a towel and settle into a chair. Pulling back on the cloth gently will stretch the top of your foot.
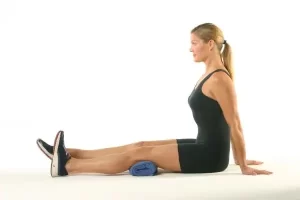
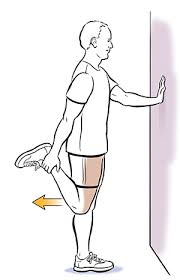
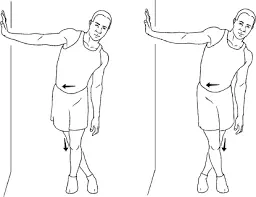
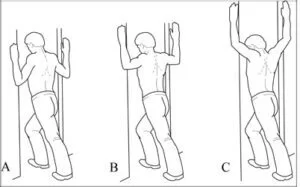
    Calf Stretching:

    Stretch your calf by standing facing a wall and placing your hands shoulder height on the wall. Until your calves start to stretch, lean forward. Repeat after 30 seconds of holding.

    Operative Treatment

    Surgery could be necessary if there is nerve discomfort that is not relieved by non-surgical means, if the nerve has been extensively scarred, or if the hardware inserted during the surgical process is irritating. Typically, sural neuritis surgery entails one of two things:

    • Releasing the nerve. Surgery to remove any aggravating structures (such as residual metal) or to release the nerve from the surrounding scar tissue may also be beneficial. Scar tissue, though, frequently reappears. Therefore, collagen nerve wrapping may help stop the growth of scar tissue recurrence.
    • Nerve Resection. It is frequently preferable to remove the sural nerve if the nerve is too severely injured due to previous scarring or if the symptoms are severe. Since the sural nerve primarily provides feeling to the outside of the foot and ankle, its resection results in numbness along its entire course without affecting motor function.

    Complication

    Complex regional pain syndrome is a potentially severe illness and a potential problem with sural neuritis, yet inconceivable.

    Prevention for the Sural Neuritis

    You can take the following actions for prevention of the Sural Neuritis

    • If you have diabetes, make sure your blood sugar levels are within a healthy range.
    • Choosing and replacing well-fitting sporting footwear when it becomes worn out.
    • Giving up smoking and other tobacco products.
    • Maintaining the health of your nerves by eating a balanced diet that includes foods high in vitamin B12 and vitamin D.

    FAQs

    What is the cause of sural neuritis?

    The most often specified causes of sural neuropathy in research include accidental damage, repetitive or prolonged external ankle compression, and nerve trauma from ankle fracture.

    How much time does it take for damage to the sural nerve to heal?

    Your nerve should heal in six to twelve weeks if it is swollen or injured but not cut. Following four weeks of “rest,” a cut nerve will grow by 1 mm per day.

    How is the sural nerve tested?

    The patient’s clinical symptoms can be replicated using the sural nerve neurodynamic test. One can also use point tenderness over the nerve or a positive Tinel sign as clinical indicators of disease. If there is discomfort, plantar flexion and/or foot inversion may make it worse.

    What is the treatment for sural neuritis pain?

    Conservative treatments for sural neuralgia, which is a very uncommon sickness, frequently work. These include bed rest, physical therapy, massage therapy, anti-inflammatory drugs, tricyclic antidepressants, gabapentin, serotonin and norepinephrine inhibitors, and calcium channel blockers.

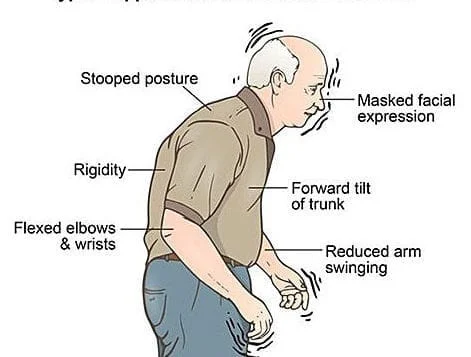
    What early symptoms indicate damage to the nerves?

    The following are the most typical signs of a nerve disorder: burning, tingling, or numbness in your extremities or limbs. unexplained weakness, paralysis, or loss of muscle strength. a persistent headache that seems “different” or appears out of the blue.

    References

    • Professional, C. C. M. (n.d.-u). Sural nerve. Cleveland Clinic. https://my.clevelandclinic.org/health/body/22323-sural-nerve
    • FootEducation. (2019, November 6). Sural Neuritis – FootEducation. http://www.footeducation.com/sural-neuritis/
    • Silverman, L., MD. (2021, May 10). Treating sural neuritis. Silverman Ankle and Foot Edina Orthopedic Surgeon. https://www.anklefootmd.com/treating-sural-neuritis/
    • Segler, C. (2018, May 3). Sural Neuritis. DOC. https://www.docontherun.com/sural-neuritis-3/
    • Silverman, L., MD. (2018, March 6). Diagnosing and treating severe nerve problems. Silverman Ankle & Foot – Edina Orthopedic Surgeon. https://www.anklefootmd.com/diagnosing-and-treating-sural-nerve-problems/
  • Shockwave Therapy

    Shockwave Therapy

    What is Shockwave Therapy?

    Shockwave therapy is a non-invasive treatment that helps the body’s natural healing process. It can reduce pain and speed up the healing of torn ligaments, tendons, and other soft tissues. It does this by releasing maturation factors from injured soft tissue. Shockwave treatment is occasionally employed with extracorporeal pulse activation technological devices.

    Shockwave treatment is a sort of regenerative medicine also known as orthobiologic therapy. It treats tendinopathy and ligament injuries that are difficult to heal. Degenerative tendinopathies are related to calcium accumulation in the muscular tendon. Concentrating shock waves can break apart such deposits.

    If a hip impingement has wounded tendons and ligaments near the hip, the remedy might support rehabilitation following orthopedic surgery. Surgery can relieve hip impingement, but after many years of overworking and degradation caused by the impingement, the surrounding tendons typically continue to ache. Shockwave therapy can be utilized to address this secondary condition.

    What is the underlying principle of shockwave therapy?

    • Electrohydraulic Generation Principle
    • Piezoelectric Generation Principle
    • Electromagnetic Generation Principle
    • Radial or Ballistic Generation Principle

    The shockwave field is made up of four basic principles: electrohydraulic, electromagnetic, piezoelectric, and radial or ballistic generation principles. The shock wave emitted by the majority of the tools has a focus zone several centimeters forward of the generator. The healing outcomes occur when most sonic waves are concentrated in the focus zone, which is often the movement location. The coupling media (ultrasonic gel) transmits the shock wave into the soft tissue, generating a focus zone. It is critical to ensure that the designated spot is in the focus zone during shock wave treatment.

    Shockwaves are temporary pressure interruptions that occur fast in three dimensions. They are connected with an impulsive peak from ambient to maximum pressure. Significant soft tissue hits cause cavitation, resulting in a negative phase of wave propagation.

    Direct shockwave and indirect cavitation strikes cause hematoma formation and localized cell stoppage, resulting in a new bone/tissue appearance.

    How Does Shockwave Therapy Work?

    Shockwave treatment contains both good and negative stages. The positive stage generates instantaneous mechanical forces, but the negative stage produces cavitations and gas drops, which then collapse at high speeds, causing a second wave of shockwaves. It employs a high peak pressure accompanied by a reduced amplitude, a shorter period, and a shorter peak duration. They produce a single pulse with a high-pressure amplitude (0-120 MPa) and a wide frequency range (0-20 MHz). Ultrasound waves have a peak pressure that is approximately 1000 times lower than that of a shockwave.

    Shockwaves are low-frequency pressure disturbances that move quickly in a three-dimensional space, accompanied by an abrupt surge from ambient force to maximum pressure. Subsequent soft tissue impacts, primarily cavitations, result in the negative stage of wave propagation.

    Shockwave treatment may be used for:

    • Increase circulation around injured soft tissues.
    • Crackdown calcified deposits, such as kidney stones.
    • Prompt cells generate new bone tissue and connective soft tissue.
    • Overstimulating nerve endings in the afflicted area can help relieve pain.
    • The entire technique does not have any heat effect, but it accelerates revascularization.

    History of Extracorporeal Shock Wave Therapy:

    ESWT was initially used clinically in 1982 to treat urological problems. This technology’s efficacy in treating urinary stones immediately established it as the first-line, noninvasive, and successful technique. ESWT was then investigated in orthopedics, where it was revealed to potentially dislodge the cement during total hip arthroplasty revisions.

    Additionally, research on animals carried out in the 1980s suggested that ESWT might enhance the interaction between bone and cement, trigger an osteogenic response, and speed up the healing of fractures. While ESWT has been found to improve fracture healing, most orthopedic research has focused on upper and lower extremity tendinopathies, fasciopathies, and soft tissue diseases.

    Physiology of Shock-wave Therapy:

    Shock-wave therapy makes use of sound waves with nonlinearity, high peak pressure, low tensile amplitude, quick rising time, and short duration (10 ms). They generate a single pulse with a wide frequency range (0-20 MHz) and high intensity (0-120 MPa).

    These characteristics lead shockwaves to have positive and negative phases. The positive phase provides direct mechanical forces, but the negative phase causes cavitation and gas bubbles, which then collapse at high speeds, resulting in a second wave of shockwaves.
    In comparison to ultrasonic waves, the shockwave peak pressure is around 1000 times higher.

    Mechanism of Action:

    The consequences of ESWT therapy remain uncertain. ESWT’s proposed mechanisms of action include the following: promoting neovascularization at the tendon-bone junction, stimulating tenocyte proliferation and osteoprogenitor differentiation, increasing leukocyte infiltration, and amplifying growth factor and protein production promoting collagen production and tissue remodeling.

    What are the benefits of Shock Wave Therapy?

    Shock wave treatment has several biological advantages, including:

    • It is a non-invasive way to manage acute and chronic pain.
    • The therapy does not require anesthesia.
    • Reduces discomfort and increases movement.
    • It has few side effects.
    • It is frequently utilized in the treatment of muscular skeletal disorders. Shockwave treatment is cost-effective.

    What are the applications of shockwave therapy?

    The physical therapist evaluates the patient at his initial appointment to determine that he is a viable candidate for shockwave therapy. The therapy begins by administering ultrasonic gel to the affected region. The applicator or treatment head is immediately placed on the area. Sound waves must be delivered from the emitter to the patient’s skin using a gel substance.

    The parameters are predetermined, and the intensity is determined by the patient’s convenience; there is no standardized procedure for the treatment of musculoskeletal problems. It can be used with therapy, basic exercises, and movement modification. Based on the results, the patient is advised to undergo shockwave therapy once a week for 5-6 weeks.

    It contains acoustic energy, energy flow density (EFD), wealth pressure distribution across the sample, and total energy at the secondary focal point. The energy flux density (EFD) of the focussed shock wave utilized to treat muscle trigger sites ranges between 0.05 and 0.25 mJ/mm2. To minimize tissue injury, the shock wave frequency at the trigger site should not exceed 4 Hz. The energy flow density (mJ/mm2) is determined by the muscle’s thickness and depth. The energy flux density should be chosen so that the discomfort caused by the shock waves is manageable for the patient. The same technique applies to radial shock waves. To avoid hematomas, exercise extreme caution while employing tiny surface shock transmitters with a small surface.

    The shock wave frequency ranges from 10 to 15 Hz, with 15 Hz often causing less discomfort. When employing a mix of focused and radial shock waves in trigger point treatment, the trigger sites are initially treated with 200 to 400 focused shock waves. It is accompanied by a radial shock wave receiver that generates 3000 to 4000 radial shock waves.

    Frequency: Most people benefit from one session each week. These intervals allow muscles to recover from irritation, which the patient may experience for up to three days.

    What are the indications for shockwave therapy?

    Shockwave therapy is frequently used to treat common musculoskeletal illnesses. These include:

    • Acute and persistent muscular discomfort in the cervical and lumbar spine regions.
    • Chronic tendinopathy
    • Rotator cuff tendinosis with calcium deposits
    • Frozen shoulder
    • Dorsalgia
    • Tennis elbow
    • Golfer’s elbow
    • Carpal Tunnel Syndrome
    • Sciatic pain.
    • Tensor fascia Late Syndrome
    • Iliotibial band friction syndrome.
    • Greater trochanteric pain syndrome.
    • Avascular necrosis in the femoral head.
    • medial tibial stress syndrome.
    • osteoarthritis of the knee
    • Patellar tendonitis
    • Jumper’s Knee
    • Bursitis
    • Metarsalgia
    • Tibialis anterior syndrome.
    • Achilles’ tendonitis
    • Plantar fasciitis
    • Heel spurs
    • Fracture
    • Exostosis of Small Joints
    • Recurrent strain and overuse injuries.

    Contraindications of shockwave therapy:

    Consult your therapist to ensure shockwave treatment is appropriate for your case. While this therapeutic strategy has few adverse effects for most people, there are a few situations in which it should not be used.

    When soft tissue is injured and more healing is required, your doctor is unlikely to recommend shockwave treatment. That might exacerbate the patient’s soft tissue dysfunction. Your therapist will not consider shockwave therapy when an injury appears to necessitate surgery rather than non-invasive treatment.

    Shockwave treatment should not be used:

    • Near the womb throughout the pregnancy phase.
    • Malignant tumors or surrounding tissues.
    • Surrounding the brain or spine
    • Close the lungs.
    • On a person with any kind of active bleeding condition
    • If you have tendinopathy or soft tissue injury that is not responding to a more conservative treatment
    • However, whether you pick shockwave therapy over another form of healing procedure is essentially up to you and your doctor.

    What to Expect from Shock Wave Therapy?

    The total amount of shocks administered to the afflicted location determines the effectiveness of shockwave therapy treatment. A normal session lasts between 5 and 15 minutes, with a total of 1000 to 8000 shocks.

    The effects of shockwave treatment remain around 2–4 hours after the session.

    What are the possible adverse effects or complications?

    You may experience some adverse effects, although they are infrequent and usually moderate. These may include:

    • During the operation, the affected area will be painful.
    • bruising
    • blood in the urine
    • Possible symptoms include penile skin infections
    • uncomfortable erections, or 
    • worsening penile curvature

    Although shockwave therapy rarely has complications, a therapist must evaluate the patient’s injuries and level of fitness prior to starting therapy. If a tendon or ligament is nearly entirely ripped, shockwave treatment can cause the remaining tissue to rupture. If a patient has very little bone density, such as someone with osteoporosis, shockwave treatment may cause a fracture.

    Clinical studies have generally demonstrated shockwave treatment to be beneficial and safe, but more research is needed to understand potential dangers and the optimum therapeutic regimens for those with erectile dysfunction.

    Shockwave treatment vs. Radial Wave treatment:

    It is critical to distinguish shockwave therapy from radial wave therapy, which is often advertised as a noninvasive treatment for erectile dysfunction available in both medical and non-medical settings. Here are some important differences:

    Shockwave Therapy
    Data suggests that it can improve blood circulation and even help build new blood vessels.
    A licensed medical specialist with specialized expertise is required to assist with this therapy.

    The Food and Drug Administration (FDA) has not yet approved it as an effective treatment for erectile dysfunction.

    Radial Wave Therapy
    There is no evidence to support claims that it can help with erectile dysfunction.
    It is not subject to FDA regulation because it is a Class I medical device.
    This therapy does not require a medical license or any type of specialized training

    Clinical Guidelines: 

    Extracorporeal shockwave therapy (ESWT) is largely used to treat common musculoskeletal problems. These include upper and lower extremities tendinopathies, greater trochanteric pain syndrome, medial tibial stress syndrome, patellar tendinopathy, and plantar fasciitis.

    There are no standardized ESWT procedures for treating issues with the skeletal system.

    FAQ’s

    Does shockwave treatment work?

    Yes. The majority of patients who use this therapy have praised its benefits. In clinical studies, almost 91% of patients reported beneficial outcomes that included a reduction in chronic pain, an increase in flexibility, and other fitness gains.

    How long do shockwaves last?

    Shockwave therapy lasts around 5-10 minutes. Around 2500-3000 shocks will be administered to the affected soft tissue each session. During your shockwave period, your physical therapist will modify the machine’s intensity to make sure that the damaged tissue receives an adequate dose.

    What are the variances and commonalities between shockwave therapy and therapeutic ultrasound?

    Differences Between Shockwave Therapy and Therapeutic Ultrasound:
    Therapeutic ultrasound creates high-frequency sound waves, whereas shockwave therapy creates low-frequency electromagnetic fields.
    While ultrasound can produce either thermal or non-thermal consequences in tissues, shockwave treatment can not produce thermal outcomes.

    Similarities between shockwave therapy and therapeutic ultrasound:
    Both techniques employ acoustic waves to provide restoration benefits.
    Both employ a coupling medium (ultrasonic gel) to transport sound waves in the tissues being regaled.
    They are both non-invasive methods of cure.

    Does Shockwave need anesthesia?

    Shockwave therapy employs shock waves to break up the stones into little pieces. The particles then exit your body spontaneously with urine, so no incisions are necessary. Shockwave treatment is an outpatient procedure, however anesthesia is required. If essential, you may be given a simple sedative or complete general anesthetic.

    Can I stretch following shockwave therapy?

    You should be able to continue your normal activities following shockwave therapy. We recommend avoiding any strenuous workouts or blows, such as jogging, for the first 48 hours after treatment. Regardless, you must continue to perform the activities prescribed by your physical therapist, such as stretching your plantar fascia.

    Can I use shockwave treatment at home?

    The Growth of At-Home Devices
    Shockwave therapy has risen in popularity over the past few decades due to its ease of use and affordability. It’s an excellent choice for those who desire relief without having to visit the clinic all the time.

    How unpleasant are shockwaves?

    Most patients report feeling tiny pulses on their skin. If your pain is severe, your expert may be able to change how they utilize the shockwave device. Each treatment will only take a few minutes, therefore the great majority of patients will be able to bear the discomfort induced by shockwave therapy.

    Is shockwave treatment beneficial for nerves?

    Shockwave treatment can aid by stimulating the body’s capacity to repair new tissue. It also relieves pain by directly activating the nerves at the location of the damage.

    Can you walk following shock wave therapy?

    It is advised to avoid high-impact activities (such as jogging) and lengthy walks for 24 to 48 hours following each treatment.

    Can I use ice following shockwave therapy?

    Do not apply ice to the treated region or take any nonsteroidal anti-inflammatory medications such as aspirin, ibuprofen, or diclofenac, since these will inhibit the inflammatory and healing processes that the shockwave therapy has initiated.

    References

    • Dhameliya, N. (2022b, August 5). SHOCK-WAVE THERAPY – Effect, Indication, Contraindications. Samarpan Physiotherapy Clinic. https://samarpanphysioclinic.com/shock-wave-therapy/#What_does_Shock-wave_Therapy_treat
    • Vaghela, D. (2023b, December 13). Shockwave Therapy – Indication, Contraindications – Mobile Physio. Mobile Physiotherapy Clinic. https://mobilephysiotherapyclinic.in/shockwave-therapy/#What_is_the_application_of_Shockwave_therapy
    • What is Shockwave Therapy? What conditions are treated by Shockwave Therapy? Who will benefit from Shockwave Therapy? (n.d.). cbphysiotherapy. https://cbphysiotherapy.in/therapies-offered/shockwave-therapy
  • Turkey Neck

    Turkey Neck

    What is Turkey Neck?

    Turkey neck, medically known as “cervical sagging” or “platysmal bands,” refers to the loose, wrinkled skin that often develops on the neck as a result of aging. This condition gets its name due to the resemblance of the sagging skin to the wattle of a turkey. It is a common cosmetic concern, particularly among older adults, and can significantly affect an individual’s appearance and self-confidence.

    It is most typically seen in individuals between the ages of 30 and 40. Since the neckline is so noticeable, many individuals who have sagging skin may feel self-conscious about it and look for ways to minimize the signs of aging, realign their jawline and profile, and seem younger.

    What Causes Turkey Neck?

    • Aging: Your skin naturally loses elasticity as you become older.  
    • Weight: Putting on weight may cause a buildup of extra fat in the neck area.
    • Lifestyle factors: Smoking, UV damage, pollution from the environment, and an unhealthy diet can all have an impact on how supple your skin is.
    • Medication: Some drugs have the potential to increase body weight or cause fat to be more concentrated in particular parts of the body, such as the neck.

    Turkey Neck may cause the jawline to lose definition, drooping skin around the neck, decolletagé, double chins, and wrinkles around the neck.

    Sagging skin around the chin and neckline can have a variety of causes, and while aging is a normal process that happens as we age, there are several things that might speed up the process. Genetics and the normal aging process can also cause drooping skin to appear early. Lifestyle variables that affect this include food, sun exposure, weight increase or loss, and weight reduction.

    In addition to drooping skin caused by elasticity loss, weakening of the neck muscles, particularly the platysmal muscles, can also result in vertical bands running from the collarbone to the chin as aging occurs.

    A double chin, or loss of definition around the chin, is another sign of aging that is associated with the “Turkey Neck”.This occurs when the skin’s natural suppleness causes collagen formation to slow down and fat cells to gather in the neck. Both weight loss and weight gain can hasten the development of a double chin since weight loss can cause sagging skin over the face and weight gain.

    Sometimes a person’s hyoid bone, a U-shaped bone in the neck, is positioned more forward, which can shorten the chin and make the skin seem more drooping and aged. Additionally, this may accentuate the look of Turkey’s Neck and neck skin drooping.

    Treatment of Turkey Neck?

    Although neck muscles can get firmer through exercise, this will not improve the skin’s quality. To enhance the look of your neck and get rid of turkey neck, there are a few procedures that can assist.

    Certain therapies are non-invasive, meaning they don’t require surgery; others are performed by conventional surgery or minimally invasive surgical methods that call for tiny incisions.

    Physical Therapy Treatment:

    Exercises that treat turkey neck

    Turkey’s neck is said to be relieved by a variety of face and neck exercises. However, no credible research has examined the efficacy of these workouts so far.

    While it can tone your muscles and improve your health, exercise can not get rid of extra skin. Therefore, even while workouts may assist in tightening the muscles in your neck, the skin that covers them may not alter.

    Four turkey neck exercises for the face

    Typical suggested face exercises include the following:

    • Forehead push

    Put a single hand on your brow.
    Avoid letting your head slide forward and instead press it up against your hand.
    For ten seconds, maintain this posture.
    After that, thrust back with your neck while holding both of your hands behind your head for ten seconds.

    • Chewing:

    Sit upright in your chair.
    Raise your head so that your chin is pointing upwards.
    Maintain a closed-lip position while using your mouth to chew. 20 times, repeat.

    • Kissing:

    Sit upright in your chair.
    Keep your mouth shut and tilt your head up so that your chin is toward the ceiling.
    Slobber on your lips like you’re kissing. 20 times, repeat.

    • Neck lift:

    Assume a reclined position on your bed, gazing upward with your face hung over the side.
    Using the muscles in your neck, carefully and gently raise your head as high as possible.
    Five times over, repeat. If this exercise is giving you neck pain, discontinue right away.

    Surgical Treatment Of Turkey Neck:

    The simplest and most effective method to treat turkey neck is through surgery. Certain of the most recent therapies are less intrusive than traditional operations, which usually involve cutting and leaving scars. The following is a list of frequent operations and medical treatments that may be used to treat turkey neck:

    Botulinum toxin type A, or Botox
    By definition, botox is not surgery, yet it is a laborious procedure carried out by experts. About three to four months are all that the results persist, and to keep the skin firm, further injections are required.

    Hyo raised her neck
    This is a more modern surgical method for lifting the neck that helps tighten and smooth the skin around the neck. The operation appears to be a potential method of lessening or getting rid of the look of drooping neck skin, according to recent research.

    MST operation
    Using minimally invasive surgery, mainly barbed threads are used to tighten the skin on the neck, to rejuvenate the area. Very few scars remain following the surgery.

    Skin tightening laser
    Many medical gadgets have the ability to tighten and heat the skin. A noninvasive procedure with modest to moderate effects is a laser. One advantage of this process is that it doesn’t require any recuperation time.

    Z-plasty
    Known by another name, anterior cervicoplasty, this procedure was first performed in the 1970s. It involves taking off superfluous skin from the neck directly. It’s simple and fast, although there’s a noticeable scar on the back of the neck.

    Skin tightening with lasers
    Without requiring surgery, the neck skin can be heated and tightened using a variety of laser kinds. The outcomes can range from mild to moderate, depending on the kind of laser used; numerous sessions are typically needed to get the desired result. The benefits can continue for several years, and there is often little recovery time.

    methods for facial enhancement
    A facelift is a surgical technique used to create a smoother, more toned neck and jaw area by tightening and raising weak facial and neck muscles and removing superfluous skin.

    To conceal the scars, the surgeon will make an incision behind each ear; if necessary, a second incision may be performed behind the chin. Patients wrap their heads and neck in an elastic compression bandage to minimize edema following surgery.

    Under general anesthesia, a common outpatient procedure that takes one to two hours to perform is combining a facelift and neck lift. Most patients resume work and other activities after two weeks, though most bruise and swell within the first week or two. To produce a highly realistic effect, there are versions of the procedure that pull the neck and face in different directions.

    Nonsurgical Treatments For a Turkey Neck

    While loose, wrinkled, or drooping neck skin may not look bad on a turkey, many people find that it is an undesirable side effect of age.

    The skin is loose and can become wrinkled and floppy, making it look like the neck of a turkey.

    The two main factors contributing to drooping skin are sun exposure and age. Although there is no way to stop aging, there are certain things you can do to slow down the process, including avoiding smoking and protecting your skin from the sun. Due to the hereditary component of turkey neck, you are more likely to have it if a parent already has it.

    Are Turkey Neck Treatment Safe?

    While many of the treatments recommended by physicians for the indications of aging on the jawline and neck are generally safe, there is a chance that they may have unintended repercussions, including temporary reactions or minor bruises.

    You may soon resume your regular activities because many of the recommended treatments for the neck region need little recovery time.

    Botox and microneedling are two examples of treatments that employ needles and injections to promote collagen and reverse aging; both treatments can cause temporary redness on the skin, but they can also leave tiny markings or mild bruises.

    Even though surgery can have greater long-lasting effects by halting the indications of aging, it also has a higher risk profile and requires a longer recovery period.

    Home Remedies and Exercises For Turkey Neck

    In addition to being able to give a more young and taut appearance, home remedies may be utilized in conjunction with clinical procedures to assist in achieving better and faster results.

    Even if they can’t totally stop sagging skin, exercises to maintain neck muscular strength can help create a stronger jawline, which can lessen the look of drooping and fat cells.

    Prevention: How Can You Avoid Turkey Neck?

    Even while aging cannot be totally avoided, there are strategies to minimize the appearance of turkey neck and slow down its symptoms. Generally speaking, many of the actions to slow down the aging process are advised as best practices.

    Delaying the aging process requires taking good care of your skin. Many anti-aging lotions and treatments contain retinoids and N-acetyl glucosamine to combat sagging, wrinkles, and elasticity loss. Even while there is some evidence to support the claim that topical skincare products help hydrate and revitalize the skin, they cannot completely reverse the effects of aging on their own.

    Another crucial component in altering the look and delaying the aging process is leading a healthy lifestyle. Since fat cells tend to collect at the jawline and neck, losing weight can help lessen the appearance of a double chin.

    Neck exercises, which serve to tighten the muscles in the face and neck, can also help maintain a more defined jawline and appearance. Although it can tighten the muscles beneath the skin, it cannot remove or change the skin above.

    Conclusion:

    The prognosis for an individual suffering from a turkey neck varies according to the kind of treatment or therapies they get. Cosmetic creams are in the center when it comes to effectiveness, with surgeries and medical treatments being the most successful forms of therapy and neck exercises
    appearing to be the least beneficial.

    Speak with your physician if you’re worried about your turkey neck; they can advise you on the best course of action.

    FAQs

    Is it possible to turn a turkey neck inside out?

    Although the skin of the neck has less collagen and elastin than most other parts of the body, tone can nevertheless be improved there. It is not possible to significantly tighten that region unless you go toward the more invasive end of the range.”

    Which at-home treatment for turkey neck works the best?

    Exercise “Chewing Gum”: This is possibly the easiest and most effective way to treat Turkey Neck. To achieve this, simply imagine yourself chewing gum and moving your mouth in that manner. Tilt your head as much to the left and right as you can.

    How do famous people get rid of their turkey necks?

    Everyone is buzzing about Thread Lifting, a 30-minute process that gives a refined, elevated, and natural appearance without requiring surgery. Celebrities have already benefited from it.

    Turkey’s neck is caused by what deficiency?

    Dietary errors and dehydration
    The health and look of the skin can be adversely affected by a diet deficient in vital vitamins, minerals, and nutrients. Decreases in collagen
    synthesis and general skin suppleness can be specifically caused by dehydration and a diet poor in antioxidants, healthy fats, and proteins.

    Does turkey neck benefit from aloe vera gel?

    Aloe has several health benefits, one of which is that it promotes skin healing from wrinkles. It’s a great approach to address necklines as a result.
    You may make your own aloe vera gel at home by chopping up one aloe plant.

    When does the development of the turkey neck start?

    Most people see noticeable drooping and wrinkles in their neck skin around the age of forty. Additionally, at that point, the underlying platysmal muscles begin to weaken and separate, revealing vertical bands that run from the collarbone to the chin through thinning skin. You are looking at turkey neck.

    What has happened to my turkey neck suddenly?

    The loose skin can become floppy and wrinkled, making it seem ugly and like the neck of a turkey. Sun exposure and age are the main reasons for drooping skin.

    Does the turkey neck benefit from vitamin C?

    Using moisturizing lotions with antioxidants, vitamins C, A, and E, and UV protection is advised by dermatologists. All of these compounds work well together to tighten loose skin.

    Which oil works well for the necks of turkeys?

    Massage with Almond Oil
    Fighting free radicals that may harm the skin, vitamin E can assist in nourishing and moisturizing the skin while also having anti-aging properties.
    Because of this, almond oil is a great option for people who want to tighten the skin around their necks and minimize wrinkles.

    Is there a turkey neck home remedy?

    These 10 non-surgical approaches and numerous natural ingredients that you probably already own can help tighten the skin on your drooping neck:
    Warm massage.
    Work out.
    Control your weight.
    pastes made from cucumbers.
    massage with almond oil.
    cosmetic lotions that tighten the skin.
    Sip on some mineral water.
    a diet that is balanced.

    What cuts off the turkey neck?

    Plastic surgeons tighten the residual muscle, tissue, and skin on the face and neck after excising extra skin and fat.

    How can my turkey neck be naturally treated?

    Four turkey neck exercises for the face
    Avoid letting your head slide forward and instead press it up against your hand. For ten seconds, maintain this posture. After that, thrust back with
    Keeping both hands behind your head, squeeze your neck for ten seconds.

    Is it possible to prevent turkey neck by drinking water?

    Remain hydrated. Drink lots of water to keep your body toned and to help you get rid of turkey neck. Water consumption contributes to smooth
    and firm skin.

    How can the skin around the jawline be tightened?

    Using the other, firmly push the flat of your palm beneath your jawline, moving from chin to ear. Repeat this five to six times on each side to firm, tighten, and contour the face.

    How do famous people get rid of their turkey necks?

    Everyone is buzzing about Thread Lifting, a 30-minute process that gives a refined, elevated, and natural appearance without requiring surgery.
    Celebrities have already benefited from it.

    How can one prevent turkey neck when cutting weight?

    When something doesn’t feel as tight as it should, you may sense it and take
    appropriate action! As you lay on the bed, slowly hang your head off the edge, raise it, and hold it there for ten seconds. With ten-second intervals in
    between, repeat again.

    When does a person develop a turkey neck?

    The majority of people see significant drooping and wrinkles in their neck skin around the age of 40. Additionally, at that point, the underlying
    platysmal muscles begin to weaken and separate, revealing vertical bands that run from the collarbone to the chin through thinning skin. You are
    looking at turkey neck.

    Why does one get a turkey neck?

    The loose skin can become floppy and wrinkled, making it seem ugly and like the neck of a turkey. Sun exposure and aging are the two primary causes of drooping skin.

    References

    • Cirino, E. (2023, February 3). Can You Treat Turkey Neck? Healthline. https://www.healthline.com/health/beauty-skin-care/turkey-neck#outlook
    • How To Fix Turkey Neck with Plastic Surgery. (2023, November 7). Scripps Health. https://www.scripps.org/news_items/7103-how-to-fix-turkey-neck-with-plastic-surgery
    • Clinic, C. (2024, April 30). How To Get Rid of ‘Turkey Neck.’ Cleveland Clinic. https://health.clevelandclinic.org/turkey-neck
    • What Causes Turkey Neck and How Can it Be Treated? (2023, December 13). Doctor Nyla Medispa. https://doctornyla.com/blog/what-causes-turkey-neck-and-how-can-it-be-treated/
  • Abnormal Posturing

    Abnormal Posturing

    Introduction Of Abnormal Posturing:

    Definition of Abnormal Posturing

    Abnormal posturing refers to involuntary and rigid body movements or positions that are often indicative of severe brain injury or neurological disorders. These postures result from disrupted communication between the brain and the muscles, typically due to damage in the central nervous system. There are mainly two types: decerebrate and decorticate.

    Decerebrate posturing involves extension and outward rotation of the arms and legs, often indicating damage to the brainstem. Decorticate posturing, on the other hand, is characterized by flexion of the arms, clenched fists, and extended legs, suggesting damage to areas above the brainstem.

    Rigid body motions and regularly abnormal body postures are referred to as abnormal posturing. The muscles on the opposing side of the joint often provide some resistance to a muscular contraction. However, when a muscle contracts in appropriate posture, the muscular groups are unable to provide resistance.

    This results in rounded or stiff feet, as well as abnormal head or back movement. This symptom is not the same as hunching over or adopting a bad posture. Instead, it refers to a propensity to maintain a specific physical posture or move one or more body parts abnormally. Serious brain or spinal cord injuries are the cause of many abnormal posturing habits.

    Involuntary muscular contractions that result in abnormal body positions, primarily in flexion and extension, are known as abnormal posturing and are typically linked to serious disorders affecting the brain and spinal cord. In this instance, one group of muscles’ tone increased while the tone of the other group of muscles dropped. Posturing like this can also occur in the absence of a trigger.

    When measuring the severity of a condition using the Glasgow Coma Scale (for adults) and the Pediatric Glasgow Coma Scale (for newborns), doctors can use abnormal posturing as a useful measure of how much the upper motor neuron-associated disease has been damaged. a measure of how much the upper motor neuron-associated disease has been damaged.

    When your spine is positioned abnormally, with the spinal curvature highlighted and the joints as a result, this is known as poor posture.

    The vertebrae and muscles are under pressure. Pressure develops on other bodily components as a result of this persistently incorrect position. A number of brain and spinal cord disorders may be linked to abnormal posturing.

    Adult bad posture is largely caused by abnormal spinal curvature, which is an irregularity in the position, development, or curvature of one or more vertebrae. More than 60% of older adults have adult spinal deformity (ASD), which often occurs in conjunction with a number of other disorders including disk degeneration, vertebral fractures, and spondylotic alterations.

    Causes of Abnormal posturing:

    The top few most frequent reasons for abnormal posing are as follows:

    • Brain hemorrhage due to any reason
    • Brain tumor
    • Brain Abscess
    • Hemorrhagic Stroke
    • The primary causes of brain damage are pharmacological side effects, poisoning, and bacterial and fungal infections.
    • Head-brain trauma
    • liver failure-related brain damage
    • Elevated cerebral pressure resulting from any cause, including hydrocephalus
    • Low glucose levels (hypoglycemia)
    • Brain tumor
    • Illnesses like meningitis
    • Intracerebral bleeding.
    • Reye syndrome: issues associated with brain damage and liver function that primarily affect youngsters
    • Oxygen-deficient brain damage
    • Malaria in the brain
    • Poisoned with lead

    Conditions include traumatic brain injury, stroke, intracranial bleeding, brain tumors, brain abscesses, and encephalopathy that raise intracranial pressure and can result in abnormal posturing.

    The most common posturings linked to brain herniation are decorticated and decerebrate. A potentially fatal disorder known as brain herniation occurs when sections of the brain press against hard structures inside the skull. Brain herniation is primarily characterized by decorticate posturing, which, if left untreated, eventually turns into decerebrate posturing. When serious brain injury occurs, one side of the body exhibits decerebrate posture, while the opposing side exhibits decorticate posturing.

    Additionally, individuals with widespread cerebral hypoxia, brain abscesses, and Creutzfeldt-Jakob disease have also been shown to exhibit it.

    In instances of judicial hanging, posturing has also been seen; in these circumstances, the impact may be concealed by strapping the arms and legs.

    Area of Pain in Abnormal Posturing:

    • Although low back pain is the most common complaint, studies indicate that postural dysfunction is also causing an increase in neck, shoulder, and arm pain. The emphasis on fitness and running has also led to an increase in the prevalence of foot and knee issues.
    • aches and pains in the body, such as pain in the arms, neck, shoulders, or lower back.Pain in the lower limbs, such as the leg, hip, knee, or ankle
    • Fatigue of the muscles
    • Stress accumulation in the upper back, neck, and shoulders is what causes headaches.

    Types of Abnormal Posturing

    Three primary categories of abnormal posturing are present:

    Decorticate posturing, displaying a decorticate posture by bending the arms over the chest
    Decerebrate Posturing: This posture involves extending the arms to the sides.
    Opisthotonus: a backward-curving head and back.

    Decorticate posturing:

    Decorticate Posture
    Decorticate Posture

    A patient with a decorticate posture has an atypical stance, with their legs extended straight forward, their wrists contracted, their fingers clenched, and their arms draped over their chest. The and rest on the chest, the arms bowed inward toward the torso. Such a posture is suggestive of serious brain damage. The wrists and fingers are bent.

    Individuals with this illness should need immediate medical attention. It might affect the body’s left or right side.

    Informally, decorticate response, decorticate stiffness, flexor posturing, and decorticate posture are also referred to as “mummy babies.”

    It is a sign of significant damage to the area of the midbrain, which is located between the brain and the spinal cord. Motor movement is governed by the midbrain. Decerebrate posture is a serious disorder, even if its symptoms are not as severe as those of decerebrate posture.

    A neuro-trauma that exhibits decorticate posture in reaction to pain receives a score of three on the Glasgow Coma Scale’s motor segment for the bending of upper body muscles.

    This position is divided into two parts:

    The cervical spinal cord’s motor neurons that supply the upper limb’s flexor muscles are stimulated by the rubrospinal tract. The upper limb’s extension posing is caused by the medial and lateral vestibulospinal and pontine reticulospinal tracts, whereas the flexion kind of posturing is produced by the rubrospinal and medullary reticulospinal tracts.

    The second feature of this position is the disturbance of the lateral corticospinal tract, which triggers the motor neurons in the lower spinal cord responsible for supplying the lower limb’s flexor muscles. The medullary reticulospinal tract is activated in response to the simultaneous activation of the pontine reticulospinal and medial and lateral vestibulospinal tracts, which in turn considerably improve the stimulation of the lower limb’s extension action.

    Posture in the upper limb (flexion) and lower limb (extensor) is mostly caused by injuries in these two pathways above the red nucleus.

    This abnormal orientation suggests a high risk of serious injury to the thalamus, internal capsule, and cerebral hemispheres. A midbrain damage is a further option. A lesion deeper in the brainstem is suggested by the involvement of the red nucleus, and this position is frequently predictive of more severe damage at the rubrospinal tract.

    Decerebrate posturing

    Decerebrate Posture
    Decerebrate Posture

    A type of abnormal posturing known as decerebrate posturing involves the body being in an extended, stiff stance with the arms and legs extended straight out, the toes pointing downward, and the head and neck arched backward. The muscles of the body are rigid and strained. Serious brain damage is usually indicated by this type of odd attitude.

    Extensor posturing, decerebrate posture, and decerebrate reaction are other names for decerebrate posturing.

    The involuntary extension of the upper limb in response to an outside stimulus in this posture. The legs are stretched in a decerebrate stiffness, the head is hyperextended back, and the arms are similarly extended by the sides.

    Damage to the cerebral cortex is a result of decerebrate posture, although the specific location of the lesion will determine the clinical symptoms. Decerebrate stiffness can be caused by trauma, vascular lesions, tumors, and convulsions. In decerebrate stiffness, spontaneous nystagmus or ocular deviation is also observed. This kind of stiff posture typically indicates significant brain injury.

    Decerebrate rigidity is a rare medical disorder in which the upper extremities are held outwardly and internally rotated. It is a sort of posture that is only found in individuals who suffer brainstem injury. Additionally, the legs are pronated and stretched. The patient’s teeth are clenched and they are stiff. In cases of severe midbrain injuries, this type of stiff posture is most common.

    It is also linked to decorticate posture, a different kind of abnormal posturing. A person who has a decorticate posture on one side of the body while on the other side decerebrate stiff posture in rare extreme situations.

    Extreme instances of decerebrate stiff posture, characterized by extreme muscular rigidity in the neck and back, may result in opthotonosis. The decerebrate rigidity posture was originally described in 1898 by Nobel winner Charles Sherrington, who had removed the brainstems of live cats and monkeys.

    Decerebrate stiff postures, in which the trunk and limbs exhibit characterized extended body motions, are classified as pathological inflexible reactions to typically uncomfortable external or internal stimuli.

    Opisthotonos posturing:

    The abnormal posture known as “opisthotonos” occurs when the muscles in your neck, back, and legs clench and go into acute spasms. Your head points toward your feet as your body bends backward into a stiff arch as a result of these intense contractions.

    Opisthotonosis is a sign of several major health issues rather than a distinct illness. It is a sign of serious neurological problems that are life-threatening and need immediate medical attention, but it is a rather uncommon disease.

    Opisthotonos, a term for a severe muscular spasm or spasticity in which a person’s head, neck, and body arch, is taken from Greek work where opistho means behind and tonos indicates tension.

    The axial muscles’ stiffness with respect to the spinal column is the source of this hyperextended posture, which is an extrapyramidal consequence. It is most commonly observed in cases of tetanus, severe cerebral palsy, and traumatic brain injury, all of which are linked to severe muscle spasms.

    Treatment of Abnormal posturing:

    Emergency Care in the ICU (Mostly Neo-ICU).
    An emergency craniotomy for the excision of an extra-axial hematoma may improve survival.
    Remove the cause (treatment is based on diagnosis and symptoms), such as by treating infections and, if necessary, resolving metabolic abnormalities. Treatment for the symptoms is initiated with some help.

    Physical Therapy treatment in Abnormal posturing:

    The symptoms of abnormal posturing are treated and improved using physical therapy treatments and exercises. The most popular form of treatment is postural rehabilitation, which strengthens the muscles supporting the back, limbs, and spine posture through exercises and physical therapy treatments.

    Making corrections Exercises for posture are used to strengthen the muscles that support the spine, as well as to improve posture in the limbs and spine. Exercises that focus on strengthening the muscles supporting the spine, extending the tense muscles caused by the head and shoulder positions, and enhancing the posture of the limb are frequently used in its treatment.

    The most often used treatments are listed below; however, they might differ depending on the condition’s symptoms, underlying causes, and diagnosis.

    • Pain-free Passive Movement 
    • Therapy for the Chest
    • Minimize stiffness and spasticity
    • Frequent stretches
    • Program for Rehabilitation
    • Posture Correcting
    • Consistent Ankle Movement
    • If the patient is in a coma, shift their posture often (mostly from supine to side laying position to minimize bed soreness)
    • Exercise for range of motion.
    • Exercises including passive relaxation and range of motion (ROM) can help prevent joint stiffness and abnormalities. Every day, the trunk and all four limbs must be passively moved.

    Prognosis:

    The prognosis is influenced by the etiology, diagnosis, severity of symptoms, age, and other pertinent factors. This odd posture might indicate severe impairment of the neurological system or brain, which can sometimes result in irreparable brain damage and produce the following symptoms:

    • Seizures.
    • Paralysis.
    • Incapable of speaking.
    • Coma.

    People who exhibit decorticate or decerebrate stiffness are often in a coma with unhelpful prognoses that include a risk of respiratory failure and cardiac arrhythmia or arrest.

    Early admission within hours of damage, extradural hematoma, and younger patient age are factors that significantly impact survival in TBI with decerebrate rigid posture. Older age and acute subdural hematoma are the main risk factors.

    FAQs

    Why does poor posture matter?

    Your body can hold your weight without experiencing strain when your spine is properly aligned, allowing for easy movement. Your tendons, muscles, and ligaments may be overworked by poor posture, which can cause neck and back pain.

    Does poor posture have a cure?

    In order to facilitate the therapy of the posture condition, the physical therapist stretches and exercises the patient’s body in accordance with its structure throughout these sessions. The usage of a posture correction device may be advised in specific circumstances by the physician and physical therapist.

    Does poor posture cause you to age?

    Additionally, it may cause problems for your skin, including early wrinkling and sagging. You might accelerate the aging process and appear older than you actually are by hunching over or craning your neck forward all the time.

    What posture errors are visible?

    8 Typical Indices of Poor Posture
    broad shoulders. Because they show that the upper back is curved and the shoulders are bent forward, rounded shoulders are an indication of poor posture. …
    Anterior pelvic tilt; hunchback; slouching; forward head position;…
    persistent headaches.
    weariness in the muscles.
    Neck and back aches.

    Can incorrect posture prevent a person from growing?

    Your real height may be hampered over time by your bad posture, which can cause your body to sag and stoop. Because our backs naturally curve, frequent slouching, and drooping can cause the curves to change to fit your preferred posture.

    Why does bad posture occur?

    Tension or weakness in the muscles: If you have some muscles that are stronger or weaker than others, it might make your posture worse. Back pain may result from your decision to rely on your back muscles for stability if your abdominal muscles are weak from insufficient training.

    How is improper posture corrected?

    Make a point of building up your core (torso and pelvic) muscles. To help with posture, spend ten minutes a day performing easy stretching activities. Take a stance with pride. This entails bringing your shoulders down to their natural resting posture, straightening your back, and gradually contracting your abdominal muscles.

    Is atypical posture dangerous?

    While abnormal posture alone may not always be a marker of disease, it can help identify the location and intensity of a disease process when combined with additional symptoms.

    Which three postural anomalies are there?

    The three most common postural issues are forward head posture (FHP), kyphosis, and lumbar lordosis. These anomalies may result in a variety of musculoskeletal issues, including headaches, neck and back pain, and in extreme situations, breathing difficulties.

    What consequences arise from improper posture?

    A few simple lifestyle changes can help with your posture and spinal health.

    What do you call an atypical posture?

    Decorticate and decerebrate posturing are typically the outcomes of abnormal posturing responses to uncomfortable stimuli. They entail conventional trunk and extremity motions. It has to be identified and treated very early to prevent the significant morbidity and death that are linked to these disorders.

    Which kinds of abnormal postures are there?

    There are three types of abnormal posture that are recognized: decerebrate posturing, which involves stretching the arms to the sides, decorticate posturing, which involves flexing the arms over the chest, and opisthotonus, which involves arching the head and back backward.

    References

    • Dhameliya, N. (2022, January 23). Abnormal posturing: Cause, Types, Prognosis, Treatment Samarpan Physio. Samarpan Physiotherapy Clinic. https://samarpanphysioclinic.com/abnormal-posturing-causetypesprognosistreatment/
    • Physiotherapist, N. P. (2021, November 7). Abnormal Posture : Type, Cause, Symptoms, Exercise. Mobile Physiotherapy Clinic. https://mobilephysiotherapyclinic.in/abnormal-posture-physiotherapy-exercise/
  • 18 Best Exercises for Runner’s Knee

    18 Best Exercises for Runner’s Knee

    Exercises for Runner’s Knee are an important part of your total treatment plan since they help to strengthen your leg muscles, improve flexibility, and increase overall stamina.

    Athletes frequently experience a runner’s knee. It’s not something to worry about. Actually, by being active in treating the condition with exercise, you can avoid the runner’s knee.

    To relieve the runner’s knee pain, try a variety of exercises that focus on supporting the hips and knees. Additionally, you could strengthen your hip flexors and hamstrings.

    Physical therapy is the most common treatment for a runner’s knee. Physical therapy can help with posture and joint mobility so you can participate in regular activities with minimum pain. Strengthening activities can relieve tense muscles, maintain knee support when jogging, and maintain leg flexibility.

    What is a runner’s knee?

    Runner’s knee is referred to as patellofemoral pain syndrome (PFPS). It happens when the knee’s soft tissues, which include the knee joint’s protective synovial tissue, fat pads, and patellar tendon, get irritated.

    Patellofemoral syndrome is a condition that can produce dull pain in the region around the kneecap and at the front of the knee. It is typical for bikers, runners, and individuals who engage in more jumping-intensive sports. the runner’s knee may be relieved with rest and the application of ice. You can perform strengthening and stretching exercises at home.

    Continue reading to learn more about exercises and other alternative natural cures. After a few weeks of at-home treatment, see a doctor if the pain gets worse or does not get better.

    What causes the runner’s knee?

    Inflammation of the knee’s soft tissues or lining, strained tendons, or worn or torn cartilage can all contribute to the pain associated with a runner’s knee.

    Additionally, a runner’s knee can be caused by any of the following:

    • Excessive use
    • Damage or misalignment of the kneecap
    • Complete or partial dislocation of the kneecap
    • Flat feet
    • Weak thigh muscles
    • Not stretching enough before working out arthritis
    • Synovial plica syndrome, another name for broken kneecap plica syndrome, is characterized by stiffness and inflammation of the joint lining.

    What signs and symptoms indicate a runner’s knee?

    Pain at the front, behind, or surrounding the kneecap is the sign of a runner’s knee. Whether dull or achy, the pain usually gets worse when you move for example, when you run, walk, climb stairs, squat, kneel, or spend a lot of time sitting with your knee bent.

    Runner’s knee symptoms and signs:

    • Swelling in the kneecap area
    • The sensation of something irritating, crushing, or breaking in the knee
    • Instability or weakness in the knee
    • Knee pain when bending or straightening

    Does physical activity work well to treat a runner’s knee?

    Most people get well with the help of rehabilitation exercises and stretches. Three times a week for six weeks, a set of hip- and knee-strengthening exercises should be done to improve physical training and reduce knee pain.

    Furthermore, using specific physical therapy exercises to strengthen the quadriceps and promote flexibility proved to be more helpful than using knee braces or knee tape. Also, there are situations in which strengthening exercises could be more advantageous than using Painkillers.

    Depending on your issue, a physical therapist can help you choose which exercises are more beneficial for you. They might help you in locating stretches and exercises that focus on particular areas. If you want correction for a muscular imbalance, they can even follow.

    Take the following steps before starting an exercise therapy:

    Before beginning any exercise program, make sure you follow a few safety measures and get the most of the benefits. Consult a physician or physical therapist for advice on which are suitable workouts for your specific problem.

    It’s important to listen to your body and avoid pushing above your comfort level. While soreness following exercise is normal, persistent or severe pain may indicate that you’re pushing yourself too hard. Your best option is to start with low-impact workouts and work your way up to more challenging ones as soon as you can.

    To avoid further injuries, it’s important to maintain proper technique and posture. If you’re unsure about how to properly complete your exercise therapy, consult a physical therapist. Before starting any exercise, warm up your muscles and joints so you can help them prepare for the task.

    Exercises for Runner’s Knee:

    These exercises are simply ideas that may help your knee; a physical therapist can give you a correct diagnosis, identify the origin of your runner’s knee, and create the best plan of care for your pain.

    Straight Leg Raises

    • Lying on your back.
    • Keeping one leg at a 90-degree angle at the knee.
    • Gradually raise the leg.
    • Hold this position for a few seconds.
    • Lower the leg to the floor gradually.
    • Then return to your neutral position.
    • Then relax.
    • Repeat this exercise 5 to 10 times.
    Straight-leg-raise
    Straight-leg-raise-

    Static quadriceps exercise

    • Laying or sitting on your back with support for your back, extend your legs straight in front of you.
    • Place a little towel below your knee and twist it up.
    • Pull the other foot toward you while moving the first one slightly to the side.
    • As you firmly press your knee down, your muscles will contract.
    • Hold this position for a few seconds.
    • Then return to your neutral position.
    • Then relax.
    • Repeat this exercise 5 to 10 times.
    static-quadriceps-exercise
    static-quadriceps-exercise

    Prone leg raise

    • Instead of a hard surface, you can use a mat or a plinth to provide yourself some support during this exercise.
    • Lying on your stomach.
    • Extend your legs behind you.
    • You can rest your head on your arms if it makes you uncomfortable.
    • As you gradually contract your abdominal muscles, your knee should be straight.
    • Then raise the left leg gradually in the direction of the roof.
    • Hold your leg out straight in the air for a few seconds.
    • Then lower your leg to the mat gradually.
    • Then return to your neutral position.
    • Then relax.
    • Repeat this exercise 5 to 10 times.
    PRONE-HIP-EXTENSION
    PRONE-HIP-EXTENSION

    Standing Quadriceps Stretch

    • Start on the floor in a comfortable standing position.
    • Keeping it by your side, raise your left arm straight in front of your body.
    • This helps with keeping things in balance.
    • If the patient experiences difficulty with this exercise, they can modify it by grasping onto the back of a chair or wall.
    • Bend to your left knee while holding onto your left ankle.
    • Behind the body, place the left foot.
    • With your hand on the ankle, attempt to move the leg up and back.
    • Verify the proper alignment of your complete body.
    • Hold this position for a few seconds.
    • Then return to your neutral position.
    • Then relax.
    • Repeat this exercise 5 to 10 times.
    Quadriceps stretching exercises
    Quadriceps stretching exercises

    Lunge

    • When standing, place your feet hip-width apart.
    • Take a longer step forward than a walking step, placing one leg in front of your body and the other behind.
    • When your foot touches the ground, it should land and stay level.
    • Your heel will come off the ground when you elevate it.
    • Bend your knees to nearly a 90-degree.
    • Remember to maintain your core engaged and your trunk upright.
    • Hold this position for a few seconds.
    • Then, to go back to the starting position, push off with force from your front leg.
    • Then relax.
    • Repeat this exercise 5 to 10 times.
    Lunge Stretch Exercises
    Lunge Stretch Exercises

    Standing calf stretch

    • You must stand facing a wall to begin this stretching exercise.
    • Stretch your arms out until your hands are comfortably pushing the wall.
    • Place your hands at eye level.
    • While maintaining the front leg bent, press the back (left) heel into the ground to straighten the back leg.
    • Hold this position for a few seconds.
    • Then return to your neutral position.
    • Then relax.
    • Repeat this exercise 5 to 10 times.
    Standing Calf Stretch
    Standing Calf Stretch

    Step-ups

    • Begin in a comfortable standing position.
    • Place one at the base of a stairwell, a platform, or the foot of a step bench.
    • Keep your height at your pelvic level.
    • With the opposing foot, slowly lower yourself to the floor while bending at the knee.
    • To take your spot, gently plant your toe on the ground and then stand back up.
    • Then return to your neutral position.
    • Then relax.
    • Repeat this exercise 5 to 10 times.
    step-ups
    step-ups

    Clamshell

    • You begin by lying on your side.
    • Bend your elbow while lying on your left side.
    • Support your head with your left hand.
    • Place your right foot and leg on top of your left, bending your knees to a 45-degree angle.
    • For balance, rest your right hand on your hip or lightly on the ground in front of you.
    • Next, slowly elevate your right knee toward the sky while keeping your feet close to the ground.
    • Keeping your core strong, raise your lower right leg back up to meet your left.
    • Hold this position for a few seconds.
    • Then return to your neutral position.
    • Then relax.
    • Repeat this exercise 5 to 10 times.
    Clamshells
    Clamshells

    Donkey kick

    • With your hands above your head, lie flat on the ground.
    • Keep your hands closest to your shoulders while your legs under your hips.
    • To maintain a flat back of the neck, lower your chin slightly and gaze downward and forth.
    • Flex your right foot and maintain a 90-degree bend in your right leg to activate your glutes.
    • Then, stretch your right leg upward and backward, toward the ceiling.
    • Verify that your body height is slightly above the point at which your lower back is bent and your hips move or bend, as these are signs that you may have raised it too high.
    • Maintain an upright, neutral back while keeping your hips parallel to the floor.
    • Try not to rush your movements so that you can finish the exercise with a full range of motion and the proper technique.
    • Lower your right leg first, and then raise it back up.
    • Then return to your neutral position.
    • Then relax.
    • Repeat this exercise 5 to 10 times.
    Donkey-kick-exercise
    Donkey-kick-exercise

    Hamstring Stretch

    • Start with a relaxing lying down position on the ground.
    • Now bend your one knee.
    • Keep your hands behind your leg.
    • Elevate one leg over the ground and raise it to your chest.
    • Straighten your leg and raise it gradually.
    • You can loop towels over your thigh if you have difficulty getting your hands behind your leg.
    • Hold this position for a few seconds.
    • Then return to your neutral position.
    • Then relax.
    • Repeat this exercise 5 to 10 times.
    Supine hamstrings stretch
    Supine hamstrings stretch

    Wall slide

    • Keep your back against the wall to start.
    • Your feet should be shoulder-distance apart, and your heels should be about 6 inches in front of your hip line.
    • Slide your back along the wall gradually until your knees are bent at a 45-degree.
    • After about a few seconds, maintain this posture and get back up.
    • Then return to your neutral position.
    • Then relax.
    • Repeat this exercise 5 to 10 times.
    Wall Squat exercises
    Wall Squat exercises

    Standing Iliotibial band stretch

    • Press firmly into both feet while standing with your right leg crossed in front of your left.
    • As much as your body will allow, bend to the right and feel the stretch in your outer hip and knee.
    • You can extend the stretch by raising your left arm above your head.
    • If you want more stability or resistance, press your left hand into a wall.
    • Hold this position for a few seconds.
    • Stand up straight once more by uncrossing your legs.
    • Then return to your neutral position.
    • Then relax.
    • Repeat this exercise 5 to 10 times.
    standing-iliotibial- band-stretch
    standing-iliotibial- band-stretch

    Side-lying leg lift

    • Laying on your right side with your feet positioned straight, extend your legs.
    • The head should be rested on the right arm, bent, or kept straight.
    • Keep your left hand forward for more support.
    • Gently move the left leg off the right leg.
    • Hold this position for a few seconds.
    • Slowly lower your leg.
    • Then return to your neutral position.
    • Then relax.
    • Repeat this exercise 5 to 10 times.
    hip-abduction
    hip-abduction

    Bridge kick

    • Lying on your back, bend your knees toward the sky and keep your arms at your sides.
    • Lift your back off the ground.
    • Move your weight to your left foot and slowly lift it off the ground until your right leg is at a 45-degree angle.
    • Keep your knee from locking.
    • Hold this position for a few seconds.
    • Without stepping on it, put the right foot back on the ground.
    • Then return to your neutral position.
    • Then relax.
    • Repeat this exercise 5 to 10 times.
    Bridge-kick
    Bridge-kick

    Single-leg Romanian deadlift

    • Standing, position your feet shoulder-width wide.
    • Place your weight on your left leg and flex your left knee just a little bit.
    • Maintaining your left arm straight at your side, bend (hinge) forward from your hip.
    • Stretch your right arm toward the floor while your right leg rises off the ground and back up.
    • Your upper torso should be nearly parallel to the ground. (For a more difficult exercise, extend your hand toward the floor while holding a dumbbell or kettlebell.)
    • Then relax.
    • Repeat this exercise 5 to 10 times.
    Single-leg-deadlift
    Single-leg-deadlift

    Lying hamstring curl with dumbell

    • One dumbbell should be positioned vertically on the floor, with one foot on either side of it.
    • Put your hands and elbows beside your head, or place your hands on your head, as you lower yourself into a prone posture.
    • Activate your glutes.
    • As you elevate off the floor toward your glutes, flex your feet, squeeze the dumbbell with your feet, and bend your knees to contract your hamstrings and glutes equally.
    • Hold this position for a few seconds.
    • As you go down back down, continue to use your legs and glutes.
    • Then return to your neutral position.
    • Then relax.
    • Repeat this exercise 5 to 10 times.
    Lying-hamstring-curl
    Lying-hamstring-curl

    Lateral band walk

    • Hold a hip-width gap between your feet
    • Use a Thera-band just above your knees.
    • After lowering yourself into a running stance, take a step to the left.
    • Continue moving left in little steps, then repeat to the right.
    • Then return to your neutral position.
    • Then relax.
    • Repeat this exercise 5 to 10 times.
    Lateral band walk
    Lateral band walk

    Leg extensions

    • Sit up straight in a long chair and place your leg on the floor to start.
    • Tighten your thigh muscles, face forward, and raise one leg as high as you can to build strength without getting off the chair.
    • Hold this position for a few seconds.
    • Gently lower your leg.
    • Then return to your neutral position.
    • Then relax.
    • Repeat this exercise 5 to 10 times.

    When exercising, what safety precautions need to be taken?

    • Maintain proper posture during the exercise.
    • Extend, hold, and repeat the exercise correctly.
    • Avoid uncomfortable routines for exercise.
    • Avoid doing exercises that hurt.
    • Stop exercising if an unexpected ache develops.
    • In between sets of exercises, rest.
    • When exercising out, wear loose clothing to allow for easy movement of your body.
    • Stretch the muscles if they feel stiff, but never feel severe or intense pain.

    When should you stop exercising?

    • Muscular burning that is intense
    • Fever
    • If you feel any discomfort or numbness.
    • If exercise causes pain, stop.
    • Headache

    Which exercises have to be avoided if you have a runner’s knee?

    • Don’t engage in high-impact sports like kickboxing, jogging, or running.
    • Avoid exercises such as deep squats and complete lunges. Your knee muscles will be under a lot of stress as a result.
    • Avoid performing complete squats.
    • A side plank exercise should be avoided since it could strain the knee joint.
    • Avoid fully extending your legs; it could harm your knees. You can elevate your leg halfway up instead of fully extended if you would prefer to execute a modified version of this exercise.
    • Stay away from excessive knee flexion.

    Advice for preventing runner’s knee:

    Although the runner’s knee pain cannot be completely avoided, the following measures can help reduce symptoms.

    • Reduce your high-impact exercise program.
    • Combine low-impact or non-impact workouts, such as yoga and swimming, with your jogging days.
    • Increase intensity and mileage gradually. Running too quickly and for extended distances might cause knee pain.
    • Maintaining a healthy lifestyle and being overweight places additional strain on the knee joint when exercising. Consult your doctor about the weight loss plan.
    • Regular stretching before an exercise could help you avoid developing knee pain.
    • Select weightless shoes. You may require more supportive shoes or orthotic inserts. Every 400 to 600 kilometers, athletes should also update their shoes. Make sure the athletic shoes you wear fit and support your feet correctly.
    • Before working out, remember to warm up and perform dynamic stretching.

    How much time does it take to recover?

    Rest is necessary for the runner’s knee pain to go away. You might need to take a break from athletics or stop completely until you feel better. Stay away from any additional activities that worsen your pain, such as climbing and descending stairs. Everybody recovers from a runner’s knee differently. In two to three weeks, your pain should go away with rest and ice.

    Alternatively, you might need to contact a physical therapist who can help you resume jogging by guiding you through strengthening and stretching activities. If, after three weeks, your knee pain does not improve, contact a physician. An MRI, CT scan, or X-ray may be ordered to identify the cause of your pain.

    Summary:

    Many runners will have knee pain at some point. A runner’s knee is a common reason for knee pain among runners. There are a variety of treatments for this condition, but strengthening exercises are one of the most successful components of any rehabilitation program.

    You should probably limit your running and other athletic activities until your runner’s knee pain goes away. However, you might still be able to engage in other low-impact sports like cycling and swimming.

    Consult a physician if your knee pain doesn’t improve after a few weeks. To find out what’s causing your pain, you could require an MRI, CT scan, or X-ray.

    FAQ:

    How do you treat an injured knee?

    Place a pillow behind your leg to give your knee some much-needed rest while it’s elevated. To relieve pain and swelling, use an ice pack over the knee. Wrap your knee with a crape bandage or brace for support. As needed, take diclofenac or ibuprofen to ease discomfort. Perform some stretching and strengthening exercises, paying particular attention to your quadriceps muscles.

    Can I work out while wearing a runner’s knee brace?

    Treating a runner’s knee injury requires addressing its underlying cause. You should be able to start exercising again as the soreness subsides. Of course, if you make a mistake during your training, such as increasing your training too quickly, you should resume training with more caution.

    What is the term for a runner’s knee?

    Usually, the area behind or close to the kneecap is affected by the anterior component of the knee pain. Consequently, medical professionals call it patellofemoral pain or patellofemoral pain syndrome (PFPS). Because it affects the region between the patella (kneecap) and the thighbone (femur), it is known as patellofemoral.

    Does the runner’s knee heal completely?

    Patellofemoral Pain Syndrome (PFPS), also known as “runner’s knee,” is a frequent overuse condition that can affect bikers, walkers, hikers, soccer players, and runners. Runner’s Knee typically goes away entirely in a few weeks, but if treatment is not received, it can develop into a chronic condition.

    Can someone with a runner’s knee walk?

    Avoid high-impact sports and keep yourself active with walks and riding. Start with several shorter runs to ease yourself back into running until you can run pain-free and comfortably once your pain has gone away and you can sit, climb down stairs, and squat without experiencing any pain.

    What would happen if a runner’s knee was ignored?

    With the runner’s knee, “knee damage” and further knee surgery are not usually necessary. However, you should not to ignore pain since it could lead to severe knee damage that would prevent you from continuing on the route.

    Are runners’ knees improved by yoga?

    It is worth noting that a well-rounded yoga practice targeted to the demands of runners has not only helped many people avoid such ailments but also helped countless others recover from the kind of knee injuries that are reported.

    Does the runner’s knee improve with stretching?

    The best runner’s knee exercises should to include both stretching and strengthening. Exercises that focus on strengthening the knee, hip, and thigh muscles are recommended. This comprises the hip abductor and rotator muscles as well as the quadriceps located at the front of the thigh.

    Can you perform daily knee exercises?

    Doing little tasks throughout the day is beneficial. As a guide, practice your repetitions once every hour. Every few days, increase the number of repetitions you do by one or two as things become simpler and if you feel capable.

    Which muscles are used in the runner’s knee?

    An individual may be more at risk for a runner’s knee if they have hamstrings, gastrocnemius (calf), iliotibial band (outside of thigh), or quadriceps that are especially tight.

    Can someone with a runner’s knee climb?

    With a runner’s knee, pain and stiffness are common, and it can be challenging to perform daily tasks like bending over or climbing stairs.

    How is the runner’s knee prevented?

    Your chances of developing a runner’s knee can be decreased by keeping your muscles strong and flexible, using good technique, and building up your mileage gradually. Take care of your body and keep hitting the ground to avoid letting this problem prevent you from reaching your running objectives.

    Can someone with a runner’s knee lift weights?

    Exercises for strengthening: By building up the surrounding muscles, it is possible to stabilize and support the knee joint. Your primary focus should be on exercises that target the hamstrings, quadriceps, and calves. Consult a physical therapist to design a safe, individualized strength-training program for your condition.

    References:

    • On April 17, 2023b, Donohue, M. Knee of a runner. The website Healthline provides information on runners’ knee care.
    • Pt. B. S. (2022, 26 May). A Patellofemoral Syndrome Exercise Program. Verywell Medical. PT exercises for runners’ knees (2696583) in https://www.verywellhealth.com
    • December 13, 2023b; Tirgar, P. Mobile Physio Clinic: 13 Greatest Runner’s Knee Exercises. Mobile Clinic for Physiotherapy. Here are the top 13 knee exercises for runners: https://mobilephysiotherapyclinic.in/
    • Exercises To Strengthen Your Knees While Running | Central Gymshark. (n.d.). Knee strengthening exercises for runners: https://central.gymshark.com/article
    • June 4, 2023b; Cp, C., & Cp, C. Which Exercises Are Good for Runner’s Knee? • The Core Function. On the website of Central Performance, there is a publication titled ” In What Ways to Treat and Avoid Runners’ Knee Pain: Which Strength Exercises Would You Do?”
    • July 30, 2020: Rdn, L. A. Are You Having Trouble with Cardio? 11 Exercises for Pain Relief from Runner’s Knee. Greatist. https://greatist.com/health/exercises-and-stretches/runners-kneeexercices
    • Image 1, Wellness. (October 25, 2013). Raise Your Legs Straight [Video]. https://www.youtube.com/watch?v=qvi8aM02_GY
    • Image 13, Kick and Bridge (n.d.). Bridge Kick: https://spineandsportspt.org/exercises/
    • Image 15, October 13, 2016 / Cassie. Pinterest – Knee-friendly work-outs for strengthening hamstrings, page 2. /pin/knee friendly-workouts-for-firming-up-hamstrings-page-2–2512171040283540/
  • Best Exercises For Stooped Posture

    Best Exercises For Stooped Posture

    What is a Stooped Posture?

    A stooped posture is an abnormal forward bending of the upper back, commonly referred to as kyphosis or hyperkyphosis. This posture can make it more difficult to move about and keep your equilibrium, which raises the possibility of fractures and falls. In addition, respiratory problems, chronic neck, shoulder, and back pain, and a general decline in quality of life may result from it.

    Stretches, exercises, and lifestyle modifications that improve posture can help lessen symptoms and prevent the condition from worsening.

    Stooped posture
    Stooped posture

    Importance of Exercises For Stooped Posture

    The importance of keeping proper posture for general health and well-being increases with age. But a lot of old people might end up hunched over because of things like weakening muscles, inflexible joints, and decreased range of motion. This may impair their look, cause pain, and raise their chance of falling.

    Exercise is very important for seniors to maintain their fitness and health. Seniors who keep their posture in check may be able to prevent developing a stooped posture, avoid developing mobility issues, and stay active and independent.

    Unfortunately, many seniors tend to stoop as they become older and lead stressful lives. Thankfully, there are a number of exercises that may correct this posture and increase general mobility.

    Seven effective posture-improving exercises for seniors are explained in this article.

    Exercises to Improve a Stooped Posture

    Exercises that combine flexibility, strength, and coordination can help older adults with their posture.
    These seven effective exercises have been designed to assist seniors with their stooped posture:

    • Shoulder Blade Squeeze:
    Shoulder Blade Squeeze

    With your back straight, either sit or stand.
    Your shoulder blades should be gently squeezed together.
    Maintain the same stance for five to ten seconds.
    then relax.
    Do this ten to fifteen times.

    • Chest Stretch:
    Chest Strech
    Chest Strech

    Keep your arms by your sides and take a doorway position.
    On the door frame, your hands should be a little over shoulder height.
    Proceed until your chest experiences a slight strain.
    After holding for 15 to 30 seconds, let go.
    Do this two or three times.

    • Chin Tuck:
    Chin-tuck
    Chin-tuck

    With your shoulders relaxed and your back erect, assume a sitting or standing position.
    Maintaining your head level
    Tuck your chin gently toward your chest.
    Maintain the same stance for five to ten seconds.
    then relax.
    Do this ten to fifteen times.

    • Thoracic Extension:
    thoracic extension
    thoracic extension

    With your back straight and your feet flat on the ground, take a sitting position in a chair.
    Keep your elbows out to the sides and your hands behind your head.
    Open your chest by slowly arching your upper back backward.
    Hold for five to ten seconds, then release and return to the beginning position.
    Do this ten to fifteen times.

    • Cat-Cow Stretch:
    Cat-and-Cow-Stretching
    Cat-and-Cow-Stretching

    To do this exercise, place your knees under your hips and your wrists under your shoulders.
    Take a breath and arch your back, bringing your head and tailbone up toward the ceiling while lowering your belly toward the floor (cow posture).

    Breathe out as you turn your back
    bringing your belly button in toward your spine
    tucking your chin into your chest (cat stance).

    For five to ten repetitions, keep switching between the cow and cat positions.

    • Wall Angels:
    Wall Angel
    Wall Angel

    Place your arms at your sides, feet hip-width apart, and your back against a wall.
    Raise your arms slowly to shoulder height, then bend your elbows so that your forearms are facing upward and your upper arms are parallel to the floor.

    Press your hands and arms against the wall and move them up and down in a controlled manner to ensure that you stay in consistent touch with it.
    As you raise and lower your arms, try to maintain touch with the wall with your shoulders, elbows, and wrists.
    Focus on maintaining appropriate posture and activating the shoulders and upper back muscles as you perform ten to fifteen repetitions.

    • Seated Row with Resistance Band:
    Seated Rows With Resistance Bands
    Seated Rows With Resistance Bands

    With your back and knees straight, take a long seat in a soft mat.
    At waist height, fasten one end of a resistance band around your ankle.
    With your arms out in front of you, grasp the opposite end of the resistance band in each hand.

    Squeeze your shoulder blades together as you bring your hands to your sides and gently draw the resistance band toward your body while maintaining your elbows close to your sides.
    After the movement is complete, stop for a short while before returning to the starting position carefully.
    Ten to fifteen repetitions of controlled movements with the shoulders and upper back engaged should be your goal.

    Physical Therapy for Stooped Posture

    Physical therapy has a critical role in correcting stooped posture in older adults.

    When doing these exercises, elderly folks need to take extreme caution; they should start off slowly and raise the intensity gradually as their bodies allow. Before beginning any new workout program, it is essential to see a physical therapist or other healthcare provider, especially for those who have pre-existing health conditions or concerns.

    Regular mobility breaks and maintaining proper posture while doing daily duties are other strategies that can help improve posture and overall spine health.

    Postural Correction Exercises:

    Physical therapists advise specific exercises meant to strengthen the muscles that support proper posture and increase the flexibility of tight muscles. These exercises, which address muscle imbalances and promote better shoulder and spine position, might involve targeted motions such as shoulder blade squeezes, chin tucks, and thoracic extensions.

    Manual Therapy Techniques:

    Physical therapists often use manual therapies to address muscle tightness, limited movement patterns, and joint stiffness. These therapies include joint mobilization, soft tissue mobilization, and myofascial release. These techniques help with spine and surrounding structural position, pain alleviation, and improved range of motion.

    Functional Training:

    Physical therapists incorporate functional exercises and activities into treatment regimens to assist with everyday duties and motions. Using proper body mechanics when sitting, standing, walking, lifting, and reaching can help create healthy postural habits and reduce the pressure on the spine.

    Education and Postural Awareness:

    Patients get instruction and guidance on ergonomic concepts, ideal body mechanics, and lifestyle modifications from the physical therapist in order to promote long-term postural improvement. This might include tactics for maintaining good posture in a range of situations and activities, as well as advice on how to make ergonomic adjustments at work or at home.

    Home Exercise Program:

    Patients are often offered a home exercise regimen consisting of recommended stretches and exercises to assist sustained improvement between therapy sessions and to complement in-clinic treatment.

    Conclusion

    A stooped posture may be the result of age-related changes in the muscles, joints, and spine. Exercise is an excellent way to help straighten up a slumped posture, and there are several postures designed specifically to help with posture that are appropriate for elderly adults.

    Receiving physical therapy care can also be a useful strategy for improved posture because physical therapists employ a variety of techniques to assist with posture. When physical therapy and exercise are combined, seniors can maintain their independence and mobility while also improving their posture.

    FAQs

    What differentiates stooped posture from slouched posture?

    Slouching is a non-erect gait akin to the messy, thoughtless gait of a weary person or a hesitant teenager. A hunched individual evokes the image of an elderly person whose back is bent and they are unable to straighten.

    Is bending forward normal?

    It is crucial to make an effort to keep an upright posture since hunching over might have further detrimental effects: When the natural curvature of the spine is misaligned, neck and back pain may result. Your capacity to breathe deeply is diminished when you are hunched over, which affects your ability to talk loudly and effectively.

    What is meant by stooped?

    definitions of hunched over. adjective. being rounded in the shoulders and back rather than upright. synonyms include bent, crooked, round-shouldered, round-backed, and stooping unerectly. not standing or sitting straight.

    How can a hunched posture be corrected?

    The muscles in the upper back, chest, and core need to be strengthened and stretched in order to correct bad posture. Scapula squeezes, which include pressing your shoulder blades together for 30 seconds at a time, and rows, which involve pulling back your elbows with a resistance band like you’re rowing, are two exercises that strengthen your shoulders.

    Why does stooped posture occur?

    Numerous reasons might be responsible for stooped posture. The most popular ones are as follows: Insufficient Exercise and Customary Slumbering: A sedentary lifestyle can aggravate bad posture by causing muscular imbalances and weak core muscles.

    What do you name a stooping position?

    Hyperkyphosis is a forward-leaning, hunched-over posture that becomes increasingly frequent as one ages. Roughly 20 to 40 percent of adults over 60 and 55 percent of adults over 70 are unable to sit up straight. Hyperkyphosis can result in respiratory and digestion problems, as well as headaches, neck and back pain, and other symptoms.

    References

    • Physiotherapist, N. P. (2024b, March 16). 7 Best Exercises For Stooped Posture – Mobile Physio. Mobile Physiotherapy Clinic. https://mobilephysiotherapyclinic.in/exercises-for-stooped-posture/
  • Voluntary Control Grading

    Voluntary Control Grading

    What is Voluntary Control Grading?

    When voluntary control grading, one usually looks at how well the person can start, maintain, and coordinate movements in certain body areas that are impacted by spasticity or motor deficits. It offers a baseline for monitoring development or assessing the efficacy of treatment approaches and aids in assessing the degree of functional limits.

    Severe spasticity can be used to grade voluntary motor control for motions that are impossible in cases of cerebral palsy, hemiplegia, and other conditions.
    While certain sluggish motions may be possible with mild spasticity, they will need excessive effort, and atypical coordination, and will make delicate movements of the limbs, particularly those involving the distal portion difficult or impossible.

    Voluntary Motor Control Grading.

    • 1+ – An aircraft with a third of its mobility possible was annihilated by gravity.
    • 1++-Plane with probable second and third movements removed by gravity.
    • 1+++: The plane’s whole range of motion was eliminated by gravity.
    • 2+ – Against gravity 1/3rd movement possible.
    • 2++ – Against gravity 2/3rd movement possible.
    • 2+++ – Against gravity full range possible.
    • 3+ – With resistance and against gravity, a third of mobility is attainable.
    • 3++: The second and third movements are feasible while resisting gravity.
    • 3+++ – With resistance, complete movement against gravity.
    • 4 – Skilled movement.

    Synergy:

    Abnormal, stereotyped, primitive, mass movement patterns linked to spasticity that may be elicited both automatically and consciously are known as synergy patterns. One type of synergy is the flexor or extensor. They entail the coordinated contraction of certain muscles that result in an abnormal pattern unsuitable for carrying out daily tasks.

    Certain muscles are always engaged in hemiparesis, which ultimately results in an odd, abnormal mass movement pattern and attitude that is typical of many hemiparesis sufferers.

    For unknown reasons, the anti-gravity muscle is always affected by spasticity. Nonetheless, it is assumed that in a neutral posture, these anti-gravity muscles are comparatively more strained than pro-gravity muscles, activating the stretch reflex and causing spasticity.

    Unusual Synergy in The Upper and Lower Extremities:

    Synergy pattern of upper limb
    Synergy pattern of upper limb

    Flexion synergy for upper limbs: Shoulder girdle retraction, elevation with shoulder abduction, outward rotation, supination, flexion of the elbow, wrist, and finger.

    Flexion synergy lower limb includes knee flexion, dorsiflexion, inversion, hip flexion abduction, and lateral rotation.

    Upper limb extension synergy is protraction and depression of the shoulder girdle, shoulder adduction, internal rotation, elbow extension, pronation, wrist and finger flexion.

    It is important to understand that synergy is not the same as the abnormal movement (Trick movement ) conduct that a hemiparesis patient exhibits. The combination of the strongest flexor and extensor synergy components in both the upper and lower limbs causes the aberrant hemiplegic attitude.

    Voluntary Control Grading For Assessing Synergy Patterns:

    • GRADE 0: ABSENT CONTRACTION
      GRADE 1: PRESENT CONTRACTION FLICKER OR MOVEMENT INITIATION
    • GRADE 2: ABNORMAL PATTERN OR HALF THE RANGE OF MOTION IN SYNERGY
    • GRADE 3: COMPLETE MOTION IN ABNORMAL PATTERN OR SYNERGY
    • GRADE 4: THE FIRST HALF OF THE RANGE IS DONE IN PATTERN, THE LATTER HALF IN ISOLATION
    • GRADE 5: COMPLETE MOTION IN ISOLATION, BUT WHEN RESISTANCE IS PROVIDED, IT GOES INTO PATTERN
    • GRADE 6: ENTIRE MOTION ISOLATION AGAINST RESISTANCE DETAILS.

    It’s crucial to remember that voluntary control grading is only one element of a thorough assessment of motor function in those suffering from diseases like cerebral palsy and hemiplegia. A more comprehensive picture of a person’s motor abilities is said to be provided by additional elements such as muscle tone, reflexes, coordination, and functional abilities.

    FAQs

    What is controllable voluntarily?

    muscle of the skeleton. The three basic types of muscle are skeletal muscle, smooth muscle, and heart muscle. This type of striated muscle tissue is controlled voluntarily by the somatic nervous system.

    What does a voluntary movement look like?

    motions that a person directly controls with their will are referred to as voluntary motions. The skeletal muscles are in charge of these. For instance, moving, speaking, dancing, etc.

    What muscle is voluntary?

    Skeletal muscles that contract and relax under conscious control are known as voluntary muscles. These muscles connect to the bones and regulate movement throughout the body. Conversely, involuntary muscles are not controlled by consciousness.

    What controls a voluntary reaction?

    Which brain regions are responsible for both deliberate and involuntary muscular movements? While other brain regions, including the hypothalamus, are in charge of involuntary muscles, the motor cortex is in charge of controlling voluntary muscles.

    What is the system of voluntary control?

    The somatic nervous system, a branch of the peripheral nervous system, controls voluntary movements of the body through the skeletal muscles.

    In what way may the lack of control be confirmed?

    The patient is given explicit instructions to carry out the intended action and refrain from moving at any other joint. Sitting is the ideal posture for UL. The ideal posture for LL is sideways and supine. Maintain the limb in the neutral or anti-synergy pattern during any movement.

    What four motor control levels are there?

    Every movement in a hierarchically organized system is governed by a variety of structures. In the hierarchy, the structures comprising the four basic tiers of the motor system are arranged from lowest to highest level:
    spinal cord
    The brainstem
    The main motor cortex
    The cortical connection.

    Which muscles are involved in voluntary control?

    Voluntary muscles are skeletal muscles that may be actively used to control movement and connect to the bones. Typical voluntary skeletal muscles are the biceps muscle, triceps muscle, lats muscle, abdominals muscle, glutes muscle, quadriceps muscle, and hamstring muscle.

    How can voluntary motor control be verified?

    The Fugl-Meyer Assessment (FMA) can be used to evaluate the VMC in stroke patients. The evaluation scale includes distinct domains for upper and lower extremities (sensory and motor), balance (trunk control), and both. The upper and lower extremity motor functional tests are based on Brunnstrom’s phases of stroke recovery.

    What is grading under voluntary control?

    The patient’s motor function is evaluated using this voluntary control grade. Due to this residual disability, most stroke survivors find it difficult to continue being independent when it comes to ADLs and ambulation. The FIM scale was used to rate daily living activities.

    References

    • Physiotherapist, B. (2023b, December 13). Voluntary control grading: Uses, Method, Interpretation. Mobile Physiotherapy Clinic. https://mobilephysiotherapyclinic.in/voluntary-motor-control-grading/
  • Humerus Bone

    Humerus Bone

    Introduction

    The humerus, the biggest bone in the upper extremities, makes up the human brachium, or arm. It articulates with the radius and ulna distally at the elbow joint and proximally at the glenohumeral (GH) joint with the glenoid. The humerus’s most proximal portion is its head, which connects to the glenoid cavity on the scapula.

    The anatomical neck of the humerus, which splits The humeral heads from the larger and smaller tubercles is located just behind the humeral head. The humerus’s anatomical neck is made up of the remaining epiphyseal plate. This creates a ball and socket. An intertubercular groove seen proximally separates the two tubercles vertically. Following the tubercles comes the humeral surgical neck, which is frequently prone to fractures.

    The posterior surface of the humerus’s cylindrical shaft, which extends distally and has a deltoid tubercle on the lateral side, is the site of the radial groove, also referred to as the spiral groove. Near the distal end of the humerus, the bone that comprises the medial and lateral epicondyles enlarges. The distal portion of the humerus finishes at the condyle, which is made up of the radial fossae, trochlea, capitulum, olecranon, and coronoid.

    The condyle’s anterior medial surface trochlea articulates with the trochlear notch of the ulna bone, whereas the anterior lateral side condyle’s lateral capitulum articulates with the head of the radius bone. Located on the anterior side of the condyle, superior to the capitulum and the coronoid process of the ulna, is the radial fossa, which receives the head of the radius during flexion of the elbow joint. Above the trochlea is a structure known as the coronoid fossa. The olecranon fossa, located on the posterior aspect of the condyle, articulates with the olecranon of the ulnar bone during elbow flexion.

    Structure and Function

    The articulation of the humeral head with the glenoid fossa of the scapula forms the synovial ball and socket joint known as the glenohumeral joint. The activation of the rotator cuff muscles (teres minor, subscapularis, supraspinatus, infraspinatus, pectoralis major, and deltoid) determines the range of motion in this joint, which includes internal and external rotation, abduction and adduction, flexion, and extension.

    Numerous synovial bursae, including the subacromial, subdeltoid, subcoracoid, and coracobrachial bursae, which allow frictionless movement, are found in the glenohumeral joint. The GH joint is stabilized and the humerus is kept from migrating proximally by the acromioclavicular and coracoacromial ligaments.

    The elbow joint, a synovial hinge joint, is formed by the articulation of the capitellum and trochlea of the humerus with the head of the radius bone and the trochlear notch of the ulna. This joint is supported by the complexes of the ulnar (medial) and radial (lateral) collateral ligaments.

    Three components comprise the ulnar collateral ligament (UCL):

    Anterior oblique band: The most potent and significant stabilizer against valgus stress, it reaches the humerus’s medial epicondyle from the proximal ulna’s sublime tubercle.

    Posterior oblique band: The highest shift in elbow ROM tension from flexion to extension is seen in the posterior component of the UCL.

    Transverse ligament: provides support to the elbow joint.

    In this case, an olecranon bursa also helps reduce friction while in motion. At this joint, only flexion and extension are possible. The muscles that control elbow mobility primarily include the triceps, coracobrachialis, and biceps brachii. It should be noted that the humerus and antebrachial do not line up exactly in terms of anatomy;

    Embryology

    The humerus is a long bone that grows by endochondral ossification, one of the several long bones in the appendicular skeleton. The replacement of a cartilage template with bone defines this process. Mesenchymal cells that produce cartilage-secreting chondrocytes first lay down a comparatively small cartilage model. Second, the ossification center, the heart of the cartilage template, is host to substances that create and promote the calcification of that cartilage, including chondrocyte hypertrophy and alkaline phosphatase. This results in a nutritional barrier and chondrocyte loss.

    Furthermore, the VEGF secreted by these cells promotes angiogenesis in the calcifying tissue cartilage before passing away. Meanwhile, the Indian hedgehog homolog (IHH) protein stimulates cells outside the perichondrium to become osteoblasts, generating the bony collar—a bone layer covering the cartilage core. A core area of dead chondrocytes develops over time, encircled by a vascular supply, a shell of bone, and tiny pieces of calcified cartilage. The vascular supply brings in internal mesenchymal cells that differentiate into more osteoblasts and monocytes that make osteoclasts.

    The bone is resorbed on the inside and deposited outside in the center of the original cartilage template, causing the hollow entity (forming a marrow) to develop. cartilage’s proximal and distal ends begin simultaneously. Cartilage development at the end of the bones is made possible by this mechanism, which permits vertical growth. Ultimately, the junction of bone and cartilage forms the linear zone of cartilage known as the epiphyseal plate. In this particular case, bone is constantly replaced by cartilage until bone development fully fuses at puberty.

    While the ossification of the humeral head occurs at delivery or soon after, the ossification of the shaft occurs during the last eight weeks of pregnancy. The larger tubercle ossifies in the first year of life, whereas the smaller tubercle ossifies in the first six years. By the time an adolescent reaches puberty, every proximal ossification center on the humerus has merged with the shaft entirely. The distal ossifications at the condyle, trochlea, and olecranon occur between early and later adolescence. By late adolescence, they fuse with the humerus’ shaft.

    Blood Supply and Lymphatics

    The anterior and posterior circumflex humeral arteries are anastomose, providing the proximal humerus with its main blood supply. These branches start at the distal portion of the axillary artery.
    According to recent research, the posterior humeral circumflex artery may be the main source of blood flow for the humeral head. Where the anterior humeral circumflex artery ends is where the arcuate artery, which supplies the majority of the larger tuberosity, comes to an end.

    The axillary artery will give blood to the profunda brachii artery, one of the brachial artery’s branches, and the remaining portion of the humerus as it matures into the brachial artery. Nutrient arteries, which split off from the brachial artery around halfway down the bone, supply blood to the interior parts of the humerus.

    Nerves

    The Axillary nerve: which is derived from the posterior cord of the brachial plexus, surrounds the humeral surgical neck and stimulates the rotator cuff and deltoid muscles, with the teres minor receiving particular attention.

    The Musculocutaneous nerve: The anterior portion of the brachium is innervated by the musculocutaneous nerve, which is a division of the lateral cord of the brachial plexus. The coracobrachialis muscle and the biceps brachii mark the termination of the forearm’s lateral cutaneous nerve.

    The Radial nerve: It crosses the posterior cord of the brachial plexus, the spiral groove of the humerus, the long head of the triceps, and the brachial artery. It stimulates the muscles of the posterior arm, the skin around it, and the forearm. The radial nerve also communicates with the lateral and medial epicondyles of the humerus. It is important to remember that the ulnar and median nerves do not supply the brachial plexus, although they also begin there and descend to the brachium.

    Muscles

    Many muscles of the upper limb, including the scapulohumeral, anterior compartment, and posterior compartment muscles, originate from the humerus.

    Scapulohumeral muscles: The deltoid muscle, which gives the upper limb the shoulder shape, originates from three locations on the scapula: the clavicle, the acromion of the scapula, and the scapula’s spine. Each of these components enters into the deltoid tuberosity of the humerus. The deltoid muscle allows for both internal and external rotation, as well as humeral abduction and adduction. Originating from the clavicle, manubrium, sternum body, and true ribs is the pectoralis major muscle. It enters the humerus’s intertubercular sulcus. The humerus is capable of medially extending, flexing, and adducting.

    The rotator cuff is made up of four muscles – teres minor, supraspinatus, infraspinatus, and subscapularis muscles. The scapula’s subscapular fossa is the source of the subscapularis muscle, which attaches to the humerus’s lesser tubercle to enable internal rotation of the joint. To assist with humeral abduction, the supraspinatus muscle enters into the larger tubercle of the humerus from the supraspinous fossa of the scapula. The larger tubercle of the humerus is where the infraspinatus muscle enters after leaving the scapula spinale and infraspinous fossa. The humerus may rotate outward due to this muscle. The teres major, which enters the humerus’s smaller tuberosity from the scapula’s inferior angle, permits internal rotation and adduction. To assist in external rotation, the teres minor originates on the lateral edge of the scapula and inserts into the larger tubercle.

    Anterior Compartment Muscles: Despite having a long and short head, the biceps brachii muscle has an origin or insertion site on the humerus. However, the transverse humeral ligament, which runs from the humerus’s smaller to greater tubercles, crosses the biceps brachii long head tendon, converting the humeral intertubercular groove into a canal. This tendon terminates at the radius and starts at the supraglenoid tubercle of the scapula. To allow flexion and internal rotation, the coracobrachialis arises from the coracoid process of the scapula and inserts into the medial side of the humerus. To flex the forearm, the brachialis muscle enters the ulna from the front of the distal humerus.

    Posterior compartment muscles: The brachialis muscle enters the ulna from the front of the distal humerus to flex the forearm. The medial head of the triceps brachii muscle originates on the posterior part of the humerus, inferior to the spiral groove, whereas the lateral head originates on the posterior side. Forearm extension at the elbow joint is made possible by both heads entering the olecranon process of the ulna. The posterior circumflex artery, vein, and nerve pass via a quadrangular area that is made up of the humerus, the long head of the triceps, the teres major and minor, and the radian nerve.

    Surgical Considerations

    Older people who fall on their shoulders or with their arms extended may suffer proximal humeral fractures. This injury appears as rigidity of the limbs and soreness in the shoulders. Several breakdowns of these proximal fractures may lead to post-traumatic osteonecrosis along with long-term illness. Most proximal humerus fractures don’t require surgery for treatment. However, elderly patients with significant displacement may benefit from surgery since their bones are not remodeling and developing as much. For internal fixation, percutaneous alternatives include needle wires, smooth wires, cannulated screws, and intramedullary nailing.

    Reverse shoulder arthroplasty can also be used to treat glenohumeral dislocations, rotator cuff tears, joint arthritis, and proximal humerus fractures in the elderly. Inflammatory arthritis and osteoarthritis may also require shoulder arthroplasty. Anterior dislocation of the glenohumeral joint is common in young, active patients. Subacromial impingement and damage to the rotator cuff muscles can result from humeral fractures affecting the greater tuberosity of the humerus. Usually, when there are displacements of more than 3 mm, surgery is necessary.

    Children three years old and younger may get distal humerus transphyseal fractures following a fall or other trauma. The cubitus varus will be clearly visible on radiologic imaging, and the humerus and forearm bone will not align with the usual carrying angle. During surgery, closed reduction and percutaneous anchoring techniques should be used. Common side effects include condyle osteonecrosis and growth stop. Dome, multi-planar, or lateral closure wedge osteotomies are common surgical procedures.

    An olecranon osteotomy is a common surgical procedure used to treat distal humerus intercondylar fractures. Because the trochlear blood supply is cut off post-traumatic supracondylar humeral fractures may develop in avascular necrosis. At the time of the injury, patients may not show any symptoms; however, within six months, pain associated with necrosis or loss of movement can occur.

    Clinical Significance

    Radial Nerve Injury

    One of the most frequent injuries to peripheral nerves that results from a humeral fracture is radial nerve palsy. Therapy typically consists of the normal course of treatment includes monitoring until nerve healing—as assessed by EMG/NCS testing—occurs within three to six months. Damage to the radial nerve may result from an injury or break at the mid-shaft radial groove.

    Conditions of the Shoulder

    Two more common conditions with unclear and/or complicated causes are calcific tendinitis of the rotator cuff and adhesive capsulitis of the shoulder, sometimes referred to as frozen shoulder syndrome. Surgery is rarely required; the primary types of therapy are rest and exercise. On the other hand, frozen shoulder syndrome can be surgically treated under general anesthesia.

    Metastatic Disease

    Metastatic bone disease usually affects the humerus and presents with severe bone lesions and strong localized pain. Lesions can raise the risk of a humeral fracture. For those whose injuries do not involve 50% of the cortex, externally administered radiation is one type of treatment. For serious lesions that extend more than half of the cortex, however, intramedullary nailing along with postoperative external beam radiation is the preferred course of treatment. It can be essential to remove or restore bone if the condition gets worse.

    Supracondylar Fractures of the Distal Humerus

    Most cases of this kind of elbow fracture happen to young persons. The superior condyles, fracture site, and medial and lateral condyles are all present. Surrounding the elbow joint, supracondylar fractures of the distal humerus may cause nerve and vascular problems, depending on the degree of displacement of the fracture. Anterior dislocation puts the median nerve and brachial artery in harm. The radial artery might be in danger from a posterior displacement.

    Palpation of the distal pulse should be done as part of the initial examination to ensure that the blood supply is intact. For accurate diagnosis and treatment, radiographs from the front, back, and side are needed. A posterior splint is used as a first therapy for nondisplaced fractures, and thereafter casting is applied. Displaced fractures are retracted and connected subcutaneously. The following conditions are linked to this fracture: malunion, compartment syndrome, and neurovascular issues.

    Radial nerve palsy is among the most common damage to peripheral nerves following a humeral fracture. Therapy typically consists of the normal course of treatment includes monitoring until nerve healing—as assessed by EMG/NCS testing—occurs within three to six months. Damage to the radial nerve may result from an injury or break at the mid-shaft radial groove.

    Conditions of the Shoulder

    Two more common conditions with unclear and/or complicated causes are calcific tendinitis of the rotator cuff and adhesive capsulitis of the shoulder, sometimes referred to as frozen shoulder syndrome. Surgery is rarely required; the primary types of therapy are rest and exercise. On the other hand, frozen shoulder syndrome can be surgically treated under general anesthesia.

    Metastatic Disease

    Metastatic bone disease usually affects the humerus and presents with severe bone lesions and strong localized pain. Lesions can raise the risk of a humeral fracture. For those whose injuries do not involve 50% of the cortex, externally administered radiation is one type of treatment. For serious lesions that extend more than half of the cortex, however, intramedullary nailing along with postoperative external beam radiation is the preferred course of treatment. It can be essential to remove or restore bone if the condition gets worse.

    Supracondylar Fractures of the Distal Humerus

    Supracondylar Fractures of the Distal Humerus occur mainly in young people. The superior condyles, fracture site, and medial and lateral condyles are all present. Surrounding the elbow joint, supracondylar fractures of the distal humerus may cause nerve and vascular problems, depending on the degree of displacement of the fracture. Anterior dislocation puts the median nerve and brachial artery in harm. The radial artery might be in danger from a posterior displacement.

    Palpation of the distal pulse should be done as part of the initial examination to ensure that the blood supply is intact. For accurate diagnosis and treatment, radiographs from the front, back, and side are needed. A posterior splint is used as a first therapy for nondisplaced fractures, and thereafter casting is applied. Displaced fractures are retracted and connected subcutaneously. The following conditions are linked to this fracture: malunion, compartment syndrome, and neurovascular issues.

    Other/Miscellaneous Conditions

    Hematologic, viral, genetic, or neurological disorders can cause humerus varus. In this case, the proximal humerus’s lateral portion will grow faster than its medial region, which will not develop normally. This condition causes the humerus to rotate the varus, which reduces arm abduction and restricts flexion at the shoulder joint. However, impairment in function is not common. A valgus osteotomy of the humerus is surgically performed using a plate screw fixation.

    Disappearing bone disease is a rare musculoskeletal condition marked by loss of bone, impaired bone development, and inadequate vascular growth. Similar to this, Gorham-Stout disease of the humerus is defined by erosion of the osseous matrix along with a lack of bone growth. It is unclear what is causing the illness, however there is a lymphovascular irregularity in the bone. Common signs include aching pain, weakening, and eventually fractures. Surgery, medication, and radiation therapy are all used for the treatment.

    An uncommon condition called Charcot arthropathy is characterized by extreme joint deterioration. The illness may make it difficult to regulate muscles and result in the loss of bone and soft tissue around the humerus. A shoulder arthroplasty is the course of treatment.

    Humeral osteochondrosis has been linked with Panner disease and osteochondritis dissecans. Panner disease is characterized by avascular necrosis of both illnesses have similar indications and symptoms. capitulum and often occurs between the ages of 7 and 10, which is one year earlier than osteochondritis dissecans. In general, panner disease is not treated with surgery.

    FAQs

    What does humerus mean in medical terms?

    It’s essential to your arm’s range of motion. Numerous essential muscles, tendons, ligaments, and parts of your circulatory system are also supported by the humerus.

    What is the function of the humerus bone?

    In addition to providing structural support for the arm, the humerus is where several significant upper body muscles, including the rotator cuff muscles, pectoralis major, and latissimus dorsi, arrive.

    What nerve is in the humerus?

    The brachial artery, the long head of the triceps, the humerus’ spiral groove, and the posterior chord of the brachial plexus are all crossed by the radial nerve. It innervates the muscles of the posterior arm, the skin around it, and the forearm.

    What is a humerus fracture called?

    The humerus, often called the upper arm bone, is a lengthy bone that extends from the shoulder, or scapula, to the elbow. There are two types of humerus fractures: proximal humerus fractures and humerus shaft fractures.

    What is the head of the humerus?

    The humerus’s almost hemispherical head articulates with the scapula’s glenoid cavity and faces upward, medially, and somewhat rearward.

    References

    • Mostafa, E., Imonugo, O., & Varacallo, M. (2023, August 7). Anatomy, Shoulder and Upper Limb, Humerus. StatPearls – NCBI Bookshelf. https://www.ncbi.nlm.nih.gov/books/NBK534821/
    • Rohit, B. (2023, April 17). Humerus Bone – Anatomy, Location, Function – Samarpan Physio. Samarpan Physiotherapy Clinic. https://samarpanphysioclinic.com/humerus-bone/
  • Obturator Nerve Injury

    Obturator Nerve Injury

    An obturator nerve injury is damage to the obturator nerve, which originates in the lower back from the lumbar plexus. In the groin is where the obturator nerve is situated. Through the pelvis and into the inner thigh, the obturator nerve provides motor function and sensation to the muscles that aid adducting (bringing the legs together).

    This article includes causes, symptoms, and treatment of obturator nerve injury.

    What is the Obturator Nerve?

    • One of the many peripheral nerves that run through your groin is the obturator nerve. It is an integral part of the peripheral nerve system in your body. The brain and body can communicate more easily because of this system.
    • Your obturator nerve (nerve root) begins at your lumbar plexus. Your lower limbs may move and feel (innervation) thanks to a network of nerves called the lumbar plexus. These consist of your foot, upper, and lower legs.

    What other nerves are located in the area of the groin?

    Here are several more nerves are present in the groin area:

    • Femoral nerve.
    • Genitofemoral nerve
    • Ilioinguinal nerve.
    • Lateral femoral nerve.

    What is the anatomy of the Obturator Nerve?

    The nerve fibers that make up your obturator nerve begin in your lower spine. This comprises the backbones, or vertebrae, L2, L3, and L4. The route of your obturator nerve is as listed below:

    • Passing through the psoas muscle tissue in a downward motion.
    • Moving along the side of your pelvic wall and behind your iliac artery.
    • Entering your thigh region after going through an obturator canal and a nearby tissue opening.

    When the obturator nerve reaches your groin region, it splits into three main branches:

    • Anterior(front): The muscles that help flex your hip are sensed by the anterior (front) region.
    • Cutaneous(skin): The skin on the upper portion of your inner thigh is sensed by the cutaneous, a further branch off of your anterior branch.
    • Posterior(back): The posterior, or back, pulls your thighs together and permits hip rotation.

    Your pectineus muscles in your inner and upper thighs occasionally receive motor function from your anterior branch as well. These muscles are normally moved by the femoral (thigh) nerve, however in rare cases, normal anatomy could be different.

    What is the function of the Obturator Nerve?

    Your inner thigh receives this nerve’s motor (muscle movement) and sensory (feeling) functions.
    The following motor functions are supported by the muscles of your obturator nerve:

    • At the knee, extend your leg.
    • At your hips, flex.
    • When walking and standing, keep your equilibrium.
    • Move your leg out from under your body.
    • Step your foot out from under you.

    Your obturator nerve gives you sensation in the following areas for sensory functions:

    • Hip joint.
    • Knee joint.
    • The inside of your upper thighs, close to your groin, is partially covered in skin.

    Another function of the Obturator Nerve

    To reduce sensation(nerve block), medical professionals may inject medicine into your obturator nerve.

    • An obturator nerve block might be necessary to numb your groin before knee or hip surgery.
    • Avoid unintentional leg jerks when undergoing pelvic surgery, including treatment for bladder cancer.
    • Relieve thigh or groin pain that is resistant to conventional treatments.
    • Treat your inner thigh’s abnormal muscle tightness or spasticity. Those who have multiple sclerosis occasionally experience this.

    What are the causes of the Obturator Nerve Injury?

    The following are typical causes of the Obturator Nerve injury:

    • Nerve entrapment occurs when abnormal pressure from surrounding tissue, such as bulging ligaments, and pelvic disorders like endometriosis, causes nerves to stop working. Pregnancy can cause nerve compression.
    • Obturator neuropathy: Unusual wear and tear or an unexpected injury might result in nerve damage.
    • Obturator hernia: Pressing on your obturator nerve is the result of abdominal tissue pushing through your obturator canal.
    • Pelvic trauma: This type of injury can result from internal hemorrhage that compresses the nerve during childbirth or from crush injuries like those sustained in auto accidents.
    • Cancer or pelvic tumors: Unusual growths can develop on your rectum, cervix, bladder, and more.
    • Sports injuries: These can happen in sports like football where kicking is a common activity. It also occurs in sports like riding horses or cycling that require extended durations of sitting.

    Additional conditions that can lead to injury to the obturator nerve:

    Your obturator nerve may be affected by complications from pelvic surgery. There are a lot of intricate structures here. It provides little room to maneuver surgical equipment. When attempting to access the surgery site, healthcare providers run the risk of injuring your nerve. Your obturator nerve may be momentarily squeezed, stretched, or less frequently damaged by surgical hardware during the procedure.

    Leg postures that require your leg to be placed away from your body during labor or certain surgeries can cause strain on your obturator nerve.

    Obturator neuropathy can result from some surgical procedures, such as:

    • Lymph node dissection for cervical cancer in the groin.
    • Repair of pelvic organ prolapse.
    • Stress incontinence was treated with a trans obturator tape (TOT) procedure.
    • Radical prostatectomy and hysterectomy.
    • Treatment for fibroids using uterine artery blockage.

    What signs and symptoms indicate an injury to the Obturator Nerve?

    The following are the most typical signs of an obturator nerve injury:

    • Pain in the pelvic region, groin, or inner thighs.
    • weakness in the muscles of the inner thighs, which can make walking and stair climbing challenging.
    • Inner thigh numbness or tingling.
    • Having trouble adducting the legs.
    • Reduced feeling in the thigh, occasionally extending to the calf.

    What are the risk factors for the Obturator Nerve Injury?

    You may be at higher risk of an obturator nerve injury if you have had previous surgeries, injuries to the pelvis or thigh, or hematomas. By appropriately warming up before hard activity and stretching frequently, athletes can lower their risk.

    What is the diagnosis for the Obturator Nerve Injury?

    Given the variety of possible causes, including hernias, tendinitis, stress fractures, and bursitis, persistent discomfort in the groin and thigh can be difficult to identify. The obturator nerve is located deep in the thigh, thus several tests could be required to identify an injury, including:

    • Physical examination: To determine the cause of your pain, the doctor will feel for any soreness in your groin area and inquire about any changes in your senses.
    • Magnetic resonance imaging (MRI) and computed tomography (CT scans): look for growths that may be compressing the obturator nerve, such as tumors or hematomas.
    • Electromyography (EMG): examines the response of muscles and nerves to determine if the muscles react suitably to stimulus.

    What are the treatments for the Obturator Nerve Injury?

    The degree of the injury and its underlying cause will determine the course of treatment for an obturator nerve injury. With conservative care, such as the following, the nerve may occasionally recover on its own. Physical rehabilitation, pain treatment, and in certain situations, surgical repair are available options for treating an obturator nerve injury.

    Conservative Treatment for the Obturator Nerve Injury

    Rest and Activity Modification:

    • Rest and avoiding activities that increase symptoms are common components of initial treatment. This helps the nerve heal by preventing additional harm.

    Heat and Cold Therapy:

    • Pain and swelling at the site of injury can be lessened by applying heat or cold packs () .

    Medications:

    • Medicines that reduce pain and inflammation.
    • Medications that calm muscles if there are spasms.
    • Neuropathic painkillers like pregabalin or gabapentin.
    • Local anesthetic injections block the obturator nerve from sending pain signals. This can also be used as a diagnostic tool to figure out the pain’s origin.

    Physical Therapy for the Obturator Nerve Injury

    • Pain management: To relieve persistent pain, electrical therapy is used, such as transcutaneous electrical nerve stimulation (TENS) and ultrasound.
    • Strengthening exercises: Mainly targeted at the adductor muscles, which are innervated by the obturator nerve. This could improve function and reduce pain.
    • Stretching exercises: Maintaining flexibility and decreasing muscle tension can be achieved by gently stretching the hip and thigh muscles.
    • Neuromuscular Re-education: Methods for improving coordination and retraining affected muscles.
    • Functional training: Consists of exercises aimed to help patients get better at carrying out everyday activities and get back to their daily routines.

    Surgical treatment for the Obturator Nerve Injury

    When conventional treatments are ineffective at treating symptoms and EMG testing shows severe lesions to the nerve, surgery may be required to regain full function.

    Nerve Decompression

    • If your obturator nerve is being compressed by scar tissue, a tumor, or another growth, nerve decompression surgery can remove the underlying cause and relieve pressure on the nerve. By making just three tiny incisions, doctors can relieve the injured nerve from whatever has compressed it with this innovative, minimally invasive surgery.
    • The majority of patients have great pain reduction and quick regaining of some sensation and mobility in their groin and thigh following an hour and a half of nerve decompression surgery. They can normally return to their regular activities after two or three weeks. They can achieve even more considerable and long-term gains with the help of physical therapy.

    Nerve Repair

    • If the damage to the obturator nerve is too great for decompression therapy to cure, some individuals may benefit from nerve repair surgery.  
    • To fix the nerve and get function back, scar tissue from the nerve endings needs to be removed. The nerve is then reattached using a small suture.
    • Depending on the severity of the damage, recovery periods might be different and the process could take more than two hours. While nerve function can sometimes be recovered rapidly, in other cases it may take several months for the damaged muscle to heal entirely.

    Nerve Transplant or Nerve Grafting

    • Severe nerve injury can cause a large section of the nerve to get crushed or to disappear. In a nerve transplant, also known as a nerve graft, the gap is filled with nerve tissue that is either autografted taken from another part of the body or allografted taken from a corpse. The nerve will regrow through the transplant to regain movement and sensation, much like when a wire is reconnected.
    • It may take many hours to finish a nerve transplant. While the nerve fibers need time to regenerate, recovery may take several weeks or months.

    Prognosis

    Recovery times for obturator nerve injuries can vary depending on their severity. In certain cases, patients could heal in a matter of weeks. But it can take a few months or perhaps a year for the nerve to heal completely. There are situations where the nerve might not recover all the way, leaving the patient with persistent inner thigh pain or paralysis.

    What are the preventions for obturator nerve injuries?

    Certain obturator neuropathy causes may not be preventable. Crush injuries or postpartum trauma may be beyond your control.

    • You can reduce the amount of pressure on your pelvis by adjusting the foot straps on horse saddles or the seat height on bicycles to prevent obturator nerve sports injuries.
    • Allowing adequate time for warm-up before engaging in sports.
    • Resistance exercise to build stronger legs and lower abdominal muscles.
    • When you feel groin pain, take a break rather than push through it.
    • Preserving a healthy weight helps lessen the strain on the thigh and hip regions.
    • Utilizing good posture and ergonomics when performing regular tasks to avoid getting injured.

    Summary

    An obturator nerve injury is a disorder that can seriously impair a person’s leg and thigh mobility. In the groin is where the obturator nerve is situated. It makes your inner thigh’s muscles and sensation possible. Sports injuries and post-operative complications from medical procedures can cause obturator nerve injury(obturator neuropathy).

    A combination of treatments is used to treat obturator nerve injury, consisting of conservative management, physical therapy, medication, and, in certain situations, surgery. For individuals with obturator nerve injury, early identification and effective treatment are essential to reducing long-term impairment and improving their quality of life.

    FAQs

    Which muscles would be impacted if the obturator nerve were injured?

    The only atrophying muscle in the thigh’s medial compartment is the adductor magnus, which is innervated by the obturator nerve. The motor impairment is restricted to adduction, and particularly, adductor weakness does not significantly impact gait but makes leg crossing difficult.

    What signs and symptoms indicate an injury to the obturator nerve?

    Depending on the extent of the nerve damage, obturator nerve injuries can present with a variety of symptoms. Numbness, tingling, burning, or pain in the inner thigh or groin are typical symptoms. Decreased feeling in the thigh, maybe extending to the calf.

    What are the causes of the obturator nerve injury?

    Sports-related injuries, tumor compression, bleeding, and surgery are among the recognized causes of obturator nerve injury. 

    What is the diagnostic process for obturator nerve injury?

    Physical examination and imaging tests, such as computed tomography (CT), magnetic resonance imaging (MRI), or ultrasound, are currently used to detect obturator nerve injuries.

    How is an obturator nerve blocked?

    To block the anterior branch of the obturator nerve, local anesthetics are injected using in-plane ultrasound guidance into the fascia between the pectineus and adductor brevis muscles or between the adductor longus and adductor brevis muscles.

    References

    • Professional, C. C. M. (n.d.-k). Obturator nerve. Cleveland Clinic. https://my.clevelandclinic.org/health/body/22348-obturator-nerve
    • Obturator Nerve Injury | The Institute for Advanced Reconstruction. (n.d.). https://www.advancedreconstruction.com/body/obturator-nerve-injury
    • Obturator nerve entrapment – City Hospital, Dehradun. (n.d.). City Hospital, Dehradun. http://cityhospitaldehradun.com/sports-injuries/obturator-nerve-entrapment/
    • Obturator nerve entrapment – groin – conditions – musculoskeletal – What we treat – physio.co.uk. (n.d.). https://www.physio.co.uk/what-we-treat/musculoskeletal/conditions/groin/obturator-nerve-entrapment.php
    • Obturator Nerve Entrapment – Page 8 – ZWAN. (n.d.). https://www.bizwan.com/en/index.php?view=article&id=82:proximal-entrapments-of-the-lower-extremity&catid=86&start=7
  • Goniometer

    Goniometer

    What is the Goniometer?

    A goniometer is an essential instrument used in several fields, including science, engineering, medicine, and meteorology. A goniometer’s principal function is to measure the angles between two or more objects. The name “goniometer” is derived from the Greek words “gonia,” which means angle, and “metron,” which means measure.

    The measuring of joint area at each joint surface is known as goniometry. As a result, the study of angles is known as goniometry. It refers to the measuring of angles in any plane of the body’s joints in rehabilitation facilities.

    A goniometer is the tool that therapists most commonly use to measure range of motion. In the event that a patient has a modified range of motion in a specific joint, the therapist will use a goniometer to measure the patient’s range of motion at the first assessment and again in later sessions to make sure the therapy is functioning and to evaluate its efficacy.

    Anatomy and Physiology

    The amount of mobility around a certain joint or body component is measured by its range of motion. Doctors, osteopaths, physical therapists, and other medical practitioners utilize goniometers, which measure the angular motion of a joint, to assess a patient’s range of motion.

    He can move in three different ways, depending on the evaluation’s goals.

    • Passive
    • Active
    • Active assistive

    Types of Goniometers

    Inclinometer

    Among all of them, universal goniometers are the most widely used variety.

    Inclinometer
    Inclinometer

    Universal Goniometer

    It has two distinct formats: short arms and long arms. Short arm goniometers are used for measurements of small joints such as the wrists, elbows, and ankles. For joints like the knee and hips with lengthy levers, long arm goniometers provide greater accuracy.

    Universal Goniometers
    Universal Goniometers

    Gravity Goniometer/Inclinometer

    Despite the pull of gravity, an arm holding a weighted pointer stays erect.

    baseline baseline gravity inclinometer
    baseline gravity inclinometer

    Software/Smartphone-based Goniometer

    Using a smartphone as a digital goniometer has a number of advantages, such as one-handed use, measurement ease, accessibility, and measurement tracking through applications.

    Smartphone based goniometer
    Smartphone-based goniometer

    Arthrodial Goniometer

    Ideal for determining the cervical spine‘s rotation, lateral flexion, and anteroposterior flexion.

    Arthrodial Goniometer
    Arthrodial Goniometer

    Twin Axis Electro-goniometer

    Even though the inter- and intra-rater reliability of electrical and universal goniometers differs and is higher for the former, their greater usage for research makes them challenging to adapt to patient clinical assessments.

    Twin axis electrogoniometer
    Twin axis electrogoniometer

    Validity and Reliability

    It is questionable if goniometers are a reliable and useful tool for determining how effective a therapy is.

    Measurements of knee joint angle relative to radiography joint angle have been rigorously confirmed, despite the paucity of research on goniometric validity. Universal goniometers typically offer good to exceptional reliability and are more trustworthy than visual assessment, especially for untrained examiners. Reliability varies depending on the joint and motion being assessed.

    While some studies reveal no discernible variations between particular equipment, others assert that the type of goniometer used determines how reliable the data are. Overall, the study demonstrates that the universal goniometer has good intra- and inter-rater reliability and that providing explicit instructions about goniometric position enhances non-expert dependability. The marine therapist must thus take all necessary steps and guarantee that there is a chance to improve accuracy. Regarding the number of activities to do and if average ratings for repeated actions increase ratings, we’ve received conflicting input.

    When using goniometry, expectations for a range of motion, readings on the incorrect side of the scale, shifts in patient motivation, or performing successive measurements at various times of the day can all be sources of inaccuracy. That is a potential.
    As a result, measures taken by the same therapist at the same time of day, with the same tools, and according to a uniform protocol tend to be more accurate overall.

    Goniometry Technique

    A standard nomenclature should be used in goniometrics. On a broad scale, the most popular approach is the neutral zero method (0-180 degree system). The therapist has to use the same goniometer every time in order to reduce the possibility of instrumental errors.

    • Align and stabilize joints correctly.
    • Perform each body part’s recommended range of motion (ROM). establishes how the ends of the joints and the range of mobility feel.
    • Feel around for the right bone markers.
    • Align the goniometer with the reference point.
    • Make sure you read the meter accurately.
    • Precisely document and take the measurements (they need to measure and record the appropriate amount for both passive and active range of motion for future use).
    • To prevent trick motion, which involves moving several joints simultaneously, or flaws that might skew measurements, each joint’s range of motion (ROM) needs to be maintained independently.

    Indications

    Uses for goniometers include:

    • existence of dysfunction pertaining to the muscles, tendons, or joints.
    • Establish the diagnosis
    • Establish treatment objectives.
    • Assessing progress
    • Adapt the course of treatment based on the patient’s development.
    • Manufacturing of braces
    • Measurements used in research

    Contraindications

    The following circumstances should not be measured with a goniometer for determining an active range of motion:

    • Dislocation of the joints
    • fracture that continues to heal
    • Osteoporosis or regions of brittle bone (because forced measures might lead to iatrogenic damage) should be avoided if movement impedes the healing process following surgery. This is especially important right after injury, when soft tissue may be damaged.

    Under what conditions and with what extra care are goniometers appropriate?

    • Inflammation or periarticular infection
    • the severe ache that worsens while moving
    • Unstable or very mobile

    Parts of the goniometer

    Three parts make up a universal goniometer:

    Parts of the goniometer
    Parts of the goniometer

    Body

    Its protractor-like shape allows it to make either a complete or semi-circle. It has a scale for measuring angles.
    For half-circle models, the scale goes from 0 to 180 degrees; for full-circle models, it goes from 180 to 0 degrees; and for all three, it goes from 0 to 360 degrees. The angle between ticks varies from 1 to 10 degrees.

    Fulcrum

    The articulated arm may move freely inside the device’s body thanks to a screw located in the middle of the casing. The moveable arm has a screw-like mechanism that may be tightened to lock it in place or released to give it more freedom of movement. The measuring joint is positioned above the body’s fulcrum.

    The fixed arm

    The fixed arm of the goniometer is the arm that is positioned in line with the fixed part of the measuring joint. It is structurally a part of the body and is unable to move on its own.

    The moving arm

    “Moving arm” describes the goniometer arm that is positioned in line with the moving component of the joint under measurement.

    In goniometry, what is the physical therapist’s role?

    Only professionals with the necessary training, such as licensed physicians, physical therapists, occupational therapists, and others, should do goniometer tests and evaluations.

    Professionals must be able to:

    • Correctly align and stabilize joints.
    • Perform each body part’s recommended range of motion (ROM).
    • establishes how the ends of the joints and the range of mobility feel. Feel around for the right bone markers.
    • Align the goniometer with the reference point.
    • Make sure you read the meter accurately.
    • Make sure you accurately record your dimensions.

    Patient preparation

    There is no need for significant preparation while using the goniometer. The patient has to provide their agreement for the examination and be informed beforehand. The connection to be inspected and its surroundings should be sufficiently exposed during the examination, which should take place in broad daylight. Please have a pre-discussion about this with the assistant if needed.

    Technique or Treatment for Using the Goniometer

    Goniatrimers are used to measure the range of motion in both active and passive motion. Positioning is important in goniometry because it establishes an empty start or neutral position for the joint and stabilizes the proximal joint segments.
    After stabilizing the proximal joint component, the examiner gradually expands the distal joint component’s range of motion until the desired distal feel is reached.
    Upon evaluating the range of motion that is accessible, the examiner puts the distal component back in its initial position. By palpating the relevant bone landmarks, the examiner signs the goniometer.
    Important things the patient should know while applying the goniometry method.

    • The patient moves the joint through its range of motion while the examiner removes the goniometer and takes the initial reading.
    • The examiner replaces and repositions the goniometer, records the measurements, and reads them once the joint is out of range.
    • After three measures are made, the appraiser determines the average. This determines the active range of motion.
    • When rotating the joint, care must be made to maintain the patient still in order to obtain precise measurements. The joint capsule, surrounding muscles, and ligaments are examples of soft tissue components whose tension is greatly affected by placement.
    • Employ the positions where the soft tissue structures are tense since these postures limit the range of motion more than those where the tissues are loose.
    • To make sure that the soft tissue stress level doesn’t change from measurement to measurement, it’s critical to make sure the same test position is utilized each time.
    • This method guarantees comparable outcomes. Any shift in position will result in inaccurate measurements. Each individual, age, and joint has a different range of motion.

    Complications

    There are very few goniometry-related difficulties, which are caused by technological shortcomings. These include:

    • Inaccurate measurements caused by technological flaws, or measurement mistakes, can seriously affect patient care.
    • Iatrogenic injury: In weak osteoporotic bones, excessive joint motion during goniometry may cause iatrogenic fractures.

    Clinical Significance

    Measurements of goniometry are helpful in a variety of therapeutic situations. The scope includes anything from assessing the range of motion of the spine following fusion surgery for scoliosis to tracking pine mobility in Bechterew’s illness. Goniometric testing allows us to measure how much a patient’s limb joints’ range of motion has improved.

    Everyone agrees that further research is needed to evaluate whether goniometers are a legitimate and reliable enough tool to assess treatment effectiveness. The type of goniometer that is used can have an impact on how reliable the readings are. They haven’t always seen a statistically meaningful change.

    Conclusion:

    Goniometers can compare the efficacy of various therapies and assist in clinical decision-making for post-use care and outcome analysis of certain interventions. In circumstances when this information is meaningful and measurable, this technique assists medical experts in identifying the most effective therapies for certain diseases, ultimately optimizing and enhancing health outcomes.

    FAQs

    Is the purpose of a goniometer flexible?

    One instrument used to assess the range of motion of different joints throughout the body is the goniometer. It is a useful tool for figuring out how flexible a joint is. Sports scientists, chiropractors, physical therapists, doctors, physical therapists, and physiologists frequently utilize it.

    What are the goniometer joint’s angles?

    The angles that are utilized for goniometric measurements include acute angles (less than 90°), right angles (less than 90°), and obtuse angles (more than 90°). Several practicing environments are using smartphones to monitor joint range of motion (ROM).There exist several elements that may impact the validity of the generated measurements.

    What is the purpose of an eye goniometer?

    In many glaucoma instances when the angle may narrow or shut, it is highly helpful. The anterior chamber angle is determined in degrees using the goniometry procedure. Using the camera below, capture an image of the anterior chamber. anterior chamber angle.

    What are the advantages of using a goniometer?

    The simplicity, convenience of use, and validation of the device for usage in dogs and cats are among the benefits of employing a universal goniometer to assess the range of motion. However, there are many disadvantages to this strategy.

    A protractor or goniometer?

    Voting and adding new comments are not permitted. A goniometer is a specialist tool used in several industries such as chemistry and medicine.

    What are the goniometer’s limitations?

    The universal goniometer has a drawback in that it takes two hands to operate, which makes it challenging to stabilize other body parts, particularly when there is only one practitioner present.

    How is a finger goniometer used?

    The Stainless Steel Short Finger Goniometer makes it simple to measure the range of motion in the metacarpal, phalangeal, and interphalangeal joints. Protractor with linear marks in inches and centimeters oriented in opposing directions on both sides. In 5° increments, the protractors measure 0-150°.

    What do a goniometer’s two arms stand for?

    A goniometer has two arms: one that is fixed to the circle with the angle degrees on it, and the other that moves to take measurements. To precisely measure the range of motion, make sure you comprehend how the moving arm points to the angle degrees.

    What does an orthogoniometer mean?

    A goniometer is a device that measures the angle of motion at a joint and is frequently used by physicians, osteopaths, physical therapists, and other health professionals to assess range of motion. Depending on the goal of the evaluation, there are three different forms of range of motion: passive, active, and active assistive.

    What is the goniometer’s working principle?

    It is believed that the angle formed by the proximal and distal bones making up the joint is accurately represented by the angle formed by lining up the arms of a general-purpose goniometer using bone markers.

    What unit of measurement is being applied to ROM?

    One common movement in joints is rotation. This is known as an “angular motion.” ROM measures employ degrees rather than inches or millimeters due to angular motion.

    What is a goniometer’s contact angle?

    An angle of engagement One tool for figuring out a droplet’s contact angle with an external surface is a goniometer. This might serve as a stand-in for the dampness of the surface. The droplet’s contact angle decreases to less than 90° as it starts to spread across the surface.

    What is a goniometer’s basic principle?

    An instrument for measuring angles is a goniometer. A physical therapist can ascertain a joint’s range of motion using the use of goniometry. A therapist trained in goiometry may assess both active and passive range of motion.

    What is the range of motion in goniometry?

    A goniometer is the most common tool used to measure the range of motion of a body joint. Measurement of the joint angle from the joint axis is done using a moving arm, fulcrum, and fixed arm. For accurate results while utilizing a goniometer for ROM measurements, appropriate training is necessary.

    Why is ROM measured?

    The term range of motion, or ROM, refers to a measurement of the suppleness of muscles, tendons, ligaments, bones, and joints. For this reason, it is imperative to examine the ROM in order to evaluate the appropriateness and potential damage.

    What are the applications of goniometry in physical therapy?

    A goniometer is one tool used in physical therapy to measure range of motion (ROM). Its arms are both stationary and movable. The points of connection for them are joints. Each is positioned such that the center of the goniometer and the joint of interest are on the same side of the body.

    References

    • Parmar, D. (2023, December 13). Goniometer – Type, Technique, Indication. Mobile Physiotherapy Clinic. https://mobilephysiotherapyclinic.in/goniometer/