Pulmonary Diseases | Autoimmune Diseases | Chest Therapy | Disease | Physical Therapy | Treatment Technique
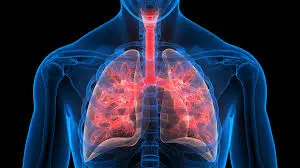
Cystic Fibrosis
What is a Cystic Fibrosis? Cystic Fibrosis (CF) is a genetic disorder that affects the lungs, pancreas, liver, intestines, and other organs. It is caused by a defective gene that makes the body produce abnormally thick and sticky mucus. Because CF affects the airways and lungs, which can make breathing difficult and lead to frequent…