
Upper Back Pain
Overview
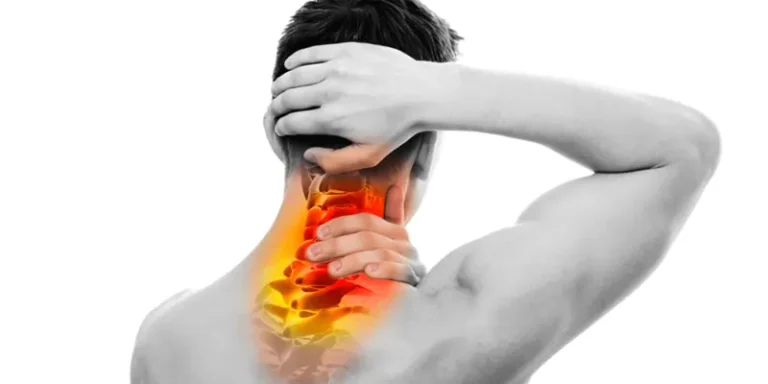
Upper back pain, including middle back pain, can occur between the base of the neck and the bottom of the rib cage. The upper and middle back are part of the thoracic spine, which consists of twelve small bones called vertebrae. These vertebrae make up the spine.
Each thoracic vertebra is connected to a pair of ribs that wrap around the body and form the sternum, a long flat bone in the center of the ribcage. This structure creates a protective box. Additionally, the upper back contains discs that act as shock absorbers between the vertebrae. It also has numerous muscles and ligaments that provide support and stability to the spine.
Various medical conditions, injuries, fractures, and damage to the vertebrae, discs, muscles, and ligaments can contribute to upper back pain. But compared to neck or lower back discomfort, upper back pain is less frequent. This is because the bones in the upper back have limited movement compared to the neck and lower back. The bones of the upper back work in conjunction with the ribs to maintain stability and protect vital organs, such as the heart and lungs.
The region of the back located above the lumbar spine, known as the upper back or thoracic spine, often requires pain treatment. Resting, engaging in physical therapy, employing pain management techniques like hot or cold therapy, and sometimes using medication or surgery are common approaches. Consulting a healthcare professional is crucial to identifying the root cause of the pain and creating a suitable treatment strategy.
The upper back, which is situated adjacent to the neck and above the lumbar spine, is often known as the thoracic spine. Within the spine, this area remains stable due to its attachments to the ribs, resulting in a limited range of motion for the upper back.
In this article, we discuss a range of stretching exercises that can alleviate tight muscles. We also provide guidance on mobility and strengthening exercises that improve posture, enhance muscle function, and increase the range of motion. By engaging in these exercises, you can strengthen the weak muscles in your upper back region.
Anatomy of Upper Back
Vertebrae
The upper back contains 12 vertebrae known as the thoracic spine. These vertebrae are labeled T1 through T12. The thoracic vertebrae have a distinct anatomy featuring facet joints that articulate with the ribcage, unlike the cervical and lumbar regions. These vertebral bodies provide structure and support for the upper back region.
Discs
Between each of the thoracic vertebrae are intervertebral discs made up of a gelatinous nucleus pulposus surrounded by the annulus fibrosus. These discs cushion and slightly separate the vertebrae, permitting smooth movements. They also facilitate load transmission through the spine. Degeneration of the thoracic discs from daily wear and tear or injury is a major cause of upper back pain.
Ribs
The 12 pairs of ribs emerge from the thoracic spine laterally and attach to the sternum anteriorly via costal cartilage. The first 7 pairs, labeled true ribs, connect directly to the sternum while the lower 5 pairs attach indirectly. The ribs are essential for anchoring the upper back musculature and protecting vital internal organs.
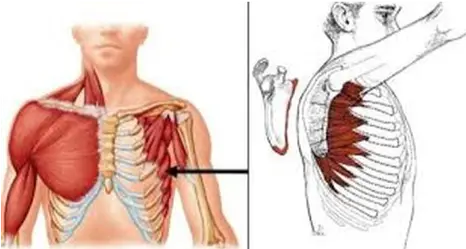
Muscles
There are many large and small muscle groups spanning the thoracic region. These include the trapezius, rhomboids, serratus posterior, splenius capitis, erector spine, multifidus, and semispinalis muscles, amongst others. These muscles stabilize the scapula, and control extension, flexion, rotation, and lateral bending of the thoracic spine. They play a key role in upper back movements and posture.
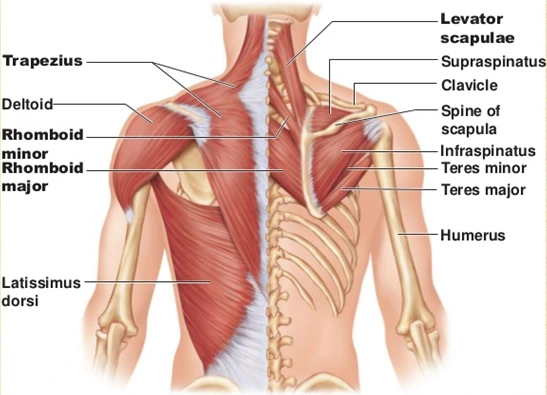
- Trapezius – This large, triangular muscle extends from the base of the skull down to the thoracic spine and scapula. Tightness or spasms of the trapezius can cause upper back pain.
- Rhomboids – The rhomboids connect the inner scapula to the thoracic spine. Weak or stretched rhomboids can pull the shoulders forward resulting in poor posture and strain on the upper back.
- Splenius – This muscle group includes the splenius capitis and splenius cervicis which rotate and extend the head and neck. Overuse can lead to splenius pain extending into the upper trapezius region.
- Erector Spinae – The erector spinae muscles run vertically along the spine on both sides. Tightness or spasms can cause localized upper back pain and spasms.
- Multifidus – These small muscles go from the spine to the back of the pelvis. Multifidus spasms can occur after injury and contribute to upper back pain.
- Latissimus Dorsi – This large, flat muscle extends from the lumbar spine up to the humerus. Tight latissimus dorsi can pull on the thoracic spine leading to pain.
- Levator Scapulae – This muscle elevates the scapula and attaches to the cervical vertebrae. Spasms of the levator scapulae can cause pain at the base of the neck that radiates to the upper back.
Nerves
The spinal cord runs through the vertebral foramen protected by the bony spine. Nerve roots exit through the intervertebral foramen between each vertebra and coalesce to form the intercostal nerves. These supply motor and sensory innervation to the thoracic trunk. Impingement of these nerves can result in radiating upper back pain.
Ligaments
Ligaments like the supraspinous, intertransverse, flavum, and iliolumbar provide stability by joining vertebrae. They guide the appropriate range of motion while preventing excessive movement. Injury to these important supportive structures causes instability, pain, and muscle spasms.
Causes of upper back pain
- Strain and sprains: The most common cause of upper back pain is muscular strain or sprain. It can occur when lifting heavy objects improperly, leading to injury in the muscles, tendons, or ligaments.
- Poor posture: Many individuals with upper back pain experience difficulty in maintaining proper posture. This can result in standing in a twisted or misaligned position, causing strain on the back and spine.
- Disc problems: Upper back pain may be caused by issues with the spinal discs. These discs can slip out of alignment, bulge, or even rupture, exerting pressure on the surrounding nerves.
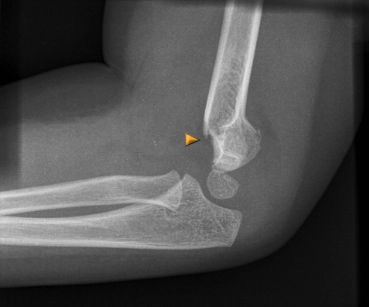
- Fractures: In cases of accidents, such as car accidents or falls, fractures of the spine bones can lead to upper back pain.
- Arthritis: The most prevalent type of arthritis, osteoarthritis, may be a factor in upper back pain.
- Muscle overload: Repeatedly engaging in the same movements over time can overload the muscles in the back, resulting in upper back pain. Muscle tension and stress may contribute to this condition.
- Herniated disc: The soft, rubbery cushions called discs that are located between each vertebra can herniate, causing a portion of the disc to press against the spine.
- Pinched nerve: A pinched nerve in the upper back can cause numbness, pain, or weakness in the arms or legs. It may also lead to problems with urination or a loss of control in the legs.
- Myofascial pain: Myofascial pain can arise after an injury or overuse of the muscles. In some cases, it can persist long after the initial injury, resulting in chronic upper back pain. Fibromyalgia, a rare condition known for widespread pain and fatigue, can also affect the upper back.
- Lung cancer: Although rare, back pain can be a symptom of lung cancer.
- Spinal infection: Infection can rarely be responsible for causing back pain. A collection of pus and bacteria that develops between the spinal cord and the spine’s bones is called a spinal epidural abscess.
Traumatic injury refers to physical injuries caused by accidents or excessive exercise. Examples of traumatic injuries include
- Slipping and falling
- Car accidents
- Lifting objects incorrectly
- Work-related accidents
- Overexertion during workouts
Additionally, muscle pain can also be caused by various conditions such as
- Different forms of arthritis
- A herniated disc
- Osteoporosis
- Inflammatory conditions like ankylosing spondylitis
- Spinal stenosis
- Fractures in the vertebrae
- Certain types of cancer affecting the spine
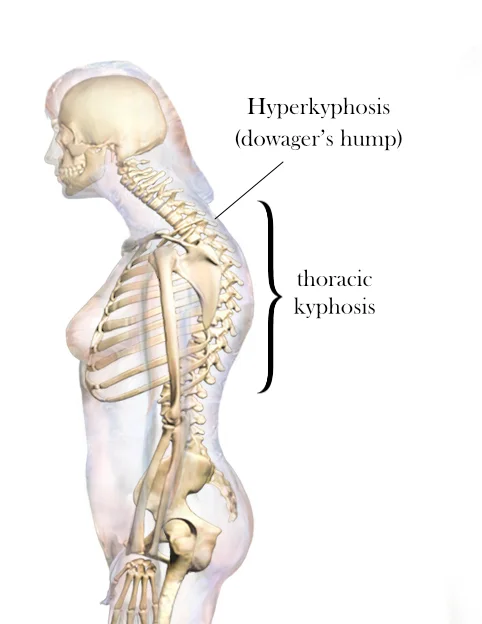
- Spinal deformities like kyphosis or scoliosis
- Fibromyalgia
Symptoms of upper back pain
- Pain experienced in the area of injury.
- Stiffness and tightness are felt in the affected region.
- Tenderness in the upper back.
- Occasional headaches.
- Experiencing weakness and numbness in the legs or hands
- Soreness in the upper back post-workout.
- Involvement of the thoracic spine vertebrae’s disc may occasionally cause bowel or bladder leakage (incontinence).
- Swellings and spasms were observed in the painful back region.
How is Upper Back Pain Diagnosed?
When consulting a doctor for upper back pain, the doctor will inquire about the pain to determine the underlying causes of the muscle pain. Additionally, the doctor will ask the patient to rate their pain on a pain scale (NPRS or VAS) to assess the severity of the pain. Furthermore, the doctor will conduct a physical examination, which includes palpating for swellings, assessing muscle strength, and examining the range of motion (ROM) in the upper back.
If you want to confirm the diagnosis, the doctor may suggest you undergo the following tests:
- MRI or CT scans & X-rays: These imaging tests are valuable for identifying abnormalities or injuries in the bones and soft tissues. They are particularly useful in diagnosing herniated vertebral disks and problems with muscles, nerves, and ligaments.
- Blood tests: Blood tests aid in the detection of infections and abnormal diseases such as rheumatoid arthritis and cancer.
- Bone density test: Also referred to as a DEXA test, it evaluates bone mineral density and helps determine the risk of osteoporosis.
- Nerve studies: Electromyography (EMG) is a nerve study that measures nerve activity. It assists the doctor in diagnosing conditions such as a herniated vertebral disc or spinal stenosis, which refers to the narrowing of the spinal canal.
Risk factors for upper back pain
Lack of exercise is a common factor that increases the risk of developing upper back pain.
Other risk factors include:
- Excess weight: The spine bears the weight of the body, so excess weight places additional stress on the back.
- Psychological conditions: Muscle pain can be triggered by depression and anxiety. In some cases, psychological disorders can contribute to the risk of upper back muscle pain.
- Belly fat: Carrying excess weight in the abdominal area increases the risk of upper back pain as it places strain on the soft tissues of the back.
Treatment for upper back pain
The treatment for upper back pain involves following the RICE protocol as a home remedy or primary management.
- R – Rest: It is recommended to rest and avoid activities that may exacerbate the muscle pain in the upper back.
- I – Ice: Applying ice to the painful area for 10 minutes can help reduce swelling and muscle pain. To prevent ice burn, it is advised to use a towel between the skin and the ice. Ice packs or frozen peas can also be used for ice therapy.
- C – Compression: Using compression bandages can help reduce swelling or edema in the upper back.
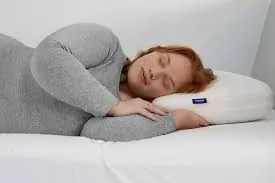
- E – Elevation: Elevation is not suitable for the neck muscles or upper back as it can worsen the pain. However, using a gentle pillow while sleeping is recommended.
The doctor may prescribe pain medication in certain cases.
- Anti-inflammatory and muscle relaxant drugs are commonly prescribed.
- In cases where the muscle pain is caused by depression, an anti-depressant drug may be recommended, but it should not be taken for a long duration.
- Opioids may be suggested for severe pain, but they are not suitable for long-term use (7 to 10 days).
- Pain-alleviating gels and sprays, such as move gel and spray, can also be used to reduce muscle pain and swelling.
- Injections, such as trigger point injections, can help alleviate muscle pain and swelling. These injections provide a direct dose of potent pain-relieving medicine.
Physical Therapy Treatment
When home management and pain medication fail to alleviate the pain, doctors recommend physiotherapy treatment to relieve muscle pain.
Physiotherapy treatment helps alleviate pain, swelling, spasms, and tightness in the upper back. It includes massage, electrotherapy treatment, and exercise therapy.
Massage
Therapists recommend massage therapy to reduce muscle pain when trigger and tender points are present in the painful area. Massage should be applied 2-3 days after following the RICE protocol and when the pain is reduced. Use oil or powder during the massage and apply it for 5-10 minutes. Massage should be performed 3 times per day at home.
Electrotherapy Treatment
If the pain persists even after following the RICE protocol, pain medication, and massage, electrotherapy treatment can be used to reduce upper back pain.
To reduce swelling, spasms, and pain, electrotherapy treatment is recommended. There are multiple choices too, including:
- Ultrasound (US) therapy: Used when tender points are present, it helps reduce pain. Apply ultrasonic gel and use ultrasound therapy for 5 to 7 minutes on the painful area. This therapy promotes healing and reduces pain and swelling.
- Short Wave Diathermy (SWD): This deep heat therapy helps reduce spasms in painful areas.
- Interferential Current Therapy (IFC) and Transcutaneous Electrical Nerve Stimulation (TENS): These therapies use ultrasonic gel and electrodes on the affected area. Apply it for 10-15 minutes.
The priority should be to achieve a balance between muscle length and strength. If muscles are not stretched enough, they may become shortened and tightened. On the other hand, if they are too flexible without enough stability, it can lead to loose joints and a lack of control over movements.
The upper back muscles are often overlooked during exercise because they are stronger and more efficient, which contributes more to one’s appearance. However, neglecting these muscles can increase the risk of injury. By dedicating time to strengthening the upper back muscles, one can improve muscle patterns and lift heavier weights while reducing the chances of unwanted injuries.
Exercise for Upper Back Pain
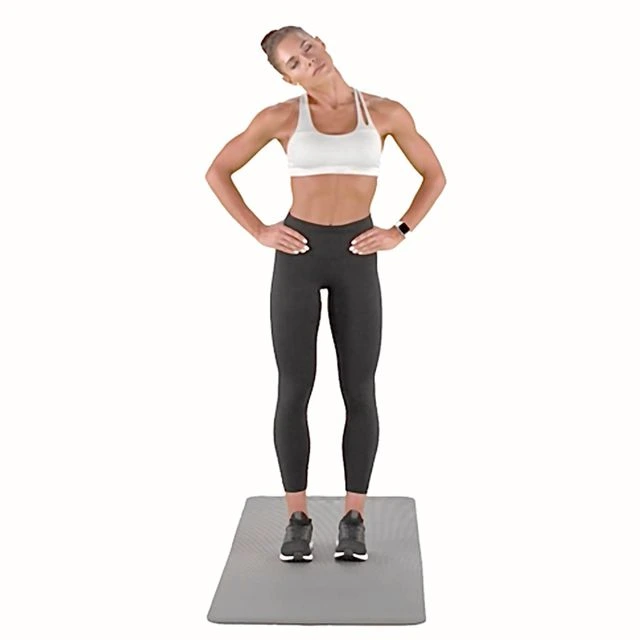
The neck roll exercise is focused on the neck and upper back muscles. To perform this exercise, start in a standing position or sit up straight. Tilt your neck to either side, feeling a stretch from the neck to the trapezius muscles.
Gradually turn your head counterclockwise, pausing at your left shoulder. Complete one round, ending where you began. Repeat the exercise in a clockwise direction. Aim to do five to ten repetitions per session, and complete three sets per day.
Stretching Exercises:
- Neck Flexion
- Arm Openings
- Shoulder Roll
- Arm Circles
- Trapezius Muscle Stretch
- Levator Scapulae Stretch
- Thoracic Spine Foam Rolling
- Lateral Side Flexion Stretch
- Child’s Pose
Neck Flexion
Neck flexion exercises can help increase neck and upper back strength, relieve pain, and improve range of motion. You can carry out these workouts while sitting or standing. Focus on slow and controlled movements, avoiding any forced motions. Keep the rest of your body still during the exercise to maintain proper alignment and posture.
Procedure for neck flexion:
- Start in a sitting or standing position, keeping your back straight.
- Lower your chin towards your chest, but stop if you experience pain or discomfort.
- Turn your head to bring your right ear close to your right shoulder.
- For five to ten seconds, maintain the neck-flexion position.
- Keep your chin down and slowly tilt your head back, bringing your left ear close to your left shoulder.
- Repeat this gentle head roll from shoulder to shoulder several times.
- Whenever you feel muscle tension, pause and deepen the stretch.
Arm Openings
Arm stretches are effective for relieving upper back pain and can be easily modified for different levels of stretch. They are particularly suitable for home exercise routines and can be a great way to start or end the day.
To perform arm openings:
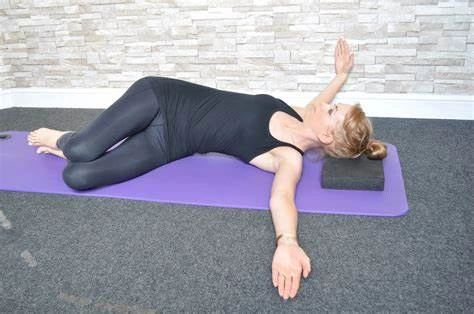
- Place a tiny pillow beneath your head and lie on your side. Bend your knees at approximately 45 degrees and keep your feet together.
- Roll your upper body and shoulders backward, bringing your hand and head along with the movement.
- Open your arms as wide as is comfortable, feeling a strong stretch in the lower, middle, and upper back.
- Hold the arm opening position for about five to ten seconds.
- Repeat on the other side. While maintaining the stretch, position your upper leg in front of the lower leg so that your knee rests on the floor. This will increase the stretch.
Shoulder Roll
The shoulder roll exercise focuses on the muscles of the shoulders and upper back. Start this exercise by standing with your arms down by your sides. Roll your shoulders in circular motions, both clockwise and counterclockwise, ensuring proper form and control. Aim for five to ten repetitions per session, and complete three sets per day.
Tips for performing shoulder rolls:
- Keep your body relaxed and initiate the movement with small circles.
- Breathe deeply throughout, maintaining smooth and continuous motions.
- Gradually increase the diameter of the circles with each breath until you are moving smoothly through the full range of motion.
- Shoulder rolls provide mobility to the shoulder joint and improve blood circulation. It also stretches the shoulder muscles, tendons, and joints, helping to reduce pain and stiffness. Starting slowly, aim for 30-second circles in each direction.
Arm Circles
- Step straight up and place your feet shoulder-width apart to begin an arm circle.
- Extend your arms out to your sides without bending your elbows.
- Slowly rotate your arms forward, making small circles approximately one foot in diameter.
- Complete one set in one direction, then switch back.
- Engage your core muscles, keep your back and arms straight, and maintain steady, deep breathing throughout the exercise.
- Maintain a T-shaped position with your body, and keep your head up.
- Arm circles are typically performed without weights, lasting approximately one minute per set (30 seconds in each direction). As you gain strength, you can increase the challenge by using light weights.
Trapezius Muscle Stretch
Stretching the trapezius muscles offers several advantages, including tension reduction, improved posture, and increased shoulder mobility. Consistently stretching your upper trapezius can lead to long-term improvements in posture. It is crucial to maintain consistency and allow enough time for the benefits to manifest.
Follow these steps for the trapezius muscle stretch:
- Sit or stand with your spine in a neutral position and engage your core.
- Place your right hand with your elbow against your lower back in an L or V shape.
- Position your left hand above your head and gently press your head to the side toward your shoulder, creating a stretch from the base of your head through your neck and upper trapezius.
- After holding the stretch for 30 to 45 seconds, switch to the other side.
If you prefer, you can perform the upper trapezius stretch while standing. However, sitting down allows for an equally effective stretch without concerns about unintentional movement.
Levator Scapulae Release
The glenoid cavity is tilted downward, rotating the scapula, and this is accomplished in part by the levator scapulae muscles. These muscles also stabilize the vertebrae during movement by contracting laterally in the cervical spine. Stretching the levator scapulae offers multiple benefits, including reducing muscle tension or pain, preventing neck pain recurrence, improving posture, increasing neck range of motion, and optimizing scapula movement.
To perform this stretch:
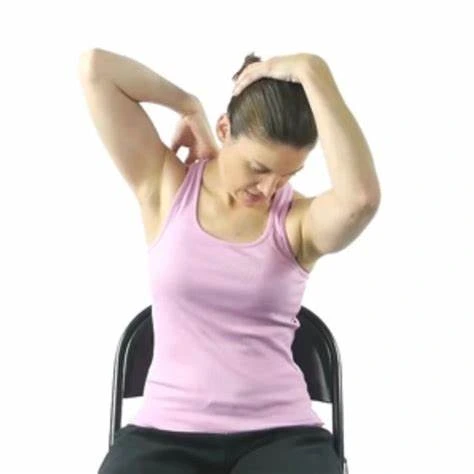
- Sit down and keep your back straight to start.
- Grab the end of the seat with your left hand and gently lower your left shoulder, pulling it towards the floor.
- Bend forward and turn your head to the right.
- Slightly tilt your head forward until you feel a stretch on the left side and back of your neck.
- Apply light pressure with your right hand to amplify the stretch.
- Hold this stretch position for approximately 10-15 seconds and then relax.
- Stretch each side two to three times.
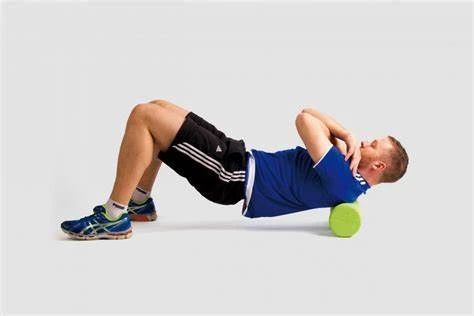
Thoracic Spine Foam Rolling
The target muscle of the thoracic spine foam rolling is the upper trapezius. This exercise effectively relaxes the upper back.
To ensure proper execution of the exercise, adhere to these steps:
- Lie on your back with your hands behind your head and place a foam roller under your upper back.
- Begin rolling up and down slowly, starting from the center of your back and moving towards the top of your shoulders.
Remember the following while performing thoracic spine foam exercises:
- Keep your abs slightly contracted throughout the exercise.
- Maintain a neutral spine in the neck and lower back, avoiding any excessive arching.
- Engage your core and use your hips to initiate the rolling motion.
- Avoid rolling over bony areas (such as knees) or areas with open wounds or injuries.
- Roll along the muscles slowly and gently.
- When encountering a tight area or muscle knot, slow down and hold the roller in that area for 20-30 seconds or until you feel the release.
Take your time and perform nice, slow rolls. Ensure that you follow these instructions carefully to prevent any discomfort or injury.
Latral Side Flexion Stretch
The lateral flexion stretch is beneficial for relieving tension in the lower back, which can alleviate lower back pain. It is particularly helpful for individuals with acute lower back injuries or chronic lower back pain that cannot be detected through imaging methods such as MRI or X-ray. In such cases, medical professionals often find no abnormalities in the back despite the pain experienced by the individual.
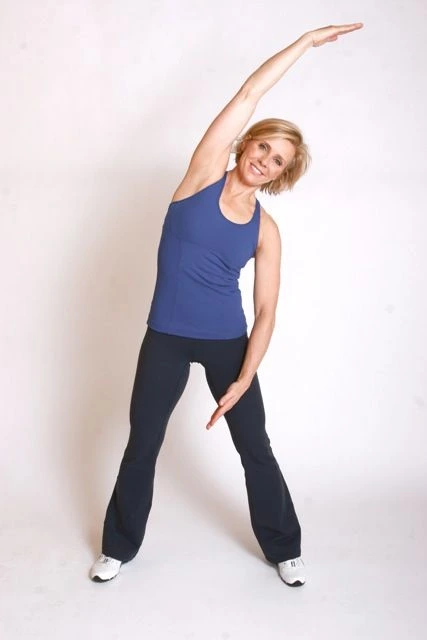
- To perform the stretch correctly, ensure that you reach your hand while landing on the opposite hip.
- As you extend your upper arm to the right, be mindful not to let your right shoulder come into contact with your right earlobe.
- Maintain a relaxed position with your shoulders, keep your chin away from your chest, and ensure your collarbones are open.
- To deepen the stretch, extend the energy through the fingertips of your upper hand.
- Repeat the stretch on the opposite side.
- If sitting with your legs crossed is uncomfortable, you can perform the exercise in a cross-legged position. Keep your elbow aligned with your shoulder, square your hips, and keep your legs bent and together.
- As you lift your hips, energize your legs and direct them towards the ceiling. It is important to keep your shoulders away from your ears during this movement.
If you find it challenging to maintain your balance with stacked feet, you can lift your top foot forward onto the mat to increase stability. To improve lateral flexibility and spinal strength, dedicate just 5 minutes each day to perform these exercises (6-8 repetitions on each side). Not only will this routine enhance your posture, but it will also contribute to increased strength and flexibility in your spine.
Child’s Pose Exercise
Child’s Pose is a yoga position that offers relaxation and benefits to various parts of the body. To perform this exercise:
- On a soft surface, such as a yoga mat, begin by kneeling.
- Extend your knees and lower your upper body towards the floor, bringing your stomach between your thighs.
- Rest your forehead on the mat or use a block or pillow for support if needed.
- Relax your shoulders, chin, and eyes.
- You can choose to extend your arms forward or place them by your thighs with palms facing up.
- Another variation is to bend your elbows, bringing your palms together and resting them on your thumbs at the back of your neck.
- Stay in this position for as long as you’d like, focusing on steady inhalation and exhalation.
- A gentle stretch for the shoulders, back, hips, thighs, neck, and ankles can be achieved in a child’s pose.
- It can also help relieve back pain.
- This exercise encourages deep breathing, mindfulness, and relaxation.
- Breathing exercises, like the one in Child’s Pose, can potentially lower blood pressure and improve lung function.
- However, avoid Child’s Pose if you have a knee injury.
- Pregnant individuals should widen their legs and avoid pressing their stomachs into their thighs.
- For those with shoulder injuries, holding hands together can provide additional support.
Strengthening Exercises:
- Chair Rotation
- Wall Angel
- Prone I and T Exercise
- Thread the Needle
- W & Y Stretch & Retract
- Side Plank
- Bridging Exercise
- Reverse Dumbbell Flyes
- Face Pull-down
- Pelvic Tilt Exercise
- Superman Exercise
- Bird Dog Exercise
- Cobra Pose
- Cat Camel Pose
- Wall Push Up
Chair Rotation
To perform the chair rotation exercise,
- Sit in a chair with your feet planted on the floor. Maintain alignment of your hips, shoulders, and ears.
- Bend your elbows and arms just a little bit below shoulder level. From the hips at the waist, bend forward while turning your head last.
- Avoid pushing through any pain. Hold the rotation for a count of 10 to 30, then return to the starting position.
- To get the maximum benefit, perform the exercise on each side for 3-5 repetitions.
Chair rotation exercises improve the mobility of the spine. Like other seated exercises, this exercise offers similar benefits, such as reducing the risk of injury or discomfort.
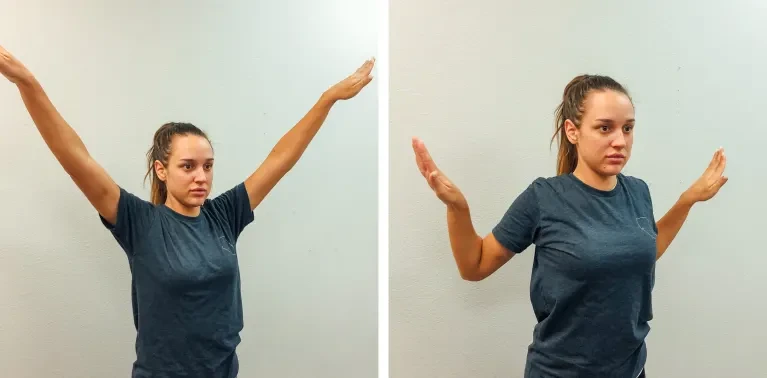
Wall Angel
For the wall angel exercise, stand approximately 6 to 8 inches (about 15 to 20 cm) away from a wall. Position your back, shoulders, and head against the wall for support. Pull your navel in the direction of your spine to begin with a neutral spine.
Ensure your ribs are pulled in and down, and feel your mid back connecting with the wall. Slightly tuck your chin and try to touch the back of your head to the wall. If necessary, place a small pillow behind your head to assist in achieving this position.
Extend your arms straight upwards and position them overhead against the wall. Ensure that the back of your hands are touching the wall, forming a “V” shape. Adjust your feet position if needed to maintain proper alignment. Gradually bend your elbows, sliding your hands along the wall until they are just above your shoulders. Throughout the movement, keep your head, body, and back against the wall.
Lower yourself as much as you comfortably can while maintaining good posture without experiencing pain (a stretched sensation is normal). At the lowest point, hold for a count of five, then return to the starting “V” position. Aim for 5-10 repetitions, stopping when your muscles can no longer maintain the position without pain.
Using dumbbells during this exercise activates the postural muscles in your upper back, helping to keep your shoulders back. It also lengthens and strengthens the pectoral, back, and trunk muscles. Additionally, your core muscles must engage to stabilize your body and maintain a neutral position. Begin with light weights and progressively increase the load as your strength improves.
Prone I and T Exercise
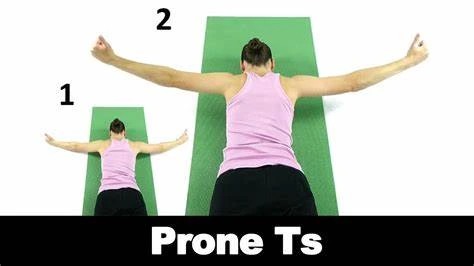
- Lying on your stomach, perform I and T exercises by placing your forehead on a table (or a bed, floor, or exercise ball).
- To make yourself more comfortable, it’s recommended to place a towel underneath your forehead.
- Squeeze your shoulders and raise your hands off the table while keeping them by your sides, palms up.
- Hold this position for five seconds, then lower your hands and repeat this movement ten times.
- For the T exercise, keep the same position but move your arms to the sides, with your palms facing downwards.
- Squeeze your shoulders and raise your arms. Hold for five seconds and repeat this movement ten times.
Thread Needle
If you experience stiffness in your upper back, especially during twisting movements, the thread-the-needle stretch is an excellent exercise for the upper back. Begin on all fours, forming a tabletop position with your body. Align your hips over your knees and place your elbows, shoulders, and wrists on the ground.
Raise your right hand and follow it with your gaze as you thread it under your left hand. Keep your hips elevated and allow your chest to rest or come close to the ground. Push your hips back and up while maintaining pressure on your left palm. Hold this position for as long as necessary, then switch sides. To exit the stretch, press your left palm firmly and slowly release your right hand, raising it back up towards the sky. Return your right hand to the tabletop position on the ground. Proceed with the left side’s stretch again.
W & Y Stretch & Retract
The W and Y stretches target the pectoral muscles while strengthening the lower trapezius muscles. This exercise improves overall posture and can be done anywhere, including the office.
How to do it:
- Stand with a straight back.
- Form a W shape with your hands and bend both arms to about a 90-degree angle, lowering them toward your stomach. Squeeze your shoulders and hold for 2 breaths.
- Create a Y shape with your arms by extending both arms upwards. Hold for 2 breaths.
- Hold each position for 1-2 seconds at the endpoint and aim for 10 repetitions.
Bridging Exercise
Bridge exercise (lying) is effective in strengthening the hip ext and improving body stability thereby enhancing posture Begin by lying down in a supine position with knees flexed. Place your feet on the floor your knees and keep your hands at your sides.
your glutes by your lower back into the and raise your hips with your knees, a bridge from your knees to your shoulders. Hold the position for about 2030 seconds and then your hips and knees to the starting position.
Other Variations of the Bridge Exercise
- Elevated Feet
- Straightened Legs
- Single-Leg Bridge
- Bridge March
Reverse Dumbbell Flyes
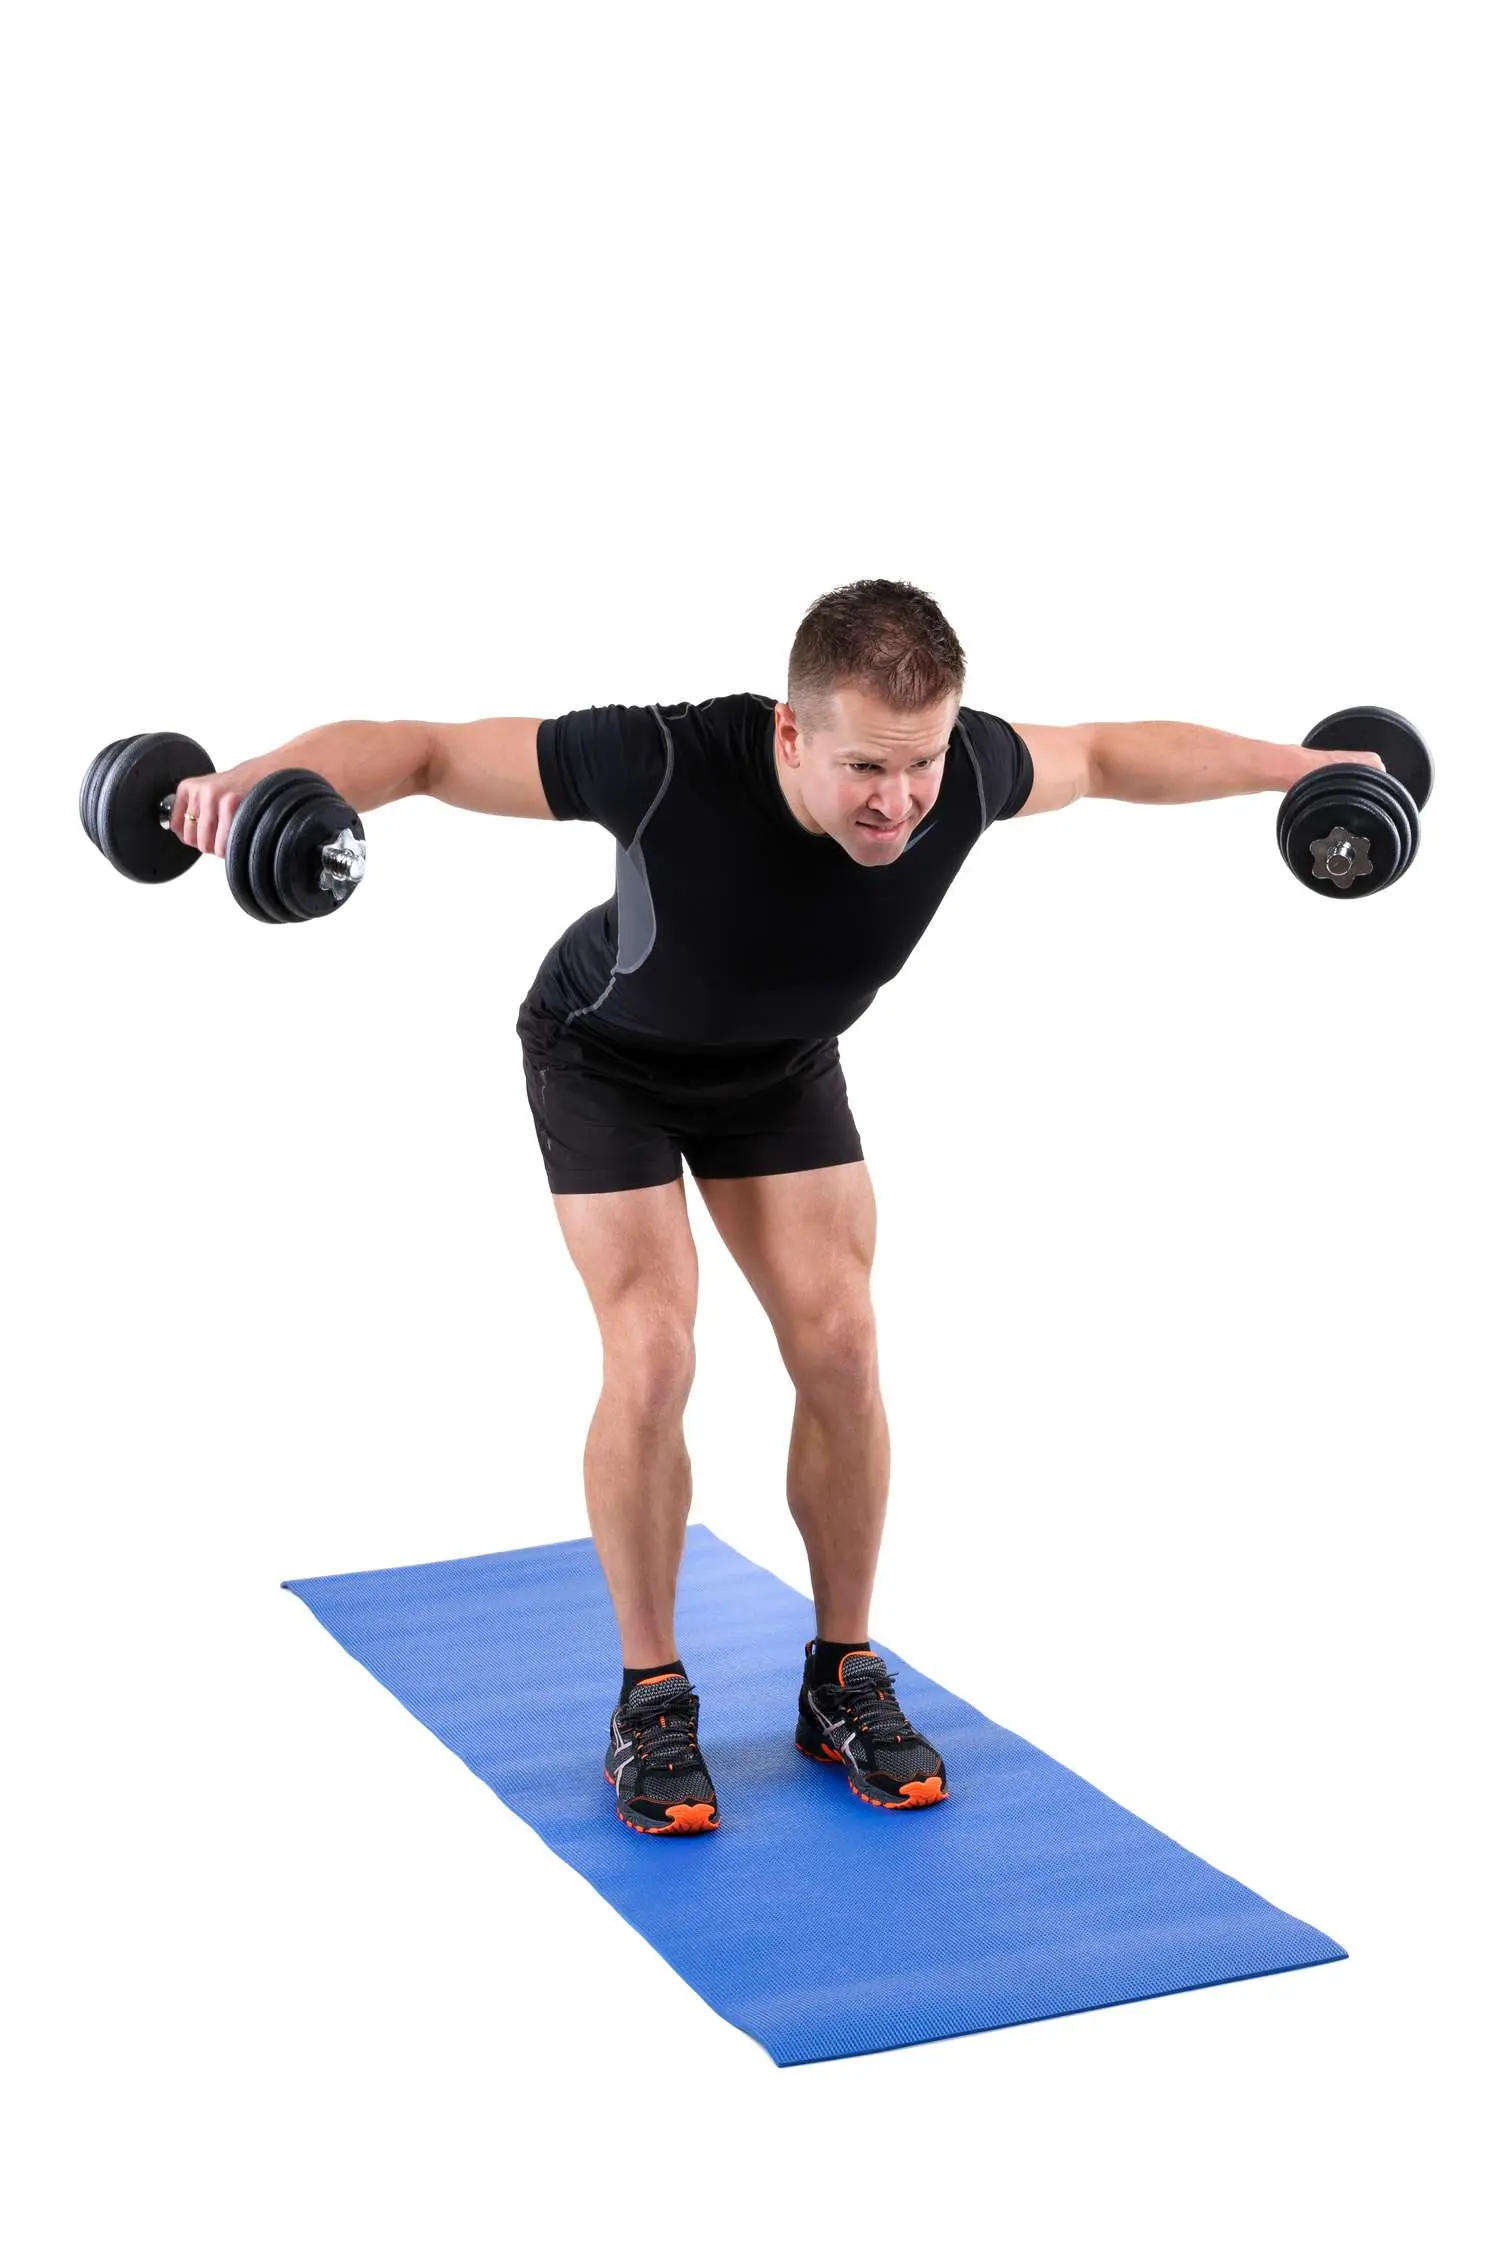
Reverse dumbbell exercises are a variation of the classic bodybuilding exercise known as the fly. Because of the resistance angle and shoulder rotation involved in each repetition, this exercise, which concentrates on isolating the shoulders, may also engage the infraspinatus muscle. It is important to note that reverse dumbbell flies may not be suitable for individuals recovering from injuries, as it requires a certain level of strength and stability in the rotator cuff.
To perform reverse dumbbell flies, start by gripping light dumbbells in both hands. Bend at the hips and knees, keeping your torso relatively parallel to the floor to maintain the optimal angle of resistance. If maintaining this position is challenging, you can use a bench for support.
Begin the exercise by allowing your arms to hang below your body. Contract your scapula and deltoids, then pull the dumbbells up and out, as if forming a “T” shape with your upper body. Raise the dumbbells as high as possible, then lower them back to the original position beneath your body to complete one repetition.
Face Pulls
For the face pull exercise, adjust the pulley system so that it is slightly above your head. Use a double-handled rope grip for this exercise. Grasp the handles with both hands, palms facing inward. Extend your arms fully and move backward, while engaging your core. Lean back slightly to achieve a 20-degree angle.
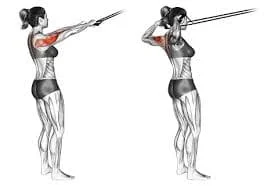
Pull the rope towards you to initiate the movement until the weight is slightly lifted off the stack. Brace your shoulders and roll them back to maintain a proper position, ensuring that they do not hunch or roll forward.
From this starting point, pull the handles of the rope straight towards your forehead. Keep your palms facing inward and allow your elbows to extend to the sides, drawing your shoulder blades together. Perform the movement in a smooth and controlled manner, maintaining good posture throughout. Start with two sets of 20 repetitions.
It is recommended to choose a lighter weight than you initially think you need and focus on slow and controlled movements. If you have any existing back or shoulder issues, consult with your doctor to determine if this exercise is suitable for you. If you experience discomfort or pain during the exercise, it is advisable to stop and seek guidance.
Other Variations of Face Pulls
- Try using resistance bands for added challenge and variety.
- Incorporate dumbbells into the exercise for a different feel and intensity.
- Adjust your grip on the handles to target specific muscles.
- Explore seated face pulls as an alternative variation.
Pelvic Tilt Exercise
The pelvic tilt exercise has several benefits. Not only does it stretch tight lower back muscles, reducing back pain, but it also helps develop deep core strength to support the body in daily tasks such as squatting and lifting.
- To begin the pelvic tilt exercise, lie on a mat or plinth with your knees bent and feet on the floor.
- Then, tighten your abs and glutes to flatten your lower back against the ground. You may notice your tail lifting slightly.
- Hold this back hip tilt position while focusing on engaging your abs.
- After completing each repetition, make sure to return to the starting position and let your glutes and abs relax completely before starting the next one.
With each rep, you should feel your hips, glutes, and pelvic floor muscles working. While the changes in muscle strength may not be as visible as when strengthening other muscles like your biceps, trust the process and know that you are making progress.
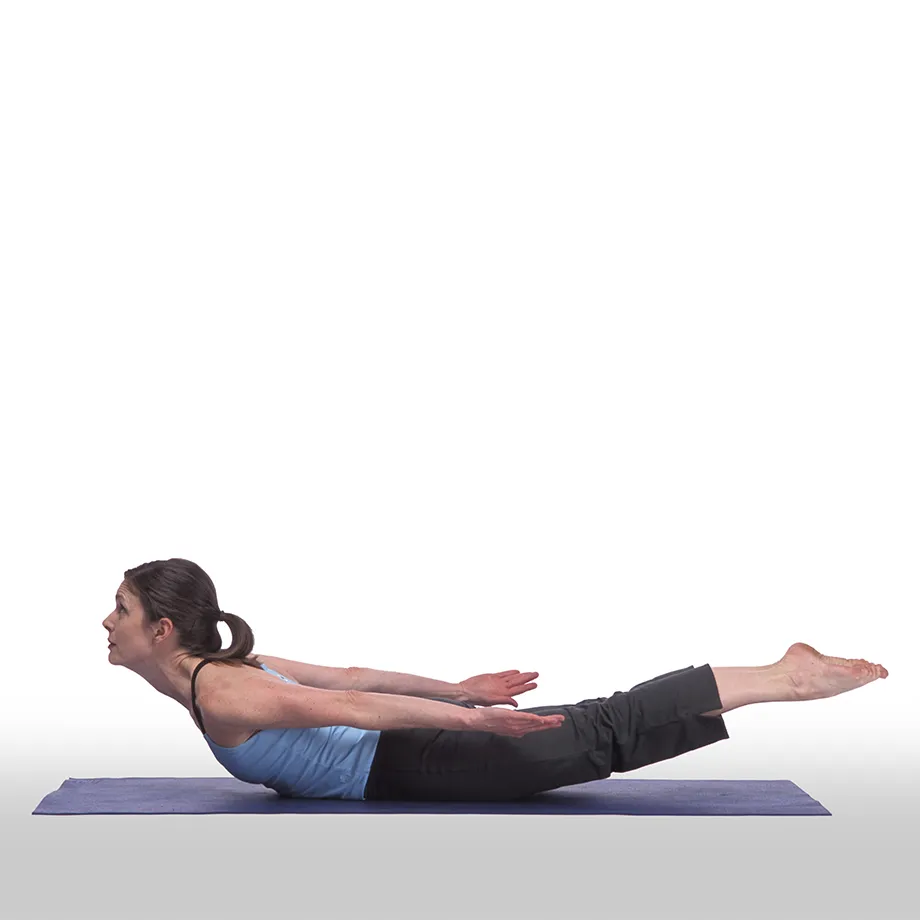
Superman Exercise
The Superman exercise involves several steps that should be followed to perform the exercise correctly:
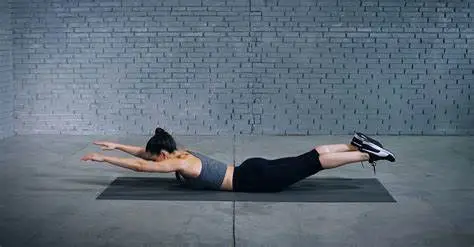
- Start by lying down: Lie on a mat or a bench in a face-down position with your legs straight and your arms extended in front of you.
- Slowly raise your arms and legs: While keeping your head in a neutral position and avoiding looking up, lift your arms and legs about 6 inches off the floor or until you feel your lower back contract. At the same time, engage your gluteus, core, and interscapular muscles. You can also try lifting your navel slightly off the floor to contract your stomach.
- Maintain the position: Imagine yourself as Superman flying through the air and stay in this position for 2-3 seconds. Remember to continue breathing while exercising.
- Lower your arms, legs, and stomach: Return your arms, legs, and stomach to the floor.
- Repeat the exercise: Perform 2-3 sets of 8-12 repetitions. Lift only as much as your body feels comfortable with. Even if you can only lift a few inches off the floor, it will still provide a great workout. If the full movement is too challenging, you can start by simply lifting your hands off the floor. Avoid lifting your head or overextending your neck, as this may cause pain or discomfort.
Bird-dog exercise
The bird-dog exercise is a simple core exercise that improves stability, promotes a neutral spine, and relieves lower back pain. It targets the entire body, strengthening the core, hip, and back muscles, while also helping to develop proper posture and maintain mobility. This exercise can be used to avoid injuries, realign the spine, and treat low back discomfort in persons of varied abilities, including elderly adults.
To perform this exercise, you will need a mat and can place a soft pillow or folded napkin under your knees for additional cushioning. You can check your alignment using a mirror.
Follow these steps:
- With your hands under your shoulders and your knees under your hips, begin in the table position while on all fours.
- Maintain a neutral back with your abs engaged.
- Shrug your shoulders and raise your left arm and right leg, keeping your shoulders and hips parallel to the surface.
- Tuck your chin into your chest and extend your neck so that it faces the floor.
- Hold this position for about five to ten seconds, then return to the starting position.
- Raise your right arm and left leg, and hold for about five to ten seconds.
- Return to the starting position. This completes one repetition.
- Repeat for 2-3 sets of 8-12 repetitions.
Knee to Chest
The knee-to-chest stretch is a simple static stretch done on the floor. Many people find this stretch helpful for relieving lower back pain and stretching the Erector Spinae muscles. Read on to learn more about the knee-to-chest stretch and its benefits. This stretch can reduce stress and tension in the lower back, making it beneficial and safe for individuals with osteoarthritis or other forms of arthritis. It also increases blood flow to the affected muscles and improves flexibility and range of motion. However, individuals with osteoporosis should avoid this stretch as it can increase the risk of compression fractures in the vertebrae.
Here’s how to perform the knee-to-chest stretch:
- Begin in the supine lying position on a mat or plinth, lying down on your back.
- Gently lift one bent knee and grab your calf with both hands.
- Interlace your fingers under your knee.
- If you’re doing the double knee-to-chest variation, lift both knees. However, it is recommended to start with the single knee-to-chest and then progress to the double knee-to-chest, especially for those experiencing more pain.
- Similar to the single-leg version, if you’re lifting both knees at the same time, curl your fingers or hook your wrists between your shins, just below the knee.
- Use your hands to gently pull the bent knee or knees towards your body.
- During the stretch, make an effort to keep your lower back, hips, and knees as relaxed as possible.
- Hold the stretch for a few seconds.
- Return your feet to the floor.
- Repeat the stretch on the other side.
- Aim to perform the stretch for 10-15 repetitions per session, doing three sets per day.
Cobra Pose (Back Extensor Exercise)
Cobra Pose is an exercise that increases spinal mobility, strengthens the supporting muscles of the spine, and can help alleviate back pain. This pose is particularly beneficial if you spend a lot of time sitting, as sitting can cause tension in the chest muscles and weaken the back muscles.
To perform the Cobra Pose, begin in a prone lying position. Place your palms on the surface of the mat directly below your shoulders. Extend your elbows straight back and keep them close to your sides. Gently lift your chest off the mat while maintaining a neutral position in your neck, looking directly at the mat. Keep your pubic bone connected to the floor and inhale as you lift your chest. Ensure that your elbows are fully extended throughout the exercise and avoid flaring your elbows out to the sides. Keep your neck in a neutral position, with your gaze focused on the floor. If you experience tension in your lower back, you can slightly lower yourself or rest on your forearms.
Regularly performing Cobra Pose can also help you sleep better, especially if you are postmenopausal and find it difficult to fall asleep. Research has shown that yoga can be more effective than aerobic activity in enhancing sleep quality.
Other Variations of Cobra Pose
- Cobra Lift: This variation involves lifting yourself into a Cobra Pose without using your hands for support.
- Cat-Camel Pose: Cat-Camel Pose is a gentle stretch that stabilizes the spine, abdomen, and back extensors. The detailed directions for completing this activity are as follows:
- Start in a quadruped position, ensuring that your wrists and shoulders are aligned in a straight line. Make sure to keep your core muscles engaged, keep your back flat, and maintain a neutral spine position.
- Take a deep breath. As you exhale, round your back towards the ceiling, pulling your belly towards your spine while maintaining core engagement. Release any tension in your neck and draw your chin towards your chest. This position resembles a cat stretch.
- Inhale and relax your stomach, allowing your back to arch. Lift your head as you bring your tailbone towards the ceiling. Avoid tensing your neck. This position is known as the cow position and combined with the previous posture creates the Cat-Cow Stretch.
Continue this exercise with the Cat-Cow Pose, engaging your whole body with each movement. Inhale as you transition into the cow pose and exhale as you move into the cat pose. Repeat the Cat-Cow Pose for at least five to seven rounds or until your hips, back, and neck are fully warmed up to achieve the full benefits of this pose. Cat-Cow Pose is a great warm-up before practicing yoga or engaging in other exercises, as it stretches and flexes the spine, promoting back flexibility and loosening the muscles.
Wall Push-Up
Push-ups are one of the most effective bodyweight exercises that you can incorporate into your routine. They target your arms, chest, back, and shoulders, requiring sufficient strength to perform multiple repetitions correctly. For beginners who are still unfamiliar with how to do a standard push-up, a wall push-up is a great option. By pressing against the wall, the load exerted by gravity is reduced, making the exercise more manageable. The only requirement for wall push-ups is a wall, with the distance between you and the wall being approximately one shoulder width apart.
To perform a wall push-up, follow these steps:
- Begin by placing both palms on the wall at approximately shoulder height and shoulder-width apart, with fingers pointing toward the ceiling.
- Gradually flex your elbows and lean your body towards the wall until your nose is almost touching it.
- Keep your back straight and your elbows bent at about a 45-degree angle (not straight out to the sides).
- Slowly push your back away from the wall to return to the original position.
When pressing against the wall, it is essential to maintain a neutral back and avoid leaning your hips forward. Visualize a straight line running from the top of your head through your back and down to your feet. Focus on executing slow and controlled movements rather than rushing through the exercise. This approach will help you maintain proper form for maximum effectiveness. To adjust the difficulty of this exercise, you can vary the distance between your feet and the wall. The further apart they are, the more body weight you will need to carry, making the exercise more challenging.
What is the surgical treatment for upper back pain?
medical treatment and physiotherapy do not the pain, the doctor may recommend surgical treatment. Surgical treatment for upper back pain is not common and mainly focuses on thoracic spine injuries.
Kyphoplasty or vertebroplasty are surgical procedures used to repair compression fractures caused by osteoporosis. During these surgeries, the doctor injects bone cement, which acts like glue, to stabilize the fractured vertebrae.
Spinal laminectomy or spinal decompression is performed when muscle pain is caused by spinal stenosis, which is the narrowing of the spinal canal. During this procedure, the surgeon removes the bony walls of the vertebrae that are causing pressure on the nerves, providing relief.
Microdiscectomy is recommended when pain is caused by vertebral disc bulging and compression on a nerve. This minimally invasive procedure involves the removal of a portion of the affected disc or the entire disc itself. It is considered the gold standard procedure for this condition.
How to Prevent Upper Back Pain?
It is not possible to prevent all causes of upper back pain, but some simple actions can help reduce the risk of experiencing upper back pain. These include:
- Take frequent breaks from prolonged sitting and lying down to stretch and engage different muscle groups in the back.
- Incorporate periodic stretching breaks while working at a desk to ensure that the muscles remain relaxed and strong.
- Engage in regular stretching exercises for the upper back muscles before engaging in any strenuous physical activities.
- When lifting heavy objects, make sure to avoid twisting and instead lift with the legs and core muscles, rather than relying solely on the back.
- Regular massages can be beneficial in reducing muscle tension and preventing upper back pain.
- Avoid carrying heavy backpacks or purses, especially during episodes of pain.
- Always maintain good posture, both when walking and sitting, by keeping the spine upright and maintaining an ergonomic sitting position.
Home remedies that can help manage upper back pain
- Heat therapy – Applying a heating pad or warm compress to the upper back can help relax tight muscles and increase blood flow. Use a heat wrap, warm shower, or bath to ease pain and stiffness.
- Cold therapy – Icing the back for 15-20 minutes several times a day, especially after activity, can help reduce inflammation. Use an ice pack, frozen gel pack, or bag of frozen vegetables wrapped in a towel.
- OTC medications – Over-the-counter anti-inflammatories like ibuprofen, naproxen, or aspirin can provide short-term pain relief. Acetaminophen helps with pain as well.
- Massage – Having someone gently massage the upper back muscles can help relieve muscle tension, spasms, and pain. Use massage oils to reduce friction.
- Stretching – Doing light shoulder rolls, chest stretches with arms crossed, and thoracic rotations can improve the extension and flexibility of the upper back. Avoid overstretching.
- Posture correction – Be mindful of posture and avoid slouching, as maintaining proper spinal alignment reduces strain. Use small pillows for support.
- Rest – Take breaks to rest the back muscles and change positions frequently. Limit activities that aggravate the pain.
- Topical analgesics – Creams, gels, and rubs containing menthol, capsaicin, or other ingredients can provide localized pain relief when applied to the upper back.
Lifestyle factors like managing weight, quitting smoking, and reducing stress can also complement these home remedies for upper back pain relief.
Summary
- Upper back pain is a common complaint that affects many people. Understanding the causes and treatments can help manage this condition.
- Muscle strains from poor posture, overuse injuries, ligament sprains, rib dysfunction, facet joint arthritis, disc injuries, and spine conditions like scoliosis can all contribute to upper back pain. Aging and degenerative changes are also factors.
- Localized pain, tenderness, soreness, aching, tightness, and spasms in the upper back region between the base of the neck and the top of the lumbar spine. Pain may radiate to surrounding areas.
- Doctors diagnose upper back pain through medical history, physical exam, range of motion tests, and imaging like X-ray or MRI to assess the vertebrae, discs, and nerves and rule out other conditions.
- Treatments include over-the-counter medications, ice/heat, massage, spinal manipulation from chiropractors or physical therapists, physical therapy modalities, exercises, and stretches for posture correction and strengthening.
- Effective exercises include chest openings, mid-back foam rolling, thoracic extensions, and rotations to improve flexibility and strengthen the upper back muscles. Proper form prevents further injury.
- Tips to help prevent upper back pain include maintaining proper posture, lifting correctly, managing weight, regular back exercise, stress control, and proper workstation ergonomics.
FAQs
Which factors are most often responsible for upper back pain?
The most common causes of upper back pain include muscle strains and sprains, poor posture, osteoarthritis in the spine, rib dysfunction, disc injuries, and spinal conditions like scoliosis.
What symptoms may occur with upper back pain?
Symptoms can include localized pain in the upper back area, tenderness, muscle tightness, soreness, aching, spasms, and reduced range of motion. The pain may remain in the back or radiate to the shoulders, arms, neck, or head.
When should I consult a doctor for upper back pain?
See your doctor if the pain does not improve with rest and home treatment after a few days, you experience numbness or tingling, the pain is severe or disrupts sleep, or you have other concerning symptoms like unexplained weight loss.
How is upper back pain diagnosed?
Doctors diagnose upper back pain based on medical history, physical exams assessing tenderness and range of motion, and imaging tests like X-ray or MRI to view the spine and surrounding structures.
What home remedies can I try for upper back pain relief?
Home remedies include cold/hot packs, OTC pain medication, massage, gentle stretches and exercises, proper posture, and sufficient rest. Avoid activities that aggravate the pain.
What are some long-term treatment options for chronic upper back pain?
Long-term treatments can include physical therapy exercises, spinal manipulations from a chiropractor or osteopath, massage therapy, pain medications, steroid injections, lifestyle changes, acupuncture, and surgery if conservative measures fail.
How can I prevent future episodes of upper back pain?
Prevention tips include maintaining proper posture, exercising to strengthen the back muscles, avoiding repetitive bending and heavy lifting, managing your weight, quitting smoking, and correcting any ergonomic issues at work.
When can I return to my regular activities after an upper back injury?
You can gradually return to your normal activities as the pain and any other symptoms improve while avoiding movements that aggravate the upper back. A doctor or physical therapist can guide you on safely increasing activity.
References
- Giorgi, A. (2023, May 17). 13 Causes of Upper Back Pain. Verywell Health. https://www.verywellhealth.com/upper-back-pain-7113604
- Professional, C. C. M. (n.d.). Upper Back Pain. Cleveland Clinic. https://my.clevelandclinic.org/health/symptoms/22866-upper-back-pain
- Prajapati, D. (2023, August 31). 35 Best Exercise for Upper Back Pain – Samarpan Physio. Samarpan Physiotherapy Clinic. https://samarpanphysioclinic.com/35-best-exercise-for-upper-back-pain/#Pelvic_tilt_exercise
- Vaghela, D. (2023, December 13). Upper Back Pain – Cause, Symptoms, Treatment, Exercise – Mobile. Mobile Physiotherapy Clinic. https://mobilephysiotherapyclinic.in/upper-back-pain/#What_are_the_Causes_of_Upper_Back_Pain
- Whelan, C. (2023, February 2). What’s Causing My Upper Right Back Pain and How Do I Treat It? Healthline. https://www.healthline.com/health/upper-right-back-pain#risk-factors

4 Comments