Blog

  • Contrast Bath Therapy

    Contrast Bath Therapy

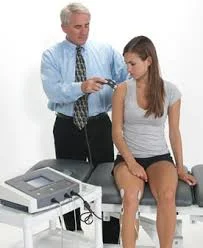
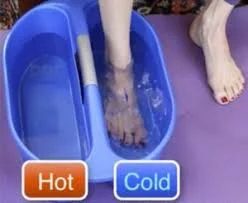
    Contrast bath therapy: what is it?

    In contrast bath therapy, the entire extremity or body part is submerged in ice water for a few minutes after being submerged in hot water for physical therapy purposes. Then, this procedure of switching between hot and cold is carried out repeatedly. The circulation around the damaged tissue may be improved with the use of the contrast bath.

    Muscle spasms, stiff joints, inflammation of soft tissues, edema, and pain in the upper and lower limbs are all treated by contrast bath therapy. Athletes are the ones who use contrast baths the most. Contrast baths are mostly used by athletes to relieve muscleaches and injury, as well as to hasten the healing process following injuries.

    It may sound agonising to submerge your body in hot water for a while and then in an ice-cold bath for a while, depending on how tolerant you are of extreme temperatures.

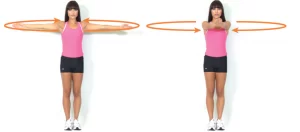
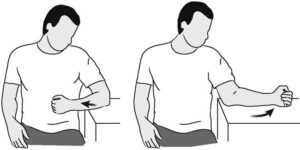
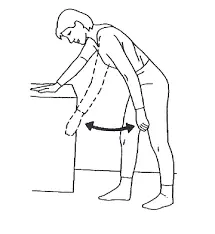
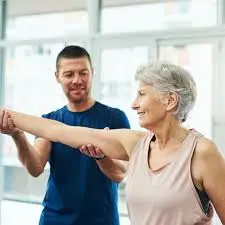
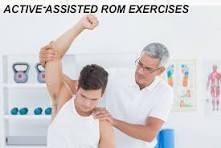
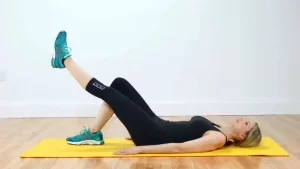
    For physical therapists, this is only one of numerous hydrotherapy treatment options that can help reduce pain and muscle spasms, increase muscular strength and range of motion, and enhance functional mobility.

    The contrast bath’s mechanics:

    A limb is repeatedly dipped in hot and cold water as part of a hydrotherapy procedure called a contrast bath. This is completed at a specific speed, temperature, and movement. Blood vessel vasoconstriction and vasodilation may result from the frequent change between the two temperatures, producing a pump action. Some people think that doing this will speed up blood flow to all of the tissues in your body.

    Despite being a popular therapy, there is no set protocol for the temperature of the water—warm or cold—or the duration of the treatment. To get the greatest outcome, different professionals could employ different temperatures and timings.

    Moreover, the contras bath therapy quickens blood flow, which could result in blood oxygenation and enhance the healing process. It might also improve waste product transportation, which would alleviate edema. The hot water causes the generation of more oxygenation. It is believed that hot water alters haemoglobin, a blood protein involved in oxygen transport, making it easier for oxygen to reach the tissues.

    The primary idea behind contrast bath therapy is the quick changes in the circulatory system that happen when you go from extremely hot to extremely cold water.

    The tiny blood vessels called capillaries in your body shrink in response to the cold when you submerge a portion of it or the entire body in cold water. Vasodilation is the term for this method.

    The opposite occurs if you submerge yourself in warm or hot water. Your blood vessels widen. It’s called vasodilation method.

    The idea behind the use of contrast baths in physical therapy is that the body’s tiny blood vessel capillaries instantly expand and close as a result of the abrupt transition from warm to cold water. When it’s cold, these tiny arteries constrict, and when it’s warm, they dilate.

    It is believed that the quick opening and closure of blood vessels close to the injury site will aid to minimise edema and inflammation surrounding the injury. Pain and mobility are enhanced by reducing edema and inflammation.

    Treatment Objectives:

    In the event that your physical therapist recommends using a contrast bath to address your injury, your treatment objectives will probably include:

    • Reduced pain
    • Restrained inflammation
    • increased mobility
    • Boost muscle regeneration following exercise

    How Contrast Treatment Functions:

    The mechanism by which contrast therapy works is by eliciting bodily responses to heat and cold. It functions according to the same ideas as cryotherapy (cold therapy) and thermotherapy (heat therapy). Blood arteries dilate (widen) when exposed to warmth, and constrict (narrow) when exposed to cold.

    Swelling may be lessened by the pumping action that results from switching between cold and warmth. Consequently, this can aid in reducing discomfort and enhancing joint flexibility.

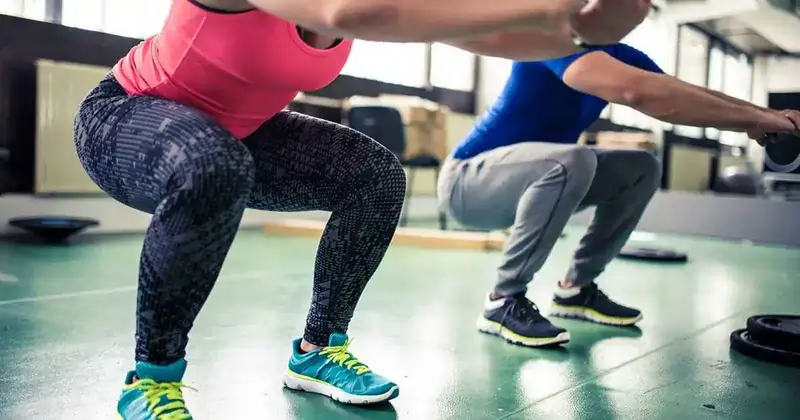
    Contrast therapy is frequently used by athletes to improve their recovery after exercise, as well as to treat soft tissue or joint injuries. In the wake of orthopaedic surgery, it can also be utilised to expedite healing.

    The following injuries respond well to contrast bath treatments:

    • fractures of the ankle and leg
    • Plantar fasciitis
    • displaced elbow
    • arthritis in the hands and fingers
    • Meniscus tear
    • anterior cruciate ligament (ACL) injuries

    The most common setting for contrast therapy is a temperature-controlled whirlpool bath. It is believed that the swirling action helps to further encourage pain relief and muscular relaxation.

    Contrast bath therapy advantages:

    lessens tiredness

    Contrast bath therapy may help athletes feel less exhausted after a game.
    The team athletes used contrast bath therapy, which entailed taking both cold as well as hot baths, to heal from tiredness 24–48 hours afterward the game.
    The benefits of submersion in cold water were not the same. as immersion mixed with heated water

    reduces pain in the muscles

    Muscle fibres are harmed by intense activity. However, you might not experience any discomfort for a day. We call this technique delayed onset muscular soreness.
    Elite athletes experiencing delayed onset muscle discomfort and weakness after intense exercises. When contrast bath therapy is used in place of passive relaxing alone, it decreases both irritation and weakening.

    It is important to consider two variables.

    • First, hot water temperatures below 104°F (40°C) produced the best outcomes.
    • Second, contrast bath therapy was nearly twice as effective as other widely used therapies, like submerging the patient in cold water alone, for reducing symptoms of weakness and discomfort.

    eliminates surplus lactic acid

    Your body produces lactic acid when you workout vigorously. Although lactic acid secretion is natural, it can nonetheless cause fatigue and pain.
    By resting, drinking water, taking a magnesium supplement, and adhering to a few other basic guidelines, you can lessen the symptoms that arise when lactic acid builds up in your body.
    By lowering the amount of lactic acid in your body, contrast bath therapy can also aid in your body’s healing from the aches and exhaustion that come with vigorous activity.

    reduces edema

    White blood cells and fluids are sent to the wounded area as part of your body’s natural inflammatory reaction when you get hurt. This fluid’s growth may put pressure on the wound and hurt.
    Three days after the accident, hundreds of patients with ankle sprains experienced less swelling thanks to contrast bath therapy.

    Conditions targeted in the contrast bath:

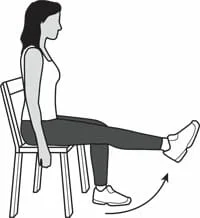
    Contrast bath therapy should be included as a routine component of rehabilitation for a variety of musculoskeletal ailments, particularly those caused by repetitive strain on the limbs. Any method for activating tissue without overstressing is beneficial for recovering from repetitive strain injuries, which typically require longer periods of rest. The most frequent users of the contrast bah are those who find it easier, more practical, and more successful to apply contrast to the limbs:

    • fractures of the upper and lower extremities.
    • arthritic hands and fingers, as well as other acute injuries to the extremities that require more than 72 hours to heal.
    • disorders correlated with decreased blood flow.
    • muscles that are overly taut, resulting in cramps or spasms.
    • Behaviours that encourage that lead to carpal tunnel syndrome or other repetitive strain injuries.
    • The chronic regional pain syndrome(CRPS).
    • Shin splints and plantar fasciitis.
    • tennis elbow
    • Achilles tendonitis

    Even though the knees are small joints, athletes can employ contras bath therapy to treat diseases including patellofemoral pain syndrome, iliotibial band syndrome, and runner’s knee with a little ingenuity.

    It is more difficult to regulate the temperature of the hips and shoulders for contrast bath therapy because they are wider, thicker, and frequently more fat-covered than the other body parts. Hips and shoulders are also more heavy to utilise. There is essentially no benefit to using a contrast bath for hip issues because the hip joint itself is most likely virtually entirely unaffected by its use. Naturally, contrast is much less pleasant or beneficial for conditions relating to the spine, such as back discomfort.

    It appears as though ligaments should have healed after a while, but ligament sprains heal very slowly and frequently become chronically uncomfortable. Contrasting may “increase healing” from sprains, but it’s unlikely that it would, therefore any therapy to speed up healing after the first swelling should be pursued in the hopes of a few tiny advantages.

    Contraindications: 

    If you have any of the following conditions, you should avoid using a contrast bath:

    If the patient’s extremities have a strong pulse, people with diabetes and neuropathies may find benefit from a contrast bath; nevertheless, this procedure must be carried out under the guidance of a physical therapist.

    Again, if you’re not sure if this treatment is good for you, speak with your doctor or physical therapist.

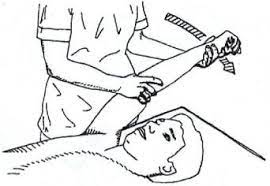
    How can contrast bath therapy be applied?

    • It takes two whirlpool tubs to complete a contrast bath. Transfer warm water into the first tub and cold water into the second. The ideal temperature ranges for the warm and cold tubs are 98–110 degrees Fahrenheit and 50–60 degrees Fahrenheit, respectively.
    • Since some physical therapy facilities only have one tub, they usually utilise a bucket for cold water and the tub for warm water instead of a tube.
    • Your damaged body part should be left in the warm whirlpool for three to four minutes by the therapist when both tubs have reached the proper temperature. Exercises involving mild motion may be required of you while receiving treatment.
    • then quickly transfer the affected area to the bucket or cold tub. Be prepared since the change from hot to cold can happen quickly and dramatically.
    • In overall, spend at least one minute in the water that is cold. Inform your physical therapist if you are unable to endure the low temperature for an extended period of time. They might have to put you back in the heated water.
    • For twenty to thirty minutes, this pattern of going from hot to cold and back to heat is usually repeated. Make sure your physical therapist is keeping an eye on the water’s temperature as you receive treatment. To keep the baths comfortable, the temperature will frequently need to be adjusted by adding more ice or warm water.
    • Your physical therapist should follow up with you after treatment to determine whether the results of the therapy were meaningful.
    • must always keep in mind, to begin with hot water and finish with cold water, with the following exceptions:
    • Rheumatoid arthritis: stop the hot water therapy and thoroughly dry the affected area.
      Use only cold water on a joint that is really swollen and heated.

    Apparatus for the contrast bath:

    Two sufficiently large containers that suit the body portion that needs to be treated and have the right shape.

    • A thermometer for a water bath
    • Towels should be draped for drying.
    • To remove the head bottle and add hot water, use a cold compress.
    • This refers to heating water for cold compression and cold baths in the event that a tub or washbasin is unavailable.

    Methods for applying contrast bath treatment:

    Numerous methods exist for heating and cooling the body. Keep in mind that, whenever achievable you should envelop the body part; immersion is always preferable to flow or spray. The primary temperature systems are:

    • immersion: in bathtubs, buckets, or sinks
    • draping: using cold packs, heating pads, or damp towels
    • drizzling or the spraying: immersion from a valve in a stream, containers, and a detachable shower head.
    • Contrasting should adhere to the fundamental framework below three to six cycles of cooling and heating.
    • More adjustments may become ineffective at some point.
    • Less than three times is most likely not worth the annoyance.
    • If it’s feasible, increase the contrast’s intensity as you get hotter and colder. With certain techniques, it’s simple.
    • after heating for around two minutes, comfortably warm
    • Cooling for approximately a minute—not freezing, just cool enough to make your skin feel tight
    • Heats up in around two minutes: hotter
    • after cooling for roughly a minute: cooler
    • Heating for about two minutes, or as hot as you can stand it
    • Cool for approximately one minute, as cold as you can stand it.
    • Many people think that cold is terrible, but you might be surprised at how bearable it is if you have a properly pre-warmed alternative option in place in case water baths are impractical or unavailable for the area that needs to be treated.
      The affected area should be covered with a warm compress or heating pad, which should be left on for three to four minutes.
    • For one (1) minute, switch between using an ice pack covered in a towel, a frozen washcloth, or a towel.
      Three more times, follow the previously stated instructions.

    Some advice on contras bathing:

    Remain warm. Generally speaking, you should apply the heat more slowly: for at least one minute, but possibly up to five, depending on how well your heating technique works. More comfortable and calming than cooling is heat, and the most common mistake people make when using contrast bath therapy is underheating the water.

    Stretch while the hot water is being treated. Stretching is caused by a fracture of the healing part, therefore avoid using it. If stretching is necessary, do it after heating. Before going on to the cold, reheat after stretching if you need to stop heating to begin the stretch.

    Adjust as you go. It’s lovely, but the difference doesn’t always get stronger as you receive treatment—the hot gets hotter and the cold gets colder.

    Since contrast has little effect on the deeper tissue, leave the contrast bath empty.

    the temperatures in the gastrocnemius calf muscle after receiving cold contrast treatment for 30 minutes and warm water treatment for 30 minutes The deep calf muscle did receive some mild heat from the hot tub, ranging from a few degrees for hot to several degrees for cold with several fluctuations.

    Nevertheless, during the contrast therapy, the temperature four cm below the skin’s surface rarely fluctuated; the calf’s depths looked to remain largely undisturbed. After the leg has warmed up, spend a minute dipping it in cold water.

    It is incomprehensible that the physiological impacts suitable for the variations

    Empty tissues may have a stronger effect; however, measurements were not made. Just because the temperature doesn’t change doesn’t indicate that the joints and connective tissues aren’t being meaningfully stimulated. In fact, the joints and connective tissues may react rather differently.

    However, it does imply that applying a contrast bath to target empty tissues increases the likelihood of its being beneficial.

    Comparing various body parts:

    You can usually apply the contrast bath most easily to your wrists, forearms, and elbows. This comes in particularly handy if you have two sinks. Just fill one washbasin with hot water and another with cold water, then take a step back.

    A water flow from the valve is an acceptable substitute if you only have one washbasin; just change the flow from hot to cold water.

    A valve might not be as effective as wrapping forearms in damp towels, ice packs, or heating pads. Few people own ice packs big enough for wrapping, although big ones are reasonably priced and accessible at most medical supply stores. Towels that are wet are untidy.

    In general, lower legs are harder. A pair of deep buckets requires a lot of setup work and specific buckets that are readily available; most users don’t utilise deep buckets since they are unaware of this optimal solution.
    The most useful shower valves for contrast are detachable ones, but the effect is not as potent as immersion—especially with a low-flow shower head.

    Generally speaking, bathtub valves provide enough water instead of a stream, which is nearly as pleasant as immersion, especially for the feet.

    Knees are simple to use but challenging to submerge. Large pails are undoubtedly the best choice, but they should only be used by those who are short in stature and are simple to erect. The best course of action is usually to pour water over the knee joint, especially if you also bathe your lower legs and feet in smaller buckets.

    Although the thighs and hips are especially difficult to employ contrast on, the effect was achieved by combining a hot bath with a sizable container of cold water used as a sitz bath. simple to assemble,

    Although it’s not the best use for the process, contrasting the back of the spine can be done quite easily in the shower. Applying a large amount of cold water to the back of the spine might be challenging for many people.

    Consequences of the contras bath at risk:

    • open injuries.
    • cardiac problems.
    • elevated blood pressure
    • deep venous thrombosis
    • localised cancers
    • Peripheral Vascular Disease (PVD)
    • weakened feeling
    • Severe bleeding and inflammation
    • diabetic neuropathy
    • Diabetes and neuropathies can benefit from a contrast bath if their upper and lower limb pulse rates are both healthy, but they must do it under a physiotherapist’s supervision.
    • burns from overheated water
    • Skin injury resulting from excessively cold water
    • The easiest method to reduce these dangers is to make sure the water you use for contrast baths is at the proper temperature.
    • Contrast bath therapy must be administered in pure, uncontaminated water. Infections could arise from contaminated water. An infection may be more likely to occur in the patient receiving therapy with tainted water. Adequate safety measures must be taken prior to using the contrast bath.

    Safety Measures for Contrast Bathing:

    • It is not recommended to use contrast baths on recently injured areas.
    • It is not advisable to start treatment until 48 hours have passed after the injury.
    • Contrast baths are a little less effective in colder rooms.

    FAQs

    How frequently are contrast baths possible?

    For a maximum of fifteen minutes, the water is submerged alternately, the first and last times being in cold water. The contras baths should ideally be taken three times a day.

    What is the recommended duration of submersion in cold water during contrast water therapy?

    In contrast, during contrast water therapy, some athletes like to alternate between submersion in warm and cold water. Many individuals either immerse themselves in an ice bath for five to ten minutes, or occasionally up to twenty minutes, or alternate between an ice bath and moderate water immersions, lasting one to five minutes each.

    Do contrast baths lessen edoema?

    A typical thermal intervention used by physicians, physiotherapists, athletic trainers, and athletes to aid posttraining recovery and minimise pain, edoema, and inflammation in the upper and lower limbs is the contrast bath.

    What is the duration of contras baths in your system?

    Under monitoring, contraceptives are safe to use, and when you urinate or have a bowel movement, your body naturally gets rid of them in a day or two.

    Can you receive contrast therapy every day?

    You can utilise contrast bath therapy almost anytime, and many individuals even include it into their everyday regimen. For the best results in reducing inflammation and discomfort after a strenuous workout, contrast treatment sessions should be used right after.

    A contrast bath: what is it?

    A contrast bath consists of periodically immersing a limb in hot and then cold water for a predetermined duration, length, and temperature.

    What is a contrast bath known by another name?

    One type of hydrotherapy is a contrast bath. It’s sometimes referred to as hot/cold immersion treatment. When there may be a decrease in blood flow, it entails applying hot and cold water to the damaged area to encourage circulation and minimise discomfort.

    Which conditions don’t apply to contrast baths?

    These conditions preclude using a contrast bath:
    Insomnia Perspiration
    Skin coldness
    ulcers on the legs
    skin conditions.

    Are baths with contrast safe?

    Contrast treatment is a great, simple, safe, and inexpensive option for mending injuries when done appropriately. The idea is to get your tissues moving again after the sudden alterations, which means a lot of metabolic and circulatory activity.

    Referance

    • Vastralphysiotherapyclinic. (2023b, November 15). Use of Contrast Bath in Physiotherapy. Mobility Physiotherapy Clinic. https://mobilephysiotherapyclinic.net/use-of-contrast-bath-in-physiotherapy/#Contraindications
    • Pt, B. S. (2024, May 3). Benefits of Hot and Cold Contrast Therapy Baths. Verywell Health. https://www.verywellhealth.com/contrast-bath-in-physical-therapy-2696628
    • What Is a Contrast Bath? (2023, July 7). WebMD. https://www.webmd.com/pain-management/what-is-a-contrast-bathCopy
    • Mandaliya, D. (2023a, December 13). Contrast bath therapy – Benefits, Indication, Contraindication. Mobile Physiotherapy Clinic. https://mobilephysiotherapyclinic.in/contrast-bath-therapy/#Risk_factors_of_the_contras_bath
  • Shoulder Range Of Motion Exercise

    Shoulder Range Of Motion Exercise

    Introduction of Shoulder Range of Motion Exercise

    Exercises for the shoulder range of motion can be classified as active, passive, or assisted because they include moving the shoulder through its whole range of motion with or without assistance.

    This is a reference to an exercise regimen designed to enhance the shoulder joint range of motion. The way the bone surfaces inside the shoulder joint are arranged, the joint capsule, ligaments, tendons, and muscles that work on the shoulder joint are all factors that influence this motion.

    A Brief Overview of the Three Kinds of Range-of-Motion Activities

    When performing a passive range of motion exercise, the person’s shoulder joint remains fully relaxed while an external force moves the body part in this case, the shoulder through its entire range of motion. This range of motion could be the outcome of most of the motion used by a therapist or by someone helping the patient.

    The last type of exercise is the active range of motion, which involves a person moving their shoulder joint totally. It is not recommended to apply any external force during this kind of exercise.

    Passive Shoulder Range of Motion Exercise

    This is helpful for shoulder joints that have become immobile as a result of trauma or even paralysis episodes. A therapist moves the upper limb or other body part of the tight shoulder joint while gradually stretching the muscles and instructing the patient how to move appropriately. To encourage quicker healing of the stiff shoulder joint, therapeutic stretching activities are typically combined with passive range-of-motion exercises. Here, the therapist stretches the shoulder’s soft tissue to release tension and relax the muscles around it.

    The most popular and secure passive range of motion (ROM) exercises for the shoulder involve stretching the nearby muscles in an effort to improve their suppleness. While these exercises help a patient hold the stretch longer, the best approach to perform passive range of motion exercises for the shoulder is to have a physical therapist assist with the stretch. To improve muscle flexibility, a skilled practitioner does this kind of exercise by moving the upper arm into a stretch and holding it there.

    This is better in a few ways.
    First, the physical therapist is aware of appropriate boundaries and knows when to draw them. The physical therapist is also aware of how long to hold the stretch.

    Finally, in order to maximize benefits, therapists are educated to determine whether they are focusing on the right location. keeping that in mind.

    In which conditions should a physical therapist perform a passive range-of-motion exercise on the shoulder joint?

    Shoulder passive range of motion (PROM) exercises are usually employed in the following situations: paralysis attacks, comatose patients, healing fractures, and pain that is evoked during active muscle contraction. Combating the detrimental consequences of immobilization is one of the primary objectives of PROME; nonetheless, it is crucial to keep in mind that muscle atrophy cannot be stopped by passive range of motion (PROM) exercise.

    A Few Advantages of Shoulder Exercises Using a Passive Range of Motion:

    Exercises that promote the passive range of motion not only help maintain healthy joint functionality but also help patients feel better by lowering pain, encouraging healing, and regaining and maintaining. They also help patients gain muscle mass, which improves blood flow and oxygen levels.

    Guidelines for Passive Range of Motion

    • Maintain constant support for an arm’s weight.
    • Provide support both above and below the patient’s moving shoulder joint.
    • Maintain both slow and fluid movements.
    • If the shoulder joint or muscle is stiff, do not push the motion.
    • The therapist should restrict their movements to what the shoulder joint or muscle will tolerate.
    • There should be no pain during the passive range of motion. Stop the shoulder motions and inform the therapist if they pain.

    Passive Range of Motion Exercises:

    • Passive Shoulder Flexion up to 90Degrees
    passive-shoulder-flexion
    Passive shoulder flexion

    The therapist then uses gentle pressure to support the arm at the elbow and wrist/hand. The patient should then be informed when the therapist gradually raises the arm to a 90-degree angle at shoulder height and attempts to move the arm during the movement. Don’t turn more than ninety degrees during the initial phase. Perform ten rounds in a session. Work out three times a day.

    • Passive Shoulder Abduction up to 90Degrees
    Passive shoulder abduction
    Passive shoulder abduction

    First, have the patient lie down in a comfortable posture on the plinth. Next, the physical therapist applies gentle pressure to the elbow and wrist/hand regions of the arm. After that, instruct the patient to try to move their arm in the direction of the motion as the physical therapist slowly moves it, Don’t turn more than ninety degrees during the initial phase. In one session, perform ten repetitions. Work out three times a day.

    • The Passive Range of Motion Exercise: Towel Stretch

    Place a towel horizontally in your hands. An advanced variation of this exercise can also be performed by the patient with a towel draped over their healthy shoulder. Perform this Exercise in one session ten to twenty times a day. Work out three times a day.

    • Supine Passive External Rotation

    After about ten seconds of holding, release the arm. Perform ten rounds in a session. Work out three times a day.

    • Supine Passive Internal Rotation

    Additionally, push on the affected arm’s hand with the cane or long stick in the other hand to cause the affected arm to rotate inward. After about five seconds, release one arm. In one session, perform ten repetitions.

    • Standing Passive Internal Rotation
    passive-internal-rotation
    passive-internal-rotation

    First, instruct the patient to stand in the doorway with their back to the door frame or close to the wall’s edge. The hand should be placed against the wall or doorframe, and the affected arm should be held firmly against the side with the elbow at the correct (90-degree) angle. Rotate the body in the direction of the wall or door with the feet to cause the shoulder to rotate inward.

    • Standing Passive External Rotation
    Passive-external-rotation-workout
    Passive-external-rotation-workout

    Begin by instructing the patient to stand in a doorway with their back to the door frame or even close to a wall’s edge. After that, maintain the injured arm firmly against the side with the elbow at the proper (90-degree) angle while holding the hand across from a wall or door frame. Rotate the body away from the wall or door by shifting the feet to cause the shoulder to rotate outward.

    • Standing Passive Forward Flexion

    Raise one arm while maintaining a straight elbow. Repeat ten times at a 90-degree angle. Complete ten repetitions fully overhead if the patient is able to do so without straining their shoulder blades.

    • Passive Forward Elevation

    The purpose of these Exercises is to enhance the passive forward elevation of the shoulder. Perform a minimum of ten repetitions of each of these exercises in a single session. Work out three times a day.
    Then, with the aid of a healthy hand, raise the cane over the patient’s head or as high as possible. Try the same exercise while sitting up straight in the chair if it doesn’t hurt. Perform ten rounds in a session. Work out three times a day.
    Assisting the affected arm with forward flexion: Whether seated in a chair or lying down on your back, use your unaffected arm to support the affected arm.
    Wall slides: To move the body forward and climb or even “walk” the wall, use your fingers.

    • Passive Shoulder Flexion
    Passive shoulder flexion
    Passive shoulder flexion

    The therapist should then hold the arm at both the wrist and elbow. Next, move it upward and straight ahead toward the side of the ear. Return to the embarking position after that. Perform ten rounds in a session. Work out three times a day.

    • Passive Shoulder Extension

    First, instruct the patient to lie down in a comfortable posture (such as a supine position), with their palm facing up. Next, grasp the arm at both the wrist and elbow. Ten times during a session, do it. Work out three times a day.

    • Passive Shoulder External Rotation

    The therapist should then gently move the arm to the side, level with the shoulder. The arm should be held at the elbow and wrist while bent, and it should be rolled forward toward the bedside. Raise the shoulder gently. Perform ten rounds in a session. Work out three times a day.

    • Passive Shoulder Internal Rotation

    Subsequently, the therapist ought to rotate the arm to the side at shoulder height. In one session, perform ten repetitions. Work out three times a day.

    • Passive Horizontal Abduction

    Ten times during the session, repeat this exercise. Work out three times a day.

    • Passive Shoulder Abduction

    Ask the patient to lie down in a comfortable posture, such as supine, to begin. A physical therapist should then grip an arm at the wrist and elbow. The medical professional then moves it away from the midline of the body and makes an attempt to contact the ear. Return to the starting position after that. In one session, perform ten repetitions. Work out for three a day.

    Ask the patient to lie down in a comfortable posture, such as supine, to begin. A physical therapist should then grip an arm at the wrist and elbow. The medical professional then moves it away from the midline of the body and makes an attempt to contact the ear. Return to the starting position after that. In one session, perform ten repetitions. Work out three times a day.

    pully-exercise
    Passive Shoulder Flexion as Well as an Extension With the use of a Pulley and Rope
    • Passive Shoulder Flexion as Well as an Extension With the use of a Pulley and Rope

    Tell the patient to get into a comfortable position before starting, such as sitting on the table. The patient should be instructed by the therapist to grip the rope’s two ends in each hand. At the finish, hold for two to three seconds, then gradually let the affected arm descend. Ten times throughout each session, repeat this action with both the damaged and uninjured hands. Work out three times a day.

    • Adduction and Abduction of the Shoulders Passively Using Rope and Pulley

    The therapist should first instruct the patient to settle into a comfortable position, like sitting at a table. Next, fasten the pulley to a hook above or above a door. Next, let the damaged arm raise by using the healthy arm to pull the rope down and up. At the finish line, hold for the following two to three seconds before lowering the wounded arm gradually. In a single session, perform this motion or activity ten times using both affected and unaffected hands. Perform this drill thrice daily.

    Active-Assisted Shoulder Range of Motion Exercise

    As the name suggests, the primary source of assistance for these exercises is either the patient or a physical therapist, either partially or completely. The patient performs the majority of the movement, but little help is provided to ensure that the shoulder movement is performed appropriately. Most often, weakness or even pain from bumps, bruises, or accidents, up to major injuries, is the reason for this limited shoulder motion. Before assisting with movement, a therapist typically secures the shoulder joint with a band or strap. When doing these exercises, a patient may initially experience severe pain and weakness, but with time, there is a good chance that their range of motion around the shoulder joint will gradually and permanently improve.

    A Few Advantages of the Active-Assisted Range of Motion Exercise for the Shoulders

    • Increase the shoulder joint’s range of motion.
    • Enhance the effectiveness of motion.
    • Increase independence.
    • Reduce the soreness in your shoulders.

    Active-Assisted Range of Motion Exercises:

    • Supine Active-Assisted Arm Elevation

    Start by lying on your back. The wounded arm should then be raised upward, almost like you would bring an arm aloft, utilizing the strength of the uninjured arm, and then carefully lowered back to the bed. Ten times during a session, do it. Work out twice a day.

    • Supine Active-Assisted Forward Flexion
    Supine active-assisted forward flexion
    Supine active-assisted forward flexion

    Tell the patient to lie on his or her back first. Next, with the damaged arm supported by the uninjured arm, elevate the injured arm up and then back down as though reaching aloft while holding the stick with both hands about shoulder-width apart. Every repeat, hold for ten seconds. Perform three sessions a day, with ten repetitions for each session.

    • Behind The Back Active-Assisted Internal Rotation

    Initially, assume a sitting or standing position, and place the damaged arm’s hand behind your back near your waist. Help the damaged hand go closer to the shoulder blade by using the therapist’s healthy hand. The patient follows the therapist’s instructions to raise their hand, but if they are unable to do so, the therapist helps them to reach their full range. Ten more seconds of holding, then let go. Ten times during a session, do it. Work out twice a day.

    • Active-Assisted Forward Elevation (Either in a Seated or Supine Position): (upper arm rise)

    The patient has the option to sit or stand throughout this stage. If lying on the back is more comfortable, start there and work your way up to standing or even sitting until the patient reaches their maximum range of motion. Look straight ahead while maintaining an erect posture and standing up straight. In the beginning, the healthy hand is used to aid with both the ascent and descent throughout this length, in addition to the injured arm. The patient can raise and lower their arm on their own as they gain strength. Lifting the wounded arm to the point of pain or as high as feasible is the best course of action.

    • Active-Assisted Shoulder Extension and Flexion Using a Pulley and Rope

    First, instruct the patient to settle into a comfortable position, like sitting at a table. The pulley can then be fastened to a hook above or above a door. Using both hands, grasp the rope’s two ends. At the finish line, hold for five seconds before lowering the wounded arm gradually. Ten times during a single session, repeat this motion with both affected and unaffected hands. Perform this drill three times in a single day.

    • Active-Assisted Abduction of the Shoulder and Adduction Using a Pulley and Rope

    The therapist should first instruct the patient to settle into a comfortable position, such as sitting at a table. Ten times throughout each session, repeat this gesture or action with both damaged and uninjured hands. Perform this three times a day.

    • Exercise Using a Stick to Actively Assist Shoulder Extension and Flexion Range of Motion
    Active-assisted shoulder flexion and extension
    Exercise Using a Stick to Actively Assist Shoulder Extension and Flexion Range of Motion

    First, instruct the patient to assume a comfortable position, such as a supine position or a sitting position with a supported back. The patient should then be instructed by the therapist to move their shoulder upward, or to the side of their ears, using a healthy hand while holding the two ends of the stick in both hands. Perform this exercise ten times in a session, three times a day.

    • Active-Assisted Shoulder Abduction and Adduction Range of Motion Exercise With The Use of a Stick

    First, instruct the patient to assume a relaxed position, such as sitting with their back supported or lying supine. The patient should then be instructed by a physical therapist to hold the two ends of a stick in both their affected and unaffected hands. The uninjured hand should be used to move the shoulder upward by moving it side to side, but the injured hand must be worked during this movement. If the injured hand is not working, the uninjured hand should work, i.e., towards the side of the ear. Ten times during a session, do it. Work out three times a day.

    • Exercise for Active-Assisted Shoulder Internal Rotation Range of Motion Using the Stick
    Internal Rotation
    Internal Rotation

    Initially, instruct the patient to assume a comfortable posture, such as sitting with their back unsupported and their elbows 90 degrees bent. The patient should then be instructed by the physical therapist to hold the two ends of the stick in both their injured and uninjured hands. The affected hand must be worked while performing the internal rotation movement; if the affected hand is not functional, the healthy hand should function. Perform this drill ten times in a single session. Work out three times a day.

    • Active-Assisted Shoulder External Rotation Range of Motion Exercise With the Use of the Stick

    The patient should then be instructed to hold the two ends of a stick in both hands by the therapist. The unaffected hand should be used to move the shoulder outward, but the injured hand must be used to perform the external rotation motion; if the injured hand is not functional, the good hand should function. Ten times during a session, do it. Work out three times a day.

    • Active-Assisted Shoulder Flexion and Extension Range of Motion Exercise With the Use of The ladder
    finger-ladder
    Active-Assisted Shoulder Flexion and Extension Range of Motion Exercise With the Use of The ladder

    Instruct the patient to take a position in front of the finger ladder before proceeding. Subsequently, set the affected hand on the finger ladder, raise the fingers by increasing the ladder’s steps as much as you can, flex your shoulder, and return to the neutral position. Ten times during a session, do it. Work out three times a day.

    • Active-Assisted Shoulder Abduction and Adduction Range of Motion Exercise With the Use of the Ladder

    First, have the patient stand ninety degrees away from the finger ladder with the injured side facing the ladder. Subsequently, elevate an injured hand on the finger ladder, move the fingers upward on the ladder (i.e., maximize the ladder’s steps), and do shoulder abduction before returning to the initial position. Ten times in a single session, do it. Work out three times a day.

    Active Shoulder Range of Motion Exercises:

    The Active Range of Motion Exercise has a few objectives.

    • Increase your strength
    • Maintain or improve endurance
    • Promote circulation
    • Maintain or extend range of motion (ROM)

    Precautions or Even Patient Education:

    • The elbow joint has no active range of motion (AROM).
    • No excessive shoulder stretching or range of motion for external rotation
    • Using the sling to reduce the amount of biceps activity
    • No object lifting using the working shoulder
    • Make sure incisions are dry and clean.

    Active Range of Motion Exercises

    • Active Circles

    First, instruct the patient to lean forward in order to disengage their arm from their body. Following that, the patient should be instructed by the therapist to spin their arm ten times in a clockwise direction and ten times in an anti-clockwise direction during each session. Work out three times a day.

    • Active Shoulder Shaping Up and Down and Clapping
    Active shoulder movement
    Active Shoulder Shaping Up and Down and Clapping

    First, instruct the patient to get into a comfortable position, such as standing. Subsequently, the patient should be instructed by the therapist to raise their arm above their head and forward. Try raising it then such that the inner arm makes contact with the ear and gives a clap. Raise an arm back up and away. Return it as far behind the body as you can. Ten times during the session, repeat this exercise. Work out three times a day.

    • Moving your shoulders actively and clapping from side to side

    Initially, the patient should be instructed by the therapist to assume a comfortable position, such as sitting or standing. Following that, the patient should clap and extend their arm as high over their head as they can. Put the arm back on the side. Ten times during a session, do it. Work out three times a day.

    • Active Shoulder Rotation
    Active shoulder rotation
    Active shoulder rotation

    Starting out, the patient should be given an order by the therapist to raise both shoulders toward the ears, mimicking a shrug. Release the shoulders and lower them to the embarking position. Retract your shoulders. Next, let them relax once again. Make a smooth circle motion with the shoulders. Next, roll your shoulders in the opposite direction in a smooth circle. Perform ten rounds in a session. Work out three times a day.

    • Active Shoulder Flexion
    Active shoulder flexion
    Active shoulder flexion

    Initially, the patient should be instructed by the physical therapist to sit or lie down in a comfortable position for shoulder flexion exercises. The therapist should next instruct the patient to slowly raise their hand toward the ceiling while keeping their elbow straight, starting with the arm by the affected side. Next, carefully lower the arm by its side while maintaining a straight elbow. Ten times during the session, repeat this exercise. Work out three times a day.

    • Active Shoulder Extension

    For the first shoulder extension exercise, the therapist should instruct the patient to lie down comfortably or sit with their hand flexed. The physician should next instruct the patient to carefully bring their hand toward the ground while keeping their elbow straight, starting with the arm by the damaged side. Work out three times a day.

    • Active Shoulder Abduction
    Active shoulder abduction
    Active shoulder abduction

    Before beginning shoulder abduction exercises, the therapist should instruct the patient to find a comfortable position, such as sitting, side lying down, or supine. The physical therapist should next give the patient instructions to begin this exercise with their arm by the damaged side. They should be instructed to slowly lift their hand and move it toward the ceiling while keeping their elbow straight. Next, carefully lower one arm back down by its side while maintaining a straight elbow. Work out three times a day.

    • Active Horizontal Adduction(transverse flexion)
    Active horizontal adduction
    Active horizontal adduction

    Next, give the patient instructions on how to move their humerus in a transverse or horizontal plane, both toward and across their chest. Ten times during a session, do it. Work out three times a day.

    • Active Horizontal Abduction(transverse extension)

    The patient should next be instructed by the therapist to move the humerus in a horizontal or transverse plane, sometimes known as horizontal abduction.

    • Active Shoulder Internal Rotation
    Active shoulder internal rotation
    Active shoulder internal rotation

    Initially, the therapist directs the patient to lie down or stand in a posture that is comfortable for them. Subsequently, the therapist should direct the patient to elevate their arm to shoulder height at a 90º angle to their body. They should then twist their hand inward when standing or upward when lying down until their elbow is parallel to their hand. Next, turn the hand slowly to the embarking position. Ten times during a session, do it. Work out three times a day.

    • Active Shoulder External Rotation

    First, the patient should be instructed by the physical therapist to lie down or stand in a comfortable position. The doctor should then direct the patient to lift their arm to shoulder height at a 90º angle to their body. If the patient is supine, they should twist their hand downward until it is even with their elbow. Allow the hand to rotate slowly to the embarking position after that. Ten times in a single session, do it. Work out three times a day.

    • Diagonal Active Abduction

    Tell the patient to stand correctly first. Proceed to move the humerus along the diagonal plane, which is at an angle with respect to the midline of the body. Ten times during a session, do it. Work out three times a day.

    • Diagonal Active Adduction

    Initially, the patient should be instructed by the therapist to move their humerus in a diagonal plane towards the body’s midline. Ten times in a single session, do it. Work out three times a day.

    • Finger Walk
    Finger walks
    Finger walks

    One type of active-assisted exercise that the patient should perform with the aid of the wall is this one. First, the patient who is facing the wall three-quarters of an arm’s length away should receive instruction from the therapist. Subsequently, extend your arm and use your fingertips to make contact with the wall at waist height. Once the patient has raised his or her arm as far as is comfortable, carefully walk the fingers up the wall in a spider-like motion with the elbow slightly bent. Lower the arm slowly, using the healthy arm to help if needed. Ten times in a single session, do it. Work out three times a day.

    • Exercises to Flexion and Extension the Pendular Shoulders
    Exercises to Flexion and Extension the Pendular Shoulders

    First, instruct the patient to stand with their wounded arm hanging down to the side and to slant slightly at the waist. As pain permits, begin by bending over as little as possible. As comfort and pain permit, gradually bend over more to get greater movement. Next, make little circles with the body by swinging it back and forth with the weight of an arm and gravity. Arm movements: forward, backward. Perform ten rounds in a session. Work out three times a day.

    • Adduction Exercises with Pendular Shoulder Abduction
    Adduction Exercises with Pendular Shoulder Abduction

    To begin, instruct the patient to stand up, bend slightly at the waist, and hang their affected arm to the side. As pain permits, start by bending slightly over, and as comfort and discomfort permit, gradually bend even more to obtain more range of motion. Next, move your body in small circles by swinging it back and forth with the weight of an arm and gravity. Arm movement: side to side. In one session, perform ten repetitions. Work out three times a day.

    • Pendular Shoulder Rotation Exercises
    Pendular Shoulder Rotation Exercises

    First, instruct the patient to stand with their arm hanging down at the side and to slant their body slightly at the waist. As soon as pain permits, begin by bending over as much as possible. As comfort and discomfort permit, gradually bend over more to obtain more movement. Turn and counterturn the arm. Perform ten rounds in a session. Work out three times a day.

    FAQs

    What is the shoulder’s functional range of motion?

    A person needs about 120° of forward elevation, 45° of extension, 130° of abduction, 115° of cross-body adduction, 60° of external rotation, and 100° of internal rotation to successfully do the activities of daily living.

    What kind of exercise makes your shoulders stronger?

    It can be done standing with a barbell or dumbbells or seated with a pair of dumbbells. To work on any weaknesses in your muscles, use the dumbbells if you see any imbalances.

    What’s the name of the shoulder joint?

    The glenohumeral joint, commonly referred to as the shoulder joint, is a ball and socket joint that has the largest range of motion in the human body.

    What causes a limited range of motion in the shoulder?

    Your shoulder’s range of motion may be restricted by an injury to any area of the shoulder or by a chronic illness that results in shoulder degeneration. Shoulder arthritis is one condition that may make it more difficult for you to move your shoulder.

    How do I get more range in my shoulders?

    Internal Rotation: Turn your arms down so that your palms are in contact with the wall, as opposed to up. Shoulders coming forward or arms falling are used to accomplish this.

    What shoulder rotation exercise is there?

    Rotation of the Shoulders Supported (Assisted)
    Maintain a stationary elbow and a downward, unified shoulder blade position. Move your forearm in the indicated direction. Alternatively, you can use a cane or stick to help extend your arm during this exercise while maintaining your elbow at your side. Ten repetitions are required for each session.

    How do you work on the range of motion in your shoulders?

    Flexion forward while standing
    Raise the arm while maintaining a straight elbow. Perform ten iterations at 90 degrees.

    Which five shoulder motions are there?

    This mobility in the upper extremities allows for large ranges of motion, such as flexion, extension, internal and external rotation, and 360° circumduction in the sagittal plane. The shoulder also permits scapular depression, elevation, retraction, and protraction.

    Which range of shoulder ROM is normal?

    Shoulder flexion ranges normally from 180 degrees. To do this, raise your arms as high over your head as possible, starting with your palms against the side of your body.

    How can the shoulder range of motion be restored?

    Maintaining proper posture while sitting up straight and placing your hand on a table towel with your thumb pointing upward. Gently extend your hand sideways as far as it is comfortable to do so. Return to your starting place cautiously and slowly.

    How can I extend the range of motion in my joints?

    Strengthening exercises are frequently recommended in addition to or soon after the range of motion exercises since greater joint movement without corresponding strength increases run the risk of re-injury.

    What is the shoulder joint’s range of motion?

    A 180-degree range of motion is typical. This motion is also somewhat assisted by the brachial muscles. Extension: Bringing the upper limb posterior in the sagittal plane is its definition.

    What is shoulder range of motion exercise?

    Exercises for Shoulder Range of Motion (ROM)
    You can move the injured joint in all directions that it should be able to move with the use of shoulder range of motion exercises. These are active exercises because you perform them on your own, without assistance from others, using your own muscle strength and force. This enhances the general strength and functionality of the muscles surrounding your shoulder.

    References

    • Prajapati, N. (2022, May 12). Shoulder Range of motion exercise: Types, How to do? – Samarpan Physio. Samarpan Physiotherapy Clinic. https://samarpanphysioclinic.com/shoulder-range-of-motion-exercise/
  • Ulna Bone

    Ulna Bone

    Introduction

    The ulna bone is one of the two bones in the forearm, the other bone is the radius. It is located on the medial side of the forearm when in the anatomical position (with the palms facing forward). The ulna is primarily responsible for forming the elbow joint with the humerus and articulates with the radius to allow for the movements of the forearm and wrist.

    Because some fractures are diagnostic based on where they occur within the ulna and where the broken segments end up, common disorders have a connection to the bone.

    Structure and Function

    The olecranon process, a bony structure on the ulna, begins near the elbow. Its proximal and posterior ends have severe curvatures, and it is curved forward. The “hinged” ulnohumeral component of the elbow joint is formed by the articular surface of the proximal ulna, a notch in the olecranon along the volar surface. The olecranon and olecranon fossa work together to control forearm flexion and extension while preventing hyperextension.

    A point from the proximal and anterior sides of the ulna is called the coronoid process. It inserts into the humerus’s coronoid fossa with a small upward arch. The brachialis muscles may now be inserted because of the coronoid process’s surfaces. The most medial position of the medial ulnar collateral ligament attachment to the anterior bundle of the coronoid process is known as the sublime tubercle. The articulating surface of the radius is headed by the radial notch, a little depression lateral to the coronoid process. The forearm’s supination and pronation are facilitated by the proximal radioulnar articulation, which also permits the radial head to rotate the proximal ulna.

    As it descends distally, the ulna’s body features many surfaces and boundaries. This border is the source of the flexor digitorum profundus and the pronator quadratus muscles. The pronator quadratus and the flexor digitorum profundus originate from this boundaryThe dorsal border starts posterior to the olecranon process and continues down to the styloid process.

    The flexor digitorum profundus and the pronator quadratus originated from the volar, or anterior, surface of the ulna, which is larger proximally than distally. Between the middle and upper thirds of the ulna is a gap that is referred to as the nutrient canal. Here, a network of blood veins extends into the medullary cavity and crosses the bone’s shaft. The dorsal surface, consisting of the bone’s posterior and lateral sides, is where the anconeus and supinator muscles are implanted in the attachments of the extensor indicis, supinator, abductor pollicis longus, and extensor pollicis longus. Only the flexor digitorum profundus has an extra origin location on the medial surface of the ulna.

    The distal end of the ulna is composed of two projections: the styloid process and the ulnar head. The ulnar notch and groove, (ulna head points downward) is the radius’s articulating surface. Supination and pronation movement of the distal forearm and wrist occur mainly due to the lateral or radial limit of the distal ulna. This serves a similar purpose as the proximal radioulnar joint, however in the opposite direction.

    Embryology

    The ulna bone is created by causing the lateral plate mesoderm. It then develops into the somatic mesoderm, which gives birth to all of the limbs’ bones, tendons, ligaments, connective tissue, and blood vessels. Hyaline cartilage that was previously put down can be converted into bone by endochondral ossification. Three components make up the ossified ulna. It starts at the ulnar tube’s body first. To properly calcify the bone template, the chondrocytes in the ulna’s center lay down collagen and fibronectin during week eight of pregnancy. The ends of bones are not ossified at birth; instead, they are still cartilaginous.

    It starts at the ulnar tube’s body first. To properly calcify the bone template, the chondrocytes in the ulna’s center lay down collagen and fibronectin during week eight of pregnancy. The ends of bones are not ossified at birth; instead, they are still cartilaginous. An ossification center appears in the middle of the ulnar head at the age of four, and it eventually encircles the styloid process. Around age sixteen, the development of the epiphysis takes place, whereas a second center starts to emerge in the olecranon around age ten. The ossification centers surrounding the elbow grow in regular order, and recognizing traumatic injuries to the elbow requires an awareness of these developmental stages.

    Blood Supply and Lymphatics

    The ulnar artery provides the blood to the ulna.

    The ulna’s lymphatics drain directly to the nearby cluster of axillary lymph nodes or indirectly to the supratrochlear lymph node.

    Nerves

    Near the ulna, the three main nerves that cross the forearm are the radial, ulnar, and median nerves. The muscles that control the flexion of the wrist and fingers (digits 1 through 3 and the radial portion of the fourth finger) are innervated by the median nerve, which runs anterolaterally. More anteromedially, between the flexor digitorum profundus and flexor digitorum superficialis, is where you’ll find the ulnar nerve. This nerve is necessary for the ulnar aspect of the fourth and entire fifth fingers, as well as for the bending of the wrist and fingers.

    The anterior interosseous nerve: It is a significant branch of the median nerve. One of the prominent clinical findings associated with anterior interosseous nerve impingement or entrapment is weakness related to the “pincer” The muscles that extend the forearm, wrist, and fingers are located behind the ulna and radius and are supplied by the radial nerve.. Weakness associated with digit extension is caused by posterior interosseous nerve impingement or entrapment in the radial tunnel area.

    Muscles

    Many different muscles with a wide range of functions attach to the ulna.
    the following muscles are inserted:

    Triceps brachii: the lower portion of the olecranon’s superior surfaceOlecranon-AnconeusBrachialis: the coronoid process’ volar surface

    • Extensor pollicis longus – dorsal shaft
    • The coronoid process’ medial surface is known as the pronator teres.
    • Olecranon process – flexor carpi ulnaris
    • Coronoid process -flexor digitorum superficialis
    • Anterioromedial surface of the flexor digitorum profundus
    • Pronator quadratus: anterior shaft, distal
    • The extensor carpi ulnaris :’ posterior border
    • Supinator – proximal ulna
    • Abducor pollicis longus: its posterior aspect.
    • Extensor indicis – posterior distal shaft.

    Physiologic Variants

    An uncommon congenital fusion of the proximal radius and ulna, known as radioulnar synostosis, causes limited forearm pronation and supination. Even still, 60 to 80 percent of cases are bilateral when it does occur. Early detection of this deformity is typical; children between the ages of two and five are the most typically affected. Cleary and Ismail have devised a system of classification that describes four separate types of malformations with different forms of synostosis and osseous hypoplasia. Depending on the type of malformation and the age at which it presents, there are several treatment options, ranging from conservative to surgical.

    Surgical Considerations

    In people with industrial accidents, medial wrist discomfort is frequently caused by ulnar impaction syndrome (UIS). Henry Milch originally recognized UIS in 1941. Patients with overuse injuries, chronic degeneration, or acute damage to the ulnar side of the wrist are affected by it. Patients may also exhibit bone changes, such as subchondral sclerosis and bone edema, as well as changes to the wrist’s cartilage and ligaments. The need for quicker and more reliable ways to treat the symptoms is critical, as the prevalence of the condition is growing rising. Orthopedists have turned to ulnar shortening osteotomy (USO) as a surgical procedure after immobilization and nonoperative NSAIDs have failed to relieve symptoms.

    The patient has comfort from this treatment because the ulna is shorter, which lessens the strain on the triangular fibrocartilage complex, which supports the carpal bones. Recent research has demonstrated that USO can both lessen pain and increase disability. However, some research has indicated that following the procedure, the joint’s range of motion was limited.

    Clinical Significance

    The majority of ulna-related diseases result from different fractures and fracture-dislocations. The interosseous membrane and ligaments bind the radius and ulna together to form a ring-shaped structure in the forearm. When one bone is broken or injured, there should be a greater clinical concern for the other bone or any related dislocation. A radial fracture often occurs with an ulnar fracture. First and foremost, a comprehensive history and physical examination are necessary for the diagnosis of an ulna fracture. Including the right radiographic images is also necessary to create a treatment plan that works.

    Common ulna fractures include the following

    • Nightstick fracture- is a break in the ulna’s central shaft, excluding further fracture sites.
    • Monteggia fracture: A break in the proximal third of the ulna that is followed by a dislocation of the radial head.
    • Galeazzi Fracture: The main signs are a dislocation of the distal radioulnar joint and a break in the distal radius.
    • Distal ulna fracture: Most frequently connected to a dist.

    FAQs

    What is the ulna bone?

    The two long forearm bones, the radius and ulna, make up the antebrachium. The Ulna bone situated on the medial side of the forearm reaches from the elbow to the wrist.

    What is the joint of the ulna?

    With the humerus in its most proximal position, the ulna’s hinge joint forms the elbow. The humerus’s trochlea inserts in the ulna’s semi-lunar notch to form this joint.

    What is the ulna bone attachment?

    The ulna and its attachments distinguish the anterior and posterior forearm divisions. On both ends, the antebrachial fascia is connected to the subcutaneous boundary, which is situated posteromedially.

    What is the function of the ulna?

    Among its numerous essential roles is assisting your wrist and forearm’s movement, flexion, and rotation, retaining the position of more than twelve muscles. support the remaining part of your hand, wrist, and arm.

    Reference:

    • Hullett, A. (2020, October 26). How Can You Get Rid of Back Fat? 11 Tips for the Gym and Your Plate. Greatist. https://greatist.com/health/how-to-get-rid-of-back-fat#upper-back-fat-exercises
    • Shenai, A. (2023, September 6). Back Fat Exercises: Say Goodbye To Back Bulges: HealthifyMe. HealthifyMe. https://www.healthifyme.com/blog/back-fat-exercises/
    • Cpt, B. R. M. M. (2023, March 3). 15 Easy Back Fat Exercises You Can Do At Home (No Equipment). Postpartum Trainer, MD. https://postpartumtrainer.com/back-fat-exercises/
    • Watson, K. (2023, March 27). How to Lose Back Fat the Healthy Way. Healthline. https://www.healthline.com/health/how-to-get-rid-of-back-fat#causes-of-back-fat
    • Lawton, R. (2014, June 1). The dynamic Coleman block test: a novel examination technique for cavo-varus feet. http://www.research-journal.net/en/The-dynamic-coleman-block-test-a-novel-examination-technique-for-cavo-varus-feet.html
    • Coleman Block Test. (n.d.). Physiopedia. https://www.physio-pedia.com/Coleman_Block_Test
    • Coleman Block Test. (2020, July 22). Wheeless’ Textbook of Orthopaedics. https://www.wheelessonline.com/bones/foot/coleman-block-test/
  • The Best Daisy Keech Ab Workout

    The Best Daisy Keech Ab Workout

    You may do Daisy Keech’s simple, effective stomach workouts at home while enjoying the music you love. Viewers can get an in-depth guide that leads them through a range of one-minute routines in the 8–10-minute Abs Workout Video.

    While there are many ways to strengthen your core, the Daisy Keech ab workout routine is among the best.

    Introduction:

    Waist slimming is the objective of the Daisy Keech Compact Abs Workout. It keeps the promise as well. A basic training program called the Daisy Keech 10-Minute Hourglass Abs Workout promises to transform your waist into a perfect 10 minutes of work each day. Losing that uncomfortable belly fat is the main objective of this training routine.

    Anyone who wants to define and tone their core like fitness model Daisy Keech may do it with her beginner-friendly ab workout. Daisy Keech has been recognized as one of the most well-known fitness personalities on social media over the last few years. It frequently becomes quite popular due to its amazing body, which it frequently has about on Instagram.

    Nothing compares to the Daisy Keech ab workout if you want to show off your toned and taught abs. You may get perfect skin from head to toe with this fitness plan, but it also helps with shaping your body, calorie burning, and muscle toning.

    Correct performance of this workout will also help you improve your posture, which will eventually lessen back pain. Furthermore, you must keep your balance and stability during this workout because, If you don’t, after a period of standing inactive, gravity will push your shape out of position or perhaps make you move too much.

    Advantages Of Daisy Keech Ab Workout:

    Beyond only developing a toned waist, there are other benefits to strengthening your abs.

    • Strong abs are essential for maintaining proper posture, preventing lower back pain, improving balance, and providing general stability.
    • Regular ab workouts additionally improve overall fitness and body composition.
    • You’ll have a smaller, more defined waist and a stronger, more functional core.
    • Your metabolism will increase from the workout, and you’ll burn calories by utilizing your abdominal muscles.
    • As a result, your body fat might decrease, highlighting the tone and definition of your abs.
    • Workout also improves other parts of your fitness program, such as your ability to do compound workouts like squats and deadlifts with improved form and stability.

    Daisy Keech Ab Workout:

    This is a thorough explanation of Daisy Keech’s ideal abs workout. Each workout is done with a 10-minute rest period. This ten-minute workout doesn’t require any extra equipment and can be done practically anywhere. Your goal should be to slim down your waist and get an hourglass figure.

    Simple crunches: one minute

    • First, crunches.
    • The starting position for a crunch is to lie on your back with  body flat on the ground.
    • Keep bending your legs and set yourself up for crunches, resembling a tabletop.
    • Use your core muscles to squash your entire body in the direction of your knees.
    • After finishing, move back and locate your neutral position.
    • Then relax.
    • Repeat this workout 8 to 10 times.
    Crunches
    Crunches

    Bicycle kicks: one minute

    • While lying on your back, completely extend your legs.
    • In all directions, the body must be level to the floor.
    • You will be more stable if you push your arms above or to the side.
    • As the left leg progressively gets closer to the chest, bend it at the knee.
    • Pull your right leg to the center of your body, bend at the knee, and extend your left leg.
    • Right now, the left leg ought to be straight at the chest.
    • Avoid letting the legs touch the ground at the bottom by keeping them 2–6 inches above the floor.
    • Take a moment or two to stay in the lowered posture while moving on to the other leg.
    • Then relax.
    • Repeat this workout 8 to 10 times.
    bicycle crunches exercise
    bicycle crunches exercise

    Russian twists: one minute

    • Keeping your knees bent and your feet level on the ground, take a seat.
    • Hold your hands near your body’s center.
    • Maintain a straight spine by taking a small step back.
    • As you turn to the left and move your right arm in that direction, exhale.
    • Move to the other side after returning your breath to the point of focus.
    • Then return to your neutral position.
    • Then relax.
    • Repeat this workout 8 to 10 times.
    Russian Twist
    Russian Twist

    Jack knives: one minute, fifteen per side

    • To start, choose a supine position.
    • This exercise is comparable to a toe touch except that you raise your neck off the floor between each touch rather than lowering your chest and extending your head.
    • Straighten your arms in front of you.
    • By tightening your abdominal muscles, push your arms and legs as if you had been trying to prop them straight up a few inches off the ground.
    • Touch your toes with your fingers.
    • Hold this position for a few seconds.
    • Then return to your neutral position.
    • Then relax.
    • Repeat this workout 8 to 10 times.
    jack knives
    jack knives

    Toe taps: one minute

    • The rectus and abdominal muscles are worked in this traditional Pilates workout.
    • To start, arrange your legs like a tabletop position.
    • Bending your right knee and engaging your core muscles, lower your right leg when your toe touches the floor, will help you stay on the table.
    • Then return to your neutral position.
    • Then relax.
    • Continue on the other side after repeating the movements.
    • Repeat this workout 8 to 10 times.
    toe-taps
    toe-taps

    Bicycling crunches: one minute

    • Like with bicycle kicks, bend one leg while lying on your back and place the other foot against your knee until you achieve a ninety-degree angle.
    • In order to make contact with the bent knee, compress the opposing elbow.
    • Each side should be worked for a few seconds or 15 repetitions.
    • Then return to your neutral position.
    • Then relax.
    • Repeat this workout 8 to 10 times.
    bicycle crunches exercise
    bicycle crunches exercise

    Scissor kicks: one minute

    • When performing a scissor kick, raise your legs to a 45-degree angle while maintaining an upright lower body on the surface of the ground.
    • Kick your legs out to the side and alternate which leg is higher while using your core.
    • Then return to your neutral position.
    • Then relax.
    • Repeat this workout 8 to 10 times.
    Scissor kicks
    Scissor kicks

    Reverse crunches: one minute

    • Sleep on your back and arrange your legs like a tabletop while performing a reverse crunch.
    • Take a big breath in, contract your core, and raise your hips off the floor and your legs back over your chest.
    • Breathe deeply, then go back to where you were.
    • That is comparable to having one representative.
    • Then relax.
    • Repeat this workout 8 to 10 times.
    Reverse crunches
    Reverse crunches

    Reverse Lunge

    The reverse lunge workout by Daisy Keech is perfect for anyone who routinely completes lunges and would like to add them to their routine or improve their balance.

    When done correctly, reverse lunges strengthen the glutes, the circulatory system, and your single leg.

    • Keep your back straight, place your hands on your hips, and take strong steps back with your left foot.
    • It may be lowered to the ground by placing it over your right ankle.
    • Point your left knee downward toward the floor while standing on your left heel, bending it to a 90-degree angle.
    • After straightening up by pressing down on your right heel, flex your left leg for one repetition.
    • Once your legs are crossed, return your left foot.
    • Then relax.
    • Repeat this workout 8 to 10 times.
    Alternating-Reverse-Lunge
    Alternating-Reverse-Lunge

    Reasons This Workout Is Successful:

    Considering this,

    • You’re finding this very easy.

    This easy ab workout isolates the abdominal muscles to target and effectively stimulate them. Develop muscle and core strength.

    • There are bicycle kicks involved

    Cycling kicks train various core muscles and strengthens balance and coordination.”This is a fantastic internal body-tightening workout for the transverse abs and obliques.

    • It challenges your basic beliefs.

    The Daisy Keech workout targets all of your muscles and core areas since it focuses on burning your muscles until you’re exhausted. That’s why it’s so incredible.

    • It focuses on various sections of the abdomen.

    The best thing about this workout is that it works the upper, lower, and obliques all at the same time.

    When did you stop doing workouts?

    • Fever
    • Headache
    • The workout should be stopped if it hurts.
    • During the workout, one should never put up with muscle soreness.
    • If throughout this workout the patient experiences any aches or pains.
    • Whether there is any pain or numbness.
    • Those with sleep problems could decide not to work out.

    Suggestions For Getting The Best Results And Reducing Injury:

    To get the most out of the Daisy Keech Ab Workout and prevent injury, there are a few key points to keep in mind.

    • Most importantly, listen to your body and modify the activities as needed.
    • Modify the action to avoid harm, or consult a professional if it causes pain or difficulty.
    • The perfect form is also essential to minimize tension and target the right muscles.
    • Focus on keeping the proper form throughout your workouts by trying to become effective in each activity.
    • Maintaining steady effort will result in the finest outcomes and changes in your abs and core strength.
    • Lastly, always remember to eat the correct nutrients for your body.
    • A healthy, balanced diet that encourages growth and healing will help you achieve your fitness goals.
    • To help with muscle building, eat a variety of nutrient-dense meals, drink plenty of water, and make sure your diet has enough protein.
    • Remember that having a developed and toned core requires time and effort.

    Summary:

    A variety of workouts are combined in Daisy Keech’s ab routine. The Daisy Keech ab program includes numerous workouts recommended by many fitness specialists in just half the repetitions. To get the greatest effects, you must still complete them all.

    You can select how long you want to rest, but it’s best to try not to go over the same amount of time between sets. The Daisy Keech Ab workout is a great option for those who wish to tone up and get fit rapidly. You can complete this workout in a circuit or by performing each movement while staying immobile. Putting Daisy Keech’s ab workout to the test is a great way to include it in the way you work.

    FAQs

    Does a 10-minute ab routine every day help?

    For an ab workout, ten minutes is great, especially if you’re lifting heavy objects. Compact training sessions make it simpler to manage busy lives and give you more time to concentrate on performing every workout correctly.

    Does doing Russian twists make your waist smaller? 

    No, the food you eat determines the size of your waist. Russian twist workout tones tighten and strengthen your core (obliques & abs). Your waist may appear larger and stronger because of these exercises.

    Is it good to perform frequent ab work?

    You can exercise your core every day since “the abdominal muscles are very tough to overuse,” but you’ll look better if you don’t just perform a ton of crunches every day.

    For how many abs each day?

    Your degree of fitness, rehabilitation capacity, and overall goals need to all be taken seriously when selecting how frequently to work out. For most people, a good beginning point is two to three ab workouts per week.

    How long does it take to see the effects of an ab workout?

    It will depend on your initial percentage of fat and how long it takes you to get a six-pack. It seems reasonable and acceptable to be aiming for 1% to 2% monthly decreases in body fat. To gain the kind of abs from that, therefore, it can take three months to two years.

    Did bicycle crunches give you a round shape?

    An extremely easy workout that works your oblique muscles, lower and midsection, is the bicycle crunch. The movement is made much stronger and more efficient by the twist and contraction it includes. However, you might not get the ideal stomach contours by simply performing the standard bicycle crunches.

    Is Daisy Keech’s ab routine beneficial?

    The Daisy Keech ab routine might be useful if you want a more muscular definition. That being said, there’s no reason to give up the plan if you find it enjoyable.

    Do abs workouts have to be done?

    A comprehensive fitness plan must include core workouts. at times certain people might perform pushups and situps. However, core workouts are commonly overlooked. However, improving the condition of your core muscles which include the muscles surrounding your pelvis and trunk pays off.

    What advantages does an hourglass-like workout have?

    As you work for an hourglass figure, you are going to improve the general health of both your body and mind. You can therefore achieve your goals and build a perfectly attractive and healthy physique without any difficulties.

    How long do abs need to rest?

    It is advised to perform strength training every other day, alternating with at least one recovery day.

    What is a good number of ab sets?

    How often someone should do ab workouts depends on their level of proficiency. Try for 12–16 challenging sets (each with 8–12 repetitions) in your ab exercises every week if you’re just getting started with exercise, or at least working out your abs. This should be enough to build up your muscle development and strength.

    How are muscles in the abdomen used?

    The abdominal muscles support the trunk, keep the organs in their proper positions, and provide movement by controlling intra-abdominal pressure. Your entire body is stabilized and supported by the muscles in your back, deep abdomen, and other “core” areas. These muscles surround your spine.

    To what extent are abs important?

    Your abs do more than just make you look nice; they also support your spine and help in proper posture. Try advanced ab workouts or gain a workout ball if you need more difficult workouts.

    Why is having strong core muscles important?

    To prevent the spine from being overstressed by transferring stresses from the lower to the upper and the other way around. We can minimize injuries and maximize our performance when we have a strong, solid core.

    References:

    • Bariya, D. (December 30, 2023f) The Best Ab Workout Clinic for Mobile Physiotherapy Is Offered by Daisy Keech’s Mobile Physiotherapy Clinic. You may find the greatest Daisy Keech ab routine at https://mobilephysiotherapyclinic.in.
    • Workout for conditioning and strength from Women’s Health UK (2023, December 22). Women’s Health. https://www.womenshealthmag.com/uk/fitness/workouts Citation inside text: (Women’s Health UK, Strength, and Fitness Exercise, 2023)
    • Workout with Daisy Keech to Form an Hourglass Figure. 13 March 2023. The JustFit app, https://justfit.app, offers Daisy Keech’s Ab Workout.”-Source: (Daisy Keech’s Abs Workout: How to Get an Hourglass Figure, 2023)
    • Vogel, K. 1 July 2022. Trainers explain to us why this Daisy Keech ab routine, which is popular on TikTok, is so effective. 1391044/Kaitlin-Vogel/daisy-keech-ab-workout Parade /parade.com/ Inside text reference: Vogel (2022)
    • Image 2, Firman & Well+Good, T., Firman, T. Nov. 5, 2022. Are You Performing Bicycle Kicks Correctly? They’re the Most Underappreciated Method for Toning Your Abs. Well Done. How to Perform Bicycle Kicks: https://www.wellandgood.com/
    • Image 4, Web Store 4091786. (n.d.). http://giselleyar.shop/details/4091786.html
    • Image 5, On December 10, 2015, Hamrick, R. Use Toe Taps to Increase Your Core Strength. FX. Strengthen your core with toe taps: https://blogs.flxstretchtraining.com/news/178498829
    • Image 7, J. McGuire (2023b), 1 July. Scissor kicks: How to do these and the benefits for improving core strength. Tom’s Manual. Scissor kicks: How to perform them and the advantages for strengthening core strength
    • Image 8, L. Putra (n.d.). Exercise the reverse crunch. Isolated flat vector image set on a white backdrop. Abs exercise with layered vectors. Vecteezy.com/vector-art/8573058-layered-vector-abs-workout-reverse-crunch-exercise-flat-vector-illustration-isolated-on-white-background
  • Phonophoresis

    Phonophoresis

    Phonophoresis: What Is It?

    Topical medication and ultrasound are combined in a physical therapy method known as phonophoresis. A drug applied topically is referred to as a topical treatment. The medicine is then absorbed by your skin into the tissues underneath with the aid of ultrasound waves.

    Pain and inflammation in your joints, ligaments, and muscles are treated using phonophoresis. It is comparable to inotroporesis. Instead of using ultrasound, iontophoresis uses electrical currents to deliver topical drugs through your skin.

    One can employ phonophoresis on its own or in conjunction with other therapies or treatments.

    How is phonophoresis carried out?

    Your physician, a physical therapist, or an ultrasound specialist can perform phonophoresis. You can receive a referral from your physician to a clinic that offers ultrasound treatment.

    Your doctor or therapist will take three primary stages during the treatment. Initially, they will treat the area of your skin next to an injured or inflamed muscle or joint using a medicinal ointment or gel. Lidocaine, hydrocortisone, and dexamethasone are a few of the drugs commonly utilized in phonophoresis.

    After applying topical treatment, they will apply ultrasonic gel to the affected area. The ultrasonic vibrations are aided in passing through the skin by this gel.

    After applying the gel and topical treatment, an ultrasonic head instrument will be used on the affected area. Medication is injected into the tissue beneath the skin using ultrasound wave frequencies.

    Conditions Handled by Phonophoresis:

    Your physical therapist may employ phonophoresis as a therapy for an inflammatory injury. In order to increase general functional mobility, it might assist reduce discomfort and inflammation.

    inflammatory response

    • Phonophoresis is a treatment for inflammation in soft tissues such as muscles, tendons, ligaments, and other tissues. It’s regarded as a remedy for inflammation.
    • The body uses inflammation as a natural healing mechanism when it is injured. Inflammation is characterized by pain, swelling, redness, and elevated body temperature in the affected area.

    prolonged onset of muscular soreness

    • One treatment for prolonged muscular soreness is phonophoresis. DOMS, or delayed onset muscle soreness, is a common side effect of intense exercise that typically lasts one to two days.

    Injuries

    Treatment for the following ailments and wounds often involves phonophoresis:

    • Tendon inflammation
    • Bursitis
    • Strains and Sprains
    • Frozen shoulder, or adhesive capsulitis
    • arthritic

    Limitations of Phonophoresis:

    Phonophoresis is generally a painless and secure procedure. On the other hand, phonophoresis might not be suitable in many circumstances.

    The following are not suitable for phonophoresis:

    • open injuries
    • Infected cuts
    • Abscesses from Eczema
    • diabetes
    • cancer
    • tuberculosis
    • deep Venous thrombosis
    • stomach sore
    • allergy to the drug being taken
    • prosthetic
    • medical devices implanted
    • Disturbances in perception

    Drugs Taken in Phonophoresis:

    Medications that reduce inflammation are frequently used in conjunction with phonophoresis treatment. These anti-inflammatory drugs assist in lessening post-injury discomfort and swelling.

    When applying phonophoresis, anti-inflammatory topical treatments (drugs administered topically) may be utilised. These include:

    Salicylates4; hydrocortisone; dexamethasone
    A painkiller called lidocaine is occasionally used in conjunction with phonophoresis.

    In what way is phonophoresis effective?

    For disorders like myofascial pain syndrome (MPS), phonophoresis may not be any more helpful than standard ultrasound therapy, according to some studies. Phonophoresis is superior to ultrasound therapy in treating disorders such as osteoarthritis of the knee, according to other research.

    Most people believe that phonophoresis works better in combination with other therapies or treatments. For carpal tunnel syndrome or De Quervain’s tenosynovitis, for instance, a wrist splint may be utilized in addition to phonophoresis.

    One investigation according to a reliable source, phonophoresis works best when combined with a dressing. For best effects, apply dexamethasone and an occlusive dressing (a type of wound dressing) at least half an hour before using ultrasonic waves.

    Exist any dangers connected to phonophoresis?

    Phonophoresis is not known to carry any dangers. If ultrasound is performed incorrectly, there is a little risk involved.

    Burns:
    In the event that a continuous beam is employed and left immobile.
    The tissue may get overheated.
    Lead will eventually burn.

    Overdose:
    Symptoms may worsen as a result of receiving too much treatment.

    Equipment damage:
    When the procedure’s head remains in the air while turned on, the reflected light of the beam back into the head damages the crystal.

    Comparing Iontophoresis and Phonophoresis:

    Although it is still very distinct from phonophoresis, another physical therapy treatment technique is Iontophoresis.

    Iontophoresis and phonophoresis are two methods of delivering medication to your body through the skin. Both are used as mostly painless substitutes for injections to manage injury-related inflammation.

    Conversely, the main difference is the transmissions mode. Whereas iontophoresis employs electrical current, phonophoresis uses ultrasonic waves to deliver topical medication to an affected body region.

    What inquiries should I make of my doctor prior to trying phonophoresis?

    Before starting any new procedure, as with any other, it’s crucial to discuss your treatment strategy with your doctor. Consider asking yourself the following queries.

    • Will phonophoresis be effective in treating my injury or condition?
    • What is the best option, phonophoresis? Is there a better option for a different kind of treatment, such as routine ultrasound therapy?
    • What further therapies could I require in addition to phonophoresis?
    • Will phonophoresis make my pain feel better or less intense?
    • Does phonophoresis treatment get covered by my health insurance?

    The evidence:

    Patients who received phonophoresis had better results than those who only had ultrasound, according to a 1967 study. However, more recent research has not been able to reproduce similar findings.

    According to other research, the drug used during the ultrasonic treatment cannot alleviate pain or inflammation because it does not pass through the skin.

    An investigation was conducted to see how well phonophoresis worked for treating DOMS. Comparing phonophoresis to a placebo, they discovered that phonophoresis did not aid in the improvement of soreness.

    No data from experimental research could support the conclusion that adding the medicine to the coupling medium (ultrasound gel) generated additional benefits over utilising ultrasound alone, according to a 2006 review published in the Physical Therapy Journal.

    The takeaway:

    The treatment of inflammation and discomfort can be effectively achieved with phonophoresis. It works particularly well for joint, muscular, or ligament injuries.

    It is not advised to use phonophoresis as a long-term or substitute treatment for ailments like arthritis. When undergoing further therapies or treatments for musculoskeletal disorders and injuries, it can assist in easing some of your suffering.

    FAQs

    What dangers come with phonophoresis?

    Hazards. Phonophoresis will be painless and virtually risk-free at an ideal frequency. In addition to causing damage to the skin’s surface, ultrasonic use can also cause cavitation, which may result in tissue damage.

    What is the phonophoresis principle?

    Topical medication and ultrasound are combined in a physical therapy method known as phonophoresis.

    How much time does phonophoresis take?

    Depending on the size and state of the affected location, a phonophoresis treatment typically lasts five to eight minutes.

    What advantages does phonophoresis offer?

    The most common uses of ultrasound and phonophoresis are to treat soft tissue inflammation in the muscles, ligaments, tendons, and other tissues.

    What drawbacks does ultrasound therapy have?

    If used for extended periods of time, the skin may get superficial burns.

    References

    • Jewell, T. (2018, September 18). What Is Phonophoresis? Healthline. https://www.healthline.com/health/phonophoresis#takeaway
    • Physiotherapist, N. P. (2023, August 13). Ultrasonic therapy machine: Types, Effects, Indications. Mobile Physiotherapy Clinic. https://mobilephysiotherapyclinic.in/ultrasonic-therapy-machine-ultra-sound/
    • Phonophoresis. (2024, June 26). Wikipedia. https://en.wikipedia.org/wiki/Phonophoresis
    • Pt, B. S. (2023, March 16). What Is Phonophoresis? Verywell Health. https://www.verywellhealth.com/phonophoresis-in-physical-therapy-2696412
  • Belly Button Infection

    Belly Button Infection

    What is a Belly Button Infection?

    A belly button infection, also known as omphalitis, is an inflammation of the umbilicus and its surrounding area. This condition can affect individuals of all ages, from newborns to adults. The belly button, due to its structure, can be a prime spot for bacteria and fungi to thrive, especially in the presence of moisture and poor hygiene.

    It results in an irritable, bright red rash around your navel. Candida grows well in warm, gloomy conditions. Creams, ointments, and powders are used as treatments. By keeping your navel area dry and clean, you can avoid developing yeast infections in your belly button.

    You can get a yeast infection anywhere in your body. In fact, they may appear practically anywhere on your body, including the button in your belly. A yeast infection in the skin of your navel is known as a belly button yeast infection. A fungal infection causes candidiasis. Candida is the kind of yeast that causes it. One kind of fungus is yeast.

    This also applies to the yeast known as Candida. This often has no negative effects on healthy individuals. However, Candida may penetrate beneath the skin’s surface when it gathers in moist, dark places. A skin infection may result from this. On your body, candidiasis may appear practically anywhere. However, the warm, moist cracks in your skin, such as your belly button, are where it’s most commonly detected.

    Sometimes a belly button infection won’t go away on its own. It’s critical to keep the area clean, refrain from picking at it, and above all seek medical assistance if you have any infection-related symptoms, such as redness, swelling, or discharge.

    In order to heal, belly button infections may need to be treated medically with antibiotics or other drugs. You can wait two to three days to see if the infection goes away on its own if you don’t have a temperature and the pain isn’t too bad. Nonetheless, it’s wise to make an appointment with your doctor if your symptoms get worse.

    Recall that maintaining the health of your belly button is crucial to avoiding problems and guaranteeing your general well-being.

    Types of Belly Button infections

    There are several tiny wrinkles in the delicate region surrounding your belly button.

    According to Banner Health family nurse practitioner Samia Kadri, “These fold areas can trap moisture, dirt, and debris.” “This warm, damp environment is ideal for the growth of yeast and fungi.”

    The following are the most typical kinds of belly button infections:

    • Bacterial infections:

    These arise from the entry of pathogenic bacteria into the belly button, which then grow and cause an infection. The most frequent culprits are Streptococcus species (strep infection) and Staphylococcus aureus (staph infection).

    • yeast infections and fungus infections:

    Belly button infections can be caused by fungus, including yeast, particularly in warm, humid conditions. Yeast overgrowth can occur anywhere on the body, mainly in the mouth, throat, and belly button (primarily caused by the Candida yeast species).

    What Are Some Home Treatments for Infections of the Belly Button?

    The following natural cures might aid in the treatment of an infection in the belly button:

    • Warm Saltwater Soaks:
      Moisten a cloth or cotton ball and dip it into the mixture.
      Cleanse the contaminated region around your abdominal button gently.
      To maintain the area clean and encourage healing, repeat a few times a day.
    • Tea Tree Oil:
      Use a carrier oil (like coconut oil) to dilute a few drops of tea tree oil.
      Using a cotton swab, apply the mixture to the affected region.
      The natural antibacterial qualities of tea tree oil can aid in the battle against illness.
    • Turmeric Paste:
      On the belly button that is infected, apply the paste.
      Turmeric possesses antibacterial and anti-inflammatory qualities.
    • Aloe Vera Gel:
      Immediately apply new aloe vera gel to the affected area.
      Aloe vera offers calming and restorative qualities.
    • Keep Dry:
      Wetness can exacerbate infections.
      Keep of moisture-trapping tight garments.
    • Avoid of Harsh Chemicals:
      Don’t use alcohol-based products or harsh soaps on the affected region.
      Use gentle, fragrance-free cleaning products.

    Remember to see a doctor right away if the infection increases, lasts longer, or causes you to feel excruciating pain. They are competent to provide precise diagnoses and provide appropriate treatments.

    What is the time belly button infections are healed?

    A belly button infection’s recovery period might vary depending on a number of factors:

    • Severity: The degree of infection is a factor. Infections that are not as serious could clear up sooner.
    • Prompt Care: Getting medical help as soon as possible will help hasten the healing process.
    • Cause: The infection’s origin is important to know. The recovery periods for fungal and bacterial infections may differ.

    In general, the healing process of a belly button infection might take three to nine months. Individual experiences, however, could differ. Don’t forget to practice good hygiene, adhere to any recommended medical advice, and see a doctor when necessary.

    What are some prevalent reasons for an infection in the belly button?

    Numerous reasons might lead to belly button infections. Let’s investigate a few typical causes:

    • Poor Hygiene:
      An infection may result from the buildup of dead skin cells, oils, germs, and debris in the belly button.
    • Piercings:
      The risk of infection is higher if you have a navel piercing.
      To avoid issues, maintaining proper cleanliness and aftercare is crucial.
    • Moist Environment:
      Bacteria and fungi love a warm, moist belly button as a perfect breeding habitat.
      Dry off the area to avoid infection.
    • Laparoscopic Surgery:
      Following a laparoscopic operation, an infection may develop in the belly button.
      Pay close attention to the post-surgery instructions.
    • Skin Conditions:
      Psoriasis and intertrigo, which are caused by rubbing together the skin, can aggravate infections.
      A favorable environment for microbial development is produced by these circumstances.
    • Underlying Health Factors:
      People who are expecting
      Those who are obese or overweight
      Individuals who use antibiotics
      People using chemotherapy for cancer treatment
      those whose immune systems are compromised

    Recall that controlling and avoiding belly button infections requires practicing proper hygiene, keeping the region dry, and getting medical help as soon as necessary.

    What are some symptoms of a belly button infection?

    Numerous symptoms might appear as a result of belly button infections.

    • Bright Red Rash:
      In the skin folds around your navel, a bright red rash is the most common symptom.
      This rash can be uncomfortable and is usually quite irritating.
    • Burning Sensation:
      The affected region may feel as though it is burning.
    • Scaling and Swelling:
      Scaling and swelling may be visible on the skin surrounding the abdominal button.
    • White Discharge:
      The diseased location may occasionally produce a white discharge.
    • No Odor (Usually):
      Yeast infections in the belly button often don’t produce any smells.

    The most typical sign of a yeast infection in the belly button is a bright red rash in the folds of skin around your navel. Usually, the rash is quite irritating. It may burn. Additionally, scaling, edema, or a white discharge may be seen.

    Yeast infections of the belly button typically don’t smell. However, if your yeast infection is caused by an intertrigo skin problem, you could smell musty. Intertrigo occurs frequently. Heat, wetness, and the friction of your skin all contribute to its occurrence.

    On the other hand, you may detect a musty odor if the infection is caused by intertrigo, a skin ailment.
    Remember, get medical help right away if you think you may have an infection in your belly button. A speedy recovery depends on an accurate diagnosis and course of therapy.

    How is a belly button yeast infection diagnosed?

    Your doctor could do a physical examination. By examining the skin around your navel, they might be able to determine whether you have a yeast infection. One frequent symptom of a yeast infection in the belly button is a bright red rash.

    It’s possible that your doctor will want to analyze a sample of the affected region. They will gently scrape out a little portion of skin from your navel region using a tongue depressor or scalpel. The material will be examined under a microscope by a lab professional. They might also insert the material into a culture. The material that helps the sample develop so the fungus may be recognized is called a culture.

    In the event that you do develop a yeast infection, your doctor could advise getting tested for diabetes. Yeast uses high blood sugar levels as food and grows when a person has diabetes.

    How is a belly button yeast infection treated?

    An antifungal medicine may be part of your treatment for a yeast infection in your belly button. An antifungal cream, ointment, or powder may be suggested by your healthcare professional. The antifungal will be applied straight to the area surrounding your abdominal button. Antifungal lotions are widely available over-the-counter. If required, your healthcare professional could prescribe an antifungal medication.

    As part of your therapy, you will need to maintain a dry and clean navel area. Additionally, keeping the region dry and clean might aid in preventing the recurrence of yeast infections. Leaving your navel open could also be beneficial.

    Your doctor could recommend an oral antifungal medicine in specific situations. Oral medication is used to consume medications like fluconazole.

    Can I use apple cider vinegar to treat my belly button infection?

    The antibacterial qualities of apple cider vinegar have been praised for their potential to fight illnesses. Here’s how to use it to heal an infection in your belly button:

    Organic Vinegar for Apple Cider:

    For best results, use organic apple cider vinegar that has been fermented with the “mother.”
    The murky, healthy component present in unfiltered apple cider vinegar is referred to as the “mother.”

    Application:

    Take a cotton swab and give it a little apple cider vinegar rub.
    Gently clean the inside of your abdominal button with the swab.
    After that, pat the area dry.

    While apple cider vinegar may be useful, keep in mind that if the illness worsens or continues, you should definitely consult a specialist. A speedy recovery depends on an accurate diagnosis and course of therapy.

    Can I use rubbing alcohol to clean my infected belly button?

    Yes, you may wipe the exterior of your belly button with rubbing alcohol.

    Application:

    Using a cotton swab, ball, or alcohol pad, apply rubbing alcohol.
    You may either pat dry the area with a clean, soft cloth or let it air dry.

    Take Care:

    Rubbing alcohol can dry out your skin even if it has antibacterial qualities.
    Try not to use it more than twice a day. Remember, it’s preferable to see a doctor if you feel pain or detect any irritation.

    Prevention:

    By keeping the region around your navel dry and clean, you may be able to avoid yeast infections in your belly button. Your navel region’s proliferation of yeast may be prevented by losing weight. Make careful to maintain appropriate blood sugar management if you have diabetes.

    Prognosis:

    If I have a yeast infection in my belly button, what should I anticipate?
    When you maintain a clean and dry navel area, belly button yeast infections frequently resolve on their own.

    What consequences may a yeast infection in the belly button cause?
    Yeast infections in the belly button can recur, particularly if the navel region isn’t maintained clean and dry. Those with compromised immune systems are more susceptible to recurrent yeast infections.

    Conclusion:

    By keeping your navel area dry and clean, you can avoid developing yeast infections in your belly button. Give your doctor a call if you have any of the signs of a yeast infection in your belly button. They’ll be capable of accurately identifying your ailment. To ensure you feel well quickly, they could suggest an antifungal medication.

    • Infections can cause belly button discharge, but it can also be a sign of another problem, such as a cyst or an injury.
    • A person who has had abdominal surgery, a navel piercing, or a medical condition that raises their risk of infections in general may be particularly susceptible to infection in this area.
    • A medical professional is able to identify the underlying problem and recommend a suitable course of action.

    FAQs

    Which oil is most effective for treating a belly button infection?

    Try applying coconut oil to your belly button once a day or every other day, especially right before bed, for the greatest results. Is it possible to use oils other than coconut oil on the belly button? You certainly can. Almond, sunflower, and olive oils are among the other healthy oils.

    My abdominal button leaks; why is that?

    Your belly button may be infected with bacteria, fungi, or yeast if it is “leaking” blood or a clear or colored discharge. Infection symptoms might also include crusty skin, redness, itching, and a strong smell.

    Does belly button discharge arise from diabetes?

    Diabetes, a recent surgical procedure, and belly button piercing are some of the variables that might raise the chance of discharge from infection. Belly button discharge can emit an unpleasant odor and come in a variety of hues. The region may occasionally be uncomfortable, sensitive, and irritated.

    Can I use salt water to clean my inflamed belly button?

    This ought to dislodge odor-causing bacteria that are tenacious. After that, pat it dry and rinse with regular water.

    If there’s blood coming from my belly button, should I worry?

    If a person has any bleeding in or around their belly button along with any of the following symptoms, they should see a doctor: red, puffy skin that feels sensitive or hurts when touched.

    Which cream is best for an infection of the belly button?

    Therapy: Apply an antifungal cream, such as clotrimazole (Lotrimin, Mycelex) or miconazole nitrate (Micatin, Monistat-Derm), and make sure your navel is dry and clean.

    How can an infected belly button be quickly healed?

    If soaking the area is too difficult (for instance, if your belly button was pierced), use a warm, damp towel instead. Observe your doctor’s instructions if they pertain to caring for your infected piercing.

    What disinfects the belly button’s bacteria?

    In order to cure a disease
    Make sure your belly button’s skin is dry and clean. To treat a yeast infection, apply a cream or powder of antifungal medication. Your doctor may advise using an antibiotic ointment for a bacterial illness. Certain infections may necessitate the use of oral antibiotics, cyst incision, drainage, or both.

    Why is foul goo seeping out of my belly button?

    If the skin is punctured, too wet, or broken, belly buttons can get infected. A further danger associated with laparoscopic surgery through the navel is infection. Antibiotics, antifungals, or drainage are used as treatments.

    Is an infection in the belly button common?

    After giving delivery, your belly button doesn’t receive much attention. But it may become infected just like any other area of your skin or body. Although belly button infections are often not very dangerous, you should still see your doctor.

    How should an infected belly button be treated?

    Use a washcloth or cotton swap dipped in warm, soapy water to thoroughly clean your belly button.

    How can I naturally clean my belly button?

    If your belly button is very dirty, dab your finger in some table salt, rub it gently, and then rinse it well. After taking a shower, be careful to gently dry your belly button.

    At home, how can I clean my belly button?

    With a washcloth dampened with warm water and a tiny bit of soap, gently clean the region right inside and surrounding the belly button. Rinse the belly button under fresh, warm water and wipe dry with a towel to make sure all the water has been gone. Frequent washing or showering can help prevent skin problems and odor.

    How can I determine whether the illness I have in my belly button is fungal or bacterial?

    There is an unpleasant smell to the discharge from bacterial diseases. The discharge may seem green or off-yellow, and it commonly causes pain and edema. There may be a little difference in the symptoms of a fungal and yeast infection.

    I have an infection in my belly button; do I need to visit a doctor?

    They could also advise you to keep the space tidy and dry. If it doesn’t work, a stronger antifungal medicine could be suggested.

    How can I take care of an infection in my belly button at home?

    If you have signs of a bacterial belly button infection, such as redness, blisters, crusting, or brown or green discharge, your doctor may suggest that you try an over-the-counter topical agent.

    References

    • Physiotherapist, N. P. (2024, March 10). Will a Belly Button Infection Go Away On Its Own? Mobile Physiotherapy Clinic. https://mobilephysiotherapyclinic.in/will-a-belly-button-infection-go-away-on-its-own/
    • Professional, C. C. M. (n.d.-a). Belly Button Yeast Infection. Cleveland Clinic. https://my.clevelandclinic.org/health/diseases/22909-belly-button-yeast-infection
    • What to Do About a Belly Button Infection | Banner Health. (n.d.). https://www.bannerhealth.com/healthcareblog/teach-me/what-to-do-about-a-belly-button-infection
  • Electroconvulsive Therapy (ECT)

    Electroconvulsive Therapy (ECT)

    What is ECT?

    Electroconvulsive treatment (ECT) is a method used to treat severe symptoms of some mental health issues. To induce of detailed seizure, an electric current is applied to the brain. ECT is performed under general anesthesia, ensuring the patient is not conscious during the procedure.

    What can ECT treat?

    Physicians are advised by the National Institute for Health and Care Excellence (NICE) to contemplate electroconvulsive therapy (ECT) only in certain situations.

    This may involve using ECT to address severe depression if:

    • You have a history of positive experiences with ECT and prefer it as a treatment option
    • You need immediate medical attention, for example, if you are in danger of starvation.
    • Other treatments like medication and talking therapies have not been effective

    The guidelines also suggest that ECT should only be used as a short-term treatment if you are experiencing:

    • A severe or prolonged episode of mania
    • Catatonia is characterized by being immobile or displaying repetitive movements

    Repeated ECT for mania and catatonia is only recommended if you have responded well to the treatment previously, or if all other treatment options have been exhausted.

    According to the NICE guidelines, ECT is not recommended for the ongoing management of schizophrenia. Additionally, it is not recommended as a standard treatment for mild depression.

    The whole set of recommendations for electroconvulsive therapy (ECT) treatment of severe depression and treatment of catatonia, mania, or schizophrenia may be seen on the NICE website.

    Who needs to have this treatment?

    ECT is appropriate for treating patients with serious mental illnesses and is appropriate for a wide age range. It is an option for children (with specific restrictions in some states), teenagers, and adults of all ages. The most significant advantages of ECT are typically observed in individuals aged 60 and above.

    Why is ECT used?

    When traditional medications are ineffective, ECT may be considered.

    ECT may be used when an individual experiences a severe shutdown of function known as catatonia.

    In cases where a person poses a danger to themselves or others, and traditional medications take days or weeks to take effect, ECT may be an option.

    What conditions are treated with ECT?

    Several disorders can be treated with electroconvulsive treatment (ECT), including:

    • Depression, especially in those above sixty years old.
    • Schizophrenia (which includes psychotic disorders as well as other conditions that fall within the spectrum of schizophrenia).
    • Bipolar disorder as well as other mania-producing disorders.

    How common is ECT?

    ECT is not frequently used as an initial treatment for depression, even though it is both safe and effective. Numerous newer medications can be used to treat this condition. The availability of ECT is limited, as fewer hospitals provide this treatment for inpatients and outpatients.

    Procedure Details

    What happens before this procedure?

    Your healthcare provider will explain ECT and how it works before you begin the treatment or someone who can make healthcare decisions for you. They will also ensure that you do not have any underlying health conditions or reasons that might prevent you from receiving ECT.

    Before ECT, various tests may be conducted, including (but not limited to):

    • Blood and urine tests, such as complete blood count, metabolic panel (basic or comprehensive), thyroid function, kidney function, and more.
    • Imaging tests on your skull, brain, and spine, which may include X-rays and computerized tomography (CT) scans.
    • An electrocardiogram (ECG or EKG) helps to check your heart function and detects any unusual changes or problems with your heart’s electrical system.

    “Contraindications” refer to the conditions and factors that may prevent you from receiving ECT. These are evaluated individually, and even in cases where there are contraindications, medical professionals may frequently evaluate the course of therapy to allow for the continuation of ECT. Contraindications include:

    • Myocardial infarction, recent heart attack, or other unstable cardiac diseases.
    • disorders such as intracranial hypertension or brain tumors that raise the pressure within your skull.
    • Aneurysm, stroke, or other recent brain hemorrhage causes.
    • severe respiratory ailments, such as chronic obstructive pulmonary disease, or COPD.
    • other potentially lethal conditions or those meeting the requirements for physical classification levels 4 or 5 of the American Society of Anesthesiologists.

    Stopping fluids and food intake

    Because the ECT process requires general anesthesia, your healthcare practitioner may advise you to fast before the operation. This implies that you have to fast for eight hours beforehand the procedure and not drink anything for two hours before the procedure.

    What you should take off or remove

    Because the ECT process requires general anesthesia, your healthcare professional will ask you to fast before the operation. Typical instances include removing your eyeglasses, contact lenses, hearing aids, false teeth, dental prostheses, etc. This precaution is taken to prevent any potential harm or choking hazards associated with these items.

    Medication stoppage

    Certain drugs may alter how ECT impacts you, potentially influencing the effectiveness of the treatment. Your healthcare professional might recommend discontinuing or lowering the dosage of specific medications. It’s crucial to follow your provider’s instructions while making adjustments to your medicines, though.

    What happens during this procedure?

    Many medical professionals, such as psychiatrists, anesthesiologists, and other qualified staff, are involved in ECT.

    Anesthesia and other preparations

    The ECT procedure begins with general anesthesia, which induces deep sleep and prevents any sensation of pain, discomfort, or anxiety during the procedure. A muscle relaxant is also administered to prevent potential injuries or strain during the seizure.

    A bite guard is placed in the mouth to safeguard the teeth, and an intravenous (IV) needle is inserted into a vein, typically in the arm. The IV provides rapid access to medication administration for anesthesia and to counteract any potential side effects.

    Electrode placement

    Electrodes will be placed by a healthcare provider on the skin of your head to serve as contact points for the electric current. Your unique demands will dictate where the electrodes are placed, and the providers will choose a location that reduces the possibility of serious consequences. Providers have three different options for electrode placement.

    Right unilateral: In this configuration, both electrodes are positioned on the right side of your head. One electrode is placed between your temple and the end of your eyebrow, while the other is positioned near the top of your head, directly above your right ear.

    Bifrontal: Electrodes are placed on contradictory sides of your forehead, just above the end of your eyebrow.

    Bitemporal

    A healthcare provider will cover the electrodes with a conductive gel to prevent skin irritation and burns. Despite the very low level of electrical current used, there is still a risk of skin irritation and burns.

    Electricity requirements

    A modest electrical current, usually up to 0.4 amps, is used in ECT. To put this into perspective, a 9-volt alkaline battery can supply approximately 0.6 amps of current for one hour before depleting. Providers will gradually increase the current from low levels until the desired effect is achieved.

    An ECT’s electrical current is only there for a very brief period. The brain is usually given short electrical current treatments most of the time.

    Induced seizure

    ECT induces a seizure by using an electrical current, which triggers a burst of electrical activity in the brain, causing affected brain cells to fire rapidly. This leads to improvements in that particular brain area’s functioning through electrical and chemical changes.

    Seizures brought on by ECT usually last thirty to ninety seconds. If seizures persist longer, medical professionals can terminate the seizure by administering injectable medications.

    What happens after this procedure?

    After the seizure ends, medical professionals will observe you as you come out of anesthesia. They will also monitor your vital signs to detect any potential side effects or anesthesia-related issues.

    After the treatment, most people regain full awareness in 10 to 15 minutes, and they may up and move around in 30 minutes.

    Indications

    Patients with treatment-resistant depression or severe major depression that impairs daily activities may be candidates for ECT. Depression that does not improve after taking antidepressants for many trials is referred to as treatment-resistant depression. ECT is also thought to be a therapy for catatonia, severe psychosis, depression-related food refusal, and self-harm.

    Patients with bipolar illness can get ECT treatment throughout both their manic and depressive periods. In patients who are old, disabled, pregnant, or nursing, ECT may have a superior safety profile than antidepressants or antipsychotics. Suicidal thoughts can be rapidly distracted by ECT, with complete resolution observed in 38% of patients after one week, 61% after two weeks, and 81% after the completion of ECT.

    Contraindications

    Blood pressure, heart rate, and intracranial pressure may also momentarily increase as a verdict of using ECT. It is important to be cautious when treating patients with cardiovascular, pulmonary, or central nervous system conditions.

    For people who have a pheochromocytoma or high intracranial pressure that puts pressure on the brain, ECT is not advised. Conditions such as high intracranial pressure without pressure on the brain, cardiovascular conduction issues, high-risk pregnancies, and aortic and cerebral aneurysms are considered relative contraindications for ECT.

    Complications

    Although this impact is temporary, bitemporal or bilateral ECT impairs cognition more than unilateral ECT. Three days following treatment, global cognition, verbal memory, and autobiographical memory were all poorer with bilateral therapy, according to a meta-analysis of 1415 depressed individuals receiving ECT.

    According to the American Psychiatric Association, patients receiving ECT are more at risk if they have a history of acute cerebral hemorrhage or stroke, unstable vascular aneurysm, severe pulmonary disease, American Society of Anesthesiologists (ASA) Class 4 or 5 status, space-occupying intracranial lesion with evidence of high increased intracranial pressure, and another condition.

    Throughout the tonic phase of the seizure, there is a physiological parasympathetic discharge that lasts for 15–20 seconds. This can result in bradyarrhythmias such as asystole, atrioventricular block, and premature atrial and ventricular contractions. Individuals who experience subconvulsive seizures are more susceptible to asystole.

    Ironically, asystole is less common in individuals with underlying arrhythmias or heart blocks. A catecholamine rush that results in tachycardia and hypertension during the clonic phase of a seizure is correlated with the seizure’s length. After the seizure, tachycardia and hypertension usually go away in 10 to 20 minutes, while some individuals continue to have persistent hypertension that has to be treated by a doctor.

    While ejection fraction can drop in healthy people after ECT, those with baseline cardiac illness are more vulnerable after therapy.

    Of the 53 people who had ECT, seven experienced new global left ventricular (LV) systolic dysfunction, and eight experienced anomalies related to the movement of their regional walls.

    LV dysfunction patients did not experience any negative consequences from this group of individuals. Eight patients had elevated cardiac troponin levels in a prospective cohort study including 100 people undergoing ECT; only two of these patients had further signs of myocardial ischemia or infarction. Cerebral blood flow as well as intracranial pressure both rise while the ECT therapy is done.

    In a clinical setting, patients may show signs of memory loss, delirium, confusion, and disorientation. The AHA-ACC guidelines classify electrocardiography (ECT) as a low-risk procedure because of its excellent tolerance, transient hemodynamic lability, and low death rate.

    Clinical Significance

    ECT, an inter-professional procedure, is relatively safe and low-risk and is beneficial for the treatment of conditions such as depression, suicidality, severe psychosis, food refusal secondary to depression, and catatonia. Anesthesiologists, psychiatrists, nurses, and other para-medics need to coordinate care for this treatment.

    Multiple sessions are usually required for a lasting effect. The stigma around ECT is mainly due to the lack of anesthesia in early treatments, which led to significant injury and severe memory loss. The effects of antidepressants usually take effect quickly and might linger for several years. When ECT is used under strict supervision, the death rate is extremely low, although, over time, moderate memory loss may result. ECT is frequently used in pregnant patients and the elderly due to the avoidance of side effects from psychotropic medications. Despite having a complex mechanism of action, ECT does alter regional metabolism along with cerebral blood flow.

    Benefits of ECT vs. other therapies

    ECT can be effective for many individuals when medications or psychotherapy are not successful. In general, it has less negative effects than prescription drugs.

    ECT also works as a rapid relief of psychiatric symptoms. It can lead to the resolution of depression or mania after just one or two treatments, whereas many medications take weeks to show effects. As a result, ECT can be particularly advantageous for individuals who:

    • suicidal
    • psychotic
    • catatonic

    However, certain individuals might need ongoing ECT sessions or medication to sustain the positive effects of ECT. Your physician will have to closely track your improvement to decide on the most suitable post-treatment care for you.

    ECT can be safely placed and used for pregnant women and individuals with heart conditions.

    Side effects of ECT

    The side effects of ECT are uncommon and usually accurate. They may include:

    • Headache or muscle soreness in the hours following the treatment
    • Momentary confusion after the treatment
    • Nausea, typically shortly after a treatment
    • Short-term or long-term memory impairment
    • Rarely, irregular heart rate

    ECT can potentially be fatal, but deaths are exceedingly rare.

    Approximately 1 in 10,000 persons die from ECT. This ratio is lower than the anticipated 12 suicides per 100,000 people throughout the United States.

    Overview

    ECT, also known as electroconvulsive therapy, involves the administration of small electric currents to the brain under general anesthesia, intentionally causing a brief seizure. Such electrical currents appear to change brain chemistry in a way that alleviates some mental disorder symptoms immediately.

    ECT is often effective when other treatments have failed, provided that the full course of treatment is completed, although it may not be effective for everyone. The early uses of ECT, which required giving huge amounts of electricity without anesthetic and led to memory loss, broken bones, and other serious side effects, are mostly to blame for the treatment’s negative reputation.

    Today, ECT is much safer. Although it can still result in some side effects, it now delivers electric currents in a controlled environment to achieve the greatest advantages with the fewest possible risks.

    FAQs

    What is electro-compulsive therapy used for?

    Electroconvulsive therapy (ECT) is a typically secure, low-risk treatment for depression, suicidality, severe psychosis, depression-related food refusal, and catatonia. Interprofessional care coordination between nurses, psychiatrists, and anesthesiologists is necessary.

    Is electroshock therapy still used today?

    In the United States, the standard protocol for electroconvulsive treatment (ECT) involves two to three weekly sessions over three to four weeks. On weekdays, some physicians do right unilateral ultra-brief pulse electroconvulsive treatment, a more recent method.

    How does ECT work on the brain?

    During an unconscious patient’s ECT session, a small quantity of electrical current is applied to the brain. The whole brain is affected by this current, including the areas that regulate mood, hunger, and sleep. It also induces a seizure.

    What to expect after ECT treatment?

    After being transferred to the recovery room, patients stay there until their respiration, heart rate, and blood pressure are almost back to how they were before treatment. This usually takes twenty to twenty-five minutes. Headaches, pains in the muscles, and nausea are the most frequent adverse effects that patients encounter.

    Can you live a normal life after ECT?

    In conclusion, after two and four weeks following treatment, ECT is linked to improvements in anterograde memory, mood, quality of life, and overall cognitive status. The majority of patients saw improvements in their function and quality of life.

  • Combination Therapy (Ultrasound and Interferential Therapy)

    Combination Therapy (Ultrasound and Interferential Therapy)

    A Combination of Therapy: What is It?

    Combination therapy often entails using electrical stimulation therapy and ultrasound (US) at the same time. While diadynamic currents are widely used in Europe, bipolar interferential current therapy (IFC) is most commonly used in conjunction with the US in the UK.

    The high-frequency modality known as therapeutic ultrasound has both nonthermal and thermal effects. Non-thermal effects encompass increased protein synthesis, membrane changes, tissue healing, and sonic streamers and compression that enhance the process of inflammatory response. Thermal effects include increasing tissue metabolism, collagen elasticity, and capillary blood flow as well as reducing skeletal muscle spasm. Tissues high in collagen content utilize it well. Osteoarthritis and other musculoskeletal disorders are treated with interferential current treatment (IFT) to relieve pain.

    Combination therapy involves using two distinct modalities simultaneously at the same location in order to simultaneously produce, apply, and achieve the therapeutic benefits of both modalities. One modality’s boosting influence over the other is observed during such an application. Few studies have found that applying a combination therapy is a more effective way to relieve pain than using an individual technique.

    IFT-WITH-ULTRASOUND
    IFT-WITH-ULTRASOUND

    US with the IFT

    Bipolar IFT involves applying the US head to the painful location and placing the IFT electrode over an adjacent area. This application lessens the adaptation that is often brought about when IFT is employed as the only modality.

    Combination therapy’s mechanism:

    A peripheral nerve’s resting potential is decreased when it is exposed to the US because it becomes more permeable to different ions, particularly calcium (Ca++) and sodium (Na+). This modified permeability brings the nerve membrane closer to its depolarization threshold but typically prevents the nerve from exploding. The depolarization potential is induced by the simultaneous application of an interferential current to the nerve; however, because of the potentiation effect of ultrasound therapy, a smaller current than usual will be required to achieve this.

    It’s easy to show this. The feeling created by the IFT will lessen even if the IFT intensity remains constant if both the US and IFT are applied and the US is dialled down to zero during the application. When the US is cranked up again, the IFT experience returns in full force.

    When combined with IFT, the US seems to have fewer negative treatment effects than when combined with other electrical stimulations, such as diadynamic currents. It has also been suggested that the US-IFT combination can offer a deeper effective treatment depth, albeit there is no hard evidence to back this claim.

    Combining the two therapy modalities seems to preserve each of the specific effects of the therapies; nevertheless, the advantage is that outcomes can be obtained with lower treatment intensities, and there may be further advantages in terms of diagnosis and treatment duration.

    Benefits of Combination Therapy:

    It is proposed that:

    The benefits of each therapy modality can be obtained by combining US and IF, however the result requires lower intensities to be felt.
    the IFT  treatment’s accompanying accommodation effects are diminished, if not completely eradicated.

    The following have been listed as the primary benefits of such a combination:

    • in accurately localising lesions (particularly chronic ones), i.e., using diagnostics to ensure precise localization of US treatment
    • to improve precision and efficacy in treating deeper lesions and trigger points.

    Using Combined Therapy for Diagnostic Purposes:

    For this technique, it is recommended to utilise a constant US output of 0.5W/cm2, while many practitioners report significant effects at lesser intensities. If available, a frequency of 1 MHz is preferred since it penetrates tissues more effectively. The most popular setting for the IFT output using a bipolar output is 100Hz (no sweep).

    Method:

    Align the indifferent electrode (the standard IFT pad electrode) so that the current can flow through the affected tissue. Generally speaking, it might be positioned on the opposite side of the limb (for deeper lesions) or on the same aspect of the limb (more common for superficial lesions).

    First, turn on the US, then the IFT (with the same specifications as before).

    When the patient experiences “normal” tingling, progressively raise the IFT output intensity, starting with the US head far from the lesion.

    Approach the location of the lesion and record any areas of increased sensitivity or pain, either local or referred.

    The focal point of the lesion is thought to represent the place of highest sensitivity; nevertheless, it simply indicates a “geographical” location and cannot reveal information about the specific tissue involved or its depth. This is typically a repeatable and consistent position.

    Utilising Combined Therapy for Treatment:

    Combination therapy can be used for both therapeutic and diagnostic purposes. When both the IFT and US therapeutic benefits have been demonstrated, it is appropriate to use it as a treatment. This seems to be the only rationale for the modality at this moment, without any specific proof of further benefit when used in combination.

    The specific dosages for each of the US and IFT should be determined by taking into account the lesion’s needs and desired outcomes. There’s no proof that special’ therapy dosages are necessary. It should be mentioned, nevertheless, that a lower-than-normal IFT intensity will probably be needed to provide the desired result.

    A swing in the IFT dosage, according to some manufacturers, is unnecessary because the effect of accommodation is minimal. IFT- the needed effect can be achieved with an acceptable frequency swing, there doesn’t seem to be any reason why it shouldn’t be employed.

    The US component would typically end first, leaving the IFT part to continue in isolation, therefore if the treatment times are different, there could be an issue. The combination of the modalities can save time and effort when the required treatment times are similar, even if no additional benefit is observed. Applying two different therapies may be just as beneficial when they are not the same.

    During combination treatment, it’s critical to follow the safe and efficient US treatment approach, which calls for constantly employing a moving treatment head, maintaining effective contact, and, whenever achievable, keeping the treatment head and patient’s skin perpendicular.

    Examples of Treatments:

    The patient has an acute ankle lateral ligament tear or lesion. The justification for ultrasound is that it will accelerate the healing and inflammatory process, whereas the use of interferential is due to its ability to lessen acute pain.

    US dosage (calculated using the standard dose)
    10 minutes, 3MHz, 0.2 W/cm2, Pulse 1:4.

    Interferential dosage (for bipolar, acute pain): 90–130 Hz, 10 min

    With the US treatment head placed over the damaged component or components of the lateral ligament, an overlapping pad electrode is positioned medially at the ankle.

    Although there is no proof that utilising both modalities simultaneously has any advantages to using them sequentially, the treatment may be more effective than using each one alone.

    Side effects of Combination Therapy:

    • Skin irritation: At the application site, both ultrasound and interferential therapy may cause moderate skin irritation, such as burning or redness. Usually only transitory, this resolves on its own following therapy.
    • Burning: An excessively high ultrasonic intensity or insufficient applicator movement may result in a burning sensation on the skin.
    • Bleeding: Ultrasound therapy may in rare instances result in mild bleeding, particularly when applied to regions with thin skin or ruptured blood vessels.
    • Side effects of electrical stimulation: Tingling, prickling, or twitching of the muscles may occur during treatment with interfereential therapy. These feelings ought to be moderate and bearable.

    Contraindications: 

    Apart from the limitations associated with the separate modalities, there don’t seem to be any particular contraindications for combination therapy.

    FAQs

    Which limitations does ultrasound therapy have?

    If used for extended lengths of time, the skin may get superficially burned.

    Is the body safe from ultrasound?

    While ultrasound is generally regarded as safe when performed carefully by medical professionals with the necessary training,

    Does sciatica benefit from ultrasound?

    It’s a focused, non-invasive therapy that can aid in lowering inflammation, enhancing circulation, and encouraging healing. Although it might not be a panacea, it can undoubtedly make a big difference in how well your sciatica pain is managed and how much better your life is.

    In physiotherapy, what is ift?

    A non-invasive physical therapy for tissue repair and pain reduction is called interferential therapy (IFT). It works by creating a frequency with low-frequency electrical currents that are designed to stop pain signals from reaching the brain. An interferential current, or IFC, is the term for this frequency.

    Which circumstance makes it inappropriate to use it?

    Although there aren’t many contraindications, individuals who present with very severe inflammation, fever, tumours, thrombosis, pregnancy, a strong allergy to this kind of therapy, or who have a cardiac pacemaker should probably not be treated.

    In IFT, where should electrodes be placed?

    IFT electrode implantation approach for “painful area” At the edges of the painful region associated with LBP, two electrodes were positioned bilaterally or unilaterally.

    References

    • Dhameliya, N. (2023a, May 11). Combination Therapy (Ultrasound and Interferential Therapy). Samarpan Physiotherapy Clinic. https://samarpanphysioclinic.com/combination-therapy/
  • Range of Motion Exercises

    Range of Motion Exercises

    What is a Range of Motion Exercise?

    Range of motion (ROM) exercises are essential activities designed to keep joints flexible, improve muscle strength, and maintain overall mobility. These exercises are particularly important for individuals recovering from injury, surgery, or those suffering from chronic conditions such as arthritis.

    A loss in the range of motion can be caused by a variety of factors, including strained or sprained muscles or joints as a consequence of an accident or sports injury, inactivity after surgery as well as simple inactivity. Exercises for range of motion that focus on these injured regions can help repair the damage and give your muscles and joints the freedom to move freely again. They’re made to deal with the specific issue you’re facing and support your recovery of range of motion and strength without damaging yourself more.

    Everybody has a distinct experience. For instance, some people are able to perform full splits, but others are unable to do so because their muscles and joints aren’t free enough. Understanding your range of motion might help you stay physically well and avoid accidents.

    After an accident or surgery, range-of-motion exercises are recommended to restore joint function. They can also be used as a continuous therapy for conditions like persistent osteoarthritis. By gradually expanding the patient’s range of motion in both joints and muscles and reducing pain, swelling, and stiffness, they hope to maintain the patient’s flexibility.

    Pain alleviation from a bent joint is oftentimes possible. However, this reduces joint mobility, therefore it is counterproductive. Range-of-motion exercises progressively stretch and strengthen muscles, enhancing joint flexibility without causing damage. They can be performed by patients alone or under the supervision of physical therapists. The body component that requires attention dictates the suitable exercises.

    Types of Range of Motion Exercises:

    In order to prevent pain from impeding growth, it is crucial that these exercises be increased gradually. Exercises to improve range of motion often fall into three categories.

    Passive Range-of-Motion Exercises

    passive-shoulder-abduction
    Passive Range-of-Motion Exercises

    To preserve joint flexibility, individuals with degenerative or congenital problems or serious injuries may benefit from these activities.

    For joints that have become immobile as a result of trauma or paralysis, they are helpful. In passive range of motion exercises, the therapist moves the patient’s limb or body part around the tight joint, gradually extending the muscles and providing a reminder of proper movement technique. To encourage a quicker recovery, therapeutic stretching exercises are typically coupled with passive range-of-motion exercises.

    In order to help you proceed toward a possible recovery, medical specialists will flex your muscles and bend your joints on a regular basis if you are immobile. They could even impart helpfulness skills to your family.

    Active-Assistive Range-of-Motion Exercises

    Active-Assistive Range-of-Motion Exercises
    Active-Assistive Range-of-Motion Exercises

    As the patient moves as much as possible in the prescribed manner, the therapist supports the distal joint, which is the portion of the joint that is furthest from the point of attachment.

    These exercises entail some degree of therapist support, as the name implies. The majority of the motions are performed by the patient, albeit they do require some assistance to be performed correctly. Most of the time, weakness or pain from bumps, bruises, falls, or other mishaps, up to major injuries, is the reason for this limited range of motion. Before helping with the motions, the therapist usually secures the joint using a band or a strap. At first, the patient undergoing these exercises could experience severe pain and weakness. They do, however, have a good chance of gradually and permanently improving the range of motion surrounding the injured joint over time.

    For instance, you cannot move your broken ankle throughout the healing process when performing AAROM exercises.

    Even when your ankle heals and is stable enough to support weight, you can still have trouble moving. It’s just so far that you can press down and raise your foot.

    Your foot can be moved somewhat more than what your body will allow by applying pressure on it from a physical therapist. You might be able to increase the muscle and joint’s range of motion by doing this.

    Active Range-of-Motion Exercises

    wrist ROM
    Active Range-of-Motion Exercises

    The patient moves the joint during active range-of-motion activities on their own, without help. Enabling the patient to exercise independently is the aim of physical therapy, even if these activities might not be feasible at first. The patient pushes or pulls against an opposing, resistance force when engaging in resistive exercise. Isometric exercises include the patient flexing and extending their muscles while maintaining a fixed joint position.

    The physical therapist’s help with these activities is minimal. The therapist’s engagement in these exercises is usually restricted to verbal cues and instructions on how to improve the posture and movement involved in the exercises, which the patient is fully capable of executing. They work well for mild injuries that cause pain, discomfort, or hindrance but do not significantly limit the movement of affected body parts. Over time, this increases your mobility and is beneficial to your general health.

    By holding stretches or motions for a minimum of thirty seconds, you can increase your active range of motion. You strengthen the muscles required for a certain activity by doing this.

    They are a crucial component of a physical rehabilitation program, designed to facilitate patients’ safe and prompt return to their regular activities.

    Benefits of Range of Motion Exercises:

    Exercises that increase range of motion (ROM) have several advantages, particularly when used in conjunction with physical therapy and general health maintenance:

    • Maintaining Joint Flexibility: Regular range-of-motion exercises assist in maintaining and enhancing joint flexibility. Because it lessens stiffness and helps avoid illnesses like arthritis, this is essential for joint health.
    • Improving Joint Function: You may increase the functional capacity of joints by putting them through their whole range of motion on a regular basis. To restore normal movement patterns following surgery or injury, this is very crucial.
    • Stretching and lengthening muscles through a range of motion exercises enhances muscular flexibility. This can enhance general muscle function and lower the chance of sprains.
    • Preventing Contractures: Contractures are irreversible shortened tendons or muscles that cause a decreased range of motion in joints. Because ROM exercises preserve normal muscle length, they can help avoid contractures.
    • Increasing Circulation: As a result of movement, the tissues around the joints receive more blood, which aids in the healing process and lowers inflammation.
    • Improving Physical Performance: Increased range of motion helps athletes and those who engage in physical activity by improving their agility, balance, and general performance.
    • Helping to Promote Relaxation: During range-of-motion exercises, controlled, moderate motions can help to promote relaxation and reduce muscular tension, which can help to relieve overall stress.
    • Improving Quality of Life: People can carry out everyday tasks more easily and with a lower risk of injury when their muscles and joints are flexible and mobile.
    • Supporting Posture: Improved posture can lessen stress on the spine and other joints by achieving proper joint alignment and muscular balance through range-of-motion exercises.
    • Facilitating Rehabilitation: To restore normal movement patterns and avoid difficulties, ROM exercises are frequently employed in rehabilitation programs following operations or accidents.

    Risks of Range of Motion Exercises:

    • Drawbacks of Motion Without Movement. Injuries are more likely to occur when a movement is not under your control. A person who doesn’t know your limit could push a joint or muscle farther than it should.
    • Increasing your range of motion by stretching a bit beyond what’s normal for you is beneficial. However, pushing too hard might result in a ripped muscle or joint injury.?
    • This also poses a concern in AAROM. You shouldn’t be forced to endure agony by anyone.
    • There could be certain movements when you just use one side of your muscle. You run the risk of restricting your range of motion if you repeatedly perform a specific action without varying the way you utilize your muscles.
    • You develop your biceps, for instance, if you work out at a gym and perform a series of exercises that target particular muscles. You risk reducing your arms’ range of motion if you only concentrate on this muscle group on the back of your arms without incorporating exercises that strengthen your triceps.
    • Remember that there should be no pain involved in any range-of-motion exercises. Pay attention to your body’s signals and quit when you’ve had enough. When utilizing a passive or active range of motion, overextending oneself might lead to harm.

    Conclusions:

    Elderly joint pain decreased after doing six rounds of ROM exercise. When there was no movement, older adults’ low joint pain levels ranged from around 30,3% prior to ROM exercise to 3% following ROM exercise.

    In conclusion, include range-of-motion exercises in your daily routine to help preserve joint health, increase flexibility, and improve your physical health in general. People of all ages and fitness levels, from athletes to those recuperating from injuries or managing long-term diseases, can benefit from these activities.

    FAQs

    How frequently do you perform ROM exercises?

    How frequently? ROM exercises should ideally be performed twice a day at the very least. Perform the exercises more often and for longer periods of time each time if you are attempting to regain joint mobility after you have already lost part of it.

    What is prevented by ROM exercises?

    Patients are frequently recommended range-of-motion exercises to assist restore joint function following an injury. These exercises aim to reduce pain, edema, and stiffness while maintaining flexibility and gradually increasing the range of joint and muscle mobility.

    What uses do range of motion exercises serve?

    They are a crucial component of a physical rehabilitation program, designed to facilitate patients’ safe and prompt return to their regular activities.

    ROM exercise summary: what is it?

    Numerous components affect this motion, including the arrangement of the joint’s bone surfaces, the joint capsule, ligaments, tendons, and muscles.

    How do ROM exercises help with shoulder pain?

    Sitting upright and laying your hand on a table towel with your thumb pointing upward, while maintaining good posture. Your hand should be gently extended laterally as far as it is comfortable. Return to your starting place cautiously and slowly.

    Which groups do ROM exercises fall under?

    Depending on your injury, you’ll work out using one or more of these three methods: active, passive, or active-passive. This is an explanation of their operation. Exercises for passive range of motion are beneficial for joints that have become immobile as a result of trauma or paralysis.

    What is a ROM exercise that is active?

    Joint movement is the outcome of opposing muscles contracting and relaxing.

    What are the ROM exercise’s conclusions?

    Conclusions: Elderly joint pain decreased following six sessions of range-of-motion exercise. When there was no movement, the elderly’s low joint pain level was around 30,3% before to ROM exercise and decreased to 3% following ROM exercise.

    Why would you exercise your range of motion?

    Exercises including active range of motion aid in enhancing joint function. Your joints’ range of motion determines how far they can travel in various directions. You may fully extend the range of motion in each joint with the aid of these exercises. Exercise helps lessen pain, maintain joint flexibility, and enhance strength and balance.

    Which three categories of range-of-motion exercises exist?

    Exercises to improve range of motion often fall into three categories.
    Range-of-motion exercises done inactively.
    Exercises for Range of Motion: Active-Assistive.
    Active Range of Motion.

    Which four active range-of-motion exercises are there?

    Pops of the Ankle. Simply flex and stretch your ankles while lying down.
    Heel Slippers. Lay flat, elevate your knee with your heel slipped back, then lower it back down.
    Kidnapping Hip adduction. Maintain a straight leg with your heel flexed while lying flat.
    Extended Arc Quads.

    Why are ROM exercises performed?

    Patients are frequently recommended range-of-motion exercises to assist restore joint function following an injury. These exercises aim to reduce pain, edema, and stiffness while maintaining flexibility and gradually increasing the range of joint and muscle mobility.

    What is ROM exercise?

    The degree to which a muscle or joint in your body can be stretched or moved is referred to as its “range of motion” (ROM). Everybody has a distinct experience.

    Which five range-of-motion exercises are there?

    Among the exercises for active range of motion are:
    Flexing of the shoulders.
    horizontal adduction and abduction of the shoulders.
    Circumduction of the shoulder.
    Rotate and extend the wrist.
    Supination and pronation of the forearm.
    Elbow extension.

    Range of motion activity: what is it?

    In order to prevent discomfort from impeding growth, it is crucial that these workouts be increased gradually.

    What is the range of motion principle?

    Joint form, the joint capsule, ligaments, and periarticular tendons and muscles all have an impact on range of motion. Exercises known as range-of-motion (ROM) allow for the flexion and extension of particular joints.

    What safety measures apply to ROM exercise?

    Avert sudden or abrupt movements. If pain strikes, stop. Although some initial discomfort is common, you shouldn’t experience any agony. Over time, regular exercise will help lessen the soreness.

    How can range of motion be maintained most effectively?

    Dynamic stretching is advised as part of the warm-up to prevent athletes from experiencing a loss in strength and performance from static stretching before to a competition or activity.

    References

    • Difference Between Passive Range of Motion and Active Range of Motion. (2024, February 18). WebMD. https://www.webmd.com/fitness-exercise/difference-between-passive-range-of-motion-and-active-range-of-motion
    • Range of Motion Exercises |  Mark Niles  PT  MS  CSCS | Physical Medicine and Re. (n.d.). https://www.mark-niles.com/rangeofmotion-exercises.php
  • 12 Best Knee Stability Exercises

    12 Best Knee Stability Exercises

    What is knee Stability Exercise?

    Knee stability Exercises are an important aspect of any complete fitness program, especially for people who participate in activities that strain their knees. The primary goals of these exercises are to increase stability throughout, balance, coordination, and strength in the muscles surrounding the knee joint. You may improve your sports performance, lessen your chance of knee injuries, and help in the healing and recovery process by including Knee Stability Exercises in your program.

    The knee joint is particularly sensitive to damage due to the strains it experiences during physical activity and its unique anatomy. Instability, higher joint stress, and a higher risk of injuries such as ligament sprains, strains, or tears can result from weakness or imbalance in the muscles surrounding the knee. The quadriceps, hamstrings, glutes, and other surrounding muscles that support and stabilize the knee are the muscles that are targeted by knee stability exercises to help treat these problems.

    In addition to preventing injuries, knee stability exercises are beneficial for those who currently have knee issues, such as osteoarthritis or patellofemoral pain syndrome. These activities could improve general knee health by lowering pain and strengthening joint function.

    Knee Stability Exercises are important for improving your general stability and building those muscles surrounding the knee joint.

    Advantages of Knee Stability Exercise:

    Knee stability Exercises provides several advantages for people of all ages and fitness levels. The primary benefits of including knee stability exercises in physical therapy are as follows:

    • Better performance

    knee stability exercises can be beneficial for athletes and others who play sports or engage in activities that involve frequent knee movement, such as sprinting, jumping, or twisting. By doing these exercises to increase balance, coordination, and sense of balance (awareness of body position), performance is improved and the chance of falls or accidents is decreased.

    • Relief of knee pain

    Knee stability exercises can help reduce pain and discomfort in those with osteoarthritis, patellofemoral pain syndrome, and other chronic knee pain problems. Increasing the strength of the muscles surrounding the knee can help to better support the joint, lessen the strain on the injured areas, or improve knee function in general.

    • Improving Functional Movement

    To strengthen the stability of the knee Exercises involve natural movements such as walking, bending, and climbing stairs. By strengthening and stabilizing your knee joint, these exercises can improve your ability to do routine tasks and reduce your risk of knee-related difficulties.

    • Preventing injuries

    Improved knee stability was achieved by exercising the muscles that surround the knee joint, namely the quadriceps, hamstrings, and glutes. It is possible to lower your risk of knee injuries such as ligament sprains or tears as well as patellofemoral pain syndrome by strengthening and stabilizing these muscles.

    • Improved Coordination Stability

    To maintain correct alignment and function during a variety of physical activities, strong and stable knee joints are necessary. knee stability exercise focuses on the ligaments, tendons, and muscles that support the knee joint, improving total joint stability and lowering the possibility of collapsing or instability.

    Remember that the best prevention against injury and excessive effort is to practice knee stability exercises correctly and raise the difficulty level gradually. To create a customized exercise program that meets your goals, it’s advisable to speak with a certified physical therapist if you have any underlying knee ailments or concerns.

    Getting Ready for Knee Stability Exercise:

    It’s important to prepare for knee exercises, just like with other physical activities. A suitable warm-up could consist of five to ten minutes of light cardio, like walking or cycling, and then dynamic stretches that are similar to the activities you are going to do.

    Knowing the boundaries of your body is also important. Start carefully if you’ve never exercised before, are returning to it after a break, or have an injury. To prevent overstressing your knees, gradually increase the time and intensity of your exercises. Always pay attention to your body’s signals; while some pain is natural, excessive or intense pain is a reason to stop and see an orthopedic physician.

    Knee Stability Exercise:

    Never forget to begin with a weight or degree of difficulty that pushes you but doesn’t result in severe pain. physical therapists or medical experts should be consulted before beginning any new exercise plan if you have any pre-existing knee issues or injuries.

    Leg extensions

    • Sit up straight in a long chair and place your leg on the floor or support to start.
    • Tighten your thigh muscles, look forward, and raise one leg as high as you can to build strength without getting off the chair.
    • Hold this position for a few seconds.
    • Then return to your neutral position.
    • Then relax.
    • Repeat this exercise five to ten times.
    knee-extension
    knee-extension

    Single-Leg Deadlifts

    • This exercise requires you to stand with both feet below your hips.
    • Take a look at your left leg, which ought to be straight with a slight bend in it.
    • Start pushing your right foot back with a straight leg, as if you were kicking the bottom of your foot against the wall behind you.
    • At the same time that you begin to bend forward at the waist, extend your trunk forward until it nearly touches the ground.
    • Your arms have to be horizontal to the floor, straight up, and shoulder height at all times.
    • At the point of lowest elevation, your body should create a straight line from your head to the bottom of your right foot.
    • Then, while maintaining your body’s straight posture, reach your right leg forward and raise your body until you are standing upright once more.
    • Then return to your neutral position.
    • Then relax.
    • Repeat this exercise five to ten times.
    Single-leg-deadlift
    Single-leg-deadlift

    Calf Raises

    • Place your feet hip-width apart and stand straight on a level surface.
    • As you point your toes forward, keep your shoulders back and straight.
    • Put your arms at your sides naturally while contracting your core.
    • Now elevate both heels off the ground.
    • Hold this position for a few seconds.
    • Then return to your neutral position.
    • Then relax.
    • Repeat this exercise five to ten times.
    Calf Raises
    Calf Raises

    Step-Ups

    • Start by standing in a comfortable position.
    • Put it on a step bench’s foot, the bottom step of a stairwell, or a platform.
    • Try to maintain your height at hip level.
    • With your knee bent, slowly lower your opposing foot to the ground.
    • Put your toe lightly onto the ground, then step back up to claim your space.
    • Then return to your neutral position.
    • Then relax.
    • Repeat this exercise five to ten times.
    step-ups
    step-ups

    Side-Lying Leg Lifts

    • To support oneself while lying on your side, raise the affected upper leg and flex the lower leg.
    • keeping your knee firm but not locked.
    • While lying flat, gradually elevate your upper leg to a 45° position.
    • Hold this position for a few seconds.
    • Then return to your neutral position.
    • Then relax.
    • Repeat this exercise five to ten times.
    side-lying-hip-abduction
    side-lying-hip-abduction

    Hamstring Curls

    • First, take a comfortable standing position.
    • A hip’s width should separate your feet.
    • Elevate one foot, bend the knee, and point the heel skyward.
    • Stretch as much as you can while maintaining a straight upper body and forward-pointing legs.
    • Hold this position for a few seconds.
    • Then return to your neutral position.
    • Then relax.
    • Repeat this exercise five to ten times.
    standing-hamstring-curl
    standing-hamstring-curl

    Straight Leg Raises

    • First, find a comfortable place for yourself and lie down on the ground.
    • Flex your knee lightly now.
    • Next, gradually elevate your one leg.
    • On the opposite side, maintain the knee straight.
    • Hold this position for a few seconds.
    • Then lower your leg.
    • Then return to your neutral position.
    • Then relax.
    • Repeat this exercise five to ten times.
    Straight-leg-raise
    Straight-leg-raise-

    Wall Squats

    • Place your feet away from the wall and your back and shoulders against it.
    • Bend your knees while your back moves against the wall to form a squat.
    • Your knees should be positioned above your ankles with a 90-degree bend.
    • Maintain pressure on your back, upper body, and the wall.
    • As you maintain this position, concentrate on tightening the muscles in your thighs.
    • After that, slide back up the wall to where you started by pushing through your feet.
    • Then relax.
    • Repeat this exercise five to ten times.
    Wall Squat exercises
    Wall Squat exercises

    Single-Leg Balance

    • Begin on the ground in a standing position.
    • Keep your arms by your sides.
    • Raise your foot back by bending one leg at the knee.
    • Using the other foot for balance, stand up.
    • Hold this position for a few seconds.
    • Put the elevated foot down.
    • Then return to your neutral position.
    • Then relax.
    • Repeat this exercise five to ten times.
    Single leg balance
    Single leg balance

    Clamshells

    • You begin by lying on your side.
    • Bend your elbow while lying on your left side.
    • Then, use your left hand to lift the support to your head.
    • Place your right leg on your left, then bend your knees to a 45-degree angle.
    • Put your right hand on your hip or gently on the ground before you for balance.
    • After that, lift your right knee carefully toward the sky while keeping your feet close to the ground.
    • Hold this position for a few seconds.
    • While maintaining a strong core, lower your right leg to meet your left.
    • Then return to your neutral position.
    • Then relax.
    • Repeat this exercise five to ten times.
    Clam Shell exercise
    Clam Shell exercise

    Lateral walks

    • It is recommended to maintain the resistance band flat and not twist it while wrapping it around both lower limbs and above the knee.
    • Step apart by the width of your shoulder.
    • Though not stretched, a resistance band is tight.
    • To engage the glute muscle, gently bend your knees and reach a half-squat position.
    • The two legs of your body are bearing the same weight.
    • Next, perform five to ten repetitions of sideways leg in and out.
    • Then return to your neutral position.
    • Then relax.
    Lateral band walk
    Lateral band walk

    Lunges

    • Place your feet hip-width apart as you begin in a standing stance.
    • Take a step forward that is longer than a walking step, placing one leg in front of you and the other one behind your body.
    • Your foot ought to touch the ground flat and stay that way throughout.
    • As you go down, flex your knees to a slightly 90-degree angle.
    • Always maintain an upright trunk and a tight core.
    • Hold this position for a few seconds.
    • After that, firmly push off with your front leg to get back to the beginning posture.
    • Then relax.
    • Repeat this exercise five to ten times.
    LUNGES
    LUNGES

    What Safety Measures Must Be Taken When Doing Knee Stability Exercises?

    Exercise is generally beneficial to your general health and well-being, but there are a few safety considerations you should follow to reduce your risk of harm.

    The following general safety measures should be considered when exercising;

    • Get advice from a medical expert

    Your physician should be consulted before beginning a new physical fitness plan if you have any underlying medical conditions, injuries, or concerns.

    • Warming up and cooling down

    Warming up correctly is important before starting any exercise routine; this might include light aerobic and dynamic stretching. Before engaging in activity, it helps in body warming and improves blood flow to the muscles. Similarly, cool down with low-intensity exercise and simple stretches to gradually drop your heart rate and prevent tense muscles.

    • Put on the right clothes and shoes

    Wear comfortable, loose-fitting clothing that won’t limit your range of motion during your exercise time. Wear sports shoes that are supportive, and stable, and provide the right comfort and stability for the activities you engage in.

    • Modify exercises as required

    Make necessary modifications to exercises if you have any special limits or injuries. To identify suitable alternatives or adjustments that are effective for you, get advice from a trained trainer or a member of the healthcare community.

    • Utilize the proper form and technique.

    Maintaining good form and technique is important for making the most of the exercise and preventing injuries. Take expert advice or help from a qualified trainer if you’re unclear about the correct form for any of the exercises to ensure that you’re doing them correctly.

    • Keep yourself hydrated

    Drink plenty of water both before and after your exercise session to make sure that you are well-hydrated. Dehydration may affect your performance and raise your chance of getting sick from the heat.

    • Pay attention to your body

    It’s important to stop and rest if you feel pain, feeling dizzy, or difficulty breathing. Trying to push through extreme pain or suffering can result in harm. See a doctor right away if symptoms appear.

    • Proceed gradually

    Don’t increase weight, length, or intensity too fast. To help your body adjust and reduce the chance of overuse problems, gradually increase the intensity of your daily activity. Understand your body’s limitations and avoid going overboard when it comes to exercising.

    Keep in mind that each person has a unique level of fitness and ability, so it’s important to pay attention to your body and adjust the way you exercise accordingly. You may exercise safely and lower your chance of injury by following these measures.

    When did you stop exercising your knees?

    • If you were told by your doctor to avoid physical exercise for a few days.
    • Stop exercising if you have any knee soreness.
    • If you suddenly develop knee pain while you are working out, consult a doctor.

    Summary:

    Exercises for knee stability are necessary for building up the muscles that surround the knee joint, improving general stability, and reducing the chance of injury. Adding these exercises to your program can provide various benefits, including preventing injuries, increased stabilization of joints, greater performance, rehabilitation and recovery help, relief from knee pain, and improved functional movement.

    When completing knee stability exercises, it’s important to keep in mind that proper form and progressive progression are essential. To create a routine of exercise that is specifically specific to your needs, it is recommended that you consult a trained physical therapist or healthcare provider if you have any underlying knee ailments or concerns.

    Making knee stability exercises a priority can help you maintain strong, stable knees and lead an active, healthy lifestyle.

    FAQ:

    What is the knee’s most stable position?

    Similar to all other structures that originate from the knee, they experience the most tension when in an extended (closed-packed) position, making them more stable than when in a flexed (open-packed) state.

    What muscles help stabilize the knee?

    The surrounding muscles of the knee joint can be used to move and stabilize it. The primary muscle groups are the quadriceps on the front of the knee and femur and the hamstrings on the rear.

    How do you stabilize a loose knee?

    To maintain the kneecap in place and immobilize the knee, use a knee brace. To reduce pain and swelling, use cold packs, nonsteroidal anti-inflammatory medications (NSAIDs), rest, and elevation. Physical therapy focuses on strengthening and expanding the kneecap-stabilizing muscles.

    Having knee pain, should you still exercise?

    Your already-existing knee pain shouldn’t get worse after exercising. Still, when the body adjusts to new movements, learning new exercises might occasionally result in temporary muscular soreness. The pain of this type will go away fast, and the next morning after exercising, your pain shouldn’t be any greater.

    Why is stability important so much?

    Gaining more balance or stability won’t keep you from falling in the future. Stability not only raises your level of general fitness but also improves your mobility, reduces your risk of injury, and makes it easier for you to push yourself during exercises.

    References:

    • Physiotherapist N. P. (2023a, 1 July). How to Perform the Top 11 Knee Stability Exercises and Their Benefits? – Mobile Physio. A mobile clinic for physical therapy. The 11-best knee stability exercises can be found at https://mobilephysiotherapyclinic.in.
    • B. M. Physiotherapy (2022b), January 10. The Top 7 Activities to Strengthen and Stabilize Your Knees. Physiology of Body Motion. The seven best exercises for knee stability and strength are available at https://www.bodymotionphysio.com.au.
    • Image 9, Balance on One Leg. (n.d.). Saint Luke’s Medical Center. Single-leg balance: https://www.saintlukeskc.org/health-library