Introduction
Exercises for the bicep femoris comprise a variety of movements, including strengthening, stretching, and neuromuscular inhibition techniques. Strengthening exercises improve weight control, balance, stronger bones, increased muscle mass, and joint flexibility.
Stretching exercises help you perform better in physical activities, reduce your risk of injury, facilitate full range of motion in your joints, and increase blood flow to your muscles. Enhance your capacity to perform daily tasks and allow your muscles to function at their peak.
Strong hamstrings are essential. You run the risk of developing tendinitis and other problems if these muscles are weak. Performers who sprint, dance, or participate in sports like football, soccer, or tennis are more likely to have injuries to these muscles.
Here are some types of exercises.
1. Exercises for stretching the biceps femoris muscle
2. Biceps femoris muscle Exercises to strengthen
3. Methods of Neuromuscular Inhibition
Function of Biceps Femoris
All of the hamstring group’s muscles perform the same function. Additionally, the Biceps Femoris is helpful.
The biceps femoris has several key functions:
- Knee Flexion: Bends the knee.
- Hip Extension: Extends the hip.
- Lateral Knee Rotation: When flexing the knee, the leg moves outward.
- Pelvis Stabilization: Helps stabilize the pelvis during movements.
- Leg Deceleration: Controls the forward motion of the leg during activities like running and kicking.
These processes are necessary for both daily tasks and sports performance.
Action of Biceps Femoris
The other hamstring muscles work in tandem with the Biceps Femoris to facilitate the following movements:
- Walking
- Leaping
- Running
- Lunging
- Squatting
Biceps femoris muscle Stretching exercise
Benefits of stretching exercise:
- Enhanced Range of Motion: Promotes flexibility.
- Enhanced Sports Performance: Promotes more effective movement.
- Injury Prevention: Lowers the possibility of rips and strains.
- Good Posture: Promotes the spine’s neutral posture.
- Reduced Muscle Soreness: lessens stiffness following workout.
- Improved Circulation: Encourages the healing of muscles.
- Better Coordination and Balance: Makes motions more fluid.
- Stress Relief: Promotes calmness and releases stiff muscles.
- Pain Relief: Reduces pain in the legs.
- Increased Joint Mobility: Preserves flexibility in the knees and hips.
Including these stretches in your regimen might help you feel better physically overall.
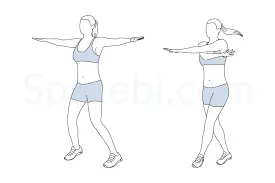
Standing and stretching both legs simultaneously:
Stretching entails standing and stretching both legs at the same time.
Both legs are crossed.
Leaning at the waist, drop your forehead to your right knee.
Maintain a straight kneeling stance.
Keep this posture for 20 seconds.
then relax.
Stretching muscles using a towel:
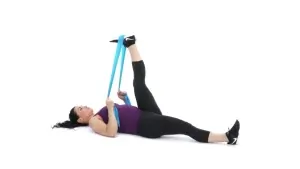
It’s easy to perform muscle stretching with a towel.
Sit and hold the ends of a lengthy bath towel with both hands while encircling your foot.
Lift the towel upward gradually to straighten your leg. Make sure your knee remains straight. Maintain the other leg straight. Raise your leg to stretch Your calf region feels stretched out.
Holding this posture for 30 seconds.
This is an exercise you can do five times on both legs.
Wall stretching
Perform this on the wall.
One leg is straight on a wall and the other leg is down.
To get the lifted leg as straight as possible, gently press the knee up against the wall.
keep the position for 15 seconds.
Complete a series of wall stretches by performing each leg individually four to five times. Aim to execute two sets per day.
Muscle Stretches when Sitting
The stretch from a laydown is the most gentle form of stretch. The degree of pain experienced when seated should be used to gauge how far to stretch. An important part of this technique is to fold forward at the hips, so as not to round the lower back.
Position yourself on a chair’s edge and place your heel on the floor while you extend one leg in front of your torso.
Sit straight and pelvis forward.
Hold this position for around thirty seconds.
For each leg, perform this exercise three times. Do this 3 times a day.
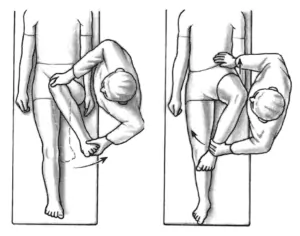
Stretching the hamstrings with a Hurdler:
One leg should be straight out when you sit on the ground.
The opposing leg should be bent at the knee by placing the sole of that foot against the inner thigh.
Stride forward over the single straight leg with your arms extended, bending at the waist as much as possible.
Keep your posture for fifteen seconds.
Repeat to the opposite leg.
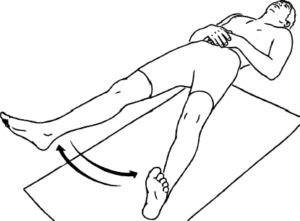
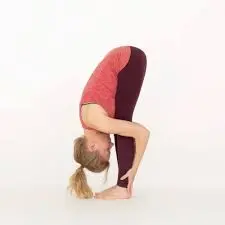
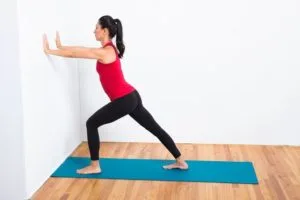
Standing hamstring one-leg stretch:
Perhaps the simplest hamstring stretch to perform is the standing, one-legged version. It doesn’t require any particular instruments and may be done outside, at home, or in an office.
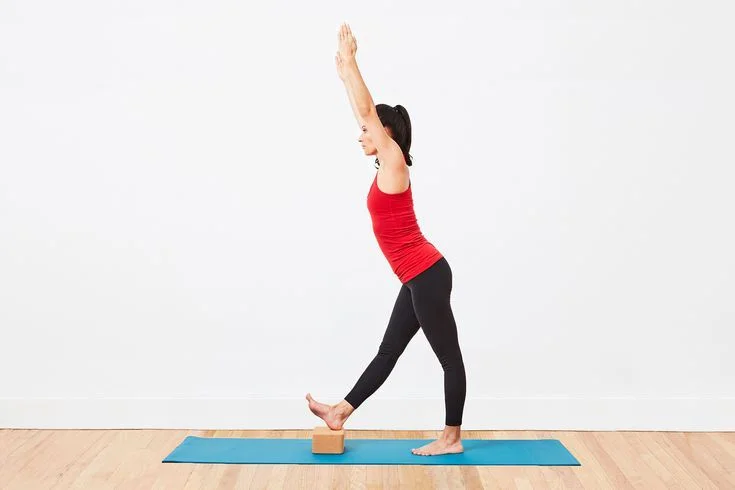
One leg is up on a small stool, stand straight. If it’s outside, utilize the curb, but keep an eye out for oncoming vehicles.
Maintain a straight knee.
Elevate both arms at the wall.
Simply raise your arms so that they are roughly level with your ears if you’re outside in an area without a wall or ceiling. Maintaining a straight back can be achieved by reaching upward with the arms rather than downward toward the foot.
Lean a little forward.
Stretch it by reaching forward.
Keeping this posture for 30 seconds, repeat 3 times.
Hamstring stretch for runners
A popular hamstring flexibility exercise is the runner’s stretch.
The position of your hand is straight to the wall with your shoulder apart while standing one foot.
Push and step back with one leg.
Put press from the foot during even back.
Hold for 15–30 seconds.
Move one limb front of the other.
This practice is repeated on both sides five times.
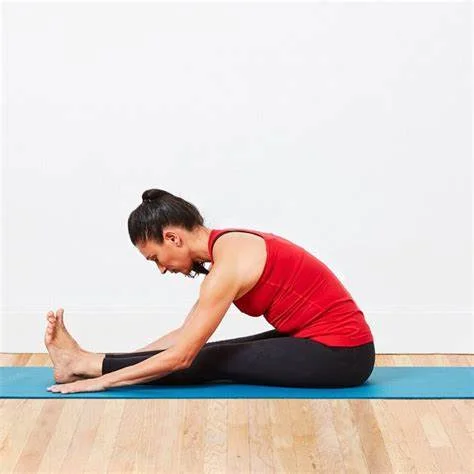
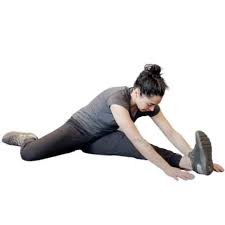
Stretching the hamstring muscles
Long leg sitting on the floor.
Bend at the back as much as you do, straighten your arms, and move forward while keeping a straight knee.
Continue in this posture for 15–30 seconds.
Return to your starting location with ease.
Do this three times.
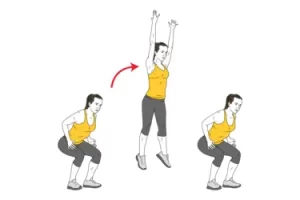
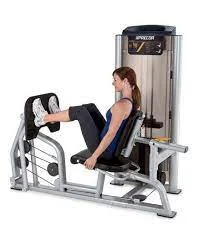
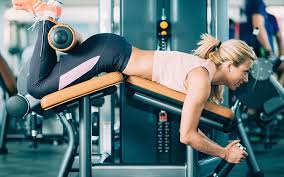
Biceps femoris muscle Strengthening exercise:
- Improved Muscle Strength: Increases power and strength.
- Better Athletic Performance: Enhances running, leaping, and sprinting abilities.
- Injury Prevention: Enhances muscle strength, lowering the possibility of sprains, rips, and other wounds.
- Stability: Provide good stability to the joint and decrease the chance of injury.
- Better Posture: Helps the pelvis and spine align more properly.
- Increased Endurance: Assists in preserving muscle function over extended periods.
- Balanced Muscle Development: lowers the chance of injury by ensuring that the hamstrings and quadriceps have equal strength.
- Enhanced Functional Movement: Facilitates everyday motions including walking, stair climbing, and lifting.
- Pain Reduction: By giving surrounding muscles better support, this technique reduces pain in the legs and lower back.
- Overall Leg Health: Encourages stronger, more robust legs, which benefits the general health of the lower body.
These advantages can be obtained by including biceps femoris strengthening exercises, which improve general physical fitness and well-being.
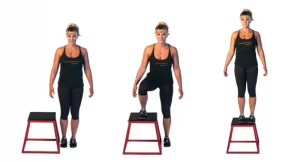
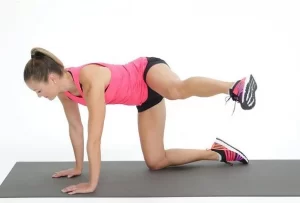
Hip hinge
During the Hip Hinge, the hips serve as the upper and lower body’s axis of rotation. Bending at the hips causes your torso to come forward while your legs and feet stay in place. Exercises involving the Hip Hinge make use of this basic movement pattern, which may be trained. Your exercise regimen will stimulate your hamstrings and strengthen your lower back by including Hip Hinge motions.

Setting your foot and take a position with pride to start.
Stepping forward and thrusting your hips back is how to start the Hip Hinge.
Your knees can be bent a bit, while your back should be in neutral alignment.
When your body has dropped to around forty-five degrees, contract your glutes and thrust your hips forward to stand back up. For the necessary amount of repetitions and sets, repeat the movement.
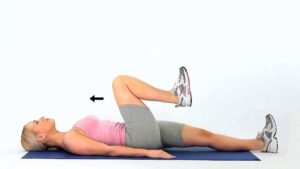
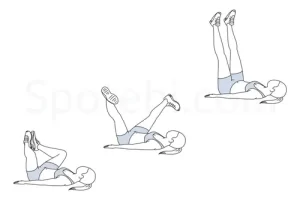
Glute bridge
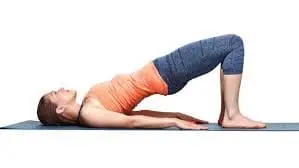
This exercise is beneficial for both lower body strengthening and hamstring injury rehabilitation.
Guidelines for Glute Bridge
Sleep supine and bend your knee. Place your hands straight beside you. Lift your back from the floor and put the weight of your body on your foot.
Down the hip to the first position.
The Hip Thrust Barbell
The barbell hip thrust is a great exercise to strengthen hamstrings.
The Barbell Hip Thrust does not overstress the lower back, in contrast to many other glute and hamstring workouts. Because of this, this exercise is a great method to strengthen your lower body without overtaxing your lower back.
How to Perform a Hip Thrust Barbell
There are a few simple actions that may be taken to simplify and comprehend the Barbell Hip Thrust. To perform a Barbell Hip Thrust, just follow these easy instructions:
Do this barbell hip thrust practice on a step. You’ll need to stack five risers to finish a step.
With grip hold the barbell about shoulder level. The ladder or bench should support your upper body, and your toes should be directly below your knees. The weight of the barbell is going to rest right below the pelvis.
Raise your hip and squeeze your glutes.
Shoulder, hip, and knee alignment should be maintained at the peak of your lift. After maintaining for one count at the highest point of the lift, slowly drop back to the position where you started.
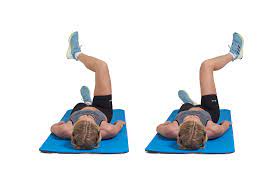
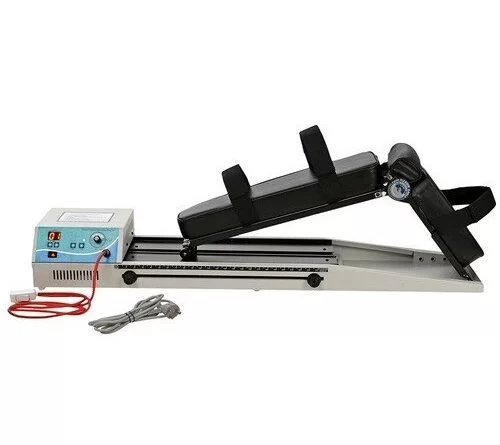
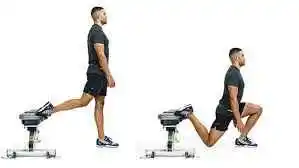
Nordic hamstring curl
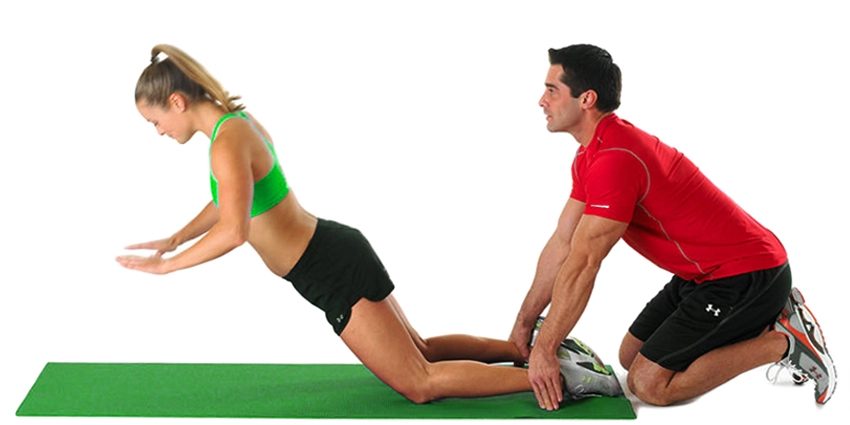
The patient is kneeling and putting a mat under her knees. When you’re ready, ask someone to hold both of your ankles as you slowly lower your upper body. As shortly as you reach the ground, raise your hands in toward you to prevent falling. Once you’ve touched the ground, take a step back and repeat.
Perform 10 to 15 repetitions.
Sets of Hamstrings
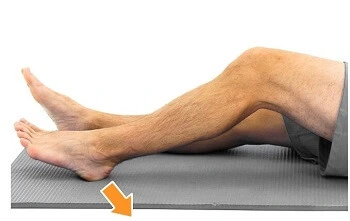
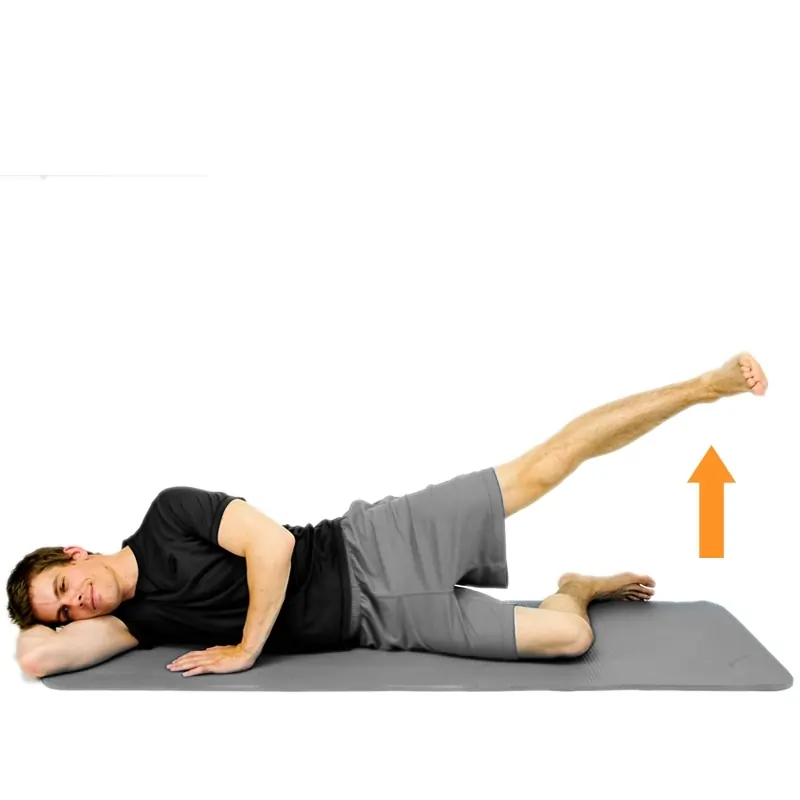
This muscle-building exercise is the best to start with because it doesn’t need knee movement, particularly after an injury. Easily adjust the amount of force you apply to the hamstrings by varying the force with which you press the heel down.
Apply weight on the back of your heel. The rear of your thigh muscles ought to be tensing up. 15 seconds of holding, then release.
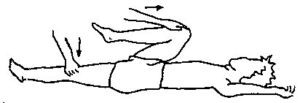
Hamstring curl at the prone
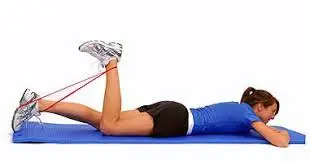
Place yourself on your stomach.
Move your heel near you.
Stop pulling as soon as you are unable to go any farther. Return to the point of origin.
Perform 10 between twelve and fifteen repetitions.
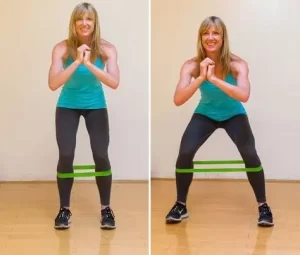
To increase muscle strength, resistance training is another option. You can use a spring, Thera band, or your hands to apply resistance.
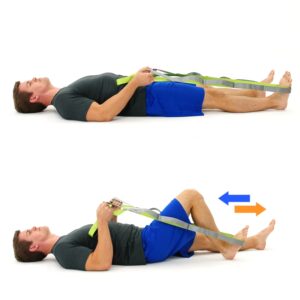
Standing hamstring curl exercises are also an option. Foot do up towards to you.
Do a 20-second hold and then relax.
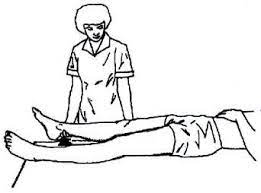
Isometric exercise
Position yourself on your bottom.
Your hamstring muscles are contracted and held for 10 seconds after that released by the therapist when you relax.
To engage the muscle at various lengths, flex your knee to varying degrees.
Practice with your foot turned outwards once you finished exercising at a variety of angles. then again with your foot pointed inside.
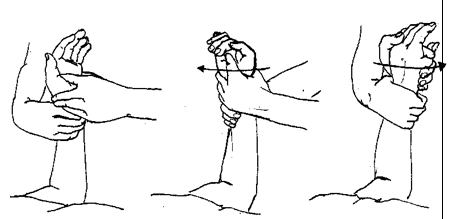
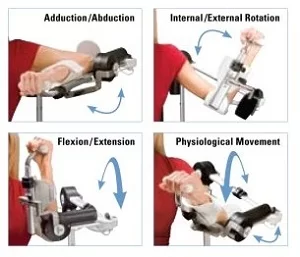
Exercises in Multiple-Angle Isometry
Position and technique of the patient:
The patient’s position is in lying.
With the knee flexed to various locations within the range of motion, give mechanical or physical resistance to a stable contraction of the hamstring muscles.
To draw attention to both the medial or lateral hamstring muscles, rotate the tibia in either an internal or external plane before resisting knee flexion.
Arrange the opposing foot beyond the ankle of the leg which has to be resisted to teach the patient how to utilize self-resistance at various places in the joint’s range of motion.
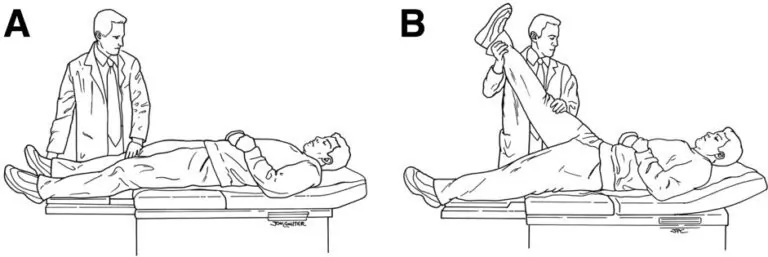
Methods of Neuromuscular Inhibition
Position and technique of the patient:
The patient’s position is in lying. Use your hand proximal to the foot to create an isometric grasp to resist knee flexion motion. After that, have the patient relax before allowing them passively (or actively) lengthen their knee joint to the end of its range utilizing hold-relax and holding-relax/agonist-contraction methods, respectively.
Position and technique of the patient:
The patient is in the prone position, having their hip and knee as stretched as feasible. To protect the femur from compression forces when it enters the patella, add a small piece of padding or a folded towel under it. Holding the hip, and apply this method to boost knee extension.
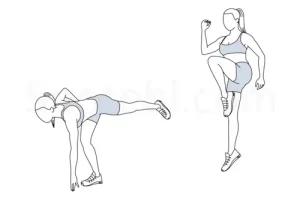
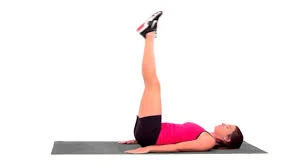
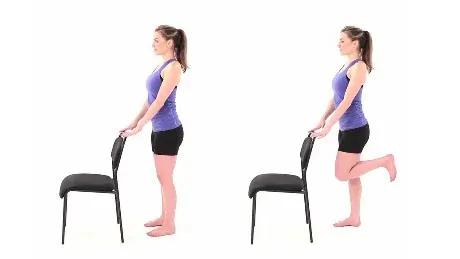
Exercise for the Biceps Femoris Muscle at Home
There are some biceps femoris exercises you can do at home:
- Bodyweight Hamstring Curls
- Glute Bridge
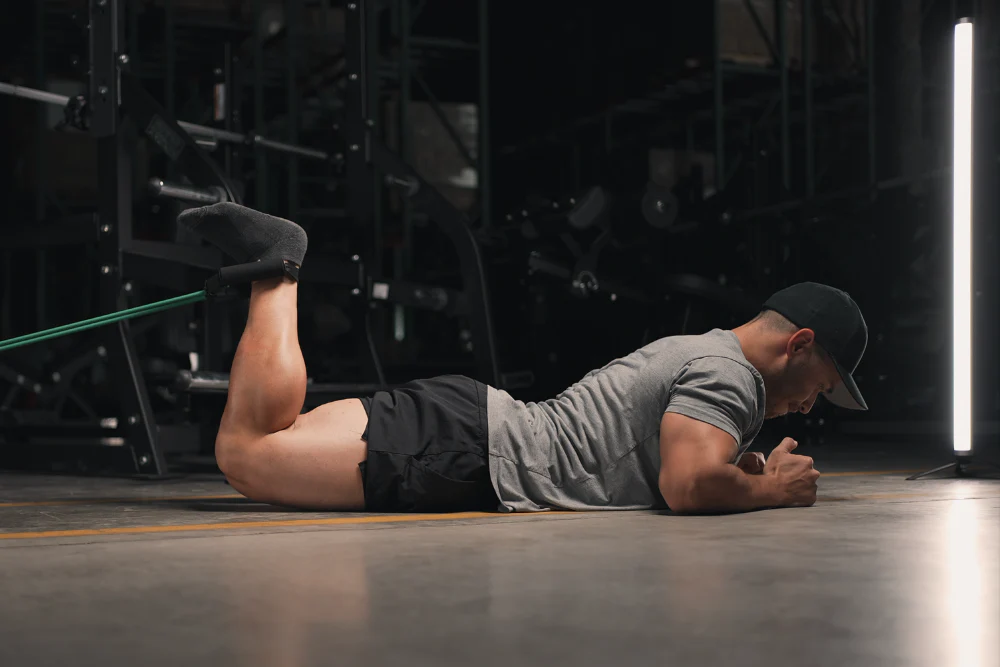
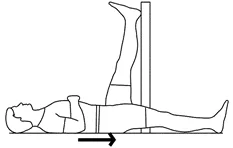
- Hamstring Walkouts
- Hip Thrusts
- Hamstring Stretches with a Towel
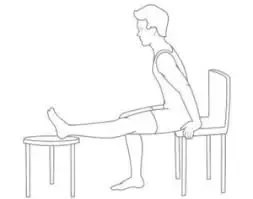
- Chair Leg Curls
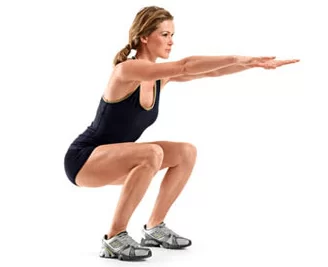
Muscle building in the biceps femoris
Exercises such as the barbell squat, dumbbell squat, lying leg curl, deadlift, and stiff-leg deadlift are used to build the biceps femoris muscles.
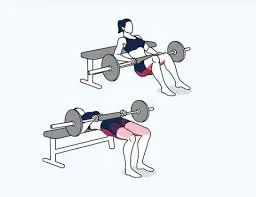
Reclining Leg Curl
Insert the pad near your lower legs as you recline lying down on the part of the twist machine. Seize the side grips and keep a level body alignment on the seat while you maximize your benefits beyond what the majority consider feasible. Reduce and do out again. Additional Regarding Fitness.
Deadlifting
In the deadlift, an imposing barbell or bar is raised off the supporting surface to the height of the hips, and the middle of the bar towards the floor, and then returned to its original position.
Bent Leg Deadlift
Anyone with athletic ability is capable of performing the bent leg deadlift, a standing routine that specifically targets hip flexion as well as an extension to increase the endurance, hypertrophy, and neural regulation of the muscles involved in strong, quick motions.
What common errors should you avoid when doing the workout for the biceps femoris muscles?
During stretching exercises, avoid doing the following mistakes:
Bending your knees: Try to keep your legs extended if you want the ideal Biceps femoris muscle stretch when seated. Just don’t stretch forward as much if your Biceps femoris muscle is tight and you have to bend your knees. Keep in mind that it takes time to increase the flexibility of the Biceps femoris muscle.
Shoulder hunching: as opposed to hunching over from the shoulders, make an effort to hinge at the hip area. Consider attempting to maintain a regular posture for your spine while reaching “to the top and over your legs.” Maintaining an upright position and avoiding leaning forward and touching your toes are beneficial postures.
Not elevating your working leg’s toes: For you to retain your leg’s straightness, the toes of the extended leg must point upward.
Not having a square hip position: Maintain a facing forward position and place your hips opposite each other side. Through doing this, you can continue to keep your pelvis correctly positioned and prevent uneven hip strain.
Lower back arching: Make an effort to keep your pelvis stable and your lower spine as parallel to the floor as you can. This ensures that you do the correct biceps femoris muscle stretch without putting excessive stress on your lower back. For additional support, you might want to put a blanket or towel below your lower back.
Misalignment: Rather than extending your posterior behind you, ensure that your hips are level to and precisely above your feet. This indicates that the muscle in your biceps femoris is stretched.
Overstretching: Although there are more difficult stretches for the biceps femoris muscle, exercise caution to avoid hurting yourself by using the band excessively.
Going too quickly: To feel the stretch in your Biceps femoris muscle, the action during a dynamic stretch should still be somewhat slow and controlled.
Neglect your core: Even though this is a Biceps femoris muscle stretch, it’s still critical to engage your core to prevent strain on your lower back.
What safety measures and safeguards apply to the activity of stretching the muscles of the biceps femoris?
The following pointers can help to improve the safety and efficacy of this biceps femoris muscle stretch:
- Avoid bouncing.
- Rather than lessening, this may increase muscular contraction.
- Verify that your hips are exactly below your feet. You don’t have your behind your feet. The stretch is less effective because of this mistake.
- If you find it difficult to stand back up during the squat stretch, you may need to use a table or another surface to support yourself.
- It’s often advisable to push yourself to the limit so long as you don’t have back pain or uneasiness.
- Refrain from straining when uncomfortable or exerting force. While completing stretches, take regular breaths.
FAQs
1. What are the ideal biceps femoris exercise post-workout regimens?
Following your training, stretch statically to increase flexibility, cool down with gentle cardio, and drink plenty of water. To help with recuperation and lessen muscular soreness, think about utilizing a foam roller.
2. What is strengthening the biceps femoris important?
Biceps femoris strength training increases total leg strength, boosts knee stability, reduces the risk of injury, and encourages better posture and balance.
3. Is it possible to train my biceps femoris without any equipment at home?
Indeed, you don’t need any specialized equipment to execute some efficient biceps femoris workouts at home. Exercises that require little to no equipment include bodyweight hamstring curls, single-leg Romanian deadlifts, glute bridges, and hip thrusts.
4. How frequently should I work my biceps femoris?
Perform two times a week for good results. To avoid overuse injuries, make sure you give yourself enough time to rest and heal in between workouts.
5. What are some popular at-home workouts for the biceps femoris?
Curls with bodyweight hamstrings
Romanian single-leg deadlifts
Glute Bridge
Walking on hamstrings
Chair leg curls; – Hip thrusts; – Towel hamstring stretches
6. How can I avoid getting hurt when doing exercises for my biceps femoris?
Always warm up before working out, use good technique, start slowly and build up to a higher intensity, and make sure you stretch well afterward to avoid injury.
7. Can stretching improve flexibility?
Indeed, stretching regularly can increase the biceps femoris’ flexibility, easing tension in the muscles and improving movement in general.
8. Are there any specific biceps femoris stretches?
Yes, hamstring stretches like the standing forward bend, sitting hamstring stretch, and lying hamstring stretch with a towel work well.
9. How can I tell whether my biceps femoris are being overworked?
Persistent muscle soreness, acute discomfort during or after exercise, decreased performance, and exhaustion are indicators of overworking oneself. If you notice any of these symptoms, let your muscles relax and heal.
10. Do I need to see a doctor before beginning biceps femoris exercises?
To guarantee safe and efficient training, speak with a fitness expert or physical therapist if you are new to exercising, have pre-existing injuries, or are unclear about proper form.
11. How can I add exercises targeting the biceps femoris to my current fitness regimen?
Exercises for the biceps femoris can be included in your leg or lower body workout days. To properly target the muscle, incorporate a combination of stretching and strength training activities.
12. What should I do if performing biceps femoris exercises causes me to experience pain?
Should you have sudden, severe pain, cease exercising right away. If there is swelling, apply ice to the affected muscle, rest it, and seek medical attention if the discomfort doesn’t go away.
13. Can lower back discomfort be alleviated by biceps femoris exercises?
Yes, by enhancing pelvic alignment and lessening the load on the lower back muscles, strengthening and stretching the biceps femoris can help relieve lower back discomfort.
14. Are there any adjustments made for newcomers?
Yes, novices can begin with modified versions of exercises, like glute bridges performed with the feet on the ground rather than elevated, or hip thrusts performed with only body weight.
15. For what length of time is each workout ideal?
Depending on your level of fitness and the variety of exercises performed, a typical session to strengthen your biceps femoris can last anywhere from 20 to 45 minutes.
Reference:
- Myprotein. (2022, November 29). How To Workout Your Biceps Femoris (aka Hamstrings) | Myprotein US. MYPROTEINTM. https://us.myprotein.com/thezone/training/hamstring-strengthening-biceps-femoris-forgetting-target/
- Dr.Aartiphysio. (2022a, September 24). Biceps femoris muscle exercise. Mobility Physiotherapy Clinic. https://mobilephysiotherapyclinic.net/biceps-femoris-muscle-exercise/
- Vastralphysiotherapyclinic. (2024, April 11). Biceps Femoris Muscle. Mobility Physiotherapy Clinic. https://mobilephysiotherapyclinic.net/biceps-femoris-muscle/
- & S. Z. K. (2023, June 12). Muscle Breakdown: Biceps Femoris. Your House Fitness. https://www.yourhousefitness.com/blog/muscle-breakdown-biceps-femoris#google_vignette
- Biceps Femoris — Exercise Library & Database — Rehab Hero. (2024, April 12). Rehab Hero. https://www.rehabhero.ca/exercise/tag/Biceps+Femoris
- Best Hamstring Exercises | Hamstring Injury Rehab | Physiotherapy. (2022, July 26). Physiotutors. https://www.physiotutors.com/wiki/best-hamstring-exercises/
- CSCS, D. O., & Nasm, B. W. (2024b, June 26). 15 Essential Hamstring Exercises to Build Muscle and Boost Your Athleticism. Men’s Health. https://www.menshealth.com/fitness/a26786932/best-hamstring-workouts/
- CPT, R. S. F. (2023, October 1). 5 Simple Hamstring Exercises (Plus 2 Great Stretches) to Strengthen and Lengthen the Backs of Your Legs. Real Simple. https://www.realsimple.com/health/fitness-exercise/workouts/hamstring-exercises-stretches
- Lindberg, S. (2024, April 16). 9 Best Hamstring Exercises for Stronger Legs. Verywell Fit. https://www.verywellfit.com/hamstring-exercises-for-stronger-legs-5094156
- CPT, C. S., & CPT, A. M. W. (2023, December 12). 15 Hamstring Exercises So Good You’ll Look Forward to Leg Day. SELF. https://www.self.com/gallery/hamstring-exercises