Introduction:
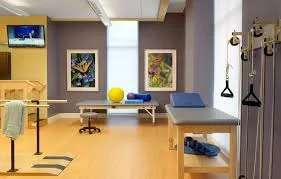
Physiotherapy clinics are essential for improving people’s quality of life since they provide a variety of therapeutic interventions. These clinics have a range of specialized instruments and technology to help physiotherapists treat patients effectively. Modern physiotherapy equipment ensures precise assessments, contributing to rehabilitation programs’ overall success.
We will look at a long list of necessary physiotherapy supplies that are frequently seen in contemporary clinics in this post.
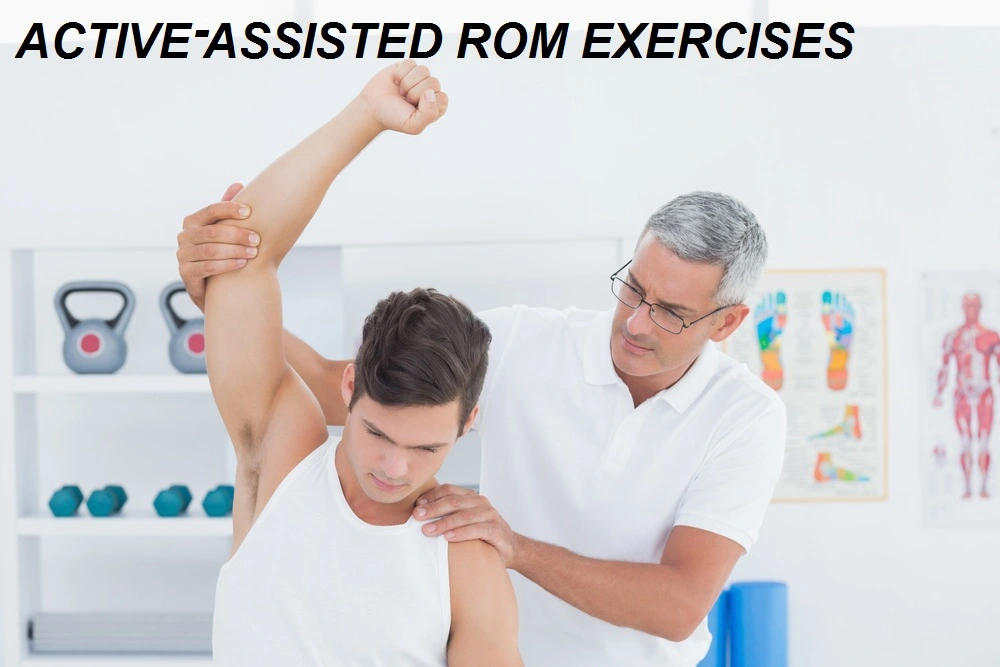
Physiotherapists are frequently the first to help patients restore movement, improve mobility, and feel less pain. The focal point of your work?
From traditional exercise balls and resistance bands to cutting-edge methods like electrical stimulation devices, you have an enormous and varied arsenal at your disposal. But how comfortable are you with your instruments? In a field like this where things are constantly changing, being up to date on the latest tools and knowing how to use them efficiently is crucial.
This comprehensive guide will cover the most often used items of equipment that every physiotherapist, regardless of experience level, should be familiar with.
The objectives, advantages, and best practices for every tool are included in this list, which also acts as a reference and reminder. From tried-and-true staples to the newest innovations, we will walk you through everything you need to ensure you’re making the most of your equipment to provide the best patient outcomes.
Let’s get started and examine the fundamental resources that affect the interventions you use daily as a physical therapist.
Equipment List for Physiotherapy Clinics:
Your Physical therapist is an invaluable source of information when it comes to recommendations for the most effective exercises and physical therapy equipment. They can suggest looking for equipment similar to what you use at the clinic so that you can continue working on particular exercises or hobbies at home.
Examine this list of the best at-home physical therapy tools to supplement the advice from your therapist.
We’ll start with the best-selling items and work our way down the list to instruments specifically designed for the nervous system and muscles.
The following are a few of the most commonly used instruments in physical therapy:
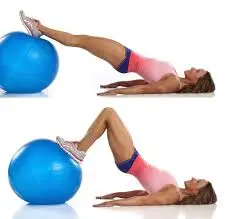
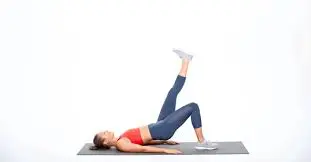
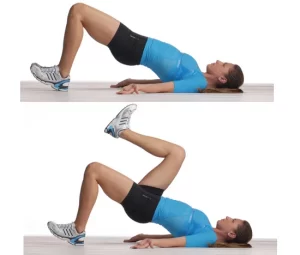
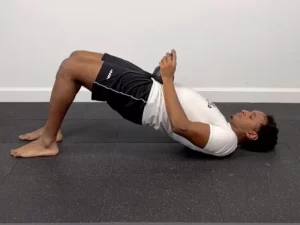
Exercise Balls

Exercise balls, sometimes referred to as Swiss balls or physio balls, are among the most widely used tools in physical therapy and have several advantages. They work wonders for improving posture, building muscle, and preventing back pain. Exercise balls, with their inflated construction and form, are often utilized to enhance core activation, joint stability, and balance.
Additionally, they are different in size; a smaller exercise ball will be easier to handle, while a larger one may demand more space and be more difficult to stabilize. Exercise balls are useful for various exercises since you can use them for challenging exercises that you can do at home by yourself or in the clinic with your therapist.
Resistance Bands

Resistance bands that are economical and effective.
Another practical and affordable physical therapy tool that you may use outside of your physical therapy clinic is a resistance band. They offer many benefits, regardless of whether you’re completing a full workout, need to stretch, or are simply looking for a challenge.
Even using a basic set of resistance bands, an exercise program needs to be increased in difficulty to continue developing strength. You can get them as long bands or loops, depending on the types of exercises you want to use them for the most. Frequently, they are offered as sets with varying levels of resistance.
With resistance bands, you may work on smaller, more specialized muscles that are generally more difficult to reach with traditional exercises, such as the rotator cuff. Again, be cautious and adhere to your PT’s suggested safe list; overstretching the rotator cuff may result in more damage.
Foam Rollers
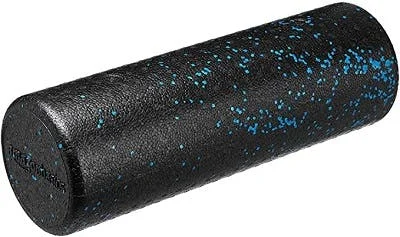
Foam rollers can help to increase the range of motion and decrease muscle soreness by relieving tension and stiffness in the muscles. At a reasonable price, foam rollers are available in various sizes and shapes.
It’s normally recommended to choose a low- to medium-density foam roller without knobs and ridges if you’re new to foam rolling or if you’re sensitive to strong pressure or massage. These are simple but effective physical therapy tools that are primarily used to expand the range of motion, however, they can also be used in conjunction with exercises that target core stability.
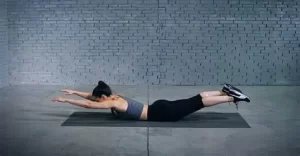
Exercise Sliders
Exercise sliders are a fantastic, underappreciated gliding tool for physical therapy that lets you concentrate on a range of core, lower, and upper body activities. Consider switching to exercise sliders if you’ve been doing exercises with towels. They’re a really flexible and reasonably priced choice for working out. Exercise sliders are not limited to using them on hardwood or tile floors with a towel; they can also be used on carpets and rugs.
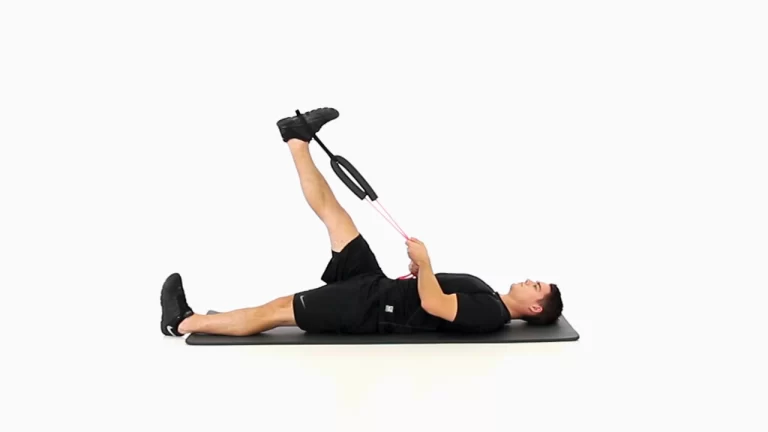
Stretching Straps
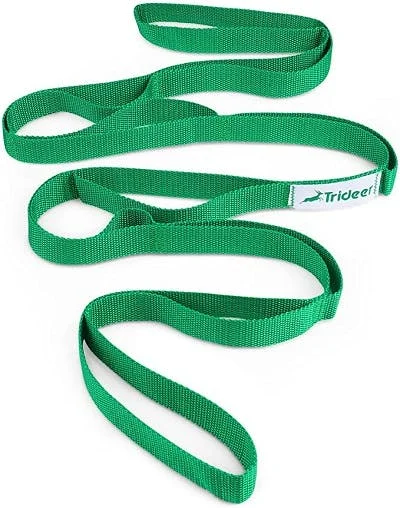
In addition to helping you stretch your muscles, stretching straps can also increase your freedom from tense muscles. Inexpensive and efficient, they offer numerous advantages such as better posture, regulated limb movement, and deeper stretches due to the extra length (even for those with limited flexibility).
Indeed, many athletes use these straps extensively to simulate partner-assisted stretching. The straps will help you relax into a stretch more easily because you won’t have to strain as much to reach particular postures or body regions. They will also enable you to complete some stretches that you would normally need to accomplish with a second person.
Strengthening Instruments for Physical Therapy:
When your physical therapist determines that you are ready to add resistance training to your regimen, you can start with some simple equipment that will aid in your strength-building. Take additional care when using these products to prevent hurting yourself or exacerbating any pre-existing pain or injury.
Common physical therapy instruments that encourage strengthening consist of:
Grip Trainers
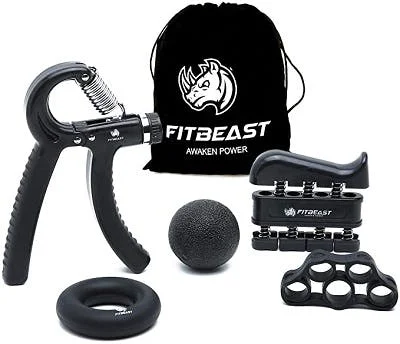
Grip strength is necessary not only for carrying out daily functional duties like lifting and carrying but also for enhancing your capacity to grab objects, which makes you more independent. It is common practice to use functional grip strength as a surrogate for general health. Those who struggle with their grasp must therefore learn how to strengthen it. Grip trainers are an excellent tool for building, restoring, and strengthening muscle.
Cuff Weights
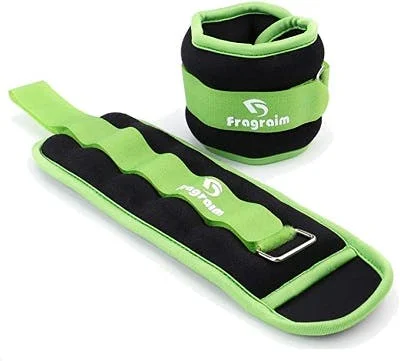
By fastening cuff weights that are adjustable to your wrists or ankles, you may strengthen yourself. Your training might get more intense as they progressively increase the resistance.
Because the weights are designed to be wrapped around the wrists or ankles, people with hand or grip impairments can still use them for strength training. Consult your physical therapist to ensure that adding more weight is safe for you before making the decision.
Weighted Medicine Balls
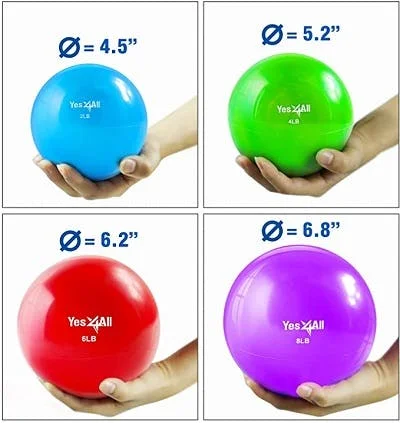
Practicing with weighted medicine balls improves your posture, balance, coordination, and strength. They may add more weight to any conventional strength or core exercise, or they could throw with a partner during a balancing exercise, to make it more difficult. Because there is a wide variety of sizes and weights available for weighted medicine balls, it is important to consider the types of exercises you may do with them.
Dumbbells
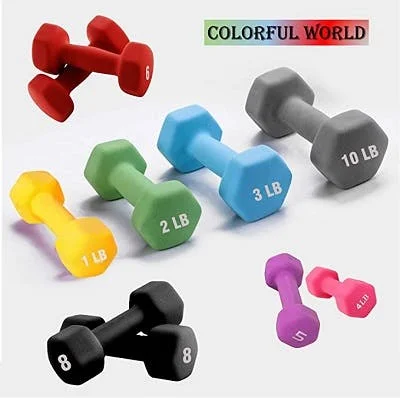
You may perform intricate exercises with dumbbells that target many body muscles and aid in muscle growth. The amount of weight you need or desire will determine how many you should purchase. For example, using two dumbbells can help you increase resistance for specific physical therapy exercises. Although they are more expensive, you may also get a single set of dumbbells that allow you to change the weight to suit your needs.
Flex Bars
Another basic physical therapy equipment that helps strengthen your grip and forearm is a flex bar. They are effective in strengthening the hands and forearms and reducing elbow pain related to “tennis elbow.”Before beginning any kind of exercise program to help with pain management, make sure it is safe and appropriate for your situation by consulting your therapist.
Treadmill
Treadmills are incredibly helpful tools for physiotherapists because they offer a controlled and secure environment for diagnosing, treating, and recuperating their patients with mobility and musculoskeletal issues. They let therapists tailor exercise plans to each patient’s specific needs and skill level because they can accurately adjust resistance, inclination, and pace.
Treadmills assist patients in safely and regulatedly improving their strength, functional mobility, and balance by imitating different walking or running circumstances. Additionally, they allow physiotherapists to keep an eye on their patients’ gait patterns and biomechanics, allowing for real-time feedback and modifications to maximize therapeutic results.
With the ability to easily modify as one’s fitness level rises, treadmills provide consumers a useful and effective kind of exercise that will improve their health and well-being over time.
Stationary bicycle
Riding a stationary bike is a low-impact method of improving cardiovascular health, joint mobility, and muscle strength.
With the help of these bikes, physical therapists may design customized treatment plans that respond to individuals’ varying capacities and recovery goals. Through the ability to prescribe and manage exercise time and intensity, they enable therapists to support the safe progression of activity levels.
Static cycles improve circulation and muscle tone while relieving joint discomfort, making them an excellent alternative for rehabilitation for clients, particularly those with lower limb, back, or weight-bearing limitations.
Wrist roller
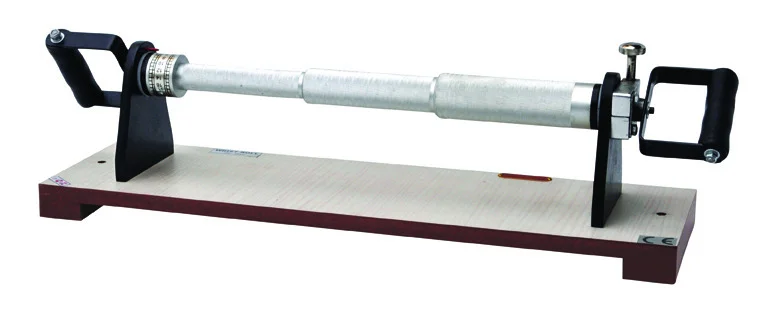
The purpose of the wrist roller is to strengthen the forearm muscles as a unit through rolling and pulling motions. It is composed of a bar that comes in different lengths and is attached to a rope or cord that the user can unroll and roll. The weight at the base of the rope opposes this. When it is coiled and unrolled, its dimensions are eccentric and concentric. By rolling the bar in alternating directions—that is, with the rope on your side or the other side—you may work out the flexors and extensors of your forearm muscles. To improve your ability to move around, it can also be done with smaller weights using your fingertips.
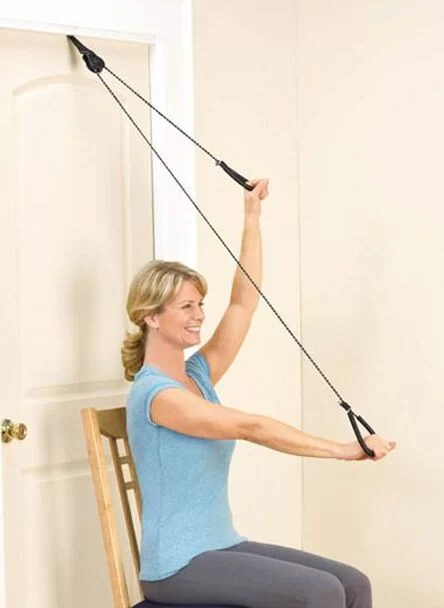
Shoulder Wheel
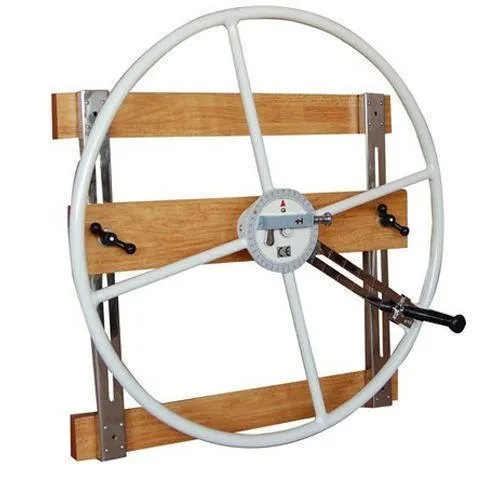
Using the Shoulder Wheel, patients can engage in resistance training to increase their range of motion and reduce pain in the shoulder joint.
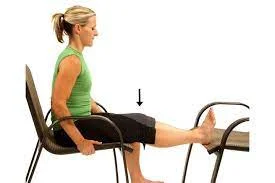
Balance board
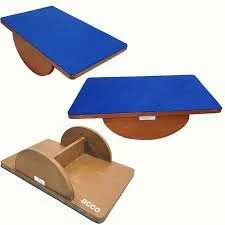
Balance boards are an effective tool for testing and improving a person’s proprioception, stability, and coordination.
Physiotherapists may safely assess and treat functional mobility and balance deficiencies in patients using these dynamic, movable platforms. These abilities are critical for patients to heal from a range of surgeries and accidents. Therapists can progressively increase the complexity of the exercises with their help so that clients can gain confidence and control over their movements.
With the use of balancing boards, patients can develop their strength and stability enjoyably and engagingly. To improve posture, reduce the risk of falls, and strengthen core strength, balance boards are a valuable tool for individuals of all ages and fitness levels who are striving for increased health and independence.
Pedal Exercisers
Designed to offer a simple, impact-free way to undertake resistance and cardiovascular training, pedal exercisers are lightweight, portable pieces of equipment.
These devices provide a regulated and focused approach to strengthening and boosting circulation, which makes them very effective in the rehabilitation of patients who have lower limb weakness or mobility problems without requiring a huge amount of room or setup.
Pedal exercisers are an excellent option for individuals who experience balance issues or difficulty standing for prolonged periods, as they can be used in a seated position. Additionally, they are helpful for at-home use, allowing patients to progress in their recuperation and enhance their level of independence and overall quality of life.
Parallel Bar
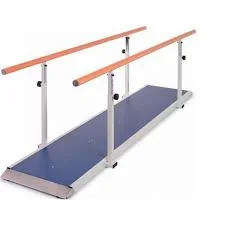
Parallel bars are a vital tool used by patients in rehabilitation settings to practice walking, balancing exercises, and functional activities. They provide consistency and encouragement during these exercises.
After an injury or surgery, these bars provide a secure, regulated setting for evaluating and improving a patient’s mobility, balance, and ability to support themselves. They enable therapists to be there for their patients throughout this critical phase of recovery, offering guidance, realigning their posture, and providing them with physical support.
Clients can regain confidence in their mobility with the parallel bars’ reassuring and secure structure. They provide an essential stepping stone for people transitioning from limited mobility to independent walking.
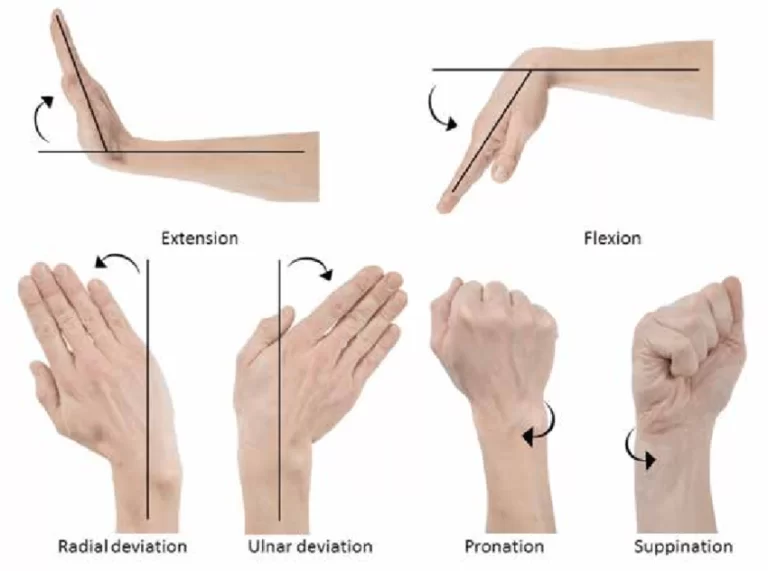
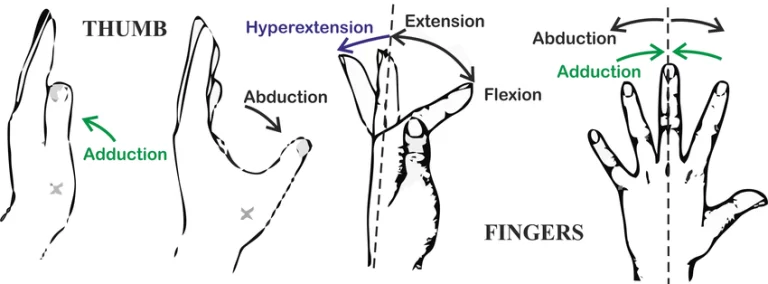
Supination Pronation bar
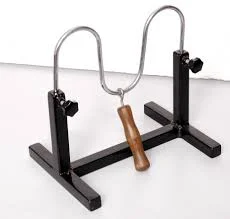
To improve wrist mobility overall as well as forearm strength and flexibility, the Supination-Pronation exercise is essential. This easy-to-learn yet powerful exercise strengthens the forearm-rotating muscles, making it more functional for both daily tasks and athletic endeavors.
Supination and pronation are the two ways that the palms of the hands are thought to turn—upward and downward, respectively—to support grabbing and holding tasks, which often need the hands to be in front of the body.
Suspension Training Systems
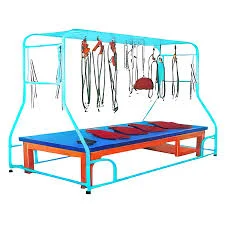
Utilizing body weight and gravity, innovative equipment such as suspension training systems like TRX allows for a wide range of exercises.
Customers may improve their core stability, strength, flexibility, and balance with these gadgets because they are small, lightweight, and adaptable.
They are suitable for individuals of all fitness levels since they make it easier for therapists to customize exercises to the particular needs and advancements of each client. Patients can enhance their recovery and fitness in a unique, enjoyable, and very effective way with the help of suspension training devices.
These exercises encourage functional movement patterns, which are important for training for specific activities as well as daily duties.
Most importantly, suspension training emphasizes smooth, controlled movements to help clients retrain their bodies rigorously and safely.
Tools for Neurological Physical Therapy at Home:
People who have had a stroke, traumatic brain injury, or another neurological disorder may struggle with motor skills like coordination, balance, and mobility. Fortunately, many people find that physical treatment helps them become more mobile.
Retraining movement patterns and restoring function through the activation of neuroplasticity is the aim of physical therapy following a neurological injury. The brain’s capacity for self-rewiring, known as neuroplasticity, is triggered by extensive repetition. The more a certain physical therapy activity is performed, the more movement is restored and neuroplasticity is triggered.
The following list of tools and supplies for physical therapy is specially made for people who have had trauma or neurological conditions.
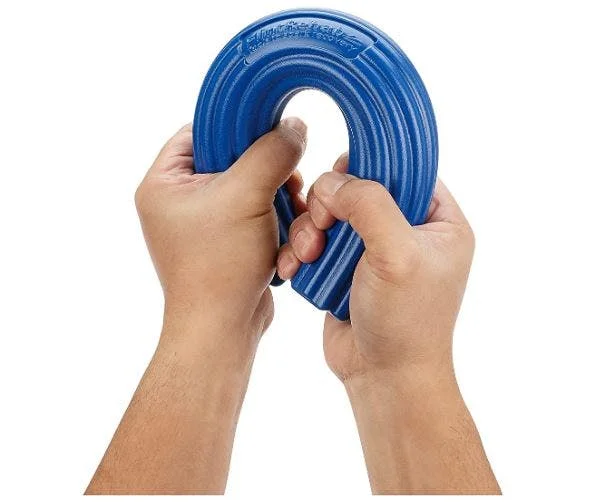
Therapy Putty
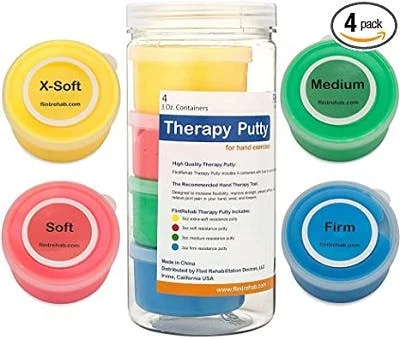
The purpose of therapy putty is to help people restore their hand strength and range of motion. It’s an easy-to-wear, reasonably priced accessory that can aid in hand dexterity and coordination restoration. Daily use of therapeutic putty exercises promotes neuroplasticity and brain stimulation. To aid in the restoration of hand function, you can use the therapeutic putty to mold, shape, pinch, grip, smash, and squeeze utilizing various hand positions.
But even with a basic tool, maintaining a regular pattern can be challenging. Investigate interactive neurorehabilitation equipment if you need an extra boost of motivation.
Music Glove
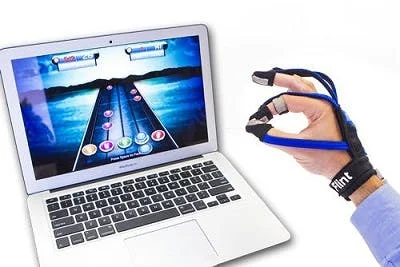
MusicGlove is another well-liked physical treatment tool for use at home. It has been clinically demonstrated that using this music-based hand rehabilitation tool can enhance hand function in as little as two weeks for users.
Through the use of an engaging, interactive musical game that synchronizes with hand treatment movements, MusicGlove inspires people. People often get so engrossed in the process that they forget they are receiving physical therapy. Maintaining motivation and engagement enables people to perform high repetition, which enhances hand function and activates neuroplasticity.
A Select Few Physiotherapy Essential Electrotherapy Tools:
Ultrasound Therapy
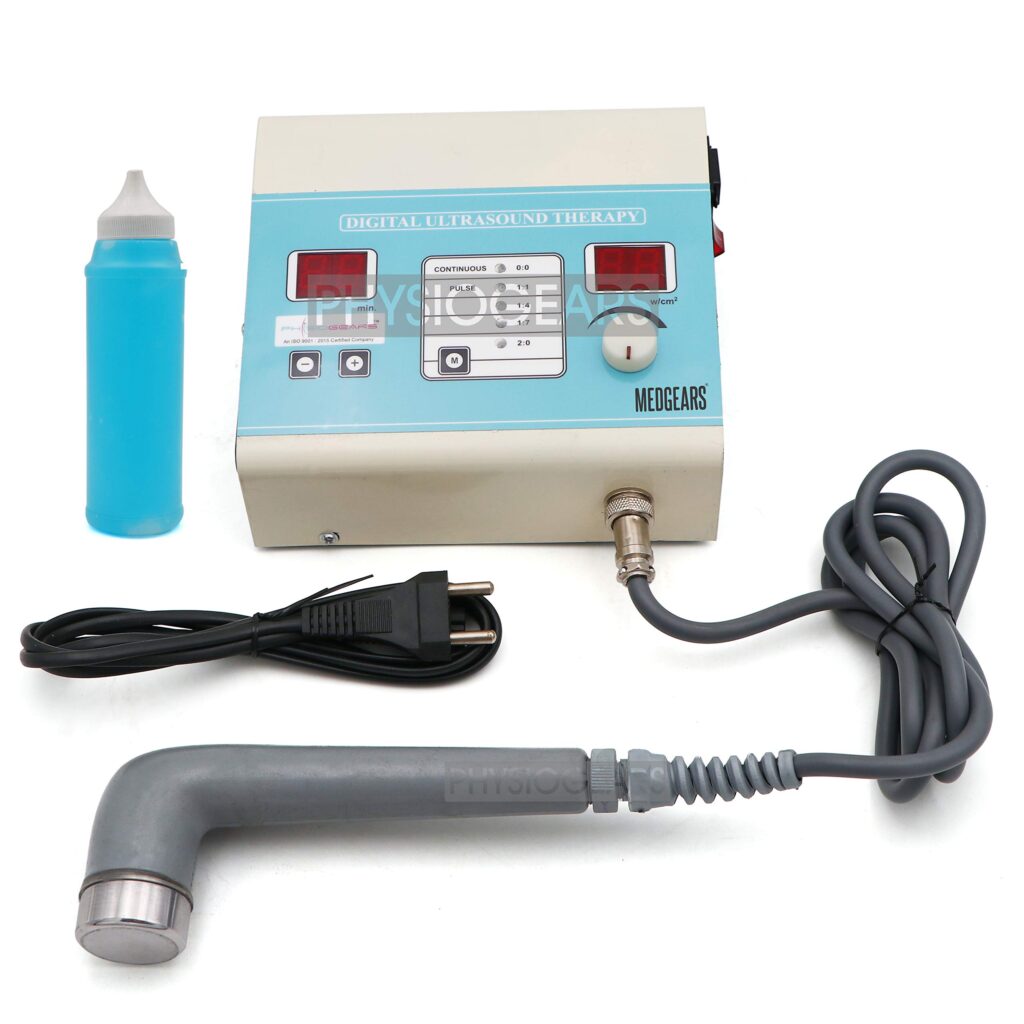
Conditions are treated with ultrasound treatment equipment. It helped in inflammation as well as pain reduction.
- Ligament Sprains
- Muscle Strains
- Tendonitis
- Joint Inflammation
- Plantar fasciitis
- Metatarsalgia
- Facet Irritation
- Impingement syndrome
- Bursitis
- Rheumatoid arthritis
- Osteoarthritis
- Scar Tissue Adhesion
Electrical Muscle Stimulation (EMS) Machine
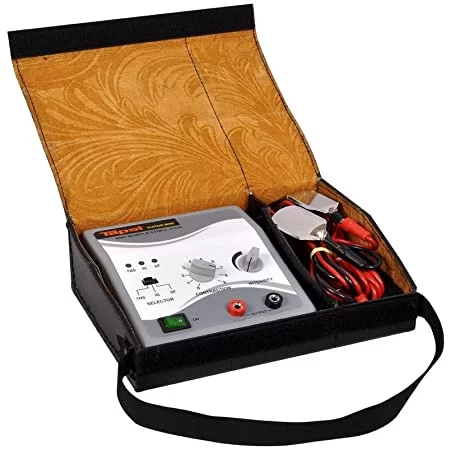
it is utilized, for instance, to strengthen, stimulate, and reinforce weakened muscles. It can be used in,
- Muscle dystrophy
- Functional paralysis
- severely harmed muscles following an injury, etc.
Excessive general exercise may be harmful since it might cause pain and inhibit the body’s natural ability to heal muscles. The goal of low-voltage stimulation is motor nerves.
Interferential Current Therapy (IFC)
IFC technology is employed in treatment because it activates “endorphins,” which efficiently increase blood circulation and enhance the healing process.
it can be used in,
- Muscular and circulatory disorders
- Cumulative trauma disorders
- Post orthopedic surgeries
- Joint stiffness
- Inflammation, edema & body pains, etc.
Studies show that when compared to utilizing prescription medications alone to control pain, using Interferential Therapy Equipments (IFT) dramatically lowers the risk of postoperative complications.
Long-Wave Diathermy (LWD) Machine

By increasing body temperature and soft tissue extensibility, long-wave diathermy (LWD), also known as capacitive and resistive electric transfer therapy, is a therapeutic heat treatment that dramatically increases muscle flexibility. Moreover, it results in vasodilation, which improves blood flow.
LWD equipment’s primary function is to treat,
- Musculoskeletal injuries
- Tendinitis
- Low back pain
- Myalgia
- Arthrosis
- Bursitis
- Ligament injuries
- Ankle distortion, etc.
Compared to shortwave, longwave may treat both a smaller and a larger region.
LASER Therapy
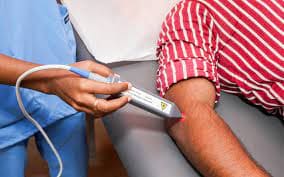
Increasing the range of motion, relieving discomfort, and optimizing the restoration of physiological functioning are the three major objectives of laser therapy equipment.
This apparatus is used for treating:
- Muscle tension
- hip, knee, shoulder, and back pain
- Sprains, strains, and soft tissue swelling
- Tendonitis/bursitis
- Tennis and golf elbow
- Skin treatment
- For Nerve regeneration
- For Diabetic wound healing
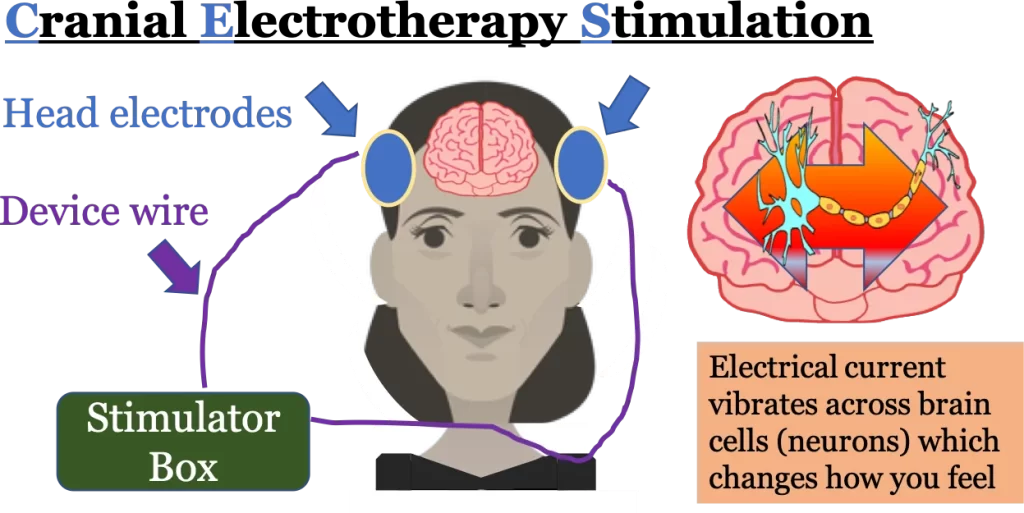
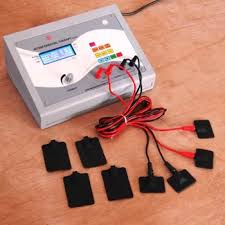
Transcutaneous electrical nerve stimulation

Pain treatment therapy includes transcutaneous electrical nerve stimulation (TENS). It works by blocking pain or altering your perception of it using a low-voltage electrical current.
TENS treatment is effective for many individuals. Additionally, scientists concur that some people find it more effective than others. However, sufficient study is lacking to precisely explain why. To learn more, researchers are still working on the problem. The majority of experts think that the electrical current facilitates the body’s natural production of painkilling substances.
Transcutaneous electrical nerve stimulation (TENS) is used by medical professionals to treat a variety of acute (short-term) and chronic (long-term) illnesses, such as:
- Back pain.
- Osteoarthritis.
- Fibromyalgia.
- Tendinitis.
- Bursitis.
- Chronic pelvic pain.
- Diabetes-related neuropathy.
- Peripheral artery disease (PAD).
Paraffin Wax Bath Therapy
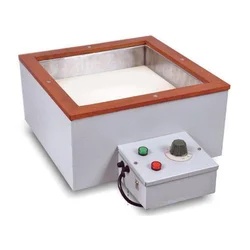
Warming the connective soft tissues with wax baths is one of the best ways to use deep heat therapy to increase mobility.
Wax bath therapy is a comfortable, soothing, and painless procedure. It releases tense muscles and relieves persistent joint pain. It addresses issues such as:
- Osteoarthritis.
- Rheumatoid arthritis.
- Fibromyalgia
- Joint Mobility Issues.
- Scleroderma.
- Raynaud’s or other rheumatic symptoms.
Infrared Radiation Therapy
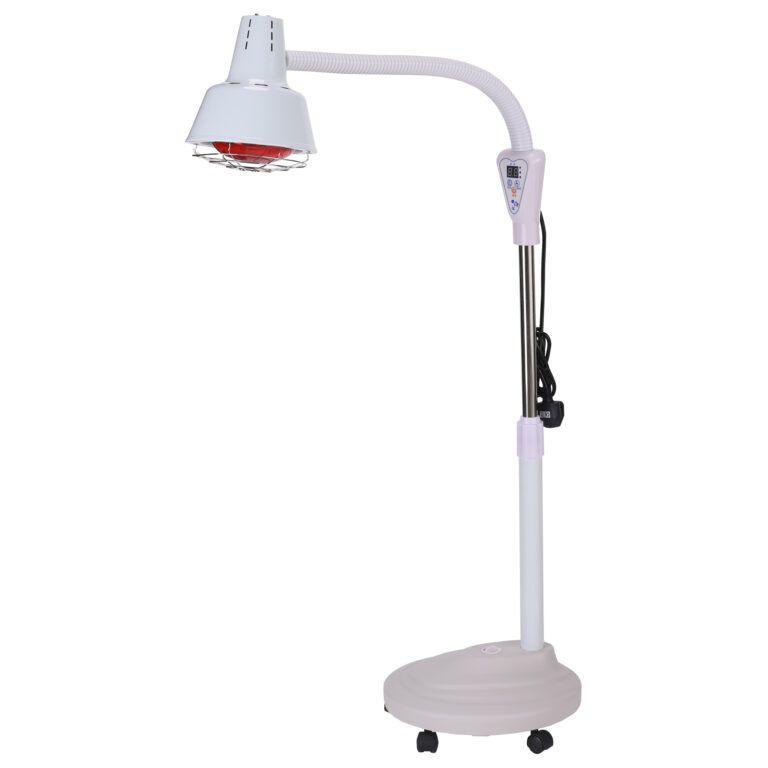
Infrared radiation therapy also referred to as light therapy, is used in physical therapy to treat patients’ acute or chronic pain, primarily related to their joints and muscles. Several light wavelengths are directed at the body’s wounded areas during this therapy.
Infrared light has a significantly higher depth since it can penetrate the skin deeper. This could lead to more efficient pain management.
This non-invasive, all-natural physiotherapy technique can improve your health in several ways without causing skin irritation.
Many common skin disorders are advised to be treated with infrared radiation therapy, such as:
- Improve wound healing.
- Reduce stretch marks.
- Reduce wrinkles, fine lines, and age spots.
- Improve your face texture.
- Improve psoriasis and eczema.
- Improve scars.
- Improve sunburned skin.
- encourage the growth of hair in those with androgenic alopecia.
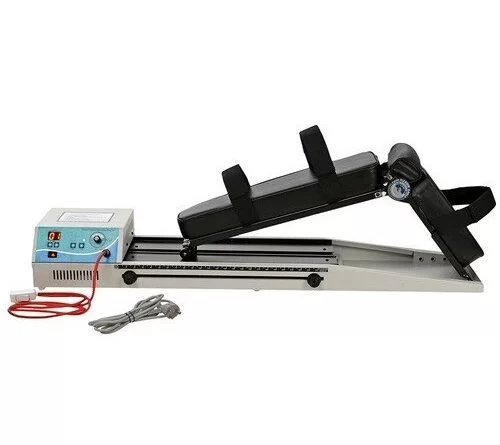
Traction Machine
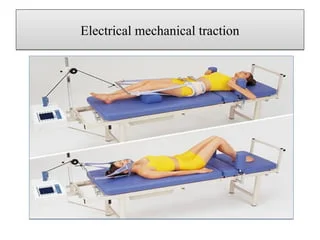
One form of therapy that applies longitudinal tension to the spine’s axis is traction. In other words, parts of the spinal column are tugged in opposite directions to stabilize or modify the posture of injured spinal segments. The force is given to the head using a series of weights or a fixation device, and the patient is typically expected to remain in bed or wear a halo vest.
One physical treatment technique called traction is applied to ease pressure on painful spinal discs. By manually stretching the spine, traction relieves pressure on the discs that are giving you pain.
The method of traction is utilized to stretch soft tissues and remove broken bones or joint surfaces. The applied force must be powerful enough to continue in the desired direction for the required amount of time, in addition to resisting the body’s movement with an equal and opposite force. This treatment is beneficial for individuals with specific spinal diseases and is most commonly used to treat:
- Slipped discs.
- Bone spurs.
- Degenerative disc disease.
- Herniated discs.
- Facet illness.
- Sciatica.
- Foraminal stenosis 8: Pinched nerves
- Cervical Spondylosis
- Lumbar Spondylosis.
CPM Machine (Continuous Passive Motion Machine)
A Continuous Passive Movement (CPM) machine is a motorized equipment that passively moves a joint through a predefined range of motion.
A Continuous Passive Movement (CPM) machine is an electrically driven apparatus that moves a specific joint automatically within a preset range of motion.You can reduce joint stiffness and increase your range of motion following surgery with this CPM machine.
it is most commonly used in :
- fracture
- knee replacement
- Arthritis
- Hip replacement
- Ligament reconstruction
SWD ( short wave diathermy )
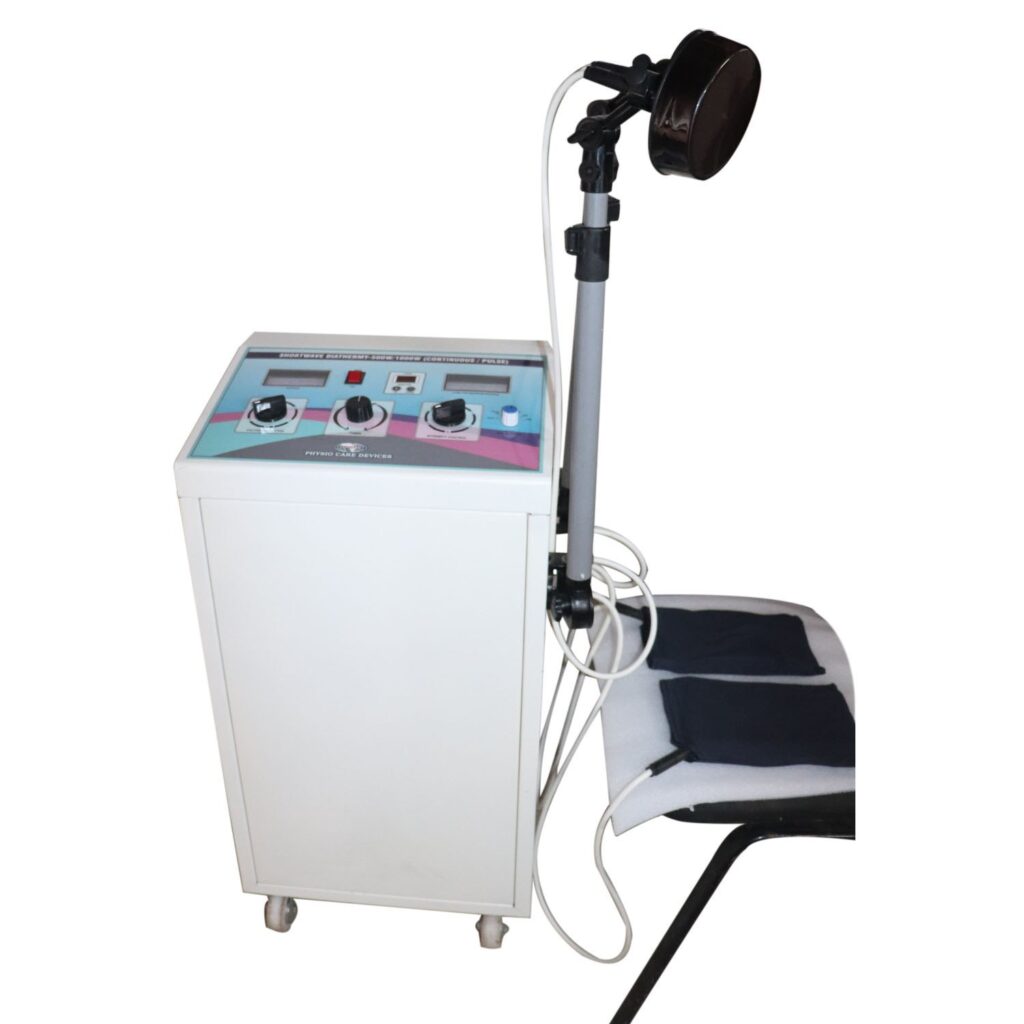
Another name for short-wave diathermy is SWD. To heal bone or tissue damage, physical therapy treatments involve delivering deep heat to a patient’s joints and soft tissues. This method enhances recovery by targeting specific regions and penetrating deeply into tissues.
This therapeutic approach can improve soft tissue diseases and reduce inflammation and joint discomfort.
Diathermy is the process of heating or creating a high temperature inside the body’s tissues.
{Warm-through thermostat}
Thermotherapy promotes circulation, reduces pain, and speeds up tissue healing.
- Musculoskeletal Disorder
- Ligament Sprain
- Muscle Strain
- Capsular lesion (frozen shoulder).
- Degenerative joint disease (OA)
- joint stiffness.
Chronic Inflammatory Conditions:
- Tendinitis & Bursitis
- Tenosynovitis
Summary
When it comes to the thorough treatment of numerous illnesses, injuries, and disorders, physiotherapy is highly beneficial. It helps improve function, strength, endurance, and range of motion in the affected areas in addition to managing the symptoms of these issues. Particularly in light of the incredibly busy lives we lead today, physiotherapy is becoming more and more vital in managing stress and other lifestyle-related disorders including anxiety, back pain, stress headaches, neck pain, obesity, and so forth.
Physiotherapy treatments are administered by a variety of equipment types. A portion of this equipment is utilized in hospitals and clinics and is used at home for in-home physical therapy sessions.
Having the right physical therapy tools is crucial to optimizing healing and prolonging a patient’s life.
FAQs
Which instruments are employed in physical therapy?
For enhancing range of motion, walking canes, like quad, forearm, and white canes, are frequently used in physical therapy. crutches, such as platform, forearm, and axillary varieties.
What are TENS and IFT?
These days, interferential therapy (IFT) and transcutaneous electrical nerve stimulation (TENS) are regarded as standard treatments for a variety of acute and chronic pain conditions.
What is the equipment for ultrasonic physical therapy?
Medical practitioners and physiotherapists use therapeutic ultrasound devices to treat pain and encourage tissue recovery. Ultrasound therapy uses sound waves that are inaudible to humans to treat conditions including runner’s knee and muscle strains.
Why is TENS applied?
One non-invasive peripheral stimulation method for treating pain is transcutaneous electrical nerve stimulation or TENS. TENS stimulates the underlying nerves by delivering brief electrical currents across the uninjured skin’s surface.
Which four types of physiotherapy are there?
Physical therapy for the elderly.
Physical therapy for sports.
Podiatric Physical Therapy.
Physical therapy for children.
References
- Cscs, A. T. P. D. N. (2022, August 23). The Best Physical Therapy Tools: Recommendations from the Experts. Flint Rehab. https://www.flintrehab.com/physical-therapy-tools/
- Portea, U. K. M. M. D. M. D., & Portea, U. K. M. M. D. M. D. (n.d.). Types of Physiotherapy Equipment and Their Uses | Portea. https://www.portea.com/physiotherapy/common-physiotherapy-equipment/
- Macdonald, E. (2023, August 16). The 23 Most Common Physical Therapy Equipment. WriteUpp Blog. https://www.writeupp.com/blog/physical-therapy-equipment
- Parmar, D. (2024, January 13). List Of Physiotherapy Equipment In Physiotherapy Clinic. Mobile Physiotherapy Clinic. https://mobilephysiotherapyclinic.in/list-of-physiotherapy-equipment/