Blog

  • Shoulder Extension

    Shoulder Extension

    What is Shoulder Extension?

    Shoulder extension refers to the movement of the arm behind the body through the shoulder joint.

    When two components are united by a joint, an extension is a movement in which the angle between them increases. Stretching is done by reaching behind your back or imagining your hands in your back pocket.

    When a shoulder extension is performed, the upper arm freely lowers from an elevated position in front of the torso. The limb then returns to its normal resting position at the waist return of the body after moving back behind the torso, allowing limited arm movement.

    Shoulder extension occurs at the humeral joint, also known as the shoulder joint, and is produced by the coordinated action of many muscles that link the shoulder girdle. This movement is continuous and smooth.

    Cross Arm stretch – Horizontal Adduction
    Your shoulders should be relaxed. Stretch your arm over your chest till it feels stretched. Give the stretch a half-minute hold.

    What muscles are used in shoulder Extension?

    The three main muscles involved in shoulder extension are the

    What is the shoulder Extension range of motion?

    Shoulder extension range of motion is 45–60 degrees. Put something in your back pocket and extend your hands behind you to practice shoulder extension.

    Benefits of Shoulder Extension training

    • Your range of motion can be improved with shoulder extension exercises.
    • Shoulder extension exercises can help you become more flexible, stable, and injury-free.
    • Exercises that emphasize shoulder extension can help avoid shoulder discomfort and damage.
    • decreased pressure on the neck and lower back.
    • Improved breathing: You may breathe more deeply and effectively by opening your chest and maintaining a better posture.
    • Greater Mobility of the Shoulders
    • Shoulder extensions can help resolve muscular imbalances and lessen pressure on your neck and lower back by strengthening the muscles that pull your shoulders back.
    • Improved posture and improved shoulder stability.
    • support the relief of shoulder and neck stiffness, discomfort, and muscular strain.

    Shoulder extension exercise

    Wand Exercise

    wand-extension
    wand-extension

    Hold the wand in both hands behind your body while standing erect and tall with your feet shoulder-width apart. Lift your shoulders gradually back and up while maintaining a straight arm position with the palms facing back. After a few seconds of holding the position, return to the beginning position. Do this three to five times.

    Isometric Shoulder Extension

    Isometric Shoulder Extension
    Isometric Shoulder Extension

    Stand straight and lean against a wall, arms at your sides. Maintain a straight elbow position while pressing your hands back into the wall.
    Release after five seconds of holding. Five to ten repetitions should be made during the session. Practice three times a day.

    Shoulder extension: Lie flat on your stomach on a hard table. Arms should hang loosely at your sides. Use both hands to hold the weight, palms toward the body. As you raise your arms in Y form, keep them straight and slowly bring them parallel to the floor. Come to a complete stop with your arms parallel to the ground. For whatever long the directions specify, keep it. Return to the starting position gradually.

    Shoulder extension exercise with weight

    Shoulder extension with dumbbells

    shoulder-extension-with-dumbell
    shoulder-extension-with-dumbell

    How to do it?

    • Hold a dumbbell in each hand while keeping your feet shoulder-width apart. Raise your shoulders slowly back and up while maintaining your arms straight and palms facing back. After a few seconds of holding the position, return to the beginning position. Repeat eight to twelve repetitions.

    Shoulder Extension Exercise using a resistance band

    • This simple resistance band exercise improves the shoulder range of motion and strengthens the upper back. It lengthens and strengthens the biceps and triceps as well.
    Shoulder Extension with theraband
    Shoulder Extension with theraband
    • Wrap the resistance band around something substantial and steady. Your chest should be level with the band.
    • Hold the band’s ends with both hands
    • Step back and raise your arms straight. Pull your arms back and down while keeping the shoulder blades together.
    • After holding the posture for a short while, slowly return to the beginning position. Repeat eight to twelve repetitions.
    Barbell Shoulder extension

    Shoulder Extension Exercise With Barbell

    Stand tall, Maintain a straight posture, and grasp the barbell with your hands slightly wider than your shoulders, pointing your palms in the direction of your body. Lift the barbell till it is parallel to the floor while maintaining a straight arm position. At this point, hold, contract your delts, and then gradually lower.

    shoulder extension with a cable machine
    shoulder extension with a cable machine

    Cable Machine Shoulder Extensions

    How to do it?

    Stand erect and tall, Connect a cable machine’s handle. Standing with your back to the machine, grab the handles with both hands. After extending your arms behind your head, carefully take a step back to the beginning. Do it 8–12 repetitions.

    Suggestions for Safe and Powerful Shoulder Extensions

    • Warm Up: To avoid injury, warm up your upper body and shoulders with dynamic stretches or gentle aerobic exercises before performing shoulder extensions.
    • Apply Good Form: Avoid arching your lower back, maintain a straight back, and keep your shoulders down. To do shoulder extensions safely and successfully, it is important to ensure the stability of the glenohumeral joint.
    • Start With Light Resistance: As your strength increases, progressively raise the weight from the beginning using resistance bands or lesser weights.
    • Rest in Between Sets: Take a 30- to 60-second break in between sets to give your muscles time to heal.
    • Cool Down: To preserve flexibility and avoid stiffness, stretch your triceps and shoulders after your exercise session.

    Manual Muscle Testing: Shoulder Extension

    Position of patient

    Prone lying position with arms at sides and shoulder internally rotated (palm up)

    Therapist Position

    Stand at the test side. Just above the elbow, the posterior arm’s transform serves as the hand used for resistance.

    Test

    Raise your arm to the table, maintaining your elbow straight.

    Instruction to the patient
    Raise your arm as high as you can. Don’t let me push it down.

    GRADING

    Grade – 5 (Normal )
    Reach the end of the range and resist as much as possible.

    Grade – 4 (Good)
    A complete range is available, but it can be achieved with severe resistance.

    Grade – 3 (Fair)
    full range of motion without the need for physical resistance.

    Grade – 2 (Poor)
    Complete partial range of motion.

    Grade – 1 (Trace) There is no noticeable osteokinematic movement or visible contraction of the muscles or tendons.

    Grade – 0 No osteokinematic movement.

    FAQs

    Which muscles are shoulder extensions?

    The three main shoulder extensors are the teres major, latissimus dorsi, and posterior deltoid.

    What are shoulder extensions good for?

    Shoulder extensions contribute to the strength of the rotator cuff and posterior deltoids, two muscles and tendons that surround the shoulder joint and offer much-needed stability and support.

    What causes poor shoulder extension?

    Shoulder degeneration caused by a chronic illness or injuries to any component of the shoulder can restrict shoulder mobility.

    How do you extend your shoulder?

    At around chest height, extend your left arm across the front of your body. Your left arm might be supported by the elbow crease of your right arm or held in your right hand. Keep your head forward while extending your shoulder. For 30 seconds, hold this position.

    References:

    • Patel, D. (2023a, June 17). Shoulder Flexion & Extension – Range of Motion, Muscle, Exercise. Samarpan Physiotherapy Clinic. https://samarpanphysioclinic.com/shoulder-flexion-extension/
    • https://www.scribd.com/presentation/504673940/4-MMT-Shoulder-Extension

  • No Pain, No Gain: A Myth or a Mantra for Success?

    No Pain, No Gain: A Myth or a Mantra for Success?

    No Pain, No Gain. It’s a common term used when one grows older.

    The phrase “No Pain, No Gain” has long been a popular mantra in the realms of fitness and personal development. It suggests that enduring hardship is essential for achieving success and reaching one’s goals.

    Parents and coaches frequently advise their student-athletes, “No pain, no gain,” before a workout or game. It is incorrect to feel that you aren’t working out hard enough if your muscles don’t hurt.

    When you are in pain, exercising through it may appear to be a sign of grit and endurance, but it is your body’s signal to stop and think about how to deal with it, not to keep going!
    After an exercise, the body does not have to feel shattered. Especially when student-athletes are younger and just starting out in athletics.

    If you follow the motto “no pain, no gain” when working out, you may gravely injure yourself.
    It is possible For example, if you’re trying to improve the strength and endurance in your legs with a squat regimen, you may experience some muscular burning while training. The burning sensation caused by lactic acid leaving the muscles should lessen 30 to 60 seconds after you stop working out.

    Recognizing the Myth

    • The phrase “No Pain, No Gain” means that you will not notice any results unless you physically strain your body to its limit.
    • This way of thinking commonly leads to people overtraining, disregarding their bodies’ warning signals, and engaging in exercises potentially damaging their overall health.

    Pain: The Body’s Alert System

    • There are other ways to evaluate a workout’s effectiveness besides pain. Pain is the body’s technique of warning the brain about a potential problem.
    • Expert trainers can help players push through discomfort and ask for more physical intensity, but your student-athlete does not have to follow suit.
    • In reality, professional athletes are trained to understand their limits, which helps them avoid overusing their muscles and joints and decreases the risk of a catastrophic injury.

    Push past the uncomfortable spot

    • Regular exercisers are familiar with the burning sensation or tiredness that comes in their muscles when they push harder than they are accustomed to.
    • This is what’s going on within your body. Lactic acid is created when a muscle is forced to work harder than it can ingest oxygen from the blood, resulting in a burning feeling. People who have done a lot of exercise previously described it as a fantastic workout or exhaustion.
    • Lactic acid production improves blood flow to the muscles, allowing you to become stronger and more resilient the next time.
    • Thus, for exercises such as swimming, weightlifting, or jogging, there is no gain without pain.

    Pain does not test the strength of your muscles.

    • Our bodies respond to physical pain by instructing us to halt movement and check for damage. Even little discomforts should be addressed and evaluated, not ignored.
    • There is a distinction between the discomfort you feel while working out to increase muscle and a real injury. If your symptoms increase or you notice swelling, seek medical treatment right once.
    • Despite common misconceptions, suffering does not have to prevent you from progressing toward your fitness goals. Exercise should be tough, even if it does not cause pain. Pain during exercising may indicate incorrect technique, overtraining, or underlying issues that require attention. Prioritizing painless exercise promotes endurance and sustainability in a fitness plan.

    The Body’s Development versus Physical Stress

    • It’s no secret that young children are significantly more lively and active than adults who work from a desk.
    • Regular exercise promotes muscle and bone strength, as well as mental and cognitive health, which is crucial for developing school-age athletes.
    • When student-athletes are initially introduced to competitive sports, which typically occurs between the ages of 8 and 13, training and technique can be physically taxing, even for these young players.
    • The majority of sports necessitate some level of strength and technique training, which may result in safe pain during a gym session if taught under constant supervision by a coach.
    • Although the growing body is more vulnerable to injury, it is better equipped to tolerate suffering.
    • It is crucial to distinguish between pain that suggests potential danger and discomfort associated with strenuous activities. While discomfort is a typical part of pushing yourself to the limit, pain could indicate an injury. A safe and effective workout plan is dependent on your ability to listen to and interpret your body’s instructions.

    Be Sore, Not in Pain

    • It is possible to recognize when enough is enough without experiencing pain. When weariness interferes with technique and posture, it is time to rest.
    • Discuss with your student-athlete the importance of listening to their body, their suffering, and experts’ advice on when to quit and when to carry on.
    • Pushing the body beyond its limits regularly can lead to overtraining syndrome, which reduces performance and raises the risk of disease and injury. The overtraining syndrome also produces fatigue. Overtraining stifles development rather than promoting it, and it can have negative long-term effects on one’s physical and mental health.

    Avoid injury with proper technique

    • Using the proper form is critical for avoiding injuries when working out. I recommend cooperating with a trainer who is aware of your aims.
    • Tendinitis, bursitis, and stress fractures may arise from overdoing it with poor form. Pay heed to your body. If you’re experiencing pain that you’re not used to, try a new technique and see if it helps.
    • One of my patients reported that doing bicep curls ached. Although I couldn’t find anything wrong, the pain subsided when I suggested switching up your grip. Occasionally, a tiny alteration can have a significant influence.

    The Function of Rest and Recovery

    • Any successful fitness program must include rest and recuperation. Muscles take time to grow stronger and repair, and getting adequate sleep allows the body to respond to activity.
    • Achieving long-term advantages without losing health necessitates striking a balance between strenuous exercise and enough rest.

    Utilize it or forfeit it

    • This is where the concept of no gain comes into play.
    • If you’re not in agony, your progress has probably stalled. You continue to benefit from keeping up your conditioning. However, you must put in more effort if you want to improve and grow stronger.
    • If you don’t exercise, the muscles used for those specific activities will atrophy or tighten. Avoid missing more than two days of exercise or physical activity.
    • Muscles’ ability to lose strength varies. For example, physical therapy is required to rebuild quadriceps strength in a patient who is immobile for a week after surgery. Arm muscles, for example, will not atrophy as quickly.

    Individualized Approach to Fitness

    • Fitness requires a tailored approach because everyone is different, and what works for one person may not work for another.
    • Exercise routines must be tailored to individual interests, physical levels, and goals in order to be effective over time. The goal should be to create an enjoyable and well-balanced workout regimen that improves overall well-being.

    How do you determine when you’ve had enough?

    It is possible to recognize when enough is enough without experiencing pain. When weariness interferes with technique and posture, it is time to rest. Anything that puts your body at risk of injury is a signal to halt.

    Working with a certified personal trainer who can detect a breakdown in form and posture throughout your workout is the best way to ensure that you maintain proper posture and technique. Physical symptoms that you’ve had enough for the day include muscular tremors and nausea.

    Conclusion

    Finally, the aphorism “No Pain, No Gain” is a false approach toward fitness. Paying attention to your body’s signals, focusing on pain-free activity, and arranging rest and recovery time are all necessary for long-term and healthy improvement.

    Fitness should be treated individually and balanced so that you can gain the benefits of exercise while not jeopardizing your entire health.

    FAQs

    What does “no pain, no gain” mean?

    Here are various situations in which the aphorism “No pain, no gain” can be applied: I studied for the entrance exam for hours, but it was all for naught. John mocks the aptitude exam preparation segment, referring to it as “pain,” but he also claims that “no pain, no gain.”

    If I’m not sore, am I still gaining muscle?

    You don’t need aching muscles to build muscle or improve your fitness level. After a workout, you may feel tight or weary but not hurting. He notices that you may not experience much soreness even if you gradually increase the frequency and intensity of your workouts.

    What does no pain no gains mean?

    Informal expressions communicate the sense that suffering or hard work is necessary for success or growth.

    Who started saying no pain no gain?

    Benjamin Franklin stated, “There are no gains without pains.” The phrases “no pain, no gain” and “feel the burn” have gained prominence in recent years, courtesy of Jane Fonda’s 1980s workout DVDs.

    References:

    • Witte, D. (2020, September 29). Is No Pain, No Gain Correct? Witte Physical Therapy, Louisville & Plattsmouth. https://wittephysicaltherapy.com/2020/09/29/is-no-pain-no-gain-correct/
    • Sharma, R. (2023, December 13). No Pain, No Gain: A Myth or a Mantra for Success? Mobile Physiotherapy Clinic. https://mobilephysiotherapyclinic.in/no-pain-no-gain/
  • Does Jawline Exercise Work?

    Does Jawline Exercise Work?

    Introduction

    Numerous studies on face yoga or activities to improve the indications of aging on the face and neck have been carried out. These studies need more research because they were carried out on limited sample sizes. Many of the women who took part in this research did, however, report fewer fine wrinkles and facial drooping.

    The positive outcome of facial and jawline exercises is dependent upon

    • appropriate posture and position when engaging in activities.
    • face exercises for at least thirty minutes.
    • Reduced alcohol and tobacco consumption, as well as healthier dietary habits.
    • reduced tension.

    The lower outline of the bone at the base of a person’s skull, which extends from the chin to the ears, is known as the jawline. The jawbone, which can grow in different sizes and angles, defines the shape of the face. A bone is said to have a robust jawline when its primary angle is visible below the ear.

    Strong jawlines provide the appearance of being more proportionate and angular. Age, orthodontic development, and general health all affect the jaw’s size and shape. Bruxism and other teeth-grinding disorders can cause the jawline to enlarge and cause the lower facial muscles to overdevelop. Age-related sagging of the skin after the ears can also make the jawline appear bigger. It has also been demonstrated that increased sodium consumption contributes to jawline definition.

    A person’s jawline has always been a key indicator of their features. Engaging in facial muscle exercises can improve the appearance of the jawbone and cheekbones, making the face appear more toned and defined. The facial muscles are small, so they respond rapidly to exercise. Hence, facial exercises are highly effective in achieving a strong jawline when combined with a healthy diet, skincare routine, and full-body training program. You can look younger or more defined by using jawline exercises.

    They can help lessen jaw, head, and neck pain. They may alleviate the effects of chronic pain or temporomandibular problems in the jaw’s muscles, bones, and nerves. However, results might not show up immediately. Continue your exercise regimen; the rewards may not be substantial. Additionally, they may not work for everyone, and if necessary, a person may seek medical help.

    How the exercises can strengthen your jawline

    The study found that in a gym or therapeutic setting, the front neck muscles are typically weak, impeded, and little used. They could be the major cause of neck drooping and a concealed source of neck pain.

    The muscles connect to different areas of the jawbone (mandible) from the clavicle, which is the collarbone and sternum. These exercises should reduce migraines, neck pain, and jaw pain in addition to sharpening the jawline.

    Why Is a Strong Jawline Necessary?

    • It has to do with athleticism and strength.
    • Characteristics like charm and confidence are described.
    • The beauty of your face is greatly enhanced by a well-defined jawline.

    Here, we outline many jawline-enhancing workouts.

    Mewing

    mewing
    mewing
    • Raise your tongue to your lips’ roof.
    • Keep it there for a minimum of fifteen seconds.
    • Ten times, or at least three times a day, repeat this motion.

    Mewing corrects the tongue’s resting position. The roof of the mouth, commonly known as the palate, should naturally be touched by the tongue when at rest. The entire lower portion of your face is mewing.

    Vowel Sounds

    • Your mouth should be wide open.
    • You will say “O” and then “E” when your mouth is wide open. Say it out loud. It should be a bit longer.
    • Perform three sets of fifteen reps.

    Numerous muscles in the face and jaw region are worked by these workouts.

    Opening and Closing the Mouth

    Opening-and-Closing-the-Mouth
    Opening-and-Closing-the-Mouth
    • For up to three minutes, keep your mouth wide open and raise and drop your lower jaw.
    • Repeat two or three times each day.
    • This can be done while cooking, walking, sitting, or anyplace else.
    • Perform this motion slowly and gently.
    • Your blood circulation will improve if you exercise more quickly and gently since it will force more blood into your face.

    Avoid going overboard with the extension in an attempt to speed up the development of your jawline. When performing this exercise, avoid pressing the rest of your face. This will keep your face from getting wrinkled.

    Curl Your Neck up

    Neck-curl-up
    Neck-curl-up
    • Press your tongue against your palate while lying on your back.
    • Raise your head off the ground and tuck your chin into your chest while keeping your other body posture.
    • Perform ten repetitions in two sets.
    • Add extra sets after you’ve gained some tolerance.

    Collarbone Backup Exercise

    Chin Tuck - Exercise Guide
    Chin Tuck – Exercise Guide
    • Either standing or sitting can be used to accomplish this exercise.
    • Ensure that your head and the floor are level.
    • Raise your head back until you can feel your throat’s muscles extending on either side.
    • Now put your head back where you started.

    Platysma Stretches

    Platysma-Stretches
    Platysma-Stretches
    • Sit upright and press your lips against your teeth.
    • Move your jaw up and down after pulling your lips shut and turning them down to slightly open your mouth.
    • Perform 10 repetitions five times.

    Large muscles that go from your chin to your shoulder are stretched by this exercise.

    Resistance Exercise for Jawline

    • Next, press your hand under your jaw.
    • If you’re standing, simply put your hand behind your chin.
    • You will open your mouth against the force of your fists pushing upward for around five seconds.
    • Unwind and do it ten times.

    With resistance, this exercise will build stronger jaw muscles.

    Chin Lifts

    Chin Lifts
    Chin Lifts
    • Extend your chin when standing or sitting comfortably.
    • Tilt your head back until your eyes make contact with the roof.
    • Raise the lower lip toward the roof as you gaze up at the ceiling.
    • You’ll notice that the muscles next to your ears are slightly stretched.
    • Hold it there for five to seven seconds, and then let it drop.
    • Feel every muscle in the neck, including those beneath the jaw, tighten around the mouth.

    Your jaw, neck, lip, and cheek muscles will all get stronger from this exercise.

    Tongue Curl

    Tongue-Curl
    Tongue-Curl
    • Put your tongue out there.
    • For three seconds, move your tongue together and hold it there.
    • Do ten reps while relaxing.

    Safety Regards When Performing Out Your Jawline

    • You want to take your time when engaging in any of these activities. The neck and chin muscles are frequently underdeveloped in many people. Moving too fast can unnecessarily produce muscle strain.
    • Additionally, if you have any discomfort while exercising, stop immediately.
    • Apart from that, you should begin working out immediately if you want a more defined jawline. After you have more definition and take care of any acne there, you’ll feel more assured about how you look.
    • Jawline exercises reduce the risk of temporomandibular joint disorders and chronic neck and chin pain, and they also improve appearance.

    Tips for Achieving Great Results

    • Give up chewing gum. The most common way to chew gum is with one side of your face. Jawline asymmetry may arise from this.
    • If you have severe jaw pain of any kind, consult your dentist before starting these exercises.
    • For the first few times, do these exercises in front of a mirror to guarantee proper form.
    • Every exercise should be performed for at least one set of ten to twelve repetitions.

    Facial transformation can be difficult, and not everyone reacts to it in the same way. Face massage techniques and face yoga positions are both regarded as non-invasive. Your facial muscles are significantly more powerful than Botox or surgery, so be prepared to maintain them tight.

    Don’t give up. You may not immediately see any changes, but if you stop exercising, you will never notice any. With consistent and focused practice, these exercises may help you sculpt your face and jawline.

    FAQ

    What type of workout is best for the jaw?

    Collarbone backup, chin, and neck curl-ups are three of the most effective jawline exercises.

    How long does it take to achieve a great jaw shape with the jawline exercise?

    Numerous studies have demonstrated that 20 weeks of consistent exercise can result in a sharp jawline.

    How is jawline efficiency affected by exercise?

    Frequent jaw exercises help the body distribute fat more evenly. This will lead to a more toned face.

    Can exercising help you get a more pronounced jawline?

    You can create modest face changes like sharper cheekbones and a more defined jawline by strengthening your neck, chin, jaw, and other facial muscles. According to one study, doing facial exercises every day for 20 weeks made people’s features look younger and their cheeks bigger.

    How can my jawline get stronger?

    Support your chin’s skin with one hand. Using the other, firmly massage from chin to ear while tucking the flat of your palm behind your jawline. Repeat five to six times per side to tighten, firm, and shape the face.

    Are double chins reduced by face exercises?

    By moving your neck from side to side, you can reduce the appearance of a double chin and ease uncomfortable neck cramps. You only need to turn your neck from right to left in a circle for five seconds on each side.

    references:

    • Tirgar, P. (2023, December 25). Does jaw exercise work? – Hype or hope? Mobile Physiotherapy Clinic. https://mobilephysiotherapyclinic.in/does-jawline-exercise-work/
    • What are the best jaw exercises? Do jawline exercises actually work? (n.d.). Quora. https://www.quora.com/What-are-the-best-jaw-exercises-Do-jawline-exercises-actually-work
    • Goldman, R. (2023, April 21). 5 Exercises for a Defined and Muscular Jawline. Healthline. https://www.healthline.com/health/fitness-exercise/jawline-exercises
    • Do Jawline Exercises Actually Work? Here’s What to Know. (n.d.). https://www.stryx.com/blogs/skincare/do-jawline-exercises-work?srsltid=AfmBOora5oKWltUq9yUhWa2Ebze1b0GC04ccE7obCzG6GyBOAuvcpwfl

  • Flat Feet

    Flat Feet

    What are Flat Feet?

    Flat feet are a common condition characterized by the absence of a normal arch in the foot. This condition can be present at birth or develop over time due to factors such as injury, aging, or certain medical conditions.

    An arch that never forms in one or both feet is thought to affect 20–30% of the general population.

    In order to absorb most of the stresses generated during foot weight bearing before they reach the long bones of the leg and thigh, the arch offers an elastic.

    Consequently, the tendon of the tibialis posterior muscle and the plantar calcaneonavicular ligament (spring ligament) are stretched to such an extent that the person with pes planus is unable to use the medial longitudinal arch (MLA). The person has “supple” flatfoot if the MLA is present and functioning when they are sitting or standing on their toes, but this arch vanishes when they adopt a foot-flat position.

    Arch supports are frequently used to address this latter issue. However, neither costly prescription orthotics (such as shoe inserts) nor less costly over-the-counter orthotics were shown to be effective in treating children’s flat feet in a recent randomized controlled experiment.

    In a group of persons who reach military service age without having ever had foot issues, three studies (see citations below in the Military Performance section). However, when this illness is detected at a younger age, these findings cannot be utilized to predict potential future harm. Additionally, they are not applicable to those who have flat feet and foot symptoms, or to specific symptoms in other body areas (such as the leg or back) that may be related to the foot.

    Treatment for flat feet is only necessary if they are uncomfortable, signify an underlying condition, or cause pain in other parts of the body. Some folks seem to have no arch at all or a very low arch, and they never seem to have any issues. Simple gadgets and exercises might help reduce the pain when flat feet do create problems.

    What are the types of flat feet?

    Whether flat feet develop in maturity or continue after infancy, they might cause issues. Among the varieties of flatfoot are:

    Flexible: The most popular flat feet are flexible. When you are not standing, the arches in your feet are visible. Flexible flatfoot develops in childhood or adolescence. The ligaments and tendons in the foot arches are prone to swelling, tearing, and stretching.

    Rigid: Usually beginning in adolescence, this illness worsens with age. Your feet could hurt. Moving the feet from side to side or flexing them up or down might be challenging.

    Adult-acquired (fallen arch): The arch of the adult-acquired flat foot (fallen arch) suddenly descends or collapses. Only one foot may be impacted. The leg tendon (posterior tibial tendon), which supports the arch, is most frequently torn or inflamed.

    Vertical talus: This congenital handicap is a birth condition that some newborns have that stops arches from growing.

    What causes flat feet?

    You can be genetically predisposed to flat feet. A child’s feet develop arches as they become older.

    Later in life, some people have flat feet. Sometimes, the illness runs in families. Additionally, a few issues raise your chance of developing flat feet, such as:

    • Achille’s tendon injuries.
    • Broken bones.
    • Cerebral palsy.
    • Down syndrome.
    • High blood pressure.
    • Pregnancy.

    What are the symptoms of flat feet?

    However, some forms of flatfoot might cause pain. Symptoms might consist of:

    • Cramping in the legs.
    • Foot or leg muscle pain, such as soreness or exhaustion.
    • Pain when walking or modifications to your gait.

    Risk factors

    Flat feet in children

    • Foot arches are typically hardly noticeable at birth, and they can take some time to grow into stable arches.
    • Having flat feet in early infancy does not guarantee that a person will always have flat feet; most children with flat feet will typically acquire regular arches by the time they are 10 years old.
    • However, a doctor will frequently need to treat the underlying reason if a kid has flat feet because of improper bone growth or another problem, such as spina bifida.
    • Adults who have flat feet typically have a medical reason for it.

    Flat feet in Adults

    In addition, flat feet can occur in adults (“adult acquired flatfoot”) as a result of disease, trauma, abnormal or chronic foot stress, poor foot biomechanics, or aging naturally. Women over 40 years old are most likely to experience this.  Pregnant women may also have flat feet as a result of transient alterations caused by the increased elasticity (elastin) of pregnancy; if flat feet develop by maturity, they usually stay flat forever.

    Flexible flatfoot occurs when a child or adult seems flatfooted when standing with their entire weight on their feet, but when they plantarflex that is, pull their toes back while keeping the rest of their foot flat on the ground an arch develops. Although the phrase “flat foot” is still valid since it is fairly general, this presentation is really caused by excessive pronation of the foot (rolling inwards), not a genuine collapsed arch because the medial longitudinal arch is still there and the windlass mechanism is still functioning. Regardless of age, foot muscle exercise is beneficial and frequently leads to higher arch height.

    Diagnosis

    By reviewing your symptoms and the appearance of your arches as you stand, sit, and walk, your healthcare professional can determine a diagnosis. X-rays may be performed to examine the structure of your bones.

    • One or both feet becoming more flat;
    • pain in the ankles, lower limbs, or feet that have just recently appeared;
    • symptoms that do not go away with supportive, properly fitting shoes;
    • sensation of rigidity, stiffness, weight, and unwieldiness

    The majority of trained medical personnel can identify fallen arches by looking at the patient’s feet and observing how they stand and walk.

    Both the front and rear of the foot will be examined by the physician. To enable the doctor to assess the form and function of each foot, the patient might have to stand on their toes.

    A physician will also take the patient’s medical history into account. In some situations, they could request an electromyography, CT, MRI, or X-ray.

    Treatment

    Many persons with flat feet don’t require therapy or have serious issues. If you have foot pain, stiffness, or other problems, your doctor could suggest nonsurgical therapy. Surgery is seldom required to treat bone or tendon issues or stiff flat feet.

    Among the treatments are:

    • nonsteroidal anti-inflammatory medications (NSAIDs).
    • Physical treatments help increase mobility and flexibility by strengthening and stretching tense muscles and tendons.
    • supportive equipment such as custom-made shoes, foot orthotics, and braces for the legs or feet.

    Prognosis

    Youngsters who have flexible flat feet will frequently outgrow it. A person’s prognosis will rely on their particular symptoms and the necessary therapy whether they have an inflexible flat foot or if the reason is an underlying ailment.

    When a degenerative illness is the reason and the symptoms get worse over time, treatment might be challenging. The prognosis is usually favorable when surgery is required. For some, exercising might help them feel better. However, avoiding high-impact activities may also be necessary for someone with flat feet.

    To choose the best course of therapy for themselves, a person should speak with a physician.

    Complications

    Flat feet may exacerbate symptoms or be a contributing factor for those with various foot, ankle, or lower limb issues.

    Among the examples are Reliable Sources:

    • Achilles tendonitis
    • arthritis in the ankle or ankles
    • arthritis in the foot or feet
    • bunions
    • hammer toe
    • posterior tibial tendonitis
    • shin splints

    Summary

    When a person’s foot arch is little or nonexistent, they have flat feet, which can lead to pain and difficulty walking. Flat feet can have a variety of reasons, and not all of them will result in pain and symptoms.

    When the ailment first appears in childhood, it often disappears as the kid becomes older. If there is pain or an effect on a person’s early life, treatment can be required. Usually, anti-inflammatory drugs and foot orthotics are used for this. Rarely, someone could require surgery.

    FAQs

    Are flat feet a congenital condition?

    Your feet or your children’s feet may be flat for the following reasons: It is a congenital defect that is hereditary. The child’s feet are flat from birth.

    Where is the flat foot pain?

    The majority of flat-foot sufferers show no symptoms. Ankle, arch, and inside/outside foot pain are some of the symptoms of flat feet and fallen arches.

    At what age do flat feet often occur?

    Ants and toddlers till they are three or four years old when the arch grows. If flat feet continue after the ages of five or six, it can be a problem that needs to be evaluated.

    Is height impacted by flat feet?

    Talk about it. According to the linear regression analysis, there was no discernible correlation between women’s actual height and foot arch height. This indicates that a person’s height is not greatly impacted by the height of their foot arch.

    Are flat feet a lifelong condition?

    Millions of individuals suffer from flat foot, a common disease. Children frequently have flat feet, a condition that many outgrow. Many youngsters, however, do not outgrow this issue and will continue to struggle throughout adulthood.
    For example, those with flat feet typically have a lower center of gravity and more stability, which can improve balance and agility in sports like dancing, gymnastics, and martial arts.

    How can flat feet be tested for?

    There is a simple test you may do if you are not sure. Simply moisten your feet, then stand on a concrete pavement, bathroom tile, or any other level surface that will reveal your imprint. You have flat feet if you can see the whole contour of your foot instead of just a part of it.

    What is the reason for flat feet?

    Arches may suddenly collapse following an injury. The foot may develop arthritis as the condition worsens.

    Is it better or worse to have flat feet?

    Your feet provide the foundation for your body’s balance, and if they are not supported properly, you may be more susceptible to joint issues caused by bad posture and an abnormal stride. People who have flat feet may be more prone to foot, ankle, knee, or hip injuries or pains.

    Is it possible to fix flat feet?

    Your flat feet can be treated by a physical therapist using specific exercises that strengthen and stretch your muscles. They can also work to strengthen your core and suggest lifestyle modifications, such as posture and how you stand and move.

    References

    • Dhameliya, N. (2023a, February 28). Flat feet : Physiotherapy Treatment. Samarpan Physiotherapy Clinic. https://samarpanphysioclinic.com/flat-feet/
    • Flat feet: MedlinePlus Medical Encyclopedia. (n.d.). https://medlineplus.gov/ency/article/001262.htm#:~:text=Flat%20feet%20are%20a%20
    • Flat Feet. (2024, September 9). Cleveland Clinic. https://my.clevelandclinic.org/health/diseases/17005-flat-feet
    • Flatfeet – Symptoms and causes. (n.d.). Mayo Clinic. https://www.mayoclinic.org/diseases-conditions/flatfeet/symptoms-causes/syc-20372604
    • Wikipedia contributors. (2024b, September 28). Flat feet. Wikipedia. https://en.wikipedia.org/wiki/Flat_feet
  • Sensory Integration Therapy (SIT)

    Sensory Integration Therapy (SIT)

    What is a Sensory Integration Therapy?

    Sensory Integration Therapy (SIT) is a specialized therapeutic approach designed to help individuals process and respond more effectively to sensory information. Originally developed to support children with sensory processing disorders, particularly those on the autism spectrum, SIT focuses on enhancing the brain’s ability to organize and interpret stimuli from the environment.

    Sensory processing is the way our nervous system takes in, processes, and reacts to sensory data. This therapy aims to help people who struggle with sensory processing control how they react to sensory information and enhance their capacity to engage in daily activities.

    Both children and adults may experience sensory processing issues, which can affect social relationships, academic achievement, and self-care abilities, among other areas of everyday living. Numerous illnesses, such as autism spectrum disorder, attention-deficit/hyperactivity disorder, developmental delays, and sensory processing disorder, can cause these challenges.

    The work of neuroscientist and occupational therapist Dr. A. Jean Ayres, who developed the idea of sensory integration, serves as the foundation for sensory integration treatment. Ayres asserts that for the brain to create a precise impression of the surroundings, sensory data from multiple sources must be processed and integrated.

    The brain may not properly process or integrate sensory data in those who have sensory processing disorders, which can cause problems with organization, discrimination, and modulation.

    Fundamentals of Sensory Integration Therapy:

    The intervention procedure in sensory integration therapy is guided by several guiding concepts. Among the fundamental ideas of sensory integration therapy are the following:

    • Sensory processing is vital for everyday functioning: People need sensory processing in order to study, interact with others, and take part in leisure activities, among other everyday activities.
    • The brain is capable of reorganizing and adapting in response to new experiences and inputs. The goal of sensory integration treatment is to enhance sensory integration and processing by encouraging constructive alterations in the brain’s neural connections.
    • It is crucial to actively engage in sensory experiences. To enhance their capacity to process and integrate sensory data, people need to actively participate in sensory encounters. The goal of sensory integration therapy is to give people the chance to participate in stimulating and meaningful sensory experiences.
    • Therapy is guided by each person’s own sensory profile: Every person has a distinct sensory profile, with varying sensory processing strengths and difficulties. The sensory demands and objectives of each individual are catered for in sensory integration therapy.
    • The intervention must be gradual and customized: To encourage beneficial changes in sensory processing, sensory integration therapy uses a gradual and customized approach, introducing and modifying activities and interventions over time.
    • Generalization of daily activities is crucial: Improving a person’s capacity to carry out daily tasks is the ultimate aim of sensory integration treatment. Therapy must encourage the generalization of sensory processing abilities to a range of contexts and activities in order to accomplish this.

    The basic concepts of sensory integration therapy place a strong emphasis on recognizing and meeting each person’s particular sensory processing needs, encouraging active participation in sensory experiences, and encouraging the transfer of acquired skills to everyday situations. Therapists can assist people enhance their sensory integration and processing abilities and, in turn, their quality of life by adhering to these principles.

    The efficacy of sensory integration treatment:

    The usefulness of sensory integration therapy as a treatment for ASDs is limited and unclear, despite scientific studies demonstrating that children with ASDs are more likely to have sensory-processing issues. The effectiveness of the therapy thus far has mostly been determined by individual experiences, but this does not imply that it may not be beneficial for certain kids.

    Talk with the pediatrician of your child if you think they may have sensory processing issues. For further evaluation, community options might be offered.

    How does sensory integration treatment work?

    The first step in sensory integration treatment was thoroughly evaluating a child’s environmental sensitivity. This evaluation also includes standard testing, a health history, observations in a clinical setting, and interviews with the child’s parents or other caregivers.

    The objectives are to identify areas where a child’s sensory knowledge is deficient and determine which therapies will best enable them to respond and adapt to their environment.

    The SI therapist will assess the following during the examination:

    • Body placement concerning environment and objects
    • Current sensory-seeking practices
    • Hand-eye coordination
    • Changing
    • Praxis, or motor planning
    • Perception of movement
    • Action planning and sequencing
    • Response to textures, noises, and touch
    • Play and spontaneous action
    • Eye movement and visual perception

    Activities that promote structured reactions to a specific sensory input will be the major focus of the SI therapist’s treatment plan. Children can learn and participate in the process because activities are repeated and ongoing throughout the day. They get an understanding of how the senses function together, learn how to control their own reactions, and become at ease with sensations.

    For the youngster, SI therapy is frequently regarded as a “fun activity.” Allowing children to explore in a free setting that enables them to formulate well-organized interpretations and responses is the goal of SI treatment. For instance, a child who finds rough surfaces uncomfortable could play with rice grains to become accustomed to their texture, which will help them feel less uncomfortable.

    When the child comprehends the importance of the result sufficiently to consistently apply the acquired technique, sensory integration therapy eventually proves to be effective.

    Different goals could include:

    Hearing, or auditory

    • Drums, pianos, guitars, keyboards, and tambourines are among the instruments.
    • Appliances: microwave, dishwasher, washing machine, and lawnmower
    • Chimes, instruments, and radio music
    • Repeating drums, rap, and clocks
    • Water features include waterfalls, faucets, waves, and fountains.

    Olfactory: the sense of smell

    • Air fresheners: sachets, lavender, and potpourri
    • Using incense and candles for aromatherapy
    • Cooking and baking: pork, onions, cabbage, bread, cookies, and stews
    • Cosmetics such as lotions, powders, and fragrances
    • Areas like changing rooms, kitchens, parking spaces, and locker rooms
    • Plants and flowers make up the vegetation.

    Oral-taste

    • Candies that are sour, soft, firm, and licorice
    • Blue, cottage, cheddar, and feta cheese
    • The condiments include peanut butter, honey, jelly, and spice.
    • Fruits: bananas, blackberries, strawberries, and grapes
    • Hot and cold foods include things like soups and popsicles.
    • Products made with milk: ice cream, milkshakes, and yogurt

    Processing of proprioception

    • balancing on a beam or the floor
    • Crawling in tunnels
    • Dancing
    • Striking balls
    • Bouncing and jumping
    • Playing in boxes with beans and balls
    • On a mat, rolling or crawling
    • On chairs, spinning
    • Swinging

    Somatosensory or tactile touch

    • Hard: flooring, countertops, and rock
    • Static, pliable, moldable, bendable, and breakable interaction
    • Things: bolts, rice, beans, and beads
    • The following are examples of pressure: push, pull, hold, tickle, rub, claw, squeeze, and press
    • Feathers, fur, and cotton balls are soft.
    • Picky, sticky, rough, pointed, and smooth surfaces
    • Sand, water, and paint textures
    • Blender, hair dryer, and hair blower vibrating

    Processing in the vestibular system

    • Headshakes, handstands, and sliding somersaults
    • Swinging on a rope, swings, or in a blanket
    • Tossing a ball
    • Rapid head turns to the left and right
    • Walk unsupported from heel to toe.

    Vision

    • Strobe, holiday, flashing, colored, and strung lights
    • Papers with patterns, neon, and fluorescent

    The SI therapist will monitor a child’s development to ensure that they are accomplishing a pre-established goal. A youngster should become more at ease with formerly upsetting stimuli after completing SI therapy.

    Who is the target audience for sensory integration therapy?

    Although parents and other caregivers can benefit from sensory integration treatment, children are the main beneficiaries.

    Therapists help kids deal with these problems that, at first, might seem insurmountable by using appropriate treatment techniques. Treatment that helps children develop the mental and physical framework of their central nervous system to appropriately acquire sensory input, track their reactions, and recognize the significance of specific textures, motions, or noises is the key to success.

    To get the most out of various therapies, a kid needs to be trained in all of these skills.

    The following are some benefits of sensory integration therapy:

    • To fully understand action and result
    • Recognize sensory input correctly
    • Establish physical balance and a feeling of space.
    • Establish constructive behavioral patterns
    • Eliminate fear and promote sociability and play.
    • Reduce your sensitivity to sensory defenses
    • Cut down on input intolerance
    • Minimize adverse bodily responses

    Sensory integration therapy is also beneficial to parents and other caregivers because it teaches them how to engage with their kids in unique ways, which greatly strengthens their bond.

    A child’s tone, or capacity to regulate brain impulses so they can appropriately respond to stimuli, is also enhanced by SI therapy. SI treatment frequently has both psychological and physical advantages.

    The following are some physical advantages of therapy:

    • Strike a balance between being overly and underly responsive.
    • Gravitational security
    • Coordination of the hands and eyes
    • Better motor planning 
    • Better sleep patterns
    • Development of Language
    • Position

    SI treatment has the following psychological advantages:

    • Increase Confidence and Attention
    • Improve irritability and emotional outbursts
    • Boost Procrastination, 
    • Boost Moodiness, 
    • Boost Restlessness
    • Boost Socialization

    Indications of Sensory Integration Therapy:

    People who struggle to process and react correctly to sensory input may benefit from sensory integration therapy. The following are some possible particular indications for sensory integration therapy:

    • The disease known as sensory processing dysfunction is characterized by difficulties in processing and reacting to sensory input. To help people with sensory processing disorders better process and integrate sensory information, sensory integration therapy may be recommended.
    • Autism spectrum disorder: Hypersensitivity to specific stimuli is one of the sensory processing issues that many people with autism spectrum disorder experience. To help people with autism spectrum conditions better control their sensory input and enhance their general functioning, sensory integration treatment may be recommended.
    • Attention deficit hyperactivity disorder (ADHD): People with ADHD may struggle to regulate and process their senses, which can impact their behavior and attention. In order to help people with ADHD better control their sensory input and enhance their behavior and attention, sensory integration treatment may be recommended.
    • Developmental delays: Sensory processing issues may impact the general development of certain children who have developmental delays. These kids may benefit from sensory integration treatment in order to enhance their integration and sensory processing abilities, which will ultimately aid in their general development.
    • Traumatic brain injury (TBI): People who have had a TBI may struggle to integrate and absorb sensory information, which can impact their general functioning. To enhance their general functioning and ability to process and integrate sensory information, people with TBI may benefit from sensory integration therapy.

    People with a variety of illnesses or difficulties that impair their capacity to comprehend and react to sensory information may benefit from sensory integration therapy. To ascertain whether sensory integration treatment is suitable for a person’s unique requirements and objectives, it is crucial to consult with a licensed occupational therapist.

    Contraindications of Sensory Integration Therapy:

    Although many people find sensory integration treatment to be very helpful, there are several situations or contraindications where it could not be appropriate or even detrimental. The following are a few possible contraindications to sensory integration therapy:

    • Acute sickness or medical condition: Sensory integration treatment might not be suitable until the patient’s health is stabilized if they are suffering from an acute illness or medical condition that could be made worse by sensory input or physical exercise.
    • Seizure disorder: People with seizure disorders may experience seizures if sensory integration therapy includes flashing lights or fast movement. To reduce the risk of seizures in such situations, sensory integration therapy should be avoided or adjusted.
    • Sensory aversion: For some people, sensory integration therapy may be too much to handle and upsetting because of their extreme sensory aversions. Therapy may need to be adjusted in these situations, or other strategies may need to be employed.
    • Psychiatric condition: People who have serious emotional or behavioral issues or severe psychiatric illnesses might not be able to handle sensory integration therapy or could need more help and supervision throughout treatment.
    • Sensory overload: Some people may struggle to control their sensory input or may already be experiencing sensory overload. In certain situations, sensory integration therapy might not be suitable and could need to be postponed until the patient’s abilities to regulate their senses have improved.

    To ascertain whether therapy is suitable for a person’s unique requirements and objectives and to guarantee that therapy is carried out safely and successfully, Working with a professional occupational therapist who has been trained in sensory integration treatment is essential. Before creating a treatment plan, therapists will thoroughly assess each patient’s capacity for sensory processing as well as any contraindications.

    A disadvantage of Sensory Integration Therapy:

    For those who struggle with sensory processing, sensory integration therapy (SIT) may be helpful, but there may be certain drawbacks or restrictions to take into account. These consist of:

    • Limited evidence: Despite SIT’s widespread use, its efficacy is not well supported by the available data. To completely comprehend the advantages of SIT for those with sensory processing disorders, more research is required.
    • Time-consuming: Because SIT frequently calls for several sessions spread out over a long period, it can be a time-consuming therapy.
    • Cost: Some people may find SIT sessions less accessible due to their high cost and potential lack of insurance coverage.
    • Requirement for specific training: Only licensed therapists with specific training in SIT should administer the method. Because of this, access may be challenging for some people or in some places.
    • Discomfort or overstimulation: SIT may cause discomfort or overstimulation for certain people, especially those who are highly sensitive to particular kinds of sensory input.
    • Not appropriate for everyone: SIT should be used cautiously in some situations and may not be appropriate for people with specific medical conditions or sensory processing problems.

    To completely grasp whether SIT is the best course of treatment for a person’s unique requirements and circumstances, it is crucial to go over any potential drawbacks or restrictions with a licensed therapist.

    Intervention of Sensory Integration Therapy:

    A type of occupational therapy called sensory integration therapy is designed to assist people who struggle to properly interpret and react to sensory information. The following actions are commonly included in the sensory integration therapy intervention:

    • Assessment: Using clinical observation and standardized tests, the therapist will first evaluate the patient’s capacity for sensory processing. This will assist in determining the precise sensory difficulties the person is experiencing and guide the creation of a therapy strategy.
    • Treatment planning: The therapist will create a personalized treatment plan based on the evaluation results, taking into account the individual’s unique requirements and objectives. A variety of exercises and therapies may be included in the treatment plan in order to address the patient’s difficulties with sensory processing.
    • A personalized combination of exercises and techniques that a person might employ to control their sensory intake throughout the day is known as a sensory diet. To create a sensory diet that suits the patient’s requirements and preferences, the therapist will collaborate with the patient and their family.
    • Activities for sensory integration: A variety of activities are used in sensory integration therapy to assist patients in processing and reacting to sensory data in a suitable manner. Swinging, bouncing on a therapy ball, manipulating tactile materials, and other exercises intended to arouse various senses are a few examples of these activities.
    • Exposure to sensory stimuli over time: People might occasionally become hypersensitive to particular stimuli. In order to help the patient desensitize and become more accustomed to the stimuli, sensory integration treatment may entail exposing them to them progressively in a safe and regulated setting.
    • Involvement of parents and caregivers: Parents and caregivers are frequently heavily involved in sensory integration treatment. To aid in their personal development, they might be requested to take part in therapy sessions or to use sensory techniques and exercises at home.

    A variety of exercises and interventions are used in sensory integration therapy, a highly customized approach, to address each person’s unique sensory processing difficulties. A licensed occupational therapist usually provides the therapy in a controlled and encouraging setting.

    Conclusion

    A therapeutic strategy for people who struggle with sensory processing is sensory integration therapy. In a sensory-rich setting, the therapy offers chances for people to participate in therapeutic and structured sensory experiences.

    In both children and adults with neurological disorders, the therapy seeks to enhance sensory processing skills and lessen sensory-related challenges. Discuss with a healthcare professional the potential inclusion of sensory integration therapy in a treatment plan if you or a loved one struggles with sensory processing.

    FAQs

    What does sensory integration look like?

    A baby’s ability to smell food as they bring it to their mouth is an illustration of sensory integration. tasting the cuisine. detecting the food’s texture.

    In what ways might sensory integration treatment be practiced at home?

    By setting up a sensory nook, implementing heavy work tasks, applying deep pressure, activating the vestibular system, and participating in oral-motor exercises for tactile input, you can perform sensory integration treatment at home.

    What are the sensory integration skills?

    The development of a child is significantly influenced by sensory integration. This includes their capacity to establish and preserve social-emotional bonds as well as to grow in motor, cognitive, and adaptive abilities, among other areas.

    How can sensory integration be taught?

    Visual timers, weighted objects, and fidget toys are examples of sensory aids that can be beneficial. Students should understand that the purpose of the quiet area is to assist them in controlling and reducing their level of arousal; it is not a place for them to misbehave.

    What adverse consequences can sensory therapy cause?

    Low self-esteem, fewer friendships, low self-confidence, social isolation, depression, underachievement, and overstimulation of senses through leisure activities are all negative effects of sensory integration therapy.

    Where in the brain is sensory integration located?

    At the most basic level, the visual and auditory cortexes map sensory data independently. The parietal lobe, which is situated in the upper part of the brain, then automatically incorporates this information.

    References

    • Ms, E. L. (2022, September 23). How Does Sensory Integration Therapy Work? Healthline. https://www.healthline.com/health/autism/sensory-integration-therapy
    • Nehaphysiotherapist. (2022, December 4). Sensory Integration Therapy – Technique, Benefits – Mobile Physio. Mobile Physiotherapy Clinic. https://mobilephysiotherapyclinic.in/sensory-integration-technique/
    • Vaghela, M. (2023b, March 11). Sensory integration therapy – Principles, Indication – Samarpan. Samarpan Physiotherapy Clinic. https://samarpanphysioclinic.com/sensory-integration-therapy/

  • Propulsive Gait

    Propulsive Gait

    Propulsive gait is a complicated syndrome that is mostly linked to neurological conditions, especially Parkinson’s disease. It greatly impairs mobility and quality of life and presents as forward-leaning posture, stumbling steps, and balance issues.

    Effective diagnosis and treatment depend on an understanding of the underlying causes, which might range from neurological and musculoskeletal disorders to cognitive problems.

    Medication management, physical therapy, occupational therapy, and, in certain situations, surgical procedures are all part of the comprehensive treatment plan. Physical therapy, which focuses on personalized exercise plans, balance training, and gait retraining, is essential for regaining function and improving mobility.

    What is Propulsive Gait?

    Propulsive gait is an abnormal walking pattern that is commonly noticed in people suffering from neurological illnesses, specifically Parkinson’s disease. It is identified by a forward-leaning posture, short, shuffling feet, and a limited arm swing. This gait pattern can hurt mobility and raise the chance of falling, complicating daily life even more.

    Key Features of Propulsive Gait

    • Forward Leaning Posture
    • Shuffling Steps
    • Reduced Arm Movement
    • Difficulty initiating movement
    • Increased Fall Risk

    These characteristics can have a major impact on a person’s stability and general mobility, which raises their risk of falling.

    Causes of the Propulsive Gait

    Propulsive gait is most typically linked to Parkinson’s disease, but it can also occur in other illnesses.

    Parkinson’s disease

    • Parkinson’s disease, which is the primary cause of propulsive gait, is a progressive neurological disorder marked by the loss of dopamine-producing neurons in the brain. This deficit causes motor symptoms such as stiffness, bradykinesia (slow movement), and postural instability, all contributing to propulsive gait development.

    Cerebrovascular accidents (strokes)

    • Balance issues and hemiparesis, or weakness on one side of the body, can result from a stroke. These difficulties may significantly change gait and contribute to a propulsive pattern.

    Other causes:

    • Huntington’s disease can cause abnormal walking patterns and impair motor control.
    • A propulsive pattern may result from changes in gait mechanics caused by arthritis or joint issues.
    • Compensatory motions may result from lower limb deformities or deficiencies.
    • Movement initiation and spatial awareness might be impacted by dementia and other cognitive diseases.

    Signs and symptoms of the Propulsive Gait

    Propulsive gait sufferers may exhibit several symptoms, such as:

    • An unusual posture that moves the center of gravity forward is called forward leaning.
    • Short, rapid steps with little lift-off are called shuffling steps.
    • Arm swing may be diminished if the arms stay near the torso, which would impair natural balance.
    • Difficulty Starting Movement. Some people may have trouble changing directions or starting to walk.
    • Higher risk of regular falls because of instability and balance problems.
    • Unusual gait mechanics may result in muscle fatigue.

    Diagnosis of the Propulsive Gait

    Propulsive gait is diagnosed using a mix of diagnostic tests and clinical evaluations.

    Physical Examination

    • Careful examination of the development, course, and symptoms.
    • While walking keep an eye on posture and gait characteristics.
    • Evaluating general neurological function, reflexes, strength, and coordination.
    • Thorough examination of walking habits in various contexts (e.g., home vs clinical setting).

    Imaging Study

    • MRI or CT scans are used to find structural abnormalities in the spine or brain that could be causing problems with gait.

    Treatment for the Propulsive Gait

    Medication

    • Levodopa is one example of a dopaminergic agent that can help alleviate the symptoms of Parkinson’s disease.
    • To control mood and anxiety that may be a factor in gait problems, antidepressants or anxiolytics are recommended.

    Surgical Treatments

    • Patients with severe Parkinson’s disease may benefit from deep brain stimulation (DBS). To aid control of motor performance, electrodes are surgically implanted in particular brain regions.

    Physical Therapy

    • The main form of treatment for propulsive gait is physical therapy, which aims to increase general mobility, strength, and balance.

    Occupational Therapy

    Enhancing a person’s ability to do daily duties safely and effectively is the aim of occupational therapy.

    Speech Therapy

    Speech therapy can help with communication and movement initiation techniques when cognitive disabilities impact mobility.

    Physical Therapy for the Propulsive Gait

    Propulsive gait can be effectively managed with physical therapy using several important strategies and tactics, including:

    • The practice of strengthening and stabilizing the lower limbs is known as strengthing exercises.
    • Exercises for improving balance include walking on uneven terrain and practicing pivoting and turning.
    • Proprioceptive training refers to exercises intended to improve body awareness and spatial orientation.
    • Postural training includes teaching students how to keep their posture straight and how to realign their spine.
    • Functional exercises are designed to encourage functional independence by using motions that resemble everyday tasks.
    • Canes, walkers, or orthotic devices are examples of assistive devices that are suggested to enhance mobility.
    •  Educating patients and caregivers on the illness and its treatment options.

    Exercises for the Propulsive Gait

    One-leg standing
    One-leg standing

    One-leg standing

    • For five to ten seconds, stand on one leg while holding onto a sturdy desk or chair.
    • After ten repetitions, switch legs.
    Single leg raises:
    Single leg raises:

    Leg raises

    • Raise one knee while maintaining a straight one while you’re on your back.
    • Raise the straight leg until it is level with the bowed knee while pointing your toes toward the ceiling.
    • Go back to the beginning and do it ten times.
    • Repeat after switching legs.
    Toe and heel lifts
    Toe and heel lifts

    Toe and heel lifts

    • Elevate your toes off the floor while maintaining your heels on the floor while sitting in a chair with your feet flat.
    • To lift your heels, you can also point your toes.
    marching in place
    marching in place

    Marching in place

    • As though you were marching, raise one leg toward your chest while seated.
    • Repeat up to ten times, switching legs.
    side-lying-leg-raise
    side-lying-leg-raise

    Side-lying leg raise

    • To strengthen your core and abductor/adductor muscles, raise your legs to the side while maintaining a stationary body.

    Stepping over objects

    Two soft objects should be placed three feet apart on the floor. Repeatedly step over each thing.

    Walking backward

    Side-stepping
    Side-stepping
    • Balance and coordination may be improved by walking backward.

    Side-stepping

    • This technique can enhance hip stability and mobility.

    Obstacle course

    • Getting over obstacles might help you become more balanced and coordinated.

    Step-ups

    chair squats
    Chair stands
    • Step-ups are a good way to strengthen and coordinate your legs.

    Chair stands

    • Chair stands can enhance balance and strength in the lower body.

    Leg kicks and knee kicks

    • Try these exercises for balance.

    Summary

    The complicated condition known as propulsive gait is generally linked to neurological conditions, especially Parkinson’s disease. Healthcare professionals and caregivers have to understand its mechanisms, underlying causes, and possible solutions.

    It is feasible to lessen the difficulties caused by propulsive gait by combining physical and occupational treatment, medication management, and assistive technology use. This will help people preserve their independence and enhance their general health.

    FAQs

    Which stage of gait is the propulsive phase?

    The point at which the lead leg’s heel comes off and its toes leave the ground is known as the entire propulsive phase. The stance phase comprises 45 to 55 percent of this phase. From the lead leg to the contralateral leg’s first point of contact, the heel-off point represents the active propulsive phase.

    How can propulsive gait be treated?

    For a propulsive gait:
    Encourage the individual to become as self-sufficient as they can.
    Allow sufficient time for daily activities, including walking.
    For safety concerns, especially on uneven terrain, offer walking support.
    For walking retraining and exercise rehabilitation, consult a physical therapist.

    Which muscles are used in propulsive gait?

    The EMG activity of the patient’s leg muscles was recorded while they walked and ran. The gluteus maximus and gastrocnemius muscles provide the force for walking. When walking, the vast provides brakes. When running, the gluteus maximus, vastus, gastrocnemius, and soleus muscles provide propulsion.

    References

    • Wikipedia contributors. (2023, August 14). Propulsive gait. Wikipedia. https://en.wikipedia.org/wiki/Propulsive_gait
    • Hsiao, H., Knarr, B. A., Higginson, J. S., & Binder-Macleod, S. A. (2015). Mechanisms to increase propulsive force for individuals poststroke. Journal of NeuroEngineering and Rehabilitation, 12(1). https://doi.org/10.1186/s12984-015-0030-8
    • Propulsive gait. (n.d.). http://medbox.iiab.me/kiwix/wikipedia_en_medicine_2019-12/A/Propulsive_gait
  • Tuberculous Arthritis

    Tuberculous Arthritis

    What is a Tuberculous Arthritis?

    Tuberculous arthritis is a disease caused by the same bacteria that causes tuberculosis. Through the blood and lymphatic systems, these bacteria can travel to other parts of your body after entering through your lungs.

    Mycobacterium tuberculosis is the bacteria that causes tuberculous (TB) arthritis, an inflammatory joint disease. The development of TB arthritis is rare in those infected with this bacteria.

    TB is an infection caused by Mycobacterium tuberculosis. Since the 1950s, TB rates in the US have dropped by more than ten timesTrusted Source. Since 2012, the annual number of cases reported by the Centers for Disease Control and Prevention (CDC) has been below 10,000.

    Respiratory symptoms are caused by pulmonary TB, the most prevalent kind of the illness. From your lungs, the germs may travel to other areas of your body, including your:

    • spine
    • joints
    • kidney
    • brain
    • lymph nodes

    Everything you need to know about TB arthritis, including its symptoms, course of therapy, and possible side effects, is included in this article.

    Symptoms of Tuberculous Arthritis:

    The most typical location for TB arthritis to develop is the:

    • Hip (25%)
    • Spine (40%)
    • Knee (8%).

    On rarer occasions, it may appear in joints like your wrist or ankle. When it affects your spine, it usually affects your mid-back or thoracic spine.

    One joint is often affected by the slow-progressing symptoms of TB arthritis. It might be confused with rheumatoid arthritis or other types of arthritis.

    Among the symptoms are:

    • Pain
    • Swelling
    • Decreased range of motion

    Elevated inflammatory markers are frequently seen in blood testing.

    Up to one-third of patients report fever and weight loss, and about half of people experience respiratory problems. You may get respiratory symptoms like these if you also have pulmonary tuberculosis:

    • coughing
    • chest pain
    • pain when breathing
    • coughing up blood

    Causes of Tuberculous Arthritis?

    Breathing in respiratory secretions is the primary way that Mycobacterium TB is transmitted from one individual to another.

    • Singing
    • Talking
    • Coughing

    These fluids include bacteria that can enter and grow in your lungs.

    Who gets tuberculous arthritis?

    Approximately one-third of people worldwide are affected with tuberculosis, with developing nations having the highest prevalence. It ranks among the top ten global causes of mortality. Traveling to a place where tuberculosis is prevalent increases your risk of developing TB arthritis.

    Approximately 10–35% of individuals with TB outside of their lungs experience musculoskeletal symptoms, which include symptoms that impact their:

    • Muscles
    • Bones
    • Joints

    When HIV-positive individuals get TB, they are more likely to experience symptoms outside of their lungs.

    Diagnosis of Tuberculous Arthritis

    Doctors use tests like these to diagnose TB arthritis:

    • scheduling blood tests, MRIs, and X-rays to check for inflammatory signs
    • Rheumatoid arthritis is frequently mistaken as it.
    • In a lab, doctors can utilize this tissue sample to check for bacterial infection symptoms.

    Treatment of Tuberculous Arthritis

    The primary treatment for the infection is antituberculosis medication therapy.

    • isoniazid (Hydra, Hyzyd, Isovit)
    • rifampicin (Rifadin)
    • pyrazinamide (Rifater, Rimstar, Voractiv)
    • ethambutol (Myambutol)

    Rheumatoid arthritis, in which your immune system assaults healthy cells in your joints, is rare but can be caused by TB. Rheumatoid arthritis can be treated with the following:

    Complications of Tuberculous Arthritis?

    The bones around your joints may be destroyed as a result of TB arthritis. Since the bacteria lacks the enzymes necessary to break down cartilage, the degradation typically doesn’t happen until the illness has grown to an advanced state.

    Permanent side effects from severe arthritis include:

    With no indication of germs in your joints, TB causes a kind of multi-joint arthritis called “poncet disease.” It falls under the category of reactive arthritis.

    When TB arthritis develops in areas of the body other than the lungs, it is often not contagious.

    Can you prevent tuberculous arthritis?

    TB arthritis can be avoided by:

    Keeping a distance from those who have pulmonary TB
    obtaining a blood test for TB before departing the United States and 8–10 weeks after returning if you will be interacting with individuals who are at high risk of contracting the disease while traveling taking precautions against HIV, which might raise your chance of contracting TB outside of your lungs, like:

    • Avoiding sharing injection equipment,
    • Using a condom or other barrier technique during intercourse For those with a high risk of exposure, it might be taken into consideration.

    FAQs

    What other name does TB arthritis go by?

    Poncet’s illness is the term used to describe reactive arthritis (ReA) in tuberculosis (TB). This uncommon aseptic kind of arthritis is seen in people who have active tuberculosis.

    How is a diagnosis of TB arthritis made?

    Finding Mycobacterium tuberculosis, either directly or by synovial fluid culture, is the gold standard for diagnosing tuberculous arthritis.

    How long does TB arthritis therapy last?

    TB arthritis normally responds well to medication therapy and is routinely treated for 6–12 months, even if joint deterioration may occur. Patients who have a higher chance of relapsing, such as those who come with significant illness, should have their treatment duration prolonged.

    Can TB arthritis be cured?

    Antituberculosis medications have the potential to treat TB arthritis. However, the condition can cause serious joint degeneration that results in lifelong symptoms if identification is delayed.

    What differentiates rheumatoid arthritis from tuberculosis arthritis?

    Mycobacterium tuberculosis infections are the cause of TB arthritis. An autoimmune disease called rheumatoid arthritis arises when your immune system targets healthy joint cells.

    References

    • Yetman, D. (2023, October 11). Overview of Tuberculous Arthritis. Healthline. https://www.healthline.com/health/tuberculous-arthritis
  • 12 Best Exercises For Gastrocnemius Strain

    12 Best Exercises For Gastrocnemius Strain

    Exercises for Gastrocnemius Strain are an essential part of your overall treatment plan, along with medical care.

    What is a gastrocnemius strain?

    A strong superficial muscle at the rear of the lower thigh, the gastrocnemius muscle is used for standing, walking, running, and jumping. A partial or complete tear or rupture of the gastrocnemius muscle results from overstretching the muscle. In older athletes, “tennis leg” refers to an acute tear of the medial head of the gastrocnemius muscle, which causes serious problems and unexpected, intense calf pain.

    A sudden, intense, or sharp pain in the leg, frequently followed by a sound, is the symptom. The player’s severe pain usually prevents them from playing again. Based on the severity of the damage, the recovery period could take anything from a few days to several weeks.

    The gastrocnemius muscle’s anatomy:

    One superficial two-headed muscle is the gastrocnemius. This muscle is situated just below the layers of skin on the back of the lower thigh. The shin muscle is mostly composed of the gastrocnemius because it is close to the skin’s surface.

    It is a big muscle on the back of the leg. The calf muscle group is composed primarily of the most superficial muscles on the rear of the leg.

    • Origin

    The surfaces of the femur’s medial condyle and the leg bone’s aspect condyle are closest to the body parts.

    • Insertion

    Achilles tendon (calcaneu stendon ) entering the tarsi fibular or mid-posterior.

    • Nerve

    The sciatic nerve, the tibial nerve, and the S1–S2 nerve roots.

    • Actions

    Knee flexion and plantar flextion

    Gastrocnemius strain grades:

    Grade 1:

    • Muscle damage from a grade 1 injury is limited, though there may be intense pain at the site.
    • Possibly able to carry on with an activity, either pain-free or with only minor difficulty.
    • On average, it takes 10–12 days to return to sports after experiencing unilateral calf rise pain.

    Grade 2:

    • Walking can be challenging for those with grade 2 injuries, which result in moderate muscle loss.
    • They frequently feel a sharp pain that worsens as they extend or flex their foot. 
    • The typical recovery period is 16–21 injury days, with symptoms including loss of flexibility, pain, and weakness with resisted plantar flexion, and pain with active plantar flexion.

    Grade 3:

    • A grade 3 injury involves a total muscle tear, which can result in severe calf edema and bruises.
    • It may take three to four months to recover fully, and in certain cases, surgery may even be required.
    • The average recovery period after surgery is six months.
    • There can be a noticeable weakness in the calf muscle’s ability to contract.

    Causes:

    • Previous injury

    With repeated gastrocnemius strains, the athlete’s scar tissue is likely to be fibrotic, which absorbs stresses differently and is therefore more likely to rupture when the muscle is strained.

    • Less-used or deconditioned muscles

    The cold, unstretched muscles used for competition by people who play sports are far more prone to rupture when pushed than conditioned and stretched muscles.

    • Activity level and age

    Middle-aged athletes who play sports are more likely to have medial gastrocnemius. This age group usually resumes moderate to high levels of physical activity, but not consistently, and they are also likely to retain a moderate amount of muscle mass from their more active days.

    Signs and symptoms:

    • The patient is complaining of pain in the calf that also spreads to the ankle or knee. Furthermore, the patient reports pain when moving their ankles.
    • It is typically reported that there was a loud click when the medial gastrocnemius was strained.
    • When the medial gastrocnemius muscle is palpated, it is found to be tender throughout, but the medial musculotendinous junction is where the tenderness is most noticeable.
    • Having difficulty engaging the muscle or standing on toes.
    • Calf muscle pain and swelling or bruises.
    • Difficulty when flexing the plantar bones or when the muscles are contracted against resistance.

    Exercises advantageous:

    • Alleviate the pain in the gastrocnemius muscle
    • Lessening the edema in your muscles
    • Improve the ligaments and the related joint’s complete range of motion
    • Strengthens the muscles of the gastrocnemius.
    • Improve flexibility

    Exercises For Gastrocnemius Strain:

    Standing Gastrocnemius stretch

    • You should stand a few inches from a wall.
    • Approach the wall with your right foot.
    • Your palms should be toward the wall.
    • Take a right knee bend.
    • Your left heel should be flat on the ground as you bend forward with your left leg straight.
    • Hold this position for a few seconds.
    • Then return to your neutral position.
    • Then relax.
    • Repeat this exercise five to ten times.
    Standing-Gastrocnemius-Stretch
    Standing-Gastrocnemius-Stretch

    Ankle-toe movement

    • Start with a comfortable sitting or standing position.
    • As close to your body as you can, flex your ankle.
    • Hold this position for a few seconds.
    • Then shift your toes out from the middle of your body.
    • Then return to your neutral position.
    • Then relax.
    • Repeat this exercise five to ten times.
    ankle-toe-movement
    ankle-toe-movement

    Calf raises

    • Place your feet shoulder-width apart, toes facing front, on a yoga or exercise mat.
    • Keep your shoulders down, your back straight ahead, and your core muscles tight.
    • Slowly raise your heels while maintaining an extended knee position.
    • Hold this position for a few seconds.
    • Put your heels back on the ground.
    • Then return to your neutral position.
    • Then relax.
    • Repeat this exercise five to ten times.
    standing calf raise exercise
    standing calf raise exercise

    Bent-knee calf raise

    • Move both of your feet toward the step’s edge to begin on a stair step and continue until your heels are on the edge and stretched off the edge.
    • After that, bend both knees.
    • Keeping your knee angle constant, lower your heels below the step while taking a deep breath.
    • Then, as you lift your heels toward the ceiling, exhale.
    • Inhale when you lower your heels below the step, and exhale as you lift them.
    • Then return to your neutral position.
    • Then relax.
    • Repeat this exercise five to ten times.
    Bent-knee-calf-raise
    Bent-knee-calf-raise

    Seated toe raise

    • Step onto the chair and settle in.
    • Keep your shoulders straight and sit up upright.
    • Your hands might be resting on your thighs or you can grab the chair’s side.
    • Next, lift your toes as high as you can off the ground.
    • Hold this position for a few seconds.
    • Then return to your neutral position.
    • Then relax.
    • Repeat this exercise five to ten times.
    Seated toe raise
    Seated toe raise

    Seated calf raise

    • Take the chair and get into a sitting position.
    • From here, lift your heels off the floor and push up on your toes.
    • Hold this position for a few seconds.
    • Gently lower your heels again.
    • Then return to your neutral position.
    • Then relax.
    • Repeat this exercise five to ten times.
    seated-calf-raises
    seated-calf-raises

    Donkey calf raise

    • Position a weight plate or aerobic step on the floor a few feet behind a railing or other stable, waist-high item.
    • Placing both heels of your feet on the far edge of the step, fold forward at the hip joints while holding the handle with both hands.
    • After lowering your heels as far as you can toward the floor, hold this pose for a few seconds while maintaining the stretched stance.
    • Compress your calves and lift your heels to the maximum height possible at the initial stage of the exercise, then hold them for a little while.
    • Then return to your neutral position.
    • Then relax.
    • Repeat this exercise five to ten times.
    Donkey-calf-raises
    Donkey-calf-raises

    Squat with gastrocnemius raise

    • Get into a standing position with your toes slightly pointed out.
    • Squat down by pulling your hips back behind you and lowering the knee.
    • Your knees should be in line with the middle of your foot; do not allow them to pass past your big toe.
    • Get out of the squat position.
    • At the top, slowly move to the heels of your feet.
    • Lower your heels back down slowly.
    • Then return to your neutral position.
    • Then relax.
    • Repeat this exercise five to ten times.
    Squat-with-gastrocnemius-raise
    Squat-with-gastrocnemius-raise

    Foam Roller Exercise

    • The floor is where you sit, with your legs straight in front of you.
    • Next, place the roller underneath the calves.
    • Roll carefully from the knee joint to the ankle while using your hands for support.
    • Stop if there are any tight or uncomfortable areas.
    • Do it for a few seconds.
    • Then return to your neutral position.
    • Then relax.
    • Repeat this exercise five to ten times.
    foam roller exercise
    foam roller exercise

    Seated-leg-extension

    • You should sit on the chair’s outside edge.
    • Your heels should be level on the ground.
    • To gain support, hold onto the chair’s sides.
    • While maintaining a straight back and an elevated chest, extend one leg in front of you.
    • Hold this position for a few seconds.
    • Afterward, carefully lower your leg down.
    • Then return to your neutral position.
    • Then relax.
    • Repeat this exercise five to ten times.
    seated-leg-extension
    seated-leg-extension

    Standing soleus stretch

    • Stand yourself two to three feet away from a wall.
    • Take a right footstep near the wall.
    • Use both palms to touch the wall.
    • Lean forward and slightly bend both knees.
    • Keep both heels planted on the floor.
    • Hold this position for a few seconds.
    • Then let both legs relax.
    • Then return to your neutral position.
    • Then relax.
    • Repeat this exercise five to ten times.
    Standing-soleus-Stretch
    Standing-soleus-Stretch

    Single-leg calf raises on a step with the knee bent

    • Place the soles of your feet on the edge of a step or elevated platform with your heels dangling off as you stand there.
    • Position one foot below the other while maintaining your toes on the step’s edge.
    • Raise your heel as high as you can gradually while maintaining a neutral position on your foot’s toes.
    • Hold this position for a few seconds.
    • As you lower your heel back below the step level, feel the stretch in your calf muscles.
    • Then return to your neutral position.
    • Then relax.
    • Repeat this exercise five to ten times.
    Single-leg-calf-raises-with-bent-knee-on-a-step
    Single-leg-calf-raises-with-bent-knee-on-a-step

    When exercising, what safety measures are necessary?

    • Stay hydrated
    • Exercise should be stopped right away as the pain becomes severe.
    • When exercising, keep your posture upright.
    • Make sure that all of your equipment has been set up correctly.
    • Stay away from difficult exercises.
    • Before and after workouts, you should stretch as often as the exercise’s instructions recommend.
    • It’s usually hard to stretch the muscles in your stiff joints. Stretches and exercises are bad for you and make your problem worse, therefore they shouldn’t harm you or make you feel like someone has hurt you.
    • Use light bending and stretching techniques.
    • Wear loose, comfortable clothing during training to promote relaxation and expand your range of motion.
    • Give yourself a break in between exercises.

    When will you stop exercising?

    • Fever
    • You should quit working out if it hurts.
    • Burning sensation in the muscles.
    • You’re not in good health.
    • If there is numbness or pain
    • Headache

    Prevention:

    • keeping the muscles in your calves strong so they can take in the energy from unexpected physical strain.
    • Participating in fitness programs to improve flexibility, strength, balance, and coordination.
    • Increasing training length and difficulty gradually.
    • Acquiring the right form for sports and fitness activities. This will lessen the strain on the calf muscles as well as all other muscles.
    • Using suitable footwear and other protective equipment.
    • Undergoing training before a tournament to make sure they are prepared.

    FAQ:

    Which type of exercise is beneficial for your gastrocnemius muscle?

    Calf raises
    The traditional exercise for building muscle in the calf is the calf raise. Using your body weight, you tone and strengthen the gastrocnemius and soleus. For balance, start by standing close to a wall.

    Should I massage a gastrocnemius strain?

    Depending on how severe the strain is and how long it has been since the injury, massaging the torn leg muscle directly could negatively impact the healing process and result in additional muscular problems. Therefore, follow your physical therapist’s advice regarding whether or not you should be doing this on your muscle strain.

    How may a gastrocnemius strain be healed?

    Early weight bearing, when tolerated, and relative rest, ice, compression, and elevation (RICE) are the first treatments for a medial calf injury. 24-72 hours should be allotted for the initial course of treatment. Applying ice therapy over a moist elastic bandage that also offers compression is ideal.

    What signs of a weak gastrocnemius are present?

    Gastrocnemius weakness causes calcaneal gait, in which the sole may not make touch with the ground while walking. A person may have trouble walking uphill and climbing stairs if their gastrocnemius is weak.

    How is the gastrocnemius strain commonly referred to?

    Due to their frequency in one particular sport, medial calf injuries are frequently referred to as “tennis leg” even though they can occur in a variety of sports or other activities. For instance, in a lunging shot, the back leg goes through a mechanism where the foot is dorsiflexed and the knee is stretched.

    Gastrocnemius rupture: What is it?

    A proximal calf injury following a quick push-off related to running or jumping is indicative of a gastrocnemius rupture, which can be detected clinically. Patients report soreness in the leg area along with a tearing or popping sensation.

    What happens if you have weak gastrocnemius muscle?

    Gastrocnemius weakness causes calcaneal gait, in which the sole may not make touch with the ground while walking. A person may have trouble walking uphill and climbing stairs if their gastrocnemius is weak.

    How can a gastrocnemius strain be identified?

    In addition to evaluating the injury report, the physician may palpate the entire medial gastrocnemius muscle to look for pain.

    What are gastrocnemius muscle advantages?

    The complex gastrocnemius muscle has an essential effect on posture and walking. It affects the entire lower limb, hip mobility, and the lumbar area. To support orthostatism and carry out daily and athletic actions, this muscle area is utilized.

    How does a strain of the gastrocnemius feel?

    The gastrocnemius’ medial head is where calf strains are most frequently encountered. In addition to experiencing severe pain in the calf, patients frequently describe hearing or feeling a “pop” in the medial region of the posterior calf or feeling as though they have been kicked in the rear of the leg.

    If your gastrocnemius has been torn, can you still walk?

    In addition to causing abrupt, severe calf pain, a calf muscle rupture can make it difficult to walk or support weight on your leg.

    Which exercise is most effective for a gastrocnemius strain?

    Standing Gastrocnemius stretch
    Standing calf raise exercise
    Bent knee calf raise
    Seated calf raise
    Foam Roller Exercise

    How can a tear in the gastrocnemius muscle happen?

    This injury may occur if you overstretch the muscle with an unexpected, fast movement. Among these motions include jumping and sudden direction changes. Individuals who participate in sports like basketball or tennis are more susceptible to this type of muscle damage. An improper warm-up or excessive exercise might weaken the gastrocnemius muscle.

    References:

    • June 12, 2024; Gilroy, F. Frank Gilroy Physiotherapy’s exercise regimen for calf (gastrocnemius) injuries. Physiotherapy by Frank Gilroy. Calf injury rehabilitation through patient exercises for the ankle: https://www.frankgilroyphysiotherapy.co.uk/ankle/
    • Gastrocnemius Muscle Tear: An Understanding (n.d.). Saint Luke’s Medical Center. This link will help you understand the gastrocnemius muscle tear.
    • Sports Medicine Australia, “Gastrocnemius (Calf) Strain,” n.d. Sports Medicine Australia. Gastrocnemius calf strain Fact Sheets: https://sma.org.au/resources/
    • May 16, 2022: Valand, B. Gastrocnemius strain: Cause, Signs, Therapy, and Physical Activity Samarpan. Physiotherapy Clinic in Samarpan. This is a treatment exercise for gastrocnemius strain: https://samarpanphysioclinic.com/
    • Image 4, The Pilates Studio. [date unknown]. Day 9: Steps with a Bent Leg and Calf Raises. www.pilatesexerciseoftheday.blogspot.com/2012/07/day-9-calf-raises-with-bent-leg-on-step.html [
    • Image 5, Dr. Nidhiphysio. April 30, 2023. How to Perform Ankle Exercises and Their Health Benefits? Variation-Mobile. https://mobilephysiotherapyclinic.in/ankle-exercises-how-to-do-variation/ Mobile Physiotherapy Clinic
    • Image 7, Luna, D. August 16, 2023c. Donkey Calf Raises Advantages, Worked Muscles, and More. Motivate the United States. Donkey-calf-raises: https://www.inspireusafoundation.org/
    • Image 8, Daisy. June 17 (1921e). Plie Squat Calf Raise Workout Instruction with Pictures. SPOTEBI. https://www.spotebi.com/exercise-guide/quat-plie-calf-raise/
    • Image 9, Calves with foam rollers. 25 July 2024. https://blackroll.com/exercises/exercises-by-body-area/foam-roller-calves BLACKROLL
    • Image 12, Manual for Lifting. 2023b, April 24. Instructions, Benefits, and Form for the Single Leg Calf Raise Off Step. The single-leg calf raise off-step is described in https://liftmanual.com/
  • Trendelenburg Gait

    Trendelenburg Gait

    Introduction

    Trendelenburg gait is an abnormal walk caused by a ruptured hip abductor system. Being made up of the gluteus medius and gluteus minimus, the gluteal muscular group is the main muscle group that is impacted.

    Walking causes the pelvis to descend to the opposite side due to muscle weakness. This course focuses on Trendenlenburg gait evaluation and management, emphasizing the role of interprofessional team members in providing well-coordinated care and improving patient outcomes.

    What is Trendelenburg Gait?

    • Trendelenburg gait happens whenever the hip abductors, specifically the gluteal muscles, are weak individually. A lesion in the fifth lumbar spine or injury to the superior gluteal nerve could be the source of this disability.
    • Weight-bearing is challenging on the side impacted by this condition. While doing the stance phase of a normal gait, both lower limbs carry half of the body weight.
    • During the swing phase, when one lower limb is elevated, the other carries the entire load. The pelvis lowers the weight-bearing leg and raises the non-weight-bearing extremity during the stance phase while walking.
    • In contrast, a weak hip abductor leads the non-weight-bearing extremity to lean downward rather than upward. To offset this effect, the person tries to tilt their trunk laterally outward from the injured hip. A lower pelvic drop results from the person’s center of gravity existing mainly on the stance limb.

    Relevant Anatomy

    • The hip joint‘s acetabulum and femoral head make up its bone composition. These structures are surrounded by 22 muscles and soft tissues. These muscles give the femur the force and stability it needs to move during activity.
    • The gluteus medius and gluteus minimus, the two main hip abductors, sustain the pelvis’ opposition and keep it from falling. The superior gluteal nerve originates in the nerve roots L4-S1 and this nerve exits the pelvis through the sciatic notch, supplying the tensor fascia lata, gluteus medius and minimus muscles, and hip joint.

    What are the causes of the Trendelenburg Gait?

    This gait is frequently the result of your hip abductor muscles being strained when exercising. Gluteal strengthening exercises are frequently the cause. In this instance, the gait will probably diminish as the inflammation in the muscles subsides.

    Furthermore, this gait may appear after total hip replacement surgery. Your surgeon will need to create cuts in the gluteus medius muscle during this treatment. You may get this gait as a result of the muscle becoming weakened.

    Other causes are :

    • Nerve injury or malfunction, particularly in the nerves that supply your gluteal medius and minimus muscles
    • Poliomyelitis, a disease linked to the polio virus that affects your muscles, and osteoarthritis, a form of arthritis that develops when joint cartilage begins to deteriorate
    • Cleidocranial dysostosis, a congenital defect that can lead to abnormal bone development, and muscular dystrophy, a condition that gradually weakens your bones and muscles

    What are the symptoms of the Trendelenburg Gait?

    • Swing and stance are the two stages of your gait as you walk. The second leg remains motionless and maintains your balance while one leg swings forward (swing).
    • Trendelenburg gait is characterized by one leg swinging forward as the hip goes down and travels outward. This occurs as a result of the opposite leg’s hip abductor being unable to sustain your weight.
    • To keep your balance when walking, you could lean slightly to the side or back. As your pelvis changes unevenly, you can raise your foot higher off the ground with each stride to prevent tripping over your feet or losing your balance.

    What is the diagnosis of Trendelenburg gait?

    An examination and evaluation of your medical history are necessary to accurately diagnose Trendelenburg’s gait and rule out other gait abnormalities caused by weak hip muscles. These might include the following:

    • An unpleasant way of walking
    • High-stepping position
    • Lenk-extension gait
    • Stomping step

    The Trendelenburg test may also be used by your physician to make this diagnosis.

    Trendelenburg’s sign

    A clinical test called Trendelenburg’s sign is used to evaluate the strength of the gluteus medius, a crucial hip muscle. It’s especially useful for detecting weakness or dysfunction in this muscle, which frequently results in issues like back or hip pain.

    How to perform?

    • As they stand, the examiner faces away from the patient.
    • One leg must be raised off the floor by the patient.
    • The examiner glances at the pelvis behind him. 

    What does a positive Trendelenburg’s sign mean?

    When the leg is elevated, it is seen as a good Trendelenburg sign if the pelvis tilts or sinks to the opposite side. The gluteus medius muscle on the side of the raised leg is impacted, according to a positive Trendelenburg sign.

    To determine the reasons behind your gluteus medius or minimus weakness, your doctor might also perform hip X-rays.

    What is the treatment for the Trendelenburg gait?

    The underlying causes of a compensated Trendelenburg gait in patients can be attempted to be addressed by medical treatment.

    • An over-the-counter nonsteroidal anti-inflammatory medicine (NSAID), like ibuprofen (Advil) or acetaminophen (Tylenol), can assist in relieving pain associated with your gait. Your doctor might recommend cortisone injections to help with pain management in extreme situations.
    • Without the requirement for preoperative traction, open reduction and salter innominate osteotomy (SIO) are successful treatments for hip developmental dysplasia in children under six.
    • Patients with untreated congenital dislocations benefit considerably from pelvic support osteotomies in terms of posture, gait, and walking tolerance.
    • Osteopathic manipulative treatment (OMT) may help people with somatic dysfunctions improve their gait characteristics by using a GaitMat II system.
    • Wearing a lift in one or both of your shoes can also help your doctor adjust for the weakness in your hip abductor muscles. As a result, the distance from the ground would be declined.

    Physical Therapy for the Trendelenburg gait

    • Trendelenburg gait can cause various hip and knee bone disorders, for example, arthritis and premature hip joint damage. As a result, it is vital to find a type of physical therapy that can diminish Trendelenburg’s gait and lower the risk of further injuries.
    • Weak hip abductors cause an unstable gait known as the Trendelenburg gait. The primary goal of physical therapy for Trendelenburg gait is to strengthen the hip joint muscles.
    • The best technique to strengthen the hip abductors is for the patient to rest on their side and abduct their upper leg toward the ceiling’s edge. To make the workout more difficult, you can wrap a weight or theraband around the active limb. Exercise can be advanced concerning the force of gravity, weight, and frequency.
    • It is also crucial to strengthen the remaining hip muscles on the side that is impacted.

    Exercises for the Trendelenburg gait

    • When completing these exercises to improve your Trendelenburg gait, always remember to be cautious.
    • Additionally, you’re probably adjusting because you’ve been walking in this manner for a while. If you experience any kind of pain, you should slow down and stop.
    • Consult your physician before starting an exercise program if you have chronic pain or have just undergone total hip replacement surgery. This will help to prevent subsequent problems.

    Exercises

    Hip Flexion

    Active hip flexion
    Active hip flexion
    • Although you are resting on your rear end, fully extend your legs in front of you.
    • Your hands should remain at your sides, palms facing downward.
    • Drop your leg back down. Change legs.
    • Instead of keeping the leg bent all the time, try straightening it. Rather than putting your hands around the front of your knee, you will reach behind it.
    • Perform this exercise ten times each leg, three times throughout the week.

    Hip Adduction 

    hip-adduction
    hip-adduction
    • Secure a resistance band around a solid object, such as the leg of a couch.
    • Insert your other leg through the resistance band’s opposite side. You and the band don’t need to be at odds here.
    • Your free leg should be shoulder-width apart.
    • The resistance band-wrapped leg should be pulled until it meets the ankle of the free leg.
    • Take a step back.
    • After ten repetitions, switch legs. All you have to do is stand backward to switch legs.
    • It could be simpler to wrap the band over the knees.
    • This exercise should be done three times throughout the week, or for ten repetitions per leg.

    Hip Abduction

    standing-hip-abduction
    standing-hip-abduction
    • Make sure your feet are almost shoulder-width apart as you stand.
    • Cover both sides of your ankles with an elastic band.
    • Lift one leg and extend it as far away from your body as you are able.
    • Put your legs shoulder-width apart again.
    • Change legs.
    • Avoid using a resistance band if your leg becomes immobile. Just extend your leg as far away from your body as you are able to. If you need balance, use a chair.
    • This stretch should be executed five times for each leg three times a week.

    Leg Lift

    side-lying-leg-lift
    side-lying-leg-lift
    • Take a lying position on your left.
    • Maintain a straight line between your right and left sides.
    • Place your right elbow on the floor and lower your arm in front of you.
    • To help you stay steady, place your left hand beneath your head.
    • Raise your right leg to where it feels tight in your thigh.
    • Drop your leg. Do this lift ten times, and change your legs.
    • Use a chair if hip dysplasia makes this too painful. Stand on the chair’s side, holding onto it with your hand for balance, and raise your left side ten times on each side, three times a week.

    Side Plank

    Side Plank
    Side Plank
    • First, rest on your left side on a mat.
    • Place your right leg over your left.
    • Raise your body gradually into a straight line. To perform this lift, you will place your weight on the outside of your left foot and your left forearm.
    • To assist you stay steady, place your right hand on your right hip.
    • Hold for 30 seconds.
    • Change sides and do it again.
    • Try to maintain the position for as long as you can if you are unable to do so for 30 seconds.
    • Three times a week, complete three sets of 30 seconds each.

    Squats

    chair squats
    chair squats
    • Take a chair and sit up straight. Cross your arms and stand erect.
    • Preserve your back muscles tense and your hips outstretched.
    • Drop until your glutes make contact with the chair.
    • Make sure your back is straight as you carefully stand back up.
    • If you are unable to descend to the chair, try to go as far as you can.
    • To make it more challenging try a one-leg squat. Raise your right leg and maintain it there while standing erect. Switch legs after three sets.
    • Three times a week, perform three sets.

    Single Leg Step

    step-up-exercise
    step-up-exercise
    • Standing upright, rest your hands on your hips.
    • Immediately behind you, tap one leg.
    • The leg in front of you should be tapped with the same leg.
    • Continue tapping for thirty seconds. Change your feet.
    • For 30 seconds, you should be able to maintain this position on each foot. You should completely avoid doing this workout if you are not going to do it.
    • Spend 30 seconds on each foot, every day.

    Bridging

    Hip bridge exercise
    Hip bridge exercise
    • Facing up while lying down.
    • Your knees should be bent.
    • Compress your heels into the mat while keeping your arms flat on the floor.
    • Raise your glutes and torso till your body forms a bridge with the floor.
    • Bring your hips down to the ground.
    • If this puts too much strain on your back, start from a higher position by placing a box or step beneath your feet.
    • Try to finish three sets on average three times a week.

    Monster Walk

    monster-WalK
    monster-WalK
    • Encircle both sides of your ankles with an elastic band.
    • To ensure that the resistance band has tension, place your feet slightly wider than hip-width apart while standing.
    • To maintain tension on the resistance band, take a step forward that is slightly diagonal.
    • Step forward with the other leg while keeping the elastic strap stretched.
    • Keep moving ahead by ten steps and backward by ten. It looks like you are walking like a “monster.”
    • If this is too challenging for your level of coordination, skip traveling backward; alternatively, place the band above your knees, since this may be simpler. Finish three sets every three days.

    Butterfly Strech

    Butterfly-stretch
    Butterfly-stretch
    • Sit with your legs bent on the ground next to you.
    • Press your foot soles together until they make contact.
    • You need to keep your heels near to your body.
    • With your arms outstretched, descend your knees to the flooring.
    • For 30 seconds, maintain this position.
    • If this hurts your inner thighs, extend your heels further.
    • Three times a week, perform this stance five times.

    Hip Flexor Stretching

    Hip-Flexor-Stretch
    Hip-Flexor-Stretch
    • With your right leg bowed and your right foot flat in front of you, make a lunge. Lower your left knee to the surface while keeping your hips upright.
    • Your hands should be on your hips.
    • Lean your pelvis and body forward slightly.
    • Reposition your torso and pelvis gently.
    • Continue this back-and-forth motion for 20 repetitions.
    • Perform this exercise three times a week for twenty repetitions.

    Standing kick

    • Place your hips shoulder-length apart and face ahead.
    • As if you were prepared for battle, place your hands in a boxer stance.
    • Throughout the count of three, raise your right leg out to the side, getting higher each time.
    • Return your leg to the floor. Change legs.
    • The leg should be raised straight in front of you rather than sideways.
    • Practice this exercise 15 times on each leg three times during the week.
    • Even though this may seem like a lot of exercises, doing them three times a week can help you develop a normal gait and strengthen your hip abductor muscles. This can help you return to walking and running pain-free and minimize future costly health problems.

    Summary

    Despite its annoying appearance, Trendelenburg gait may typically be treated with appropriate shoes or exercises that strengthen your hip abductor muscles. If your gait is caused by an underlying condition, such as muscular dystrophy or osteoarthritis, your doctor will collaborate with you to establish an appropriate treatment plan.

    The condition’s effects on your health and walking abilities can be lessened with medication and physical treatment. Treatment can help you walk more smoothly and lower your risk of problems, even if Trendelenburg’s gait may not always be completely correctable.

    FAQs

    What is the Trendelenburg gait?

    An irregular gait caused by a malfunctioning hip abductor mechanism is known as Trendelenburg gait. The gluteal musculature is the main muscle group that is engaged. Muscles of the gluteus, such as the medius and minimus.

    What does a positive Trendelenburg sign mean?

    When evaluating for hip dysfunction, a physical examination observation described as the Trendelenburg sign is observed. Weakness in the hip abductor muscles, which include the gluteus medius and gluteus minimus, is typically indicated by a positive Trendelenburg sign.

    The Trendelenburg sign involves which nerve?

    Unilateral weakness in the hip abductors, mainly affecting the gluteal musculature, is the cause of the Trendelenburg gait. A lesion in the fifth lumbar spine or injury to the superior gluteal nerve could be the cause of this disability.

    References

    • Kelly, E. (2023, March 17). 8 of the Best Hip Flexor Stretches and Exercises. Healthline. https://www.healthline.com/health/fitness-exercise/hip-flexor-exercises#stretches
    • Patel, D. (2023, December 13). Trendelenburg Gait – Causes, Treatment, Exercise – Mobile Physio. Mobile Physiotherapy Clinic. https://mobilephysiotherapyclinic.in/trendelenburg-gait/
    • Prajapati, N. (2023, March 17). Trendelenburg Gait – Symptoms, Treatment, Exercise – Samarpan. Samarpan Physiotherapy Clinic. https://samarpanphysioclinic.com/trendelenburg-gait/
    • Trendelenburg Gait. (n.d.). https://www.physiotherapy-treatment.com/trendelenburg-gait.html
  • Hypnotherapy

    Hypnotherapy

    Introduction

    Hypnotherapy is a therapeutic technique that uses hypnosis to help individuals tap into their subconscious mind and bring about positive changes. By guiding individuals into a deep state of relaxation and heightened focus, hypnotherapy allows them to explore thoughts, feelings, and memories that may be difficult to access in a normal state of awareness.

    Increased focus and concentration are hallmarks of hypnotherapy. Under the supervision of a qualified, experienced hypnotist or hypnotherapist, hypnosis makes you more receptive to recommendations for healthily altering your memories, thoughts, feelings, actions, perceptions, and sensations.

    Explain to the client the operation and what they can expect before entering the operation and the interpretation of the test result is used to create a hypnotic state in the client you lead to this deep level of focus and relaxation. Tests are used to assess the level of emotional and physical suggestibility. There are four stages of hypnosis: induction, deepening, concentration, and emergence. The client could get self-hypnosis conditioning training.

    Induces a hypnotic state in clients to change behavioral patterns, To improve motivation, talk about the case’s nature with the patient, To increase motivation, discuss the case’s nature with the client.

    It is occasionally incorporated into phobia and other anxiety condition treatment programs. Along with many other uses, it is occasionally used for pain relief, weight reduction, and quitting smoking.

    The problems that hypnosis can cure, its potential applications, and its potential efficacy in comparison to other therapies have all been investigated by contemporary researchers.

    What is hypnosis?

    Deep relaxation and concentrated attention are hallmarks of hypnosis, also known as hypnotherapy.

    Through verbal cues, repeating it constantly, and visualization(through images), a proficient and certified hypnotist or hypnotherapist lets you into achievement of a deep state of focus and calmness. This extreme attention and concentration during hypnosis enable you to block out everyday distractions and be more receptive to directed advice on how to enhance your health.

    Procedure Specifics

    What usually takes place during a session of hypnosis?

    Hypnosis progresses through four stages:

    Introduction
    You start to calm down, concentrate, and block out distractions during this phase. and techniques such as progressive muscle relaxation (contracting the muscles during inhalation and relaxing the muscles during exhalation, then repeating in a series of muscle groups throughout the body), and controlling breathing (breathing). (count to seven, then divide by eleven) or a video image will help you in this section.

    The Deepener
    This step builds on the previous step and deepens concentration and relaxation. This stage frequently entails counting down or imagining a comparable descent, like going downstairs or gradually falling deeper and deeper into a cozy bed. The initial two phases aim to help you become more open to suggestions.

    Suggestions
    This is where experience, behavior, or thinking changes. Your hypnotist will employ well-chosen words and images. The instructions are usually exploratory (to examine events related to the start of a symptom) or target-specific (to fix a single symptom). Changes in perception, feelings, emotions, memory, thinking, or behavior are considered.

    To quit smoking, for instance, you will learn how to recognize what makes you want to smoke, how to change in a good way, how to use resources to change, how to break your habit, how to respond better, how to notice the difference, and how to implement the new behavior. You might be encouraged to look into a mirror behind you to see your “old” self with unhealthy black lungs, while a mirror in front reflects your “new” healthy self with clear lungs.

    After that, you’ll receive guidance on which self you like and how to move toward it.

    The emergence
    At this point, you awaken from hypnosis. Your attacker may use reverse immersion techniques, such as pretending you are counting or climbing.

    Approaches to Hypnotherapy

    People are led through a procedure to create a trance-like condition during a hypnotherapy session, which aids in mental focus, increased receptivity to suggestions, and profound relaxation. Through the increased awareness of the hypnotic state, hypnotherapy helps you concentrate more intently on an issue. Techniques used in hypnotherapy include:

    Relaxation: The hypnotherapist can help you picture yourself in a calm and relaxed condition, especially when dealing with troubling behavior or the object of your fears.
    Advice: Your hypnotist could offer tactful recommendations for altering your behavior to assist you overcome your problem. For instance, you could be instructed to believe in yourself and your capacity to overcome the circumstance.

    Coping mechanisms: Some cognitive-behavioral coping mechanisms include guided imagery and then one may utilize the STOP! approach to face your anxiety or fears.

    Examining previous experiences: You could even be invited to discuss how you initially encountered the habit or issue you’re attempting to resolve, as well as your current feelings.

    Is hypnosis the only kind of treatment?

    As part of a comprehensive approach, hypnosis is typically utilized in conjunction with other therapies and treatments.

    As part of a comprehensive therapy approach, hypnosis is typically utilized in conjunction with other therapies and treatments. A certified professional who has received training in the use and limits of hypnotherapy is consulted before deciding to employ it in a therapeutic environment as the only treatment or as an adjunct in psychotherapy or traditional medicine.

    How long does hypnotherapy treatment usually last?

    A normal length does not exist. The course of treatment will be processed by the type and up to how critical the problem is. Numerous sessions may be required for hypnotherapy.

    How do you organize

    Hypnosis doesn’t require any particular preparation on your part. To help you relax, it’s a good idea to dress comfortably. Make sure you get enough sleep. You’ll be less inclined to nod off throughout the session in this manner be relaxing. be relaxing. Select a medical professional with hypnotherapy certification. It’s advisable to get a recommendation from someone you trust. Find out more about any potential provider. Pose queries like:

    • Have you had any specific hypnosis training?
    • Do you have a license in this particular state for your specialty?
    • How much hypnosis training have you received? Which schools are they from?
    • You’ve been doing hypnosis for how long?
    • How much do you charge? Are your services covered by insurance?

    What to anticipate

    Your healthcare physician goes over your treatment objectives and the hypnosis procedure with you before you start. The therapist usually starts by speaking in a soft, calming voice and explaining pictures that evoke feelings of calm, safety, and well-being. be relaxing.

    Your healthcare professional makes recommendations for how you can accomplish your objectives while you’re at ease and content. For instance, strategies to lessen discomfort or lessen the desire to smoke may fall under this category. The service can also assist you in conjuring up clear, significant mental pictures of yourself achieving your objectives.

    You might be able to free yourself from hypnosis when the session is completed. Alternatively, your healthcare practitioner could assist you in increasing your level of attentiveness gradually and gently.

    People do not lose control of their conduct when under hypnosis, unlike what you may witness in movies or during a hypnotist stage show. During a session, they often stay conscious and recall what transpires. be relaxing. You could eventually be able to self-hypnose. Without the assistance of a medical professional, self-hypnosis allows you to achieve a state of peace and relaxation. This ability can be useful in a variety of circumstances, including before surgery or other medical treatments.

    Findings

    People can manage their pain, worry, and anxiety with the use of hypnosis. However, keep in mind that medical professionals usually recommend other therapies, including cognitive behavioral therapy, for those disorders either before or in addition to hypnosis. When used in conjunction with a more comprehensive treatment approach, hypnosis may be useful for weight loss or smoking cessation.

    Not everyone is a good candidate for hypnosis. Not everyone can enter a deep enough state of hypnosis to make it useful. In general, people are more likely to benefit from hypnosis if they can relax and get quiet throughout a session more quickly and readily.

    Why it’s carried out

    Stress and anxiety can be effectively managed by hypnosis. It may help reduce tension and anxiety, especially before a medical treatment like a breast biopsy.

    Additionally, hypnosis might be useful for:

    Pain management. Burns, cancer, childbirth, fibromyalgia, irritable bowel syndrome, jaw issues, dental operations, and headaches can all be less painful with hypnosis.
    bursts of heat. Menopausal heat flashes may be lessened with hypnosis.
    Modification of behavior. Sleep issues, bedwetting, smoking, and overeating have all been treated using hypnosis with varying degrees of effectiveness.
    adverse effects of cancer therapy. The negative effects of radiation and chemotherapy have been lessened by hypnosis.
    mental health issues. The anxiety brought on by phobias and anxieties may be lessened by hypnosis.

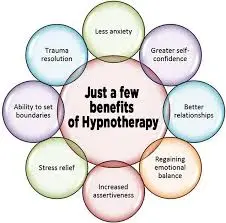
    Advantages of Using Hypnosis in Therapy

    Hypnotherapy may provide remarkable outcomes for certain individuals. In other cases, people may just feel exceedingly comfortable. The following are some possible advantages of hypnotherapy:

    Some folks stay completely conscious during the whole encounter. They can even carry on conversations while in hypnosis and remember everything that occurs. Some people could get into profound levels of relaxation where they even feel cut off from reality.

    Focus: We are frequently sidetracked by our environment. No matter how loud the TV is, your children are when your partner wants to chat or demands attention, it might be a sign that their mind is busy as well. You can feel anxious about an impending project, nervous about paying a bill, or preparing the meal for tonight. The goal of the treatment session is to overcome these daily issues and enable you to give the current issue your full attention.

    Relaxation: When you are under hypnosis, you are incredibly relaxed. It facilitates your unconscious mind’s focus on your problem by relaxing your conscious mind. You are also more calm, which allows you to face your problems or fears more honestly. “You are safe” and “No one can harm you” are among the soothing phrases that most hypnotherapists use to comfort their clients so that they can address their issues honestly and without panicking when in hypnosis.

    Is Hypnotherapy Effective?

    Depending on the patient and the way the treatment is administered, hypnotherapy can have different effects and levels of efficacy. For various uses, hypnotherapy has been demonstrated to be somewhat effective, especially:

    • Controlling and minimizing pain during dental treatments and delivery
    • decrease in nausea and vomiting in patients receiving chemotherapy for cancer
    • decrease in the intensity of irritable bowel syndrome (IBS) symptoms4.
    • It could be most effective when used in conjunction with first-line therapies like cognitive behavioral therapy (CBT) and pharmaceuticals, even if it might assist patients deal with stress and anxiety-related issues.

    According to research findings in the Journal of Affective Disorders’ May 2021 edition, hypnotherapy was just as successful as cognitive behavioral treatment (CBT) in treating mild to moderate depression. The study found that hypnotherapy reduced symptom severity by 44.6%, while cognitive-behavioral therapy reduced it by 38.5%.

    Warnings

    Although hypnotherapy is usually well-tolerated and safe, there are still some possible hazards, including:

    • Hypnosis may be ineffective for those suffering from psychotic symptoms that consist of delusions and hallucinations.
    • Under hypnosis, highly suggestible people may feel less in control of their own lives.
    • Side symptoms including headaches, dizziness, or anxiety are possible for some people.
    • Hypnosis may be unhelpful for people undergoing psychotic symptoms including delusions and hallucinations.
    • These factors make it crucial to always get medical advice before using hypnosis. Additionally, make sure you only attempt hypnosis under the supervision and direction of a trained expert.

    Common Misconceptions

    Many mental health specialists continue to debate the efficacy of hypnotherapy. Myths and misunderstandings regarding hypnotherapy might influence how people perceive this therapeutic method.

    Hypnotherapy is frequently mistaken for stage hypnosis. Stage hypnotists are competent entertainers who understand their audiences. They look for extroverts who can put on a terrific show for the audience. Although it’s unclear if the individuals are actually hypnotized, they are eager to follow the stage hypnotist’s often extreme instructions.
    Hypnotherapy doesn’t make you forget what occurred. During hypnosis, you will recall events, remain awake, and have the ability to exit the trance at a time.

    Hypnotherapy does not make you lose control. During hypnosis, you maintain control. Even as the process of hypnosis is on, you cannot be manipulated to do anything you do not want to. You may be focused on your task and not notice your surroundings, but you are always responsible for your actions, behaviors, and words.

    Being hypnotizable does not imply you are less intellectual. Contrary to common opinion, research shows that most people can be hypnotized to some level.

    What the experts say

    According to Steve G. Kopp, a professional mental health counselor, and marital and family therapist, hypnotherapy is most effective when combined with other therapeutic methods. It can diminish a patient’s resistance to more standard therapies.

    Depression, as well as other chronic mental diseases like bipolar disorder and schizophrenia, can hurt physical health. Depression encompasses more than simply sadness and bad thoughts. It is a disorder characterized by chemical imbalances in the brain.

    How to Get Started

    There are various options for finding a reliable hypnotherapist. Finding a practitioner by word of mouth is always a reliable method. Your mental health professional is a registered hypnotherapist or you know one.

    If you know anyone who has gone through this form of therapy, inquire about their experiences. It’s important to note that certain hypnotherapists specialize in specific conditions, so a friend’s recommendation may not be appropriate for you.

    While hypnosis remains controversial in certain areas, many professionals feel it may be effective. Discuss this treatment choice with your physician. Before proceeding, verify with your insurance carrier since some may not cover this.

    Overview

    Hypnosis enhances attention and concentration by altering consciousness and relaxing the mind. It’s also called hypnosis. Hypnosis is frequently conducted under the guidance of a healthcare professional, including vocal repetition and mental images. Most people experience a sense of serenity and relaxation while hypnotized. Hypnosis often oughts to be making people more open to suggestions for behavioral adjustments.

    Hypnosis can help you acquire control over the habits you want to modify. It may improve your ability to cope with anxiety and discomfort. During hypnosis, you are more susceptible to suggestions, yet maintain control over your conduct.

    FAQs

    Can hypnosis cure anxiety?

    This treatment includes picturing something that generates anxiety and reaching deep relaxation. Hypnosis promotes profound relaxation, which reduces tension and anxiety. This therapy involves imagining what causes
    anxiety and then achieving a profound level of relaxation.

    How does hypnosis actually work?

    The mechanism behind this is not well known. Hypnosis has been linked to increased brain wave activity and the ability to accept new ideas. Others argue that it accesses the ‘unconscious mind’, which is more susceptible to fresh thoughts than the rational ‘conscious mind’.

    Can hypnosis stop overthinking?

    Hypnotherapy can relieve stress and concern, leading to less frequent and intense instances of overthinking. It provides practical strategies to minimize and eliminate ruminating, allowing individuals to reclaim control over their thought processes.

    Can hypnosis stop depression?

    A meta-analysis suggests that hypnosis may be equally beneficial for depression as other psychological therapies including cognitive behavioral therapy and interpersonal therapy.

    Is hypnotherapy worth the money?

    Hypnosis is a valid therapy that can assist with a variety of difficulties, such as quitting smoking, weight reduction, chronic pain, depression, and anxiety. It has been proven to be a useful supplement to Stanford Medicine. The study finds brain locations that change during hypnotic hypnosis.

    References

    • (2024b, May 1). Hypnosis. Cleveland Clinic.https://my.clevelandclinic.org/health/treatments/22676-hypnosis
    • Wikipedia contributors. (2024b, October 8). Hypnotherapy. Wikipedia. https://en.wikipedia.org/wiki/Hypnotherapy
    • Hypnosis – Mayo Clinic. (n.d.). https://www.mayoclinic.org/tests-procedures/hypnosis/about/pac-20394405
    • (2023, November 21). Hypnotherapy: How to Benefit from Hypnosis Through Therapy. Verywell Verywell Mind. https://www.verywellmind.com/hypnotherapy-2671993
    • (2019, April 1). Hypnotherapy. Healthline. https:/www.healthline.com/health/depression/hypnotherapy