Blog

  • Pectoral Muscle Pain

    Pectoral Muscle Pain

    Pectoral Muscle Pain refers to discomfort or soreness in the chest muscles, which can arise from a variety of causes, including muscle strain, overuse, injury, or underlying medical conditions. These muscles, located in the chest area, play a crucial role in upper body movements such as pushing, lifting, and reaching.

    Understanding the potential causes and symptoms of pectoral muscle pain is essential for effective diagnosis and treatment, ensuring optimal recovery and prevention of further issues.

    What is Pectoral muscle pain?

    The four muscles that make up the pectorals are paired on either side of the chest. It can be caused by a variety of injuries and strains, and it must be possible to distinguish this type of pain from other causes of chest pain. The patient experiences a reduction in arm function and limited arm movements; some conditions of this pain can be resolved with rest and ice packs, while others necessitate complex surgery. Physical therapy and pain medication can also help relieve this pain.

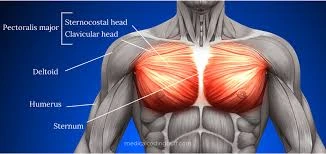
    What is the anatomy of the pectoral muscles?

    Each pair of pectoral muscles in the human body has two.
    The pectoralis major and minor are the names of the bigger and smaller muscles, respectively.

    The pectoralis major:

    • muscle is considerably bigger.
    • This muscle starts at the sternum, which is the breast bone and ribs, and the clavicle, which is the collar bone.
    • This is joined to the bone of the humerus.
    • This muscle aids in a number of shoulder motions.

    The pectoralis minor:

    • This muscle is situated beneath the pectoralis major and is smaller.
    • This muscle joins to the scapula, or shoulder bone, and starts in the ribs.
    • During arm motions, this muscle keeps the scapula stable.

    Causes of Pectoral muscle pain?

    • The injury that causes this pectoral muscle soreness is typically caused by weightlifting.
    • The most common cause of this muscle damage is the bench press.
    • When this muscle is severely injured, the pectoralis muscle tears.
    • At the arm’s attachment point, the pectoralis muscle tears away from the collar bone and ribs.
    • This tear might be partial or whole, and occasionally it gets too painful.
    • Occasionally, a muscular sprain occurs.
    • Complete rupture also happens.
    • They are accompanied by pectoral muscular soreness and direct damage to the muscle.
    • The patient sustains a muscular injury when they fall onto their chest and large things fall on it.
    • American football and rugby are two sports that can cause pain and injury to the pectoralis muscles.
    • Since the pectoralis minor is situated deep beneath the pectoralis major, it is not directly hurt; rather, it is harmed by overuse.
    • Weight exercise, swimming, rugby, and bodybuilding can all cause injuries to the pectoralis minor muscle.

    Symptoms of the Pectoral muscle injury?

    • The patient experiences pain near the front of the armpit and where the muscle attaches to the humerus bone.
    • Pectoralis minor pain typically starts gradually and is subacute in nature.
    • There are sensitivity and pain trigger points in the affected area.
    • The area of pain also has swellings and spasms.
    • Inflammation can occasionally also appear where pain is felt.
    • Patients experience shoulder mobility weakness and respiratory difficulties.
    • The patient may occasionally show obvious signs of bruises.
    • The pain is increased when the region is touched and pressed.

    Which condition requires a doctor’s appointment?

    • You must call your doctor and visit the hospital right away if you experience any of the symptoms of this muscle pain in addition to the chest pain.
    • First, the doctor is brought in to evaluate the muscle ache.
    • Take the patient’s history, ask some questions regarding the pain in the muscles, and try to find out what’s causing it.
    • The physician then checks the region of pain for bruising, redness, and swelling.
    • During the palpation, the pain area’s swelling and spasms are felt.
    • The physician assesses the shoulder’s range of motion and strength.
    • In order to diagnose pectoral muscle rips, the doctor also recommends ultrasound and magnetic resonance imaging (MRI) scans.

    Treatment for pectoral muscle pain?

    RICE principle:

    To lessen muscle pain in the beginning, the pain specialist suggests using the RICE method.

    • R-rest = After experiencing muscle pain, the patient rests; during this time, you used to wrap the remaining muscles.
    • I-ice = To relieve muscle pain, you can also apply ice to the affected area.
    • C-compression = To relieve the swelling and spasms, you can also apply a compression bandage.
    • E-elevation = To lessen swelling, raise the affected arm with a pillow under it.

    Pain medication :

    • You are accustomed to using non-steroidal anti-inflammatory medicines (NSAIDs), such as aspirin and ibuprofen, to relieve muscle pain.
    • The doctor’s advice and the intensity of the pain determine the drug’s dosage.
    • To relieve pain, you can also use dioflance and volini gel to the affected area.

    Treatment for pectoralis major muscular strains:

    • Conservative treatment is used to treat pectoralis major muscle strains and partial tears.
    • During conservative treatment, the medical professional placed the affected arm in a sling to rest the muscle.
    • Ice packs and painkillers were also placed on the strained area to assist reduce the agony.
    • It takes four to six weeks for the muscle to recuperate from this damage.
    • In order to restore optimal function, surgical treatment is typically a preferable alternative for athletes and other participants in competitive sports.

    Treatment of pectoralis minor muscle injury:

    • In addition to rest and pain medication, the doctor prescribes reducing any activity that caused the pectoralis minor strains.
    • A combination of a local anesthetic and a corticosteroid is injected into the pectoralis minor tendon by the physician if the pain is more intense.
    • In order to put the injection precisely, the medical professional also uses ultrasound.

    Physical Therapy Treatment:

    In order to alleviate muscle pain, the physical therapy treatment consists of electrotherapy, stretching, and exercise.

    Electrotherapy for pectoral muscle pain:

    • Ultrasound therapy, SWD, TENS, and an Interferential Current Therapy (IFC) machine are examples of electrotherapy treatments that are used to reduce pain and swelling in the affected area.
    • Apply ultrasound to the trigger points and tender points to relieve pain and edema.
    • To lessen pain, edema, and spasms in the affected area, apply SWD, TENS, and an IFT machine.

    Stretching for pectoral muscle pain:

    • Doorway Pectoral Stretch
    • Camel Pose
    • Floor Angels
    • Behind-the-back Elbow-to-elbow Grip
    • Above-the-head Chest Stretch
    • Bent-arm Wall Stretch
    • Extended Child’s Pose on Fingertips
    • Side-Lying Parallel Arm Chest Stretch.

    Doorway Pectoral Stretch:
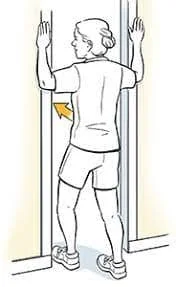
    Doorway Pectoral Stretch
    Doorway Pectoral Stretch
    • Standing in an open doorway.
    • Next, Step forward slowly with one foot.
    • The patient experiences chest and shoulder joint strain.
    • It’s important to stand straight and avoid bending forward.
    • For 30 seconds, maintain this stretching position.
    • Take a step back and unwind.

    Camel Pose:

    Camel Pose
    Camel Pose
    • The patient is kneeling on the floor with their hands on their waist and their knees hip-width apart.
    • Place the toes flat against the floor and tuck them in.
    • Next, place one hand on each heel while slowly reaching back.
    • Maintain a raised chest, shoulders back and down, and slowly push your hips forward by using your core.
    • Repeat this stretching exercise three times a day, holding it for 15 to 20 seconds each time.

    Floor Angels:
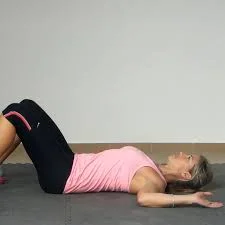
    Floor Angels
    Floor Angels
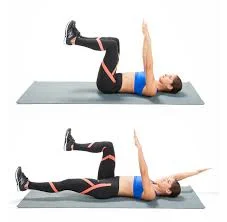
    • With the palms pointing up toward the sky, place both arms at a 90-degree angle sideways.
    • Maintaining constant touch with the floor, steadily raise your arms above your head until they are fully stretched.
    • Return both arms to their initial 90-degree posture gradually.
    • For three sets, perform this stretching exercise ten times.
    • It’s important to keep the ribs tucked in and the back flat against the floor during this stretching.

    Behind-the-back Elbow-to-elbow Grip:

    • The patient starts out in a sitting and standing position with their shoulders pulled down away from their ears and their arms dangling by their sides.
    • Expand the chest and gradually push the shoulder blades together.

    Above-the-head Chest Stretch:
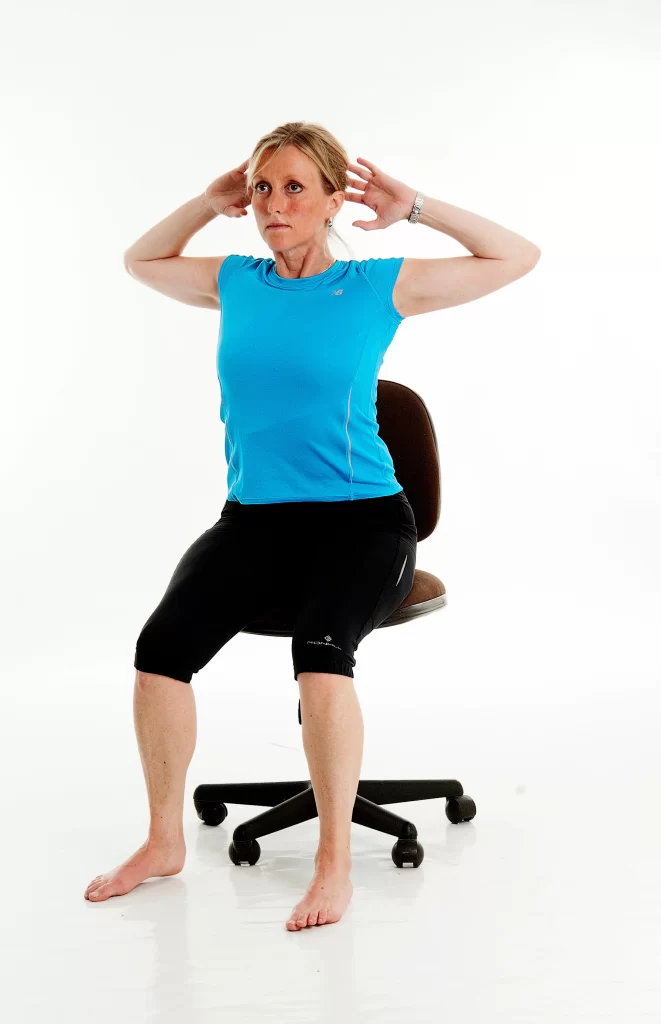
    chest-stretch-
    Above-the-head Chest Stretch
    • When the patient is standing or seated, interlock their fingers, bend their elbows, and lift their arms above their heads.
    • To highlight the shoulder joint and chest, adjust the height of the hands so that they are behind the head, on top of the head, and a few inches above the head.

    Bent-arm Wall Stretch:

    • In a doorway and at the end of a wall, the patient adopts a split stance, with the right leg in front and the left leg behind.
    • You can stretch the different parts of your chest by raising and lowering your arm.
    • Next, do this exercise again with the opposite side.

    Extended Child’s Pose on Fingertips:

    • The patient is sitting on their heels; try touching their big toes together.
    • After that, divide the knee joint by roughly the same width as the hip joint. Next, walk the hands out as far in front of them as you can while bending them forward from the hip joint.

    Side-Lying Parallel Arm Chest Stretch:

    • After that, place the right temple on the ground.
    • Surely For balance, keep your left hand on the ground.
    • After that, stretch the opposite side.

    Exercise for the pectoral muscle pain:

    • Incline push up
    • Flat bench press
    • Incline bench press
    • Decline bench press
    • Push-up
    • Cable crossover
    • Chest dip.

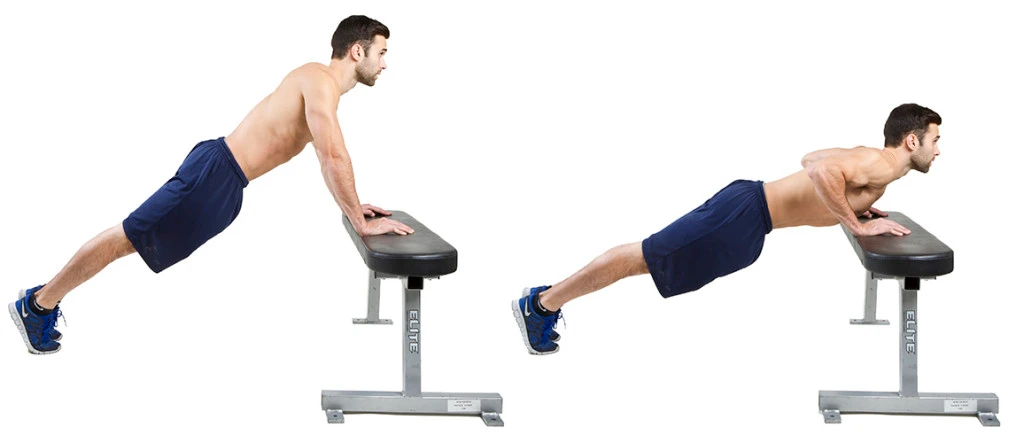
    Incline push-up:

    incline push up exercise
    Incline push-up
    • The hands are placed on the wall, and a countertop of the height surface is used to begin this workout.
    • Next, walk the feet back until the torso and floor form a 45-degree angle. Lower your chest to the surface and rest against it while maintaining a straight posture and a neutral spine.
    • After a brief pause, go back to the beginning position.
    • This resistance needs to be sufficiently light to perform all 20 repetitions.
    • To make the exercise easier, go closer to the hands.
    • Move farther away to make the workout more difficult.

    Flat bench press:

    • The weight is lifted off the rack when the arms are pressed directly toward the ceiling. Next, raise the weight above your chest.
    • The weight of the chest can be gradually reduced by bending the elbow joint to a 45-degree angle.
    • The bar needs to be kept about parallel to the nipples.
    • After a brief pause, press the weight back into its initial position.
    • Perform all three sets of 8–12 repetitions.

    Incline bench press:
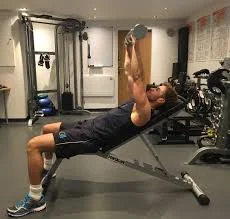
    Incline bench press
    Incline bench press
    • With their feet level on the floor and their knees bent, the patient is positioned on the back of the inclination bench.
    • The patient is holding the barbell with their hands facing their feet and their thumb encircling it.
    • To remove the weight from the rack, press the arms directly toward the ceiling. Above the collarbone, place the weight.
    • Next, Reduce the weight gradually until it is slightly above the nipples and about in line with the mid-chest.
    • After a brief pause, press the weight back into its initial position.
    • Perform all three sets of 8–12 repetitions.

    Decline bench press:

    • The patient is lying on his back on the decline bench, with his ankles locked behind the ankle rests and his knees bent.
    • The patient is holding a barbell with their hands facing their feet and their thumb encircling the barbell.
    • The weight is positioned in the upper belly region, above the lower chest.
    • Next, Lower the weight to the chest, around where the nipples are, by slowly bending the elbow joint.
    • After a brief pause, press the weight back into its initial position.
    • Perform all three sets of 8–12 repetitions.

    Push-up:
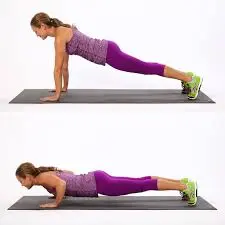
    Push ups
    Push-ups
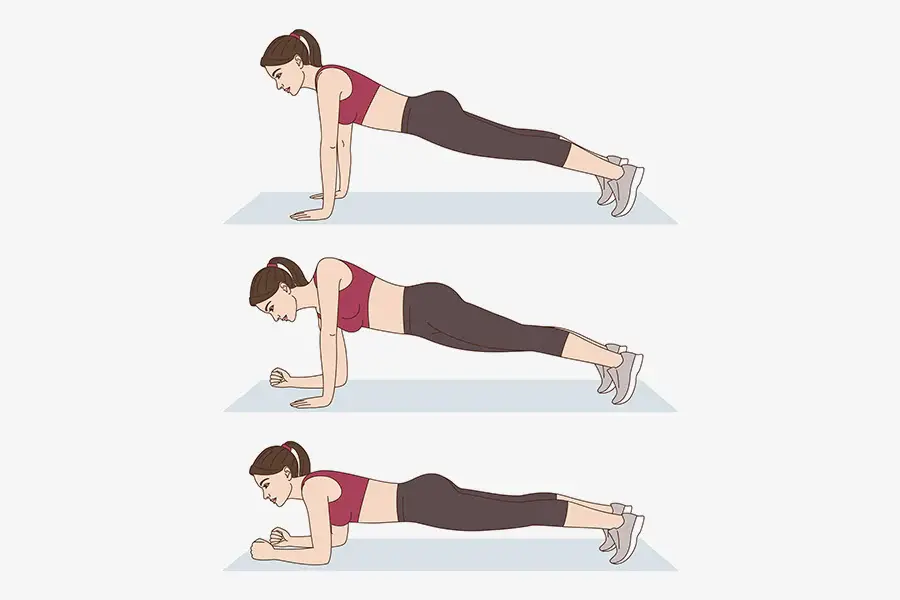
    • After starting on their hands and knees, the patient returns to a high plank position.
    • The legs should be straight with the quadriceps, and the hands should be slightly wider than the shoulders.
    • Maintaining a straight line from head to heel, drop the chest toward the floor by keeping the core muscle taut and bending the elbow joint at a 45-degree angle.
    • To make the elbow joints straight press the chest away from the floor.
    • After that, repeat and finish 8–12 repetitions.
    • Perform the three exercise sets.

    Cable crossover:

    • Standing away from a set of high pulley cable machines and resistance bands that are fastened overhead is how this exercise begins.
    • Choosing a light to moderate weight increases the difficulty but increases the likelihood of success.
    • As they advance one foot, grasp the hands (or the band’s ends). Keep the handles in front of the chest and maintain adequate tension and control over them.
    • To highlight the serratus anterior muscles, the hands are crossed.
    • Next, repeat on the opposite side.
    • Perform 8–12 repetitions in 3 sets.

    Chest dip:
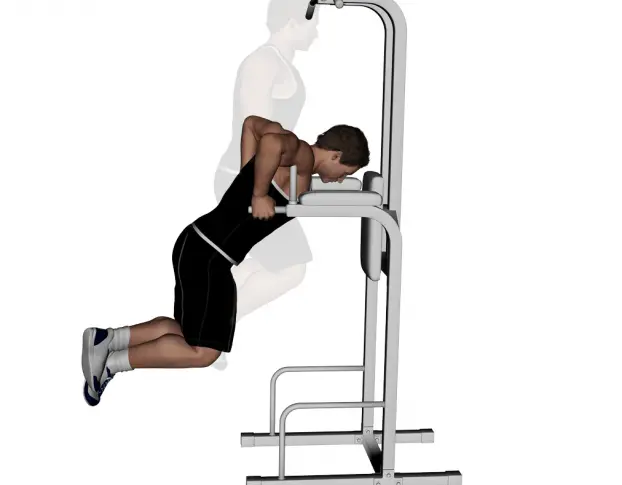
    chest-dips-exercise
    Chest dip
    • The patient is standing, facing the two parallel bars, and holding them with their palms facing inward.
    • Next, raise the torso until it is parallel to the hands by straightening the elbow joint and applying pressure to the hands.
    • Next, drop the chest toward the hands while bending the elbow joint. After pausing, press to return to the initial position.
    • Repetition Perform the 8–12 repetitions in three sets.

    How to Prevent Pectoral Muscle Pain?

    • After working out or participating in sports, stretch.
    • Steer clear of sudden, severe strength exercises and increase your strength gradually. As part of your general physical activity, perform regular stretching and strengthening exercises for your sports, fitness, or job effort.
    • You can reduce your risk of muscular strains by participating in an exercise program.
    • Instead of playing your sport to get in shape, try to be in shape to play it.
    • If your job requires a lot of hard labor, regular exercise can help prevent injury.
    • To maintain a healthy weight, engage in an exercise regimen and eat a balanced diet. Muscle strain can be increased by being overweight.

    FAQs

    Can pectoral pain be caused by stress?

    How chest pain is caused by anxiousness. Your brain causes a spike in cortisol and adrenaline while you’re feeling nervous. Your blood pressure and heart rate quickly increase as a result of these hormones. Many patients suffer from perspiration, chest pain, or difficulty breathing as a result.

    What is the duration of pain in the pectoral muscles?

    Chest pain is deemed chronic if it persists for more than twelve weeks and could be caused by repetitive motions and prolonged activity.

    Is it appropriate to massage a pec strain?

    Activities that enhance blood flow to the damaged muscle should be avoided in the initial days after a pectoralis major strain. These include taking a hot shower, stretching the pectoralis, applying heat, getting a massage, drinking alcohol, and using the arm excessively.

    How can modest pectoralis pain be resolved?

    Massage Therapy: Deep tissue massage is one technique that can ease tense muscles and encourage recovery. Strength Training Activities: To regain strength, gradually add workouts like resistance band chest presses and wall push-ups.

    What symptoms indicate pectoral?

    Bruising, weakness, and an abrupt onset of chest and upper arm pain are signs of a pectoral muscle or tendon rupture. When the injury happens, some people may also experience a “pop” in their upper arm. Additionally, the shape of the armpit and upper arm may noticeably shift.

    How can pec tension be resolved?

    The four best stretches for a strained chest muscle are elevation, compression, ice, and rest. These should be used as a first line of treatment to control pain and inflammation during the acute stage of the injury. It’s also critical to avoid activities that make the pain worse and to give the body time to recover.

    How may pectoral pain be relieved?

    For ten to twenty minutes at a time, apply ice or a cold pack to the hurting spot. For the next three days, while you are awake, try to do this every one to two hours, or until the swelling subsides. Apply a warm towel or a heating pad on low to the sore spot after two or three days.

    What is the duration required for the healing of a pec strain?

    How much time does it take for pec strains to heal? Grade 1 strains of the chest can heal in as little as two to three weeks, depending on the severity of the injury. Grade 2 strains can heal in 4–8 weeks, whereas grade 3 strains might take 6 months or more to heal and frequently require surgery.

    How does pain in the pectoral muscles feel?

    Usually felt near the front of the armpit, this pain can also occasionally be felt throughout the chest. Something ‘tearing’ in your chest is another possible sensation at the same time. You might be able to continue taking part with only mild pain if you have minor tears.

    References

    • Patel, P. (2024, December 25). Pectoralis Major Muscle Strain – Cause, Symptoms, Treatment. Samarpan Physiotherapy Clinic. https://samarpanphysioclinic.com/pectoralis-major-muscle-strain/
    • Ladva, V. (2024b, December 10). Pectoral muscle pain: Cause, Symptoms, Treatment, Exercise. Samarpan Physiotherapy Clinic. https://samarpanphysioclinic.com/pectoral-muscle-pain-treatment-exercise/
  • Tibialis Anterior Muscle Pain

    Tibialis Anterior Muscle Pain

    Tibialis anterior muscle pain refers to discomfort or soreness in the muscle located along the front of the lower leg. This muscle is essential for dorsiflexion, which involves lifting the foot upward, and plays a vital role in stabilizing the ankle during movement.

    Pain in this area is often associated with overuse, strain, or repetitive activities such as running, walking on uneven terrain, or sports that involve frequent changes in direction.

    What is the Tibialis Anterior Muscle Pain?

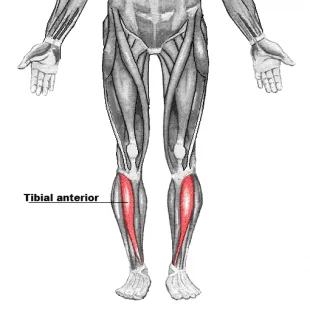
    • The muscle that is locked at the front of the lower leg and connected to the top of the foot is the source of this tibialis anterior muscle pain.
    • The pain the patient experiences here is mistaken for shin splints, which cause pain on the inside of the shin and lower leg.
    • The tendon on the top of the foot and the front of the lower leg, which is outside the tibia bone, are the sites of this pain.
    • The big tendon that is visible spanning the front of the ankle joint is this muscle tendon.

    Anatomy of the Tibialis Anterior Muscle?

    • In the leg, this tibialis anterior crosses over into the deep peroneal nerve and anterior tibial vessels.
    • The lateral condyle and the upper half/two-thirds of the lateral surface of the tibia’s body are the origins of the tibialis anterior muscle.
    • between it and the Extensor Digitorum Longus is the intermuscular septum.
    • the fascia’s deep surface.
    • The medial and undersurface of the first cuneiform bone as well as the base of the first metatarsal bone are where the tibialis anterior muscle is implanted.
    • Pulling the foot up, which involves ankle joint flexion and dorsiflexion, is one of the primary roles of the tibialis anterior muscle.

    Causes of Tibialis Anterior Muscle Pain?

    • Pain in the tibialis anterior muscle is caused by overuse and injury to the muscle.
    • Because the anterior tibialis muscle helps to maintain the medial arch, a collapse of the arch results in overwork of the muscle, which causes an inner arch with an inward tilt of the ankle.
    • It is extremely uncommon for an abrupt injury to result in a tear or damage to the tibialis anterior muscle.
    • The tibialis anterior muscle can also stretch as a result of injury.
    • Tiny tears are created inside the tibialis anterior tendon if the patient repeatedly uses the tibialis anterior muscle.
    • It happens as a result of microscopic damage and an inflammatory response in the muscle.
    • The tibialis anterior tendon, which is located at the front of the ankle joint, is injured when a patient wears strapping or shoelaces that are too high.

    Symptoms of Tibialis Anterior Pain?

    • The front of the patient’s lower leg hurts and feels tight.
    • Walking or putting pressure on the affected area causes this pain.
    • Immediately following the heel impact, the patient experiences more pain when dropping the foot to the ground while walking.
    • The patient experiences muscular spasms as a result of overusing the muscle.
    • also exhibits soreness at the muscle’s location.
    • When tendinopathy develops in the anterior tibialis muscle, patients have stiffness in the ankle joint.
    • Walking causes pain for the patient as well.
    • Over the painful area, the patient feels a high temperature.
    • Additionally, the patient exhibits an irregular gait.
    • Foot drop, decreased dorsiflexor muscle power, decreased ankle flexor muscle strength, and decreased foot movement are all consequences of anterior tibialis muscle rupture or injury.

    When should the patient call the physician?

    • Contact a doctor as soon as possible if the RICE principle and medication at home are unable to repair and relieve the muscular pain.
    • if the patient’s odd gait is noticed by the patient’s family.
    • Observe the patient’s foot drop as well.
    • The patient’s foot movement should be reduced.

    Treatment of the Tibialis Anterior Muscle Pain?

    RICE principle:

    • The RICE principle was applied at home in the first part of the exercise.
    • R-rest = When the patient is in pain, they are taking it easy, which implies they aren’t walking for extended periods of time or working too much.
    • I-ice = The patient is given ice for 20 minutes in the painful location. The patient is also given frozen peas and an ice pack.
    • C – compression = warp to bandage to compress the painful spot and lessen swelling.
    • E-elevation: Does elevating the foot contribute to a reduction in swelling?

    Orthotics:

    • Orthotics aid in foot stability and lessen anterior tibialis muscle strain.
    • The orthotic device aids in pushing the foot and relieving the anterior tibialis muscle strain that arises from a collapsing arch.
    • It also happens as a result of pain compensation; therefore, in order to prevent this compensation, the pain must be addressed first.
    • These orthotics are crucial to the healing process if the pain is caused by an unexpected injury.

    Footwear:

    • By providing optimal support, wearing the appropriate footwear helps to lessen the tension on the anterior tibialis muscle.
    • The patient benefits from wearing appropriate footwear to go with an orthotic device.
    • The particular foot mechanics determine which shoe is best.
    • Any orthotic device is typically worn with a neutral running or walking shoe.
    • In certain situations, a stable running shoe is used in conjunction with the orthotic device as advised by the orthotic specialist.
    • The weight of the shoe should also be taken into account when using the anterior tibialis muscle.
    • It is advised to wear a lighter shoe if the tibialis anterior muscle is weak or heals slowly.
    • To lessen the strain on the irritated tibialis anterior tendon, the patient is also accustomed to using kinesiology tape.
    • Since the patient is taking anti-inflammatory drugs, NSAIDs reduce pain and inflammation runner with anterior tibialis soreness.

    Physical Therapy Treatment:

    Stretching and exercise are part of the physical therapy treatment, which helps to lessen muscle pain.

    • Standing Tibialis Anterior Shin Stretch
    • Kneeling Shin Stretch:
    • Seated Shin Stretch
    • Lying Shin Stretch
    • Stair Stretch
    • Standing Stretch
    • Tennis Ball Massage
    • Band foot drop
    • Seated toe raise
    • Wall to raise
    • Heel walk
    • Tibialis Anterior press & flex

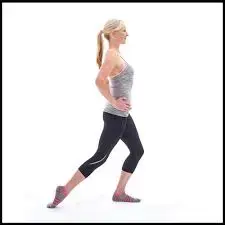
    Standing Tibialis Anterior Shin Stretch:

    Standing Anterior Tibialis Shin Stretch
    Standing Tibialis Anterior Shin Stretch
    • Currently, the patient is standing.
    • The patient is accustomed to using a hand on a wall or another stability aid.
    • Next, both knees are gently bent.
    • With the toe of the stretching foot touching the ground, the patient’s other foot is positioned directly behind this steady foot.
    • To feel a stretch from the top of the stretching foot through the shins, keep the toe firmly planted on the ground and draw the stretched leg forward.
    • stretching as soon as the patient feels comfortable.
    • Next, incorporate this stretch into your warm-up stretching regimen or as a component of a cool-down.

    Kneeling Shin Stretch:

    • To gently stretch their shins, the patient is kneeling.
    • The stretch is provided by the patient’s right knee flexion while sitting on their heels.
    • Avoid it if it makes your knees hurt.
    • For 15 to 20 seconds, hold.

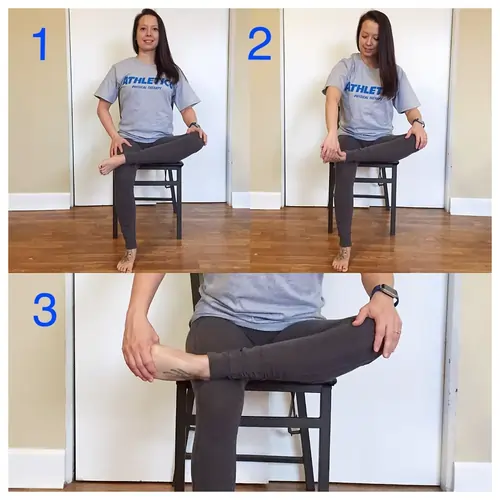
    Seated Shin Stretch:

    Seated Shin Stretch
    Seated Shin Stretch
    • As in the standing stretch, lower the knee joint toward the floor such that the foot’s toe extends into the ground.
    • Then, like the standing stretch but while seated, gently draw the forward while keeping the toe planted in the ground.
    • After that, repeat for every foot.

    Lying Shin Stretch:

    • The patient’s foot is now behind their back while they lie on their side with their knee bent on their upper thigh.
    • Grab the forefoot with your back and bring it to the back.
    • After that, repeat for every foot.

    Stair Stretch:

    • The patient is standing with their back to a similar height step, curb, or stool.
    • Next, place the top of the foot on the step behind you and lift the leg if you want to stretch.
    • To put pressure through the top of the foot on the step until they feel a stretch in the front of their shin, slowly squat down and reduce their body weight through their leg to standing.
    • After that, stretch each leg three times.

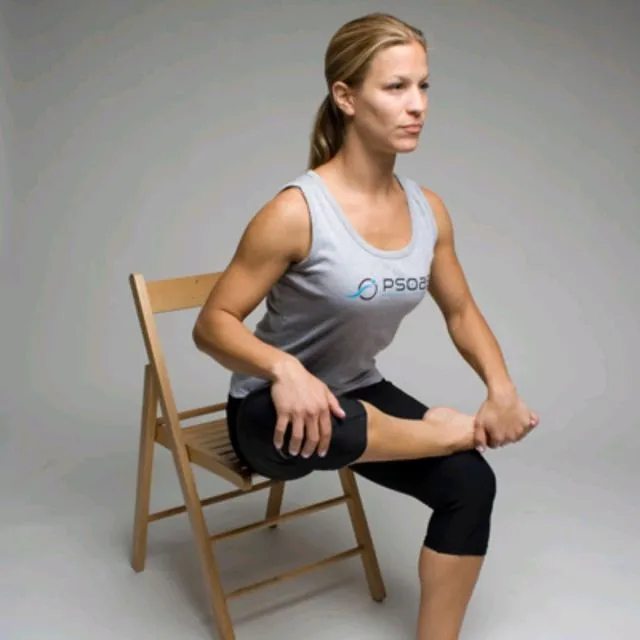
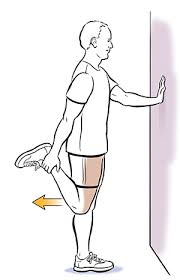
    Standing Stretch:

    • The patient is using their left foot to stand.
    • Bend the right knee and raise the heel toward the buttocks to extend the right tibialis anterior.
    • Next, use the right hand to grasp the top of the right foot.
    • Draw your right foot nearer to your buttocks.
    • They are pointing their toes toward the ceiling.
    • After that, gently draw the foot in until the patient’s right shin feels stretched.
    • On each leg, perform this stretching three times.

    Tennis Ball Massage:

    • The patient stands with the foot resting on an elevated surface in front of you and is comfortably seated with the knee bent.
    • Press the tennis ball up against the muscle and use your palm to hold it there.
    • Move the tennis ball slowly up and down the tibialis anterior muscle for 30 to 60 seconds while maintaining firm pressure.
    • Although the patient finds this exercise painful, it is beneficial to them.
    • On the opposite side, repeat this practice.

    Band foot drop:

    • Near the floor, the patient is gripping a resistance band around an anchor.
    • Hold the ankle at the top for a moment after flexing it up toward the torso.
    • Next, Return to the starting position gradually.
    • Do this exercise ten to fifteen times.
    • Then repeat with the opposite side.

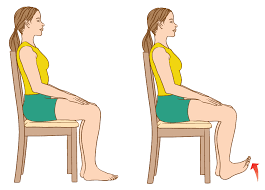
    Seated toe raise:

    Seated toe raise
    Seated toe raise
    • The patient is Putting your feet in front of you while seated in a chair
    • Lift your toes slowly off the ground.
    • Three sets of ten to fifteen repetitions of this stretch.

    Wall to raise:

    • Lift your toes off the ground, keep them there for one or two seconds, and then bring them back down.
    • three sets of ten to twenty repetitions of this stretching exercise.

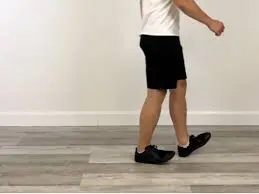
    Heel walk:

    Heel Walking
    Heel Walking
    • The patient is Without shoes, place both feet hip-width apart and lift them off the ground until the heels touch the floor.
    • The patient is Leaning back and putting your weight on your heels, moving forward.
    • Do this exercise again for 30 to 45 seconds.
    • Three repetitions of this workout.

    Tibialis Anterior press & flex:

    • Apply pressure with a massage ball or roller stick to the muscle’s trigger points.
    • As you apply pressure, flex your ankles up and down.
    • Use the other leg to perform this exercise again.

    Strengthening exercise for the tibialis anterior muscle:

    • The patient is seated on a bench or the floor.
    • Next, Loop an exercise band around the top of the foot after fastening it to a strong object.
    • Flex the ankle toward the count of two with the toes facing up.
    • Bring the ankle joint back down to four.
    • Perform two to three sets of ten to twenty repetitions each day.
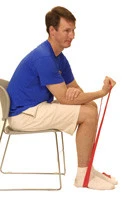
    • Seated Elastic Band Exercise for Foot Drop.
    • Cuff Weight Exercise for Foot Drop.
    • Isometric Exercise for Foot Drop.

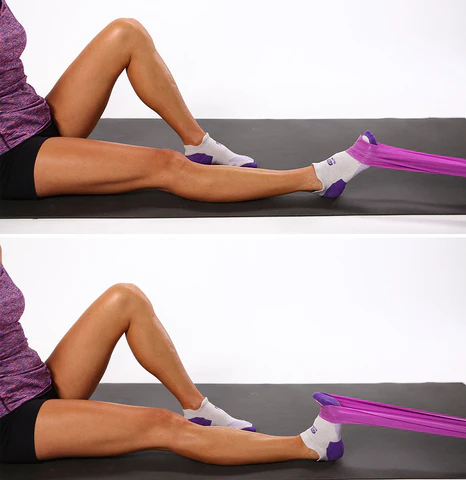
    Seated Elastic Band Exercise for Foot Drop:

    Seated-Elastic-Band-Exercise-for-Foot-Drops
    Seated Elastic Band Exercise for Foot Drop
    • The patient is Place your leg out in front of you while sitting on the floor.
    • The alternative is for the patient to prop their foot up on another chair as they sit in a chair.
    • Fasten the band with a loop.
    • When they flex the foot up, just the ankle joint moves.
    • For one or two seconds, the patient is kept in the end position.
    • Next, Return to the starting position slowly.
    • Do 10 to 15 repetitions of this workout.
    • The ankle joint is flexed up till the anterior tibialis muscle tries and fails.

    Cuff Weight Exercise for Foot Drop:

    • Start this exercise by flexing your ankle joint such that your foot and toes go up towards your knee joint while you sit with the cuff weight on your foot.
    • when the foot is bent upward and maintained for a few seconds.
    • Next, Return to the beginning posture by slowly lowering the toes.
    • Do this exercise ten to fifteen times.

    Isometric Exercise for Foot Drop:

    • To begin exercising, place the foot over the ankle joint.
    • It is important to ensure that the ankle joint does not move.
    • After five seconds of holding this position, carefully release it.
    • Do this workout two to three times a day for 10 to 15 repetitions.

    FAQs:

    The tibialis anterior is used in which sports?

    For athletes who participate in activities that include running and jumping, it is especially crucial since it helps stabilize the ankle and foot.

    What causes soreness in the tibialis anterior?

    Tendonitis of the anterior tibialis
    This disorder develops when a traumatic ankle injury or excessive use inflames the tendon. The tendon is extremely tough to treat and may rupture if treatment is not received. Some individuals may have weak muscles, which might result in a “foot drop.”

    Why does a tight tibialis anterior occur?

    Weakened or incorrectly stimulated lower leg muscles might also result in tibialis anterior pain. The load might be too much when it has to replace another muscle. Additionally, you cannot clear the ground during a stride if trigger points constrict the tibialis anterior.

    Is the tibialis anterior worked during squats?

    During squatting, additional ankle muscles, including the tibialis anterior and posterior and the peroneus brevis and longus, are also engaged to regulate the foot’s posture.

    What is the duration of anterior tibialis pain?

    Rest, ice, and over-the-counter drugs are usually sufficient to treat anterior tibial tendinitis in two to four weeks. On the other hand, physical therapy may be necessary for persistent anterior tibial tendinitis. Anterior tibial tendinitis can be treated with mobility exercises and stretching.

    What causes the nighttime pain in my tibialis anterior?

    The tibialis anterior tendon may experience deterioration and soreness along its entire length with time. When the ankle and foot are at rest with the toes pointed down, this pain is frequently experienced at night. As a result, the tendon is stretched and may develop tendinitis.

    Without the tibialis anterior, is it possible to walk?

    This muscle aids in regulating the foot’s up-and-down motion. Walking on the heels is made difficult or impossible by weakness in the tibialis anterior muscle, although it often does not severely affect normal walking.

    How can tibial pain be resolved?

    For three days, or until the pain subsides, use ice multiple times daily. Perform stretches, paying particular attention to the front portion of the shin. To reduce swelling and pain, take aspirin, ibuprofen, or naproxen. Be aware that some medications have adverse effects, including the potential for bleeding and ulceration.

    Is it necessary to massage the tibialis anterior?

    Ankle and big toe pain might be caused by active trigger points in this muscle. Runners and indoor sportsmen are especially impacted. However, you can use a self-massage to relieve the pain and these places.

    What is causing the tightness in my tibialis anterior muscle?

    Walking or applying pressure to the affected area are two possible ways to do this. The pain would be worse when you were walking and dropping your foot to the ground right after a heel strike.

    How is pain in the anterior tibialis treated?

    It could be advised to use anti-inflammatory medications like naproxen (Aleve) or ibuprofen (Motrin or Advil). Take these as prescribed by your physician. Acetaminophen and other mild pain relievers may be utilized.

    References

    • Ladva, V. (2024b, December 11). Tibialis Anterior Muscle Pain: Cause, symptoms, Treatment and Exercise. Samarpan Physiotherapy Clinic. https://samarpanphysioclinic.com/tibialis-anterior-muscle-pain/
    • Sankhla, D. (2022, December 15). Tibialis Anterior Tendonitis Cause, Symptoms, Treatment, Exercise. Samarpan Physiotherapy Clinic. https://samarpanphysioclinic.com/tibialis-anterior-tendonitis/
  • Forearm Muscle Pain

    Forearm Muscle Pain

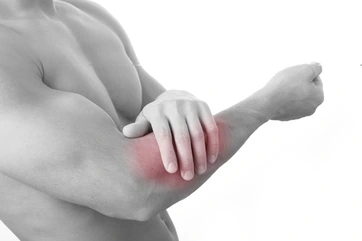
    Forearm muscle pain occurs when you experience pain when moving your hands and arms. The patient’s everyday life is severely disrupted by this agony. There are various causes of this pain, and each one calls for a unique strategy for therapy.

    What is forearm muscle pain?

    • The forearm contains numerous muscles that are responsible for hand and arm movements.
    • Forearm muscle pain may result from any hand or arm injuries.
    • because of an injury to the forearm muscles, which can seriously limit movement and interrupt daily activities.
    • The patient has trouble gripping an object with one hand and typing on a keyboard when they have forearm pain.
    • The majority of the time, rest and scheduled movement help people manage their forearm pain.
    • Both exercise and electrotherapy help to alleviate this muscle soreness.

    Muscles of the forearm:

    Two compartments of forearm muscles:

    • Anterior Compartment
    • Posterior compartment

    The forearm’s anterior compartment muscles:

    Depending on the muscular layer, the forearm muscle’s anterior compartment is separated into three sections.

    Superficial muscles:

    • Flexor carpi ulnaris
    • Flexor carpi radialis
    • Palmaris longus
    • Pronator teres
    • A single tendon that emerges from the humerus bone’s medial epicondyle is the source of all muscles.

    Intermediate muscle:

    • Flexor digitorum superficialis.
    • The medial epicondyle of the humerus bone is the origin of one of this muscle’s two heads, whereas the radius bone is the origin of the other.

    Deep muscles:

    • Flexor pollicis longus
    • Pronator quadratus
    • Flexor digitorum profundus
    • Pronation of the forearm, wrist joint flexion, and finger flexion are all performed by this anterior compartment muscle group.
    • The ulnar and radial arteries provide the vascular supply to this anterior compartment muscle group, which is mostly innervated by the median nerve.

    The forearm’s posterior compartment muscles:

    The extensor muscles are the muscles found in the forearm’s posterior compartment.
    The radial nerve innervates the entire posterior compartment of the forearm muscles.

    Depending on the muscular layer, the forearm muscle’s posterior compartment is separated into two sections.

    Superficial Muscles:

    • Extensor carpi radialis brevis
    • Extensor digitorum
    • Extensor carpi ulnaris
    • Extensor digiti minimi
    • Brachioradialis
    • Extensor Carpi Radialis Longus & Brevis

    Deep Muscles:

    • The supinator
    • Abductor pollicis longus
    • Extensor pollicis brevis
    • Extensor pollicis longus
    • Extensor indicis.

    Causes of the forearm muscle pain?

    Injury:

    • Acute trauma, such as a fall, can result in ligament and tendon injury as well as a fracture in one of the forearm bones.

    Overuse:

    • Forearm strains can result from sports like tennis and some forms of weightlifting that place a lot of force on the muscles.
    • Overuse of computers can also lead to repetitive strain injury (RSI), which is a strain on the forearm muscles.
    • Repetitive strain injuries, or RSIs, are becoming more prevalent in the workplace and are mostly caused by an increase in computer-based labor.
    • stiffness in the forearm muscles caused by inactivity, usually following an accident.

    Nerve entrapment:

    • The affected area may experience pain, numbness, or a tingling sensation when the nerves are overly squeezed.
    • Numerous syndromes that impact the forearm muscle might result in nerve entrapment.

    Arthritis:

    • The wrist and elbow joints are affected by arthritis, which causes a dull aching in the forearm muscles.
    • An underlying condition: A number of illnesses, such as angina, which causes forearm pain.
    • Sports injuries and inflammation in the forearm muscles are the causes of the pain.
    • Infections, nerve issues, growths, and possibly cancer are linked to this forearm muscle pain.

    Other circumstances that result in forearm muscle soreness include:

    • Sports injuries
    • Tendinitis
    • Dislocation
    • Overuse injury
    • Bone fracture

    Symptoms of the forearm muscle pain

    The signs and symptoms of a forearm muscle injury vary depending on the underlying illness.

    • The patient experiences forearm muscular weakness.
    • Affected areas are warmth, redness, and swelling.
    • Reduced mobility translates into a range of motion, or ROM, for the wrist and elbow joints.
    • The patient experiences pain in all upper limbs, including the shoulder, arm, hand, and finger.
    • An area of pain also exhibits tenderness.
    • occasionally exhibit obvious elbow and wrist joint deformities.
    • The patient experiences tingling and numbness in the arm.
    • Skin discoloration, such as bruises, can occasionally develop. These symptoms could point to a serious illness.

    Under what circumstances should I call a doctor right away if I have muscle pain?

    • Forearm pain can occasionally coexist with other symptoms, indicating a dangerous problem that needs to be treated right away in an emergency room.
    • Call 911 for treatment if you require medical attention right away.

    Some severe illnesses that require prompt medical attention include:

    • When the bone protrudes from the skin
    • If it happens to The forearm is bleeding excessively.
    • Muscle paralysis in the forearm
    • If the patient experiences sudden, severe forearm pain.

    Treatment for the forearm muscle pain?

    RICE principle:

    When muscular pain first appears, the RICE concept is applied.

    The RICE principle

    • R-rest is the reduction of forearm activity, which aids in the healing of injured tendons, ligaments, muscles, bones, and nerves. Instead of staying idle for extended periods of time, a person takes occasional breaks.
    • I-ice = applied to the painful area for 20 minutes, which helps to relieve pain and inflammation. To relieve the pain, you can also use frozen peas and an ice pack.
    • C-compression = A person must use a splint and sling to limit movement and reduce pain when movement is extremely unpleasant.
    • E-elevation = Use a pillow to raise the arm and lessen edema.

    Medication for pain relief:

    • In order to control your pain, your doctor will typically prescribe you NSAIDs, like Ibuprofen, and other anti-inflammatory medications.
    • Diofanace gel and Volini gel are two examples of pain reliever gels and patches that you utilize.

    Hot therapy:

    • Additionally, you are attempting to reduce the pain by applying heat therapy to the swollen area.
    • To lessen the spasm and edema, a hot pack is given to the painful location.

    Physical Therapy Treatment:

    The goal of physical therapy is to gradually strengthen and repair the forearm through exercises, stretches, and strengthening exercises.

    Stretching for forearm muscle pain:

    • Wrist extensor stretch
    • Forearm flexor stretch
    • Supinator stretch
    • Two-arm forearm stretch
    • Praying forearm stretch

    Wrist extensor stretch:

    Wrist extensor stretch
    Wrist extensor stretch
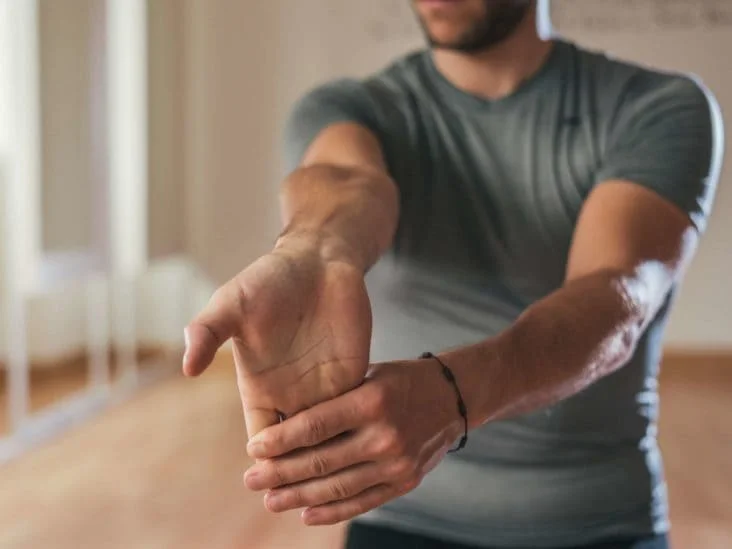
    • During the stretching, the patient is either seated or standing.
    • Make sure the hand is pointing down.
    • The wrist joint should be bent, and the hand and forearm should feel stretched.
    • To experience a further stretch, turn the arm slightly inward.
    • For 20 seconds, maintain this stretching position.

    Forearm flexor stretch:

    • During this stretching, the patient is standing.
    • With the elbow joint locked out, extend both arms in front of the body.
    • Next, raise one hand’s palm in a gesture similar to a friend’s wave.
    • For 15 to 30 seconds, maintain this stretching position.

    Supinator stretch:

    Forearm Supinator Stretch
    Forearm Supinator Stretch
    • During this stretching, the patient is seated.
    • Next, place the arm on a level surface, palm down.
    • For 15 to 30 seconds, maintain this stretching stance, but make sure the weight is light.

    Two-arm forearm stretch:

    • Then, internally rotate that is, rotate the shoulder joint medially so that the backs of the hands face one another.
    • Next, Interlock all of the fingers on one hand by placing it over the other.
    • Next, drive the stretched arm’s wrist joint into flexion with the non-working arm.

    Praying forearm stretch:

    • The patient is sitting up straight in a chair and standing.
    • To get the wrist joint to bend, raise both elbow joints.
    • The elbow joint should then continue to be raised until the undersides of the forearms feel nicely stretched.

    Exercise for the forearm muscle pain:

    You can lessen your pain by exercising.

    • Elbow bend
    • Wrist extension
    • Elbow extension
    • Wrist rotations
    • Forearm squeeze
    • Fingertip pushups
    • Crab walk
    • Plank with shoulder taps
    • Isometric wall push
    • Sphinx push-ups
    • Pull-up bar hang

    Elbow bend:

    elbow-bend-exercise
    elbow-bend-exercise
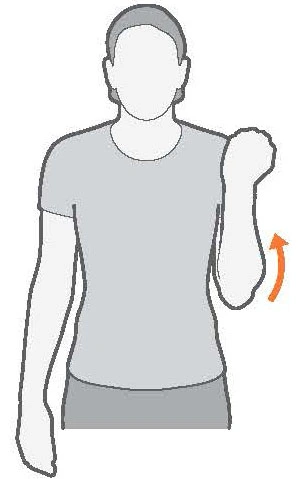
    • The patient is With your arms by your sides, take a straight stance.
    • Allow the inside of the hand to touch the shoulder joint while bending the right arm upward.
    • Stretching only as close to the shoulder as possible is necessary if the patient is unable to reach it.

    Wrist extension:

    • For the wrist extension exercise, the patient is standing.
    • The affected arm should then be extended such that the palm is parallel to the ground.
    • Pull the wrist joint back toward the body with the other hand.
    • Next, Pull the wrist joint back until the forearm muscle stretches, but do not experience any pain.
    • For 30 seconds, maintain this workout stance.

    Elbow extension:

    Elbow Extension
    Elbow Extension
    • When performing the elbow extension exercise, the patient is seated.
    • Hold this position for 15 seconds when you feel a stretch but no pain.

    Wrist rotations:

    Wrist flexion stretch with internal rotation
    Wrist rotation
    • During the wrist rotations, the patient is seated.
    • The patient’s arms are extended in front of them, and their hands are at shoulder height.
    • In a single session, complete ten repetitions in either direction.

    Forearm squeeze:

    • After three to five seconds of holding this exercise, release your grip for a short while.
    • Keep doing this exercise for ten to fifteen minutes at a time.
    • Perform this workout two or three times every day.

    Fingertip push-ups:

    • The patient is bringing their fingertips to the surface while kneeling next to a bench or other stable object.
    • The patient brings their chest to the bench slowly and carefully, then bends their elbow joint to a 90-degree angle.
    • Perform this exercise in two to three sets of eight to twelve reps.

    Crab walk:

    • The patient is reversing the tabletop position.
    • Directly place the ankle joint beneath the knee joint.

    Plank with shoulder taps:

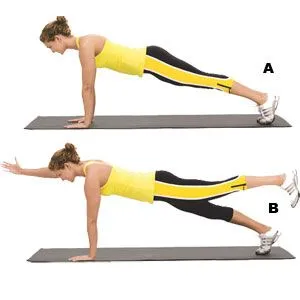
    • As in a push-up, place the hands squarely beneath the shoulder joint.
    • Surely Keep your core muscles steady.
    • Raise your right hand off the floor and place it on the shoulder on the other side.
    • Spend 30 to 60 seconds on this exercise, or as long as the patient is able.
    • Do this exercise two or three times.

    Isometric wall push:

    Push-Ups (Plus or Minus) on Wall or Table
    Isometric wall push
    • Maintaining a straight arm position without locking the elbow joint.
    • Release the pressure after 30 seconds.
    • Do this workout two or three times a day.

    Sphinx push-ups:

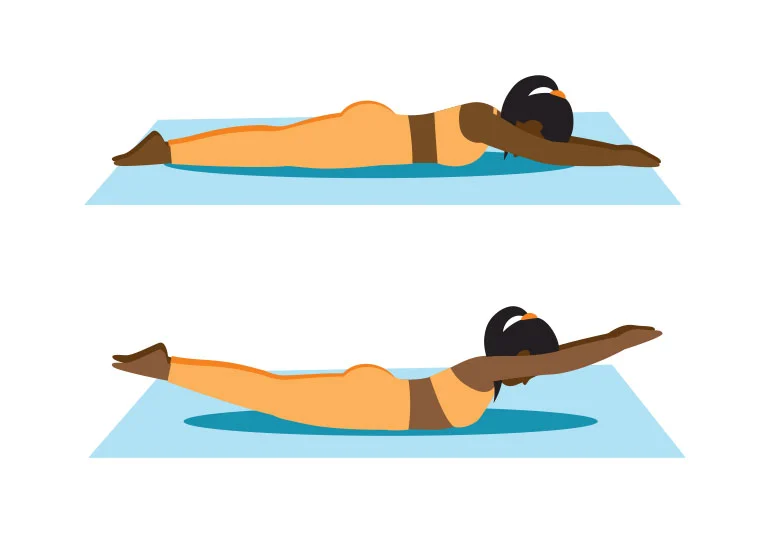
    • The patient begins by performing a forearm plank on both the knees and the toes.
    • After that, firmly press your hands down and attempt to raise your forearms till they are straight.
    • Take it one inch and two at a time if you are unable to go all the way at first.
    • Let go of the pressure.
    • Do this workout two or three times a day.

    Pull-up bar hang:

    • Initially With your palms facing front and your hands shoulder-distance apart, grasp the pull-up bar.
    • Keep your arms straight and your ankles crossed behind you as you hang for up to 30 seconds.
    • Let go.
    • Do this workout two or three times a day.
    • Next, Make this activity more difficult: Grasp the bar with two tiny towels wrapped around it.

    Strengthening exercise the forearm muscle pain:

    This forearm strengthening exercise helps you build stronger forearm muscles and lessen forearm weakness.

    • Palms-up wrist curl
    • Palms-down wrist curl
    • Grip crush
    • Wrist dumbbell curls
    • Farmer’s walks
    • Pinch-grip plate holds
    • Reverse barbell curl with the thumb-less grip

    Palms-up wrist curl:

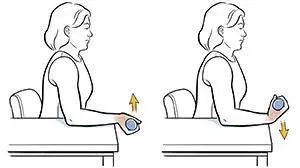
    • With the hands facing up, place the wrist joint on the knee joint and a level surface while seated.
    • In each hand, the patient is gripping a dumbbell.
    • Then, without moving the arms, elevate the hands as high as you can. However, if the wrist joint doesn’t lift off the ground, it is in a resting posture.

    Palms-down wrist curl:

    • With the hands facing up, place the wrist joint on the knee joint and a level surface while seated.
    • The patient is required to hold a dumbbell in each hand, raise it as high as they can, and maintain a motionless arm position.
    • However, the wrist joint is at rest if it does not rise off the surface.
    • Return the hands to their initial posture after a brief delay.

    Grip crush:

    • The patient uses a holding dumbbell while sitting and rests the left wrist joint on the knee and a level surface.
    • Repeat on the other side after completing the ten repetitions.

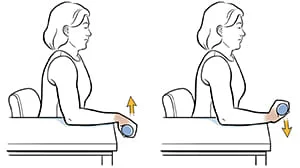
    Wrist dumbbell curls:

    Wrist Curls
    Wrist dumbbell curls
    • The patient holds a relatively heavy dumbbell in each hand while seated on a bench and chair.
    • Next, position the wrists above the knees by placing the forearms on the thighs.
    • The palms are pointing down and up.
    • Reduce the weights as gradually as the patient is able.
    • Next, Hold the weights firmly and just use your hands to move them.
    • To finish the muscles, repeat this exercise three times for a total of twelve repetitions.
    • Another option is to work on one side at a time.

    Farmer’s walks:

    • The patient is tall, standing, and carrying two heavy dumbbells and a kettlebell at each side.
    • Next, take a leisurely stroll from one end of the exercise area to the other and return.
    • The goal of this workout is to complete one set of the Farmer’s Walk for 30 to 45 seconds.
    • Next, complete the remaining tasks.
    • Do this workout two or three times a day.

    Pinch-grip plate holds:

    • Pinch and hold a somewhat heavy plate between the thumb and the hand’s four fingers using the straight fingers.
    • One side at a time, however, is how this exercise is done.
    • As long as the patient is able, hold this position for 30 to 45 seconds every set.
    • Next, complete the remaining tasks.
    • Do this workout two or three times a day.

    Reverse barbell curl with the thumb-less grip:

    • The patient is standing and carrying a barbell with their hands shoulder-distance apart and palms facing down. For a “thumbless grip,” keep the thumb next to the other fingers.
    • Bring the barbell steadily toward the shoulders while maintaining the elbow joint near the sides.
    • Next, concentrate on your forearms by bending solely at the elbow joint.
    • Go back to the beginning and proceed too slowly the entire time.
    • Next, Try to complete the three sets of twelve reps.

    What is a home treatment for forearm pain?

    • Forearm resting typically aids in lowering the severity of edema and inflammation.
    • used to ice the affected area for 10 to 15 minutes at a period using an ice pack covered in cotton, which also aids in reducing swelling.
    • Using over-the-counter painkillers, such as acetaminophen (Tylenol) or ibuprofen (Advil), can help lessen pain and discomfort.
    • Apply a bandage and splint to help with healing and to limit movement.

    Prevention of the forearm muscle pain?

    • Keep away from activities like tennis and other forms of weightlifting that impose undue strain on the forearm.
    • utilizing an ergonomic keyboard at work and taking regular breaks from prolonged computer use.
    • Perform forearm strengthening exercises and use resistance training to increase your grip strength.

    Summary:

    • If someone gets a minor strain or sprain, they might be able to use home remedies to treat it. If the symptoms worsen rather than get better, rest the forearm and consult a physician.
    • The cause of the forearm pain can be determined by a physician. The majority of patients may effectively manage their symptoms without surgery because of the several treatments available for this illness.
    • Call for immediate medical assistance if someone experiences sudden, severe arm pain or other symptoms that raise concerns. Treatment can alleviate forearm pain caused by a severe accident or medical emergency and lessen sequelae.

    FAQs

    What condition results in soreness in the forearms?

    Tendinitis: Inflammation of the tendons in the forearms, which connect muscles to bones, can result in stiffness in the morning, pain at night, and tenderness that gets worse with exercise. 15. Depending on the reason, tendinitis may go by several names, such as golfer’s elbow or tennis elbow.

    Which is best for pain in the forearm?

    Causes, Symptoms, and Treatments of Forearm Pain
    Swelling may also be lessened by applying a cloth-covered ice pack to the affected area for five minutes at a time, multiple times throughout the day. Pain can be lessened by using an over-the-counter pain reliever, such as acetaminophen (Tylenol) or ibuprofen (Advil).

    What unique test is used to diagnose forearm pain?

    Physical examination: Against opposition, your doctor will instruct you to turn your palm from palm down to palm up. You must maintain your middle finger straight against resistance in the second section of this test.

    How can I improve the feeling in my forearm?

    Extension of the wrist
    The forearm muscles can be stretched using this exercise: With the palm parallel to the floor, stretch the injured arm in front of you while standing erect. Without experiencing any pain, pull the wrist back until you feel a stretch in your forearm.

    Who should I see if I have forearm pain?

    Orthopedic intervention may be necessary to address the cause of your arm pain, particularly if you have abnormalities, shattered bones, or nerve pain.

    Can forearm pain be caused by elevated blood pressure?

    It might happen when you’re at rest or when you’re exerting yourself. Sweating, nausea, radiating pain in your arm or jaw, and abrupt, crushing chest pain could all be signs of a heart attack or hypertensive crisis if you have extremely high blood pressure. Dial 911 right away.

    Which exercises result in soreness in the forearm?

    Because of the repetitious nature of the exercise and the considerable strain it puts on the forearm muscles and tendons, forearm pain is a typical overuse ailment linked to bicep curls. Your forearm muscles, especially the flexors, are used to stabilize your wrist and hold the weight when performing bicep curls.

    Is heart disease a factor in forearm pain?

    Back, shoulder, or arm pain that improves with rest and happens with any activity. This could indicate decreased blood supply to your heart muscle or cardiac disease.

    Why is my forearm muscle hurting?

    Forearm pain is typically caused by repetitive tension from activities like typing, tennis, and golf. These forearm pain symptoms may be caused by: stretched or pulled muscles. rips or ruptures in the muscles.

    How can forearm pain be relieved?

    Swelling may also be lessened by applying a cloth-covered ice pack to the affected area for five minutes at a time, multiple times throughout the day. Pain can be lessened by using an over-the-counter pain reliever, such as acetaminophen (Tylenol) or ibuprofen (Advil).

    How much time may pain in the forearm last?

    After receiving primary treatment for two to three weeks, the inflammation should subside. In cases of severe or chronic tendinitis, the forearm frequently needs to be totally rested for a few days. You will also need to refrain from activities that aggravate the tendon for a few weeks or months.

    Can heart problems cause forearm pain?

    A heart attack may even be the cause of arm pain, especially if it extends into the left arm.

    Is soreness in the forearm typical?

    Numerous factors can contribute to forearm pain. These include acute trauma, chronic strains, and underlying illnesses that harm bones, joints, or nerves. Forearm pain is frequently temporary and goes away on its own.

    How can forearm pain be relieved?

    RICE treatment: Pain and inflammation in the affected forearm muscles and tendons can be reduced with rest, ice, compression, and elevation therapy. Painkillers: Forearm pain symptoms may be reduced by over-the-counter drugs.

    References

    • Ladva, V. (2022b, April 7). Forearm muscle pain: Cause, Symptoms, Treatment, Exercises Samarpan. Samarpan Physiotherapy Clinic. https://samarpanphysioclinic.com/forearm-muscle-pain/
    • Sankhla, D. (2023, April 27). Forearm Pain – Cause, Symptom, Treatment, Exercise- Samarpan. Samarpan Physiotherapy Clinic. https://samarpanphysioclinic.com/forearm-pain/
  • Triceps Muscle Pain

    Triceps Muscle Pain

    Triceps muscle pain refers to discomfort or soreness in the large muscle located at the back of the upper arm, responsible for elbow extension and arm stabilization.

    What is Triceps pain?

    • If you feel pain near the back of your upper arm, it could be triceps pain. Overusing your muscles, carrying heavy objects, or straining yourself excessively at the gym are the usual causes of this kind of soreness.
    • Because it is composed of three segments, this muscle is called the triceps.
    • There are several reasons for triceps pain or discomfort, but it usually indicates that the muscle fibers are torn. Soreness, micro tears or larger tears, and straining are the causes of this pain.
    • Additionally, the patient has tendinopathy, tendinitis, and triceps pain.
    • The cord-like structure that attaches the triceps muscle to the elbow joint bone is called the triceps muscular tendon.
    • Tendinitis is a disorder that causes inflammation and pain in the tendon as a result of repetitive motion against resistance.
    • The triceps muscle tendon eventually becomes damaged due to a persistent ailment called tendinopathy.

    What is the triceps muscle?

    • The triceps muscle’s primary job is to extend the elbow joint.
    • The three muscular head places of origin are what this triceps brachii muscle depends on.
    • This muscle, which runs nearly the whole length of the humerus, is the only component group of the arm’s posterior muscles.
    • The triceps muscle attaches to the scapula and humerus at their respective origins and inserts into the ulna through a single tendon.

    What are Causes of the triceps muscle pain?

    The first reason is excessive elbow joint use or strain:

    • This illness causes pain in the triceps muscles.
    • This situation occurs following an exercise session, an activity such as shoveling, or an axe-throwing night.
    • However, it is a typical aspect of the muscle’s recovery from intense exercise.
    • Patients usually don’t experience any pain until the next day, usually within two days.
    • Muscular soreness usually goes away with rest, a gentle massage, and some light stretching.

    Triceps strain:

    • When the triceps muscle tears, it results in a triceps muscle strain, which causes acute, severe pain.
    • The number of ripped muscle fibers determines how painful this strain is.
    • Rest and icing are the first steps in the treatment.
    • Light exercise and stretching assist prevent stiffness after the patient believes the pain is manageable.
    • Call a doctor if the pain is severe, unbearable, or persists for more than a week or two following the injury.

    Tendonitis & tendinopathy:

    • It follows the repetitive motion at the elbow joint that results in the tendon’s microtears.
    • Tendinitis eventually progresses to tendinopathy, a persistent deterioration of the tendon, due to the tendon’s poor capacity for self-healing.
    • Both tendonitis and tendinopathy cause pain that worsens when performing arm-straightening exercises, especially when doing so against resistance, such as push-ups.
    • Compression, ice, rest, and gentle stretching are the methods used to treat triceps tendonitis.
    • Anti-inflammatory drugs, such as naproxen or ibuprofen, also relieve pain.
    • These drugs might not work for tendinopathy because it is a degenerative rather than an inflammatory disorder, and applying heat packs to the affected area is more likely to be beneficial than applying ice.

    Tendon rupture:

    • Since the rupture is partial, portions of the muscular tendons are still joining the triceps muscle to the bone.
    • When a tendon or muscle rips completely, the triceps muscle at the elbow joint becomes totally separated from the bone.
    • When the tendon is already too weak due to chronic tendinopathy, a tendon rupture occurs in the triceps.
    • In addition to the underlying medical conditions—such as long-term steroid usage, local steroid injections, endocrine disorders, and previous elbow surgery—that weaken the muscular tendon and cause rupture.
    • Depending on the function and level of pain, minor tendon ruptures may not require surgery, while major ruptures typically require surgery to reattach the tendon.
    • Contact the physician within a few days if the patient experiences a partial or complete rupture of the triceps tendon.

    Bruising:

    • In high-impact trauma, like car accidents/being hit with a baseball bat, bruising is a sign of a fracture of the humerus which lies the upper arm bone.
    • There may also be a visible deformity.
    • If the patient suspects the arm is broken, they go to the ER immediately.

    Other possible causes of triceps muscle pain:

    • There are numerous disorders that can cause triceps muscle soreness, however, this particular condition is rare and has the following distinctive symptoms:
    • Cellulitis is a localized infection of the skin and soft tissues.
    • Upper arm compartment syndrome damage to the brachial plexus or cervical spine
    • Damage to the radial nerve.

    What are Symptoms of the triceps muscle pain?

    • The patient experiences dull, achy pain in the triceps.
    • When the muscle contracts, the arm straightens, and when the muscle relaxes, the arm bends, making the soreness greater.
    • After overexerting a muscle, soreness may take up to one or two days to manifest.
    • The patient feels as though the triceps muscle is tearing or ripping.
    • When the patient extends their arm, primarily against the opposition, they experience increasing agony.
    • The patient feels a pressure point where the tendon and bone meet right above the rear of the elbow joint.
    • The patient notices bruises close to the rear of the elbow joint.
    • The patient experiences pain at the location of the bruise.

    When should the patient call the doctor?

    • if the at-home treatment for the triceps muscle pain does not improve after one to two weeks or if it interferes with day-to-day activities.
    • If a person has pain in both the neck and the back of their upper arm, the pain will only get worse over time.
    • if the patient experiences weakness, tingling, or numbness in the arm that develops gradually.
    • if the patient experiences severe elbow joint pain in addition to a dent.
    • Falling onto an outstretched hand might cause damage to the tendon.
    • spreading a rash on warm-to-the-touch skin, usually in patients who have fevers.
    • Along with other neck anomalies, the patient is experiencing sudden onset arm pain or tingling, which is indicative of spinal cord injury from a herniated disc.

    What is the Treatment for triceps muscle pain?

    Medical Treatment:

    RICE protocol:

    • R-rest = The patient must occasionally take a break from work when they experience pain.
    • I-ice = Applied to the painful area for 20 minutes; the patient is also accustomed to using frozen peas and an ice pack to relieve pain and swelling.
    • C-compression: A compression bandage is applied to the painful area to relieve swelling and spasms.
    • E-elevation: Using a pillow to raise the upper limb in order to minimize swelling and ensure proper blood flow.

    Pain medications:

    • NSAIDs that reduce pain and swelling include ibuprofen, Advil, and Motrin.
    • However, avoid taking the drug for longer than a week without first visiting your doctor.

    Corticosteroid injections:

    In order to help with pain and swelling, the doctor recommends corticosteroid injections.
    In the vicinity of the triceps tendon, the physician administers the medication injection.
    However, this injection is not advised for tendinitis because the course of treatment extends beyond three months, resulting in recurrent steroid injections that may weaken the tendon and raise the risk of additional damage.

    Platelet-rich plasma = PRP injection:

    For tendonitis, the physician is also advised to administer platelet-rich plasma (PRP) injections.
    Platelet-rich plasma, or PRP, is made by extracting platelets and other blood components from a blood sample.
    The region surrounding the triceps tendon receives this injection. Due to the triceps tendon’s inadequate blood flow, this injection aids in supplying nutrients to promote the healing process.

    Surgery Treatment:

    However, surgery is necessary to repair the torn tendon if the triceps muscle tendon is severely damaged or if no other treatment has been successful.
    When a tendon is partially or totally ripped, this operation is usually advised.

    Tendon repair:

    • Usually, a general anesthetist performs this surgical treatment, rendering the patient asleep during the procedure.
    • Following the procedure, the incision is made and the affected arm is immobilized.
    • Therefore, after the triceps muscle tendon has been carefully exposed, instruments known as bone anchors or suture anchors are inserted into the bone to use sutures to connect the wounded triceps tendon to the olecranon.

    Graft:

    • A section of a triceps tendon from another part of the body is used to assist mend the injured tendon when this issue occurs.

    Physical Therapy Treatment:

    Exercise & stretching for triceps muscle pain.

    • Elbow bend & straighten
    • French stretch
    • Static triceps stretch
    • Towel resistance
    • Overhead triceps stretch
    • Horizontal stretch
    • Dynamic triceps warmup
    • Leaning stretch
    • Triceps pull-down
    • Standing bench triceps stretching
    • Cross-body stretch
    • Wrist pull
    elbow-bend-exercise
    elbow-bend-exercise

    Elbow bend & straighten:

    • The Elbow Bend & Straighten exercise begins with either a seated or standing position.
    • The hands should then be closed into loose fists at the sides.
    • Bring both hands up to your shoulders.
    • Then, slowly lower your hands and straighten your elbows until your hands are at your sides once more.
    • Do this exercise three times a day and up to ten times in a single session.

    French stretch:

    • When the patient is upright, raise their hands above their head and clasp their fingers together.
    • Then, lowering the hands behind the head while keeping the elbow joints close to the ears, try to contact the upper back.
    • For 30 seconds, maintain this stretching position.
    • Do this stretching three times a day and up to ten times in a single session.

    Static triceps stretch:

    Triceps stretch
    Triceps stretch
    • Standing or sitting is the initial posture for the static triceps stretch.
    • Make sure the elbow joint of the damaged arm is at a 90-degree angle.
    • With the palm pointing inward, make a fist out of your hand in this posture.
    • Next, Tighten the triceps muscles at the rear of the injured arm by using the fist of the bent arm to press down on the open palm with the other hand.
    • For 30 seconds, maintain this stretching position.
    • Do this stretching three times a day and up to ten times in a single session.

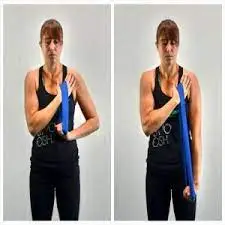
    Towel resistance:

    • Standing in the initial position for the towel resistance.
    • Next, place one end of the towel in the patient’s hand.
    • The patient stands with one arm behind their back and the wounded arm over their head.
    • For 30 seconds, maintain this stretching position.
    • Do this stretching three times a day and up to ten times in a single session.

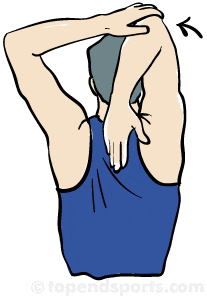
    Overhead triceps stretch:

    Overhead triceps stretch
    Overhead triceps stretch
    • Standing or sitting is the initial posture for the overhead triceps stretch.
    • Draw them back and down after raising the shoulder joint toward the ears.
    • With your middle finger still resting along your spine, move your right hand close to the middle of your back by lifting your right arm to the sky and bending it at the elbow.
    • Next, gently press the elbow joint down and in toward the center with the left hand.
    • Do three repetitions of this stretching stance on each side for 30 seconds.

    Horizontal stretch:

    • The standing or sitting position is where the horizontal stretch begins.
    • Cross the body with the right arm.
    • Next, bend the elbow joint gently.
    • As you press the arm into your chest and shift it to your left side, use your left hand to guide the motion.
    • Do the three repetitions on each side while maintaining this stretch position for 30 seconds.

    Dynamic triceps warm-up:

    • The dynamic triceps warm-up begins with the standing/sitting position.
    • Next, do backward circles with the arms.
    • Next, rotate the arms in circular motions forward.
    • Feel the arms’ pulse as you turn your palms to face forward.

    Dynamic triceps warm-up:

    • The dynamic triceps warm-up begins with the standing/sitting position.
    • Next, do backward circles with the arms.
    • Next, rotate the arms in circular motions forward.
    • Feel the arms’ pulse as you turn your palms to face forward.

    Leaning stretch:

    • First, place the elbows over the head on the chair.
    • The elbow joint is then bent to assist the lower back strain.
    • Make sure the elbow joint is the only area of the body that touches the chair.
    • Next, lay the palms on the back of the neck and guide the forearms towards the neck.
    • After 30 seconds of holding this stretch, turn around and return to your kneeling position.

    Triceps pull-down:

    Triceps pull-down
    Triceps pull-down
    • The patient stands erect and places their feet shoulder-width apart.
    • The patient is using their left hand to grasp one end of the resistance band.
    • With the aid of your right hand, grasp the resistance band’s other end.
    • Next, position this hand at the hip joint level.
    • Throughout the action, the patient inhales and presses their left hand against their chest.
    • Using the right hand, the patient pulls the band down toward the floor on this inhale until the right arm is fully straight.
    • Then, without snapping back, pull the band as far as you can and keep it there for 30 seconds.
    • Release the tension that the resistance band has created by exhaling and gradually bringing the right arm back to hip level.
    • Switch arms and repeat this exercise.

    Standing bench triceps stretching:

    • The patient is standing upright, feet apart, with the left leg straight and the right leg bent.
    • The right elbow joint should be placed on the bench.
    • In order to tilt toward the bench, the patient must first inhale.
    • Apply pressure to the right elbow joint and bent right leg during inclining.
    • For 30 seconds, maintain this stretching position.
    • Then, as they move away from the bench, exhale, straighten their posture, and put their right arm back by their side.
    • Do this exercise again with the opposite arm.
    • After switching the arm, switch the legs as well.

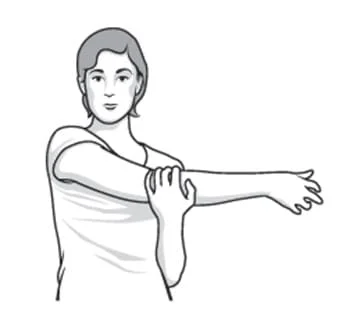
    Cross-body stretch:

    Cross-body stretch
    Cross-body stretch
    • The cross-body stretch begins with the person seated or standing.
    • Reach over to the left side of the body after raising the right arm to shoulder height.

    Home remedies for triceps muscle pain?

    • The RICE concept must be followed when pain arises.
    • To relieve the pain, use an anti-inflammatory medication.
    • Perform the stretching as well as the same exercise that the physical therapist has given you.
    • Use a hot pack: A heating pad can also aid people with chronic tendinopathy who are experiencing pain.

    FAQs:

    What is the duration of tricep pain?

    Within a few days of ceasing the activities that triggered your triceps tendonitis, the symptoms may subside.

    How can you get your triceps back?

    The Triceps Rehab The Brachii Muscle
    Ice Therapy: To lessen inflammation, apply ice packs for 15 to 20 minutes. Compression: To reduce swelling, apply a bandage or sleeve. Stretching: Reintroduce mild triceps stretches gradually. Strengthening: Under expert supervision, including workouts like push-ups and triceps dips.

    Why is the pain in my triceps so intense?

    People who frequently lift weights or participate in specific sports are prone to tendonitis in their triceps. This syndrome also frequently affects people who begin a fitness program or sport and engage in excessive exercise too soon. It’s a sign from your body that a muscle has been overworked. Tricep tendonitis develops gradually rather than all at once.

    How is tricep pain tested for?

    Sometimes other tests, including an MRI, CT, X-ray, or ultrasound, are needed to help diagnose the problem and determine its severity.

    Which physician handles pain in the triceps?

    An orthopedic expert can perform an examination on your elbow or shoulder and prescribe imaging tests such as ultrasounds, MRIs, or X-rays.

    What time of day is ideal for triceps rest?

    One to three minutes of rest
    The traditional recommendation for optimizing muscle growth, or hypertrophy, is to take a minute’s break in between sets of eight to twelve repetitions. Three minutes, however, maybe the real sweet spot, according to recent studies.

    How can I recuperate my triceps more quickly?

    This entails refraining from exercises that make the pain worse, like pushing, lifting weights, and any repetitive arm motions. Pain and inflammation can be lessened by applying ice to the affected area for 15 to 20 minutes several times a day.

    Where is the pain in the triceps?

    Pain in the triceps region, which is located near the back of the upper arm or shoulder, is a typical sign of tricep tendonitis. When the arm is moved, the pain frequently gets worse.

    How can a tricep tear be detected?

    Analysis. With the elbow at the end of the table and the forearm drooping, the patient performs the modified Thompson squeeze test. The triceps muscle is tightly squeezed, and the inability to extend the elbow against gravity indicates a total disruption of the triceps proper and lateral expansion.

    Can tricep pain be caused by stress?

    Yes, to put it succinctly. Arm pain and other symptoms might be caused by anxiety. Many people have arm pain on a daily basis. While some people have a more chronic disease that is more persistent, others may suffer sudden intense pain that comes on unexpectedly and doesn’t stay very long.

    Which drugs are effective for treating tricep pain?

    Your doctor could suggest specific activities to strengthen and stretch the tendon after the inflammation has decreased.

    Do triceps heal quickly?

    One minor muscle group that heals rather quickly is the triceps. Think about performing the triceps following the chest; since they help with chest-pressing movements, you might as well complete them first.

    How long does it take to recover from tricep pain?

    Within a few days of ceasing the activities that triggered your triceps tendonitis, the symptoms may subside.

    What affects the triceps cause

    What Leads to Tendonitis in the Triceps? The two main causes of inflammation are acute injury and overuse. Because they frequently perform repeated motions like throwing a baseball, swinging a tennis racket, or lifting weights, athletes are susceptible to this injury.

    How can tricep pain be relieved?

    However, to address greater partial tears or total tears, surgery might be required. If someone has triceps muscle soreness, it is best to seek medical help.

    References

    • Ladva, V. (2022, March 18). Triceps pain: Cause, Symptoms, Diagnosis, Treatment, Exercise – Mobile P. Samarpan Physiotherapy Clinic. https://samarpanphysioclinic.com/triceps-muscle-pain/
    • Patel, P. (2022b, September 2). Triceps muscle strain: Cause, Symptoms, Treatment, Exercise – Samarpan. Samarpan Physiotherapy Clinic. https://samarpanphysioclinic.com/triceps-muscle-strain-treatment-exercise/
  • Wrist Extension

    What is a Wrist Extension?

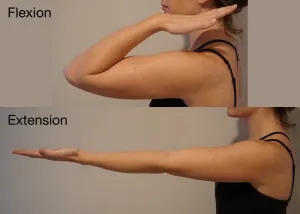
    Wrist extension is a fundamental movement of the wrist joint where the hand moves upward, away from the palm, aligning the back of the hand with the forearm. This motion is primarily facilitated by the extensor muscles located in the forearm, including the extensor carpi radialis longus, extensor carpi radialis brevis, and extensor carpi ulnaris.

    As the back of the hand pulls away from the forearm during wrist extension, the angle between the hand and the forearm rises. This movement mostly happens at the radiocarpal joint, which is the joint that forms between the carpal bone and the wrist’s radius, one of the forearm bones. The wrist extensor muscles, which are mostly found on the rear of the forearm, must contract to extend the wrist. Extensor carpi radialis longus, brevis, ulnar, and other extensor muscles that are involved in finger extension are among these muscles.

    Activities that need the back of the hand to move away from the forearm, including pushing and lifting, require wrist extension. The overall range of motion and functionality of the hand and wrist are improved.

    Extensor muscle of the wrist

    The forearm’s back contains the wrist extensor muscles. When these muscles contract, the wrist is flexed backward and the back of the hand moves away from the forearm, a movement known as wrist extension.

    The main extensor muscles of the wrist are as follows:

    Extensor Carpi Radialis Longus: The base of the hand’s second metacarpal bone is where this muscle attaches after starting on the lateral (outside) side of the humerus, or arm bone. This facilitates radial deviation, or shifting the wrist away from the thumb, and encourages wrist extension.

    Extensor Carpi Radialis Brevis: The base of the third metacarpal is where this muscle inserts, however, it also starts on the lateral side of the humerus. When combined with the extensor carpi radialis longus, it facilitates wrist extension and radial deviation.

    Extensor Carpi Ulnaris: Derived from the posterior surface of the ulna, one of the forearm bones, and the lateral epicondyle of the humerus. It is situated near the base of the fifth metacarpal bone and is in charge of ulnar deviation, which causes the wrist to move to the side of the little finger, as well as wrist extension.

    Extensor digitorum: Stretching down the back of the forearm from the lateral epicondyle of the humerus. It attaches itself to the extensor digitorum muscle and is principally in charge of finger and wrist extension.

    Extensor tendon muscle: This muscle extends exclusively to the index finger and is a continuation of the extensor muscle. Both the wrist and the index finger can be extended with its assistance.

    Lifting, pushing, and other motions that require the back of the hand to move away from the forearm are just a few of the activities that require the wrist to be extended by these muscles. When moving the arms and forearms, they offer control, strength, and stability.

    Range of Motion of Wrist Extension

    Each individual may have a different range of motion for wrist extension, which is the motion of bending the wrist backward. However, the typical range of motion for wrist extension is between 70 and 80 degrees.

    Using a goniometer, which is frequently used to measure joint angles, you can take a quick measurement to determine the wrist’s range of motion. Here’s how to accomplish it.

    • Place your forearm palm down on a level surface, such as a table, while you sit or stand comfortably. Maintain your wrists in a neutral position, neither bent nor extended, and your elbows at a 90-degree angle.
    • The back of your hand should be moved away from your forearm as you slowly and smoothly extend your wrist.
    • Ask someone to place the goniometer on the back of their hand while extending their wrist. After that, put one hand on the forearm and the other on the back.
    • When you have extended your wrists as far as is comfortable, read and note the angle the goniometer indicates.
    • Note the variations between the left and right wrists and repeat the measurement a few times to make sure it is consistent.
    • Remember that this measurement is an estimate that could change depending on personal anatomy, flexibility, and any underlying conditions or injuries.

    Wrist Extension Test

    The “wrist extension test,” sometimes known as the “Watson test,” is a frequently used procedure to evaluate wrist extension. This can aid in the diagnosis of some ailments, like ligament injury or scapholunate instability. This is the way the test is offered.

    • Start by placing your forearm palm down on a table or other level surface while you are sitting or standing comfortably.
    • The examiner stabilizes the forearm to stop movement while standing close to the wrist being evaluated.
    • Conversely, the examiner positions the index finger on the metatarsal bone and the thumb on the patient’s articular bone, which is found on the radial side of the wrist.
    • Next, while keeping pressure on the patient’s ears and occiput, the examiner delivers a force backward to the patient’s wrist. The patient is instructed to resist the force as the examiner tries to stretch their wrist.
    • A successful test is one in which the patient experiences pain, instability, or a “tired” feeling in their wrist when applying force.
    • A positive test result could be a sign of instability or ligament damage.
    • It is crucial to remember that there are other tests available to evaluate wrist extension and identify particular ailments, and the Watson test is just one of them.

    A Special Test For Wrist Extension

    There is not a single, widely used test for measuring wrist extension. Nonetheless, a few clinical tests may help assess certain wrist injuries or illnesses. Here are a few examples:

    Cozen’s test (tennis elbow test):

    Although wrist extension is indirectly involved, the main purpose of this test is to diagnose lateral epicondylitis, also referred to as tennis elbow. The patient is instructed to create a fist, extend their arm (palm down), and then stretch their wrists against opposition by the examiner. If the patient is unwilling to move, the examiner stops them from extending their wrist. A positive test result is defined as lateral soreness or discomfort (bony feeling on the outside of the elbow) during this movement.

    Mills test:

    The tendons on the thumb side of the wrist are affected by De Quervain’s tenosynovitis, which is assessed using the Mills test. The patient’s thumb is passively flexed across the palm by the examiner while they abduct the wrist ulnar, or move it to the side of the little finger. When the tendons cross the radial styloid process (the bony protrusion on the thumb side of the wrist), the test is deemed affirmative if the patient experiences pain or discomfort in that location.

    Finkelstein’s test:

    The Finkelstein test is another way to evaluate De Quervain’s tenosynovitis. The patient is instructed to make a fist with the thumb inside the fingers before bending the wrist to the side of the little finger (elbow deviation). In the region where the tendons cross the radial styloid process during movement, a positive test result is interpreted as pain or discomfort. Note that these tests are not all-inclusive; they are only a few instances.

    Other wrist movements

    Notably, the wrist joint permits not just flexion and extension but also abduction, which is the movement of the hand away from the body’s midline, and adduction, This involves the hand moving back toward the midline.

    Flexibility, stability, and grip strength can all be enhanced with wrist flexor and extensor strengthening and stretching exercises. It is best to speak with a medical expert or a licensed hand therapist if you have special issues or need exercises for fitness or rehabilitation. They might provide customized guidance according to your particular needs.

    Wrist Stretching Exercises

    Extension of the wrist:

    Hold your arms shoulder-high in front of you with your hands down. Gently hold the fingers with the other hand and draw them down so that the hand and wrist can expand. For 15 to 30 seconds, hold the stretch while pulling gently and steadily. For each arm, perform the stretch two to three times.

    Stretch for Wrist Extension

    Tall and Erect Standing in front of the table. Place your elbows straight, your fingers flat, and your palms down at a table. Your weight should be leaned forward. For fifteen seconds, maintain this posture. Do this three times.

    Stretching the Wrist Extensors

    Position of the patient is straight standing. Keep your arm palm down. Apply pressure to the affected hand’s back until the forearm’s outer muscles begin to stretch. Then Releases. do this stretching exercise 3 times.

    Benefits Of The Wrist Extension Exercise

    • Strengthens the forearm and wrist: Exercises involving wrist extension can help strengthen the muscles supporting the elbow and wrist.
    • Enhances mobility: Wrist workouts might aid in boosting wrist range of motion and flexibility.
    • Prevents injury: Exercises for the wrists can help avoid injury and soreness.
    • Increases grip strength: Exercises for the wrist can assist increase grip strength, which is crucial for a variety of tasks.
    • Rehabilitation: Following surgery or an injury to the wrist or elbow, wrist extension exercises may be a useful option.
    • Arm size balance: You can achieve a more balanced arm size by performing wrist extension exercises.
    • enables you to hold larger weights: You can hold heavier weights for extended periods by performing wrist extension workouts.

    Wrist Extension Exercises

    The following wrist extension exercises can help increase wrist flexibility and strengthen the relevant muscles:

    Extension Curls on the Wrist:

    Wrist extension
    Wrist extension

    Wrist-extension

    Place your wrist over the edge of the surface and place your forearm palm down on a table or thigh if you are seated in a chair.
    Hold a light dumbbell a food container or other household item. Elevate the weight toward the ceiling by slowly bending your wrist upward. Then, after a little pause at the peak, gradually lower the weight back to where you started. For each arm, perform ten to fifteen repetitions in two to three sets.

    Wrist Curls in reverse:

    Start with your palm facing up, just like you would for the wrist extension curl. Hold a household object or light stop. Slowly lower your wrist by bending it in the other direction. Slowly raise your wrists to the starting position after a little rest at the bottom. Two to three sets of ten to fifteen repetitions should be given to each arm.

    Extension of a rubber band.

    Wrap a rubber or resistance band over your thumb and fingers, palm down. Stretch your wrist and fingers as far as you can against the strap’s resistance. After a few seconds of holding the stretched position, let your arms drop back down. Throughout the task, each hand should be used ten to fifteen times. As you gain strength and comfort, gradually raise the weights or resistance from the lower starting point.

    Manual Muscle Testing: Wrist Extension

    One method for evaluating the strength and functionality of the muscles surrounding the wrist joint is manual wrist muscle testing. It entails introducing resistance to particular wrist movements and having the test taker attempt to sustain or overcome that resistance. This test can be used to measure muscle strength, spot imbalances or deficits, and help diagnose several wrist-related illnesses or injuries.

    Assessing the muscles

    • Extensors carpi radialis brevis
    • Extensors carpi radialis longus
    • Extensors carpi ulnaris

    Grading

    Normal (5): The examiner demonstrates the ability to maintain the test posture and provide it more than 95% of their effort when under extreme strain. Examiners are not permitted to “break” the test position.

    Good (4+): 75–95% of the examiner’s effort is put out; they can hold the test position and endure moderate to high pressure until their muscles give out.

    Good (4): The examiner exerts between 50 and 74 percent of their energy; they can maintain the test position and withstand mild pressure until their muscles fail.

    Fair (3+): The examiner exerts 1-24% effort; they can withstand light pressure until their muscles become fatigued.

    Fair (3): Being able to maintain gravity without the need for further force is fair.

    Fair (3-): The patient gradually loses the test position as a result of their limitations in resisting gravity.

    Poor (2+): While trying to maintain a *gravity eliminated (GE) posture, the individual can only perform a partial range of motion (ROM) against gravity and can only move through the entire range of motion (ROM) with resistance at the end range.

    Poor (2): Unable to keep a full range of motion in a GE position and defy gravity,

    Inadequate (2-): Capable of moving part of the range in a GE position, but unable to maintain an agape attitude.

    Trace (1): Although no visible osteokinematic activity is present, the examiner feels a muscle or tendon contract.

    Zero (0): There is no discernible contraction or osteokinematic movement of the muscles or tendons.

    GE or gravity eliminated: refers to a patient’s positioning that allows them to defy gravity without the use of their muscles. This region is usually found in the horizontal plane.

    Patient’s position

    The patient should sit with their forearm resting on a table or armrest and their elbow flexed to a 90-degree angle.
    Although the wrist should not be flexed or extended, it should be neutral when evaluating the wrist extensors.
    It is necessary to prorate the patient’s forearm.

    Therapist Position

    • Grade 0: There is no movement
    • Grade 1: the patient makes an effort to do the movement. There is a flicker contraction.
    • Grade 2: The therapist should try to extend the patient’s wrist with one hand while standing behind them and supporting their forearm with the other.
    • Grade 3: The therapist should stand behind the patient and use their hand to support the patient’s forearm while letting the patient extend their wrist freely and through its entire range of motion.
    • Grade 4: As the patient tries to extend their wrist, the therapist should stand behind them and use one hand to support their forearm and the other to create resistance. The resistance should be just enough to keep the patient from finishing the motion, but not so much that it wears them out.
    • Grade 5: As the patient tries to extend their wrist, the therapist should stand behind them and use one hand to support their forearm and the other to create resistance. The resistance should be just enough to keep the patient from finishing the motion, but not so much that it wears them out. To motivate the patient to finish the motion, the therapist should also give verbal cues.

    What is the test procedure?

    • Describe the process to the patient and get their consent.
    • Place the patient’s arm on a table or in their lap while they are standing or sitting.
    • Have the patient raise their hand toward the ceiling to lengthen their wrist. The patient performs the wrist extension themself.
    • Give the dorsal side of the hand resistance in the opposite direction of extension for grades 4–5.

    In addition to recording the grade, note any observations or restrictions on the patient’s capacity to complete the test correctly.

    Take Precautions

    • Before beginning the exam, make sure the patient is steady and at ease.
    • To protect the patient from harm, avoid using too much resistance.
    • During the test, pay attention to any pain or discomfort the patient may feel and stop if needed.
    • Before taking the exam, look for any precautions or contraindications, such as recent surgery or wrist injuries.
    • To prevent strain or injury to oneself throughout the test, use appropriate body mechanics and placement.
    • To stop infections from spreading, always use gloves and sanitize your equipment as part of the recommended infection control procedures.

    Summary:

    • The wrist joint can move in two different ways: flexion, which involves bending the hand toward the inside of the forearm, and extension, which involves straightening the hand away from the forearm. Certain forearm muscles are responsible for these actions.
    • Wrist flexion is caused by the flexor carpi radialis, flexor carpi ulnaris, and palmaris longus muscles, whereas wrist extension is caused by the extensor carpi radialis longus, extensor carpi radialis brevis, and extensor carpi ulnaris muscles.
    • The flexibility, stability, and grip strength of the wrist can all be enhanced by stretching and strengthening these muscles. For individualized advice, it is advised that you speak with a medical expert or licensed hand therapist if you have particular needs or concerns.

    FAQs

    Which four major muscles are used in wrist extension?

    The main way to bear weight is to bend the wrist backward. Extensor Carpi Radialis Longus (primary mover), Extensor Carpi Radialis Brevis (prime mover), Extensor Carpi Ulnaris, and Extensor Digitorum (assistant only) are among the muscles, among others.

    What nerve is used for wrist extension?

    The radial nerve that goes down the arm controls the triceps muscle, which is situated at the posterior compartment of the upper arm. Along with aiding in hand and wrist mobility and sensation, it also gives the wrist extension.

    What are the benefits of wrist extension?

    Your forearm muscles, which support your wrist and elbow, get stronger with this workout. Additionally, it strengthens your grip and increases wrist and wrist mobility. It is a fantastic option for rehabilitation following surgery or injury to the wrist or elbow because it is a mild exercise that can be readily adjusted with less resistance.

    What daily activities require wrist extension?

    The wrist extensors are crucial for gripping and lifting objects because they aid in wrist extension. The wrist flexors aid in wrist flexion and are necessary for writing and typing.

    What happens when you over-extend your wrist?

    Wrist sprains occur when the ligaments in the wrist are strained; in the worst situations, the ligaments rip, leaving the joint weak, painful, and unable to move normally.

    References

    • Patel, D. (2023h, June 29). Wrist Flexion & Extension – Samarpan Physiotherapy Clinic. Samarpan Physiotherapy Clinic. https://samarpanphysioclinic.com/wrist-flexion-extension/
    • Patel, D. (2023b, May 21). Manual Muscle Testing of the Wrist – Flexion, Extension, Deviations. Samarpan Physiotherapy Clinic. https://samarpanphysioclinic.com/manual-muscle-testing-of-the-wrist/
  • Phalanges of Foot

    Phalanges of Foot

    Phalanges of the foot are tiny fingerbones located in the feet. Each foot consists of 14-foot phalanges. The large toes or hallux have two phalanges the proximal and distal, whereas the others have three: proximal, middle, and distal.

    For individual toes, the metatarsal-phalangeal articulation binds the metatarsals to the proximal phalanx. These joints are what make up the football. The big toe and the first metatarsal phalangeal joint are parallel to each other. This location frequently causes foot pain and other issues.

    Types of Phalanges of Foot

    The lengthy bones in the foot situated distal to the metatarsals are called phalanges. Comparable to the hand, every toe carries three phalanges i.e. proximal, middle, and distal phalanges.

    Proximal phalanges

    Proximal phalanges (Latin: phalanges proximales) are the proximal bones of the fingers of the hand and foot. Every foot has five proximal phalanges, which correspond to five toes. Out of the three, the proximal phalange is the biggest.

    Middle phalanges

    The middle phalanges, also known as intermediate phalanges (Latin: phalanges mediae), are essentially detached from the proximal and distal phalanges. Since the big toe lacks middle phalanges, each foot has four in total. In terms of their shape and position, the middle phalanges fall within the proximal and distal phalanges.

    Distal Phalanges

    The rounded portions of the bones at every single toe’s tilt are known as the distal phalanges (Latin: phalanges distales). Each foot bears five distal phalanges that are curved in form distally. The distal phalanges have flattened heads with rough, raised patches called tuberosities.

    Anatomy of Phalanges of Foot

    Interphalangeal joints are formed when the phalanges of each toe articulate with one another. Metatarsophalangeal joints develop when the proximal phalanges articulate with the metatarsals of the foot.

    The bottom is positioned at the proximal end of every phalanx, followed by the head at the distal end and the body in the core of the bone.

    • Base: The base or proximal extremity’s proximal section is enlarged. At the base every single proximal phalanx are circular and concave articular surfaces. However, a median ridge divides the two identical concave articular surfaces at the bases of the middle and distal phalanges.
    • Body: The body, also occasionally referred to as the shaft, is the extending prolongation coming from the base. Every phalanx’s body is convex on both flanks, with the dorsal surface being more concave than the plantar surface. Flexor tendons can adhere to rough spots on the sides of the body.
    • Head: The heads or distal extremities have rounded distal ends and are enlarged. Phalanges’ heads are smaller than their bases. Except for the distal phalanges, which have distal tuberosities and are flattened, each head has an articular surface.

    Articulation

    • Through the metatarsophalangeal joint, the proximal phalanges keep their connection to the metatarsals.
    • The association between the proximal and middle phalanges occurs at the proximal interphalangeal joint.
    • A distal interphalangeal joint is used to connect the middle and distal phalanges.
    • An individual interphalangeal joint had been identified on the great toe.

    Muscles Attachment

    • The rear of the foot is where the extensor tendons are fastened. Extensor hallucis longus is received by the great toe’s distal phalanx, whereas extensor hallucis brevis is received by the proximal phalanx.
    • The lumbrical, interossei, and digitorum extensors make up the extensor development. The tendons known as extensor digitorum brevis are connected to the second, third, and fourth toes’ extensor expansions.
    • While flexor hallucis brevis enters the proximal phalanx through the two sesamoids, flexor hallucis longus joins to the great toe’s distal phalanx on the plantar surface.
    • The flexor digitorum longus connects the distal phalanx, and the flexor digitorum brevis connects all of the additional toes to the sides of the middle phalanx.
    • The pointed end of the fifth proximal phalanx can be utilized for attaching the flexor digiti minimi brevis and abductor digiti minimi brevis.

    Ligaments Attachment

    • Each metatarsophalangeal joint on the plantar surface is strengthened by the plantar ligament, a substantial fibrocartilage pad.
    • The plantar ligaments that encircle the metatarsophalangeal joints are joined by the deep transverse metatarsal ligament, which is made up of four tiny bands of fibrous tissue.
    • Collateral ligaments (similar to the hand) strengthen the sides of the metatarsophalangeal joint and interphalangeal joints.

    Blood Supply

    • Arterial Supply: The external plantar arch of the foot has been established by the lateral plantar artery. Across the bases of the second, third, and fourth metatarsals, this curvature is convex. The four webs and digits are nourished by plantar metatarsal arteries, which emerge from this arch. The hallux receives its flow of blood right from the medial plantar artery. Dorsal metatarsal arteries receive their distribution from the foot arch’s starting and metatarsal arteries.
    • Venous drainage: The perforating veins, which accompany the perforating arteries, convey blood from the dorsal venous arch. The “sole pump” function of the plantar muscles facilitates the passage of blood back into the veins.

    Nerve Supply

    • Both the dorsal and plantar digital nerves innervate the complete phalangeal bone assembly.

    Anatomical variation

    • The plantar portion of the great toe’s metatarsophalangeal joint typically has two sesamoid bones, with the medial being the bigger one (refer to multipartite hallux sesamoid). Sesamoid bones can be discovered in the metatarsophalangeal joint joints of the second to fifth toes and the interphalangeal joint of the great toe.

    Function of the Phalanges of Foot

    • The proximal phalanges are important for proper toe bending.
    • As such, they play an essential function in everything from walking to jumping.
    • Additionally, these bones play a crucial role in lateral motions, which aid in maintaining your balance and navigating uneven surfaces.

    Relevant Condition to Phalanges of Foot

    Claw toe

    The lateral four toes are nearly usually affected by toe deformities, which can result in incapacitating discomfort. The metacarpophalangeal, proximal interphalangeal, and distal interphalangeal joints dorsiflex due to claw toe. Women and older people are more likely to have this malformation. Certain neuromuscular conditions, including multiple sclerosis and cerebral palsy, can coexist with claw toe. Additionally, it can be observed in inflammatory conditions like rheumatoid arthritis and metabolic disorders like diabetes mellitus.

    Hammertoe deformity

    Hammertoe deformity is the most prevalent abnormality observed in the distal four toes. This deformity is typically caused by poorly fitting shoes, which leads to hyperextension of the metatarsophalangeal and distal interphalangeal joints as well as a flexion deformity of the proximal interphalangeal joint. Wearing the proper footwear and taping the toe are effective therapy options for this issue. After using these techniques, surgical correction might be necessary if the incapacitating discomfort persists.

    Mallet toe

    The term “mallet toe” refers to a distal interphalangeal joint flexion abnormality. This disorder, which may be caused by trauma or improper footwear, may result in calluses and nail abnormalities. Orthotics and toe guards are examples of non-operative therapy options.

    Fractures

    The fifth toe is the most frequently fractured; toe dislocation may also occur. These fractures are typically caused by trauma, such as a falling object or a toe stub, and they frequently happen distal to the metacarpophalangeal joint.

    FAQs

    What are the 5 phalanges?

    Five proximal phalanges, one associated with every digit, are present in each finger. In terms of the distal and middle phalanges, they are the largest. The exception is the thumb’s proximal phalanx, which is broader and shorter than the others.

    The fourteen phalanges are what?

    The toes of both feet and the fingertips of both hands contain these 14 bones. The phalanges of each finger are proximal, middle, and distal. Only two are present in the thumb.

    Which formula applies to phalanges?

    A “phalangeal formula” that shows the number of phalanges in digits is frequently used to express the number of phalanges in animals. The thumb has two phalanges, whereas the remaining fingers each have three, according to the 2-3-3-3-3 formula seen in the hands and feet of the majority of land mammals, including humans.

    What function do the toes’ phalanges serve?

    The proximal phalanges are crucial for proper toe bending. They are therefore crucial for actions like walking and jumping. Additionally, these bones play a crucial role in lateral motions, which aid in maintaining your balance and navigating uneven surfaces.

    References

    • Phalanges of the foot. (2022, November 24). Kenhub. https://www.kenhub.com/en/library/anatomy/phalanges-of-the-foot
    • Hacking, C. (2015). Phalanges of the feet. Radiopaedia.org. https://doi.org/10.53347/rid-41552
    • Next, A. (n.d.-b). %s  | Anatomy.app | Learn anatomy | 3D models, articles, and quizzes. https://anatomy.app/encyclopedia/phalanges-of-foot
    • Foot phalanges. (n.d.). https://surgeryreference.aofoundation.org/orthopedic-trauma/adult-trauma/foot-phalanges
    • Wikipedia contributors. (2024c, November 30). Phalanx bone. Wikipedia. https://en.wikipedia.org/wiki/Phalanx_bone
  • Back Muscle Tightness

    Back Muscle Tightness

    Introduction

    Back muscle tightness is a common issue that many people experience due to factors like poor posture, overuse, stress, or underlying medical conditions. It often manifests as stiffness or discomfort in the upper, middle, or lower back, affecting mobility and daily activities.

    The lower back, upper back, or muscles around the spine may be affected, and it may present as a dull pain, stiffness, or severe pain.

    Anatomy of Back Muscle

    • Extrinsic Muscle
    • Intrinsic Muscle

    Extrinsic Muscle includes:

    • Trapezius
    • Latissimus Dorsi
    • Rhomboid Major and Minor
    • Levator Scapulae

    Trapezius:

    1. The trapezius muscle crosses the shoulders and reaches the mid-back.
    2. The upper portion raises the shoulder.
    3. The scapula retracts in the middle.
    4. The scapula is depressed at the lower half.

    Latissimus Dorsi:

    1. Place: From the lower ribs to the upper arm, the latissimus dorsi muscles encompass the lower and middle back.
    2. Its functions include internal rotation, adduction (pulling the arm toward the body), and shoulder extension.

    Rhomboid Major and Minor:

    1. Location: The shoulder blades and the spine are separated by these muscles.
    2. They support the stabilization of the shoulder girdle and aid in the retraction of the scapula, which pulls the shoulder blades together.

    Levator Scapulae:

    1. Location: This muscle connects the top corner of the scapula to the upper cervical spine or neck.
    2. Function: Supports neck motions and raises the scapula.

    Intrinsic Muscle includes

    Erector Spinae:

    1. Location: A group of muscles that run vertically down the spine from the sacrum to the head is called the erector spinae.
    2. Stabilizing and lengthening the spine are the roles of the erector spinae. Moreover, it facilitates rotation and lateral flexion, or sideways bending.
    3. Three columns make up the erector spinae:
    4. The outermost column that aids in the extension and lateral bending of the spine is called the iliocostalis.
    5. The middle column that aids in the extension and rotation of the spine is called the longissimus.
    6. Spinalis: The innermost column that helps with extension and stabilizes the spine.

    Transversospinalis:

    1. Location: Between the spinous processes (the bony protrusions along the spine) and the transverse processes (the little projections from each vertebra), these deep muscles are situated.
    2. Multifidus: Located all the way along the vertebral column, these structures are essential for keeping the spine stable when moving.
    3. The little muscles known as the rotatores help extend and rotate the spine.

    Quadratus Lumborum:

    1. Location: In the lower back, it joins the lumbar vertebrae, lower ribs, and iliac crest (hip bone).
    2. The quadratus lumborum’s function is to support the spine and pelvis. Keeping the rib cage stable facilitates respiration and helps the spine bend laterally.

    Causes

    • Poor Posture
    • Muscle Strain
    • Overuse
    • Stress and Tension
    • Dehydration
    • Inactivity
    • Injury or Trauma
    • Underactive Core Muscles

    Poor Posture: Long-term poor posture when sitting or standing can cause muscular tension, particularly in the shoulders and lower back.

    Muscle Strain: Muscle strains may result from improper lifting techniques, abrupt motions, or repeated tasks.

    Overuse: Tight muscles might come from severe exercise or physical activity that is not properly recovered from.

    Stress and Tension: Especially in the neck, shoulders, and upper back, emotional stress can make muscles tense.

    Dehydration: Muscle tightness and cramping might result from consuming insufficient amounts of water.

    Inactivity: Muscles can get stiff by sitting or lying down for extended periods of time without moving.

    Injury or Trauma: Muscle spasms and back stiffness might result from a fall or other abrupt impact.

    Underactive Core Muscles: The back muscles may be overworked if the core muscles are weak.

    Symptoms

    • Muscle Stiffness
    • Dull Ache or Soreness
    • Localized Pain
    • Muscle Spasms
    • Reduced Range of Motion
    • Tightness
    • Pain Radiating to Other Areas
    • Numbness or Tingling
    • Headaches
    • Fatigue
    • Pain that Worsens with Certain Movements
    • Worsening Pain with Stress

    When to Seek Medical Attention

    Despite the fact that muscular soreness usually passes with rest and self-care, you should see a doctor if:

    • It hurts a lot, sharply, or continuously.
    • Without getting better, the stiffness persists for more than a few days.
    • You feel weak, tingly, or numb in your arms, legs, or other parts of your body.
    • Fever and inexplicable weight loss accompany the tightness, which might be signs of an infection or other medical disease.
    • You may have a major spinal problem (such as cauda equina syndrome) if you have trouble managing your bowel or bladder function.

    Diagnosis

    • Medical History
    • Physical Examination
    • Imaging and Diagnostic Tests

    Imaging and Diagnosis:

    X-rays: Bone alignment, structure, and indications of spinal abnormalities or degenerative disc disease are frequently evaluated via X-rays.
    However, soft structures like muscles and ligaments are invisible on X-rays.

    MRI: Muscles, ligaments, and intervertebral discs are among the soft tissues that may be seen in great detail on MRI scans. This can assist in determining whether a person has spinal stenosis, herniated discs, or other problems that impact the muscles or spine.

    CT Scan: If more precise pictures of the soft tissues and bones are required—especially if MRI is not appropriate or available—a CT scan can be suggested.

    Electromyography (EMG): In order to evaluate nerve impingement or other neurological problems, an EMG can assess the electrical activity in the muscles and nerves if nerve compression is suspected (for example, from a herniated disc).

    Treatment

    Stretching, strengthening exercises, self-care practices, and perhaps expert therapies are routinely used to treat back muscular stiffness, depending on its degree and underlying reason.

    • Stretching
    • Heat Therapy
    • Cold Therapy
    • Over-the-Counter Pain Relief
    • Posture Correction
    • Strengthening Exercises
    • Physical Therapy
    • Medical Intervention

    Over-the-counter Pain Relief: Pain and inflammation can be reduced by NSAIDs (such as ibuprofen) or acetaminophen, but only when used as prescribed.

    Medical Intervention: In cases when muscular stiffness is severe, chronic, or linked to an injury, a medical professional may recommend further therapies such as prescription muscle relaxants or painkillers.
    Osteopathic manipulation or chiropractic adjustments for problems with alignment.
    For specific pain relief and muscular relaxation, use acupuncture.

    Heat Therapy: Blood circulation can be enhanced, and muscles can be relaxed by using a warm bath, heating pad, or compress.

    Cold Therapy: Applying ice packs for 15 to 20 minutes to the afflicted area can help dull severe pain and decrease inflammation.

    Physical Therapy Treatment

    A tailored program to enhance posture, strength, and flexibility can be created by a physical therapist, particularly if you suffer from severe or persistent muscular tightness.

    • Stretching
    • Strengthening Exercises
    • Posture Correction

    Stretching

    • Cat-Cow Stretch
    • Child’s Pose
    • Seated Forward Bend
    • Torso Twists
    • Knee- to- Chest Stretch
    • Figure Four Stretch

    Cat-Cow Stretch

    1. Begin by undertaking a tabletop stance on your control and knees.
    2. As you upraise your chest and tailbone toward the ceiling by arching your back( Cow pose), take a breath.
    3. Exhale by bending your back (cat stance) and tucking your chin and tailbone toward the bed.
    4. Continue for ten to fifteen cycles, moving deliberately and slowly.
    Cat-and-Cow-Stretching
    Cat-and-Cow-Stretching

    Child’s Pose

    1. Sit back on your heels and stretch your arms forward from a hands-and-knees position.
    2. While extending your hips and back, lower your forehead to the ground.
    3. Return to the beginning position after holding for 20 to 30 seconds while taking deep breaths.
    Childs-Pose-stretch
    Childs-Pose-stretch

    Seated Forward Bend

    1. Your legs should be directly outside in front of you while you sit on the bottom.
    2. Breathe in and extend your back.
    3. After exhaling, slowly fold onward and snap your shins or bases.
    4. Hold for twenty to thirty seconds while maintaining the straightest possible back.
    seated-forward-bend
    seated-forward-bend

    Spinal Twist

    1. Your legs should be directly outside in front of you while you sit on the bottom.
    2. Your bottom should be on the outside of your left foreleg while your right knee is crooked.
    3. Your core should be gently bent to the right by laying your left elbow on the exterior of your right knee.
    Supine Spinal Twist
    Supine Spinal Twist

    Knee- to- Chest Stretch

    1. Your bases should be positioned on the bottom, and your knees should be crooked while you lie on your reverse.
    2. With your control clasped behind the foreleg, bring one knee up to your chest.
    3. After gripping for 20 to 30 seconds, change legs.
    One-Knee-to-Chest
    One-Knee-to-Chest

    Figure Four Stretch

    1. Observe your knees bent while lying on your reverse.
    2. Apply your legs to form a figure-four, and put your right ankle on your left knee.
    3. To make the stretch deeper, gently drag your left foreleg toward your chest.
    Seated-FOUR-FIGURE-STRETCH
    Seated-FOUR-FIGURE-STRETCH

    Cobra Stretch

    1. position your palms flat on the bottom beneath your shoulders and stretch your legs while you lie face down on the bottom.
    2. Arch your rear by sluggishly pressing into your palms to raise your chest off the ground.
    cobra-pose
    cobra-pose

    Strengthing

    • Plank
    • Superman Exercise
    • Bird- Dog
    • Glute Bridge
    • Dead Bug
    • Wall Sits
    • Back Extension

    Plank

    1. Start a drive-up by keeping your shoulders above your wrists and your arms straight.
    2. observe your core in a straightaway line from your head to your heels by using your core.
    3. Start with 20 – 30 seconds of holding, then increase to 1 minute as you go.
    up-down plank
    up-down plank

    Superman Exercise

    1. Extend your arms above while lying face down on the bottom.
    2. At the same time, raise your legs, arms, and torso as high as you can.
    3. Do this 10 – 15 times.
    superman-exercise
    superman-exercise

    Bird- Dog

    1. To create a tabletop position, start on your hands and knees, positioning your hands just behind your shoulders and your knees behind your hips.
    2. keeping up a straightforward body alignment, extend your right arm forward and your left leg straightway back.
    3. Return to the starting pose after gripping for a short time.
    4. do to the contrary side.
    Bird Dog Exercise
    Bird Dog Exercise

    Glute Bridge

    1. With your knees crooked and your bases flat on the bottom, hip-range apart, lie on your reverse.
    2. Contract your glutes and core as you elevate your hips toward the ceiling to create a straight line from your shoulders to your knees.
    3. At the peak, hold for numerous seconds before lowering yourself gradually again.
    4. Do this 10 – 15 times.
    Hip bridge exercise
    Hip bridge exercise

    Dead Bug

    1. With your arms reaching toward the ceiling and your legs bent at a 90-degree angle, lie on your back.
    2. With your rear flat on the bottom, slowly drop your left leg and right arm toward the bottom.
    3. Go back to the beginning and do it again on the contrary side.
    4. Do 10 to 12 reps
    Dead bug
    Dead bug

    Wall Sits

    1. Your bases should be hip-range apart as you stand with your rear to a wall.
    2. Gently descend the wall until your knees form a 90-degree angle.
    3. As your strength increases, precipitately increase the duration of the posture from 20 to 30 seconds.
    sit-wall
    sit-wall

    Cobra Pose- Back Extension

    1. With your hands crossed over your chest or behind your head, lie face down on an exercise ball or mat.
    2. Lower back muscles should be contracted to raise your chest off the bottom( or ball).
    3. Hold for one or two seconds, and gently lower yourself again.
    4. Do this 10 – 15 times.
    Bhujangasana (Cobra Pose)
    Bhujangasana (Cobra Pose)

    Posture Correction: Pressure in the reverse muscles can be aggravated by bad posture. Aim for an ergonomic workstation and practice sitting and standing with the right alignment.

    Posture Correcting Exercises
    Posture Correcting Exercises

    Prevention

    • Maintain Good Posture
    • Strengthen Core and Back Muscles
    • Stretch Regularly
    • Exercise Proper Lifting ways
    • Stay Active
    • Manage Your Weight
    • Sleep with Proper Alignment
    • Avoid Stress
    • Ergonomic Work Environment
    • Stay Doused and Eat Nutritious Foods
    • Avoid Overexertion
    • Avoid Smoking

    Summary

    Back muscular tightness is a frequent problem that may be successfully treated with a mix of focused therapies, regular exercise, and healthy behaviors. Back stiffness may be avoided and a healthier, more flexible back can be encouraged by correcting posture, maintaining an active lifestyle, and correcting muscular imbalances. It is crucial to see a healthcare provider to rule out underlying illnesses if the tightness continues or is accompanied by excruciating pain.

    FAQ’s

    What causes back muscle tightness?

    Poor posture
    Muscle overuse or strain
    Sedentary lifestyle
    Stress
    Injury or trauma
    Muscle imbalances

    How can I relieve back muscle tightness?

    Stretching
    Heat or cold therapy
    Massage
    Over-the-counter pain relievers
    Strengthening exercises
    Proper posture

    What are some effective stretches for back tightness?

    Cat-Cow Stretch
    Child’s Pose
    Seated Forward Bend
    Spinal Twists
    Knee-to-Chest Stretch
    Hip Flexor Stretches

    What exercises strengthen the back to prevent tightness?

    Planks
    Glute Bridges
    Bird-Dog
    Superman Exercise
    Dead Bug
    Reverse Hyperextensions

    Can sleeping position affect back tightness?

    Actually, sleeping in a discomforting posture can aggravate back pain. Your muscles may be strained if you sleep on your stomach or in a posture that throws off your spine alignment. To maintain the natural curve of the spine, it is ideal to sleep on your back with a cushion behind your knees or on your side with a pillow between your knees.

  • Wrist Flexion

    Wrist Flexion

    Wrist Flexion & Extension

    Wrist flexion and extension are the motions that take place at the wrist joint, which enable the hand to bend and straighten in relation to the forearm. These movements are used in many sports, workouts, and professional jobs and are essential for carrying out a variety of daily life activities.

    What is Wrist Flexion?

    • A movement known as wrist flexion occurs when the wrist joint flexes, bringing the palm closer to the inside of the forearm. Several muscles on the front (front) aspect of the forearm are used. Wrist flexion is the result of these muscles contracting.
    • The most crucial muscles used in wrist flexion are the flexor carpi radialis, flexor carpi ulnaris, and palmaris longus. Attached to the bones at the base of the wrist or hand, these muscles begin in the medial (inner) region of the elbow and forearm.
    • Swinging a tennis racket, lifting weights, and gripping items are just a few of the everyday and sporting actions that frequently need wrist flexion. Additionally, it is an essential action for many professional duties, such as typing, playing an instrument, and writing.
    • It is crucial to remember that the wrist joint can move in a variety of ways, and wrist flexion is just one of them. Wrist extension, radial deviation, and ulnar deviation are additional movements that cause the wrist to move to the side of the thumb and little finger, respectively. which bends the wrist back. These motions work together to give the hands and wrists a great deal of dexterity and functionality.

    Wrist Flexor Muscle

    The wrist flexors are a set of muscles located on the front (front) side of the forearm. Wrist flexion is the result of these muscles working together to bend the wrist and bring the palm closer to the inside of the forearm. The primary flexor muscles of the wrist are:

    Flexor Carpi Radialis: This muscle, which is situated near the base of the second and third metacarpals of the hand, arises from the medial (inner) epicondyle of the humerus (arm bone). This makes it easier to move the wrist to the thumb’s side, or radial deviation, as well as wrist flexion.

    Flexor Carpi Ulnaris: The olecranon process of the ulna, one of the forearm bones, and the medial epicondyle of the humerus are the origins of this muscle, which is situated on the base of the fifth metacarpal. It facilitates motion of the wrist to the side of the little finger, known as ulnar deviation, as well as wrist flexion.

    Palmaris Longus: The palmaris longus muscle is not always developed in all people. It begins at the humerus’ medial epicondyle and ends at the palmar aponeurosis, a large, flat tendon in the hand’s palm.

    The muscles flexor digitorum superficialis and flexor digitorum profundus, which primarily flex the fingers but also have some effect on wrist flexion, are other muscles that contribute to wrist flexion to a lesser degree. Strength and control during hand and forearm movements are provided by these muscles, which are crucial for activities involving wrist bending and gripping.

    Range of Motion of Wrist Flexion

    Wrist flexion, or the movement caused by bending the wrist forward, typically has a range of motion between 80 and 90 degrees. This indicates that the palm can approach the inside of the forearm at an angle of roughly 80 to 90 degrees when the wrist is fully flexed.

    It is crucial to remember that each person’s actual range of motion may differ and be influenced by several variables, including age, flexibility, and any underlying medical conditions or injuries. To properly evaluate wrist movement, it is always better to speak with a physician.

    The following easy test can be used to determine your wrist flexion range of motion:

    Place your forearm palm up on a table or other level surface as you sit or stand comfortably.
    Throughout the evaluation, maintain a calm and motionless elbow position. With a gentle wrist bend, bring your palm closer to the inside of your forearm. Wrist flexion is this.

    When you bend your wrist, note the angle at the forearm and the back of your hand form.
    If a goniometer (gauge) is available, you can use it to visually measure the degree of bending.
    Increase the bend gradually until you can no longer move without pain or discomfort, or until you feel a comfortable stretch.

    Take note of the angle at which your wrist is bent. To determine whether your range of motion falls within the anticipated range, you can compare it to the previously indicated usual range of motion, which is roughly 80 to 90 degrees.
    Do the same with the opposite wrist.

    Make sure to finish the evaluation and to stop if you experience any pain or discomfort.

    Wrist Flexion Test

    The following actions can be used to conduct a basic wrist flexion test:

    • Position your forearms on a flat surface, like a table, and take a comfortable seat or stand.
    • With your palms facing up, lean against the surface while maintaining an elbow angle of roughly 90 degrees.
    • Your wrist should be in a neutral posture at the beginning, which means it should not be bent or extended.
    • Bring your palm closer to the inside of your forearm by bending your wrist steadily and slowly.
    • To start and manage the movement, concentrate on activating your forearm muscles.
    • Keep bending your wrist until it feels slightly stretched or you have reached the maximum tolerable range of motion.
    • Take note of the forearm’s and hand’s back angles.
    • Make sure you do not experience any pain or discomfort as you hold the position for a moment.
    • Reverse the motion and slowly extend the wrist after returning it to its neutral position.
    • To guarantee consistency, repeat the test a few times and observe how the left and right wrists differ from one another.
    • Keep track of any pain, strange feelings, or restricted movement during the exam.

    Special Test For Wrist Flexion

    To measure wrist flexion and analyze possible issues or injuries, medical practitioners may employ specialized testing. The “wrist flexion test,” also referred to as the “Phalen test,” is demonstrated here.

    • Start by putting your arms at your sides and sitting or standing comfortably.
    • To form a prayer position, place your hands in a 90-degree angle with the backs of your hands together, fingers down.
    • Hold this posture for approximately one minute. If you feel any discomfort, tingling, numbness, or weakness in your hands, fingers, or wrists during the test, pay attention to it.
    • The development of aberrant sensations or a rise in pain intensity could be signs of compression or irritation of the median nerve, which could be linked to conditions like carpal tunnel syndrome.

    Wrist Flexion Stretching Exercises

    Wrist flexibility:

    • Keep your arms palms up at shoulder level.
    • The forearm and wrist can be stretched by gently holding the fingers with the other hand and pulling them down. Hold the stretch for 15 to 30 seconds while pulling gently and steadily. Twice or three times, stretch each arm.

    Rotations of the wrists

    To perform this stretch:

    • In front of you, extend your arm.
    • Until you feel a stretch, carefully point the fingers downward. Draw the lifted hand slowly toward the body with the other hand. Hold for three to five seconds.
    • Pointing your fingers at the ceiling should cause a stretch. Pull the lifted hand gently toward the body with the other hand. Hold for three to five seconds.
    • Do this three times.

    Benefits of Wrist Flexion Exercise

    • Increased wrist range of motion and flexibility can be achieved using wrist flexion exercises.
    • Avoid injuries: You can avoid hand and wrist injuries by doing wrist exercises.
    • Boost strength: You may strengthen the muscles surrounding your wrists by performing wrist workouts.
    • Reduce pain: Carpal tunnel syndrome and tendinitis are two ailments that can be lessened with wrist flexion exercises.
    • Enhance coordination: You can enhance your wrists’ balance and coordination by performing wrist workouts.
    • Boost performance: Wrist workouts can help you perform better overall in other activities.
    • Pain control: Exercises for wrist flexion can alleviate discomfort from ailments such as tendinitis, carpal tunnel syndrome, and wrist sprains.
    • Wrist stability: Wrist flexion exercises can aid with wrist joint stabilization.

    Wrist Flexion Exercises

    The following are some wrist flexion exercises that will increase wrist flexibility and strengthen the relevant muscles:

    Dumbbell curls for the wrists:

    wrist-flexion
    wrist-flexion

    Place your arm palm up on your thigh and hang your wrist off the edge. Using the bottom handle, grasp a stop with your hand. With your weight shifting to your forearm, slowly bend your wrists upward. Slowly return the weight to the starting position after a little pause at the top. Give each arm two to three sets of ten to fifteen repetitions.

    Resistance-Band-Wrist-curl-exercise
    Resistance-Band-Wrist-curl-exercise

    Flexing your wrist with a resistance band:

    Your wrist should hang off the chair’s edge as you place your arm palm up on your thigh. Wrap one end of the resistance band around your fingers while holding it in your hand. Pull the resistance band in the direction of your forearm while bending your wrist to keep it motionless. After holding for a brief moment, carefully return the bar to its initial position. Repeat ten to fifteen reps in two to three sets for each arm.

    Applying pressure on the wrist with a ball:

    A stretch ball can be held in your hand or pressed into your palm. Squeeze the ball as tightly as you can while bending your wrist forward. For a few seconds, maintain the pressure and wrist flexion, then let go. Give each hand ten to fifteen repetitions of the exercise. As you gain comfort and strength, be careful to progressively increase the resistance or weights you begin with.

    Wrist Curls with Cable

    How to do wrist curls using cables

    It is crucial to remember that you can do this exercise while standing or sitting on a seat with your legs supporting your forearms. The instructions below describe how to perform the cable wrist curl standing.

    • Choose a suitable weight, fasten a straight bar to the cable, then lower the cable pulley as far as it will go.
    • Maintain a shoulder-width distance from the cable. in your palms facing up, bend over and grasp the cable in a supinated grip that is slightly wider than shoulder width.
    • Maintain a straight posture by extending your arms in front of you and keeping your wrists straight. The cable needs to be somewhat tense. This is where you start.
    • Curl your wrist toward your forearm, brace your core, and take a deep breath to start the exercise. Throughout the entire exercise, maintain a straight elbow and a steady upper arm. Your wrist should be the only thing moving.
    • Exhale and lower the bar back to the beginning position by extending your wrist back to neutral when you have reached peak contraction, pausing for one to two seconds.
    • Keep going until you have completed the required amount of repetitions.

    Manual Muscle Testing: Wrist Flexion

    Participating Muscles:

    Patient Positioning

    The patient is seated in a supinated position with the dorsal surface of their forearm supported on a table.

    Therapist Position

    The therapist sits down to gain access to the test-side
    Wrist flexor palpation

    Grading:

    Normal (5): Under severe pressure, the examiner exhibits the capacity to maintain the test posture and exert more than 95% of their effort. The test position cannot be “broken” by examiners.

    Good (4+): The examiner exerts 75–95% of their effort; they can maintain the test position and withstand moderate to high pressure until their muscles fail.

    Good (4): The examiner puts out 50–74% of their effort; they can sustain test position and tolerate light pressure until their muscles break down.

    Good (4-): The patient can withstand mild to moderate pressure and defy gravity till muscle failure; the examiner puts in 25–49% effort.

    Fair (3+): The examiner puts up 1-24% effort; capable of resisting gravity and enduring mild pressure until muscular tiredness.

    Fair (3): Having the ability to sustain gravity without additional force.

    Fair (3-): Due to their inability to defy gravity, the patient gradually loses the test position.

    Poor (2+): The person can only move through a full range of motion (ROM) with resistance at the end range and can only do a partial range of motion (ROM) against gravity while attempting to maintain a *gravity eliminated (GE) posture.

    Poor (2): Unable to maintain a full range of motion in a GE stance while defying gravity,

    Insufficient (2-): Able to move in a GE stance throughout a portion of the range, but unable to keep an agape attitude.

    Trace (1): The examiner feels a muscle or tendon contract, but there is no obvious osteokinematic movement.

    Zero (0): No observable osteokinematic movement or contraction of muscles or tendons is present.

    Gravity Eliminated, or GE: The patient is positioned so that they can resist gravity without using their muscles. Usually, this place is found on the horizontal plane.

    How the MMT is performed:

    • Through range, the patient actively flexes their wrist.
      Using the palm, apply resistance in the opposite direction of flexion for grades 4–5.
      The patient must be able to move through their whole range of motion (active resistance testing) OR sustain an endpoint range (break testing) against maximum resistance to meet the grade 5 “normal muscle” performance standards.
    • Patients should be taught to bias their flexor carpi ulnaris by flexing their wrists beginning with the fifth digit, applying resistance in the direction of radial deviation, and extending over the fifth metacarpal.
    • The patient’s instructions include stretching across the second metacarpal bones to bias the flexor carpi radialis, providing resistance in the direction of ulnar deviation, and flexing the wrist while leading with the thumb.

    FAQs

    What are the wrist’s three primary flexors?

    Flexion refers to the wrist’s bending toward the palm. The Flexor Digitorum Superficialis, the finger flexor that just assists, the Flexor Carpi Ulnaris and Radialis, the main movers, and the Palmaris longus, which tightens the palm’s skin and fascia, are some of these muscles.

    Which nerve controls wrist flexion?

    Your forearm muscles are stimulated by the median nerve, which enables you to: Bend and straighten your thumbs, first three fingers, and wrists.

    What are the benefits of wrist flexion?

    The wrist flexor stretch can help you increase your range of motion, flexibility, and mobility while also stretching your tense and aching wrist, forearm, and upper arm muscles.

    What daily activities require wrist flexion?

    Strong, flexible wrists are essential for comfort and performance when typing on a keyboard, lifting weights, or participating in any activity requiring fine motor skills.

    Why is wrist flexion important?

    Wrist flexor muscle strengthening can benefit several ailments or injuries, such as: Strengthening these muscles can assist in stabilizing the wrist and relieve pressure on the median nerve, which is frequently constricted in carpal tunnel syndrome.

    References

    • Patel, D. (2023g, June 29). Wrist Flexion & Extension – Samarpan Physiotherapy Clinic. Samarpan Physiotherapy Clinic. https://samarpanphysioclinic.com/wrist-flexion-extension/
    • Jacques, H. (2023, June 7). The 7 Best Cable Forearm Exercises. Lift Vault. https://liftvault.com/exercises/cable-forearm-exercises/
  • Gluteal Pain

    Gluteal Pain

    Gluteal pain refers to discomfort, soreness, or aching sensations in the gluteal region, which encompasses the muscles, tendons, and tissues of the buttocks. This area plays a vital role in maintaining posture, facilitating movement, and supporting the lower back and hips.

    What is the Gluteal muscle pain?

    There are too many reasons for gluteal pain, which is typically treated by rest, medication, and physical therapy exercises. Gluteal pain is primarily caused by misuse of the muscles, small strains, infections, or accidents.

    The patient’s gluteal pain indicates that their buttocks are experiencing gluteal muscle ache.
    The most frequent cause of gluteal muscle pain is local trauma from direct hits or falls.

    Buttock pain is also caused by other gluteal muscles, nerves, and bursae, such as the hip rotator muscles, sciatic nerve, and ischial bursa.
    Most of the time, medicine and the RICE principle reduce pain.
    After that, have some exercise and resume your regular activities.

    What is the Gluteal muscle?

    The gluteal muscles, often referred to as the glutes, are a collection of the three muscles that make up the gluteal area, which is also referred to as the buttock.

    These three muscles attach to the femur bone after emerging from the ilium and sacral.
    These muscles perform the following tasks for the hip joint: abduction, extension, external rotation (ER), and internal rotation (IR).

    What are the causes of gluteal pain?

    • If so, the muscle area becomes bruised due to a gluteal contusion.
    • A gluteal muscular strain, which is a partial tear or stretch of the muscle and tendon, is another reason.
    • The majority of gluteal pain is caused by trauma to this area from a fall or a direct impact on the buttocks.
    • Gluteal/buttock contusions are frequently caused by falls.
    • Patients on blood thinners who are anticoagulated have severe pain or edema due to extensive bleeding inside and around their muscles.
    • Overuse injuries, which typically affect the hip joint, can result in strains of the gluteal muscles and tendons. Another factor is if the patient does repetitive tasks at work, such as lifting and squatting, which can lead to hip joint inflammation.
    • Overtraining, primarily from squats and weightlifting, can result in gluteal injuries.

    Symptoms of Gluteal muscle pain.

    • Every injury causes pain in the gluteal area.
    • The intensity, duration, location, and aggravating/relieving causes of this pain vary from case to case.
    • Bleeding, edema, and inflammation are the results of falls and direct hits to the buttock.
    • Due to the reduced range of motion (ROM) of the hip joint, this ailment also causes pain and makes it difficult for the patient to stand, sit on their buttocks, and walk normally.
    • Hip joint movement causes pain when the gluteal muscles are irritated.
    • The buttock feels bloated, warm, and somewhat red due to inflammation, which is caused by deep bleeding that is not immediately visible on the skin’s surface.
    • There is some tenderness in the gluteal area.

    What is diagnosed for gluteal muscle pain?

    • The medical professional first evaluates the painful location.
    • The first crucial step in assisting medical professionals in diagnosing a patient is taking their medical history.
    • History describes how the gluteal area was injured,
    • Depending on when the damage occurred, it may be either acute or chronic.
    • Is there a muscle tear or fracture present?
    • Does the patient have the ability to walk while exhibiting signs of leg numbness?
    • Examine the swelling in the painful location during the observation phase.
    • Additionally, note the redness where the pain is.
    • Feel the swelling during the palpation phase.
    • Check the place that hurts; it may be warm because of inflammation.
    • Examine the region of pain for soreness.
    • Check the hip joint’s range of motion during the examination; it may have decreased as a result of the pain.
    • Additionally, assess the hip joint’s muscle strength.
    • X-rays aid in identifying hip, pelvic, and lumbar spine fractures.
    • Large blood collections deep inside the gluteal muscle can be helped by ultrasound, which is also used to screen for infections in the gluteal area.

    What is the treatment for gluteal muscle pain?

    • The RICE principle was initially applied to pain management.
    • R-rest = The patient is usually encouraged to take occasional breaks.
    • I-ice = 20 minutes of ice application on the painful location; the patient is accustomed to using an ice pack or frozen ice cubes.
    • The compression that is applied to the pillow to reduce swelling is called C-compression.
    • E: Elevation: Apply a pillow beneath the feet to relieve pain in that location.
    • With time, the majority of gluteal muscle soreness subsides and heals.
    • With time, the majority of gluteal muscle soreness subsides and heals.
    • To lessen the pain of sitting on a bloated buttock or gluteal area, try a rubber doughnut.
    • The physical therapist teaches the patient gait training if the patient has an aberrant walking pattern.
    • In certain cases, medical professionals recommend steroid injections.
    • In order to target the site of inflammation with the injected steroid, a long needle is placed close to the injury site using ultrasonography.
    • Although it is not often thought of, surgery is required when nonsurgical treatments are ineffective.
    • Repairing torn muscles is also necessary.

    Electrotherapy Treatment

    • In the electrotherapy used US – ultrasonic therapy on the tender pain for the reduction of swelling & pain.
    • used inferential current treatment, or IFC, to lessen pain.
    • Transcutaneous electrical nerve stimulation, or TENS, improves radicular pain in patients who exhibit radicular symptoms.

    What is stretching for gluteal muscle pain?

    • Gluteal stretch
    • Lying Deep Gluteal Stretch
    • Groin and long adductor muscle stretch
    • Seated figure-four stretch
    • Seated glute stretch

    Gluteal stretch:

    Supine-gluteal-stretch
    Supine-gluteal-stretch
    • The supine posture serves as the exercise’s starting position.
    • The patient is lying on their back, then they are lifting their knee and crossing from their right ankle to their left knee.
    • Next, lightly grasp the left thigh.
    • Draw the hips closer to the chest.
    • For 30 seconds, maintain this stretching position.
    • Next, do the three workouts each day.

    Lying Deep Gluteal Stretch:

    • The workout begins with you in the supine posture.
    • The patient’s legs are excessively bent while they lie on their back.
    • Then, keeping the head and back on the floor, slowly draw it toward the patient while tying both hands together behind the left leg.
    • For 20 to 30 seconds, maintain this stretching position.
    • then use the other leg to perform this exercise again.
    • then complete the three daily workouts.

    Groin and long adductor muscle stretch:

    • In order to keep their legs straight in front of their bodies, the patient is sitting on the floor with their legs spread out too far.
    • Keep your elbows on the floor and lean forward.
    • For 30 seconds, maintain the position.
    • Next, do the three workouts each day.

    Seated figure-four stretch:

    • The Seated Pigeon Pose is another name for this.
    • The hands should then be placed on the shins.
    • Then, to extend the stretch, bend forward a little while maintaining a straight spine.
    • Do the stretching posture three times in a single session, holding it for 30 seconds each time.
    • After that, go back to where you were before you started stretching.
    • Next, repeat with the opposite leg.
    • Both standing and sitting on the floor are used for this stretching.

    Seated glute stretch:

    Seated-gluteal-stretch
    Seated-gluteal-stretch
    • Raise the left leg while maintaining a straight back.
    • On the right knee joint, place the left ankle joint.
    • After that, lean forward a little and feel the patient extend the stretch.
    • Do this three times in a single session, holding the pose for 30 seconds each time.
    • Stretch the opposite side as before.

    Strengthening exercise for gluteal muscle pain

    • Buttocks
    • Knee to the opposite shoulder
    • Side Leg Raises
    • Prone Straight Leg Raises
    • Glute bridge with band
    • Seated hip abduction with resistance band
    • Spiky ball roll on glutes
    • Bridges
    • Knee to Chest
    • Downward-Facing Dog
    • Pigeon Pose

    Buttocks:

    • The workout begins in the supine posture.
    • The patient Rest on your back.
    • After that, raise the affected leg to a straight angle.
    • then locking onto the head’s fingers.
    • Place the ankle joint against the knee joint while holding the unaffected leg.
    • Repeat this practice on the other side.
    • Next, do the three workouts each day.

    Knee to the opposite shoulder:

    • The supine posture serves as the exercise’s starting position.
    • The patient is on their back with their feet flexed upward and both legs outstretched.
    • Next, bend your right leg and wrap both hands around your knee.
    • Then Pull the leg gently in the direction of the left shoulder over to the torso.
    • For 30 seconds, maintain this workout stance.
    • To return the leg to its initial position, push the knee joint.
    • After that, perform this exercise three times a day.

    Side Leg Raises exercise:

    • The patient’s legs are piled while they are on one side.
    • For support, the patient is bent to the bottom leg.
    • After ten seconds of holding this workout stance, release your tension.
    • After that, do this exercise ten times in a single session.
    • Perform this workout three times a day.

    Prone Straight Leg Raises exercise:

    • The prone posture is where you begin the activity.
    • Lay flat on your stomach, patient.
    • Surely Maintain a straight posture.
    • After that, tighten the muscles in the bottom and one leg’s hamstrings.
    • They raise one leg toward the ceiling.
    • For ten seconds, maintain this exercise position.
    • Perform this workout three times a day.

    Glute bridge with a band:

    Banded-Glute-Bridge
    Banded-Glute-Bridge
    • The supine posture serves as the exercise’s starting position.
    • Wrap the calves with a small, snug resistance band.
    • The patient is elevating their hips while lying on their back.
    • Surely Maintain the band’s tension while you tap the hip joint to the ground and then raise it back up.
    • Maintaining a straight spine and performing the action from the hip joint is crucial.
    • In a single session, perform this exercise ten times.
    • Perform this workout three times a day.

    Seated hip abduction with resistance band:

    • Sitting is a good starting position.
    • Next, The hands should be placed just behind the patient.
    • Surely As the legs externally rotate the hip joint, maintains a straight back and pushes them out to the sides.
    • The legs should then be brought back together gently and carefully.
    • In a single session, perform this exercise ten times.
    • Perform this workout three times a day.

    Spiky ball roll on glutes:

    • The supine posture serves as the exercise’s starting position.
    • Roll the tense muscles into the buttocks with the spiked ball.
    • Next, roll the ball once for 30 seconds around to the fleshy area of the buttock.
    • Do this workout 10 times in 1 session.
    • Three times a day, perform this workout.

    Bridges:

    • The patient’s feet then make contact with the ground.
    • Next, lift your hips toward the ceiling.
    • For ten seconds, maintain this exercise position.
    • Perform this workout ten times in a single session.
    • Do this exercise three times a day.

    Knee to Chest:

    Knee to Chest
    Knee to Chest
    • The starting position is supine.
    • Turn over on your back.
    • Hold for ten seconds.
    • With the opposing knee, repeat this technique from knee to chest.
    • Do this workout three times a day and ten times a session.

    Downward-Facing Dog:

    • Then press into the hands as far as the elevation of the hip joint toward the ceiling.
    • Bring the ears into alignment with the upper arms and chin by lowering the head all the way toward the chest.
    • For the pelvis to tilt slightly forward, bend at the knee joint.
    • After that, proceed to the body and any different sensation for the proper.
    • Hold this stance for a maximum of one minute.
    • Three times a day, perform this yoga position.

    Pigeon Pose:

    Pigeon-Pose
    Pigeon-Pose
    • beginning with limbs on all fours.
    • Place the shin on the floor after moving the right knee joint toward the right wrist.
    • Next, move from your right ankle to your left wrist.
    • Next, extend your spine.
    • Walk the hands forward gently.
    • For five to ten breaths, hold this stance.
    • Then Return to the starting location.
    • Repeat after switching the legs.
    • Practice this yoga three times a day.

    Prognosis & Recovery Time for gluteal muscle pain

    Depending on the type of damage, which is measured in weeks rather than days, the majority of traumatic gluteal injuries that produce pain go away on their own with time and conservative therapy.
    Although gluteal overuse injuries take longer to recover, the aim of treatment for gluteal muscle pain is to get patients back to their pre-injury level of function.

    Is it possible to prevent gluteal muscle pain?

    Gluteal muscle pain can indeed be avoided.
    Accidental falls must be avoided by people in order to prevent them.
    The balance problem in older patients needs to be addressed.
    Stretching warming up and cooling down before engaging in any activity can help reduce the chance of injury.

    FAQs

    Does walking help with gluteal pain?

    Indeed, walking can play a significant role in your gluteal tendinopathy rehabilitation and recovery, but there are a few things to take into account. In fact, going overboard can make matters worse. We’ll examine how you might modify your walking to help with your recuperation in this post.

    When you have gluteal pain, how do you sit?

    Avoid prolonged sitting, go for quick walks, or switch between sitting and standing if you have piriformis syndrome-related buttock pain. To assist in transferring weights equally across the pelvis and through the spine, sit with an erect, neutral posture and refrain from leaning forward or drooping.

    Does walking help with soreness in the buttocks?

    One of the greatest ways to manage buttock pain resulting from arthritis or injuries to your hips or lower back is to engage in regular exercise. According to Claudette Lajam, MD, an orthopedic specialist from NYU Langone in New York City, “buttock pain can be caused by any type of arthritis that affects the hips or lower back.”

    How can gluteal pain be avoided?

    Over-the-counter (OTC) drugs, heat and/or cold therapy, and mild stretching exercises that focus on the buttock, hip, and lower back muscles can all be used to treat buttock muscle pain.

    Which workout is most effective for buttock pain?

    With one ankle resting on the opposing knee, cross one leg over the other. After 20 to 30 seconds of holding the stretch, take a 20 to 30-second break.

    How can someone with gluteal pain sleep?

    For proper spine alignment, tuck your chin in and keep your legs straight or just slightly bent. Try sleeping in a reclined posture, such as on an adjustable bed, or reclining chair, or with a wedge pillow for support and comfort, if standing upright exacerbates your pain and leaning forward relieves it.

    What is the natural cure for pain in the buttocks?

    Stretch your legs, hips, and buttocks gently every day. When sitting, use a cushion to reduce pressure points. Consult your physician if, after two weeks, nothing has changed or if new problems appear.

    What is the duration of gluteal pain?

    It may take up to a year for symptoms of gluteal tendinopathy to go away, although about half of patients will recover without treatment. That’s a long time to live with hip pain, especially considering that after eight weeks of physical therapy exercises, seven out of ten patients experience noticeable improvements.

    How can a torn gluteal muscle be healed the quickest?

    Rest: You should stay away from high-impact activities and exercises, according to your doctor. Ice, Compression: To lessen pain, apply pressure on the affected area with an elastic bandage. Elevation: To reduce swelling, you will be told to raise your leg.

    How can I eliminate severe gluteal pain?

    Nonsurgical treatments for deep gluteal pain syndrome include compression, ice, rest, and activity adjustment. If these steps don’t work, you might need: Anti-inflammatory medications administered to reduce swelling and pain. Use muscle relaxants to ease tense muscles.

    References

    • Ladva, V. (2023, June 17). Gluteal pain: Causes, Symptoms, Diagnosis, Treatment. Samarpan Physiotherapy Clinic. https://samarpanphysioclinic.com/gluteal-muscle-pain/
    • Physiotherapist, N. P.-. (2024, February 11). Gluteus Muscle: Origin, Insertion, Innervation & Exercise. Mobile Physiotherapy Clinic. https://mobilephysiotherapyclinic.in/gluteal-muscle-details-and-exercise/
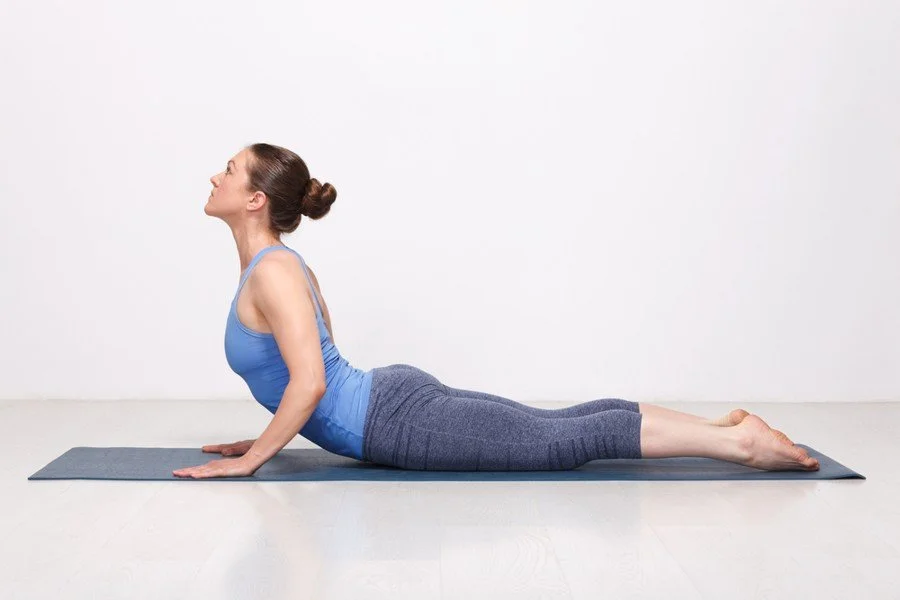
  • Quadriceps Tightness

    Quadriceps Tightness

    Introduction

    Quadriceps tightness is the sensation of stiffness or tension in the muscles at the front of the thigh. Walking, sprinting, jumping, and squatting all rely heavily on the quadriceps, a group of four muscles. Tightness can be caused by a number of circumstances, including overuse, injury, or extended sitting.

    Anatomy of Quadriceps muscle

    The quadriceps tendon joins the quadriceps muscles to the patella, while the patellar ligament connects the patella to the tibia.
    The quadriceps are necessary for motions that involve elevating the leg and extending the knee, making them important in many daily tasks and sports.

    Function

    Walking, sprinting, crouching, and jumping all need knee extension, and the quadriceps are essential for this. When the leg moves, these muscles work together to straighten the knee joint. Furthermore, the rectus femoris helps to flex the hip since it crosses both the hip and knee joints.

    Common Causes of Quadriceps Tightness

    • Overuse or Strain
    • Dehydration or Electrolyte Imbalance
    • Poor Posture or Sitting for Long Periods
    • Muscle Imbalance
    • Injury or Trauma
    • Inadequate Warm-Up
    • Post-Exercise Recovery

    Overuse or Strain: Running, cycling, and weightlifting are all examples of prolonged or vigorous activity that can cause quadriceps stiffness. Excessive exercise or an insufficient warm-up can also contribute.

    Dehydration or Electrolyte Imbalance: Inadequate hydration or mineral imbalances such as potassium and magnesium can result in muscular cramps and tightness.

    Poor Posture or Sitting for Long Periods: Sitting with your hips flexed for a lengthy amount of time might cause quadriceps shortening and tightness. This is especially common with sedentary occupations or activities.

    Muscle Imbalance: If other muscles, such as the hamstrings or glutes, are weak or underused, the quadriceps may overcompensate, causing tightness and pain.

    Injury or Trauma: A direct impact to the quadriceps, such as that sustained during a fall or contact sport, can cause muscle stiffness and tightness.

    Inadequate Warm-Up: Not warming up adequately before physical activity increases the risk of muscle tightness and strain.

    Post-Exercise Recovery: Muscles may tighten when they recover from strenuous exercise.

    Symptoms

    The primary signs of quadriceps tightness include:

    • Stiffness and tension in the front of the thigh.
    • Pain, especially when extending or flexing the knee.
    • Limited range of motion in the knee.
    • Muscle cramps or spasms.
    • Soreness after activity.
    • Weakness or instability in the legs.
    • Tenderness to touch in the quadriceps area.
    • Difficulty walking or moving, especially after prolonged sitting.
    • Swelling or bruising if related to injury.

    When to See a Doctor

    Physicians may recommend you to a physical therapist, orthopedic expert, or neurologist for additional treatment and rehabilitation if they identify a specific problem that calls for specialized care (such as muscle strain, nerve compression, or injury). To relieve the tightness and increase mobility, a physical therapist can provide focused exercises and modalities.

    Diagnosis

    To find out why you have tight quadriceps, a medical professional, such as a doctor or physical therapist, might do the following tests:

    • Medical History
    • Physical Examination
    • Imaging

    Medical History: carefully examining current activity, previous injuries, and ways of life.

    Physical Examination: Strength testing, range-of-motion tests, quadriceps palpation, and a look for any pain areas or muscular imbalances.

    Imaging: It is possible to rule out structural problems (such as tears, arthritis, or patellar tendinopathy) via X-rays or MRI scans.

    Treatment

    • Medical
    • Physical Therapy
    • Surgical( if required)

    Medical Treatment:

    If there is an accompanying strain or injury to the quadriceps, over-the-counter (OTC) NSAIDs such as naproxen (Aleve) or ibuprofen (Advil, Motrin) can help reduce inflammation, soreness, and muscular stiffness.
    Because long-term use of these medications can have negative effects, they should only be used as prescribed and for brief periods.

    Physical Therapy Treatment

    • Stretching
    • Strengthening Exercises
    • Manual Therapy
    • Dry Needling
    • Ultrasound Therapy

    Stretching

    • Standing Quad Stretch
    • Kneeling Quad Stretch
    • Lying Quad Stretch
    • Prone Quad Stretch
    • Quad Extend with a Towel or Strap
    Quadriceps stretching exercises
    Quadriceps stretching exercises

    Standing Quad Extend:

    • Your feet should be hip-width apart.
    • As you pull your foot closer to your glutes, bend one knee.
    • Gently bring your ankle closer to your torso by grabbing it with your hand.
    • Keep your standing leg slightly bent and your knees close together to stay balanced.

    Kneeling Quad Stretch:

    • Both of your knees should be on the bottom.
    • Step forward with one foot while bending your knee to a 90-degree angle.
    • Take hold of your other leg’s ankle( the one on the floor) and slowly bring it up to your glutes.
    • You can make the stretch more intense by pushing your hips forward.
    Kneeling-quadriceps-stretch
    Kneeling-quadriceps-stretch

    Lying Quad Stretch:

    • With your legs outstretched, lie on your side.
    • Bring the heel up to the glutes and bend the top knee.
    • drag your ankle gently towards your core with your hand.
    • Keep your shoulders and hips stacked to prevent overrotation.
    side-lying-quadriceps-stretch
    side-lying-quadriceps-stretch

    Quad Stretch with a Towel or Strap:

    • Place yourself flat on your stomach.
    • Wrap your ankle on the bowed leg with a cloth or strap.
    • Stretch your quadriceps by gently pulling the strap or cloth toward your glutes.

    Dry Needling

    In order to relieve tension, a tiny needle is inserted into muscle trigger points. This may lessen tense muscles and increase blood flow to the afflicted area.

    Strengthing Exercise

    • Squats
    • Lunges
    • Step- Ups
    • Wall Sits
    • Straight Leg Raises
    • Resistance Band Squats

    Squats

    1. Position your toes slightly outward and your bases shoulder-width apart.
    2. As though you were sitting in a chair, lower your hips back while maintaining your knees behind your toes.
    3. As deeply as it seems comfortable, lower your body until your thighs are parallel to the floor.
    4. Put pressure on your heels to get back to standing.
    5. Perform 10 – 15 reps in 3 sets.
    chair squats
    chair squats

    Lunges

    1. With your feet together, take a tall stance.
    2. Lower your body to a 90-degree angle with both knees by taking a big stride forward with one leg.
    3. The front knee should stay below the toes, while the rear knee should droop slightly above the ground.
    4. To get back to where you were before, push through the front heel.
    5. For each leg, do three sets of 10 – 12 repetitions.
    static lunges
    static lunges

    Step- Ups

    1. Take a position facing a stable step or bench.
    2. Stepping up with one foot, raise your body by pressing through the stepping foot’s heel.
    3. perform by holding a step down with the same foot.
    4. perform 10 – 15 reps per leg in 3 sets.
    step-ups
    step-ups

    Wall Sits

    1. Maintain a 90-degree angle at your knees as you slide into a squat position while standing with your back against a wall.
    2. Maintain the posture for 30 to 60 seconds, paying close attention to using your quadriceps.
    3. Rest and perform two or three times.
    Ball Wall Squats
    Ball Wall Squats

    Straight Leg Raises

    1. One leg should be bent and the other straight while you lie flat on your back.
    2. Raise the straight leg slowly, keeping up the knee straight, about 6 to 8 height above the ground.
    3. Drop it back down after a brief moment of holding.
    4. perform 10 – 15 reps per leg in 3 sets.
    Straight-leg-raise
    Straight-leg-raise-

    Box Jumps

    1. Take a place facing a sturdy box or stand.
    2. Leap onto the box while bending your knees, landing with both feet simultaneously.
    3. Repeat after slowly stepping down.
    Box Jump
    Box Jump

    Resistance Band Squats

    1. On the resistance band, place both of your bases shoulder-width apart.
    2. You can either loop the band around your shoulders or hold the handles.
    3. Squat by lowering your body and pressing your hips back.
    4. To get back to where you were before, push through your heels.
    5. Perform 10 – 15 reps in 3 sets.
    Resistance band squat
    Resistance band squat

    Ultrasound Therapy

    A physical therapist might employ therapeutic ultrasonography, which increases blood flow, promotes healing, and penetrates deep tissues using sound waves. In the quadriceps, this can aid in reducing inflammation and relaxing the muscles.

    Prevention

    • Warm up properly before exercise.
    • Stretch regularly, especially the quadriceps.
    • Strengthen opposing muscles( hamstrings, glutes).
    • Use proper form and avoid overuse.
    • Cool down and stretch after exercise.
    • Foam roll to release tightness and improve flexibility.
    • Stay watered and consume a balanced diet.
    • Manage stress to reduce muscle tension.
    • Incorporate active recovery into your routine.
    • Avoid long-term sitting and maintain good posture.

    Summary

    When the big muscles at the front of the leg feel stiff or uncomfortable, it’s called quadriceps tightness. This disorder can impair flexibility, produce pain, and interfere with mobility. Dehydration, poor posture, muscular imbalances, overuse, and lack of stretching are all common causes of tight quadriceps. Physiotherapy treatments like stretching, strengthening, and manual therapy help the patient to recover and relieve their tight muscle.

    FAQ’s

    What causes quadriceps tightness?

    Overuse
    Lack of stretching
    Muscle imbalances
    Poor posture
    Injury
    Dehydration

    Can dehydration cause quadriceps tightness?

    Indeed, cramping and muscle tightness, especially in the quadriceps, can be caused by dehydration. Drinking adequate water is important, particularly if you’re exercising vigorously or perspiring a lot. Magnesium and potassium are two electrolytes that are crucial for muscular function.

    Can tight quads lead to knee pain?

    It is true that persistent quadriceps tightness can impact knee mechanics and perhaps result in knee pain. Tightness or weakening in the quadriceps can change movement patterns and cause knee pain or discomfort because they are crucial for stabilizing the knee joint.

    How do I know if I have tight quadriceps?

    a sensation of pain or stiffness at the front of the leg.
    difficulty bending or fully straightening your knee.
    quadriceps soreness or tenderness following exercise.
    tightness that gets worse when you do particular things, like squatting or climbing stairs.

    What stretches are best for tight quads?

    Standing quad stretch
    Kneeling quad stretch
    Lying quad stretch