Blog

  • Chronic Obstructive Pulmonary Diseases (COPD)

    Chronic Obstructive Pulmonary Diseases (COPD)

    What is a Chronic Obstructive Pulmonary Diseases (COPD)?

    Chronic Obstructive Pulmonary Disease (COPD) is a progressive lung condition that causes airflow obstruction, making breathing difficult.

    People with COPD may experience lung damage or phlegm blockage. Symptoms include fatigue, wheezing, breathing difficulties, and coughing, occasionally with phlegm.

    The most prevalent causes of COPD are air pollution and smoking. Other health issues are more likely to affect people with COPD.

    Although there is no cure for COPD, symptoms can be lessened if a person gets vaccinated against illnesses and abstains from smoking and air pollution. Additionally, medications, oxygen, and pulmonary rehabilitation can be used to treat it.

    When you have COPD, the airways and lungs will change as follows:

    • Loss of flexibility in the lungs’ alveoli, or air sacs, and airways.
    • Airway constriction, inflammation, and scarring (fibrosis).
    • Mucous in your airways that is thick.
    • The walls connecting your alveoli are destroyed. They get bigger and trap more air as a result.
    • Flare-ups, or worsening of symptoms, such as coughing, wheezing, thicker mucus, and extreme difficulty breathing, are common in people with COPD. Significant exacerbations may require hospitalization.
    • As time goes by, COPD grows worse. Flare-ups occur more frequently and become more severe. Although some people deteriorate more quickly, this often takes years or decades.

    Pathophysiology

    • The pathological alterations associated with COPD are caused by the aforementioned pathogenic processes. These lead to physiological anomalies, including ciliary dysfunction and mucous hypersecretion, obstruction of airflow and hyperinflation, abnormalities in gas exchange, pulmonary hypertension, and systemic consequences.

    Hypersecretion of mucus and malfunctioning cilia

    A persistent productive cough is the result of mucous hypersecretion. Although not always linked to airflow obstruction, this is a feature of chronic bronchitis, and not all COPD patients experience clinical mucus hypersecretion.

    Squamous metaplasia, a rise in goblet cells, and enlarged bronchial submucosal glands are the causes of the hypersecretion, which is caused by persistent irritation by harmful particles and gases. Squamous metaplasia of epithelial cells causes ciliary malfunction, which manifests as an aberrant mucociliary escalator and difficulties expectorating.

    Blockage of airflow and air trapping or hyperinflation

    The tiny conducting airways with a diameter of less than 2 mm are the primary location of airflow restriction. This is due to inflammatory exudates in the tiny airways, as well as irritation and narrowing (airway remodeling). Loss of lung elastic recoil (caused by alveolar wall disintegration) and alveolar support (caused by alveolar attachments) are additional variables that contribute to airflow blockage.

    During expiration, the airway blockage gradually traps air, causing resting hyperinflation and active hyperinflation during exercise. During exercise, hyperinflation lowers the inspiratory capacity and, consequently, the functional residual capacity. These characteristics lead to the dyspnea and restricted exercise ability that are characteristic of COPD. Spirometry is the most accurate way to measure airflow obstruction in COPD, and it is a requirement for the diagnosis of the condition.

    Abnormalities in gas exchange

    They are characterized by arterial hypoxemia with or no hypercapnia and arise in advanced illness. The primary mechanism for improper gas exchange is an aberrant distribution of ventilation: perfusion ratios, which is caused by the structural alterations present in COPD. There is a strong correlation between the severity of emphysema and the degree of impairment of the diffusing capacity of carbon monoxide per liter of lung volume.

    Hypertension in the lungs

    This appears when major problems in gas exchange occur late in COPD. Endothelial dysfunction, pulmonary arterial remodeling (hypertrophy and hyperplasia of smooth muscles), pulmonary arterial constriction (due to hypoxia), and pulmonary capillary bed degradation are all contributing factors. Persistent hypertension of the lungs and right ventricular hyperactivity or enlargement and function (cor pulmonale) are caused by structural alterations in the pulmonary arterioles.

    Chronic obstructive lung disease types

    Emphysema and chronic bronchitis are also included in COPD. Both traits are frequently present in people with COPD.

    When your alveoli get destroyed and expanded, you get emphysema. The most common symptom is dyspnea, or shortness of breath.

    Your big airways get inflamed when you have chronic bronchitis. This causes your airways to narrow and produces a lot of mucus. The most typical symptom is coughing.

    Chronic bronchitis

    • Although the phrase “chronic bronchitis” may still be used, chronic obstructive pulmonary disease (COPD) is the most correct word today. Only a few individuals have chronic bronchitis without the airway blockage (obstruction) of COPD.
    • An inflammation of the trachea, bronchi, or bronchioles in your lungs is known as chronic bronchitis. For two years or more, people with chronic bronchitis have symptoms including coughing and shortness of breath most days of the month, three months of the year.
    • A virus, such as the flu or the common cold, is typically the cause of acute bronchitis. From just a few days to a few weeks, it lasts. When you experience bronchitis symptoms on a regular basis for two years or more, you have chronic bronchitis. Usually, smoke or other irritating substances for the lungs are the culprit.

    People who smoke or used to smoke are frequently affected by chronic bronchitis, or COPD, but you may also be at risk if you:

    • Are in close proximity to a smoker.
    • Are regularly exposed to dust, chemicals, or air pollution.
    • Suffer with asthma.
    • Frequent coughing and feeling short of breath due to lung damage is known as chronic bronchitis.
    • Your immune system reacts to irritation of your airways, causing them to expand and fill with mucus.

    Although bronchitis is usually transient, recurrent irritation of the airways (such as through cigarette smoke or air pollution) can lead to damage that produces an excess of mucus-producing cells (goblet cells). Furthermore, cilia—tiny, hair-like structures—that remove mucus can occasionally malfunction. Your airways enlarge and frequently fill with mucus as a result of this injury. They cough and have breathing difficulties as a result.

    Additionally, you have an increased risk of developing bacterial and viral lung infections, which can exacerbate your symptoms.

    What is emphysema?

    • Destruction to the walls of your lungs’ alveoli causes emphysema, a lung condition. It’s possible for an obstruction to form, trapping air in your lungs. Your chest may seem larger or barrel-chested if there is excessive air trapped in your lungs. Less oxygen enters your bloodstream when your alveoli are smaller.
    • Deep within your lungs, at the tip of your bronchial tubes (airways), are clusters of tiny, delicate air sacs called alveoli. About three hundred million alveoli make up a normal set of lungs. The air goes through the bronchial tubes as you inhale, eventually arriving at the alveoli. The alveoli expand, take in oxygen, and deliver it to your blood once the air reaches it. Your alveoli contract when you exhale, forcing carbon dioxide from your body.
    • Your lungs are like bubble wrap. Single bubbles in the bubble wrap are analogous to the alveoli. Your alveoli will eventually burst if you have emphysema. You create a giant air pocket, similar to a large shipping air pillow, in place of several tiny bubble wrap bubbles. This damage reduces the total surface area of your lungs, making it more difficult for new air to enter and exit your lungs. You become short of breath and have trouble breathing as a result.

    Typically, emphysema appears after years of smoking. But there are additional causes of emphysema. These consist of:

    • contaminants in the air at home or at work.
    • Alpha-1 antitrypsin insufficiency is one example of a genetic (inherited) component.
    • infections of the respiratory system.
    • What are the emphysema stages?
    • COPD is divided into four stages by the Global Initiative for Chronic Obstructive Lung Disease (GOLD). Although emphysema can cause COPD, not all emphysema patients also have COPD. Medical professionals explain emphysema using the phases of COPD. The phases are:
    • The first stage of emphysema is the mildest. Your lungs function at least eighty percent as well as those of a healthy person of the same sex, age, and height.
    • Stage 2: This type of emphysema is moderate. Like the normal lungs of a person of the same age, height, and sex, your lungs function between 50% and 79%.
    • Severe emphysema is stage 3. Compared to the lung health of a person of the same age, height, and sex, your lungs function between 30% and 49%.
    • Emphysema at stage four is really severe. Compared to a healthy person of the same age, height, and sex, your lungs function less than thirty percent as well.

    Causes and Symptoms

    What signs of COPD are present?

    COPD symptoms include:

    • Cough up mucous that you’ve accumulated for a while (at least two years, three months at a time).
    • Inability to inhale deeply.
    • Breathlessness, particularly during routine tasks or with light exertion.
    • Additional lung noises, such as wheezing.
    • Chest fashioned like a barrel.
    • Cyanosis (blue skin).

    Why does COPD occur?

    • The primary cause of COPD is lung damage from smoking. Other reasons are as follows:
    • Lung injury may result from alpha-1 antitrypsin deficiency, a hereditary condition.
    • Second hand smoke.
    • Contamination of the air.
    • Dust and fume exposure from your occupation or pastimes.

    What are this condition’s risk factors?

    • Although the largest associated risk for COPD is smoking, not all smokers will get the disease. You might be more susceptible to COPD if you:
    • Are women and above 65 years old.
    • Been exposed to pollutants in the air.
    • Have dealt with dust, fumes, or chemicals.
    • Have a lack of alpha-1 antitrypsin.
    • Had numerous childhood respiratory illnesses.

    What COPD problems exist?

    Infections can result from bacteria being trapped in your lungs by COPD. Additionally, it can stop carbon dioxide from leaving your body and oxygen from entering. Serious issues could result from this, such as:

    • Pneumonia.
    • Elevated blood carbon dioxide levels (hypercapnia).
    • Hypoxemia, or low blood oxygen levels.
    • Respiratory malfunction.
    • Hypertension of the lungs.
    • Heart failure on the right side (cor pulmonale).
    • Lung collapse (pneumothorax).
    • Making too many red blood cells is known as polycythemia.

    Testing and Diagnosis

    How can someone be diagnosed with chronic obstructive pulmonary disease (COPD)?
    A healthcare professional will examine you and inquire about your medical history in order to diagnose COPD. In addition to testing your lung function, they may take pictures of your lungs.

    Which tests are used by medical professionals to diagnose COPD?

    Testing for pulmonary function. Spirometry is and other tests can be used by healthcare professionals to assess the function of your lungs.

    Oximetry of the pulse: This test measures the amount of oxygen in your blood using an instrument on your finger.

    Imaging examinations: CT scans or chest X-rays can check for lung abnormalities caused by COPD.

    Test for arterial blood gas: This blood test measures your levels of carbon dioxide and oxygen.

    Test your muscles: This is how your doctor determines whether activity causes your blood’s oxygen level to decline.

    EKG, or electrocardiogram: This test examines the function of the heart and eliminates heart disease as a potential cause of dyspnea.
    blood examinations. To determine whether you may have Alpha-1 antitrypsin deficiency, your healthcare professional may measure your levels of the protein AAT.

    Genetic analysis: Your doctor may perform a blood test to look for genetic alterations if they believe a genetic condition may be the source of your lung problems.

    What phases does COPD go through?

    The results from your forced expiratory volume in one second (FEV1) might be used by your healthcare professional to stage COPD. Your FEV1 can inform your doctor how restricted your airways are because it measures how much air you can exhale in a second. Your provider uses spirometry to determine FEV1.

    The severity-based COPD phases are:

    • FEV1 is 80 or higher in stage 1.
    • Stage 2: FEV1 ranges from 50 to 79.
    • Stage 3: FEV1 ranges from 30 to 49.
    • FEV1 is less than 30 in stage four.
    • Additionally, your provider can use groups with the numbers A, B, and E to assess your symptoms and risk of exacerbation:

    A: Your symptoms are minor, and there is little chance that they will worsen.

    B: You are less likely to experience exacerbations and your symptoms are more severe.

    E: Your risk of exacerbations is high.

    Your symptoms aren’t always correlated with your stage; for example, you may be in stage 3 or 4, yet still have minor symptoms. Your stage, symptoms, and frequency of exacerbations can all be used by your healthcare professional to inform your course of treatment.
    Handling and Therapy

    What is the treatment for COPD?

    COPD has no known cure. Reducing your symptoms and preventing and managing exacerbations are the main goals of treatment. Your healthcare practitioner might suggest:

    Programs to help people stop smoking. The development of COPD can be slowed down by quitting smoking.

    Inhaled drugs: Steroids and bronchodilators help expand your airways and lessen inflammation. These may be available as a liquid to use in a nebulizer or as an inhaler.

    Oxygen treatment: To raise your oxygen levels, you could require more oxygen.

    Rehabilitation for the lungs: This regimen of information and exercise will help you manage COPD and improve your lungs.

    Corticosteroids: During an exacerbation, you may require a course of steroids to alleviate inflammation.

    Positive airway pressure: To assist you breathe, particularly during an exacerbation, your doctor may prescribe a BiPAP machine.
    antibiotics.

    Your doctor can recommend antibiotics if you frequently get bacterial lung infections in order to stop infections and flare-ups.

    Lowering of lung volume (LVR): Your doctor might recommend surgery or a valve operation that lowers the amount of air trapped in your lungs if you have severe COPD and are a good candidate.

    Clinical experiments: New medicines are tested in clinical trials to determine their efficacy and safety. If a new treatment seems like a good fit, your provider may suggest one.
    rehabilitation for the lungs. Exercises and other techniques to help you breathe more easily and enhance your quality of life are taught in pulmonary rehabilitation.

    Steroids.: To lessen inflammation, your doctor may recommend corticosteroids, either as a tablet or in an inhaler.

    Surgery to reduce lung volume (LVRS): A section of your damaged lung tissue is removed during LVRS, and the remaining tissue is joined together. By removing the damaged tissue, you may be able to enhance the flexibility of your lungs and reduce pressure on your breathing muscles. Results from LVRS are often encouraging. But not every emphysema patient is a good candidate for this procedure.

    Lowering of lung volume by bronchoscopy: A clinician inserts a one-way valve into your airways during a bronchoscopic lung volume reduction procedure. Air can exit those parts of your lungs through the valve, but it cannot enter. By decreasing the amount of “trapped” air in your lungs, this makes breathing easier. This treatment is not appropriate for all emphysema patients.

    Prevention

    Is it possible to prevent COPD?

    Avoiding smoking, secondhand smoke, and other lung-damaging pollutants is the greatest method to prevent COPD.

    Respiratory infections are more common in people with COPD, and they can cause significant exacerbations of symptoms or even pneumonia. You can lower your chance of contracting illnesses by:

    Getting all the recommended immunizations, such as those for COVID-19,

    • pnumococcal pneumonia, and the flu.
    • frequently washing your hands.
    • Cleaning surfaces.
    • If your healthcare physician advises it, wearing a mask around other people.
    • Avoiding busy areas, particularly when COVID instances are high and the cold and flu seasons are upon us.

    How can someone with COPD take care of themselves?

    Here are some self-care suggestions for people with COPD:

    • Avoid anything that exacerbates your symptoms, including lung irritants. This includes dust, air pollution, smoking, secondhand smoke, and overpowering scents.
    • Attend programs for pulmonary rehabilitation. This covers education sessions as well as occupational and physical therapy. Even when your sessions are over, stick to the strategy they provide.
    • Speak with a certified dietitian. They can advise you on which things to eat or stay away from in order to maintain your health.
    • As directed, take all of your prescription drugs. Before you run out, make sure you have your daily prescriptions on hand.
    • Prepare yourself for flare-ups. Create a plan with your healthcare professional about what to do in the event of an exacerbation. This could entail knowing when to visit the hospital and keeping specific prescriptions on hand.
    • Understand how to operate your medical equipment. This can include CPAP machines, nebulizers, inhalers, and other equipment. Request that your provider illustrate proper usage.
    • Look after your emotional well-being. It might be detrimental to your mental health to have a chronic condition. You can manage social, emotional, and other mental health concerns with the assistance of a mental health professional, such as a psychiatrist, psychologist, or counselor.

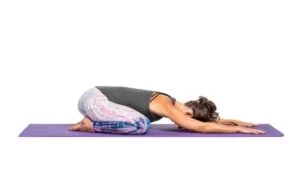
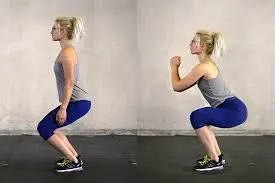
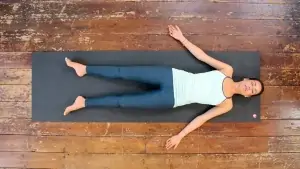
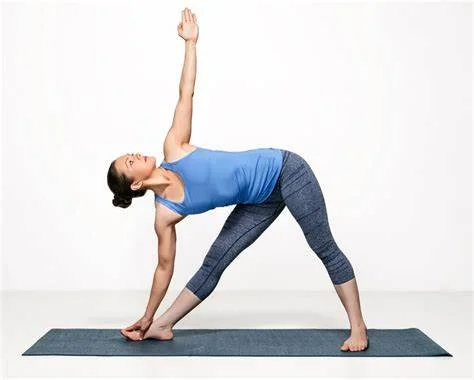
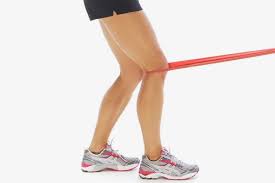
    COPD Physical Therapy

    Individuals experiencing chronic obstructive pulmonary disease (COPD) can benefit from physical therapy.

    Physical Therapy for respiratory disorders

    Breathing can be challenging if you have lung illness.

    Common issues may include the following, based on the type of lung disease:

    • Breathlessness is the inability to effectively breathe.
    • Difficulty supplying oxygen to your body or surrounding tissues, an accumulation of phlegm fluid in your lungs,
    • Development of a tumor within or near your lungs
    • You may find it more difficult to walk, exercise, and carry out daily tasks as a result of these issues.

    Physical therapy employs a variety of methods to address these issues.

    You will discuss your problem and symptoms with your Physical Therapist.

    How you are treated will depend on:

    • your health, your symptoms, and your ability to handle the projected course of therapy for your illness or disease
    • Plan of treatment

    Together, you and your Physical Therapist will create a treatment plan that could involve:

    Breathing exercises are methods to help clear mucus or phlegm manually or to lessen shortness of breath. To aid in lung expansion and phlegm clearance, use vibrations and percussion to release mucus or phlegm placement.

    Enhancing exercise and fitness education and self-management; providing guidance on the use of inhalers, nebulizers, and oxygen prescriptions; offering guidance and instruction on the use of devices to help clear your airway or lung volume loss; and offering pulmonary rehabilitation sessions in both community and hospital settings

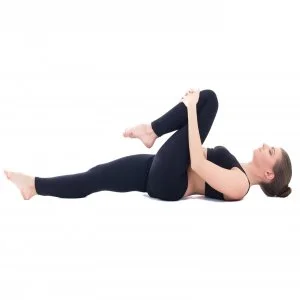
    Exercises for Breathing with COPD

    • Shortness of breath is one of the symptoms of chronic obstructive pulmonary disease (COPD) that breathing exercises can help you manage.
    • Try the huff cough and pursed lip breathing as exercises.
    • Pursed lips breathing exercise
    • synchronized breathing
    • Deep breathing Exercises
    • coughing, huffing, and diaphragmatic breathing

    Breathing with pursed lips

    Pursed-lip-breathing
    Pursed-lip-breathing
    • The following are some advantages of pursed lip breathing:
    • lowering dyspnea, boosting lung airflow, promoting relaxation, and expelling air that has been trapped in the lungs.
    • Using this method four to five times a day can be beneficial. Use these procedures to practice pursed lip breathing:
    • Breathe deeply via your nose while counting to two, keeping your mouth shut. Repeat the following sequence in your mind: “Inhale, 1, 2.” It is not necessary to take a deep breath. A normal breath will suffice.
    • Press your lips together as if you were blowing out the candles on a birthday cake or beginning to whistle. It’s called “pursing” your lips.
    • Breathe out slowly while keeping your lips pursed and counting to four. Avoid trying to expel the air. Breathe through your mouth slowly.

    Synchronized breathing

    • Anxiety caused by shortness of breath can drive you to hold your breath. You can use these two strategies to learn synchronized breathing and avoid this:
    • Before starting a workout, take a breath through your nose.
    • During the hardest portion of the workout, exhale through your mouth while pursing your lips. Curling upward on a bicep curl could serve as an illustration.

    Deep breathing

    Deep Breathing Exercise
    Deep Breathing Exercise
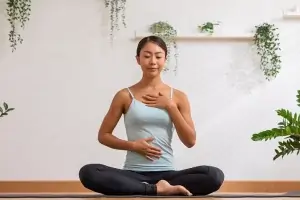
    • Breathing deeply helps keep air from becoming stuck in the lungs, which can make you feel out of breath. You are able to take in more fresh air as a result.
    • To practice deep breathing, follow these steps:
    • Keep the elbows slightly back while standing or sitting. Your chest can enlarge more completely as a result.
    • Take a deep breath through your nose.
    • Hold your breath while you count to five.
    • Exhale slowly and deeply through your nostrils until you feel as though the air you’ve breathed has been expelled.
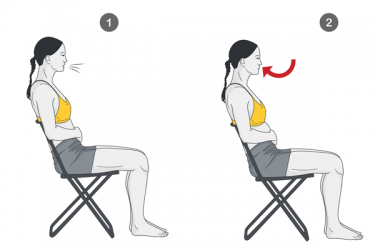
    Coughing huff

    • Mucus might accumulate in your lungs more readily if you have COPD. The purpose of the puff cough is to assist you cough out mucus efficiently with making you feel overly exhausted.
    • The puff cough can be practiced as follows:
    • Ensure that you are sitting comfortably. Breathe in through your mouth, a little wider than you would normally do.
    • Make the sounds “ha, ha, ha” while you contract your abdominal muscles to expel the air in three even breaths. To make a mirror steam, picture blowing upon it.

    Diaphragmatic breathing

    Diaphragmatic-breathing
    Diaphragmatic-breathing
    • The primary breathing muscle is the diaphragm.
    • In order to breathe, people with COPD typically use their neck, shoulders, and lower back auxiliary muscles more than their diaphragm.
    • Abdominal or diaphragmatic breathing aids in retraining this muscle to function better. Here’s how to accomplish it:
    • Place one hand on your chest and the other on your stomach when you are sitting or lying down with your shoulders relaxed.
    • For two seconds, inhale through your nose while feeling your tummy expand. If your tummy moves more than your chest, you’re performing the exercise correctly.
    • Gently press your tummy against your lips while you exhale gently through your mouth. This will improve the air-release capacity of your diaphragm.
    • Do the exercise as many times as you can.

    Conclusion

    • Shortness of breath and tightness in the chest are two symptoms of COPD that breathing exercises can frequently assist you alleviate.
    • Deep breathing and pursed lips are examples of slow, focused activities that may assist you recover from physical activity and enhance your daily quality of life.

    FAQs

    Does COPD pose a threat to life?

    Despite being fatal, COPD and oxygen deprivation are not the exclusive causes of death. Cardiovascular disease is one of the numerous medical issues that some persons with COPD suffer. Within five years of diagnosis, COPD is also a risk associated with sudden cardiac mortality on its own.

    What is the etiology of COPD?

    Smoking. The primary cause of COPD, which is believed to be caused by smoking in about 90% of cases, is smoking. Smoke contains dangerous compounds that can destroy the outer layer of the airways and lungs. Quitting smoking can help stop the progression of COPD.

    Which four phases of COPD are there?

    COPD can be divided into four stages: moderate, severe, mild, and extremely severe. The findings of a breathing test known as a spirometry, which evaluates lung function through determining the amount of air you can breathe in and out and the speed at which you can exhale, will be used by your doctor to identify your stage.

    Which medication works best for COPD?

    Inhalers with short-acting bronchodilator are the initial treatment for the majority of COPD patients. Bronchodilators are medications that relax and enlarge your airways to facilitate breathing. Short-acting bronchodilator inhalers come in two varieties: beta-2 agonists, which include terbutaline and salbutamol.

    What is lung function physical therapy?

    The methods and tools utilized in chest physical therapy are designed to facilitate the removal of thick, sticky, or extra mucus from the lungs. Some of these methods use vibration or percussion (force) to break up the mucus in the affected lung area.

    Which breathing technique is most effective for those with COPD?

    Inhale as deeply as you can, slowly, via your nose. Slowly exhale through pursed lips. Tighten the muscles directly beneath your ribs as you exhale. As you tighten the muscles, softly push in and up with your hand.

    Can breathing techniques help people with COPD?

    Are you having trouble breathing because of COPD? You can manage shortness of breath and take in air more easily by strengthening the muscles that you use to breathe with simple workouts.

    Will walking help people with COPD?

    When you have COPD, exercise can help you breathe better and manage some of your symptoms. Joining a singing or walking group is beneficial for many people.

    Reference

    • World Health Organization: WHO & World Health Organization: WHO. (2024b, November 6). Chronic obstructive pulmonary disease (COPD). https://www.who.int/news-room/fact-sheets/detail/chronic-obstructive-pulmonary-disease-(copd)
    • Chronic Obstructive pulmonary Disease (COPD). (2025, February 9). Cleveland Clinic. https://my.clevelandclinic.org/health/diseases/8709-chronic-obstructive-pulmonary-disease-copd
    • Chronic bronchitis. (2024, December 3). Cleveland Clinic. https://my.clevelandclinic.org/health/diseases/24645-chronic-bronchitis
    • Emphysema. (2025, February 7). Cleveland Clinic. https://my.clevelandclinic.org/health/diseases/9370-emphysema
    • Physical therapy for COPD. (n.d.). HSE.ie. https://www2.hse.ie/conditions/copd/physical therapy-for-copd/
    • Crna, R. N. M. (2023, July 17). Breathing Exercises with COPD. Healthline. https://www.healthline.com/health/copd/breathing-exercises#conclusion
  • Broca’s Aphasia

    Broca’s Aphasia

    What is Broca’s Aphasia?

    Broca’s aphasia, also called non-fluent aphasia, is a language disorder caused by damage to the left frontal lobe, specifically Broca’s area. It affects speech production, making it slow and effortful, while comprehension remains relatively preserved.

    Individuals with Broca’s aphasia may struggle with forming complete sentences but can often understand spoken and written language. The condition typically results from a stroke or brain injury.

    There are two categories for each type: fluent and non-fluent. This is the non-fluent form of Broca’s aphasia.

    It is among the parts of the brain that control speech and movement.
    It bears the name of Pierre Paul Broca, a French doctor who made the discovery in 1861. Expressive aphasia is another name for Broca’s aphasia.

    Since speaking and writing are the two main ways humans produce, or express, language, Broca’s aphasia is largely an expressive language disability. While word and sentence repetition is typically poor in Broca’s aphasia, language comprehension is mostly unaffected. Broca’s aphasia sufferers frequently have a keen awareness of their challenges, which can cause them to become extremely frustrated and occasionally depressed.

    Non-fluent aphasia is another name for Broca’s aphasia. The majority of utterances are four words or less, and speech is laborious and rather stilted. In order to convey their message, a person with Broca’s aphasia mostly uses verbs and nouns. Prepositions, articles, and other function words are frequently left out. Telegraphic speech, which recalls a time when sending a telegram cost money per word, is created by this pattern of employing just content words.

    Comprehension and Broca’s Aphasia

    In Broca’s aphasia, understanding is still largely functioning. Accordingly, a person with Broca’s aphasia is able to comprehend in everyday discussions. Sentences with more intricate grammatical patterns, such passive sentences, begin to provide challenges. For instance, a person with Broca’s aphasia could find it challenging to determine who was sending and receiving in the line “The package was mailed to Jane by Paul.” A person with Broca’s aphasia might not have any trouble at all, though, if this sentence is rephrased, for instance, “Paul mailed the package to Jane.”

    Nonetheless, a lot of persons with Broca’s aphasia still have trouble understanding fast-talking people, many speakers, and background noise. It will be simpler to comprehend familiar subjects and individuals than complicated or unknown ones. A person with Broca’s aphasia might have missed some of the subtleties of what was stated, even if they seem to understand. Jokes tend to take longer to process, and numbers can be particularly difficult.

    Written Language in Broca’s Aphasia

    People with Broca’s aphasia frequently discover that their reading skills are superior that their writing skills, which is consistent with their spoken language abilities. Although reading aloud can be challenging, silent reading typically improves comprehension. Writing can be laborious and characterized by grammar and spelling problems, much like the challenges we observe in spoken language.

    Since the brain’s Broca’s region is close to the motor cortex, paralysis on the right side of the body sometimes coexists with linguistic issues. However, the primary cause of writing difficulties is not physical paralysis of the dominant hand but rather injury to the language center of the brain. As their language skills recover, many persons with Broca’s aphasia learn to write again with their left hand, begin typing, or go back to using their right hand.

    Severity Levels of Broca’s Aphasia

    Individual differences exist in the intensity of expressive language disability. The degree of damage to Broca’s region or the surrounding brain tissue is frequently correlated with severity. Verbal apraxia, which also restricts speech, can occasionally co-occur with Broca’s aphasia. In these situations, writing frequently works better than speaking.

    Automatic, rote language, such the days of the week, counting, or popular songs like “Happy Birthday,” may be retained even in these extreme situations, albeit the person may not be able to employ these words in a conversation. Many individuals with Broca’s aphasia learn to work up to the desired word using these sequences. For instance, someone might silently begin “Sunday, Monday, Tuesday” before pronouncing the desired day out loud in order to say “Wednesday.”

    When Broca’s aphasia becomes better, it might lead to milder forms of aphasia, including anomic aphasia, which is more grammatical and fluent but has clear word-finding issues. Following a stroke or other brain injury, many patients initially experience a condition known as global aphasia, which progresses to Broca’s aphasia as understanding and insight improve. Transcortical motor aphasia is a different kind of aphasia that is quite similar to Broca’s aphasia. The ability to repeat words and sentences is the sole way that this classification varies from Broca’s aphasia.

    Pathophysiology

    Comprising Brodmann areas 44 and 45, the Broca area is located in the inferior frontal lobe of the dominant hemisphere of the brain. 60% of left-handed people and 96% to 99% of right-handed people have language function lateralized to the left hemisphere. The frontal lobe, basal ganglia, cerebellum, and contralateral hemisphere are all connected to the Broca area via a number of routes.

    A lesion in the Broca region causes a breakdown between a person’s verbal skills and their thinking. As a result, patients frequently believe they know what they want to say but are unable to articulate it. They are unable to verbalize the representations and images in their minds. Normal speaking fluency is impacted. Normal speaking fluency is impacted. The loss of language function could be due to the Broca area’s function in establishing links between linguistic materials by organizing sounds into words and words into sentences.

    What are the causes of Broca’s aphasia?

    Aphasia can be caused by any neurological disorder that damages the language-related brain cells. When oxygen or blood flow to a specific region of the brain is reduced or interrupted, brain cells die.

    Causes involve:

    • stroke
    • brain tumor
    • brain damage, such as from a gunshot wound, serious head injury, infection, or degenerative neurological disorders like Alzheimer’s disease.

    What are the symptoms of Broca’s aphasia?

    Because your brain cannot regulate your speech, people with Broca’s aphasia may be able to understand what is being said yet struggle to speak clearly.
    You may become quite frustrated because you know what you want to say but are unable to express it in the way you would like.

    Broca’s aphasia symptoms include:

    • Grammatical errors or absence,
    • difficulty constructing entire phrases, and the omission of certain words such “the,” “an,” “and,” and “is” (a person with Broca’s aphasia could say “Cup, me” instead of “I want the cup”),
    • more difficulties with appropriately using verbs than nouns, articulating words and sounds, repeating what others have said, composing sentences, reading, fully comprehending, following instructions, and becoming frustrated.

    What are the Diagnosing of Broca’s aphasia?

    A doctor will check for aphasia symptoms if a stroke or other type of brain injury occurs.
    A medical evaluation should be obtained right away if you or someone with a progressive neurological illness starts to exhibit difficulties speaking or understanding language.

    To assess your comprehension and communication skills, the doctor will consult with you.
    Further testing will be conducted if speech or comprehension issues are evident or suspected.
    An MRI or CT scan is required to diagnose Broca’s aphasia.
    These tests help identify the precise region of the brain that is damaged and how much of it is impacted.

    History and Physical Examination:

    Non-fluent aphasia is known as broca aphasia. Speech produced spontaneously is much reduced. Normal grammatical structure is lost (agrammatic speech). In particular, prepositional usage, conjunctions (and, or, but), and minor linking words are eliminated. For instance, “I took the dog for a walk.” may be changed to “I walk the dog.” Interjectional speech, in which the words are uttered as though under pressure, can be displayed by patients with a long latency.

    Additionally, the capacity to repeat words is compromised.The generated words are frequently understandable and appropriate for the situation, despite these limitations. Comprehension remains intact in cases of pure Broca aphasia. Broca aphasia patients frequently express great distress at their inability to communicate.

    This could be because nearby frontal lobe areas that regulate the suppression of unpleasant emotions are impaired or damaged. Other neurological impairments such apraxia, hemiparesis or hemiplegia, and weakness of the right face can coexist with broca aphasia.

    Evaluation

    When a patient with suspected aphasia is examined at the bedside, fluency tests are performed to evaluate the patient’s reading and writing skills, object names, short phrase repetition, and capacity to follow simple and complex instructions.

    The kind and severity of the language impairment may be identified with the aid of formal neuropsychological testing. To identify and diagnose the cause of aphasia, neuroimaging may be necessary. Since depression is especially common in Broca aphasia, patients should also be tested for it.

    Differential Diagnosis for Broca’s aphasia?

    • Anterior circulation stroke
    • Cardioembolic stroke
    • Central pontine myelinolysis
    • Cerebral venous thrombosis
    • Dementia
    • Motor neuron disease
    • Dissection syndrome
    • Frontal lobe syndrome
    • Glioblastoma multiforme
    • Head injury

    What is the treatment for Broca’s aphasia?

    • Speech therapy is necessary to treat Broca’s aphasia. It is not anticipated to rise by itself.
    • Working in-person or virtually with a speech-language pathologist is part of speech therapy, which can greatly accelerate improvement. One may be more inclined to keep attempting to improve the more times they practice speaking in a secure setting.
    • Additionally, it can be quite helpful to find a book club, support group, or other social setting with others experiencing a similar situation.
    • Last but not least, linguistic encounters with individuals you trust can help you with Broca’s aphasia to speed up your own growth.

    People with Broca aphasia frequently experience severe impairments in their capacity to do daily tasks. It impairs the patient’s capacity for communication, which frequently results in a loss of social isolation, career, and productivity. There isn’t a conventional treatment for Broca aphasia at the moment. The needs of each patient should guide the treatment. The cornerstone of treatment for aphasia sufferers is speech and language therapy. Giving aphasic patients a way to express their needs and desires is crucial in order to meet those requirements.

    This is frequently accomplished by giving the patient a board with different objects on it so they may indicate which one they desire.When creating a care plan for a patient with Broca aphasia, the participation of a neurologist, neuropsychologist, and speech therapist is highly beneficial in achieving a positive result. Melodic intonation is one cutting-edge therapy for people with Broca aphasia. Melodic intonation depends on the fact that Broca aphasia frequently spares musical talent. As a result, the speech therapist advises patients who have trouble producing their words to use musical tones. Clinical investigations have demonstrated the potential of this strategy.

    Clinical trials are currently being conducted to investigate medical treatment of aphasia. Drug therapies include catecholaminergic agents (bromocriptine, levodopa, amantadine, dexamphetamine), piracetam and related compounds, acetylcholine esterase inhibitors, and neurotrophic factors; however, previous studies have been small, and more research is required to determine the efficacy of these pharmacological agents. Recovery of language function peaks two to six months after a stroke, after which time further progress is limited.

    However, as improvements have been shown long after a stroke, patients should be encouraged to focus on their speech production. Although there are commercial software programs that make the claim that they can enhance language function, most of them have not undergone thorough testing in randomized clinical studies.

    To maximize the outcome for each patient, it is critical to address post-stroke depression and post-stroke cognitive impairment, as well as executive function, awareness, neglect, and hemiparesis disorders, during the rehabilitation process. In order to keep patients with language impairments involved in social and recreational activities, which can significantly impact the aphasic patient’s quality of life, family and social support are crucial.

    Here are some methods you can employ:

    • To get rid of any unnecessary distractions, try to regulate the noise level in the space you’re in.
    • Before attending parties, practice a few sentences, including “How are you?” and “What are you doing for holidays?” in front of a mirror. This may sound goofy at first. This could help you become more confident.
    • Don’t give up! Keep in mind that progress might last for many years.
    • Proceed at your own speed, but make sure to never stop.
    • helping a person who has Broca’s aphasia.
    • Remember that the person you care about is just as smart as they were before they were diagnosed with this illness. Be considerate, as they can feel irritated by their current circumstances.

    Make an effort to be patient and include them in your family’s or your friends’ lives. Keep them informed by actively engaging them in discussions and by speaking to them directly rather than around them.

    Additional communication advice includes:

    • Don’t talk to them like a child, but don’t make your sentences short and simple.
    • Remember that only their capacity to discuss their interests has altered.
    • Ask a lot of yes-or-no questions or inquiries with straightforward answers.
    • Make use of objects or gestures to convey your message.
    • Include easy ways to enjoy each other’s company without talking too much, such as sitting quietly in the outdoors.

    Physical Therapy Treatment:

    Physical therapists have the opportunity to treat patients with neurological disorders that might occasionally result in aphasia. In order to maximize patient contact and facilitate appropriate referral if or when the physical therapist discovers the problem during patient care, it is crucial to be informed about the condition and its types.

    Speech Therapy for Broca’s Aphasia

    Although Broca’s aphasia can get better with time, speech and language treatment will speed up the process. The individual with aphasia and their family will collaborate with a skilled and knowledgeable speech-language pathologist to create attainable treatment objectives. A range of evidence-based therapeutic procedures, including Constraint Induced Language therapeutic (CILT) and Melodic Intonation Therapy (MIT), may be employed by the therapist. He or she might suggest using therapeutic apps at home to get additional experience, or they might utilize them during sessions.

    Can you prevent Broca’s aphasia?

    • There isn’t a single way to stop Broca’s aphasia or any other kind of aphasia. Trying to lower your risk of stroke is one method to try to avoid it.
    • If you smoke, you may need to stop, and if you are overweight, you may need to lose weight. It might be challenging to stop drinking or smoking, but a doctor can help you create a strategy that works for you.
    • Drugs that lower cholesterol and blood pressure can also help. Consult a physician about your risk of stroke and the lifestyle modifications you can do to lower it.
    • Protecting your head is crucial when playing sports and engaging in other activities, including riding a motorcycle. The kinds of brain injuries that might lead to aphasia can be avoided by wearing a helmet.

    Prognosis:

    Over time, people with Broca’s aphasia may have notable improvements in their speech. Recovery may be impacted by a number of factors, including the severity of the injury, its source, your age, and general health.
    Within days, weeks, or months following the injury, speech improvement may begin. For years afterward, improvements can continue to be noticeable.

    FAQs

    How is Broca’s aphasia treated?

    Although Broca’s aphasia can get better with time, speech and language treatment will speed up the process. The individual with aphasia and their family will collaborate with a skilled and knowledgeable speech-language pathologist to create attainable treatment objectives.

    What does Broca’s aphasia look like?

    You may struggle to locate the right words for a phrase, compose sentences longer than four syllables, or pronounce each word with the appropriate sound. You might find it easier to read than to write. Examples of Broca’s aphasia speech include the following: Instead of saying, “I want a glass of water,” say, “Want water now.”

    What distinguishes Wernicke’s aphasia from Broca’s?

    The impairment of repetition is similar to that of Broca’s aphasia. Wernicke’s aphasia sufferers, in contrast to those with Broca’s aphasia, communicate with normal prosody and fluency and adhere to regular sentence structure and grammar standards.

    When someone develops Broca’s aphasia, what is damaged?

    The frontal lobe of the brain is the primary site of injury in those with Broca’s aphasia. Because the frontal lobe plays a crucial role in motor movements, they frequently have right-sided weakness or paralysis of the arm and leg.

    What signs of Broca’s aphasia are present?

    Poor or nonexistent grammar is one of the signs of Broca’s aphasia.
    trouble putting words together in full phrases.
    leaving off words like “the,” “an,” “and,” and “is” (someone with Broca’s aphasia might say “Cup, me” rather than “I want the cup”).
    more trouble appropriately using verbs than nouns.

    Does writing get affected by Broca’s aphasia?

    While reading abilities may only be slightly affected, writing with Broca’s aphasia is typically affected similarly to speech output; misspellings, letter omissions, poor letter construction, and agrammatism are all common.

    Are individuals with Broca’s aphasia able to repeat words?

    Although apraxia may have an impact, patients with Broca’s aphasia can usually repeat one to four words. Similar to speech production, those with moderate Broca’s aphasia will repeat up to four or five words, whereas those with more severe aphasia will pronounce fewer sounds or words.

    Is it possible for people with Broca’s aphasia to read and write?

    While reading abilities may only be slightly affected, writing in Broca’s aphasia appears to be hampered in a manner similar to speech output; misspellings, letter omissions, poor letter construction, and agrammatism are all common in writing.

    When someone develops Broca’s aphasia, what is damaged?

    Damage to the Broca’s area, a particular language center in the frontal lobe of the brain, results in Broca’s aphasia. It has nothing to do with the mouth, throat, or muscles. There are numerous language-related brain regions, including Broca’s area.

    What are Broca’s area’s two purposes?

    According to recent study, the frontal cortex’s Broca’s region, which is colored above, organizes speech by interacting with the motor cortex, which regulates mouth motions, and the temporal cortex, which processes sensory input.

    What causes Broca’s aphasia?

    Damage to speech and language brain regions, including the inferior frontal gyrus in the left hemisphere, among others, results in Broca’s aphasia. Although brain trauma can also cause this kind of damage, strokes are the most common cause.

    What is the speech pattern of someone who has Broca’s aphasia?

    Non-fluent aphasia is another name for Broca’s aphasia. The majority of utterances are four words or less, and speech is laborious and rather stilted. When communicating, a person with Broca’s aphasia mostly uses verbs and nouns, which are crucial terms.

    What differentiates Wernicke’s aphasia from Broca’s?

    Speaking in a “word salad” that is incomprehensible to others is a symptom of Wernicke’s aphasia. It’s possible that you can only speak in short phrases or single words. Others, however, can generally grasp what you’re saying.

    What symptoms are present in Broca’s aphasia?

    Poor or nonexistent grammar is one of the symptoms of Broca’s aphasia. trouble putting words together in full phrases. leaving off words like “the,” “an,” “and,” and “is” (someone with Broca’s aphasia might say “Cup, me” instead of “I want the cup”).

    References

    • Whelan, C. (2023, May 23). Your guide to Broca’s aphasia and its treatment. Healthline. https://www.healthline.com/health/brocas-aphasia
    • Broca’s aphasia. (2024, November 19). Cleveland Clinic. https://my.clevelandclinic.org/health/diseases/brocas-aphasia
    • Serasiya, A. (2023, February 1). Broca’s aphasia Cause, Symptom, treatment – Samarpan Physio. Samarpan Physiotherapy Clinic. https://samarpanphysioclinic.com/brocas-aphasia/

  • Costochondral Joints

    Costochondral Joints

    Introduction

    Costochondral joints are the cartilaginous connections between the ribs and the costal cartilage in the front of the ribcage. These joints provide flexibility and support for breathing movements. They are synchondroses, meaning they are immobile and composed of hyaline cartilage. Injuries or inflammation in these joints can lead to costochondritis, a common cause of chest pain.

    They are primary cartilaginous joints, also known as synchondrosis, which are hyaline cartilaginous joints. Each rib features a cup-shaped depression with which the costal cartilage articulates. These joints typically don’t move at all. Plane synovial joints connect the sixth and ninth rib costal cartilages. Fibrous articulation separates the ninth and tenth ribs’ costal cartilages.

    The periosteum holds the two costal cartilages together when their lateral ends are received into a depression in the sternal end of the rib.

    Anatomy

    The cartilaginous joints that join the ribs to the costal cartilages in the anterior thoracic wall are known as costochondral joints or synchondroses. They are essential for preserving the rib cage’s stability and flexibility during breathing.

    Structure

    The primary cartilaginous joints (synchondroses) that join the costal cartilages to the ribs are called costochondral joints.

    Movement during breathing is made possible by these joints, which give the thoracic cage flexibility and structural integrity.

    Articular surfaces

    A rib’s link to its costal cartilage is known as the costochondral joint.

    It happens when bone finishes and cartilage starts on the thoracic wall.

    The rounded lateral end of the costal cartilage and the roughened cup-shaped anterior end of the ribs make up the joint’s two articular surfaces.

    • Rib End: A thin layer of compact bone covers the spongy bone at the sternal end of the rib.
    • Through the sternocostal joints, the hyaline cartilage structure known as the costal cartilage progressively moves from the rib to the sternum.
    • Bone-Cartilage Interface: Without a synovial cavity, the periosteum of the ribs forms a continuous connection with the perichondrium of the costal cartilage.

    Joint capsule and ligaments

    These joints lack ligaments, a joint capsule, and a hollow. The rib’s periosteum connects the bone and cartilage by running continuously through the costal cartilage’s perichondrium.

    The point where the ribs articulate with their corresponding costal cartilage is known as the costochondral joint. Given that it is a cartilaginous joint (synchondrosis), movement is limited to nonexistent.

    The costochondral joint does not have actual ligaments to support its structure, in contrast to synovial joints. Rather, it is kept stable by:

    • Periosteum and Perichondrium: The primary stabilizing elements. At the intersection, the periosteum (around bone) and perichondrium (around cartilage) combine to provide strength.
    • Intercostal Muscles: These muscles support the rib cage and attach close to the internal and external costochondral joints.
    • Connective tissue and surrounding fascia offer extra support but don’t work as separate ligaments.

    The costochondral joint lacks the ligamentous components of the sternocostal or costovertebral joints, which are seen in synovial joints because it is a synchondrosis.

    Innervation

    The intercostal nerves are the anterior rami of the thoracic spinal nerves, and their branches supply the costochondral joints.

    Blood supply

    The anterior intercostal arteries’ branches provide the costochondral joints with arterial flow. These joints’ related anterior intercostal veins are responsible for their venous drainage.

    Movements

    The actual costochondral articulations are static joints that are incapable of moving. The front ends of the ribs can, however, be attached to the sternum with flexibility thanks to the costal cartilage, which can also bend and twist somewhat to let the thoracic diameters expand during breathing.

    The costochondral joint, where the ribs join the costal cartilage, is a cartilaginous joint (synchondrosis). Because of its static and inflexible design, it does not permit much mobility.

    Movement at the Costochondral Joint

    • Minimal Flexibility: The hyaline cartilage that makes up the joint gives it a tiny quantity of flexibility, which permits mild expansion and bending.
    • Passive Movements: The joint does not move actively as synovial joints do, however, it may gently distort in response to external stimuli, rib cage expansion, and breathing.
    • Indirect Contribution to Breathing: During inhalation and exhalation, the rib cage expands and contracts, and the costochondral joints passively support these motions without producing their motion.

    Muscles acting at the costochondral joint (junction)

    The immobility of this joint means that no muscles can directly affect it. However, the anterior muscle fibers and the aponeurosis of the intercostal muscles have sites of attachment at the costochondral joints.

    Clinical significances

    The cartilaginous joints that connect the costal cartilage to the ribs are called costochondral joints. These joints are essential to the thoracic cage’s stability and flexibility. Their clinical importance consists of:

    Costochondritis

    • Costochondral joint inflammation causes chest pain that resembles heart problems.
    • Frequently idiopathic, although infections, trauma, and excessive use can all cause it.
    • ECG findings were normal and there were no cardiac risk factors, which distinguished it from myocardial infarction (heart attack).

    Tietze Syndrome

    • The costochondral joints swell locally in this uncommon inflammatory disease.
    • The second or third costochondral junction is frequently impacted.
    • Although self-limiting, it may result in chronic chest pain.

    Rib Fractures & Trauma

    • Costochondral joints are susceptible to blunt trauma, such as falls or auto accidents.
    • Breathing difficulties and rib instability can result from fractures.

    Arthritis and Degenerative Changes

    • These joints may be impacted by diseases such as ankylosing spondylitis and rheumatoid arthritis, which can cause persistent pain and stiffness.

    Slipping Rib Syndrome

    • Causes sporadic pain and clicking sensations and is caused by hypermobility or dislocation of the costochondral joint.
    • Occurs frequently in the eighth, ninth, and tenth ribs.

    Surgical Considerations

    • Maintaining costochondral integrity is essential during chest surgeries (such as rib resection and thoracic surgeries) to prevent long-term pain and respiratory issues.
    • In reconstructive surgery, costochondral grafts are occasionally employed, particularly in mandibular reconstruction.

    FAQs

    What does the term “costochondral” mean?

    Involving or connecting costal cartilage and ribs.

    What is the number of costochondral junctions?

    The third or fourth ribs are more commonly afflicted, however any of the seven costochondral connections might become inflamed. Injury, recurrent minor trauma, and extraordinary physical activity are the most likely causes.

    What kind of joint is a costochondral joint?

    The joints of the thoracic wall that unite the sternal ends of the ribs and their corresponding costal cartilages are called costochondral joints. They are categorized anatomically as synchondrosis, or primary cartilaginous joints, where hyaline cartilage connects the bones.

    Which joint is the first rib’s costochondral?

    The upper eight costochondral junctions form a tough joint with very little movement, similar to the costosternal joint. These joints are called hyaline cartilaginous joints, and they resemble the synchondrosis.

    What role does the costochondral junction play?

    The point where the costochondral cartilage and bone connect is known as the costochondral junction. The costochondral joint, a hyaline cartilaginous junction, connects the ribs and the sternum. Joints move more easily thanks to hyaline cartilage.

    References

    • Wikipedia contributors. (2024a, February 12). Costochondral joint. Wikipedia. https://en.wikipedia.org/wiki/Costochondral_joint
    • Costochondral joint (junction). (2023, October 30). Kenhub. https://www.kenhub.com/en/library/anatomy/costochondral-joint-junction

  • Osteoporosis

    Osteoporosis

    Osteoporosis is a condition characterized by weakened bones that become fragile and more prone to fractures. It occurs when bone density and quality decrease, often due to aging, hormonal changes, or nutritional deficiencies.

    Common risk factors include lack of calcium and vitamin D, sedentary lifestyle, smoking, and genetic predisposition. Prevention and management focus on weight-bearing exercises, a nutrient-rich diet, and, in some cases, medication to maintain bone strength.

    Introduction:

    The medical disorder known as osteoporosis is defined by the weakening of bones, which increases the risk of fractures. It is frequently called a “silent disease” because, until a bone fracture happens, there usually are no symptoms. This condition is most prevalent in elderly persons, particularly in postmenopausal women. However, people of any age or gender might be affected.

    Live tissue, such as bone, is continually being broken down and replaced. When the production of new bone isn’t keeping up with the loss of existing bone, osteoporosis develops. 

    Men and women of every background are affected by osteoporosis. However, Asian and black women are more at risk, particularly older women who have passed menopause. Weight-bearing activity, a nutritious diet, and medications can help strengthen weak bones or stop bone loss.

    What Is Osteoporosis?

    Osteoporosis bone
    Osteoporosis bone

    Osteoporosis arises from either limited new bone formation or excessive bone mass loss. Due to the loss of bone tissue caused by this imbalance, bones become weaker and more likely to fracture. Bones lose strength and density when the rebuilding process is out of balance, increasing the chance of fractures.

    Although any bone can fracture, osteoporosis most frequently affects the wrists, hips, and spine. The quality of a person’s life can be greatly affected by these fractures, which can cause pain, inability, and in extreme situations, death.

    Due to lower estrogen levels, osteoporosis mainly affects older persons, especially postmenopausal women, although it may also affect men and younger people, especially if there are additional risk factors.

    There are various kinds, which are categorized according to the characteristics and causes of bone loss. The main types are:

    Primary Osteoporosis

    • Type 1 (Postmenopausal Osteoporosis): This type mainly affects women after menopause because estrogen, which is important for bone density, decreases. Frequently, it leads to wrist and spine fractures.
    • Type 2 (senile osteoporosis): This kind usually begins to affect both men and women around the age of 70. It is linked to a slow decline in bone density caused by age, which frequently results in fractures of the hip and spine.

    Secondary Osteoporosis

    This sort of condition of condition comes from medications or other health issues that restrict bone growth. Among the frequent reasons are:

    • Hormonal conditions (such as hyperparathyroidism and hyperthyroidism)
    • Medications (such as anticonvulsants and corticosteroids)
    • Chronic conditions (such as diabetes, liver disease, and rheumatoid arthritis)
    • Factors related to lifestyle (such as smoking and drinking excessively)
    • Shortages in some nutrients, such as a lack of calcium or vitamin D

    Juvenile Osteoporosis

    Children and teenagers are prone to this uncommon type of osteoporosis. It may be caused by medication, genetic disorders, or underlying medical diseases such as juvenile arthritis.

    Causes:

    Numerous factors could affect bone density and strength, leading to osteoporosis.

    • Growing older

    Natural bone loss: Bone loss, or the breakdown of bone, usually exceeds bone formation, which causes people’s bone density to decline with age. Beyond the age of 30, this is very common, and women lose more bone following menopause due to a decrease in estrogen.

    • Gender

    Being a woman increases your risk of getting osteoporosis. Women’s bones are thinner and their maximal bone mass is lower than men’s. However, men are still at risk, especially after the age of 60 to 70.

    • Genetics

    Family history: You may be more at risk if your parents or grandparents suffer from osteoporosis or bone fractures. Bone strength and density can be affected by genetic factors.

    • Changes in Hormones

    Menopause: After menopause, women’s estrogen production declines, which significantly speeds up bone loss.

    Testosterone deficiency: In men, bone loss may also result from a drop in testosterone levels, which is frequently associated with aging.

    Thyroid issues: Too much thyroid hormone treatment or an overactive thyroid (hyperthyroidism) can cause bone weakening.

    • Medicines

    Long-term use of some medicines: If taken for an extended length of time, certain medications, like corticosteroids (prednisone), can cause bone loss. Bone health can also be affected by other medications, such as specific anticonvulsants or cancer treatments.

    • Low Nutrition

    Calcium deficiency: Strong bones require calcium. Over time, a lack of calcium can cause bones to break down.

    Deficiency of vitamin D: Vitamin D facilitates calcium consumption in the body. Vitamin D deficiency can cause bones to break down.

    Poor nutrition: Bone health can be seriously affected by a diet deficient in important nutrients (such as protein, magnesium, and other vitamins).

    • Lack of Physical Activity

    Sedentary lifestyle: Bone density is maintained by regular exercise, particularly weight-bearing activities like running, walking, or strength training. Bone weakening results from inactivity.

    • Factors of Lifestyle

    Smoking: Smoking raises the risk of osteoporosis by weakening bones and reducing blood flow to them.

    Excessive consumption of alcohol: Excessive consumption of alcohol may affect bone formation and intake of calcium.

    • Health Problems

    Chronic illnesses: Several illnesses, including diabetes, kidney disease, and rheumatoid arthritis, can raise the risk of osteoporosis.

    Gastrointestinal disorders: Disorders such as inflammatory bowel disease (IBD) or celiac disease can interfere with the intake of nutrients, resulting in shortages that affect bone health.

    • Minimal Body Weight

    Small body: People who weigh less and have a smaller body may have less bone mass in the beginning, which raises their chance of developing osteoporosis as they age.

    Signs and symptoms:

    There are usually no obvious warning signals in the early stages, but as the illness progresses, certain symptoms may appear.

    These include:

    • Breaking bones, or fractures

    Bone fractures that happen more frequently than expected, even with mild accidents or traumas, are the most common signs of osteoporosis. Typical fracture sites include:

    Spine: Vertebral (or spine) compression fractures are frequent. Over time, this may result in a slumped posture or a loss of height.

    Hip: People with osteoporosis may find it more difficult to recover from a broken hip, which often happens after a fall.

    Wrist: Fractures may result from falls onto an outstretched hand.

    • Back Pain

    A compression fracture in the spine or a broken vertebra can cause severe back pain. The pain may not go away and may get worse when you move or do specific things.

    • Decrease in Height

    The vertebrae may collapse as a result of compression fractures when osteoporosis weakens the spine’s bones. Over time, this may cause a progressive decrease in height, frequently several inches.

    • Tenderness or Pain in the Bones

    In regions of the body where the bones are weak, including the spine, hips, or wrists, bone tenderness or pain may be experienced, especially if the bone is prone to fracture.

    Osteoporosis patients may experience kyphosis, a hunched or stooped posture. The back is bent as a result of the vertebrae in the spine breaking.

    • Having trouble moving or bending

    People with osteoporosis may have decreased mobility and find it difficult to bend or move specific body parts painlessly due to degeneration of the bones and potential fractures.

    • Weakness in Gripping Power

    Fractures or pain in the hands and wrists can cause weakened grip strength, which makes it harder to grasp onto objects or carry out daily duties.

    • A Higher Chance of Falls

    Additionally, osteoporosis can lead to muscle weakness and balance problems, which can raise the risk of falling, particularly in older persons.

    Risk factor:

    Osteoporosis risk factors are conditions or actions that increase your likelihood of developing the illness. While you have no control over some risk factors, you can manage many of them with medical treatment and lifestyle modifications.

    The following are the main osteoporosis risk factors:

    • Age

    Due to a natural decline in bone density with age, older persons are more at risk. As testosterone levels drop after menopause, this process quickens for both women and older men.

    • Gender

    Women are more likely than men to have osteoporosis. This is because menopausal hormone changes cause the bone density to rapidly decrease. Women are more prone to osteoporosis since their bones are often thinner and smaller.

    • Family Background

    Your risk is increased if you have a family history of osteoporosis or fractures. You might also be more at risk if your parents or grandparents had the illness or were prone to bone fractures.

    • Lack of physical activity

    Weaker bones might result from a sedentary lifestyle or from not doing weight-bearing activities like strength training, jogging, or walking. Frequent exercise maintains bone strength and promotes bone growth.

    • Previous Fractures

    An increased risk of future fractures is indicated by a history of previous bone fractures, particularly following a mild accident.

    • Excessive Consumption of Alcohol

    Excessive alcohol consumption may affect bone growth by interfering with the body’s calcium consumption. Additionally, it affects balance, raising the possibility of fractures and falls.

    • Smoking

    Smoking increases the risk of osteoporosis and fractures by interfering with bone production and lowering blood supply to bones.

    • Some Medicines

    When taken over extended periods, corticosteroids (like prednisone) and certain other medications, including anticonvulsants, chemotherapy treatments, and cancer therapies, can cause bone loss. Certain medicines can weaken bones over time and raise the risk of fractures.

    • Medical Problems

    Gastrointestinal disorders: Disorders such as inflammatory bowel disease (IBD) or celiac disease can cause nutritional malabsorption, which in turn can lead to osteoporosis.

    Chronic renal illness can affect bone health by altering the balance of calcium and phosphorus.

    Rheumatoid arthritis: Rheumatoid arthritis’s ongoing pain may speed up bone loss.

    • Poor Nutrition and Eating Disorders

    Low levels of calcium and vitamin D are among the nutritional deficiencies that can result from anorexia nervosa and bulimia, and both conditions raise the risk of osteoporosis.

    Bone density loss can also be caused by low body weight and nutritional deficits linked to these conditions.

    Diagnosis:

    A physical examination, imaging testing, and medical history are frequently used to diagnose osteoporosis. A bone density test is the most popular way to identify osteoporosis.

    Medical History

    Your physician is going to ask about your family’s and your medical history, particularly concerning:

    • Any indications of bone loss or past bone fractures.
    • Fractures or osteoporosis in the family history.
    • Diseases or medications that may have an effect on bone health (e.g., corticosteroid use, thyroid issues).
    • Lifestyle choices (e.g., food, exercise, alcohol, and smoking).

    Physical Examination

    During a physical examination, your doctor will also check for kyphosis, a stooped posture that may indicate vertebral fractures and any signs of spinal anomalies.

    Height measurement: A decrease in height as osteoporosis worsens could be a sign of spinal compression fractures.

    Your doctor may evaluate your balance and muscle strength to determine your fall risk.

    Bone Density Test (DXA or DEXA Scan)

    The most popular and reliable test for identifying osteoporosis is Dual-Energy X-ray Absorptiometry (DEXA or DXA).

    This test measures the concentration of a mineral, usually calcium, in a specific bone area, like the wrist, hip, or spine.

    T-score: The findings are contrasted with the bone density of a healthy, normal adult. The T-score indicates how much your bone density varies from the average peak bone mass of a young, healthy person.

    • Bone density is normal if the T-score is -1.0 or greater.
    • T-score in the range of -1.0 to -2.5: Osteopenia (poor bone mass without osteoporosis yet).
    • A T-score of -2.5 or less indicates osteoporosis.

    X-rays

    Although X-rays are not commonly used to check for osteoporosis, they might be recommended if you have a history of fractures or symptoms like back pain. Although an X-ray can reveal bone fractures or structural alterations caused by osteoporosis, it is not as sensitive as a bone density test for identifying the condition in its early stages.

    Differential Diagnosis:

    Reduced bone strength and density are the indications of osteoporosis, a disorder that raises the risk of fractures. When diagnosing osteoporosis, medical experts investigate several conditions that may resemble the disease or cause similar bone-related issues.

    A differential diagnosis for osteoporosis is as follows:

    • Osteomalacia: A condition in which the bones become weaker as a result of either a phosphate or vitamin D deficiency. This condition is caused by poor bone mineralization, as opposed to osteoporosis, which is a condition of loss of bone density.
    • Bone Disease: Paget’s disease causes abnormal bone remodeling, which weakens bones and increases their risk of fracture or deformity. This is a more localized disorder that frequently causes pain and deformity in particular bones, such as the pelvis, spine, and skull. The two conditions can occasionally be confused with osteoporosis.
    • Osteogenesis Imperfecta: A genetic ailment that causes fragile bones, this condition can be mistaken for osteoporosis when fractures happen, particularly in children or young people.
    • Rheumatoid Arthritis: Rheumatoid arthritis causes chronic inflammation, which can cause bone loss and joint damage. However, unlike osteoporosis, this bone loss may not be common and is frequently the result of inflammation.
    • Cushing’s Syndrome: Bone loss and fractures can result from excessive cortisol production, which can frequently come on by long-term corticosteroid use or anomalies in the adrenal glands. Cushing’s syndrome characteristics, such as weight gain and moon face, can help identify it from osteoporosis.
    • Multiple myeloma: Osteolytic lesions that weaken bones can result from this plasma cell malignancy. Multiple myeloma patients may experience bone pain or fractures that were originally misdiagnosed as osteoporosis. Imaging tests and bone marrow biopsies may help in the diagnosis.

    Osteoporosis Treatment:

    By slowing down bone loss and encouraging bone production, osteoporosis treatment tries to improve bone strength, prevent fractures, and lessen pain. Usually, treatment combines a mix of medication, physical therapy, lifestyle modifications, and taking care of risk factors or underlying illnesses.

    Lifestyle Modification

    • Diet: Make sure you’re getting enough calcium and vitamin D, as these are essential for healthy bones.
    • Calcium: Most individuals should consume 1,000 mg per day, whereas postmenopausal women and older adults should get 1,200 mg.
    • Vitamin D: necessary for the taking in of calcium. 800–1,000 Mg per day is the ideal amount, however, higher dosages may be needed if there is a deficiency.

    Medicines

    There are numerous kinds of medications that can be used to treat osteoporosis:

    • Bisphosphonates

    The most often prescribed medications for osteoporosis are these. By stopping the breakdown of bones, they help in the prevention of fractures.

    Zoledronic acid (Reclast), alendronate (Fosamax), risedronate (Actonel), and ibandronate (Boniva) are examples.

    • Modulators of Selective Estrogen Receptors (SERMs)

    Without some of the dangers associated with estrogen therapy, these medications simulate the effects of estrogen on bone. They lessen the resorption of bone.

    Raloxifene (Evista) is one example.
    Use: Usually given to postmenopausal women who are unable to tolerate alternative therapies.

    • Menopausal hormone therapy (HRT) or hormone replacement therapy(MHT),

    Estrogen, the female sex hormone, is essential for preserving bone tissue strength in women. Menopause raises the risk of osteoporosis and osteoporotic fractures and results in a significant decrease in estrogen levels.

    Menopausal hormone therapy (HRT) for menopause has been linked to an increased risk of several illnesses, including breast cancer and venous thrombosis (blood clots in the veins), even though it increases estrogen levels and protects osteoporosis after menopause. On the other hand, Menopausal symptoms such as redness, sweats, and difficulty sleeping can be effectively treated with menopausal hormone treatment (HRT).

    Although long-term use is no longer advised for managing osteoporosis, it is still regarded as a first-line treatment for women under 60 who are at risk for osteoporosis and a reduction in bone density.

    • Analogs of Parathyroid Hormones

    By simulating the effects of parathyroid hormone (PTH), these medications promote the growth of new bone.

    Examples include Abaloparatide (Tymlos) and Teriparatide (Forteo).
    For people with severe osteoporosis or those who are at high risk of fractures, this medication is usually prescribed.

    It is important to remember that every medicine has the potential to have negative side effects. If your doctor prescribes medicine for osteoporosis, go about the advantages and disadvantages of the course of therapy.

    Physical Therapy Treatment

    Older adults are more likely to have osteoporosis, which frequently causes falls. People 65 and older frequently experience falls. A physical therapist can help you strengthen your balance if you are in danger of falling.

    An essential part of managing osteoporosis is physical therapy. Improving strength and balance, lowering the risk of fractures, and maintaining or increasing mobility are the basic objectives of physical therapy for osteoporosis.

    People with osteoporosis can live more active and independent lives while reducing their risk of fractures by using physical therapy, which combines focused exercises, posture correction, and fall prevention techniques.

    Osteoporosis Physical Therapy Goals:

    • Strengthening muscles to protect bones and reduce the risk of falls.
    • Improving balance to avoid falls, which are a significant risk factor for osteoporosis patients’ fractures.
    • Correcting one’s posture can help prevent compression fractures and preserve a healthy spinal alignment.
    • Weight-bearing activities can increase bone density by promoting bone growth and preventing bone loss.

    Types of Exercises for Osteoporosis:

    Weight-Bearing Activities

    Exercises involving weight bearing apply pressure to the bones, which promotes bone growth. These workouts require you to stand and move against the force of gravity.

    Example,

    • Walking
    • Hiking
    • Climbing stairs
    • Jogging (if tolerated; however, people with severe osteoporosis should be cautiously watched)
    Resistance Exercise (Strength Exercise)

    Strength training promotes bone health by increasing muscular mass. Strong muscles protect the bones by receiving some of the effects during exercise.

    Example,

    • Bodyweight workouts include wall push-ups, lunges, and squats
    • Using resistance bands or free weights
    • Weight-lifting devices

    Resistance training can help stop more bone loss, particularly in the wrists, hips, and spine.

    Exercises For Range of Motion and Flexibility

    Maintaining or increasing flexibility is essential for preserving mobility and lowering joint and muscle stiffness. Stretching helps in this process. To prevent muscle imbalances that may result in falls, these exercises are important.

    Example,

    • Mild yoga or tai chi (with adjustments to prevent excessive spinal flexion)
    • Hip flexor, calf, and hamstring stretches that are easier
    Exercises for Balance and Coordination

    Physical therapy must focus on improving balance and coordination because osteoporosis raises the risk of falls. Balance-improving exercises help lower the chance of fall-related injuries.

    Example,

    • Standing on one leg
    • Walking heel to toe, or walking in a straight line while touching the toe of the subsequent step
    • Tai chi and other balance-focused exercises that promote slow motions
    • Uses of stability balls or balancing boards

    Balance and posture also benefit from exercises that strengthen the core, such as pelvic tilts or modified planks.

    Posture Correction

    Vertebral compression fractures caused by osteoporosis can result in kyphosis, a hunched or stooped posture.

    Physical therapists can help patients strengthen the muscles that support the spine and improve posture by teaching them exercises and strategies.

    Example,

    • Postural exercises include chest openers, shoulder blade squeezes, and seated rows.
    • Exercises for breathing: Diaphragmatic breathing to support a straight posture
    • Exercises for spinal extension: To prevent spinal flexion, try gentle back stretches or targeted workouts like “back extension” movements.

    Physical Therapy Precautions for Patients with Osteoporosis:

    Avoid High-Risk Movements: People with osteoporosis should refrain from or alter certain workouts and movements, such as:

    • Spinal flexion: Stay away of excessive forward bending as this might strain the vertebrae and cause fractures.
    • Twisting motions: To prevent over stressing the spinal discs and joints, the spine should rotate as little as possible.
    • High-impact exercises: Stay away of sprinting, jumping, and other activities that put your bones in fast contact.

    Progress and Supervision: The physical therapist should be supervised to make sure that exercises are done correctly and safely. It is best to raise the intensity gradually so that the body can adjust without becoming hurt.

    Surgical treatment

    The main effects of osteoporosis are changes in bone density and structure, which make bones more susceptible to breaking. Although medication, lifestyle modifications, and preventative measures are the core of osteoporosis treatment, surgical treatments may be required in extreme cases when fractures or considerable deformities are present.

    In patients with osteoporosis, fractures that do not heal properly, severe pain, or the need to stabilize broken bones are the most frequent causes of surgery. The primary surgical procedures for osteoporosis-related problems are listed below:

    Vertebroplasty and Kyphoplasty

    In patients with osteoporosis, vertebral compression fractures are frequently treated with minimally surgical procedures such as vertebroplasty and kyphoplasty. By stabilizing damaged vertebrae, these surgeries hope to lessen pain and stop more falls.

    • Vertebroplasty: This treatment stabilizes the fractured vertebra by injecting a specific cement into it. Because of the cement’s rapid solidification, the bone is less likely to break down further.
    • Kyphoplasty: This procedure compares to vertebroplasty, but before the cement is injected, a balloon is placed inside the vertebra to partially restore its lost height. More pain relief and better spinal alignment can be achieved with this operation than with vertebroplasty.

    Indications: Generally speaking, these procedures are advised for people who have:

    • Severe back pain due to vertebral fractures.
    • Conservatively treated compression fractures that do not heal.
    • A decrease in spine height or curvature, such as a “dowager’s hump.”

    Spinal Fusion

    In cases when vertebral fractures have resulted in severe spinal instability or considerable deformity, such as a misaligned spine or an extreme forward curvature of the spine, spinal fusion is a more invasive surgery.

    Procedure: To support the spine, spinal fusion is attaching two or more vertebrae using bone grafts, rods, screws, or plates. By removing motion between the fused vertebrae, this procedure helps lessen the pain that comes with bone fractures.

    Signs: There may be a need for spinal fusion when:

    • A severe misalignment or deformity of the spine is present.
    • Bracing and physical therapy are examples of non-surgical treatments that have not been successful in reducing pain.
    • When the vertebrae are unstable, the spinal cord or nerves could be further damaged or compressed.

    Prevention of Osteoporosis:

    Maintaining a healthy lifestyle and habits that support strong bones throughout your life is essential to preventing osteoporosis. Even though osteoporosis may not be completely preventable, There are several things you can do to reduce your risk and maintain the health of your bones, especially if you have a certain gene or a family history of the condition.

    Get Enough Calcium

    Calcium is necessary for healthy bones. It helps in maintaining and increasing bone mass.

    Calcium-rich foods include:

    • Dairy goods (cheese, yogurt, and milk).
    • Leafy greens, such as bok choy, broccoli, and kale.
    • Foods that have been fortified (certain plant-based cereals, juices, and milk).
    • Salmon and sardine fish.
    • Consult your physician about calcium supplements if you struggle to obtain enough of it from your diet.

    Weightlifting Exercises

    One of the most important things you can do to avoid osteoporosis is to exercise. It improves balance and lowers the chance of falls by strengthening bones and muscles.

    Exercises with weights include:

    • Jogging, hiking, or walking.
    • Aerobics or dancing.
    • Resistance training or lifting weights.
    • Sports that require physical activity, like tennis.

    Refrain from smoking

    Smoking weakens bones and decreases blood supply to them, increasing the likelihood that they will break. To reduce your chances of osteoporosis and improve your general bone health, think about giving up smoking.

    Keep Your Weight in Control

    Osteoporosis risk can be increased by being underweight or overweight. Bone health is supported by a healthy weight.
    Your bones might not have enough bulk to remain strong if you are underweight. Being overweight can place additional strain on your bones, especially your hips and spine.

    Observe and treat the underlying conditions.

    Bone health can be affected by certain medical diseases, such as diabetes or rheumatoid arthritis. Follow your doctor’s treatment plan to manage any underlying conditions you may have.

    Preventing Falls

    For those with weak bones, preventing falls is essential to preventing fractures.

    To lower the risk of falls;

    • Engage in exercises like yoga or tai chi to improve your balance and coordination.
    • To make your house safer, remove dangerous surfaces like loose carpets and make sure there is enough lighting.
    • In bathrooms, place non-slip mats and, if necessary, grab bars.

    When should I visit my physician?

    You should make plans to see your doctor if you think you may have osteoporosis. Your best chance of avoiding broken bones as you age is to treat osteoporosis early. A family history of osteoporosis is possible. If a close relative has the illness, let your doctor know. If you have ever experienced a bone break or fracture as a result of a small injury, you should also disclose this information to them.

    Summary:

    When bone mass and mineral density decrease, or when the composition and strength of bone change, osteoporosis develops. The risk of fractures (broken bones) may rise as a result of this reduction in bone strength.

    Your bones become weaker and thinner than they should be due to osteoporosis. Because it increases your risk of suffering a bone fracture, it may be harmful. Since you usually don’t have any symptoms and might not even be aware that you have osteoporosis until you break a bone, it’s known as a “silent” illness.

    Osteoporosis management includes a long-term strategy to care in addition to medication physical therapy and lifestyle modifications. To guarantee ideal bone health, this entails routine examinations, bone density tests, and support from medical professionals.

    FAQ:

    What is osteoporosis?

    Osteoporosis is a bone disease that weakens and cracks the bones, making fractures more likely. Even while this disorder may not cause any symptoms, it can lead to fractures, especially in the spine, hips, and wrists.

    What is the cause of osteoporosis?

    As people age, their bone density naturally declines.
    Hormonal alterations caused by reduced estrogen levels, especially in postmenopausal women
    Absence of vitamin D or calcium.
    A life that is sedentary.
    Genetics and family history.
    Smoking or drinking too much alcohol.
    Certain medications including corticosteroids.

    For whom is osteoporosis a risk factor?

    Postmenopausal women.
    People over fifty, those with a family history of osteoporosis, and those with low body weight.
    Individuals who are dehydrated, particularly those who don’t get enough calcium or vitamin D.
    Heavy drinkers or smokers.
    Individuals with specific medical disorders or those using steroids or other long-term medication.

    How can osteoporosis be prevented?

    Receiving enough calcium and vitamin D from food or supplements.
    Strength training, jogging, and walking are weight-bearing activities that help build stronger bones.
    Avoiding heavy drinking and smoking.
    Keeping a healthy weight and eating a well-rounded diet.
    Those at risk should have regular bone density tests.

    How does one diagnose osteoporosis?

    DEXA (Dual-Energy X-ray Absorptiometry), a bone density test, is commonly used to diagnose osteoporosis. By measuring bone mineral density, this test may help identify individuals who are at risk for fractures or who have osteoporosis.

    Which symptoms of osteoporosis are present?

    The reason osteoporosis is frequently referred to as the “silent disease” is that many patients do not show any symptoms until they have a bone fracture. However, typical symptoms include of:
    Back pain that could be brought on by a vertebral fracture or collapse
    A slow decline in height
    A stooped-over position (kyphosis)

    Which foods are beneficial to bone health?

    Bone health depends on foods high in calcium and vitamin D, such as:
    Dairy goods (yogurt, cheese, and milk)
    Leafy greens, such as kale and spinach
    Fish (sardines, salmon)
    Plant-based milk and cereals are examples of fortified foods.
    Seeds and nuts (chia seeds, almonds)

    Men can develop osteoporosis?

    Yes, osteoporosis can affect males as well as women, however, it is more common in women. Although male osteoporosis affects roughly one in four men over 50, it is frequently underdiagnosed.

    Which kinds of physical activity are advised for people with osteoporosis?

    Exercises involving weight bearing, such as dancing, hiking, and walking
    Resistance training (using resistance bands or mild weightlifting)
    Balance improving exercises like yoga and tai chi
    Exercises for flexibility can help you keep proper posture and lower your chance of falling.

    What are osteoporosis complications?

    Especially in the wrists, hips, and spine, bone fractures are the most frequent side effect of osteoporosis. These fractures, especially in elderly persons, can cause pain, loss of independence, and damage.

    How can osteoporosis affect a person?

    Osteoporosis causes weak, broken bones that are easily fractured by small stresses like bending over. Osteoporosis is most frequently associated with fractures of the hip, wrist, or spine. There is a constant breakdown and replacement of bone and other living tissue.

    Is it possible to cure osteoporosis?

    Although there is no cure for osteoporosis, its symptoms can be managed with medicine and changes in lifestyle. Based on your age, sex, and medical history, your doctor will recommend several treatments to help you. The goal of treatment is to strengthen your bones so that they are less likely to break.

    Which organ suffers from osteoporosis the most?

    As a result of osteoporosis, bones get weaker. This makes it more likely that the bones may break. The most commonly affected bones are the wrists, hips, and spine. Because of a decrease in estrogen after menopause, males are four times less likely than women to develop osteoporosis.

    Does walking help people with osteoporosis?

    Examples include walking, dancing, gardening, elliptical training, low-impact aerobics, and climbing stairs. These workouts directly target the legs, hips, and lower spine to reduce bone loss.

    What are the osteoporosis risk factors?

    Age: The danger is higher for those over 50.
    Gender: Osteoporosis is more common in women, particularly after menopause.
    Family history: The risk may be elevated if one parent has osteoporosis.
    Diet: Insufficient consumption of calcium and vitamin D raises the risk of bone loss.
    Alcohol and smoking: Both excessive alcohol consumption and smoking can damage bones.
    Physical inactivity: Not exercising may speed up the loss of bone.
    Medical conditions: Some illnesses can raise the risk, such as thyroid issues and rheumatoid arthritis.

    Which lifestyle modifications are beneficial for osteoporosis?

    Exercise more: Resistance training and weightlifting can help preserve bone density.
    Increase your nutrition: Consume foods high in vitamin D (from fortified foods to sunlight) and calcium (from dairy products to leafy greens).
    Give up smoking and cut back on drinking.
    Make sure your house is fall-proof. To prevent accidents, remove any potential risks that could cause falling and use support devices or supports as needed.

    References:

    • N. S. C. a. O. Branch (2025, January 8). osteoporosis. The National Institute of Musculoskeletal and Skin Disorders and Arthritis. The following URL: https://www.niams.nih.gov/health-topics/osteoporosis#:~:text=Osteoporosis in Men-, Osteoporosis is a bone disease that occurs when bone mineral, pregnancy, breastfeeding, and bone health
    • OrthoInfo, AAOS, Osteoporosis (n.d.). Osteoporosis: https://orthoinfo.aaos.org/en/diseases–conditions/
    • N. P.-. Physiotherapist (2024, January 22). The causes, symptoms, diagnosis, and treatment of osteoporosis. Mobile Clinic for Physiotherapy. Osteoporosis: https://mobilephysiotherapyclinic.in/
    • Osteoporosis. February 7, 2025. Cleveland Medical Center. Osteoporosis https://my.clevelandclinic.org/health/diseases/4443
    • Website, N. April 17, 2024. NHS.uk: Osteoporosis. Osteoporosis: https://www.nhs.uk/conditions/
    • Health and Human Services Department, n.d. osteoporosis. The Better Health Channel. Osteoporosis: https://www.betterhealth.vic.gov.au/health/conditionsandtreatments
    • MacGill, M. November 14, 2023. Information on osteoporosis. Medical News Today: https://www.medicalnewstoday.com/articles/155646
    • Image 1, There are six ways to prevent osteoporosis, according to The Orthopedic Institute of New Jersey (n.d.). This article discusses ways to prevent osteoporosis.
  • Metacarpophalangeal (MCP) Joints

    Metacarpophalangeal (MCP) Joints

    The metacarpophalangeal (MCP) joints are the knuckle joints where the metacarpal bones of the hand meet the proximal phalanges of the fingers. These synovial joints allow flexion, extension, abduction, adduction, and limited rotation, enabling fine motor movements. They are supported by collateral ligaments, the volar plate, and the extensor hood, contributing to joint stability and hand function.

    Each metacarpal bone is connected to the matching proximal phalanx of each finger by five distinct metacarpophalangeal joints. Concave bases of the proximal phalanges accept convex heads of the metacarpal bones to form each metacarpophalangeal joint.

    The metacarpophalangeal joints can move in the following directions: flexion, extension, circumduction, abduction, adduction, and limited rotation. The ligaments, joint capsule, and surrounding musculotendinous structures all contribute to the stability and flexibility of the fingers, which are essential for hand function.

    Introduction

    Metacarpophalangeal (MCP) joints are diarthrodial joints in which the concave proximal aspect of each phalange articulates with the massive convex heads of the distal aspect of the metacarpals. Each metacarpal head and proximal phalange has a hyaline cartilage articulating surface. As transitions between the palm and the fingers, each hand has five distinct MCP joints. In layman’s terms, the MCP joints are known as the “knuckles,” the metacarpal heads are most apparent dorsally while making a fist.

    Stability and flexibility are combined in these joints to provide the hand’s necessary dexterity. Muscles act on the MCP joints, just like on other joints in the body, to enable particular joint movements. These motions consist of limited circumduction, flexion, extension, abduction, and adduction. A classic and distinguishing characteristic of rheumatoid arthritis (RA) from osteoarthritis (OA), which usually affects the distal interphalangeal (DIP) joints, is arthritis affecting the MCP joints.

    Structure and Function

    The human hand’s ability to function depends critically on the MCP joints. Although the thumb’s MCP joint and the MCP joints of the other digits are physically and functionally identical, there are some variances, which will be mentioned as appropriate. The thumb’s MCP joint is a hinge joint that permits little extension, adduction, or abduction and up to 80 to 90 degrees of flexion. The two to five-digit MCP joints are shallow ball and socket joints that permit minimal circumduction, flexion, extension, abduction, and adduction.

    Along with differences in muscle attachment sites, the thumb’s MCP joint’s range of motion differs significantly from that of the fingers’ MCP joints. The form of the metacarpal heads explains this discrepancy. Range of motion (ROM) is decreased in the thumb because the metacarpal head is flatter than the metacarpal heads of the second through fifth MCP joints. Despite this, there is a great deal of variation in thumb range of motion because different people have more spherical metacarpal heads.

    The MCP joint’s design offers very little inherent stability. The joint capsule, ligaments, and the surrounding musculotendinous balance are the main stabilizing factors of the joint.

    The dense fibrocartilaginous thickening of the palmar aspect of the MCP joint capsule is called the volar plate. The main purpose of the volar plate is to keep the joint from becoming too stretched. After starting on the metacarpal head, it attaches to the nearby proximal phalange. Two sesamoid bones are embedded in the thumb, and the proximal part of the palmar plate is narrower than the distal third.

    Together with the palmar plate and A1 annular ligament, the sesamoids—which are joined by the phalangoglenoid ligament—form a synovial sheath that stabilizes the flexor pollicis longus tendon as it crosses the MCP joint. The deep transverse metacarpal ligament, which supplies stability and keeps the metacarpal heads from separating, connects the palmar plates of digits two through five.

    There is a collateral ligament on the radial and ulnar aspects of every MCP joint, which is made up of an auxiliary collateral ligament and a proper collateral ligament. The main stabilizers of the MCP joint are the appropriate collateral ligaments, which are robust cord-like structures. The appropriate collateral ligaments arise from the lateral-dorsal face of the metacarpal head and traverse the joint to insert onto the volar border of the next proximal phalange.

    The accessory collateral ligaments fan out obliquely to insert onto the distal part of the volar plate, having a more volar and proximal origin than the true collateral ligament. The proper collateral ligaments are taut in joint flexion, while accessory collateral ligaments are taut in joint extension because of the two collateral ligaments’ different orientations and the metacarpal head’s distinctive oval form. Furthermore, these variations produce a cam effect that allows for a significant range of motion (ROM) in both the flexion extension and adduction-abduction axes.

    Along with the palmar plate and collateral ligaments, the joint capsule envelops the MCP joint. It keeps the joint taut during joint flexion and stabilizes it dorsally.

    The plantar plate gives rise to sagittal bands, which superficially encircle the MCP joint and form a “lasso” around the extensor muscle-tendon underneath. The extensor muscle may extend the MCP joint thanks to this structure, even though it has a weak attachment to the proximal phalanx.

    Embryology

    The zone of polarizing activity (ZPA), the apical ectodermal ridge (AER), and the nonridged ectoderm are the three main signaling centers that work in concert to guide the creation of the proper developmental axis for the upper extremities.

    The conclusion of the fourth week of embryonic development marks the emergence of four limb buds from the ventrolateral surface of the growing embryo. The lateral plate mesoderm gives rise to the somites and mesenchyme that make up the limb buds, which are then encased in a layer of cuboidal ectoderm.

    Later, the cells from the lateral plate mesoderm will develop into the connective tissue of the extremities. When the somites’ paraxial mesoderm cells move into the limb buds, they produce the limb musculature. The AER is finally formed by the ectoderm layer at the distal tip of the developing limb growing larger. As more proximal limb cells farther from the AER start to develop into connective tissue and muscle cells, the AER causes nearby mesenchymal cells to stay undifferentiated and keep growing.

    As the sixth week of embryonic development concludes, chondrocytes have produced a basic hyaline cartilage construct that will later undergo endochondral ossification to build the upper extremity’s bones. This cartilage forms the MCP joints when chondrogenesis is locally stopped by factor signaling, which eventually leads to the creation of a joint cavity. The joint capsule develops from mesenchymal cells that are close to the joint cavity. The epiphyses ossify postnatally, whereas the diaphyses of the metacarpal and proximal phalanges are ossified by the ninth week.

    Articular surfaces

    The joints that link the palm and fingers are called metacarpophalangeal joints. The rounded biconvex head of the metacarpal bones is home to the proximal articular facet. Anteriorly, this articular surface is larger than posteriorly.

    The significantly smaller concave articular facets on the bases of the proximal phalanges engage with the metacarpal heads. The palmar ligament, which serves as a hinge, elongates the facets of the phalanges anteriorly. Hyaline cartilage lines the articular surfaces of the phalangeal and metacarpal processes.

    Two of the hand’s bones articulate to form the metacarpophalangeal joint:

    • The metacarpal head is a convex, massive articulating surface.
    • The proximal phalanx’s base has a concave, smaller articulating surface.

    Hyaline cartilage lines the articular surfaces of the metacarpal and phalangeal bones.

    Ligaments and joint capsule

    A loose fibrous capsule that is attached around the articular facets’ edges envelops the joint. Through collateral metacarpophalangeal ligaments, the joint capsule is reinforced and thickened on its medial and lateral sides. The posterior capsule gets fibers from the tendons of the long extensors of the forearm (extensor pollicis longus, extensor indicis, extensor digitorum, and extensor digiti minimi), while the palmar metacarpophalangeal ligament primarily replaces the capsule on its anterior aspect.

    Collateral ligaments

    ligament of Metacarpophalangeal (MCP) Joints
    ligament of Metacarpophalangeal (MCP) Joints

    The collateral ligaments, which are found on the radial and ulnar sides of the MCP joint, are important stabilizers of the joint. Proper collateral and auxiliary collateral ligaments make up these ligaments. Together, these robust ligamentous bands restrict the range of motion in the adduction-abduction and flexion-extension axis.

    The palmar aspect of the nearby proximal phalanx, just distal to the base, is where the appropriate collateral ligaments extend from the posterior tubercles on the dorsolateral aspect of the metacarpal head. These ligaments’ main function is to restrict the MCP joint’s range of motion.

    The accessory collateral ligaments connect to the distal third of the palmar (also called volar) plate more distally after attaching more proximally to the metacarpal head. The joint’s range of motion is restricted by the accessory collateral ligaments’ taut extension.

    Palmar ligament

    A dense fibrocartilaginous thickening on the palmar face of the MCP joint capsule is called the palmar ligament, sometimes known as the palmar or volar plate. Their attachment to the palmar side of the metacarpal neck is slack, but they are securely attached to the palmar surface of the neighboring proximal phalanx’s base. The collateral ligament and the palmar ligament’s sides merge. The thumb’s palmar ligament comprises two sesamoid bones that articulate with the thumb’s metacarpal head’s palmar facets. The primary purpose of this ligament is to keep the MCP joint from being overextended.

    Deep transverse metacarpal ligaments

    The thin fibrous bands that connect the second through fifth metacarpophalangeal joints by running across their palmar surfaces are known as the deep transverse metacarpal ligaments. They are located posterior to the lumbricals and anterior to the interossei muscles. The central palmar aponeurosis’s digital slips are attached to their palmar surfaces. The stability of the MCP joints during grip functions is mostly facilitated by these ligaments.

    Joint Capsule

    The loose fibrous joint capsule that covers each metacarpophalangeal joint affixes along the articulating surface edges. Collateral ligaments strengthen the thicker joint capsule on the medial and lateral sides.

    Innervation

    The nerves listed below innervate the metacarpophalangeal joints:

    • The radial nerve’s branch known as the posterior interosseous nerve (C5-T1)
    • The C8-T1 deep terminal branch of the ulnar nerve
    • The median nerve’s palmar branches (C6-T1)

    Blood Supply and Lymphatics

    The ulnar and radial arteries, which anastomose in the superficial palmar and deep palmar arches, provide blood to the hand. The dorsal and palmar metacarpal arteries, the radial artery of the index finger, the common palmar digital arteries, and the Princeps pollicis artery are only a few of the many branches that supply the MCP joints.

    Both superficial channels that run beside the basilic and cephalic veins and deep channels that run alongside the arteries are responsible for the hand’s lymphatic drainage. The cubital and epitrochlear lymph nodes are among the lymph nodes in the elbow where these lymphatics flow before finally emptying into the axillary or infraclavicular lymph nodes.

    There are branches of the radial and ulnar arteries that give blood to the MCP joints.

    • Princeps pollicis artery
    • Palmar and dorsal metacarpal arteries
    • Radialis indices artery
    • Common palmar digital arteries

    Nerves

    The three primary forearm nerves—medial, ulnar, and radial—provide innervation to the muscles that traverse the MCP joint by branches. The palmar branches of the median nerve, the deep terminal branch of the ulnar nerve, and the posterior interosseous nerve innervate the MCP joints.

    Mobility and Stability

    The metacarpophalangeal joint is stabilized mostly by the collateral ligaments. Whereas the supplementary collateral ligaments restrict hyperextension, the proper collateral ligaments mainly restrict hyperflexion.

    The palmar ligament’s primary purpose is to stop overextension. When performing grip functions, the deep transverse metacarpal ligaments help to stabilize the MCPJ.

    Movements

    There are two planes of motion in each metacarpophalangeal joint. Flexion, extension, abduction, adduction, circumduction, and restricted rotation of the digit are all permitted.

    The hand and forearm muscles are responsible for moving the joint.

    Thumb

    • The flexor pollicis brevis and longus muscles cause flexion.
    • Extensor pollicis brevis and longus create extension.
    • Adductor pollicis produces adduction.
    • Abductor pollicis longus and brevis create abduction.
    • The flexor and abductor pollicis brevis muscles contract together to cause axial rotation.

    Digits 2-5

    • Flexor digitorum superficialis, flexor digitorum profundus, lumbricals, and flexor digiti minimi (5th digit) all contribute to flexion.
    • Extensor digitorum, extensor indicis (second digit), and extensor digiti minimi (fifth digit) all contribute to extension.
    • The palmar interossei muscles create adduction.
    • The muscles that produce abduction are the dorsal interossei. It is also the abductor digit minimi that causes the abduction of the fifth digit.

    Metacarpophalangeal joints can move in flexion, extension, adduction, abduction, circumduction, and limited rotation. Every joint has two degrees of freedom.

    Flexion and extension

    The two main movements in the metacarpophalangeal joint are thought to be flexion and extension. While extension spans from 10° in the index finger to 30° in the little finger, active flexion has a range of motion of about 90°. A minor lateral rotation is associated with flexion in the third to fifth MCP joints, whereas a slight medial rotation is associated with flexion in the second MCP joint.

    About 60°, or nearly total flexion, is the thumb MCP joint’s full range of motion. Antagonistic muscles and ligamentous tissues around the joint restrict mobility in this axis.

    Abduction and adduction

    About 25 to 30 degrees is the complete range of motion in this axis. Abduction is primarily responsible for this rather limited range of motion. Collateral ligaments and the metacarpal head’s width and shape mostly restrict these motions. The above-described configuration of the collateral ligaments prevents either abduction or adduction from occurring while the MCP joints are flexed. The movements in the corresponding carpometacarpal joints always follow abduction and adduction in the MCP joints.

    The thumb’s MCP joint is most affected by axial rotation, which happens during opposition. There are two types of rotation: active and passive. The flexor pollicis brevis and abductor pollicis brevis muscles work together to produce the active axial rotation. While passive movement might go either way, active rotation is always directed medially.

    Full flexion is the close-packed position of the second to fifth metacarpophalangeal joints, whereas maximal opposition is the close-packed position of the first metacarpophalangeal joint. Slight flexion is the open packed (resting) position for every joint. The capsular arrangement of the joints restricts flexion more than extension.

    These joints also have some auxiliary movements. Anteroposterior and lateral translation of metacarpals or phalanges, as well as accessory rotation at the thumb joint, are the main aspects of this.

    Muscles acting on the metacarpophalangeal joint

    All of the MCP joints’ movements are controlled by the hand and forearm muscles.

    • The flexor pollicis brevis, with assistance from the flexor pollicis longus muscle, is the primary muscle responsible for thumb flexion. Flexor digitorum superficialis, flexor digitorum profundus, lumbricals, and flexor digiti minimi brevis (fifth digit) are responsible for flexing digits two through five.
    • The extensor pollicis brevis is the primary muscle responsible for thumb extension (from the flexed position), with some assistance from the extensor pollicis longus muscle. Extensor digitorum, extensor indicis (second digit), and extensor digiti minimi (fifth digit) all contribute to the extension of digits 2 through 5.
    • Adduction of the thumb is performed by the adductor pollicis, whereas the palmar interossei muscles cause adduction of the other four digits.
    • Abductor pollicis longus and abductor pollicis brevis create abduction of the thumb; abductor digiti minimi produce abduction of the fifth digit; and dorsal interossei muscles produce abduction of fingers 2–5.
    • Flexor pollicis brevis and abductor pollicis brevis co-contraction actively produce axial rotation.

    Clinical Significance

    Metacarpophalangeal joint pain

    Metacarpophalangeal (MCP) joint pain refers to discomfort or inflammation in the knuckle joints, which can result from various causes, including arthritis (such as rheumatoid or osteoarthritis), injury, overuse, or ligament strain.

    Hand function may be impacted by symptoms such as discomfort, stiffness, edema, and decreased range of motion. In order to control symptoms and stop more joint deterioration, a proper diagnosis and course of treatment are crucial.

    One characteristic of rheumatoid arthritis is that it affects the MCP, whereas osteoarthritis affects the distal interphalangeal joint.

    Skier’s Thumb

    An injury to the ulnar (medial) collateral ligament of the first metacarpophalangeal joint is referred to as a “skier’s thumb.” Usually, it happens when the thumb is violently abducted.

    Skiers who fall on an outstretched arm while carrying a ski pole are most likely to experience it because the thumb is forced to stay in an abducted position.

    To heal severe injuries like displaced bone avulsion fractures or total ligamentous rupture, surgery is necessary.

    Rheumatoid Arthritis With MCP Joint Involvement

    The inflammatory disease known as rheumatoid arthritis (RA) is characterized by significant inflammation of the synovium, hyperplasia, and the loss of cartilage and osseous tissue.MCP and proximal IP joints are the most often attacked minor joints by autoantibodies. Anti-cyclic citrullinated protein (anti-CCP) and rheumatoid factor (RF) antibodies are disease markers that are usually associated with high C-reactive protein (CRP) and erythrocyte sedimentation rate (ESR). Swelling and joint discomfort are the most typical signs of RA. Along with additional physical issues, some patients may experience psychological issues and cardiovascular problems.

    RA differs from other joint illnesses in that it involves the MCP joint. An imbalance between the active and passive forces acting on the joint is caused by connective tissue inflammation, which results in deformity, discomfort, and instability. Usually, bilaterally symmetric MCP joint edema is discovered early. A physical examination reveals pain while applying pressure or moving passively. MCP joint dislocation is frequent; in the later stages of the disease, it typically manifests as flexion and ulnar deviation. Consideration must be given to surgical intervention when the deformity significantly impairs function.

    A systemic inflammatory disease that lasts a lifetime is RA. For RA patients who are surgical candidates, a thorough assessment of their dietary and general condition is necessary. The best surgical treatment is determined in part by the extent of bone loss and deformity.

    MCP Joint Dislocation

    MCP joint injuries are frequently the result of direct trauma.

    Swelling, bruising, deformity, palpable discomfort, and restricted range of motion are common symptoms of MCP joint dislocation. The distal osseous fragment and its location with the proximal osseous element are usually affected by the disease. Dorsal dislocation is the most typical pattern of presentation.

    MCP joint dislocations can be further divided into two categories: basic and complicated. Closed reduction is an effective method for treating simple dislocations, whereas open reduction is typically necessary for complex ones.

    The following characteristics characterize a classic complicated dorsal MCP dislocation:

    • High proximal phalanx extension
    • Avulsion from the proximal metacarpal head and rupture of the volar plate
    • Dorsal to the metacarpal head, the volar plate prevents closed reduction.
    • Ulnar displacement of the flexor tendons
    • Both radial and volar displacement of the metacarpal head

    “Button-holes” in the metacarpal head between four structures:

    • Lumbrical
    • Flexor tendon on the displaced digit’s ulnar side
    • The distal transverse bands of the natatory ligaments
    • Superficial transverse ligament (proximal)

    Entrapment of the volar plate, sesamoid bones, bone fragments, and flexor pollicis longus tendon may result from dislocation of the thumb MCP joint.

    FAQs

    The MCP joints are what?

    The point where the finger and hand bones meet is called the metacarpophalangeal joint (MCP joint), or knuckle. The fingers have various directions of motion at the MCP joint. They may spread apart, bend, straighten, and move in unison. MCP joints are crucial for gripping and pinching.

    What are the metacarpophalangeal joints’ articulating features?

    A condyloid synovial joint is what the metacarpophalangeal (MCP) joint is classified as. Each digit is combined to form the palm. The articulation between two hand bones makes up the metacarpophalangeal joint: The metacarpal head is a convex, large articulating surface.

    What are the phalanges and metacarpals?

    A condyloid synovial joint is what the metacarpophalangeal (MCP) joint is classified as. The palm is created by combining each digit. Two of the hand’s bones articulate to form the metacarpophalangeal joint: The metacarpal head has: a large, convex articulating surface.

    How many joints are metacarpophalangeal?

    Each finger’s proximal phalanx is connected to the metacarpal bone by five distinct metacarpophalangeal joints.

    What are the metacarpophalangeal joints’ main functions?

    The concave bases of the proximal phalanges accept the convex heads of the metacarpal bones, which together form each metacarpophalangeal joint. The metacarpophalangeal joints can move in the following directions: flexion, extension, circumduction, adduction, abduction, and restricted movement.

    How is the capsule of the metacarpophalangeal joint supported?

    Many ligaments and adjacent musculoskeletal structures support the metacarpophalangeal joint capsule. Proper and accessory collateral metacarpophalangeal ligaments support the medial and lateral portions of the joint capsule.

    What is the metacarpophalangeal joints’ arterial supply?

    The radial and ulnar arteries’ branches provide the arterial supply to the MCP joints. The metacarpophalangeal joints can move in the following directions: flexion, extension, adduction, abduction, circumduction, and fixed rotation.

    References

    • Metacarpophalangeal (MCP) joints. (2023, October 30). Kenhub. https://www.kenhub.com/en/library/anatomy/metacarpophalangeal-mcp-joints
    • Wikipedia contributors. (2024, December 4). Metacarpophalangeal joint. Wikipedia. https://en.wikipedia.org/wiki/Metacarpophalangeal_joint
    • TeachMeAnatomy. (2023, April 15). The metacarpophalangeal joint – ligaments – TeachMeAnatomy. https://teachmeanatomy.info/upper-limb/joints/metacarpophalangeal/
    • H. Rupapara. April 5, 2023. The anatomy of the Samarpan metacarpophalangeal (MP or MCP) joint. Physiotherapy Clinic of Samarpan. The metacarpophalangeal joint (MCP) can be found at https://samarpanphysioclinic.com.
  • Anterior pelvic Tilt Brace

    Anterior pelvic Tilt Brace

    An anterior pelvic tilt brace is designed to support the lower back and pelvis by encouraging a neutral pelvic position. It helps reduce excessive arching in the lower back, alleviating strain on the lumbar spine and hip flexors.

    These braces are often used in posture correction, rehabilitation, and pain management. They work best when combined with strengthening and stretching exercises targeting the core, glutes, and hamstrings.

    Rotating or tilting your pelvis forward is a frequent condition known as anterior pelvic tilt. About 85% of men and 75% of women are impacted. This bad posture can lead to a number of health issues.

    The Negative Impact of Anterior Pelvic Tilt

    • Back pain, including a stabbing feeling between your pelvis and rib cage, and an abnormal curve of the lower back (lordosis)
    • A protruding stomach and weak abdominal muscles
    • Pain in your groin that is not specific
    • Hip joint pain
    • Hamstring sprain risk and overstretched hamstrings (the muscles on the back of the thighs)

    These alterations can lead to poor posture and raise your risk of injury, particularly when working out. Additionally, it may result in issues with your spinal discs.

    A sedentary lifestyle, excessive sitting, and bad posture are some of the reasons of anterior pelvic tilt. These elements may result in weak buttocks and hamstring muscles that are unable to resist the pressure of tight hip flexors dragging the pelvis downward.

    Causes

    • Hip flexor shortening and hip extensor lengthening are the causes of anterior pelvic tilt. This causes the upper back and lower spine to become more curved.
    • The muscles that connect the bone in the thigh to the pelvis and lower back are called hip flexors. They are used for kicking, running, and hip bending.
    • Three of the four muscles that make up the hip extensors are collectively referred to as the hamstring muscles, along with the gluteus maximus. They aid in hip extension.
    • Anterior pelvic tilt is also caused by weak stomach muscles.
    • Long periods of sitting are frequently the cause of the shifting curvature of the spine and the resulting muscular imbalances. Anterior pelvic tilt might also result from a lack of stretching or strengthening activities.

    Risk factors

    The following are risk factors for anterior pelvic tilt development:

    • Long periods of sitting,
    • inactivity,
    • bad posture, and
    • genetics

    Signs and symptoms

    Although an anterior pelvic tilt may not create any symptoms, it can lead to a bent spine and poor posture.

    Anterior pelvic tilt is frequently accompanied by no symptoms. Those who have symptoms might observe:

    • stiff muscles in the thighs and pelvis
    • weak stomach and gluteus maximus muscles
    • bad posture with a bulging stomach and a bending lower spine
    • Although lower back, hip, or knee pain is frequently mentioned as a symptom, there isn’t much proof that anterior pelvic tilt is the source of this.

    Advice for prevention

    The risk of anterior pelvic tilt may be decreased by following these suggestions.

    • Be careful of extended periods of sitting. People who work desk jobs or other employment that need them to sit for extended periods of time should take regular breaks to stretch or go for walks.
    • Take part in regular exercise. Exercises for strengthening and stretching should be a part of this.
    • Maintain good posture, particularly when seated. A workstation, screen, and seating arrangement that is both comfortable and healthful is crucial.

    Methods for Assessing Anterior Pelvic Tilt

    Measuring the angle between your anterior superior iliac spine (ASIS) and posterior superior iliac spine (PSIS) is a very easy process.

    How do you do this, then? You can either ask a friend for assistance or stand sideways in front of a mirror.

    • Step 1: Find your PSIS. These are located directly beneath your lower back’s dimples.You will feel a bony protrusion on each side if you move your fingers slightly to the left and right.
    • Step 2: Find your ASIS. These are located in front of your hips, at roughly the same level as the PSIS. Since they are fairly bony, you should have no trouble finding them.
    • The third step is to picture a line joining your PSIS and ASIS.

    It’s time to evaluate:
    An anterior pelvic tilt may be present if your descending line is significantly larger, upward of 2 inches. Remember that women often have a greater anterior pelvic tilt than men, and that there is a little descending line (about ½ inch) between the PSIS and ASIS by nature.

    How to Adjust the Pelvic Tilt in the Front
    It is crucial to address the muscle imbalance by strengthening the weaker muscles and releasing/stretching the tense ones in order to correct an anterior pelvic tilt. Let’s examine the muscles that we will be working.

    The following muscles are tense: –

    Hip flexors (tensor fascia latae, iliacus, rectus femoris, and psoas)
    The quadratus lumborum, multifidus, erector spinae, and latissimus dorsi are the back extensors.

    Core muscles (rectus abdominus, internal and external obliques, and transverse abdominus) are among the weaker muscles.
    The gluteus maximus, medius, and minimus are the gluteal muscles.

    Corrections

    A range of stretching and strengthening activities can be used to progressively bring the pelvis back to a neutral position in situations of anterior pelvic tilt. These workouts consist of the following:

    Child’s Pose:

    Childs-Pose
    Childs-Pose

    This stretch helps release the back muscles, including the Latissimus dorsi, which are typically tense during anterior pelvic tilt. To perform it, start on your hands and knees on the floor with your knees slightly wider than your hips.

    Then, bend your knees and turn your toes inward to push your hips backwards. Once you’re comfortable, straighten your arms forward and let your head fall forward into a relaxed position. Hold this position for 15 to 20 seconds, then slowly return to the starting position. Three repetitions is the goal.

    Cow and Cat

    Cat-and-Cow-Stretching
    Cat-and-Cow-Stretching

    This stretch helps in loosening the tense back muscles (Erector Spinae) associated with anterior pelvic tilt.
    Begin this stretch by getting down on your hands and knees.
    As you look up at the ceiling, take a breath and let your stomach to “drop” towards the floor.

    • Exhale, then slowly rotate your spine while pressing your hands into the floor and bending your neck slightly to gaze at your feet.
    • Try to perform this stretch five times.

    Warrior 2 Pose

    • This position opens up the hips, including the TFL muscle, and strengthens the legs
    • How to accomplish it:
    • Bend your right knee over your right ankle and bring your right toes toward the wall on your right to start from the Five Pointed Star position.
    • Reach out to the walls on either side while turning your hips and shoulders forward.
    • Look in the direction of the middle finger on your right hand.
      Maintaining the strength of your legs, press into your feet.
      To assist stretch your spine, lower your hips toward the floor and reach for the top of your head.
    • Press your chest upward while letting your shoulders drop and back.
      Maintain this posture for a maximum of 60 seconds.
      Resuming the five-pointed star stance, slowly straighten your legs and turn your feet forward.

    Double Knee to Chest

    • By stretching the spine extensors, which are frequently tense in people with anterior pelvic tilt, this stretch helps to release tension in the lower back.
    • How to accomplish it:
    • Start by placing your feet level on the floor and bending your knees while resting on your back on a mat.
    • Pull your right knee slowly in toward your chest with your right hand behind it, then bring your left knee in toward your chest.
    • Maintain this posture for fifteen to twenty seconds.
    • Unwind and gradually return to the beginning position, lowering one leg at a time.
    • Try to do this stretch three times.

    Squats

    SQUATS
    SQUATS
    • A person’s posture can be improved by strengthening their buttocks and leg muscles.
    • The hamstrings, buttocks, and other leg muscles are strengthened with squats.
    • Extend the toes a little.
    • Maintain a neutral back posture while applying pressure to the stomach muscles.
    • Inhale. To get the thighs parallel to the floor, bend the knees by lowering the hips back and down.
    • The heels should be firmly planted on the floor, and the knees should not go past the toes.
    • Exhale and slowly move back to the beginning position.
    • Do this ten to twenty times.

    Tilt of the pelvis

    PELVIC TILT
    PELVIC TILT
    • The abdominal muscles are strengthened by this workout.
    • With your knees bent and your face up, lie on the floor.
    • The back should be flat against the floor as you contract the abdominal (stomach) muscles. Raise the pelvis a little.
    • Maintain this posture for ten seconds or more.
    • Five sets of ten repetitions should be performed.
    • Raising the back leg while kneeling
    • This exercise strengthens the muscles in the stomach while stretching the muscles in the back and buttocks.
    • On an exercise mat, start on your hands and knees. The knees should be positioned squarely beneath the hips, and the hands beneath the shoulders. The hands and knees should bear an equal amount of weight.
    • Tighten the muscles in your stomach.
    • Maintaining the right leg straight and the toes pointing, bring it back into alignment with the body. Avoid arching your back.
    • Keep the leg in place for five seconds. Reduce and do it ten times.
    • Repeat the previous step with the other leg after switching sides.

    Hip flexor stretch while kneeling

    • Tight hip flexor muscles can be lengthened and loosened with this stretch.
    • Make sure the right knee is exactly above the right ankle when you kneel on the left knee.
    • For support, place both hands on the right thigh. Make sure the spine is straight and tall.
    • Maintain a neutral pelvic position while contracting the muscles in your stomach and buttocks.
    • Make sure your back and pelvis stay stable as you lean forward into your right hip. The inner thigh and hip flexors should both be stretched.
    • For 30 seconds, maintain this posture. Try to stretch a little bit more with each of the five repetitions.
    • To extend the opposite hip, switch sides and follow the same procedure.

    The bridge of the glutes

    • This workout focuses on the hamstrings and buttocks.
    • With your knees bent and your face up, lie on the floor.
    • The feet should be hip-width apart.
    • Squeeze the muscles in your tummy until your back is flat on the ground. Throughout the exercise, maintain your abdominal muscles active.
    • Exhale and raise your hips off the ground so that your thighs and upper torso are in a straight line.
    • Take a deep breath and softly drop to the ground.
    • Do this ten to twenty times.

    The plank

    PLANK
    PLANK
    • Although performing a plank may be challenging at first, participants should aim to maintain the position for as long as they can, eventually up to one minute.
    • The back and stomach muscles are targeted by the plank workout.
    • On an exercise mat, lie face down.
    • Palms down, place the hands on the mat. The hands should remain precisely beneath the shoulders.
    • Tighten the muscles in your thighs and tummy.
    • Ascend slowly into a push-up position by raising your thighs and upper torso off the floor. Maintain a straight and rigid body. Throughout the workout, make sure your abdominal muscles are working.
    • Try to hold the plank position for as long as you can, up to 60 seconds. Gently bring the body down to the floor.

    Dead Bug

    Dead bug
    Dead bug

    In addition to strengthening the deep core, this exercise helps to stabilize the hips and trunk.
    How to do it:

    • Start by extending both arms toward the ceiling while resting on your back. Raise your legs to a 90-degree angle off the ground.
    • In order to flatten your back onto the floor, rotate your pelvis upwards, brace your core muscles, and exhale to bring your ribs down. This is the starting posture for the exercise, which you must maintain throughout the movement.
    • Lower your right arm back to just above the floor while you begin the exercise by extending your left leg, straightening at the knee and hip, and bringing the leg down to just above the floor (don’t allow your lower back arch).
    • Return your right arm and left leg to the beginning position while maintaining a taut abdominal and gluteal muscle.
    • Do the same with your left arm and right leg.
    • For twenty repetitions, switch sides.

    Dog Bird

    Bird-dog Exercise
    Bird dog with elbow-to-knee
    • This is an excellent workout to strengthen your lumbar back muscles and core.
    • How to accomplish it:
    • Start on your hands and knees, placing your knees beneath your hips and your hands beneath your shoulders.
    • Before starting any movement, brace (contract) your core as firmly as you can.
    • Lift your left arm and reach it forward until it is in line with your chest while bracing your core. Kick your right leg backwards until it is in line with your torso likewise.
    • When doing this, it’s crucial to avoid arching your low back.
    • Return to the starting position gradually after holding this position for two to three seconds.
    • Do ten reps on each side.
    • Avoid arching your low back and only extend your arm and leg as far as it feels comfortable.

    Anterior pelvic tilt brace

    Anterior Pelvic Tilt Brace Types

    People with anterior pelvic tilt (APT), a postural problem in which the front of the pelvis is tilted downward and the back is slanted upward, can benefit from using a brace to assist manage or rectify the condition. Numerous musculoskeletal disorders, such as lower back discomfort, hip pain, and knee and ankle problems, can result from this posture. The following brace types are frequently employed for this purpose:

    Belts for the hips
    The pelvis can be stabilized and supported with the use of hip belts. They can help realign the pelvis to its neutral position when worn around the hips. For those whose anterior pelvic tilt is linked to hip mobility problems, this can be especially helpful.

    LSO, or lumbar sacral orthosis
    An LSO brace can help correct APT by supporting the pelvis and lower back. It helps to keep the spine’s natural curvature and the pelvis in a more neutral position by supporting the lumbar region and the sacral portion of the pelvis.

    Brace for Posture Correction
    To assist in pulling the shoulders back and down, a posture corrector brace can be worn around the chest and over the shoulders. This can help lessen the excessive lower back curvature, or lumbar lordosis, that is frequently linked to APT. The bracing’ design allows for adjustment.

    Orthosis of the Pelvic Dynamic
    The purpose of this kind of brace is to give the pelvis dynamic support and correction. Usually, it comprises of a harness system that is fastened to the pelvis and linked to a ground-anchored base. The force vector produced by this arrangement aids in stabilizing the pelvis in a neutral posture and realigning it.

    Personalized Orthotics
    These are customized shoe inserts made to meet the unique requirements of each person. By giving the feet the proper support and alignment, they can aid in the correction of biomechanical problems associated with APT, which in turn impacts the pelvic and lower back.

    How to pick an anterior pelvic tilt brace

    An important first step in controlling and resolving posture problems associated with anterior pelvic tilt (APT) is choosing the appropriate anterior pelvic tilt brace. APT results in an accentuated lumbar curve and a number of musculoskeletal issues when the front of the pelvis tilts downward and the back tilts upward.

    The brace is a supporting device that helps with posture correction, pelvic realignment, and pain relief. When selecting an anterior pelvic tilt brace, keep the following important considerations in mind:

    Speaking with a Healthcare expert: 

    It’s crucial to speak with a healthcare expert, such as an orthopedic specialist, chiropractor, or physical therapist, prior to selecting an anterior pelvic tilt brace. They are able to determine the extent of the posture problem, spot any underlying musculoskeletal issues, and offer tailored advice on the best kind and kind of brace.

    Type and Design of Braces:

    For correcting anterior pelvic tilt, braces of several kinds are available, such as sacroiliac (SI) joint belts, posture correctors, and pelvic belts. Every kind has a unique function and provides varying degrees of assistance. For instance, whereas posture correctors concentrate on enhancing general posture, pelvic belts and hip braces are made to realign the pelvis.

    Adjustability and Customization:

    To match a certain body shape and size, look for a brace that is both adjustable and customizable. Effective correction requires the ability to modify the tightness and support levels because anterior pelvic tilt can vary in severity and impact people differently.

    • Quality & Durability: Select a brace composed of sturdy, long-lasting materials that can tolerate frequent use. Seek out braces with strong fastening systems, reinforced stitching, and breathable materials. Purchasing a high-quality brace can guarantee improved support and more durable outcomes.
    • Comfort and Mobility: Because an anterior pelvic tilt brace must be worn for extended periods of time, comfort is crucial. Choose a brace that offers sufficient support without being uncomfortable or limiting movement. To improve comfort and mobility, look for features like breathable fabrics, ergonomic design, and padded straps.
    • Integrated Support Features: Some braces have built-in support components that might offer more comfort and stability, such silicone inserts or lumbar support pads. If you have lower back pain or discomfort related to anterior pelvic tilt, think about wearing braces with these features.

    Functions

    • Posture Support: Good posture depends on the pelvis and spine being properly aligned, which is something that the brace helps to maintain. It encourages a neutral pelvic position and stops excessive anterior tilting by supporting the pelvis. For people who spend a lot of time sitting or doing activities that cause them to have bad posture, this function is crucial.
    • Pain Relief: The purpose of these braces is to alleviate anterior pelvic tilt-related lower back, hip, and knee pain. They accomplish this by reducing pressure on the intervertebral discs, encouraging improved spinal alignment, and easing the strain on the muscles and ligaments. Those who suffer from musculoskeletal pain or postural disorders would especially benefit from this feature.
    • Rehabilitation: In order to address postural imbalances, anterior pelvic tilt braces are utilized as instruments in rehabilitation programs. They improve stability and function by helping to strengthen the muscles supporting the lower back and pelvis. For people who are recuperating from accidents or who require corrective measures to address postural concerns, this function is essential.

    Qualities

    • Adjustable Straps: The majority of braces have straps that may be adjusted to suit the user’s comfort and support requirements. This function guarantees that the brace stays firmly in position and provide the required support and compression.
    • Lumbar Support: A lot of braces have built-in lumbar support, either with contoured design components or padded inserts. This function is intended to give the lower back area more support, which will lessen the pain and discomfort brought on by lumbar spine disorders.
    • Breathable Materials: Braces are frequently made of breathable materials like mesh panels, moisture-wicking textiles, and ventilated designs to improve comfort, particularly during extended wear. By keeping the skin pleasant and dry, this function lowers the chance of irritation or overheating.

    Design

    • Contoured Design: In order to accommodate the natural curve of the lower back and pelvis, braces for anterior pelvic tilt are frequently made with a contoured shape. This design improves comfort and efficacy by giving the afflicted areas appropriate support and pressure alleviation.
    • Multi-Panels: A number of panels that offer compression and support make up the multi-panel design of certain braces. This design is appropriate for people with different degrees of anterior pelvic tilt and related discomfort because it offers more accurate support and better adaptation to the contours of the body.
    • Easy Wear: People with mobility concerns or those undergoing rehabilitation may find these braces to be a convenient alternative because they are usually simple to put on and take off. This aspect of the brace’s design guarantees that users may easily and comfortably integrate it into their everyday routine.

    FAQs

    Can other postural problems be resolved with an anterior pelvic tilt brace?

    Unfortunately, no. Every posture problem is different and needs a different kind of brace to be fixed effectively. Therefore, without expert advice, a brace made for anterior pelvic tilt might not be appropriate for addressing other postural problems.

    When using a brace, how long does it take to see a change in posture?

     The length of time varies based on how severe the condition is and how consistently the brace is used. Usually, within a few weeks or months, consumers may begin to observe measurable changes. However, other remedial methods should be employed in addition to the brace.

    Is it possible to wear an anterior pelvic tilt brace while exercising or engaging in physical activity?

    Some braces are made especially to be worn during exercise or physical activity. However, it’s crucial to pick the appropriate brace type and speak with a medical expert to make sure it fits your activity level and won’t limit your range of motion or result in harm.

    Are pelvic braces effective?

    Narrower belts that wrap around your pelvis, between your hip and leg bones, are called sacroiliac (SI) joint braces or pelvic braces. For people who are more hyperflexible and whose pain radiates down into their glutes or pelvis instead than just their spine, they can be a terrific way to provide some support.

    What is the name of a pelvic brace?

    When someone has a pelvic fracture, a pelvic binder is a tool used to compress the pelvis. It supports and stabilizes the pelvic area and lessens pain during movements. The Aukris pelvic binder is useful for post-trauma, post-surgery, and pelvic fracture applications.

    Is it possible to permanently correct pelvic tilt?

    Although APT can be resolved, some people may need to put in more effort than others in order to resume their regular lives. In the end, the degree of difficulty will be determined by the patient’s objectives, skill level, and the degree of postural disruption.

    Is sciatica a result of pelvic tilt?

    Indeed, the sciatic nerve may be compressed or irritated by misalignments that cause muscle imbalances or deform the spine or pelvis. It’s crucial to align properly.

    What advantages does pelvic tilt offer?

    Tilts of the pelvis assist offset that posture. Additionally, they strengthen deep core strength to support your body during daily activities like lifting and squatting, and they stretch tight muscles in your lower back to assist relieve back discomfort.

    Reference:

    • Anterior pelvic tilt. (n.d.-b). Baptist Health. https://www.baptisthealth.com/blog/sports-medicine/anterior-pelvic-tilt
    • Leonard, J. (2017, May 11). Six fixes for anterior pelvic tilt. https://www.medicalnewstoday.com/articles/317379#fixes
    • McQuilkie, S., DC. (2023, July 3). How to fix anterior pelvic tilt posture – 10 exercises | Back Intelligence. Back Intelligence. https://backintelligence.com/anterior-pelvic-tilt-fix/
    • Brace for anterior pelvic tilt – Alibaba.com. (n.d.). https://www.alibaba.com/showroom/brace-for-anterior-pelvic-tilt.html

  • 14 Best Yoga To Relieved Stress

    14 Best Yoga To Relieved Stress

    Stress has become common in the modern world. Whether stress is caused by personal struggles, pressure from the workplace, or a general sense of overburden, it can have an unhealthy impact on one’s physical and mental health. One of the best ways to manage stress is through yoga, a traditional method that promotes meditation, balance, and relaxation.

    This article will discuss Yoga To Relieve Stress, its benefits for stress management, and advice for beginning a yoga practice.

    Introduction:

    For most people, stress happens every day. Finding strategies to reduce stress and prevent it from entering your life is important because it can be moderate in certain situations and severe in others. One way to reduce stress is to practice yoga.

    Yoga’s popularity keeps rising as more individuals discover its mental and physical advantages. A frequent goal for those who want to encourage good growth and concentrate on self-improvement is to prevent and minimize stress, which can be achieved by starting a personal yoga practice.

    You may be able to release stress and emotions by doing yoga positions that help you reduce physical limitations like muscular knots. Additionally, they encourage the release of feel-good hormones called endorphins, which can improve your ability to cope with stress.
    During your yoga practice, concentrating on the here and now helps you become more aware, concentrate better, and focus your thoughts.

    The Benefits of Yoga for Stress Reduction:

    • Encourages Prolonged Relaxation

    The parasympathetic nerve system, sometimes known as the “rest and digest” system, is activated when yoga helps the body achieve a deep level of relaxation. Yoga creates a relaxing effect that lowers blood pressure, and heart rate, and promotes calmness by focusing on the breath and employing slow, purposeful movements.

    • Reduces Tension in the Muscles

    Muscle tension is a common sign of stress, especially in the shoulders, neck, and back. Asanas, or specific postures, are used in yoga to help people stretch and relieve this tension. Stress-related pain can be instantly relieved by releasing tense muscles with the help of gentle yoga poses.

    • Improves Focus and Mental Clarity

    Stress may affect decision-making, making it difficult to concentrate or think clearly. By helping practitioners concentrate on the present movement, yoga promotes attention. Movement, peace, and breath awareness all contribute to mental relaxation, which promotes mental clarity. This mental focus not only helps during practice but also improves concentration and decision-making in daily life, which makes managing challenging situations easier.

    • Promotes Oxygen Flow and Breathing

    The focus on deep breathing, or pranayama, is one of the fundamental elements of yoga. The body receives more oxygen while breathing slowly and constantly, which lowers stress chemicals like cortisol and promotes the relaxation response. By expanding lung capacity and raising blood oxygen levels, breathing techniques like diaphragmatic breathing and alternative nostril breathing might help the body better handle stress and anxiety.

    • Lowers Anxiety and Encourages Emotional Stability

    One of the most prevalent side effects of stress is anxiety, which yoga effectively reduces. Yoga’s focused technique helps control the neurological system, which lowers anxiety levels. The mind can be calmed by some positions, particularly those that incorporate forward bends and gentle twists. Additionally, the meditation aspect of yoga helps practitioners manage powerful emotions like worry, fear, or frustration by promoting emotional balance and concentration.

    • Improves Sleep Quality

    A good night’s sleep is frequently affected by stress and anxiety. By reducing physical stress that may be affecting relaxation and beneficial to the neurological system, yoga helps improve sleep quality. To prepare the body and mind for a good night’s sleep poses like Savasana (Corpse Pose) and Legs Up the Wall (Viparita Karani) are very beneficial. Regular yoga practice can help you sleep better and longer, which will give you more energy and help you handle stress better.

    • Gives a sense of control

    Feeling out of control or overcome by outside events is a common cause of stress. By concentrating on your body, breath, and mind, yoga offers the chance to regain control. As you continue to practice, you will feel more in control of your breathing and posture patterns, which can help you feel more in control of how you react to stress. This feeling of strength can help you feel less powerless and improve your ability to handle stress healthily.

    • Improves General Happiness and Well-Being

    Endorphins are the body’s natural “feel-good” hormones, and yoga increases their production. As a result, one’s mood and sense of well-being improve. Including yoga in your daily routine can help you feel more calm, less angry or depressed, and have a more positive outlook on life. Increased strength and flexibility are two physical advantages that also support improved body awareness and self-worth.

    • Develops Present-Moment Awareness and Concentration

    A basic principle of yoga is the practice of awareness, which involves staying fully engaged and present in the moment. You can avoid the worrying habit that often follows stressful situations by using this strategy. Instead of thinking about the past or the future, yoga encourages you to focus on your breath, your environment, and the sensations in your body. Because of this improved awareness, you may face life with greater strength and calm, which also helps in better stress management.

    • Improves the Relationship Between Mind and Body

    A strong bond between the body and mind is promoted by yoga. Yoga helps you become more self-aware by concentrating on how your body feels in each pose and paying attention to your thoughts and feelings as they come up. It may be simple to identify when stress is increasing and take protective measures to reduce it if there is a greater mind-body connection. This relationship also promotes self-compassion, which allows you to handle stressful situations with greater tolerance and understanding.

    The Best Yoga Poses for Stress Relief:

    Certain yoga poses are very beneficial for promoting relaxation and reducing stress. These poses promote mental calmness, tension release, and physical opening.

    Some useful yoga poses to include in your practice are as follows:

    Child’s Pose (Balasana)

    Child’s Pose is a very calming pose that relaxes the nervous system and extends the thighs, hips, and back. It’s an excellent way to start or finish your practice.

    • Start by placing your wrists just beneath your shoulders and your knees about hip-width apart on a tabletop position.
    • Depending on how comfortable you are, slowly sit your hips back toward your heels while maintaining your knees together or widely apart.
    • To stretch your spine, reach forward and extend your arms in front of you on the floor, palms down.
    • For a more relaxing variation, you can also place your arms next to your body with the palms facing up.
    • Let your neck relax and place your forehead gently on the floor.
    • For extra comfort, place a block or cushion beneath your forehead.
    • As you hold the pose for a few breaths, concentrate on relaxing your mind and letting go of any tension in your body.
    • Allow your body to relax even farther into the stretch as you exhale, and feel your ribcage expand as you inhale.
    • Then return to your neutral position.
    • Then relax.
    • Repeat this yoga pose for 5 to 10 times.
    Childs-Pose
    Childs-Pose

    Cat-Cow Pose (Marjaryasana-Bitilasana)

    Tension in the neck, shoulders, and spine can be released with this gentle movement between two positions. The change from rounding to arching the back also promotes deep breathing.

    • Start on your hands and knees, placing your knees beneath your hips and your wrists exactly beneath your shoulders.
    • To support your weight, keep your fingers wide apart.
    • Raise your chest and tailbone toward the ceiling while arching your back during the inhalation.
    • Allow your abdomen to fall toward the floor while you look forward or slightly upward, causing your spine to gently curve. It’s called the Cow Pose.
    • Pull your belly button toward your spine and tuck your tailbone as you exhale, extending your spine upward.
    • Imagine a cat stretching its back as you lower your head toward the floor (without bringing your chin to your chest). The cat pose is this one.
    • Continue to move with your breath as you alternate between these two postures.
    • To enter Cow Pose, take a breath; to enter Cat Pose, take a breath out.
    • For multiple rounds, repeat the action while keeping your breath in rhythm.
    • Then return to your neutral position.
    • Then relax.
    • Repeat this yoga pose for 5 to 10 times.
    Cat-and-Cow-Stretching
    Cat-and-Cow-Stretching

    Legs Up the Wall (Viparita Karani)

    This healing posture encourages circulation, lowers anxiety, and relaxes the nervous system. It’s particularly beneficial for mental relaxation following a tired day.

    • Look for an open area that has a wall.
    • Make sure you’re near the wall when you set a blanket or yoga mat on the floor.
    • Your right or left hip should be near the wall as you sit sideways.
    • After that, lift your legs to the wall and slowly drop your back to the floor.
    • Your thighs should be parallel to the wall and your feet contracted as you extend your legs straight up against the wall.
    • To ensure that your legs are supported comfortably, adjust the distance between you and the wall.
    • To increase your level of relaxation, you can raise your hips a little by placing a pillow or block underneath them.
    • You can rest your arms on your tummy if you’d like, or you can rest them out to the sides with your palms facing up.
    • With your neck in a neutral posture and your head comfortably resting on the floor, you can make your neck more comfortable by placing a folded towel or small pillow beneath your head.
    • Close your eyes and concentrate on your breathing, taking deep breaths in and out.
    • For a few seconds, or longer if it feels good, relax yourself into the pose.
    • Gently turn to one side, bend your knees slowly, and pull them toward your chest before raising yourself back up to a seated posture.
    • Then return to your neutral position.
    • Then relax.
    • Repeat this yoga pose for 5 to 10 times.
    Legs up the wall pose
    Legs up the wall pose

    Standing Forward Bend (Uttanasana)

    Back, shoulder, and neck tension is released in this pose.

    • Place your arms at your sides, keep your body tall and straight, and place your feet hip-width apart.
    • When you inhale deeply, extend your arms upwards and lengthen your spine.
    • Bend slowly forward from your hips (not your waist) as you release the breath, maintaining a small bend in your knees if necessary.
    • As you tilt at the hips, try to move your upper body closer to your thighs while maintaining a long spine.
    • Let your head hang loosely after folding your body up.
    • Any neck tightness can be relieved by giving it a gentle shake.
    • Depending on your level of flexibility, place your hands on the ground, your ankles, or your shins.
    • If your hands aren’t touching the floor, you can use yoga blocks underneath them to make the pose easier to do.
    • Pay attention to your deep breathing and let your upper body droop.
    • Over time, you can gradually increase the stretch’s depth by straightening your legs more (without locking your knees).
    • Breathe deeply and relax into the stretch while you hold this pose for a few seconds, or whatever long it feels comfortable.
    • Then return to your neutral position.
    • Then relax.
    • Repeat this yoga pose for 5 to 10 times.
    Standing-forward-bend-uttanasana
    Standing-forward-bend-uttanasana

    Seated Forward Fold (Paschimottanasana)

    This pose stretches the hamstrings, lower back, and spine while promoting relaxation and stress relief.

    • Your legs should be straight out in front of you while you sit on the floor.
    • Maintain a flexed foot position, with the toes pointing up at the sky, and a straight but loose knee.
    • Lengthen your spine as you take a deep breath, reaching your head’s top toward the ceiling.
    • Imagine that when you get ready to fold, your spine gets taller.
    • With your back as extended as you can, begin to bend forward over your legs as you exhale, progressively leaning at the hips rather than the waist.
    • Avoid going back too soon.
    • Instead, concentrate on hip-based movement.
    • Your flexibility will depend on whether you extend your hands to your shins, ankles, or feet.
    • Hold onto your feet with your hands if you can reach them.
    • If you are unable to reach your feet, place your hands on your legs or secure yourself with a yoga strap around your foot soles.
    • Your head should be relaxed about your legs.
    • Release any tightness in your neck to keep it long and prevent straining.
    • Try to let go of any tension in your body and extend the stretch as you take deep breaths.
    • Your body will eventually approach your thighs, but it’s important to concentrate on lengthening rather than pushing the fold.
    • Hold this position for a few seconds.
    • Then return to your neutral position.
    • Then relax.
    • Repeat this yoga pose for 5 to 10 times.
    Seated Forward Fold (Paschimottanasana)
    Seated Forward Fold (Paschimottanasana)

    Easy Pose (Sukhasana)

    Easy Pose, also known as Sukhasana, is a straightforward pose that releases mental tension and anxiety in both beginning and intermediate yoga.

    • Sit on the floor with your legs out in front of you to start.
    • For support, you can use a cushion or a yoga mat.
    • One foot should rest in front of the other as you cross your legs and bend your knees.
    • Your knees should slowly go under toward the floor, and the soles of your feet should be facing up.
    • Make sure that the bones you sit on, known as your sit bones, are securely connected to the ground.
    • Maintaining a straight spine will be easier if you sit on a cushion, blanket, or bolster to raise your hips a little if they are tight.
    • Maintain a long spine and sit upright.
    • To keep your neck in line with your spine, imagine something pulling the top of your head toward the ceiling.
    • Palms facing either upward or downward, depending on your preference, place your hands on your knees or thighs.
    • To expand up your chest and make space between your shoulder blades, gently rotate your shoulders back and down.
    • If it is comfortable for you, close your eyes and start breathing deeply and mindfully.
    • Breathe in and out slowly through your nose to focus on the present moment and now.
    • Sukhasana can be held for a few minutes or more, based on what you prefer.
    • It’s perfect for focusing on yourself, deep breathing, and meditation.
    • Then return to your neutral position.
    • Then relax.
    • Repeat this yoga pose for 5 to 10 times.
    Easy Pose (Sukhasana)
    Easy Pose (Sukhasana)

    Eagle Pose (Garudasana)

    Eagle position, also known as Garudasana, is a complex position that helps in stress relief and concentration by letting you “squeeze” out physical tension and concentrate on your balance.

    • Place your arms at your sides and stand tall with your feet hip-width apart.
    • Breathe deeply a few times to help you focus on yourself.
    • Put your weight on your left leg and start by bending your knees slightly.
    • You’ll stand on this leg.
    • With your right foot outside your left calf, raise your right leg and cross it over your left, or wrap it over your left thigh or calf if you can.
    • You don’t want to put your foot on your knee.
    • Finding balance while maintaining a squared hip position and an active core is the primary goal here.
    • Lift your arms shoulder-high and straight out in front of you.
    • Then, with your elbows bent at a right angle, cross your right arm beneath your left arm, pulling your palms together, or as near as possible.
    • Put the backs of your hands together if you are unable to move your palms together.
    • To help you stay balanced, pull your belly button closer to your spine.
    • To help keep your stability, keep your chest up and your eyes on a spot in front of you.
    • Maintaining a long spine, lower your hips and bend your knees further into a squat.
    • Your legs will stretch more deeply as a result, and your balance will be tested.
    • Hold this position for a few seconds.
    • Relax your arms and legs gradually before standing up again.
    • Then return to your neutral position.
    • Then relax.
    • Repeat this yoga pose for 5 to 10 times.
    • Repeat the position on the other side after taking a little break.
    Eagle arm stretch
    Eagle arm stretch

    Half Shoulder Stand (Sarvangasana)

    As your legs are elevated over your heart, this pose improves your mood and quality of sleep while also improving your body’s circulation.

    • On a yoga mat, start by lying on your back with your legs straight and your arms at your sides.
    • Press the soles of your feet against the mat while bringing your legs together.
    • For support, place your hands flat on the floor next to your body.
    • Using your core, raise your legs straight up toward the ceiling while you take a breath.
    • Make sure your legs are parallel to the ground.
    • Without resting on your neck, use your core strength to gently raise your hips off the floor.
    • With your elbows close to the floor, support yourself by placing your hands on your lower back after raising your hips.
    • Maintain a straight body alignment from your shoulders to your toes while in this position.
    • Your neck shouldn’t be compressed; it should stay long.
    • The weight should be supported by your shoulders and upper arms rather than your neck.
    • Keep your head from tilting or rotating, and make sure the back of it rests comfortably on the floor.
    • You can stay balanced by keeping your gaze fixed on the ceiling.
    • Hold this pose for a few seconds.
    • Return your legs to the floor carefully when you’re ready to exit the stance.
    • Then return to your neutral position.
    • Then relax.
    • Repeat this yoga pose for 5 to 10 times.
    Half Shoulder Stand (Sarvangasana)
    Half Shoulder Stand (Sarvangasana)

    Bridge Pose (Setu Bandha Sarvangasana)

    The heart is elevated above the head in Bridge Pose, also known as Setu Bandha Sarvangasana, which functions as a mild inversion. It relaxes the brain and central nervous system, reduces tension and anxiety, and lessens moderate depression.

    • Lay flat on your back on a yoga mat to begin.
    • Maintain a hip-width distance between your feet and knees, with your knees bent.
    • The palms of your arms should be down at your sides.
    • Make sure the soles of your feet are firmly pressed into the mat and that your feet are clearly beneath your knees.
    • Your hips and knees ought to line up.
    • As you start using your legs and core, press your feet into the mat.
    • Lift your hips toward the ceiling by using your thigh and glute muscles.
    • Start by slowly raising your hips off the floor, vertebra by vertebra, so that your shoulders and knees form a straight line.
    • Maintain a grounded head and shoulders on the mat.
    • For extra stability, press your arms into the floor and, if you feel comfortable, connect your fingers beneath your back.
    • Additionally, it deepens the bend in the back and expands the chest.
    • Maintain a neutral, relaxed neck posture and refrain from turning your head.
    • Make sure your chin rests just a little bit on your chest.
    • Hold this position for a few seconds.
    • Then return to your neutral position.
    • Then relax.
    • Repeat this yoga pose for 5 to 10 times.
    Hip bridge exercise
    Hip bridge exercise

    Tree Pose (Vrikshasana)

    Encourages focus and concentration: The balancing technique in this position helps to relax the mind and lower stress levels by promoting mental focus and awareness.

    • With both feet together and your weight equally split between them, take a tall stance.
    • Maintain a straight back while using your legs and core.
    • Let your shoulders drop.
    • Using the sole of your foot as a basis, gradually shift your weight to your left leg.
    • Maintain a small bend in your left knee while keeping it in line with your toes.
    • Place the sole of your right foot on your left leg’s inner thigh, calf, or ankle after raising it off the ground.
    • Stay wary of putting it directly on the knee as this may apply unnecessary pressure.
    • Your balance will be more difficult the higher you put your foot (on the thigh).
    • Gather your palms in front of your chest in the Anjali Mudra, or prayer pose, after you’ve regained your balance.
    • You can also maintain your arms by your sides or raise them aloft with your palms facing each other.
    • To keep your balance, look at a drishti, or point, in front of you.
    • Continue to breathe mindfully and slowly while maintaining an even focus.
    • Hold this pose for a few seconds.
    • Then return to your neutral position.
    • Then relax.
    • Repeat this yoga pose for 5 to 10 times.
    Tree-pose-_Vrikshasana_
    Tree-pose-_Vrikshasana_

    Reclining Bound Angle Pose (Supta Baddha Konasana)

    Hip and lower back stiffness can be released with this mild hip opener. It’s a relaxing pose that encourages deep relaxation as well.

    • Sit on the floor with your legs out in front of you to start.
    • Move your feet close to your pelvis while bending your knees so that their soles make contact.
    • Open up your hips by letting your knees drop lightly toward the floor.
    • If your knees aren’t comfortable reaching the floor, you can support them with pillows or blocks.
    • Either lay your arms by your sides or on your belly with your hands down or extend them out to the sides with your palms facing up.
    • Being comfortable and relaxed in this position is the aim.
    • Your chin should be slightly tucked in as you gently place your head on the floor, keeping it in line with your spine.
    • Breathe slowly and deeply while maintaining the stance, filling your nostrils with air and letting it out completely through your lips.
    • Let your body relax and let go of any stress with each inhalation.
    • Then return to your neutral position.
    • Then relax.
    • Repeat this yoga pose for 5 to 10 times.
    reclined butterfly pose
    Reclined butterfly pose

    Stick Pose (Yastikasana)

    Yastikasana, or Stick practice, is a straightforward and energetic yoga practice that strengthens and expands the body. It helps to activate the muscles in your arms, legs, and core and is excellent for increasing flexibility, particularly in the shoulders and spine. This pose is frequently used to help the body relax or warm up.

    • With your legs straight out in front of you, take a seat on the floor. Maintain a straight spine, relaxed shoulders, and flexed feet.
    • Maintaining both arms parallel to one another, raise them both toward the ceiling.
    • To lengthen through your arms and chest, engage your arms and spread your fingers wide.
    • Exhale through the top of your head and extend your back as you do so.
    • Do not sag or curve your back; instead, keep your body engaged.
    • Continue raising your arms as you exhale, maintaining the length of your spine.
    • Press your heels into the floor to keep your legs moving, and make sure your legs are firm and straight.
    • Hold this pose for a few seconds concentrating on lengthening your body and keeping your arms, body, and legs stretched.
    • Continue to look directly ahead or slightly up.
    • Exhale and slowly move your arms back to your sides to release the pose, letting your body relax.
    • Then return to your neutral position.
    • Then relax.
    • Repeat this yoga pose for 5 to 10 times.
    Stick Pose (Yastikasana)
    Stick Pose (Yastikasana)

    Happy Baby Pose (Ananda Balasana)

    The calming and fun yoga practice known as “Happy Baby Pose” (Ananda Balasana) works the thighs, hips, and lower back. It is an excellent way to relax the mind, stretch the inner thighs, and release stress.

    • To begin, lay on your mat with your feet flat on the ground and your knees bent.
    • Hold the outsides of your feet with your hands while pulling your knees to your chest.
    • Reach out and grasp the soles of your feet.
    • Make sure your feet are exactly above your hips and your knees are bent at a 90-degree angle.
    • Put your ankles over your knees.
    • Pull your feet gently down toward the floor, making sure they are either slightly wider or in line with your knees.
    • The soles of your feet should ideally be facing the ceiling.
    • Your inner thighs need to feel stretched.
    • Make sure your shoulders are relaxed and your head stays on the mat.
    • Do not strain your neck or raise your head.
    • Breathe deeply while you maintain the pose, letting your body relax and let go of any stress.
    • Lengthen your spine with each breath in and deepen the stretch with each exhale.
    • Hold this pose for a few seconds.
    • Lower your knees back to your chest and gently release your feet to exit the pose.
    • After that, return your legs to the floor gradually.
    • Then return to your neutral position.
    • Then relax.
    • Repeat this yoga pose for 5 to 10 times.
    Happy Baby Pose
    Happy Baby Pose

    Corpse Pose (Savasana)

    The ultimate relaxation pose, Savasana, is frequently performed at the end of a yoga practice. It encourages deep relaxation and allows the body to benefit from the exercise.

    • Lay flat on your back on a yoga mat to begin.
    • With your feet hip-width apart, maintain a comfortable and stretched pose.
    • Let your toes drop to the sides as they naturally will.
    • With your palms facing up, place your arms by your sides.
    • Place your hands lightly on the mat and let your shoulders drop.
    • Make sure that your head and heels are in a straight line.
    • Ensure that your neck, spine, and head are all in a neutral posture.
    • To keep your neck in alignment, tuck your chin gently toward your chest.
    • Close your eyes and relax your muscles in your face.
    • Breathe slowly and deeply.
    • With each exhale, let your body relax as you breathe in through your nose and out through it.
    • Take your attention back to your breathing softly if your thoughts go away.
    • Release any tension in your body intentionally as you relax in the posture, beginning with your toes and working your way up.
    • On the mat, let your body feel grounded and weighty.
    • Hold this position for a few seconds.
    • Give up all outside distractions and concentrate solely on your breathing and the present moment and now.
    • As you prepare to exit Savasana, begin by taking a deeper breath.
    • Stretch your arms and legs, start moving your fingers and toes gently, and then slowly roll to one side.
    • Push yourself up to a seated position using your hands.
    • Then return to your neutral position.
    • Then relax.
    • Repeat this yoga pose for 5 to 10 times.
    corpse-pose
    corpse-pose

    Advice for Beginning a Yoga Practice:

    • Start Slow: If you’ve never done yoga before, start with short classes (10–20 minutes) and work your way up to longer ones as you get more comfortable.
    • Make a Goal: Spend a moment developing an intention for your practice before you begin. This could be as straightforward as “I will focus on my breathing” or “I will let go of stress.”
    • Pay attention to your body. Moving in a way that feels nice and paying attention to your body are key components of yoga. Adjust or remove a stance if it makes you uncomfortable.
    • Breathe deeply: One of the most important aspects of yoga is breathing. To encourage your body’s relaxation reaction, concentrate on taking deep, constant breaths.
    • Practice Frequently: For best stress relief, target to include yoga in your routine multiple times a week. Its effects build over time.
    • Think About Guided Yoga: If you’re not sure where to begin, think about taking an online or in-person beginning yoga class. Proper alignment and breathing methods can be learned through guided sessions.

    Safety precautions to take when performing yoga poses to relieve stress:

    Even while yoga is generally risk-free and good for lowering stress, there are some precautions you should take to make sure your practice is safe and injury-free. Being aware of your body and its limitations is important, regardless of your level of experience with yoga.

    The following safety precautions should be taken when doing yoga to reduce stress:

    • Pay Attention to Your Body

    Since every person’s physique is unique, yoga is a personal practice. Observe your body’s signals and refrain from forcing yourself into painful or uncomfortable poses. Never stretch yourself to the point of pain, just till you feel a slight pull or stretch. Adjust or remove a posture if it doesn’t seem comfortable. Yoga should be about finding balance, not about forcing your body into uncomfortable poses.

    • Make sure you properly warm-up

    Spend some time warming up your body before attempting more difficult poses. To get your muscles and joints ready for the practice, start with some light stretches and motions. A good warm-up can lower the chance of injury, improve flexibility, and promote blood flow.

    • Don’t Overstretch

    Overstretching can result in ligament damage or muscle strains, even though yoga can gradually increase flexibility. Pay attention to your range of motion, particularly if you haven’t been practicing much or are a beginner. Breathe deeply and maintain the pose gently once you feel the stretch. To avoid straining your muscles, never jump or leap during a stretch. Muscles should be stretched and lengthened gradually rather than being forced into uncomfortable positions.

    • Remain within the bounds of your strength and flexibility.

    It’s important to practice within your existing strength and flexibility levels if you’re new to yoga. Even trying to attempt more difficult poses before developing the necessary strength and flexibility can result in injury. As your strength and flexibility increase, progressively go on to increasingly difficult poses from beginner-friendly ones. With time, your body will adjust, allowing you to safely expand your positions.

    • When necessary, take breaks.

    Although yoga is supposed to be beneficial and calming, if you ever feel exhausted or dizzy, stop. You can improve your technique and avoid injuries if you respect your body’s limitations and don’t feel pressured to keep going until you’re tired.

    • Drink plenty of water.

    Drink plenty of water before, during, and after your yoga practice, particularly if you’re doing a more difficult form. Even while stress-relieving yoga doesn’t have to be strenuous, staying hydrated helps avoid dehydration, which can cause feelings of dizziness or exhaustion. Keep a bottle of water close at hand and drink from it as needed.

    • Take a deep, concentrated breath.

    An essential component of yoga is breathing. Throughout your practice, it’s important to pay attention to your breathing to guarantee enough oxygen to your tissues and to help relax your nervous system. Avoid holding your breath too much during poses since this might lead to tension and anxiety. To help relieve tension in the body while restoring consciousness to the present, instead, concentrate on taking deep, thoughtful breaths (inhale through the nose and exhale through the mouth).

    • Make Use of Proper Alignment

    In yoga, alignment is essential for both injury prevention and maximizing the benefits of each position. Additionally, proper alignment lessens unnecessary load on your muscles and joints. In every position, pay attention to keeping your spine neutral, your weight distributed evenly, and your core muscles active.

    • Avoid Using Hard Surfaces for Practice

    To avoid damage and give your body some comfort, yoga should be performed on a soft, non-slip surface, such as a yoga mat. Particularly in positions when you’re on your knees or reclining on your back, hard surfaces like tile or concrete can be uncomfortable and raise your risk of injury. With the comfort and stability that a good yoga mat offers, you can practice safely and non-slip.

    • Be mindful and focused.

    Even though yoga is a great way to reduce stress, it’s important to maintain present-moment awareness and concentration. Stay away from distractions such as looking at your phone or planning out future duties. To maximize the stress-relieving effects of yoga and develop a deeper connection with the mind-body experience, allow yourself to fully engage with the practice.

    When should you stop practicing stress-relieving yoga poses?

    It’s important to understand when to stop doing yoga poses for stress relief to maintain a healthy and productive practice. Even though yoga is typically a gentle practice, being aware of what your body requires and knowing when to stop or take a break are important.

    The following are indicators that your yoga practice has to be modified or stopped:

    • You Feel Pain or Uncomfortable

    Pain is your body’s obvious way of telling you that something is wrong. Stop right away and adjust your position or relax if you feel sudden, intense pain or soreness while performing a pose. It’s normal to stretch until you feel uncomfortable, but never force yourself to endure severe or acute pain. There should never be any harm from yoga.

    • You Experience Lightheadedness or Dizziness

    Low blood sugar, poor breathing, and dehydration can all cause dizziness or lightheadedness. Stop and sit or lie down in a resting pose, such as Savasana or Child’s Pose, if you begin to feel lightheaded. Until you feel secure again, pay attention to your breathing and take deep, slow breaths.

    • Your breathing is becoming short.

    Yoga promotes focused breathing, but if you have dyspnea or other breathing difficulties while practicing, stop right once. This may indicate that you’re performing a position incorrectly, breathing too slowly, or exerting yourself excessively. Take a moment to relax, take a big breath, and consider whether you are exerting yourself excessively.

    • You’re feeling worn out or exhausted.

    Your body needs rest if you begin to feel very stressed out or exhausted during your practice. The goal of yoga for stress treatment is relaxation, so if you’re feeling exhausted or overburdened, stop practicing or end your session early. Let your body rest and recover in a comfortable position.

    • Your stomach is giving you nausea or pain.

    Certain yoga poses, particularly those that compress the abdomen, can occasionally cause nausea or stomach pain. Stop the practice and concentrate on your breathing if this occurs. You might want to wait a moment before practicing if you just finished a large meal. If you experience feelings of pain in your abdomen, stay away from poses that require deep twists or forward folds.

    • Your joints hurt or give you aches.

    If you have joint pain, particularly in your shoulders, wrists, or knees, stop practicing and evaluate your alignment. If your alignment is off or you’re forcing yourself into a pose that’s not good for your body, joint pain may result. Change your position, use help from props, or take a break in this situation.

    • You Feel Hyperactive or Exhausted Mentally

    Although the purpose of yoga is to promote mental calmness, you may occasionally feel overstimulated or mentally overwhelmed, particularly after a more intense practice. If that happens, pause and spend a few minutes in a pose that promotes rest. Calm your mind, be mindful, and pay attention to your breathing. Stress should be lessened, not increased, by yoga.

    • You Have Any Pre-Existing Medical Conditions or Injuries

    You must be aware of any limitations or safety measures that apply if you have any pre-existing injuries or medical issues. If you feel any pain or irritation in a region that has already been injured, you should stop. See an experienced yoga instructor or medical expert for modifications that fit your particular situation.

    • You’re Feeling Uncomfortable On an emotional level.

    Since yoga promotes relaxation and self-reconnection, it can occasionally generate strong emotions. Take a break if you feel emotionally uncomfortable, such as overwhelmed or nervous. Sometimes an approach or deep breathing can help release bottled-up emotions. Don’t be scared to pause, lie down, and allow yourself to process your feelings in these situations.

    Summary:

    Yoga is an effective stress-reduction approach that has mental and physical advantages. You may lessen stress, clear your head, and feel better overall by including focused movement, breathwork, and relaxation in your daily routine. Regular yoga practice can improve your ability to manage stress and lead a more balanced, relaxed life, whatever your level of experience.

    Yoga has many advantages for reducing stress, including promoting physical and mental relaxation. Through a combination of physical postures, breathing exercises, and meditation, yoga provides a powerful and entirety approach to stress reduction. Whether you’re struggling with daily worries or more severe anxiety, yoga can help you relax, regain your balance, and improve your mental clarity. Incorporating yoga into your everyday practice will improve your general well-being and reduce stress.

    Develop a regular practice, start with a few easy positions, and experience how yoga can improve your stress levels.

    FAQ:

    In what ways does yoga help in stress reduction?

    Yoga combines concentration, breath control, and physical exercise to help people feel less stressed. While deep breathing (pranayama) relaxes the nervous system, physical postures (asanas) alleviate the stress that has been developed in the body. By encouraging attention to the present movement, meditation, and awareness methods help people feel less anxious and think less negatively. When combined, these components activate the body’s relaxation response, which lowers stress and improves emotional health.

    Can I do yoga if I’m not very flexible or a beginner?

    In fact! No matter your level of flexibility or expertise, yoga is for you. Yoga is a fantastic method to gradually improve your flexibility. You may adjust a lot of positions that are easy for beginners to fit your needs. Begin carefully, pay attention to your body, and advance progressively as your strength and flexibility increase. Additionally, there are a lot of services that provide beginner advice, like online courses or local beginner sessions.

    How frequently should I do yoga to help me deal with stress?

    Try to do yoga at least two or three times a week for the best stress reduction. Stress reduction and relaxation can be achieved in as little as 20 minutes. Make an effort to include yoga in your daily practice since regularity is essential. If you’ve never done yoga before, you can begin with shorter sessions and work your way up to longer ones as you get more comfortable.

    Which basic yoga positions can help reduce stress?

    Balasana, also known as Child’s Pose, is a calming pose that helps to extend the back.
    Adho Mukha Svanasana, or downward-facing dog, is a full-body stretch that relieves tension.
    The Cat-Cow Pose (Marjaryasana-Bitilasana) is a calming flow that eases tension in the back and neck.
    A relaxing stretch for the hamstrings and spine is the seated forward fold (Paschimottanasana).
    The ultimate relaxation stance for calming the body and mind is Savasana, also known as the corpse pose.

    Is meditation required when doing yoga to reduce stress?

    Even though meditation is a great way to reduce stress, it’s not required for every yoga pose. However, adding meditation or awareness to your workouts can greatly increase the advantages of stress relief. Before or after your yoga session, you can spend a few minutes meditating, concentrating on your breathing, or using a relaxing mantra. Stress can be decreased by just paying attention to your breathing during the exercise.

    Can anxiety be reduced with yoga?

    Yes, yoga is an effective way to manage anxiety. Through careful motion and breathwork (pranayama), yoga helps the body’s relaxation response be activated, which counteracts the stress reaction associated with anxiety that is connected with a state of flight. Pose techniques that promote calmness and peace include a Child’s Pose, Forward Folds, and gentle twists. Deep breathing techniques, such as diaphragmatic or alternate nostril breathing, can be particularly useful in lowering anxiety.

    How long does it take to experience yoga’s stress-reduction benefits?

    After a yoga practice, you can feel the advantages right away. After only 20 to 30 minutes of yoga, many people say they feel more at Through careful motion and breathwork (pranayama), yoga helps the body’s relaxation response be activated, which counteracts the stress reaction associated with anxiety that is connected with a state of flight. And relaxed. However, regular practice is necessary to provide long-term stress alleviation. Regular yoga practice eventually lowers stress levels overall, increases resilience to stress, and improves mental clarity.

    Does doing yoga to relieve stress require any particular equipment?

    No particular equipment is required to perform yoga, especially if you want to reduce stress. But it helps to have a yoga mat for support and comfort. Additionally, you can alter or improve poses with the use of props like blocks, blankets, or pillows. Wear loose-fitting, comfy clothes that don’t restrict your range of motion.

    Can yoga help with stress-related sleep issues?

    Yoga may improve the quality of your sleep, particularly if stress or anxiety is keeping you from getting a good night’s sleep. Legs Up the Wall and Savasana are two calming poses that help ease physical stress and relax the mind, both of which can improve sleep quality. Your body and mind can be ready for a better night’s sleep by doing yoga in the evening, particularly poses that encourage deep breathing and relaxation.

    Is it possible to combine yoga with other methods of stress relief?

    Sure! Other stress-relieving methods like breathing exercises, careful motion and breath work (pranayama), and yoga help the body’s relaxation response be activated, which counteracts the stress reaction associated with anxiety that is connected with a state of flight., meditation, and even physical activities like swimming or walking can be included with yoga as a complimentary practice. You may handle stress in your life in a well-rounded way by combining several stress-reduction techniques.

    Does yoga provide a good stress-reduction substitute for counseling or medicine?

    Yoga may be a useful technique for stress management, but it shouldn’t be used in place of counseling or medicine, particularly for people with more severe mental health conditions or chronic stress. Although yoga can help with relaxation and emotional balance, it’s best to speak with a healthcare professional for a more thorough approach if you’re dealing with serious mental health issues.

    How can I maintain my motivation to do yoga regularly to relieve stress?

    It can be difficult to maintain your motivation to do yoga daily, but here are some suggestions:
    Create a routine: To develop consistency, do yoga at the same time every day.
    Begin carefully: Yoga can be helpful and keep you motivated for even ten to fifteen minutes.
    Participate in a course: Taking a yoga class, whether in person or online, can help you stay accountable.
    Monitor your progress: To keep yourself motivated, acknowledge minor victories like increased flexibility or less tension.
    Show self-compassion by keeping in mind that yoga is a personal practice and that perfection is not necessary. Simply show up and try your hardest.

    Is it possible to practice yoga at home to reduce stress?

    Of course! Yoga may be done at home with barely any supplies and space. A yoga mat and a peaceful setting are all you need.

    Do I need to see a doctor before beginning yoga?

    Before beginning any new physical activity, including yoga, it’s a good idea to consult your healthcare professional if you have any pre-existing medical concerns, or injuries, or are new to exercising.

    References:

    • Here’s How to Use Yoga for Stress Reduction. (2021, May 4). Healthline. https://www.healthline.com/health/fitness/yoga-for-stress
    • Simonds, B. November 7, 2024. Seven calming yoga poses to reduce stress. Private Palladium. https://www.palladiumprivate.com/blog/7-stress-relieving-yoga-poses/
    • The Art of Life. November 8, 2023. The Best 15 Yoga Pose Ideas for Stress Reduction: How to Unwind with Them. Living Art (United States). Yoga poses for stress relief: https://www.artofliving.org/us-en/stress/relief
    • M. S. Admin (2024, March 7). Yoga for Stress Reduction: A Contemporary Approach to Today’s Stressors in 2024. India needs to wake up. The article https://mywakeup.in/blogs/posts/yoga-for-stress-relief-a-modern-solution-to-modern-stressors-in-2024?srsltid=AfmBOopMj8bBE7Bwbih8zR5_u6zRLOuH8X2U5pmu0a40FVXhKsYDn4I-1
    • The Effects of Yoga on the Mind and Body: The Science of Calm. Oct. 12, 2023. medicine of lifestyle. The impact of yoga on the body and brain to alleviate stress is explained in https://longevity.stanford.edu/lifestyle/2023/10/03/.
    • Try these nine yoga positions to relieve tension. (undated). Nike.com. This article discusses how yoga poses stress.
    • Image 5, Yoga Ashrams Arhanta, n.d. seated forward bend, also known as Arhanta Yoga’s Paschimottanasana. The posture known as “seated-forward-bend-paschimottanasana” can be found.
    • Image 6, You can lower your blood pressure using sukhasana. (n.d.) Easy stance. The blog at https://www.arogyayogaschool.com. Your blood pressure can be lowered with sukhasana: https://www.arogyayogaschool.com/blog/
    • Image 8, get benefit to performing Shoulder-Stand https://discover.hubpages.com/health.
    • Image 12, https://www.thehealthsite.com/fitness/yastikasana-use-this-asana-p314-130213/ to reduce stress after work
  • Quadratus Lumborum Muscle Pain

    Quadratus Lumborum Muscle Pain

    Quadratus Lumborum Muscle Pain refers to discomfort or tightness in the deep lower back muscle that connects the spine to the pelvis. This pain is often caused by poor posture, prolonged sitting, heavy lifting, or muscle imbalances.

    It can lead to stiffness, aching, or sharp pain in the lower back, hips, and even the ribs. Stretching, strengthening exercises, and proper ergonomics can help alleviate and prevent Quadratus Lumborum pain.

    What is the quadratus lumborum muscle?

    The deepest muscle in the abdomen is the quadratus lumborum (QL). It is situated on either side of the lumbar spine in your lower back. It terminates at the apex of your pelvis and begins at your lowest rib. Because you utilize this muscle to sit, stand, and walk, soreness in this area is typical.
    One of the main causes of lower back pain is the QL, which can also affect your physical health.

    Beginning at the pelvis, the quadratus lumborum muscle extends to the lowest rib. It is crucial to keep the pelvis stable when a person is standing.

    Additionally, it supports the body’s center during breathing. One of the main causes of lower back pain is the quadratus lumborum muscle.

    Causes of quadratus lumborum muscle pain?

    Stress, strain, and excessive use can all cause quadratus lumborum pain. When muscles are weak or overly taut, they can occasionally produce pain and stiffness.

    Sitting for extended periods is one activity that might lower blood flow, particularly in the QL and surrounding areas. Weak back muscles and repetitive activities can also cause pain, contributing to bad posture.

    These elements can all cause you to lift, bend, or twist incorrectly, which increases tension. If your QL has to overcompensate to maintain your spine and pelvis, it may also become excessively tight. Accidents and uneven leg lengths can also cause pain in this area.

    Sitting too long

    • Long periods of sitting cause the quadratus lumborum muscle to continuously contract or tighten. Muscle exhaustion may result from continuous contraction. A reduced blood flow to the muscle might cause it to become uncomfortable and rigid.

    Poor posture

    • The muscle might get sore and tight when you slouch, tilt to one side, or sit without back support.

    Weak muscles

    • Other muscles may have to work harder than necessary if the quadratus lumborum’s surrounding muscles are weak.
    • The quadratus lumborum must use more effort to support the body when other back and pelvic muscles are weak. The quadratus lumborum muscles may eventually become stiff and overused.

    Unequal leg length

    • An uneven leg length might put additional strain on the quadratus lumborum and other muscles in the body.
    • The pelvis may be higher on the side of the larger leg if one leg is shorter than the other.
    • The quadratus lumborum may shorten as a result of the pelvic tilt, putting strain on the muscle.

    Trauma

    • The quadratus lumborum is susceptible to injury like any other muscle. Quadratus lumborum pain may result from muscular trauma sustained in a vehicle accident or athletic injury.
    • Injuries might also result from performing commonplace tasks incorrectly. For example, the quadratus lumborum may be strained by improper or awkward lifting of big goods.

    Symptoms of quadratus lumborum muscle pain?

    • Tightness and soreness in the lower back are signs of quadratus lumborum pain. The pain might vary in nature and intensity.
    • Depending on the source, lower back pain can be intense and abrupt, although it is frequently described as a deep agonizing pain.
    • Even though the soreness usually happens when you’re at rest, moving around can make it worse. Rolling over in bed, standing, and walking can all make the pain worse.
    • Sneezing or coughing can also cause sharp pain. Pain in the quadratus lumborum might even make it difficult to do daily tasks like sitting and walking.
    • Additionally, quadratus lumborum pain may be chronic, meaning it lasts for a long time. Chronic pain frequently affects a person’s physical health as well as their quality of life and general well-being.
    • One study found that those with persistent low back pain had higher rates of anxiety and depression than those without chronic pain.
    • Additionally, other parts of the body may try to assist the wounded area by compensating if one component is producing pain.
    • For example, someone may alter their bending or walking patterns if their quadratus lumborum is uncomfortable and tight. Further harm may result from the alteration putting additional strain on other bodily parts, like the hips.

    Trigger points and pain

    A location of your body known as a trigger point is one that, when activated, may cause pain. Muscles that are strained or wounded make up trigger points, which are painful and constricted. A sharp pain in your hips or pelvis or a deep pain in your lower back could be caused by quadratus lumborum trigger points. They may also be the cause of any sudden, intense pain you experience when your QL contracts during a cough or sneeze.

    A region of muscle or connective tissue that is sensitive or tender and aches when squeezed or stimulated is called a trigger point. Small knots are a common description of trigger points.

    Referred or radiated pain can also occur when a trigger point is pressed. pain that originates in a different part of the body than the one being squeezed or stimulated is known as radiating pain. Lower back, pelvic, and hip pain can be caused by quadratus lumborum trigger points.

    How is quadratus lumborum pain diagnosed?

    If you believe you have quadratus lumborum pain, speak with your physician. They can assist you in identifying the source of your pain. They can also ascertain whether it has anything to do with any underlying medical conditions.

    You could be required to describe the type of pain you’re experiencing and carry out specific physical tasks. They can collaborate with you to develop a bodywork-based treatment plan. They will also advise you to take care of yourself and receive therapy at home.

    How is quadratus lumborum pain treated?

    Quadratus lumborum can be treated in several ways. Inflammation and pain can be lessened by using cold and heat. Additionally, your physician could advise you to take a muscle relaxant or pain reliever. Another method is to use trigger point injections.

    If a qualified professional is chosen, the following therapies may help reduce your pain:

    • massage therapy, such as myofascial release
    • physical therapy
    • chiropractic treatment
    • Rolfing
    • acupuncture
    • yoga therapy

    Pain in the quadratus lumborum may be alleviated by several therapies. Home therapy might work in some situations. In other situations, it can be necessary to use both medical treatments and home care to lessen the pain.

    The following therapies might be beneficial, depending on how bad the pain is:

    Yoga

    • Several yoga positions and stretches may help reduce pain in the quadratus lumborum.
    • Yoga can lessen the pain and impairment caused by persistent low back pain.
    • For those with persistent back pain, yoga may enhance mental health in addition to physical function.

    Medications

    • Quadratus lumborum pain may be lessened with the use of medications such as muscle relaxants and painkillers.
    • Certain painkillers should only be taken as directed because they may cause adverse effects like weariness, dry mouth, and sleepiness.

    Trigger point injections

    • To reduce pain, a trigger point injection is injecting medicine straight into the trigger point.
    • An anesthetic, which numbs the area, could be used in the injection. Steroid injections are sometimes used to reduce inflammation.
    • Injections of trigger points may help lessen quadratus lumborum pain and muscular spasms.

    Massage therapy

    • For the treatment of quadratus lumborum pain, massage therapy may be helpful. Massage can improve blood flow to the area and relax tense muscles.

    Heat or ice

    • Applying heat to the area can improve blood flow and lessen pain while applying cold can reduce inflammation.
    • To relieve back pain, a person can try switching between cold and heat packs. Additionally, a warm bath may be beneficial.

    Physical therapy treatment for quadratus lumborum pain:

    Patients with low back pain (as previously noted) and patellofemoral pain syndrome are more likely to have quadratus lumborum syndrome. The quadratus lumborum is tense and exhibits trigger points when a person has chronic low back pain. Trigger point pain can be relieved with manual trigger point therapy.

    Another therapy option that instantly relieves trigger point pain and lessens the overactive muscle’s sensitivity and tension is dry needling. Ultrasound and TENS are two of the few often-used treatments for this illness. It aids in lessening pain and agitation. Quadratus lumborum stretches are also beneficial for people with generalized low back pain. The patient can continue cryotherapy and self-massage at home.

    Exercise of quadratus lumborum pain:

    Gate pose

    • With your toes pointing forward or to the right, extend your right leg to the side while kneeling.
    • Place your right hand along your leg as you bend to the right.
    • Reach to the right and raise your left arm up and down.
    • Roll your left ribcage up toward the ceiling and extend through your left fingertips.
    • On the other side, repeat.

    Side stretch

    standing-side-bend-stretch
    Side stretch
    • Lift your arms above your head and interlace your fingers while standing.
    • Tilt to the right and press into your legs and feet.
    • From your hips to the tips of your fingers, you will experience a stretch.
    • With your chin tucked in, look down at the floor.
    • On the left side, repeat.
    • On each side, repeat two to four times.
    • Cross one leg in front of the other or grab one wrist with your other hand to extend the stretch farther.

    Triangle pose

    • With your right toes pointing forward and your left toes out at a small angle, stand with your feet wider than your hips.
    • With your hands facing down, raise your arms until they are parallel to the floor.
    • As you extend your right fingers forward, hinge at your right hip.
    • After pausing at this point, drop your right hand on a block or your right leg.
    • With your palm facing away from your body, place your left hand on your hip or reach it up toward the ceiling.
    • You can turn your head to look anywhere.
    • As you contract your lower back and core muscles, lengthen your spine.
    • Continue on the opposite side.

    Revolved triangle pose

    triangle-pose
    Revolved triangle pose
    • With your right toes pointing forward and your left toes out at a small angle, stand with your feet wider than your hips.
    • Maintain a forward-facing hip position.
    • With your hands facing down, raise your arms until they are parallel to the floor.
    • When your torso is parallel to the floor, pause and fold halfway forward.
    • Drop your left hand to the floor, a block, or your right leg.
    • Turn your palm away from your body and raise your right arm straight up.
    • Look up at your outstretched hand, down at the floor, or sideways.
    • On the left side, repeat.

    Extended side angle pose

    • Place your feet wide, your left toes out at a slight angle, and your right toes looking forward.
    • Your right knee should be bent forward and above your ankle.
    • Lift your arms till they are level with the ground.
    • Bring your right hand down to the floor in front of your calf while bending at the hips.
    • With your palm facing down, raise and extend your left arm.
    • Tuck your chin in toward your chest and pull your tummy to your spine.
    • Continue on the opposite side.

    Pelvic tilt

    PELVIC TILT
    Pelvic tilt
    • With your feet close to your hips and your knees bent, lie on your back.
    • Tuck your chin in a little and relax your upper body.
    • Press the small of your back onto the floor while using your core.
    • Hold for five seconds.
    • Take a few deep breaths to relax.
    • Do this 8–15 times.

    Spinal twist

    • With your chin pulled in toward your chest and your upper body relaxed, lie on your back.
    • Bring your feet in close to your hips while bending your knees.
    • While maintaining a solid upper body, slowly lower your knees to the right.
    • Place your knees on a cushion or block if they are off the ground.
    • Wait 20 to 30 seconds.
    • Continue on the opposite side.
    • Put a flat cushion underneath your head for more support.
    • For comfort, you can also put a pillow or block between your knees.

    Child’s pose

    Extended Child’s Pose on Fingertips stretch
    Child’s pose
    • With your big toes touching and your knees slightly wider than hip-width, start on your hands and knees.
    • Stretch your arms straight out in front of you while lowering your buttocks to your heels.
    • Focus on relaxing your lower back by bringing your attention to it.
    • Hold this posture for a maximum of five minutes.
    • Gently move your hands to the right, pressing them deeper into your hips, to extend the stretch. Next, walk your hands to the left and return to the middle.
    • For comfort, you can put a pillow beneath your thighs, chest, or forehead.

    Revolved head-to-knee pose

    • Bring your left heel toward your groin and extend your right leg from a seated position.
    • With your palm facing up, bend to the right and rest your right elbow on your leg, a block, or the floor.
    • Bring your left arm down toward your right foot after extending it upward toward the ceiling.
    • Look up at the ceiling while tucking your chin into your chest.
    • Hold this position for a maximum of one minute.
    • On the left side, repeat.
    • Sit on the edge of a folded blanket or flat cushion to increase the stretch.

    Knee-to-chest stretch

    Recline-Knee-To-Chest
    Knee-to-chest stretch
    • With both feet flat on the ground, lie on your back.
    • Bring both knees gently in close to your chest.
    • Encircle your legs with your arms.
    • Using your hands, grasp your opposing elbows or wrists.
    • Use a strap or clasp the backs of your thighs if you are unable to reach.
    • Lengthen the back of your neck by slightly tucking your chin in.
    • Take a few deep breaths to relax.
    • Do this two or three times.
    • Do this position one leg at a time for convenience.

    What is the prognosis for quadratus lumborum pain?

    If you treat QL pain early on, it can usually be managed and get better over time. It may take a while to heal this part of your body completely, but as long as you take action to get better, you should see improvement. Try to maintain your health and get rid of the things that are causing your pain.

    The intensity of quadratus lumborum pain determines the prognosis. Many times, the pain can be effectively controlled, particularly if it is addressed as soon as the symptoms appear.

    The muscle may take a long time to mend in some situations. However, most people find that their symptoms improve when they use a combination of the aforementioned treatments.

    Complications of quadratus lumborum pain?

    Other parts of your body may experience stress if your QL pain is not treated. More imbalances and misalignments may arise when your body adjusts to accommodate one asymmetrical part. The pain may worsen and radiate to other parts of your body.

    The following are possible outcomes of quadratus lumborum pain:

    • Hip, buttock, and thigh pain as well as sacroiliac joint pain
    • low back pain
    • abdominal pain

    How is quadratus lumborum pain prevented?

    You may prevent quadratus lumborum soreness by keeping your body as fit as possible. To maintain your body aligned, stay in shape and think about seeing a movement therapist. To prevent pain from getting worse, treat it as soon as it starts.

    Engage in exercises designed to strengthen and stretch the affected area. Stretches and side bends are crucial for activating the side muscles and releasing back stiffness. Engage in activities that will increase the distance between your pelvis and ribs. Tai chi, Pilates, and yoga are good ways to improve your core. Back pain can also be reduced by taking mild walks.

    Additional advice for avoiding quadratus lumborum pain:

    • When driving, standing, or sitting, make it a point to keep proper posture.
    • Make sure you are correctly lifting large goods.
    • Make sure you sleep in a position that helps ease your back pain.
    • Using a lumbar support pillow when sitting, lifting objects, and bending at the knees rather than the waist are all examples of good posture when standing and sitting.
    • keeping a healthy weight
    • Taking frequent breaks to avoid becoming stiff while sitting
    • Refraining from sleeping on just one side.

    FAQs

    Is it possile to massage the quadratus lumborum?

    To promote circulation and keep things moving, I usually provide some friction across the QL fibers, which allows the local cells to repair and regenerate. In the days following a massage, simple side exercises can typically assist sustain the work’s alleviation.

    How long does it take for the quadratus lumborum to heal?

    How much time does the QL take to recover? Depending on how severe the strain is, the quadratus lumborum may take different amounts of time to heal. Grade 1 strains could be gone in a week or two. Grade 2 strains might last anywhere from four days to three months.

    Which nerves in the quadratus lumborum are blocked?

    When employing a similar volume of local anesthetic (T6-L1 for QL block vs. T10-T12 for TAP block), QL blocks produce a wider sensory blockage than TAP blocks. The lateral cutaneous branches of the thoracoabdominal nerves (T6 to L1) are presumably equally susceptible to QL inhibition.

    The QL walk: what is it?

    Other exercises that I might not have mentioned here include the well-known QL walk, which involves sitting with your legs straight out in front of you and scooting back and forth while holding weight in your hands.

    How can QL pain be relieved?

    There are several methods for treating QL pain. Heat: Apply heat for ten to fifteen minutes. This will provide you with some temporary pain relief and assist increase the muscle’s flexibility. Stretches: You can get temporary pain relief by using stretches that target the QL muscle.

    What is the unique quadratus lumborum test?

    The QL endurance test involves the subject lying on his or her side with the arm supporting them and the forearm at a 90-degree angle to the torso. That foot is in front of the lower leg foot when the upper leg is crossed in front of the lower.

    What is the quadratus lumborum’s primary purpose?

    the quadratus lumborum aids with the mobility and stability of the pelvis and spine. The lumbar spinal column extends as a result of bilateral contraction. The trunk bends in that direction (lateral flexion) when only one side of the muscle is contracted.

    How can someone with QL pain sit?

    Your back will tend to round out if you sit on a soft couch or chair that doesn’t maintain its natural curve. Adjust your workstation and chair height at work so that you may tilt your work up at you and sit near it.

    Which exercises are effective for the quadratus lumborum?

    This traditional workout works the hamstrings, glutes, and QL. Keeping your back straight, begin by standing with your feet hip-width apart. Then, stoop to grasp the barbell with an overhand grip and raise the weight towards your hips.

    How is the quadratus lumborum massaged?

    Accessible just to the side of the long spinal erectors, the QL muscle is somewhat deep. Because of the numerous attachments on the spine, pelvis, and ribs, it’s critical to use upward and downward QL massage glides in addition to directly compressing the attachment sites to fully cover the muscle.

    For tight QL, is walking beneficial?

    Movement might exacerbate the pain, even though it normally happens at rest. Rolling, standing, walking, and lying down can all make the pain worse.

    How can someone who has quadratus lumborum ache sleep?

    For lower back pain, lying on your side with your knees slightly bent is the ideal position. See the Source. Maintaining a bent knee position eases pressure on the lumbar spine and aids with body balance. To make this position more comfortable, many people find that placing a tiny pillow between their knees is beneficial.

    How is the tightness of the quadratus lumborum measured?

    Assessing QL Spasm
    Ask your client to sit and do lateral flexion as a test for QL spasms. Look for a ‘hinge’ in the lumbar region, which signifies a spasm, and a smooth curvature in the spine, which is typical.

    What is the duration of quadratus lumborum pain?

    The severity of the problem and how it is treated can affect how long Quadratus Lumborum (QL) Pain Syndrome lasts. Abrupt strain or overuse is the cause of acute instances. In this case, the pain usually subsides within a few days to a few weeks.

    Why does the quadratus lumborum hurt?

    When muscles are weak or overly taut, they can occasionally produce pain and stiffness. Sitting for extended periods is one activity that might lower blood flow, particularly in the QL and surrounding areas. Weak back muscles and repetitive activities can also cause pain, contributing to bad posture.

    References

    • De Pietro Crt, M. (2018, January 3). Quadratus lumborum pain: Treatment and stretches. https://www.medicalnewstoday.com/articles/320497
    • Cronkleton, E. (2017, June 2). Identifying the cause of quadratus lumborum pain. Healthline. https://www.healthline.com/health/quadratus-lumborum-pain
    • Cronkleton, E. (2023, April 24). 10 QL stretches to relax your spine. Healthline. https://www.healthline.com/health/quadratus-lumborum-stretch
  • Ankle Brachial Index (ABI) Test

    Ankle Brachial Index (ABI) Test

    What exactly is the ankle-brachial index?

    The ankle-brachial index test is a rapid and straightforward approach to detecting peripheral arterial disease (PAD). This illness develops when constricted arteries limit blood flow to the arms and legs. PAD can cause leg discomfort when walking and increase the risk of heart attack and stroke.

    The ankle-brachial index test compares blood pressure in the ankle and arm. A low ankle-brachial index value indicates that the arteries in the legs are narrowed or blocked.

    Ankle-brachial index testing may be performed before and immediately following treadmill exercise. This is known as an exercise ankle-brachial index test. It can determine how severely the arteries are constricted during walking.

    Why it’s carried out:

    The purankle-brachial index test aims to screen for PAD, which is characterized by constricted arteries that decrease blood flow, typically in the legs.

    For those who have leg pain when walking, an ankle-brachial index test may be helpful. Those with PAD risk factors may also benefit from the screening.

    Among the risk factors for PAD are:

    • Tobacco usage history.
    • Diabetes.
    • High blood pressure.
    • High cholesterol.
    • Plaque accumulation in the arteries restricts blood flow to other areas of the body. We refer to this as atherosclerosis.

    What are the benefits of conducting an ankle-brachial index test?

    The ankle-brachial index test is the ideal technique to screen at-risk persons and diagnose PAD since it’s:

    • Simple.
    • It takes around 10 to 20 minutes.
    • Low-cost.
    • It can be completed at your doctor’s office or an outpatient facility.
    • It is non-invasive and does not create any long-term complications.

    Application of the Ankle Brachial Index Test:

    The ABI test serves a variety of diagnostic and monitoring purposes:

    • Detecting Peripheral Artery Disease (PAD): Determines whether the leg arteries are narrowed or blocked.
    • Assessing PAD Severity: Determines how advanced the ailment is.
    • Monitoring disease progression: Measures changes in blood flow over time.
    • Evaluating Treatment Effectiveness: Determines if interventions such as medication, lifestyle modifications, or surgery improve blood flow.
    • Risk Assessment: Determines which persons are at a higher risk of cardiovascular events.

    When would a brachial-ankle index be required?

    An ankle-brachial index test may be recommended by your physician if you:

    • Has a history of tobacco use.
    • Are older than 50 and have diabetes.
    • Are above 65 years old.
    • Possess a family history of heart disease, high blood pressure, or high cholesterol.

    The ankle-brachial index test should not be performed if you have:

    • Severe discomfort in the legs.
    • You may have cuts on your feet or legs.
    • Deep vein thrombosis.

    Ankle-brachial index testing is done by whom?

    Typically, nurses do an ankle-brachial index exam. Nonetheless, the test may be administered by physicians, nurse practitioners, and other medical professionals. The test is frequently administered in the office of a primary care physician. On the other hand, the test could be administered while you’re in the hospital.

    What’s the Process for the ABI Test?

    The ABI test usually takes 10 to 15 minutes to perform and is non-invasive and painless. This is how it operates:

    • Preparation: To make it easier to reach the ankles, the patient takes off their shoes and socks while lying flat on an examination table.
    • Blood Pressure Measurement.
    • Blood pressure cuffs are wrapped across both arms and ankles.
      A Doppler ultrasonography instrument detects blood flow in the brachial artery (upper arm) and the dorsalis pedis, or posterior tibial artery (ankle).
    • Ratio Calculation: Divide the systolic blood pressure in the ankle by the systolic blood pressure in the arm to compute the ABI in each leg.

    Risks of ankle-brachial index :

    Blood pressure cuffs may induce arm and leg discomfort during inflation. However, this pain is transient and should subside after the air is released from the cuff.

    If you are experiencing significant leg discomfort, you may require an imaging examination of your legs’ arteries.

    Ankle-Brachial Test details:

    How should I prepare for the ankle-brachial index test?

    Before the test:

    • Do not exercise in the hour before the exam.
    • On the day of your test, avoid any caffeine-containing foods and beverages.
    • For one hour before your test, avoid using tobacco products or drinking alcohol.
    • Wear loose, comfy clothes.
    • Inform your healthcare practitioner if you have had any treatments to increase circulation in your legs.
    • Go to the loo and pee till your bladder empties.

    What you may expect on your test date:

    You will lie down and relax for 10 to 30 minutes before the exam begins. You should remain on your back during the exam.

    Because your arms and ankles must be at heart level for blood pressure measurements, they may be pushed up using pillows or cushions.

    Your doctor may use ultrasound equipment to listen to your pulse and blood flow before getting your blood pressure measurements. This helps them determine the optimal artery to utilize for the test.

    Expectations for the ankle-brachial index test:

    Your medical professional will:

    • In one arm, measure the brachial artery’s blood pressure.
    • On the same side as the arm that was just measured, check the blood pressure in the dorsalis pedis or posterior tibial artery in the ankle region.
    • Verify the blood pressure in your opposite leg’s ankle.
    • Check your other arm’s blood pressure.
    • Divide the greater systolic (upper number) blood pressure in your ankle by the higher systolic blood pressure in your arms to determine your ankle-brachial index.

    Expectations following an ankle-brachial index test:

    Anesthesia or skin punctures are not necessary for this noninvasive examination. You can resume your regular activities following the exam.

    ABI Values’ Normal Range:

    The ABI ratio aids in classifying the state of blood flow:

    • 1.0 to 1.4 is the normal range (sufficient blood flow).
    • PAD borderline: 0.91–0.99.
    • 0.41 to 0.90 for mild to moderate PAD.
    • Severe PAD: critical ischemia, 0.40 or less.
    • Unusual A high ABI (>1.4) might be a sign of calcified, non-compressible arteries.

    Analyzing the Results of an ABI Test:

    The findings of the ABI test inform diagnosis and therapy:

    • A normal ABI (1.0 to 1.4) means that there isn’t any serious artery blockage.
    • Abnormal ABI (<0.9): Indicates different levels of PAD and calls for additional testing or care.
    • Non-compressible arteries are indicated by a high ABI (>1.4), which is frequently observed in diabetes or chronic renal disease.

    For a more thorough evaluation, further tests like a vascular ultrasound or angiography could be suggested.

    Findings and Follow-Up of Ankle-brachial Index:

    How does the ankle-brachial index become determined?
    The ankle-brachial index is determined by dividing the higher systolic blood pressure reading from your two arm readings by the higher systolic blood pressure reading from your two ankle arteries. Instead of using the greater number, some individuals utilize the average of each pair of values.

    What is the meaning of a low ankle-brachial index?
    You have PAD if your ABI is 0.9 or below. You want to schedule a consultation with an expert in vascular medicine. If your ankle-brachial index is low, you are more likely to:

    • Heart attack.
    • Kidney disease.
    • High blood pressure.
    • Stroke.

    After you walk on a treadmill, your doctor might want to check your ABI again if you have PAD symptoms but it’s just slightly low. After exercising, a 20% or more drop is considered an unhealthy outcome.

    Why would someone have a high ankle-brachial index?
    An ABI ratio greater than 1.4 may indicate that you have diabetes or advanced age-related stiffness in your limb blood vessels. According to research, those who had an ankle-brachial index of more than 1.4 were twice as likely to die from cardiovascular causes.

    Conclusion

    A straightforward yet effective method for assessing blood flow in the lower limbs and identifying peripheral artery disease is the Ankle Brachial Index (ABI) test. It supports cardiovascular event risk assessment, treatment planning, and early diagnosis by offering vital information about vascular health.

    Patients may take charge of their vascular health by being aware of the ABI test’s goals, procedures, and consequences. Discuss if an ABI test is appropriate for you with your healthcare practitioner if you have symptoms or are at risk for PAD.

    FAQs

    What is the significance of the Ankle Brachial Index (ABI) examination?

    The ABI test is used to identify peripheral arterial disease (PAD) by assessing blood flow in the lower limbs. It is also used to measure cardiovascular risk, track the efficacy of therapy, and gauge the severity of PAD.

    Does the ABI test hurt?

    The ABI test is painless and non-invasive. It includes measuring blood flow using Doppler equipment and blood pressure cuffs, which may result in modest pressure but no pain.

    What is the duration of the ABI test?

    Typically, the exam takes ten to fifteen minutes. The entire session, including preparation and findings explanation, might take around half an hour.

    Before an ABI test, do I have to fast?

    Fasting is not necessary. However, as smoking and coffee can momentarily alter blood flow and pressure results, refrain from doing so for at least two hours before the test.

    Is it possible for the ABI test to identify every circulation issue?

    The ABI test can successfully identify blockages in major arteries, but it might miss problems with microvascular illness in smaller blood vessels. Further testing could be required for a thorough assessment.

    What occurs if the results of my ABI test are abnormal?

    Reduced blood flow is suggested by abnormal findings, which might be a sign of PAD or other vascular disorders. To enhance circulation, your doctor could suggest more testing, lifestyle modifications, drugs, or operations like angioplasty.

    Is it safe for everyone to take the ABI test?

    Yes, the majority of people, even those with diabetes or other long-term illnesses, may safely take the ABI test. Patients with non-compressible arteries, however, might need to use different testing techniques.

    What is the recommended frequency of ABI testing?

    The test may be performed once a year or as prescribed by your physician for those who are at risk of PAD or who have symptoms including leg discomfort or wounds that don’t heal. Usually, standard screening is carried done every several years.

    If I take blood pressure medicine, can I still have an ABI test?

    Yes, but make sure to let your doctor know about all of your prescriptions. The readings may be affected by blood pressure drugs, however they may be adjusted during interpretation.

    In which PAD risk factors is an ABI test necessary?

    Obesity, high blood pressure, high cholesterol, diabetes, smoking, and a family history of vascular disorders are risk factors. People who are over 50 or who have symptoms like ulcers or leg discomfort should also think about being tested.

    References

    • Ankle-brachial index – Mayo Clinic. (n.d.-b). https://www.mayoclinic.org/tests-procedures/ankle-brachial-index/about/pac-20392934
    • Professional, C. C. M. (2024a, May 1). Ankle-Brachial Index (ABI). Cleveland Clinic. https://my.clevelandclinic.org/health/diagnostics/17840-ankle-brachial-index-abi
    • Hospitals, A., & Hospitals, A. (2025, January 17). Ankle Brachial Index (ABI) test. Apollo Hospitals. https://www.apollohospitals.com/diagnostics-investigations/ankle-brachial-index-abi-test-procedure-results-and-benefits/

  • Vastus Lateralis Muscle Pain

    Vastus Lateralis Muscle Pain

    What is a Vastus Lateralis Muscle Pain?

    The vastus lateralis is one of the four quadriceps muscles on the thigh’s outer side. It plays a crucial role in knee extension, walking, running, and stabilizing the leg during movement. Vastus lateralis muscle pain can arise from various factors such as overuse, strain, trauma, or nerve irritation. This pain may present as soreness, tightness, or sharp pain, often impacting mobility and daily activities.

    Understanding the causes, symptoms, and treatment options for vastus lateralis pain is essential for proper recovery and prevention. Whether due to sports activities, prolonged sitting, or muscle imbalances, effective management can help restore function and reduce pain.

    The largest of the four quadriceps muscles, the vastus lateralis is found on the outside of the leg. It is essential for stabilizing the leg during movement and for knee extension.

    The vastus lateralis helps expand your knee joint by coordinating with the other quadriceps muscles. Additionally, it actively maintains the position of the kneecap and thighs when running and walking.

    Anatomy of Vastus Lateralis Muscle Pain:

    The largest of your thigh’s four quadriceps muscles is the vastus lateralis. It might be found on the outside or lateral portion of the thigh.

    The majority of muscles are bone-attached. The origin and insertion points are the names given to these attachment sites. The following are the locations of the vastus lateralis insertion and origin:

    • Origin: The upper inter-trochanteric line of your femur, or thigh bone, is where the vastus lateralis begins. Additionally, it originates from the lateral intermuscular septum, the supracondylar ridge, the linea aspera, and the base of the greater trochanter.
    • Insertion: The vastus lateralis begins at the tibial tubercle, an elevated area of the upper shin, and travels down your lateral thigh before joining the lateral quadriceps tendon. With a flat aponeurosis (sheath of connective tissue) on the outside of your thigh, the muscle is a huge, flat mass with numerous attachments.

    The femoral nerve that emerges from lumbar (lower back) levels two, three, and four controls (innervates) the vastus lateralis. The upper thigh’s lateral circumflex femoral artery supplies blood to the muscle.

    Causes of Vastus Lateralis Muscle Pain?

    The following are the most common causes of vastus lateralis muscle pain, which can range from overuse injuries to underlying medical conditions:

    • Overuse and Strain on the Muscles
    • Running, cycling, and squatting are examples of repetitive exercises that might overwork the vastus lateralis.
    • Inappropriate warm-ups or abrupt changes in exercise intensity can cause microtears in the muscle fibers, which can result in pain and inflammation.
    • Direct Injury or Trauma
    • The muscle may be bruised or strained by an accident, fall, or direct blow, resulting in pain and edema.
    • Excessive contraction or stretching of the vastus lateralis can result in muscle tears.
    • Muscle imbalances and poor biomechanics
    • Excessive strain on the vastus lateralis can result from weakness in the surrounding muscles, such as the hamstrings, glutes, or hip flexors.
    • Uneven strain and pain might be caused by bad posture, incorrect running form, or differences in leg length.
    • ITBS, or iliotibial band syndrome
      • The vastus lateralis is irritated by the tightening of the iliotibial (IT) band, which runs down the outer thigh.
      • ITBS is prevalent in athletes, cyclists, and runners who do repetitive leg motions.
    • Muscle knots and trigger points
    • Localized pain and stiffness may result from myofascial trigger points, also known as muscle knots, in the vastus lateralis.
    • Prolonged muscle stress, dehydration, or improper stretching can all lead to the development of these knots.
    • Sciatica or Nerve Compression
    • Sometimes misdiagnosed as muscle pain, pain radiating into the outer thigh might be caused by compression of the femoral or sciatic nerve.
    • Nerve-related pain may be exacerbated by lower back disorders including spinal misalignment or ruptured discs.
    • Muscle Soreness with a Delayed Onset (DOMS)
    • Temporary pain may result from intense activity, particularly from eccentric motions like deep squats or downhill sprinting.
    • After an exercise, DOMS often peaks 24–72 hours later and goes away in a few days.
    • Deep vein thrombosis (DVT) or circulatory problems (rare but serious)
    • Rarely, a blood clot (DVT) may be the cause of vastus lateralis pain, particularly if there is warmth, redness, or swelling.
    • DVT needs to be treated right away.
    • Health Issues
    • Fibromyalgia: A persistent pain disorder that can lead to soreness in the vastus lateralis and other muscles.
    • Chronic trigger points that result in chronic muscle pain and stiffness are known as myofascial pain syndrome.

    Symptoms of Vastus Lateralis Muscle Pain

    Depending on the underlying cause and severity of the problem, vastus lateralis muscle pain can manifest as a variety of symptoms. Typical signs and symptoms include:

    • Pain and Discomfort
    • ache in the outer thigh that is achy, throbbing, or acute.
    • Movement, such as walking, jogging, or squatting, might exacerbate pain.
    • increased soreness following extended workouts or activities.
    • Tightness and Stiffness of Muscles
    • sensation of constriction or limited thigh mobility.
    • difficulty bending or fully extending the knee.
    • tightness that gets worse after spending a lot of time sitting down.
    • Sensitivity and Tenderness
    • Pressing or massaging the muscle may cause it to feel sore.
    • Pain may radiate up toward the hip and along the outer thigh.
    • The Inflammation and Swelling
    • mild to moderate edema, particularly in the aftermath of an injury.
    • When muscles are strained or irritated, there may be warmth or redness.
    • Leg Weakness No.
    • inability to stay stable or balanced.
    • a feeling of weakness when bearing weight or extending the knee.
    • reduced strength, which makes it challenging to stand up or climb stairs.
    • Cramps or Muscle Spasms
    • Sharp pain is caused by abrupt, uncontrollable muscular contractions.
    • Cramps can happen during or after vigorous exercise.
    • Pain Associated with Particular Motions
    • Running, squatting, or lunging are among the exercises that can exacerbate pain.
    • Long-term sitting and stair climbing might also cause pain.
    • If there is nerve involvement, radiating pain, or nerve symptoms
    • Burning, tingling, or numbness in the outer thigh.
    • pain that radiates to the lower leg, knee, or hip.
    • It’s critical to see a healthcare provider if the pain is severe, ongoing, or accompanied by swelling, redness, or trouble moving the leg.

    Diagnosis of Vastus Lateralis Muscle Pain

    To identify the precise cause of vastus lateralis muscle pain, a physical examination, patient history, and occasionally imaging studies are used. Usually, a healthcare professional will take the following actions:

    Medical History Assessment

    • The doctor will inquire about the pain’s location, duration, and intensity.
    • Accidents, injuries, or recent physical activity.
    • any underlying illnesses, such as nerve problems or arthritis.
    • Workplace or exercise routines that can lead to strained muscles.

    Physical Examination

    • Palpation (Touch Examination): To feel for soreness, muscular knots, or swelling, the physician will apply pressure to various parts of the leg.
    • Range of Motion (ROM) Tests: To assess stiffness and pain during movement, the patient may be asked to bend, rotate, or extend their leg.
    • Strength testing is the process of evaluating quadriceps strength to look for imbalances or deficiencies.
    • Gait analysis is the process of observing a patient’s running or walking to spot biomechanical problems.

    Special Tests for Muscle and Nerve Involvement

    • The Ober’s Test is used to check for iliotibial (IT) band tightness, which may be a factor in vastus lateralis pain.
    • The Straight Leg Raise Test is used to determine whether there is nerve involvement, such as sciatica or compression of the femoral nerve.

    Imaging Tests

    • To rule out other illnesses, the doctor could prescribe imaging studies if the pain is severe or chronic.
    • X-ray: To look for problems with the bones, such as arthritis or fractures.
    • Ultrasound: To evaluate inflammation, muscle rips, or soft tissue injuries.
    • To identify strains, tears, or nerve compression, MRI (Magnetic Resonance Imaging) offers a close-up image of the muscles, tendons, and nerves.
    • Nerve Conduction Studies or Electromyography (EMG) (If Nerve Issues Suspected)
    • These examinations assess nerve function and can be used to detect injury or compression of the vastus lateralis muscle.
    • Blood Tests (Very Infrequent)
    • Blood tests may be performed in suspected cases of deep vein thrombosis (DVT), inflammatory diseases, or infections.

    Treatment of Vastus Lateralis Muscle Pain

    The underlying cause, severity, and whether the pain is from an injury, strain, or another ailment all influence how the vastus lateralis muscle is treated.

    Pain, thigh swelling, or difficulty walking might result from injuries to your quadriceps or vastus lateralis muscles. Following a vastus lateralis injury, several treatments could aid in your recovery.

    When recovering from vastus lateralis injuries, consulting a physical therapist may be beneficial.

    Heat and Ice

    Your lateral thigh may be treated with ice in the initial days following an injury to manage pain and reduce swelling and inflammation. Applying ice for 10 to 15 minutes is recommended; to prevent frost burns, place a towel or piece of clothing between the ice and your skin.

    You can use heat to increase tissue mobility and circulation two to three days after the injury. Apply heat for ten to fifteen minutes. Once more, caution is necessary to prevent burns.

    Massage

    Following an injury to the quadriceps or vastus lateralis, massage can help reduce pain and increase circulation. Before stretching to increase quadriceps motion, massage treatments can increase tissue mobility.

    Physical Therapy of Vastus laterally muscle pain:

    Your physical therapist could suggest specific exercises to help you rebuild strength and range of motion if you have suffered an injury to your vastus lateralis.

    Floor extension

    Dumbbell Hip Extension Floor Press
    Floor extension
    • Take a seat upright on the ground. With your chest proud, bring your shoulders down your back. With your left foot flat on the ground, bend your left knee toward your chest. With your foot pointing slightly to the right, extend your right leg in front of you.
    • Throughout the exercise, maintain your right quad contracted while holding beneath your left knee with both hands clasped.
    • Breathe out.
    • Raise your right leg as high as you can in the air without letting your posture deteriorate or bend away from the wall. Maintain this posture for one count.
    • After taking a breath, carefully return to your starting position by lowering your right leg. Keep your right heel from slamming back down.
    • After three or four sets of 12 repetitions, swap legs. Add an ankle weight over the thigh of the extended leg, not on the ankle, and repeat the exercise for the same number of repetitions if you find it to be somewhat easy.

    Lateral heel drop

    • Maintain a tall stance, place your right foot on a little step, and keep your left leg straight but not locked. With your left foot flat on the ground, your right knee should be slightly bent. You should avoid putting your right knee over your toes. Balance by tensing your core.
    • Until both legs are completely straight, exhale and push up off your right leg. Aim to step up with your hips level.
    • As you take a breath, flex your left quadriceps, and gradually return your left foot to its initial position.
    • After performing this exercise 15 times for three or four sets, control the negative portion of the movement by repeating it with your right leg on the floor and your left leg on the treadmill.

    Step downs

    Step down
    Step downs
    • Place your left foot off to the side and your right foot on the step.
    • Take a breath. Bend your right knee and flex your left quadriceps until your left foot is flat on the ground. Once more, make sure your hips are always level.
    • Push off your left foot, exhale, contract your core, and return to your starting position.
    • After three or four sets of 15 repetitions, swap legs.

    Leg extension

    • Take a seat upright and go to the front of the chair.
    • Put a resistance band around your ankle and place it beneath the chair.
    • Then, stretch back and grasp the band with your hand.
    • Exhale, then slowly stretch your leg fully out in front of you in a single motion.
    • Breathe in, flex your quadriceps, and then slowly return the leg to its 30-degree position.
    • Do three to four sets of 15 repetitions. Until your knee feels healthy again, don’t forget to maintain that 30-degree angle.

    Single leg raises

    • With your left foot flat on the mat and your left knee bent, lie on your back. If you choose, place an ankle weight on your thigh as you fully extend your right leg in front of you. Don’t use a weight if this is your first time doing the workout.
    • Raise your right leg about 2 inches off the mat by contracting your right quadriceps and tensing your core. Throughout this workout, keep it raised. Be careful not to arch your back. There should be no gap between the mat and your back.
    • Take a breath. Raise your right leg till your right and left thighs are equal while contracting your right quadricep. Maintain this posture for one count.

    Terminal knee extensions (TKEs)

    terminal knee extension
    Terminal knee extensions
    • With the other end facing the anchor, slip the resistance band up to just above the rear of your right knee after tying it around a strong anchor. Reposition yourself until the band is taut. Keep your right knee slightly bent while you straighten your left leg.
    • Emphasize the contraction in your right quadriceps and push your right knee back to match your left knee. Once more, you want to feel the vastus medialis constricting and tightening. For one count, maintain this posture while facing opposition.
    • Bend your right knee back to the beginning position after taking a deep breath and gradually releasing the tension in the resistance band.
    • Use a thicker band or move farther from the anchor to make the band more taut if you feel no resistance in your vastus medialis.
    • After three or four sets of 15 repetitions, switch to your left leg.

    Conclusion of Vastus Lateralis Muscle Pain:

    A frequent ailment, vastus lateralis muscle pain can be caused by trauma, overuse, muscle tension, or underlying biomechanical problems. It frequently manifests as outer thigh soreness, tightness, or severe pain that interferes with movement and day-to-day activities. To reduce pain and avoid recurrence, early diagnosis and appropriate treatment such as rest, cold or heat therapy, stretching, and strengthening exercises are essential.

    Conservative therapies including massage, physical therapy, and painkillers work well most of the time. However, to rule out underlying disorders like nerve compression or structural abnormalities, persistent or severe pain may need to be treated by a physician. People can support their vastus lateralis and general lower body health by adopting good posture, doing strength training regularly, and using injury prevention measures.

    FAQs

    What is the vastus lateralis artery?

    The vastus lateralis is mostly supplied by the lateral circumflex femoral artery. There are three major branches of the lateral circumflex femoral artery: descending, transverse, and ascending. The profound femoris, also known as the deep artery of the thigh, has perforating arteries that provide some blood supply to the muscle.

    Is it possible to damage your vastus lateralis?

    A rare injury that can be effectively treated with surgery and return to preinjury activity is an isolated vastus lateralis rupture.

    What’s causing my tight vastus lateralis?

    Release of Vastus Lateralis Trigger Points
    This is a tight and dysfunctional part of the muscle. Your back’s inflamed nerves are frequently the culprit. It can be removed by applying direct pressure to the area.

    What is the vastus lateralis good for?

    Muscle of the Vastus Lateralis
    The largest muscle in the quadriceps group is one of the four muscles in that group. The vastus lateralis helps expand your knee joint by coordinating with the other quadriceps muscles.

    How can thigh muscle soreness be resolved?

    The reason for upper thigh pain determines how to treat it. Rest, heat, ice, compression, elevation, and light massage are all common at-home treatments for minor injuries.

    How is the vastus lateralis reduced?

    The Vastus Lateralis Stretch
    This tightness may be the result of underuse from extended sitting or overuse from exercises like jogging or walking. Myofascial release treatments and stretching are useful methods for increasing flexibility and encouraging muscular relaxation.

    How can pain in the vastus medialis be treated?

    Options for Vastus Medialis Pain Treatment. A multimodal strategy is frequently recommended to relieve vastus medialis pain. This includes using over-the-counter drugs to treat pain as well as rest, ice application, compression techniques, and elevation (RICE).

    How long does it take for a vastus lateralis to recover?

    Injuries to the quadriceps can take anywhere from a few days to many months to heal, depending on the type of damage. For all quadriceps injuries, treatment aims to get the patient back to their pre-injury level of activity.

    Which exercises are effective for the vastus lateralis?

    When performing knee extension exercises, the Vastus Lateralis muscle is used. Because it tests your balance and leg mobility, the lunge is one of the greatest exercises for targeting the Vastus lateralis.

    What is the vastus lateralis nerve?

    The L2, L3, and L4 muscular branches of the femoral nerve innervate the vastus lateralis muscle.

    What occurs if there is weakness in the vastus lateralis?

    Pain, thigh swelling, or trouble walking might result from injuries to your quadriceps or Vastus Lateralis muscles. If the muscle group doesn’t work correctly, it could also result in injury.

    How is the vastus lateralis relaxed?

    Stretch of the Vastus Lateralis-IT Band
    Wrap your hand around the foot of your top leg and stretch your knee as much as you can while side-lying with both legs flexed to a 90-degree angle at the hip and knee. If the foot is out of reach, use a band, belt, or cloth to help.

    What causes the soreness in my vastus lateralis?

    The majority of vastus lateralis tears are caused by activities performed without an adequate warm-up. The muscle can rip since it doesn’t have time to stretch before use. Pain following trauma, like being struck by a ball, is more likely to result in a bruise or contusion.

    References

    • Levarda, T. (2024, November 16). Acupuncture for vastus lateralis pain — Morningside Acupuncture NYC. Morningside Acupuncture NYC. https://www.morningsideacupuncturenyc.com/blog/acupuncture-for-vastus-lateralis-pain
    • Trigger point pain from Vastus Lateralis and how to find relief | Painalog. (n.d.). https://www.painalog.com/trigger-point-pain-from-vastus-lateralis-trigger-point-four-and-how-to-find-relief/